
Introduction
After a much longer than expected hiatus, we are back with a very special review. The folks over at STREACOM entrusted us with reviewing their FC5 Alpha chassis. The FC5 Alpha is a fanless chassis that is designed to be the king of HTPC chassis’, and it may just be! Coming in two colours, both the black and silver models can come with, or without, optical drive bays depending on the end-user preference. I think this is a great move from STREACOM, in this day and age a lot of people no longer require the use of an optical drive, but as this is designed to be a HTPC, STREACOM has decided to have both models readily available. The FC5 Alpha is designed from premium grade aluminium, features a 10mm thick front panel and has a total height of 69mm with the feet attached to the case.
- Manufacturer Website: STREACOM
- Product Page: FC5 Alpha
- Purchase: £190.11 At the time of review on Amazon UK
- Purchase: £214.90 At the time of review at Scan UK
Home Theatre PC’s (HTPCs) are becoming more popular, thanks in part to the massive amounts of storage we can now get on a single hard drive and also thanks to all the streaming services that are now out there. Long gone are the days of when you would have to run to your favourite movie store and pick up your favourite VHS tape and pray that the person before you was kind and didn’t forget to rewind. These days, you can turn your PC on, sit down on your couch and have pretty much every movie and/or TV show available to you at the click of a couple buttons. STREACOM have really gone and kicked it up a notch with their FC5 Alpha as this chassis really does look the business and is going to have people asking you where you got it from. Enough of that, though, let’s take a quick look at the specifications before getting into the closer look of STREACOMs FC5 ALPHA Chassis.
Chassis Material: Premium Grade (6063) All Aluminium, 10mm Thick Front Panel
Available Colors: Silver / Black – Sandblast Finish
Motherboard Support: Mini-ITX, Micro-ATX and Full ATX
Drive Capacity: Minimum 1 x 3.5″ + 2 x 2.5″, Maximum 3 x 3.5″ or 6 x 2.5″*
Optical Drive Capacity: 1 x Slim Slot Loading Drive (FC5 Optical Version Only)
USB Ports: 2 x USB3.0, Left & Right Side, 19/20 PIN
Expansion Slot: 1 x Full Height Expansion Card (Flexible Riser Required)
Cooling: Heatpipe Direct Touch 4 Pipes – Recommended CPU TDP 65W, Max TDP 95W**
External Dimensions: 435 x 325*** x 60mm (W x D x H, 69mm including feet)
Internal Dimensions: 380 x 318 x 55mm (W x D x H)
Power Supply: ZF240**** or Nano Series PSU (Not Included)
Remote Control: FLirc or IRRC Solutions (Not Included)
Net Weight: 4.2KG
Closer Look
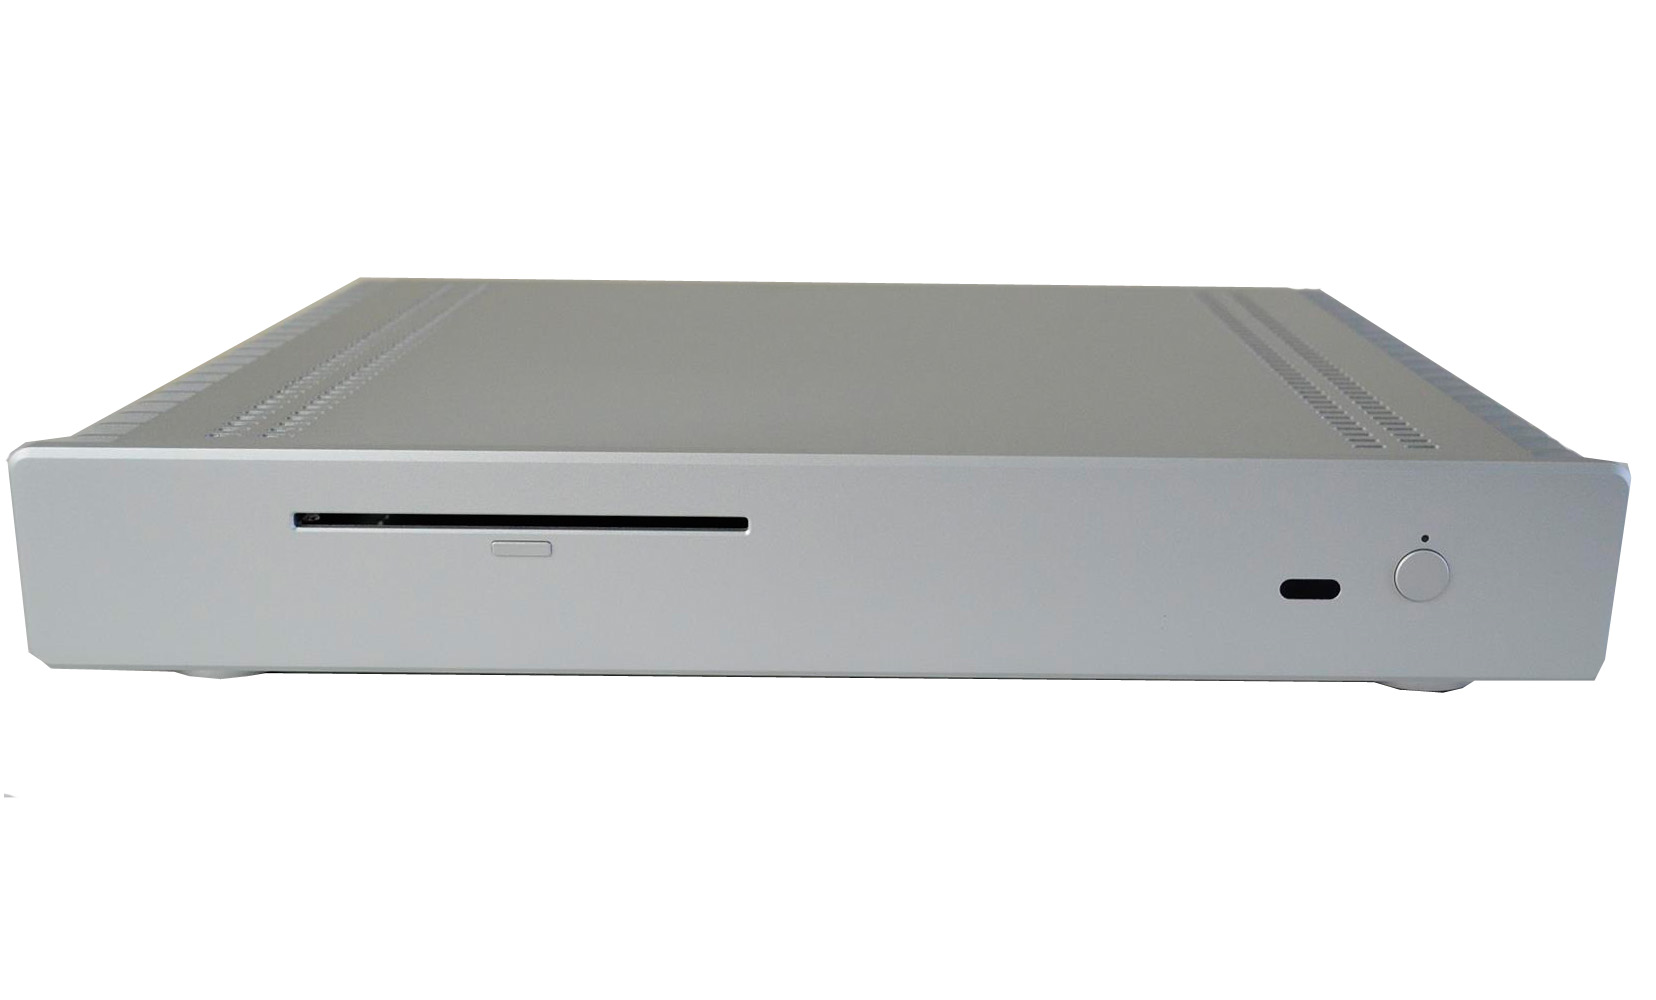
The front of the chassis is a bit wider than the rest of it, while the rest of the chassis comes in at 435mm, the front panel is 450mm wide so this will definitely be something to make note of. As you can see, we have the model that you can add a slimline optical drive to if you so desired. Over on the right side are the Power button and LED and a small place where some sort of FLirc or IRRC remote sensor can be added.

The FC5 ALPHA looks extremely sleek and professional and can easily become the centre of attention when added to any home media centre setup.

When looking at it, it’s not too much bigger than your standard VIRGIN or SKY boxes here in the UK, albeit a bit wider. However, what’s even more impressive is the sheer weight of this thing, it might be very thin but it has a nice sturdy weight to it. While I wouldn’t recommend doing it for prolonged periods of time due to heat concerns, it is definitely sturdy enough to set your TV on top of. As you can also see here on the top are some extra ventilation holes on each side as this chassis is designed to be completely passively cooled (no fans).

Both sides of the FC5 ALPHA feature a fin-like design. This is to allow for better dissipation of heat from the chassis itself, especially the side where the heatsink will be installed, but we will look at that in a bit.

Also on each side, tucked in between a pair of the fins are USB 3.0 Inputs for all your external storage and peripheral needs.

The back of the chassis features the cutout for the rear IO on the motherboard, a single slot PCI expansion slot which you will need a riser cable to make use of and a small place to add a PSU plug, should you need. As the FC5 ALPHA is so thin, you can not use standard PSUs with it and need either a ZF240 Fanless PSU or a NANO PSU. Both PSU types can also be purchased from STREACOM should you decide to purchase one of these cases.

On the bottom, we have 4x feet with anti-slip protection. You will also see a lot of holes. These holes will allow you to install an ATX / Micro-ATX or Mini-ITX motherboard as well as allow for the mounting of numerous 3.5″ and 2.5″ hard drives and SSDs.

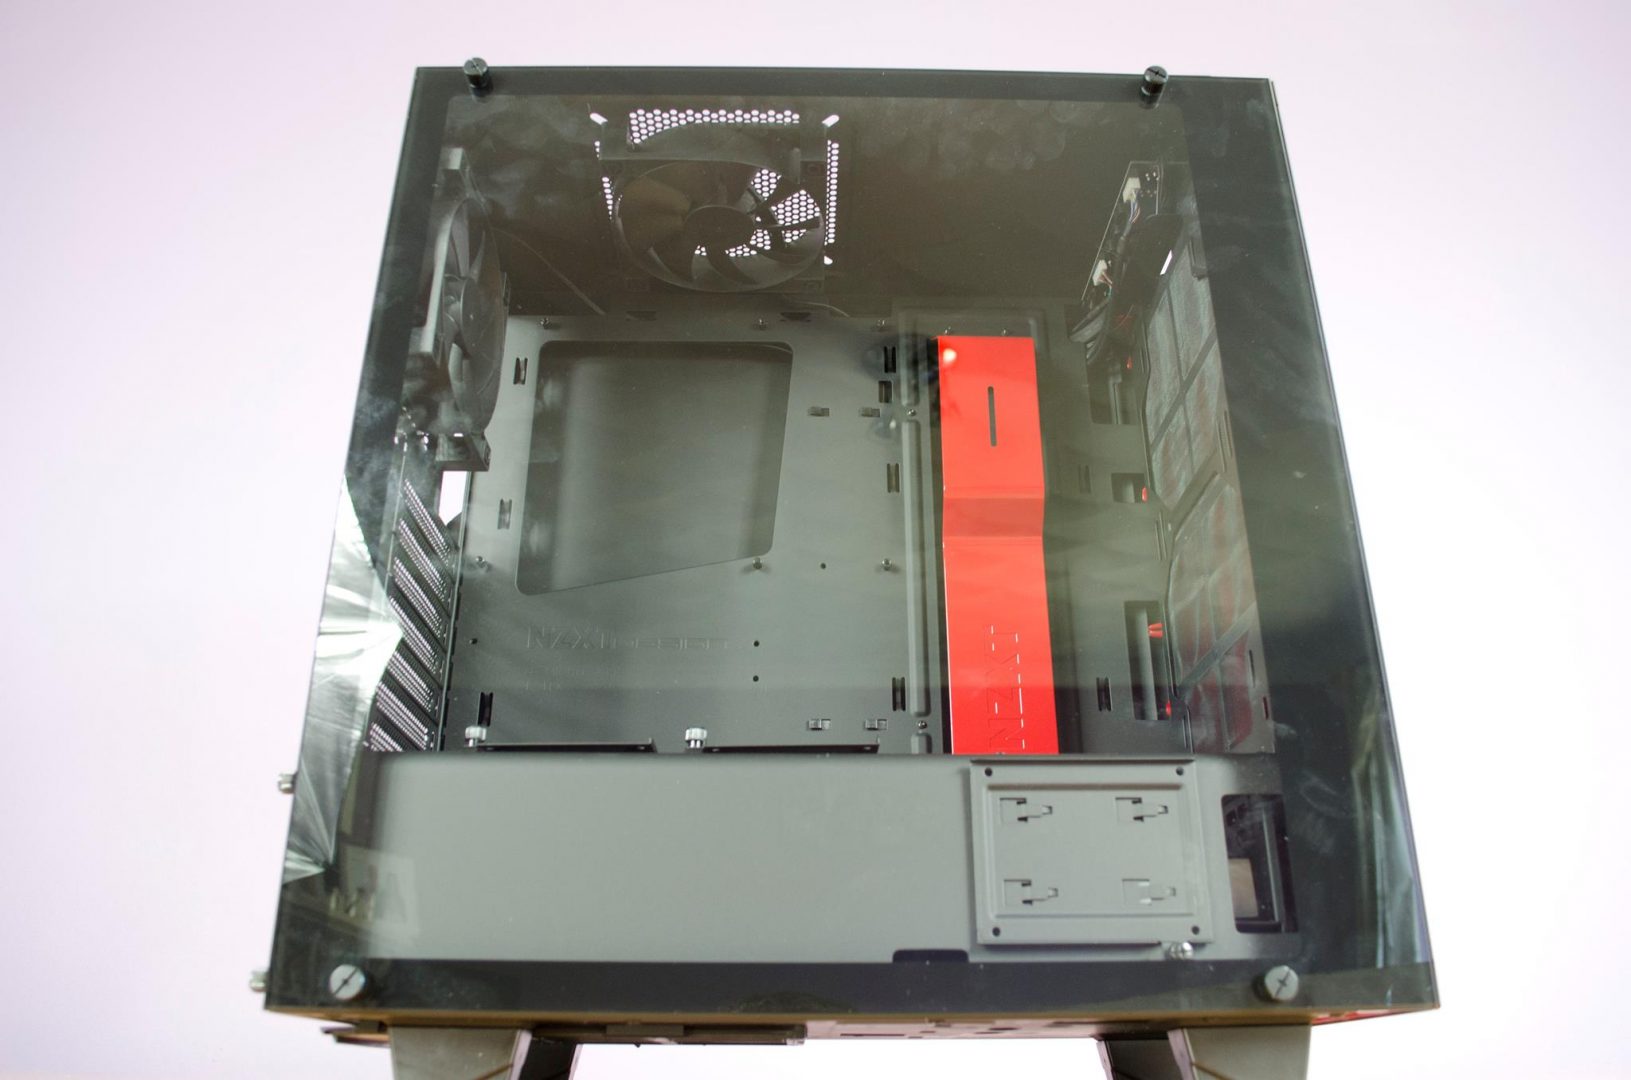
Taking the top off, which is done be removing 2x screws on each side of the case and we can now get a look at some of the mounting. There are already motherboard risers in place for a Mini-ITX sized motherboard but there are more standoffs in the box should you decide you want to add a bigger motherboard. We can now also get a look at the slimline optical drive bay mounting and see the USB3.0, cables running from each side of the case. While it may be small, STREACOM has done a great job of making sure there are plenty of places to mount hard drives no matter the size of the motherboard you want to install inside the FC5 ALPHA.

The optical drive mount is raised off the floor of the case which allows it to appear towards the top of the front panel. This not only adds a great aesthetical feel, but also a functional one as they were able to place the eject button underneath.

Again, there is a single slot PCI expansion bay on the case which you will need a PCI riser to make use of. This could come in handy for those looking to make use of a better GPU or Sound Card than what their motherboard has or a number of other things.

Final Build
There are a number of screws and accessories that come included with the FC5 ALPHA chassis. One thing I noticed right away is the two tubes of thermal paste and you will soon find out why these are needed! 
As this is a passively cooled chassis, it comes with it’s own heatsink assembly which you will need to install. The first thing I will say is if you are not familiar with these, it may take a couple of tries and some tweaking to get it installed properly, but worry not, you can do it!
OK, so the first thing you want to do is take these circle CPU socket mounts and get them into place. These are going to allow you to screw the heatsink onto the motherboard. Inside the package with these are some small 3M double sided sticky tape circles to put on so you can attach them to the motherboard without them falling off.

Next, what you will want to do is start on the part of the heatsink that will set atop your CPU. For my testing, I installed this on the 1150 socket from Intel. All of the copper heat pipes are labeled so you know which ones go where, as they are different shapes and sizes. You will also want to make sure to put thermal paste on them so they can transfer the heat from the CPU to the heatsink. Please see the instructions for where and when to apply the thermal paste.

Once you have figured out where each heat pipe belongs, you can add the top on. However, only put it on tight enough so that the pipes will not fall out and not too tight so that they won’t move. It is ever so important that the heat pipes be able to move just a bit when installing.

Now for the fun part, hoping everything lines up as it should and this is where the heat pipes being able to move will come into play. You will want to spread some thermal paste on them and put the heat pipes up against the inside wall so they are as flat as possible, then you will want to installed the brackets to hold them in place. To install the brackets I actually found out it is much easier to push the screw all the way through from the outside and line it up with the hole on the bracket inside the case, this will also allow you to move things around a bit and get everything installed nice and flush.
As you can see in the below image, one of the brackets is not completely flush which is no good as this will not allow for maximum heat transfer from the pipes to the chassis itself and this is why it is very important you allow the heatsinks to be able to move inside the piece you built and set atop your CPU. Also, once they are installed and flush with the inside wall, you should be able to install the CPU block mounting screws into the previously installed mounts we have put on the backside of the motherboard.

As mentioned, I found it easier to push the screw all the way through from the outside first and then line it up with the piece on the inside of the case, this allowed for a much flusher fit in my testing.


Hopefully, if all goes to plan, you should have been able to line everything up and should now have the heatsink installed properly. Don’t worry if it takes you a couple of tries to get everything lined up perfectly, that is just the way this case is built. The Heatsink is designed for CPUs with a TDP of 65W, though in certain circumstances it may be able to take a 95W CPU if you have ample room, airflow and a moderate ambient temperature where you will be putting it.

As mentioned, there is plenty of places to install hard drives and SSDs in the FC5 ALPHA. I chose to stick my SSD right next to the motherboard but it could be more to almost anywhere that there is free space in the case.
Unfortunately, at the time of review, I did not have an adequate PSU for this case. As mentioned, you will most likely be best off buying a suitable PSU right from STREACOM as well.

The rear IO shield fits in nicely and as you can see, the rear IO looks nice and flush once the motherboard is installed properly. While I did use an ITX board for testing, do not forget this chassis can accommodate both Micro-ATX and normal ATX boards as well.

Final Thoughts
There is no denying that STREACOMS FC5 ALPHA chassis is unique, but is it worth the hefty price tag that comes along with it? Would you be willing to spend around £200 on just the chassis for your HTPC? Well, while that can be very subjective, there is also no denying the FC5 is a quality built chassis with a definite place in the market.
Performance
The FC5 ALPHA is a chassis that is designed to offer passive CPU cooling. Why might you ask? Well, it is designed to be a HTPC and as such it needs to be as quiet as possible and what’s the easiest way to do that? Removing the need for fans of course. I did not have a PSU on hand or a suitable CPU to test the temperature but do remember, the CPU cooler attaches to the side of the chassis, essentially making the whole of the FC5 one massive heatsink. Also, remember it’s not designed for CPU with a TDP over 65W, so it should be more than adequate for that.
Design
STREACOM has an amazing chassis with the FC5 ALPHA. The premium grade aluminium offers a great aesthetical appearance and it’s solid as can be. Each side of the case as a fin-like design to help dissipate the heat from it more efficiently which is also nice. It also comes in two different colours, each of which can come with or without an optical drive leaving users plenty of options to get it just the way they want. Inside the chassis, you can fit up to a standard size ATX motherboard alongside plenty of hard drives and/or SSDs. There is also a single slot PCI expansion bay should you want to install a sound card, GPU or any other PCI based device. STREACOM put a lot of time into designing this chassis and it shows, I’m especially a fan of the extra thick and extra wide front panel which gives it a very premium and high-quality look and feel.
Value
This is what is going to turn some people away, the price. The FC5 ALPHA has a hefty price tag of around £200 here in the UK which is quite expensive for any chassis, especially a smaller HTPC chassis. What people need to realize is that this is designed to sit alongside very expensive and high-quality HiFi equipment, which can sometimes cost thousands of pounds. The FC5 ALPHA offers users a premium look and its passive cooling capabilities mean you won’t have to turn up the volume to drown out the noise from the fans as there aren’t any. STREACOM have added all the right options and features to the FC5 ALPHA to make it a top-notch case worthy of its asking price.
When all is said and done, if you want the best, you will pay for it, plain and simple. The STREACOM FC5 is hands down the best HTPC chassis I have ever personally had the pleasure of getting my hands on. As mentioned, the sheer weight of the chassis gives it an immediate feel of quality from the time you take it out of the box. The FC5 ALPHA really is a top-tier HTPC chassis and you will just have to get your hands on one to really appreciate it in all of its beauty!

I would like to thank STREACOM for sendings in their FC5 ALPHA chassis for review and hope to see more from them in the future.


