
Introduction
- Manufacturer: Thermaltake
- Product: View 22 TG
- Purchase: £53.99 At the time of review on scan.co.uk
Thermaltake, hate them or love them, they have one of the most extensive catalogues of PC components and hardware in the industry. From PC Cases to power supplies, chairs, coolers, peripherals and more, Thermaltake is almost a one-stop shop for your PC gaming needs. Not only is Thermaltake great for gamer’s, they also show the modding community loads of love as well. Not only do they host and sponsor a myriad of modders, a lot of their products are designed with modders and customization in mind. One of the best things about their products is that most of the time they also offer great value for money and are cheaper than similar products.
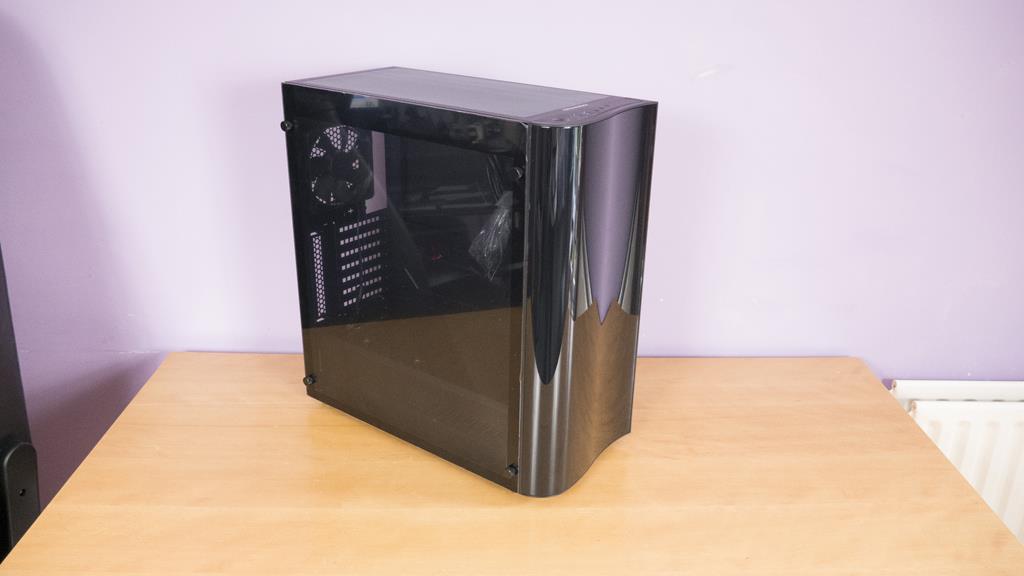
Today, we will be taking a look at the VIEW 22 TG case. Thermaltake is on a roll right now with their View line of cases that allow users to ‘View’ the internals of the PC. The View 22 has a lot going for it. The front panel has a curved effect to it that reminds me of the Windows logo and the 4mm tempered glass side panel is a great way to show off what’s inside. The View 22 TG offers a well-rounded approach to your case needs and can house a load of storage, components and cooler gear. All in all, it looks good and paper and in photos but let’s see if it can live up to the hype!
Specifications
| P/N | CA-1J3-00M1WN-00 |
| Case Type | Mid Tower |
| Dimension (H x W x D) | 467 x 223 x 491 mm (18.4 x 8.8 x 19.3 inch) |
| Net Weight | 6.95 kg / 15.32 lb |
| Side Panel | 4mm Tempered Glass x 1 (Left) |
| Color | Exterior & Interior : Black |
| Material | SPCC |
| Cooling System | Rear (exhaust) : 120 x 120 x 25 mm fan (1000rpm, 16dBA) |
| Drive Bays -Accessible -Hidden |
2 x 2.5’’ (HDD Bracket) 2 x 3.5’’ or 2 x 2.5’’ (HDD Tray) |
| Expansion Slots | 7 |
| Motherboards | 6.7” x 6.7” (Mini ITX), 9.6” x 9.6” (Micro ATX), 12” x 9.6” (ATX) |
| I/O Port | USB 3.0 x 2, HD Audio x 1 |
| PSU | Standard PS2 PSU (optional) |
| Fan Support | Front: 3 x 120mm , 2 x 140mm Top: 3 x 120mm , 2 x 140mm Rear: 1 x 120mm |
| Radiator Support | Front: 1 x 360mm , 1 x 280mm Top: 1 x 360mm , 1 x 280mm Rear: 1 x 120mm |
| Clearance | CPU cooler height limitation: 160mm VGA length limitation: 400mm PSU length limitation: 160mm |
Closer Look
The front panel of the View 22 TG is a gloss black. While this thing will surely attract dust and fingerprints, it does look amazing when it is clean and shiny. The panel itself has a nice curved design to it which gives it a sleek and stylish look.

The side panel is 4mm thick tempered glass and is held in place by four thumbscrews. This TG panel will allow users to show off the complete internals of their PC with ease and leave them with an amazing looking build.

The back of the case shows us the seven PCI expansion bay covers for ATX motherboard, the power supply and motherboard cutouts and lastly, we can see the pre-installed exhaust fan. There is an extra pair of thumb screws next to the PCI expansion bays and you need to remove these to get access to the screws for the bays so you can install your components.

The other side panel is plain but from this view, we can see the ventilation for the front of the case that will allow any intake fans to pull in a bit of air.

Having a closer look shows us that these vents have a bit of a dust filter persay installed. This will allow the fans to pull in as much air as possible without bringing in any unnecessary dust into the case itself.

The top of the case is home to the front IO panel which features power and reset buttons alongside two USB 3.0 ports and the headphone/mic inputs. We can also see an easily removable dust filter which covers the top of the case. This filter is held in place with magnets and is a great addition to the case as it allows the filter to be cleaned easily. Also, being able to remove the filter so easy will allow for an easier installation time should you want to install some fans or a radiator to the top of the case. The top of the case can house up to a 360mm radiator which gives users plenty of room for a custom water cooling loop should this be the road they want to go down. Thermaltake offers a wide range of cooling products that can be found on the Cooler page of their website.

The bottom of the case is fairly simple and straightforward. There is a small dust filter to help keep dust out of the PSU. we also see for thumb screws which are attached to the hard drive bay inside the case. You can take this bay out or even move it should you need a bit of extra room closer to the PSU.

The front panel is easily removed and once done, you have plenty of room to install fans or a radiator for cooling. The front can also house up to a 360mm radiator. Can we say dual GPU rig with a full custom loop? We sure can!

Taking that lovely TG panel off and having a look around on the inside and things seem quite spacious on the first take. There should be plenty of room for a dual GPU system here as well as a custom watercooling loop should you desire. The first thing I noticed was the massive cutout to the motherboard tray which will allow for easy CPU cooler installation and changing. I notice this as I test a lot of coolers and this is a major feature, in any case, I plan on actually using past the testing phase. Looking down at the PSU cover and we can also see there are a couple of SSD mounts for those who want to show off their SSDs with the rest of their build.

Towards the front panel, there is a nice big cutout in the PSU shroud which can be used for a number of things. From passing cables through to routing watercooling tubes, this cutout is sure to come in handy for a lot of users.

Looking at the rear of the case from the inside and we can get a better look at the preinstalled 120mm exhaust fan. This is just a standard fan and doesn’t have any RGB lighting or cool features but it does its job and that’s what matters. Considering the price of the case, we wouldn’t expect it to come with all the bells and whistles.

The rear of the motherboard tray has a lot going for it. On the left side, you can actually mount a pair of SSDs, just to the left of the cable passthrough hole. Speaking of cable passthrough, this is the first time I’ve seen this type of unique design to pass cables from the backside of the motherboard tray to the front. One thing I will say is it does work well, my only gripe with it is that it doesn’t extend all the way to the top of the motherboard. Aside from this, it works well and when combined with the places to tie cables, the cable management system as a whole works rather well. Under the motherboard tray/PSU cover we can see the 3.5″ HDD bay and as mentioned, this can be taken out or it can be moved towards to the front of the case. Plenty of options here to allow users to make the most of this build and be left with a very clean looking build!

The Build
- Case: Thermaltake View 22 TG
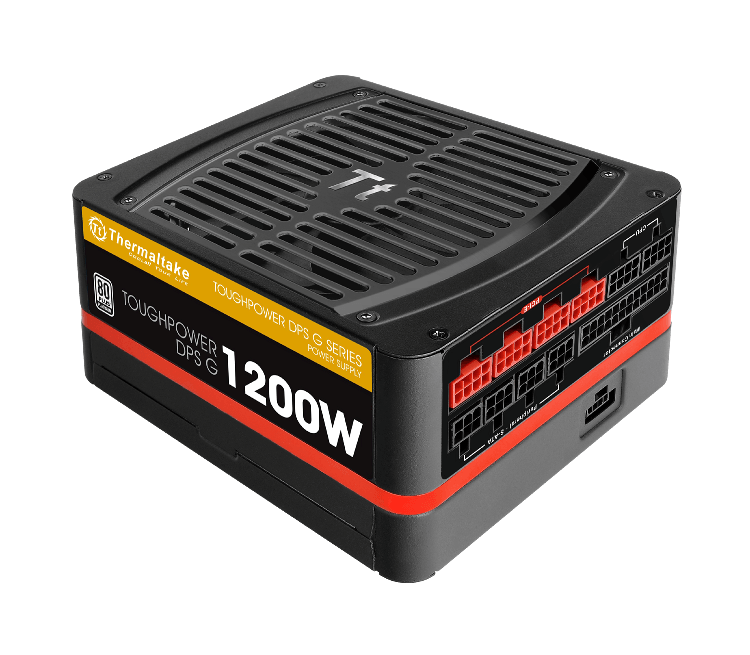
- PSU: Thermaltake DPS G 700W
- Motherboard: Asus Z270F
- CPU: Intel I7-6700K
- CPU Cooler: Thermaltake Riing Silent 12 Pro
- RAM: 16 GB (4×4) Crucial Ballistix Extreme 3300MHz
- Graphics: 2x ASUS Strix 1060 6GB GPUs
- SSD: Crucial BX300 240GB
Final Thoughts
Performance and Design
As we have seen, the View 22 TG has a lot to offer. It’s a sleek looking case which features plenty of room for all of your component needs. It also has plenty of room for all your watercooling needs should that be something of interest to you. If not, you can still install a massive air cooler as we saw with the Riing Silent 12 CPU Cooler I used in the test build. The View 22 TG was easy to build in and everything is easily accessible. For those looking to install better cooling, the front panel is easily taken off and the top dust filter is only held on with a magnet. These simple features make this case a joy to work in. One thing I was happy to see it that there are no wires of any sort attached to the removable part of the front panel, this means it is truly removable and can be placed out of the way while you install your cooling. The PSU cover, SSD mounts and cable management system mean it is seamlessly easy to be left with an amazing looking build in no time, even if you are a novice builder. Thermaltake have done a great job making this a very user-friendly PC case that will make sure you have a sleek looking build to show off once everything is installed inside.
Value
This is where things get interesting. This case is coming in at around £54 here in the UK from multiple retailers! For this price, this case has so much potential that it’s almost silly. There is plenty of room for most anything you could want to install in such a case. It’s sleek looking and easy to build in and for the price, you really can’t go wrong. The PSU cover and frontside SSD mounts are a nice touch and when combined with the unique cable passthrough system, you really do just get a lot for your money! Thermaltake has hit it out of the park with this one. The View 22 TG is not only user-friendly but it is also budget friendly and still remains to be comprised of quality components.


