
Introduction
- Manufacturer: Thermaltake
- Product: View 32 Tempered Glass RGB
- Purchase: £139.99 from Scan UK
Following on from our review of the Toughpower iRGB Plus 1250W PSU, today we have another great product from our friends at Thermaltake. The View 32 Tempered Glass RGB Edition PC case is fully kitted out with TG and RGB. With two separate TG panels that come in their own box inside the case box instead of already being installed on the case and three RGB fans, Thermaltake is making sure this case will turn heads. This case features four 4mm thick TG panels, that’s one for each side as well as the front and top of the case, giving users the best chance possible to show off their beloved components inside. TG and RGB aside, this case still has plenty going for it which we will take a closer look at in just a bit.
Thermaltake has been heavily focusing on the Modding and Water Cooling scenes and as such have started to implement some of this into their own cases to make them more easily customizable. Not only does Thermaltake have a great lineup of cases, they have also been releasing a load of other great products from Power Supplies to cooling, peripherals, accessories and more. In the last 2-years or so Thermaltake has significantly stepped up their game and it will be nice to see how they continue to top themselves in the near future. Keep up the good work Tt and with that being said, let’s get back to the View 32 Tempered Glass RGB case at hand.
Specifications
| Case Type | Mid Tower |
| Dimension (D x W x H) | 480 x 227 x 524 mm (18.5 X 8.9 X 20.6 inch) |
| Net Weight | 8.2 kg / 18.07 lb |
| Side Panel | 4mm Tempered Glass x 4 (Left, Right, Top and Front) |
| Color | Exterior & Interior : Black |
| Material | SPCC |
| Cooling System | Rear (exhaust) : 120 x 120 x 25 mm Riing RGB fan (1400rpm, 28dBA) Front (intake) : 120 x 120 x 25 mm Riing RGB fan x 2 (1400rpm, 28dBA) |
| Drive Bays -Accessible -Hidden |
2 x 2.5’’ 2 x 3.5’’ ; 1 x 2.5’’ |
| Expansion Slots | 7 |
| Motherboards | 6.7” x 6.7” (Mini ITX), 9.6” x 9.6” (Micro ATX), 12” x 9.6” (ATX) |
| I/O Port | USB 3.0 x 2, USB 2.0 x 2, HD Audio x 1, RGB Switch x 1 |
| PSU | Standard PS2 PSU (optional) |
| Fan Support | Front: 3 x 120mm Top: 2 x 120mm Rear: 1 x 120mm |
| Radiator Support | Front: 1 x 360mm Top: 1 x 240mm Rear: 1 x 120mm |
| Clearance | CPU cooler height limitation: 160mm VGA length limitation: 400mm PSU length limitation: 220mm |
Closer Look
When you first take the View 32 out of its box, the side panels are not attached. Rather, the side panels come flat packed separately inside the main box. The first thing most will notice however is the front and top TG panels that look absolutely amazing and will be even better once everything is all powered up and you are making use of the included Riing RGB fans.

The front IO panel is on top of the case and has a bit going on with it. Here we can see it included 2x USB3.0, 2x USB2.0, audio inputs, and RGB, reset and Power buttons. The RGB button will give you quick access to changing the colors on the fan.

As the side panels were already off, I decided to take a look at the back first. Here we can see there is quite a bit going on. There is a couple of drive mounts, plenty of cable management opportunities and a fan controller that will allow you to easily connect up to 3x more Riing fans with ease

Taking a closer look at we can see there are 7x pass through holes with rubber grommets so you have the best chance of being able to easily route all your cables. There are also 2x 3.5″ HDD and 1x 2.5″ SSD mounts. You will also see 3x velcro zip ties which will help you group all the cables together firmly which is necessary when it comes time to put the TG side panel on.

Taking a quick look at the back and as is the case a lot of the time, there’s not too much going on here. We have our standard PSU and motherboard rear IO cutouts alongside 7x PCI expansion bays and a mount for a rear exhaust fan which comes pre-installed in this case. You will also notice the mounting for this fan will allow you to move the fan into different locations as needed depending on what components you install inside the case.

One of the first things I noticed when looking at the main inside of the case is the fact there is no PSU cover. While I am personally a fan of PSU covers, I also have not currently set up a custom cooling loop before and generally, I don’t need the space. However, this case has been designed with liquid cooling in mind and more importantly, those looking to create a full custom loop rather than just sticking ain AIO in and calling it a day. Not including a PSU covers will allow users to install a 360mm radiator in the front without the need for customisation and it will also all for more room for pumps and reservoirs. So, when all is said and done, Thermaltake didn’t cheap out on a PSU cover on a £130 case, they left it out for good reason, in my opinion. You’ll also notice that due to the 3.5″ mounting on the backside of the motherboard tray, there is a little lip on the front side which will allow for easier installation of a custom PSU cover. Again, almost seems as if this was done on purpose but I can’t be sure of that, all I can say is that it’ll all work out very well either way you decide to go with your build.

While there is not any housing installed to allow users to install an optical drive, you can easily see where one could go should you need to install a DVD/Blu Ray or even a card reader. However, you would also need to cut the TG glass front panel to incorporate this and may not be the easiest thing in the world to do. However, Optical drives are becoming a rarity these days and I for one am glad. Other than burning CD’s for my car using my laptop, I have no interest in optical drives or their mounting allocation inside any new case. Seeing this here make me things the barebones of the chassis may be used for another case which may in fact actually feature mounting for Optical drives. However, I say ditch the DVD burner and install another RGB fan personally.

As mentioned, in the bottom there is a little lip that you could easily install a PSU cover onto. We can also see the rather large pass-through hole for the PSU cables to be passed through to the backside of the motherboard tray. You’ll also notice the raised rubber feet and ventilated area to install the PSU. The vents are to allow for airflow to keep things cool while the rubber feet are to help reduce the noise from vibration of the PSU.

The cutout on the motherboard tray for CPU cooler installation is fairly large so should offer an easy swap out of CPU coolers should you ever need to. One thing I would have liked to of seen here, with this case being how it is, is a vertical GPU mount. While I won’t hold this against Thermaltake in any way, it would have really set this case off even more. Either way, the View 32 is still great and the included Riing fans are a nice touch.

The side panels come flat packed inside their own box which is inside the main box for the case. They are quite heavy and better protected this way and while this is a first for me to see the panels packed this way, it is a welcome first. The panels are easily installed onto the brackets on the backside of the case. Each panel only fits on one side of the case so no need to worry about installing the wrong one on the wrong side. It’s also worth noting that the one that goes on the backside of the motherboard panel is tinted which helps to hide all the cables from being too easily viewable. You can still definitely see them but the tint is a very nice touch.

Installing the TG side panels is as easy as setting the hinges on the panel onto the hinges on the case and ensuring they are properly pushed down and in place. You can also remove the panels by lifting them up but in my experience, this isn’t as easy as you would hope or as they included manual would make you think. When I took the panels off it took me a good few minutes which lets me know that they were firmly installed if nothing else.

The panels open up very wide as you saw in the image above but when they are shut, they look amazing. Again, as previously mentioned the rear side panel is tinted just a bit to help and try to hide your cables from being in view too much.


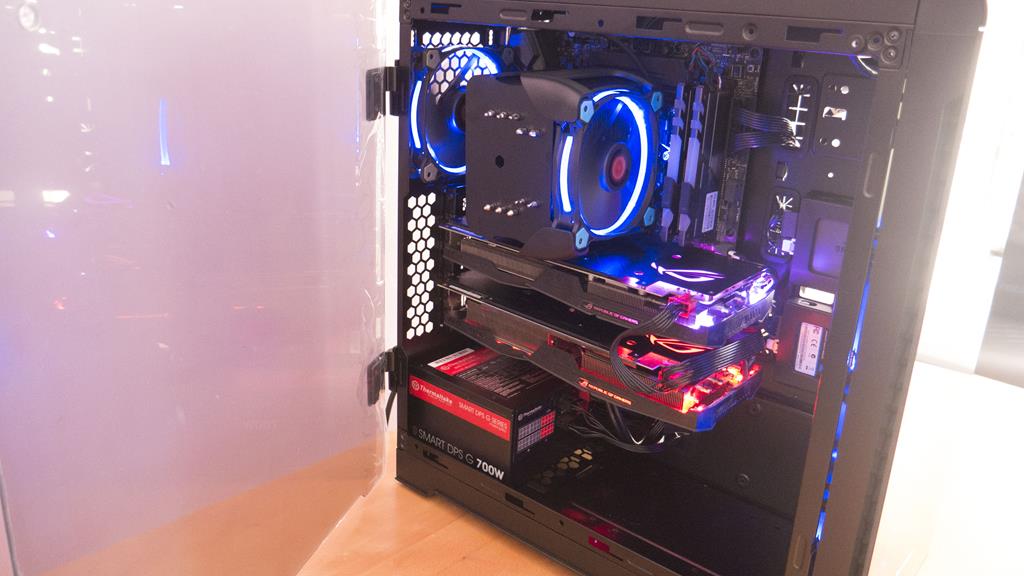
Final Build
Building in the View 32 was fairly easy, though I did run into one small little inconvenience. The SSD mounts on the front side leave the SATA ports of the SSD a bit close to the case and in my experience, I couldn’t use a right angled SATA cable as it wouldn’t fit and also the power cables from the PSU were a bit tight for my personal preference. One the SSDs were fully installed, there was no issue per say, just very tight in fitting with the cables I was using for this build. Aside from this, the case was very easy to build in and everything fits in with ease. There is plenty of cable management options to offer you a clean looking build on both the front and backside of the motherboard tray. As far as room is concerned, there is loads of it and as you’ll see, a dual GPU build with a fairly big air CPU cooler still leaves plenty of room! This tells me there would be more than enough room for a nice custom loop should that be something you are considering. All this room also means the View 32 could be a modders dream as there is plenty of places to add fake walls and the likes to help the create whatever their heart desires. All in all, I had an enjoyable time building in the View 32 and the way the cable management passthrough holes are laid out made a massive difference in how easy it was to have the wires looking as clean as possible on the backside of the motherboard tray.


Conclusion
Performance & Design
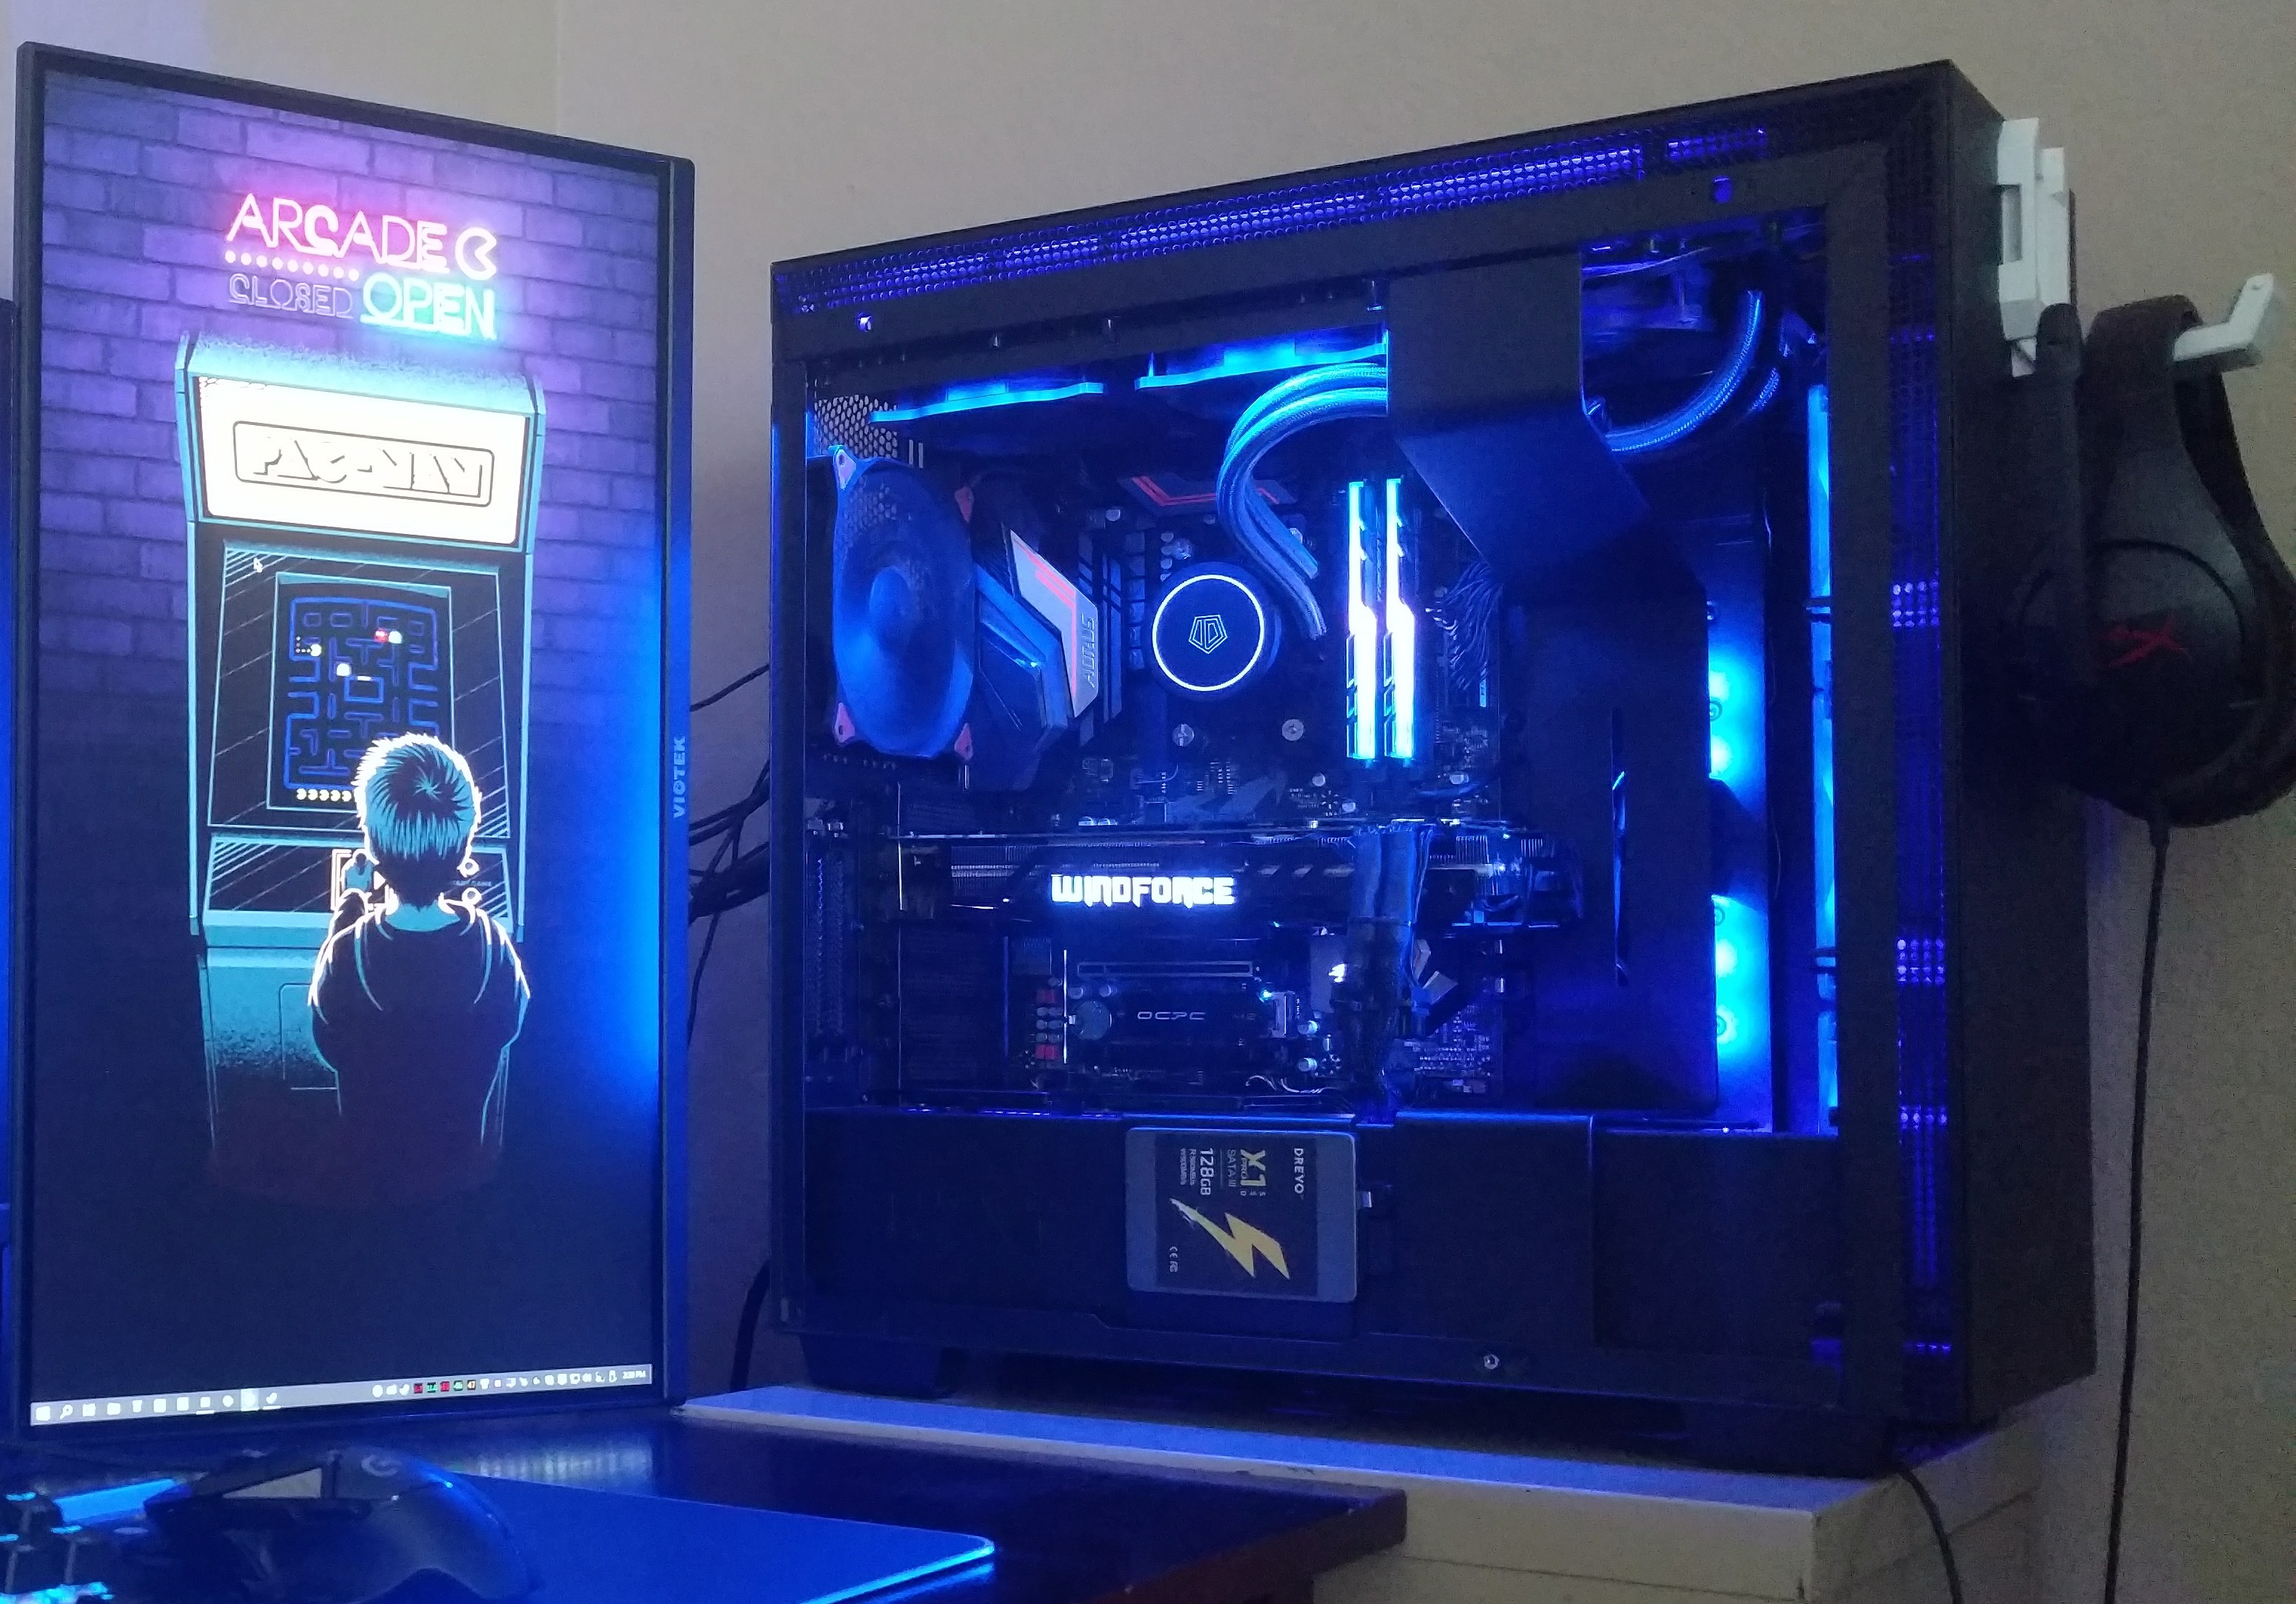
The View 32 Tempered Glass RGB case is definitely and looker and the only thing that surpasses this is how easy it is to be left with a clean looking build. This case is designed to house a decent amount of higher-end hardware but will be more than welcome to housing anything you have on hand. As we saw in the final build, it takes 2x GPUs with ease and doesn’t look cramped at all. The 4x Tempered glass side panels make this case look ridiculously sleek, especially with the included RGB Riing Fans helping light things up a bit. With the included Riing fans, the case offers more than ample cooling power to make sure all of your components don’t overheat. The View 32 is designed to be an RGB lovers dream and will allow users to have the room they need to help there build look just as they want.
I only really have 2 small criticisms about the View 32. First is the SSD mounts as in my experience, the wires once connected to the SSD were pushing against the case a bit and were just a bit tighter than I would have cared for. I have been using the case for a couple weeks now and have not had an issue with this, it is just something worth mentioning. The 2nd thing I would have liked to of see was some sort of included PSU cover, even if it didn’t come pre-installed in the case, it could come flat packed with the TG side panels. While I can appreciate why the likely didn’t include one, I think there are a few ways that one could easily be implemented and included with the case for those of looking to make use of a PSU Cover.
Value
The Thermaltake View 32 Tempered Glass RGB Case can be had for £130-£150 depending on your preferred retailer. For this price, you get a lot of case especially when you consider that 3x RGB Riing fans will run you £50-£60 on there own! Coupling that with a case that features 4 TG panels, 2 of which can be fairly easily removed, you have had a great deal on your hands. Thermaltake products are usually quite aggressively priced and they have not let us down with the View 32 in today’s review. For those who want a bit more case for their money but don’t want to spend a couple hundred pounds on one, the View 32 TG RGB model has a lot to offer. If you’re in the market for a TG case that comes already equipped with RGB fans and plenty of room for your components then the View 32 is definitely worth checking out!

Many thanks to Thermaltake for sending in this case for todays review!


