Introduction
Sabrent has released a new NVMe enclosure named Thunderbolt 3 To Dual NVMe M.2 SSD Tool-Free Enclosure. This enclosure allows the user to use two NVMe SSDs to be connected to the PC over the Thunderbolt 3 port. This enclosure not only allows to use of any brand’s SSDs but also provides faster data connectivity using Thunderbolt 3. Sabrent also provides software-based RAID support on this enclosure.
Its features are:
- Turn two NVMe SSDs into independent, fast, reliable, and portable drives!
- Plug and play (PnP), no drivers needed.
- Solid aluminum construction for durability and maximum heat dissipation.
- Integrated temperature and health monitoring system.
- Power adapter is required and included.
- Compatible with M.2 NVMe form factor sizes: 2242/2260/2280.
- Single SSD speeds of up to 1500MBps, software RAID up to 2500MBps.
Product: Sabrent Thunderbolt 3 To Dual NVMe M.2 SSD Tool-Free Enclosure
Price: $149.99 [At the time of the review]
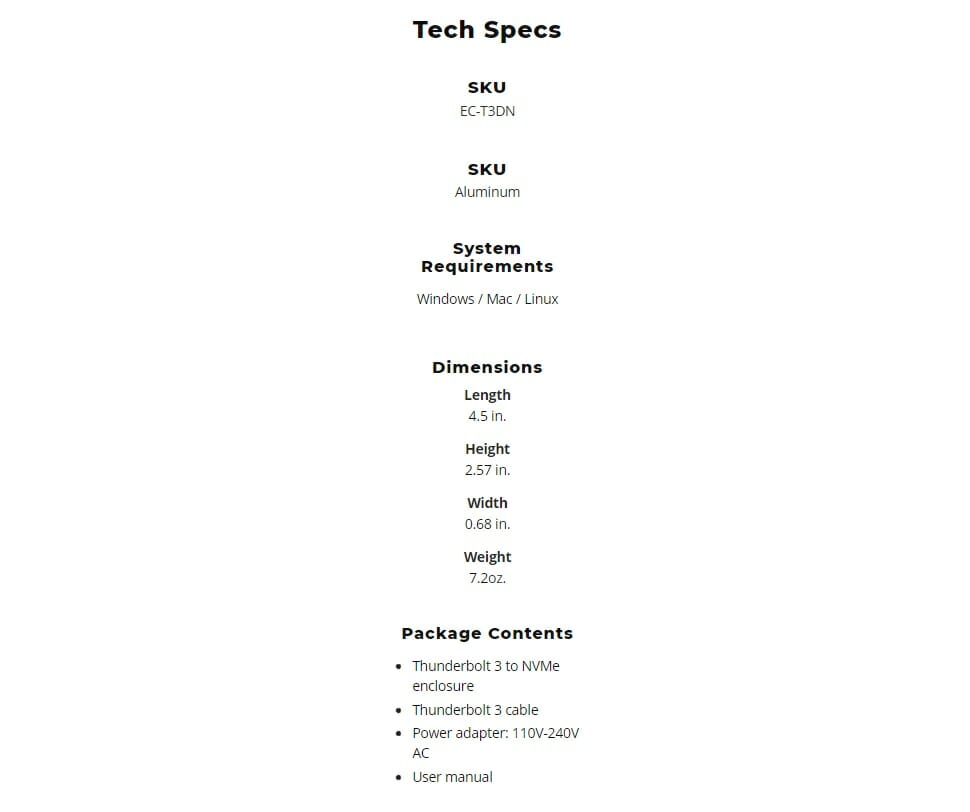
Specifications
Unboxing
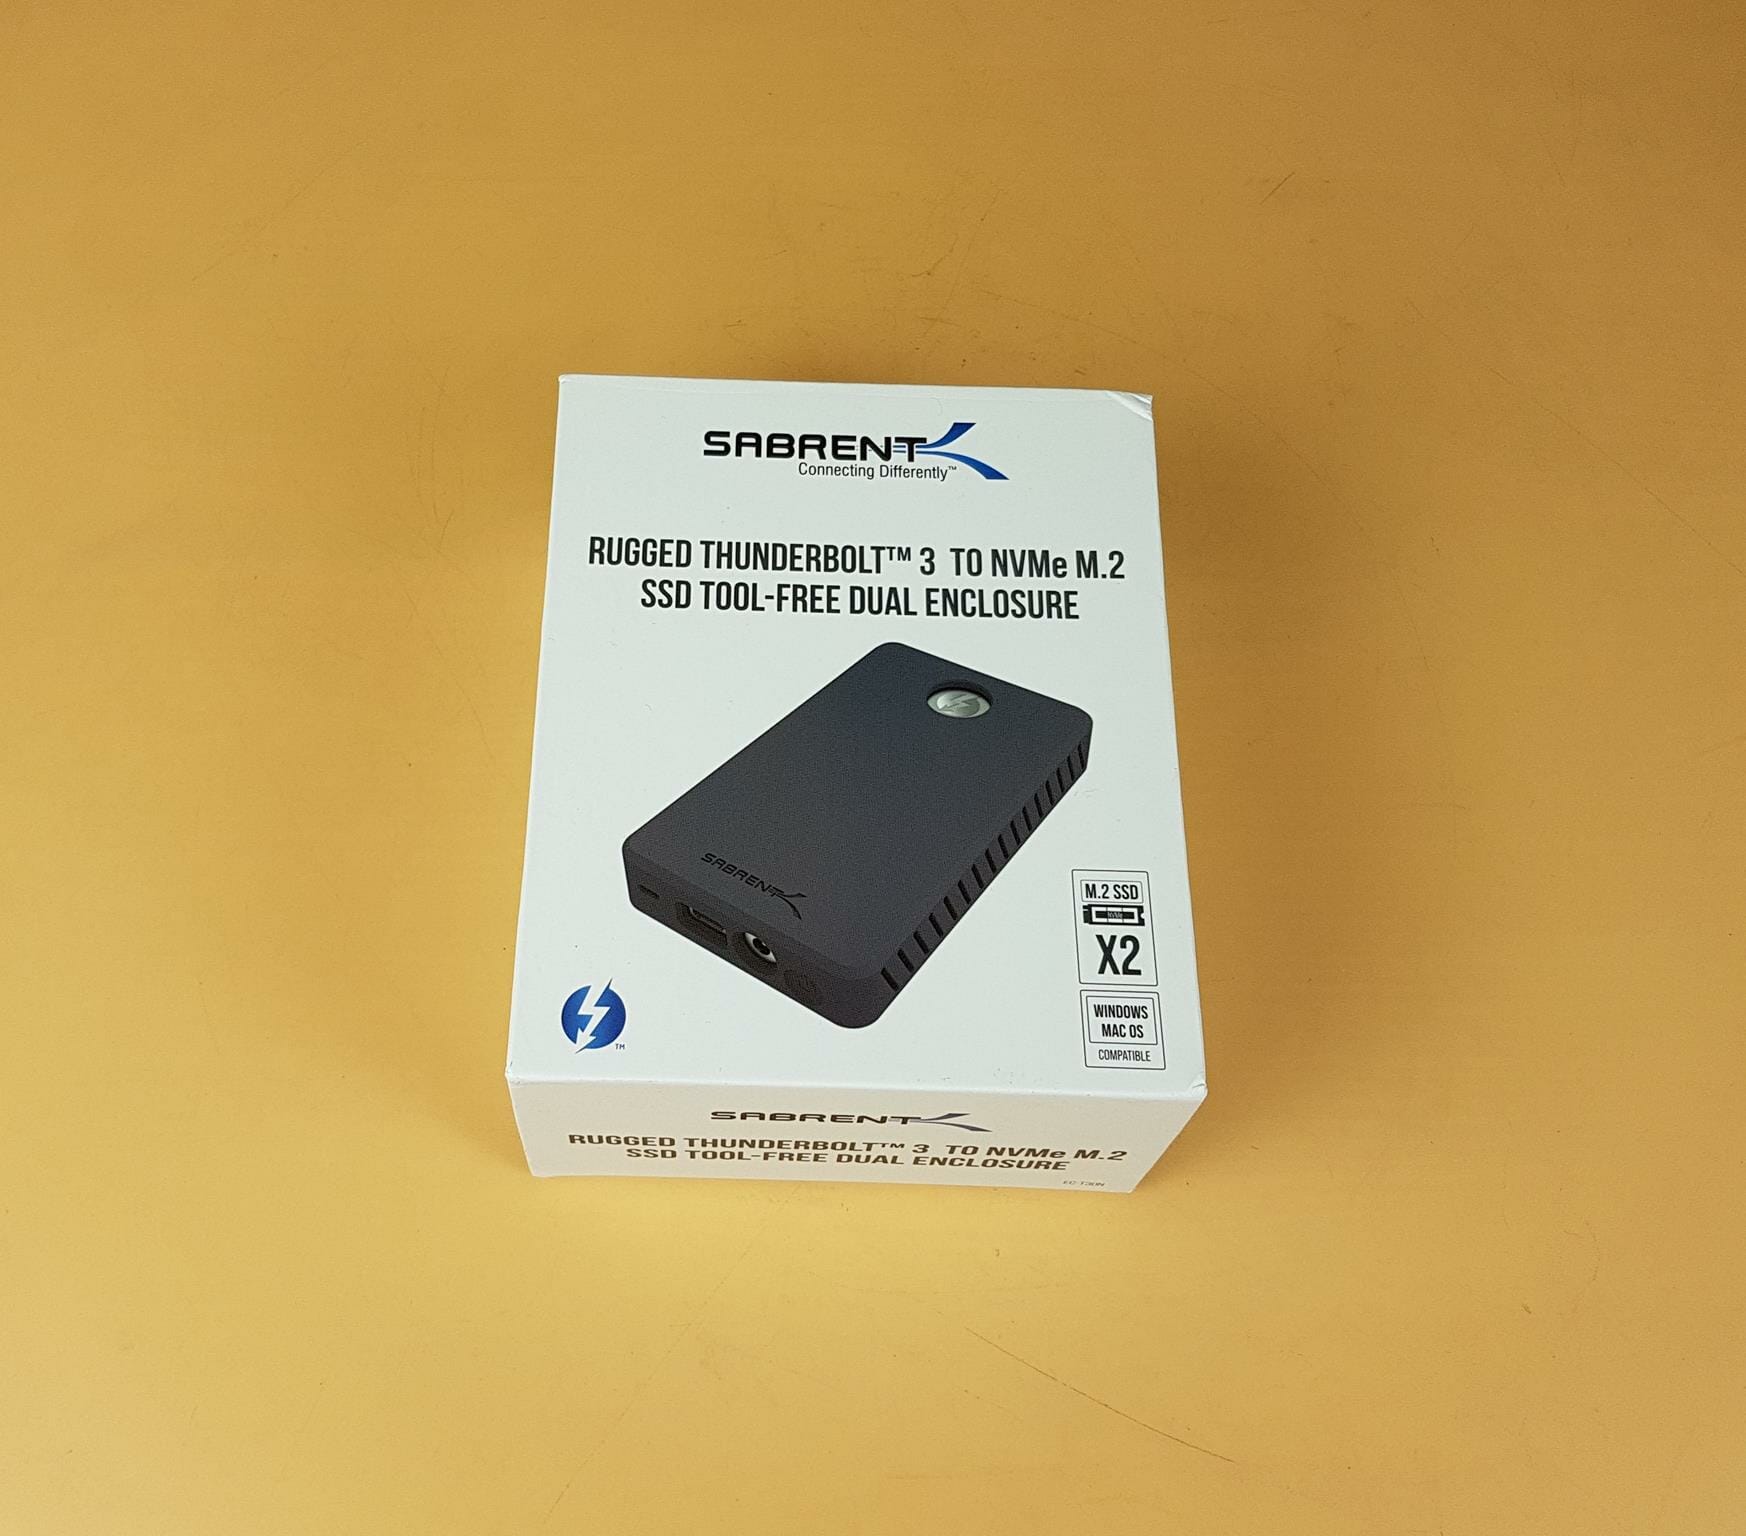
The enclosure is shipped inside a cardboard box. The box carries quite a weight to it. The enclosure is Microsoft Windows, Linux, and MAC OS compatible.
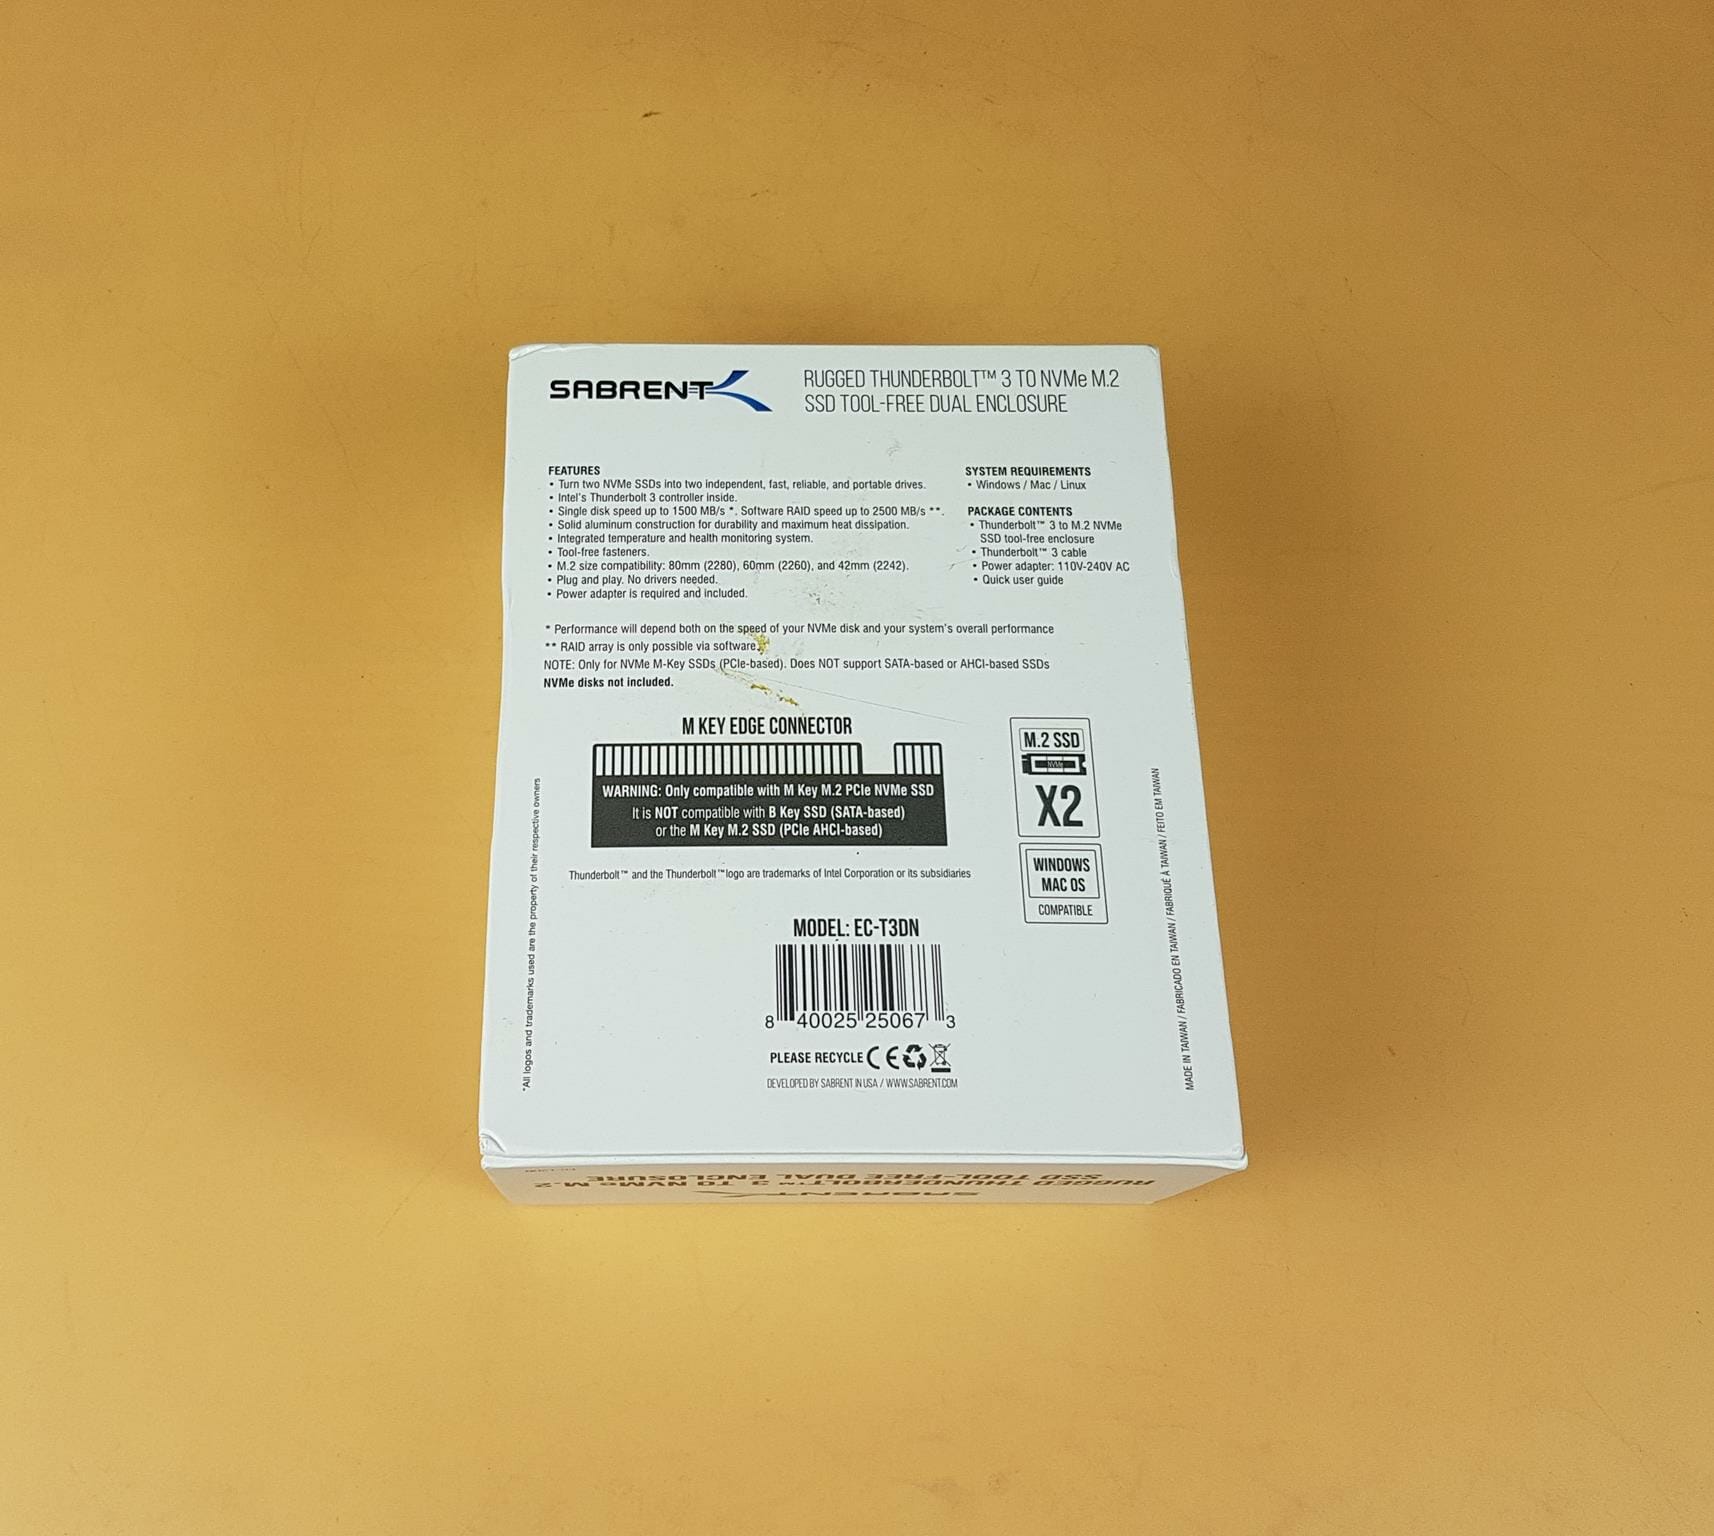
The model of the enclosure is EC-T3DN. This enclosure only supports M-Type SSDs meaning you can’t use SATA or AHCI-based SSDs.
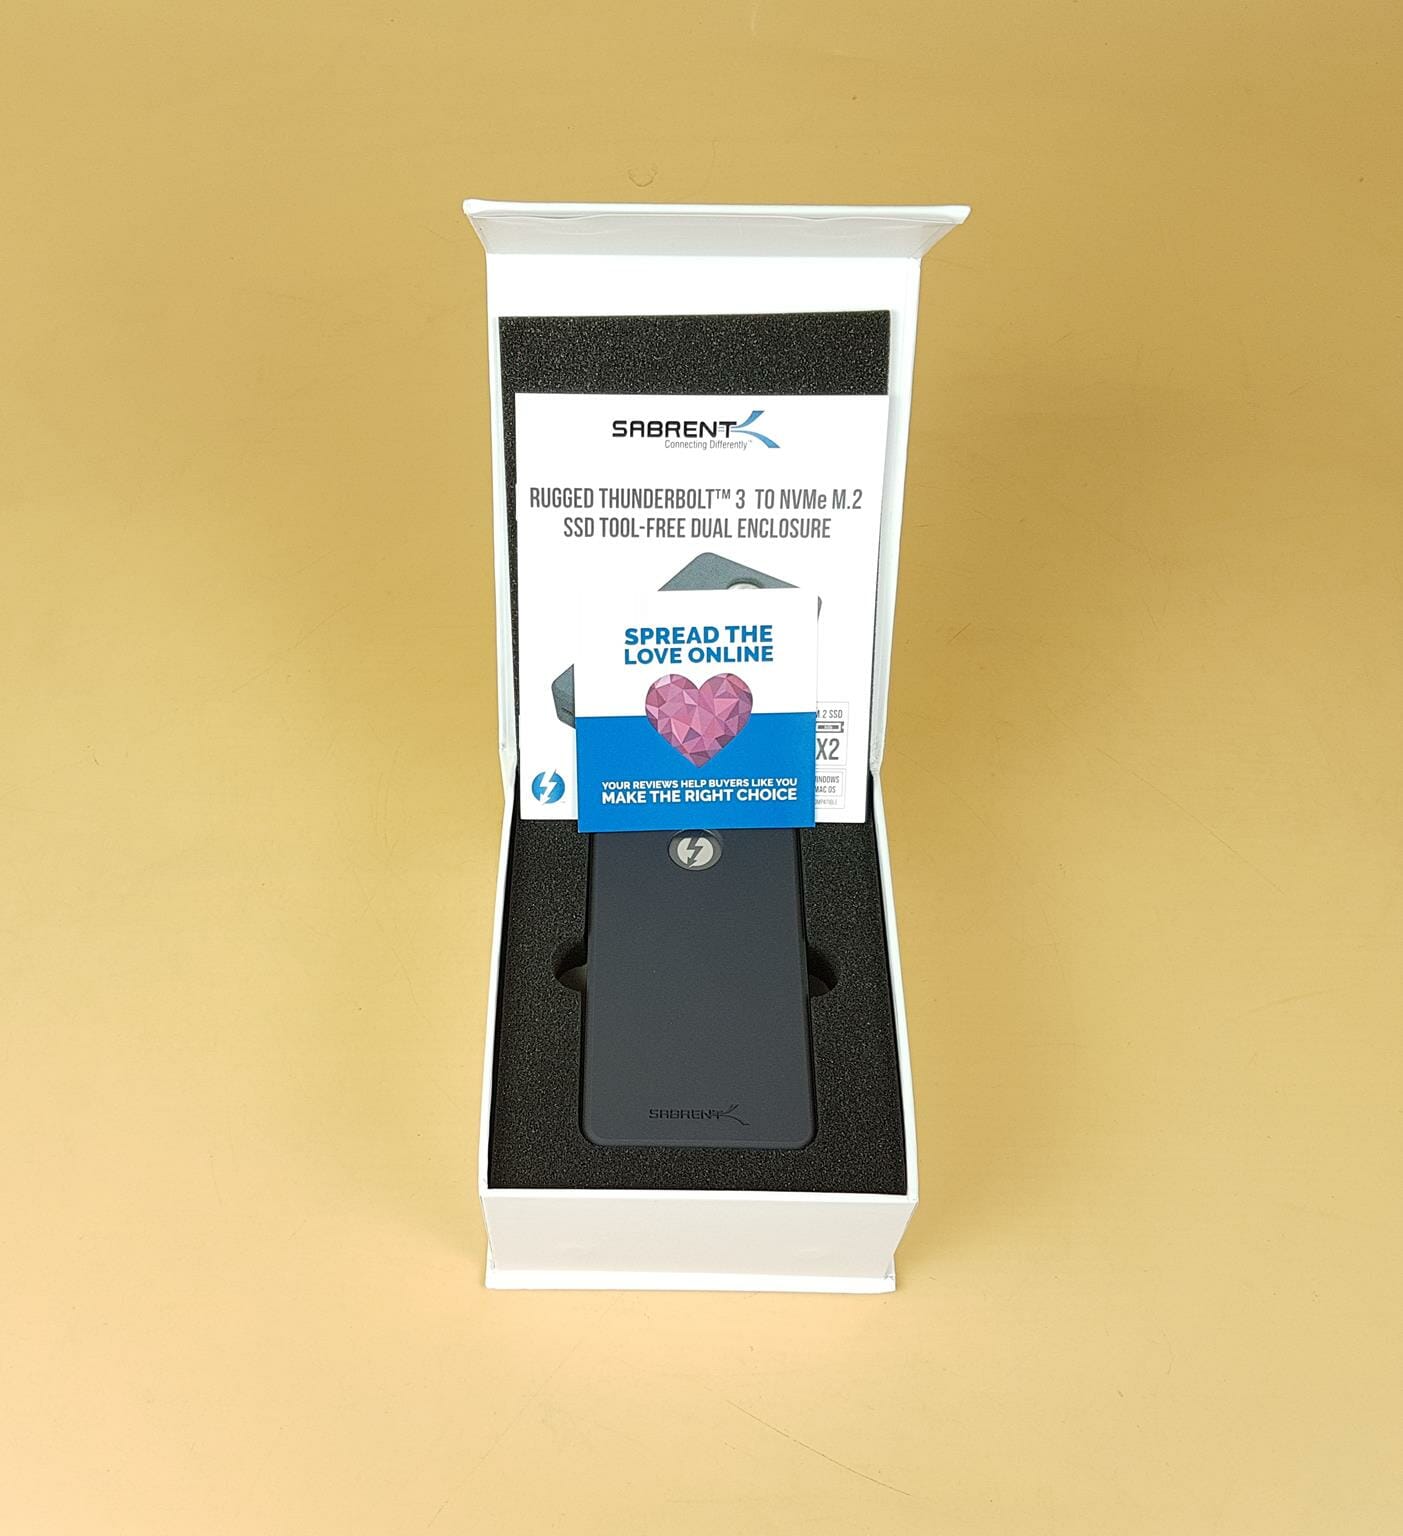
Sabrent is on the point with the presentation. Black color Styrofoam pad covers the enclosure. The user guide and Warranty paper is placed over the top.
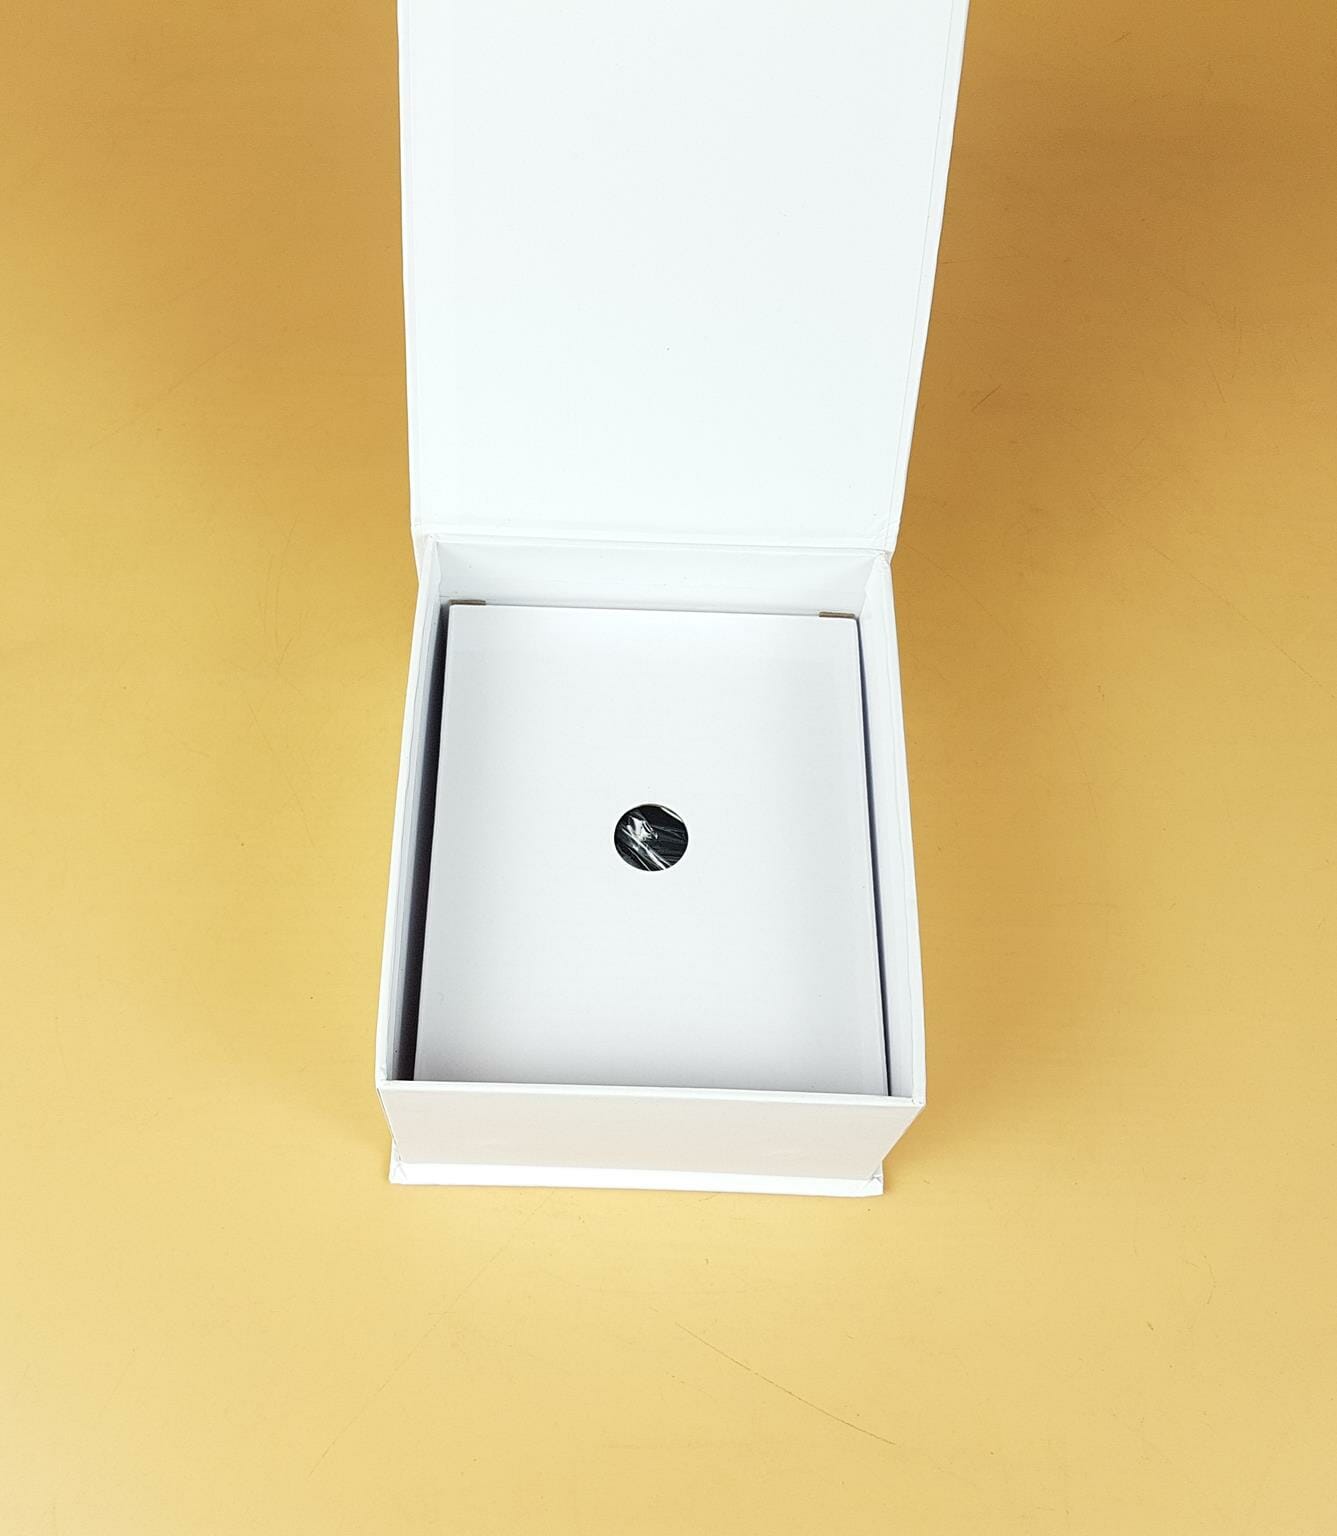
There is a white color box having the power adapter, Thunderbolt cable, and Thermal pads.
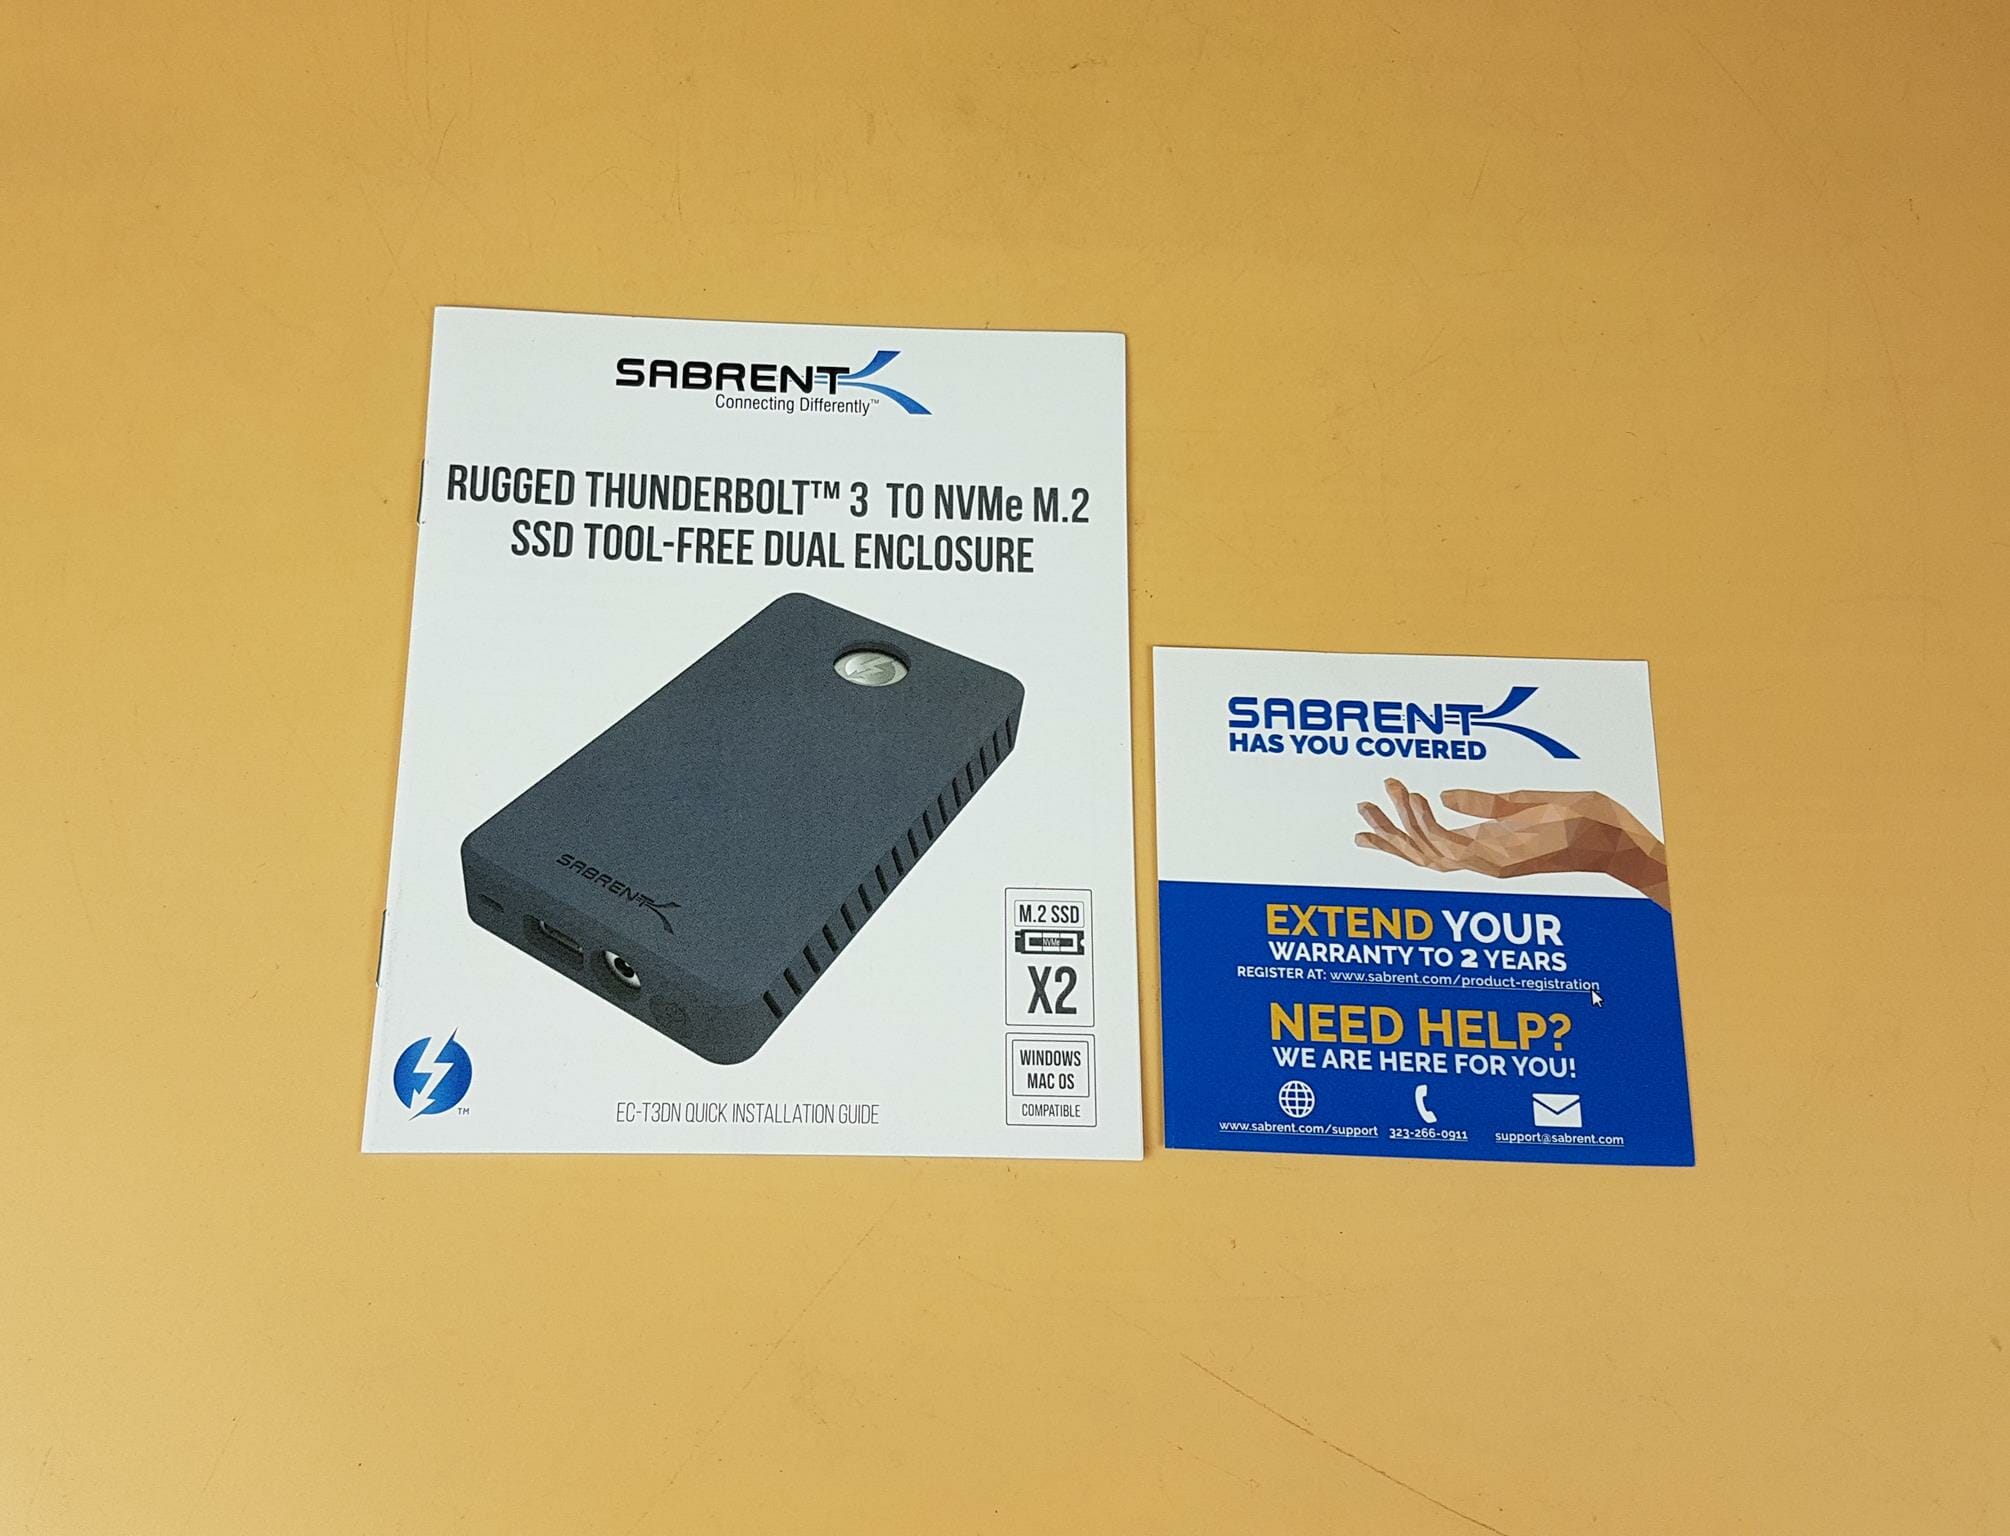
Sabrent has provided a user guide and a warranty paper in the box.
Closer Look
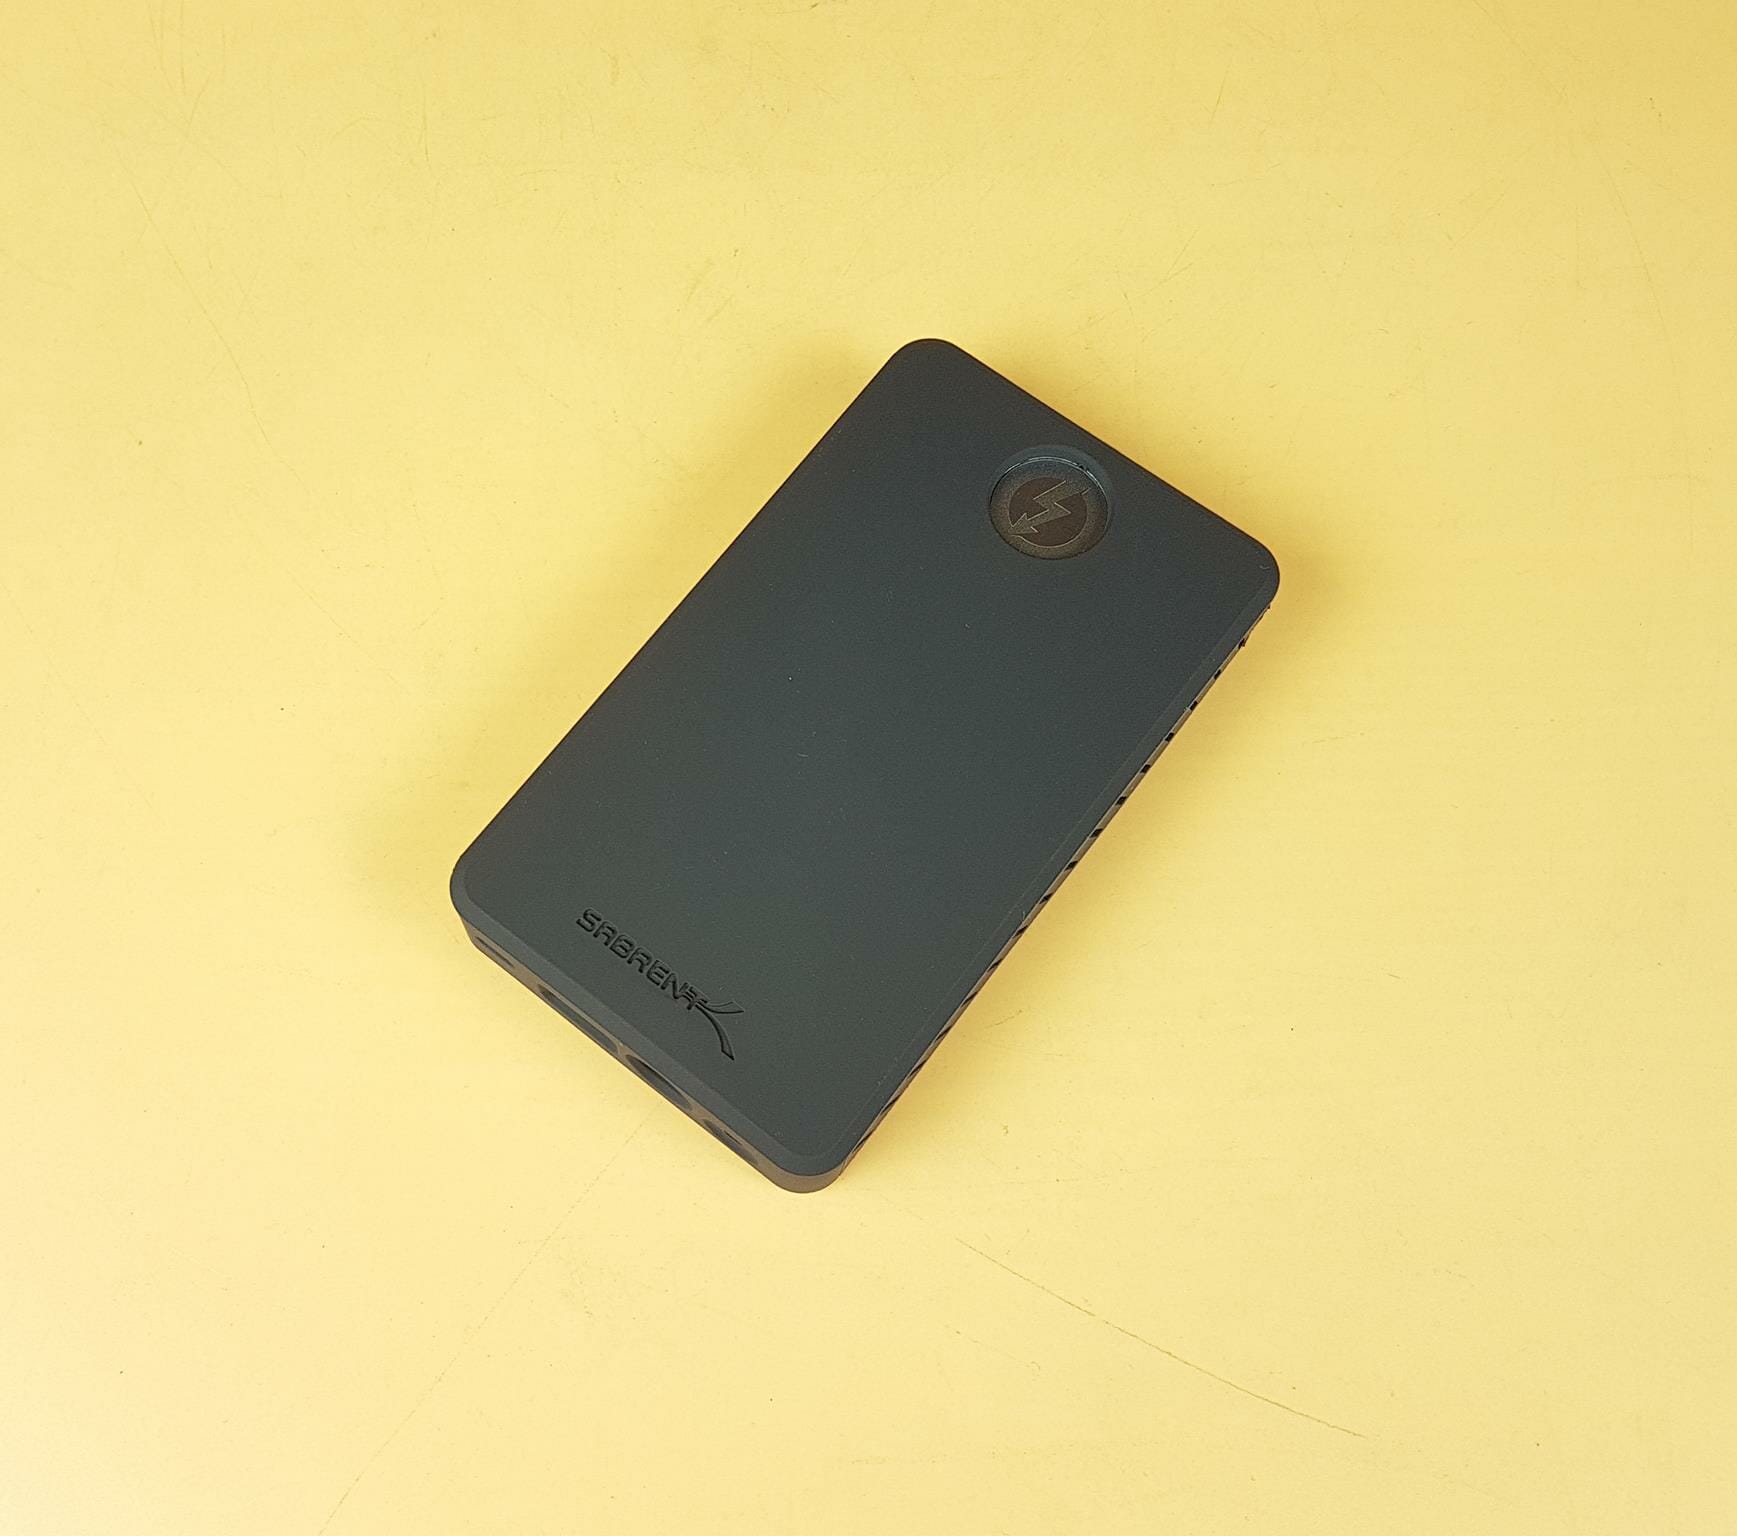
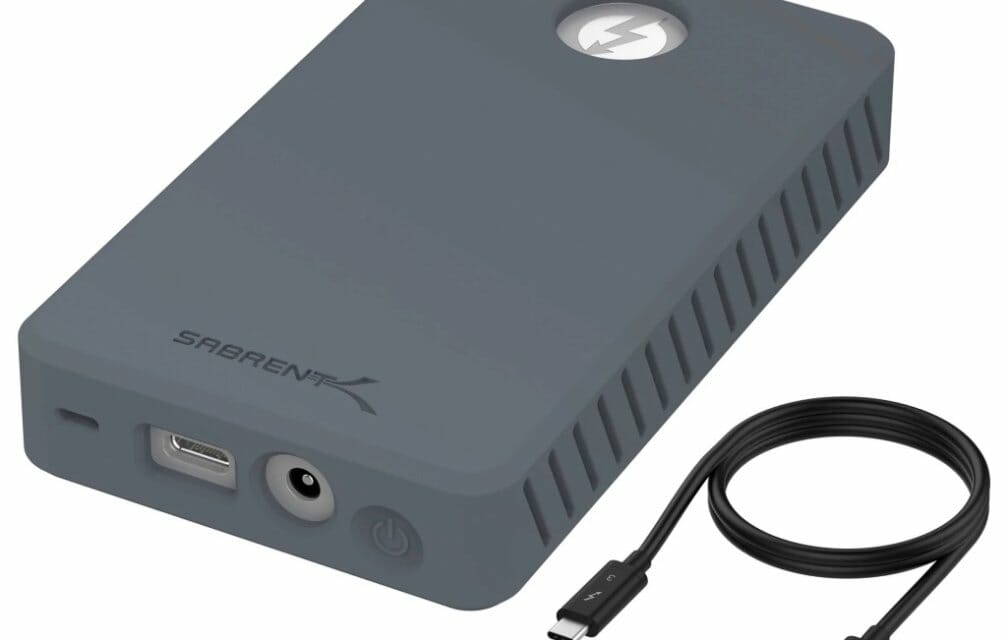
The enclosure comes inside a protective covering made of silicon material to add ruggedness and further safety. There is a Sabrent branding carved on the protective cover. The rounded hole on the top shows the Thunderbolt logo indicating that this enclosure is a certified Thunderbolt device.
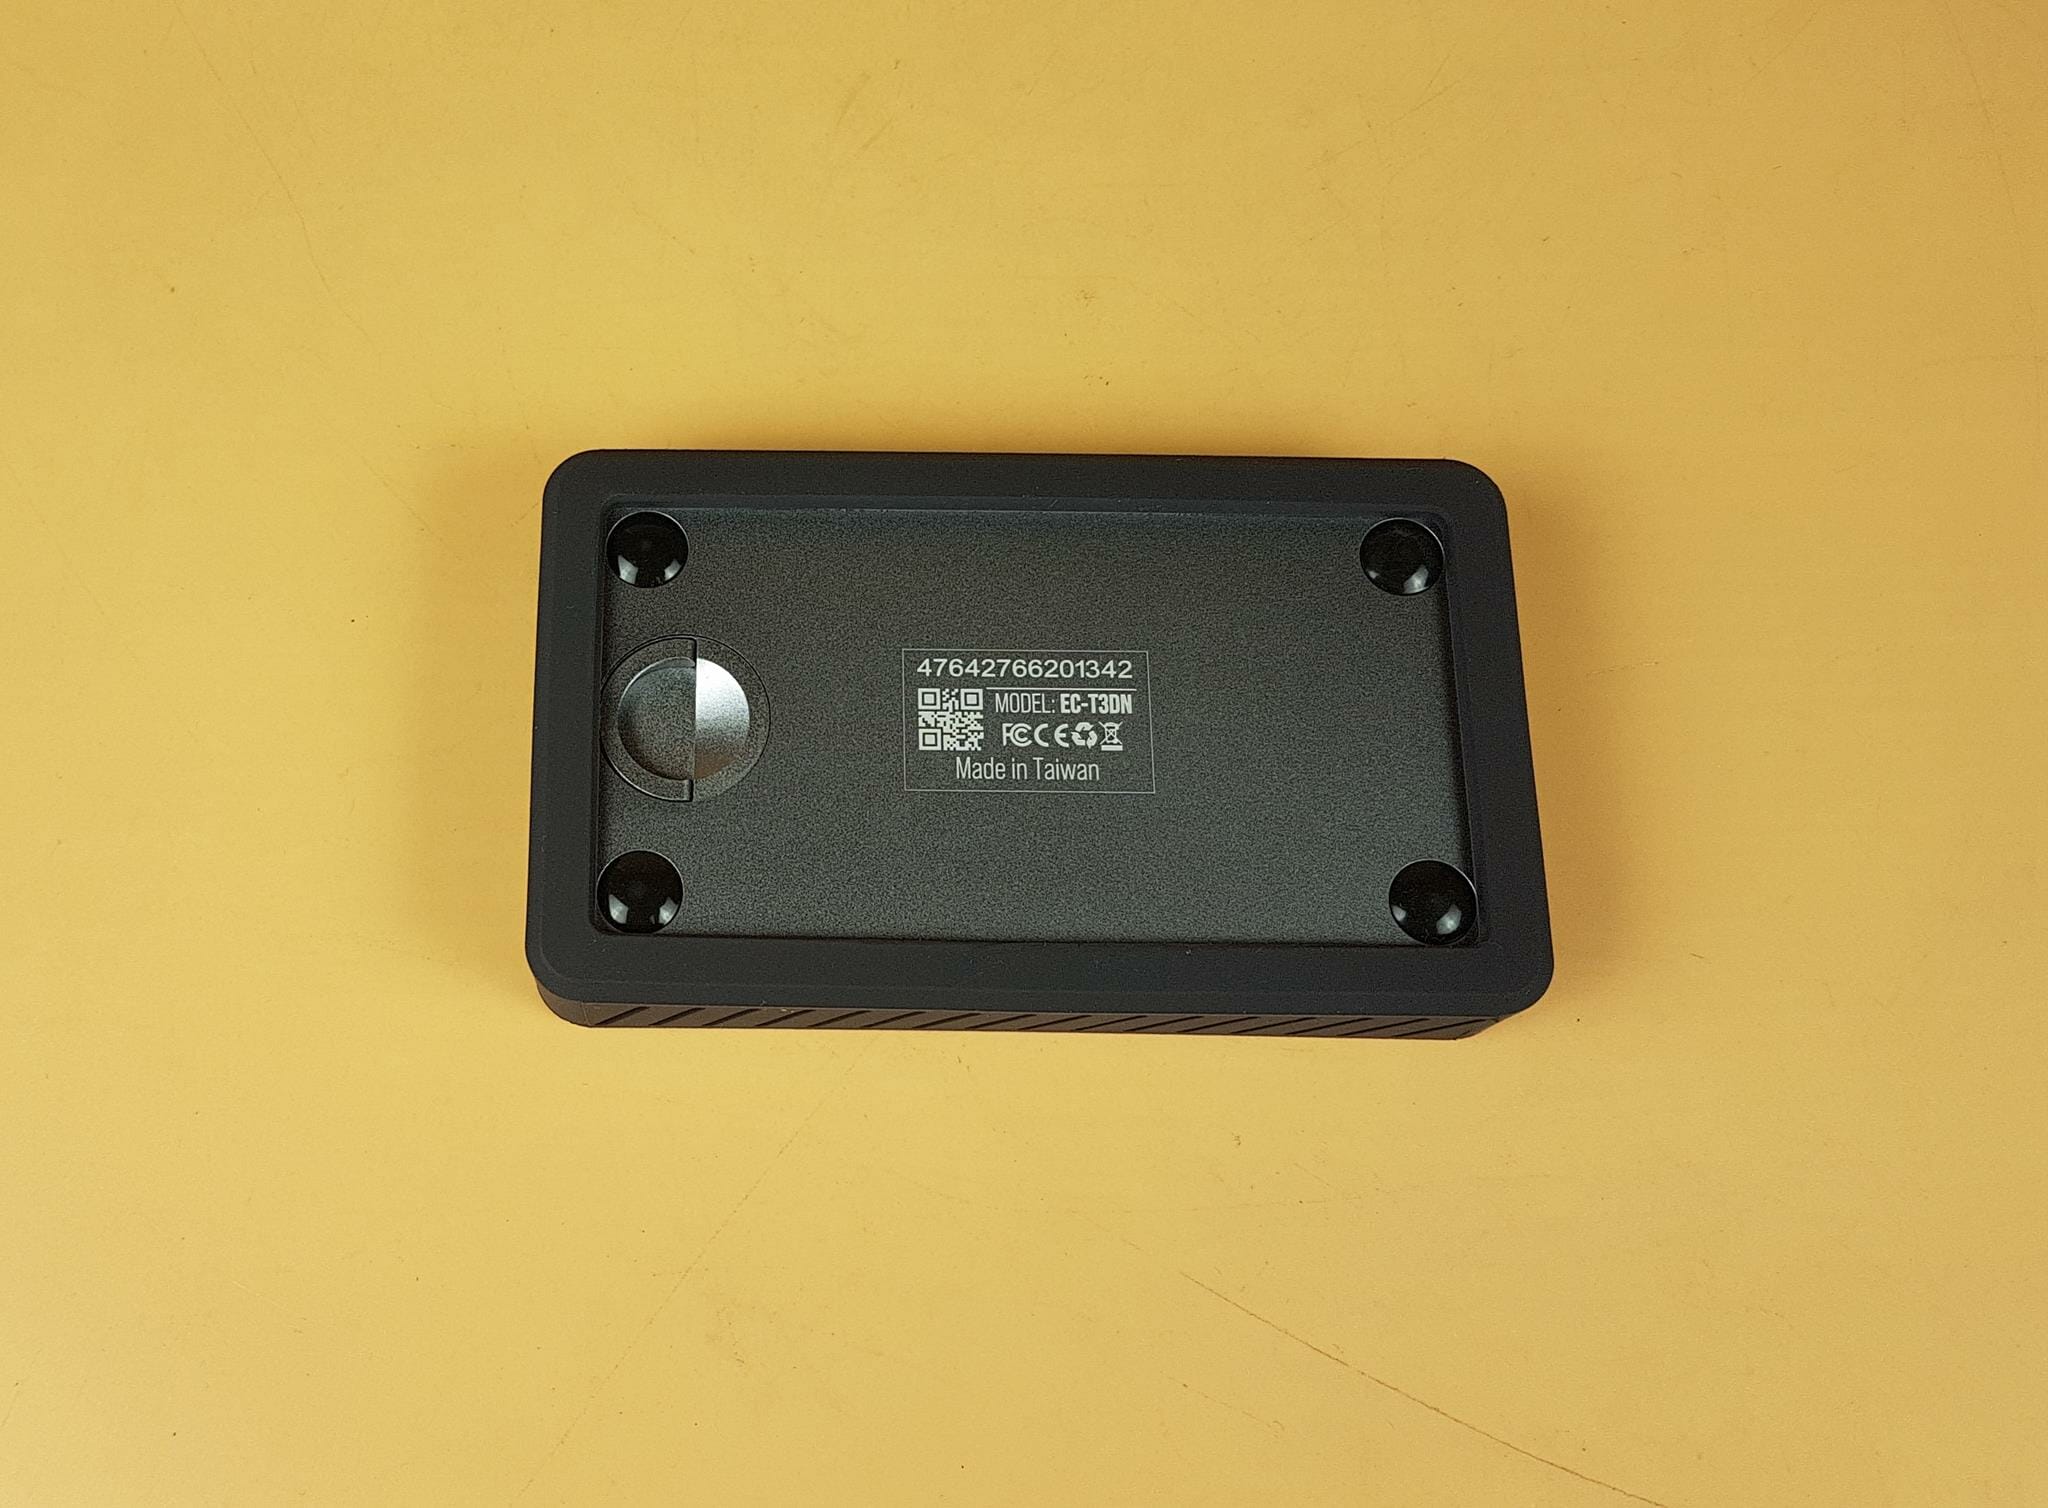
The above picture shows the underside of the enclosure with the protective cover on.
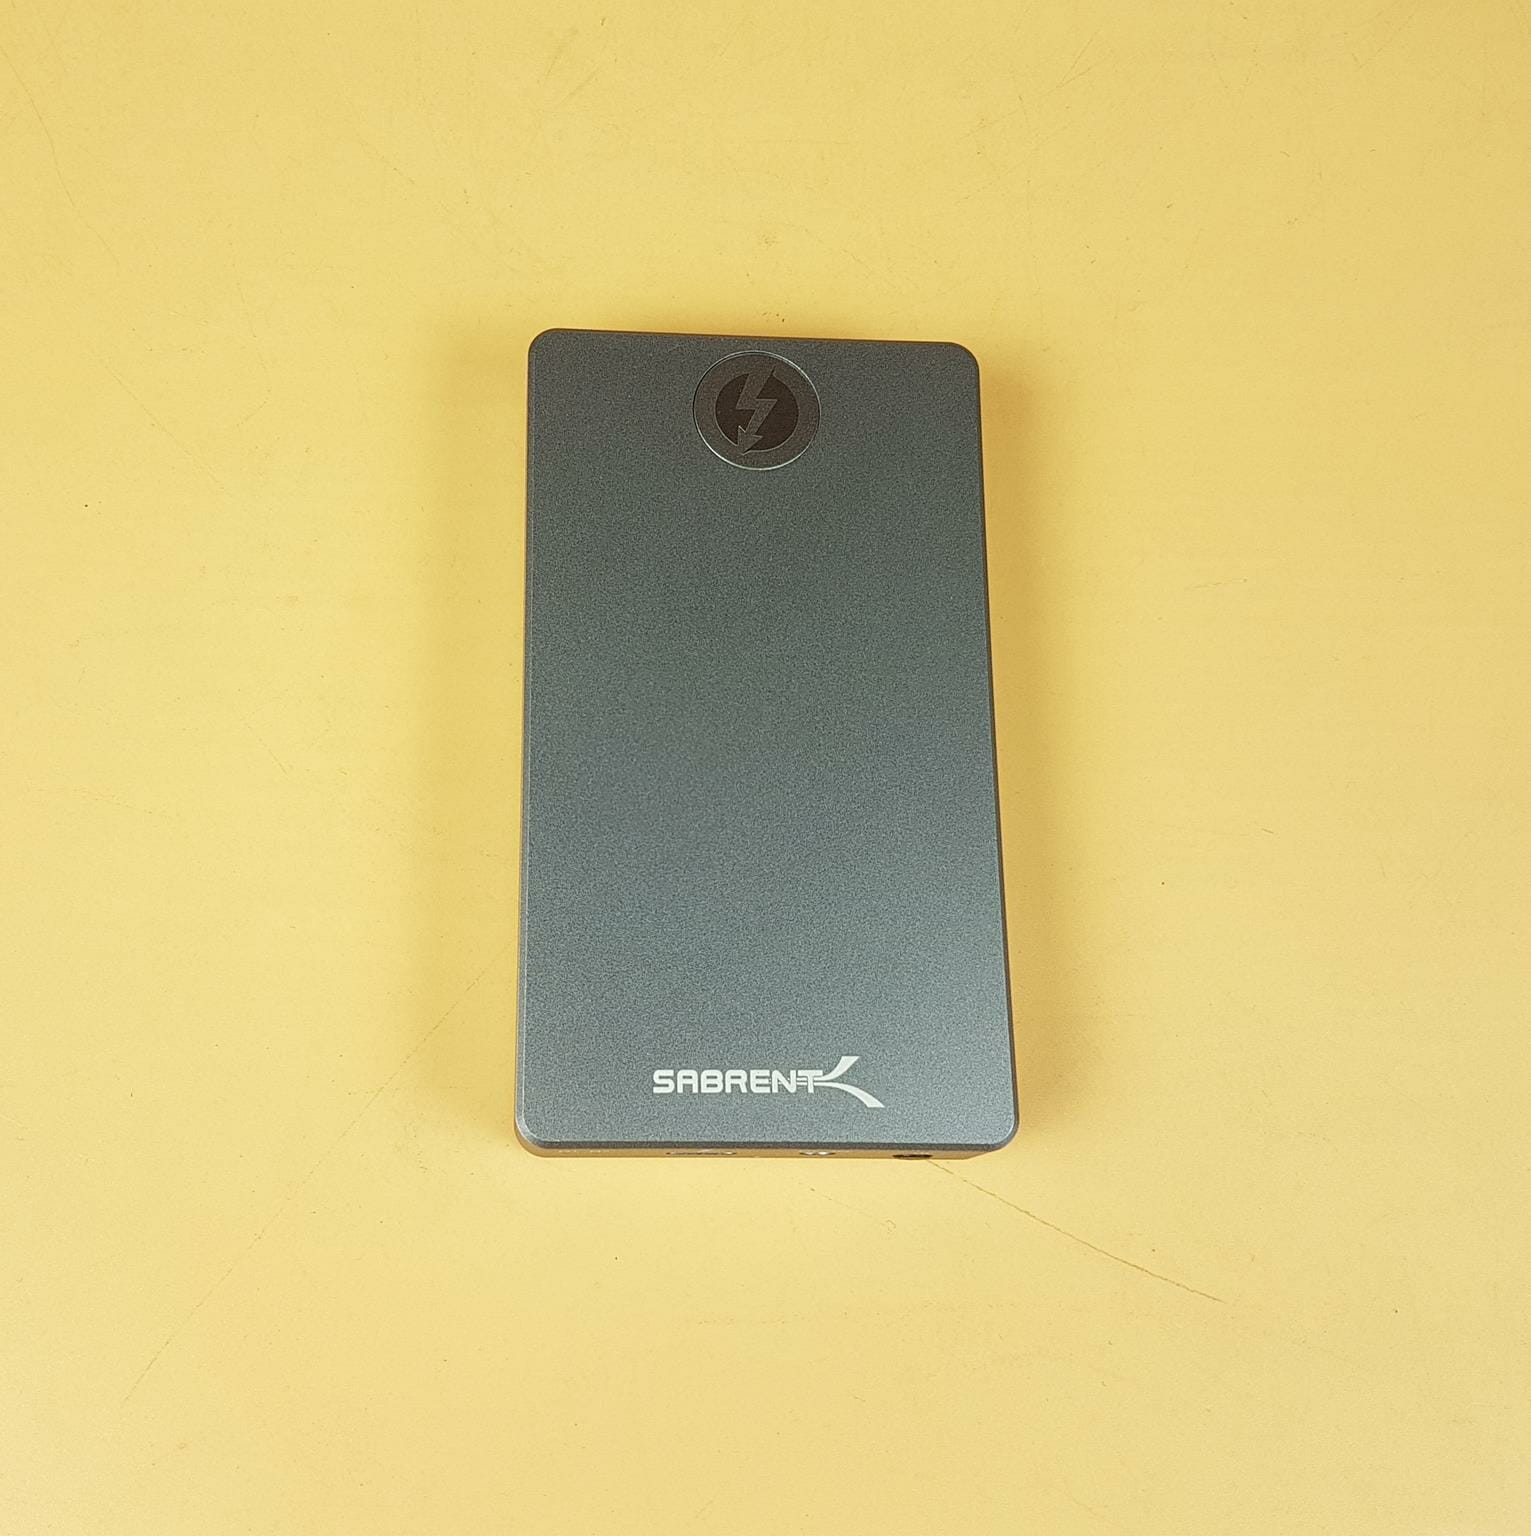
We have taken off the cover to show the enclosure. The enclosure is made of aluminum material. It is in silver color finishing. The dimension of the enclosure is 4.5×2.57×0.68 inches (LxHxW). The enclosure itself weighs 7.2 oz. There is a white color Sabrent branding at the base and the Thunderbolt logo is on the top.
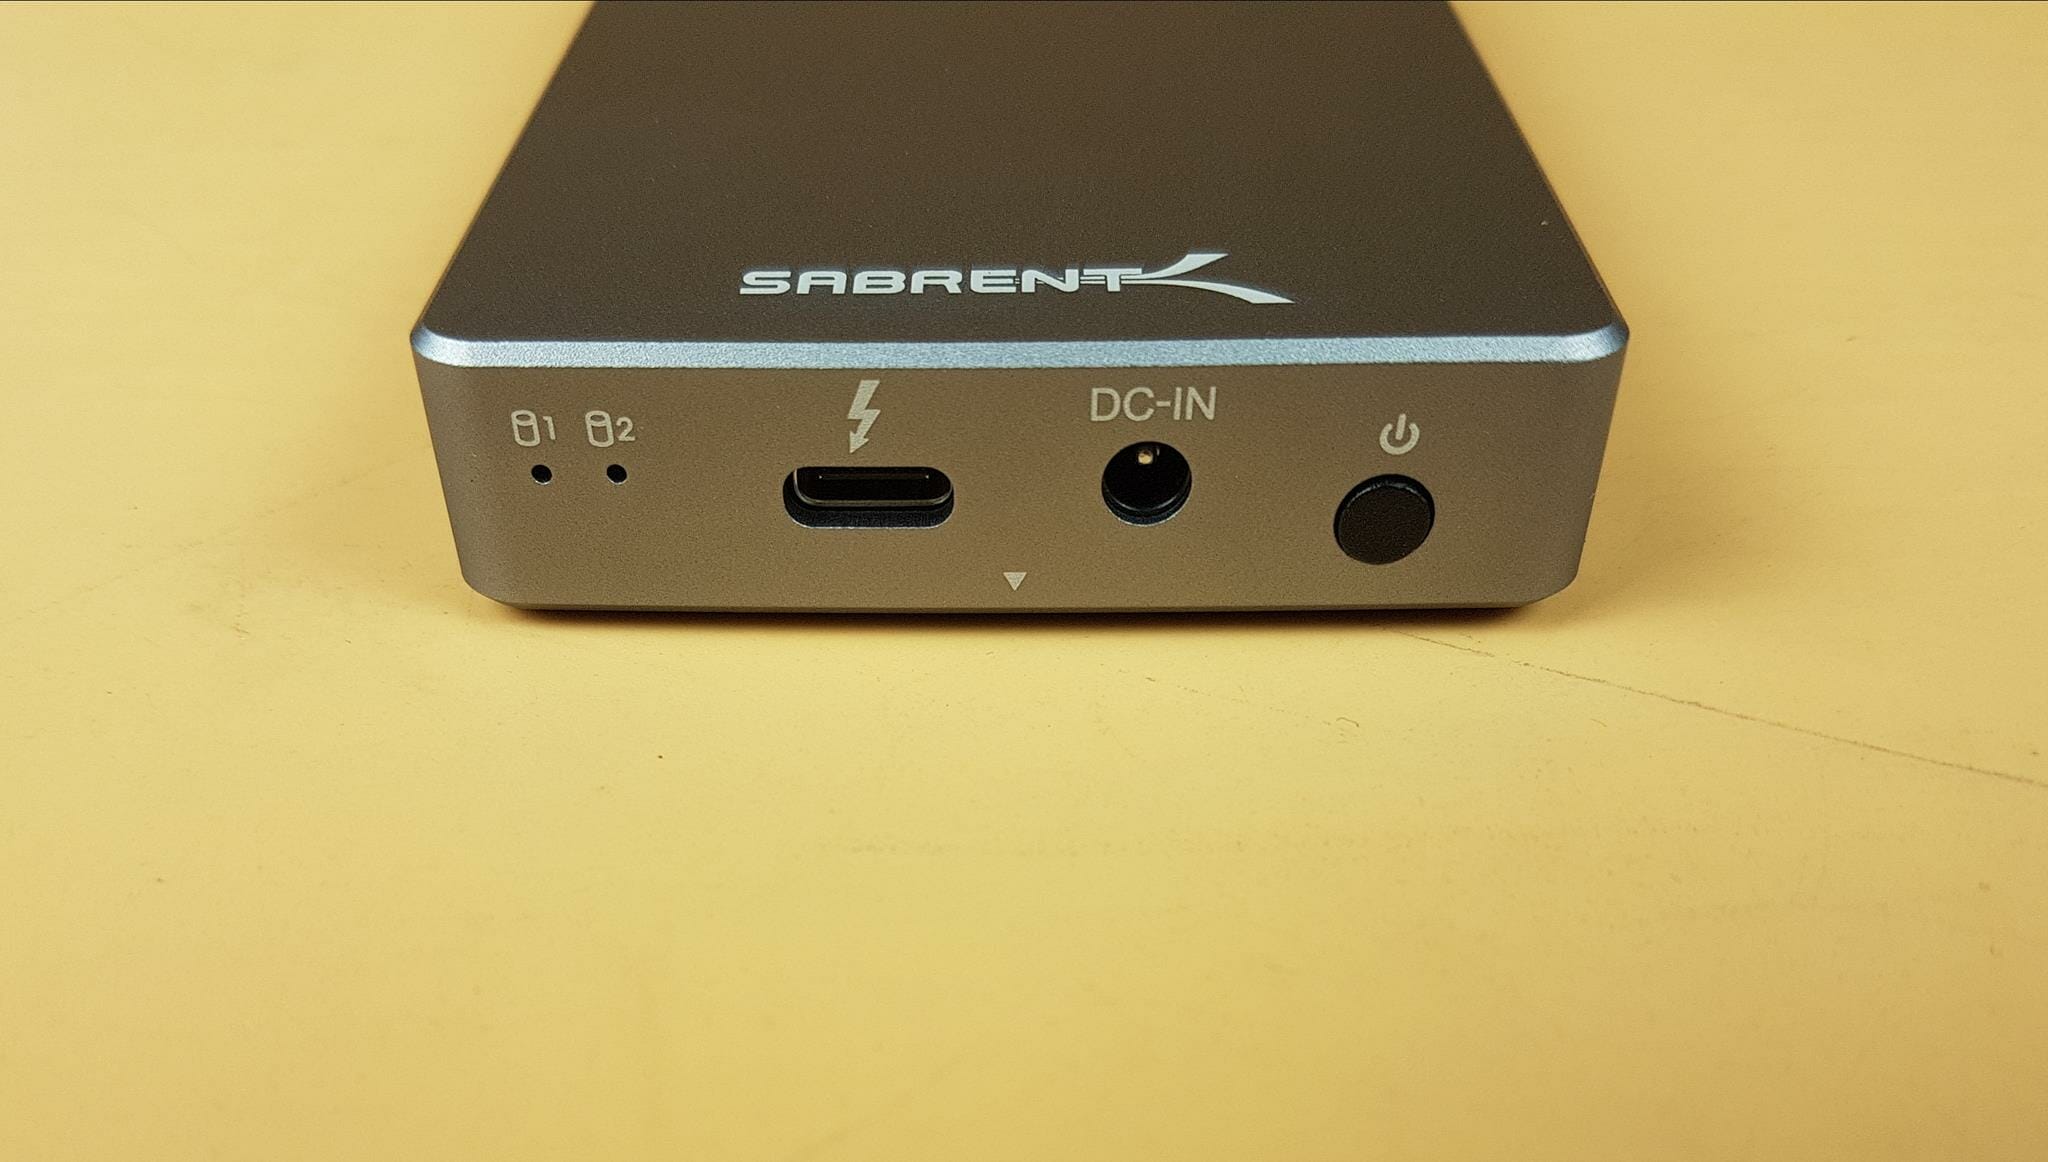
Looking at the port side of the enclosure, we have:
- Dual blue backlit LED indicators for 2x Drives
- Thunderbolt 3 Port
- Power Jack
- Power button
There is a white color arrow indicator pointing toward the base of the enclosure. This is there to indicate the location of the knob which is used to remove the lid for the installation of the SSDs.
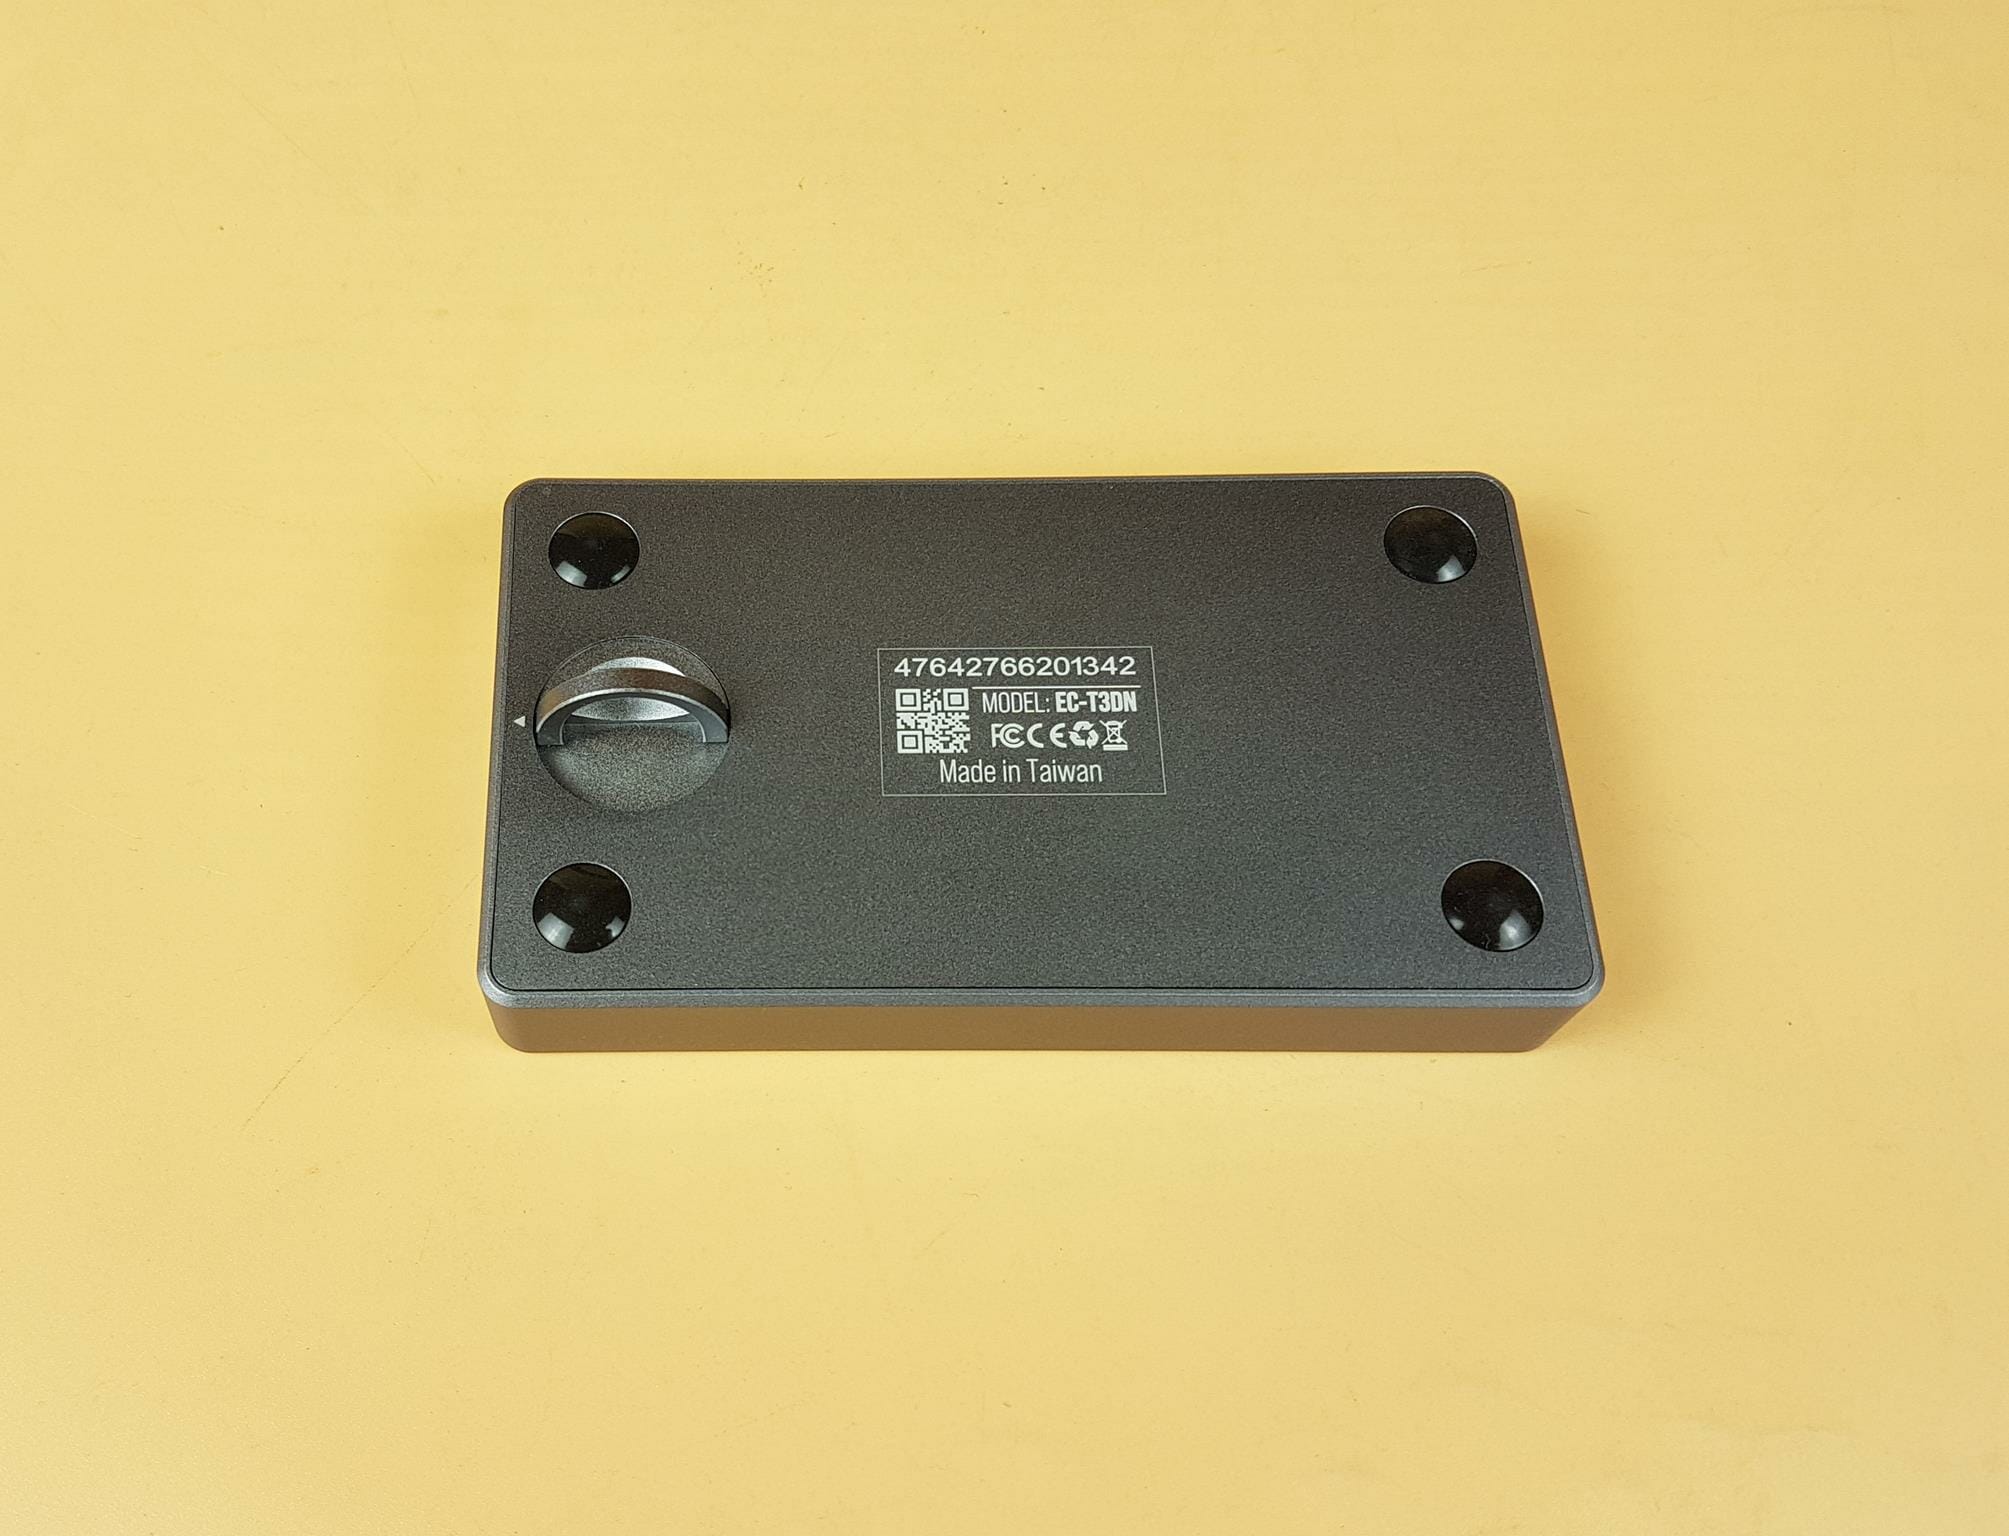
Lift and rotate the knob to take the cover/lid off the enclosure. As simple as it sounds! Hence the term Tool-Less. We don’t need any screwdriver for this enclosure. The enclosure is made in Taiwan.
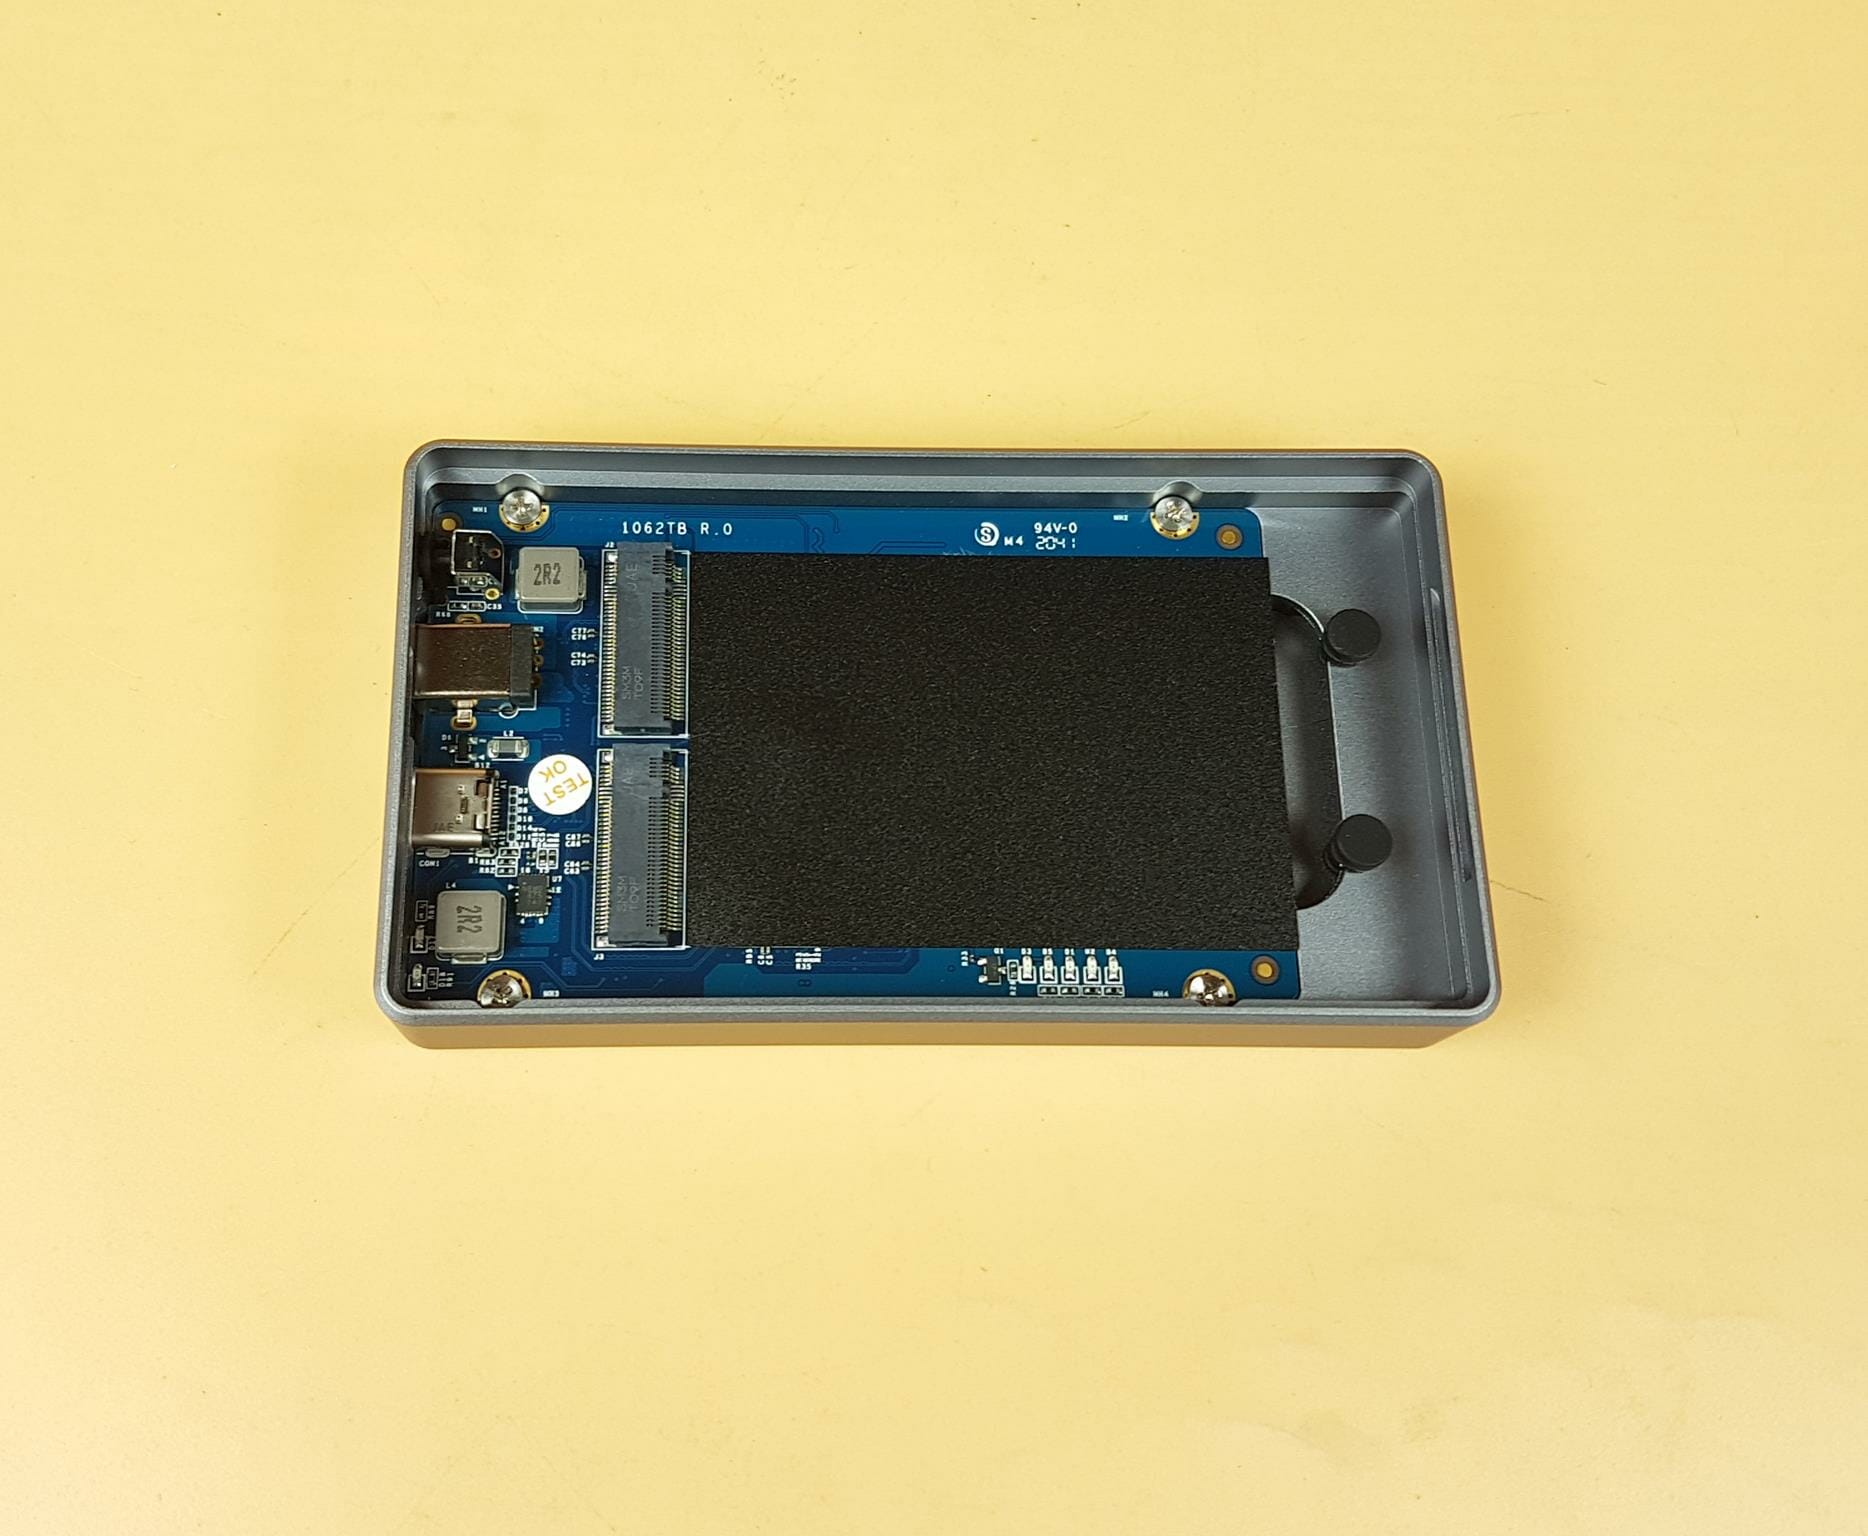
The above picture shows the inside of the enclosure after removing the top lid. We can spot 2x M.2 ports that can house NVMe SSDs having form factor sizes: 2242/2260/2280. There are two rubber-made push pins on the far end. These are there to hold the SSDs in their place. These are not magnetic as advertised by Sabrent. The PCB is secured with the frame of the enclosure using 4x screws.
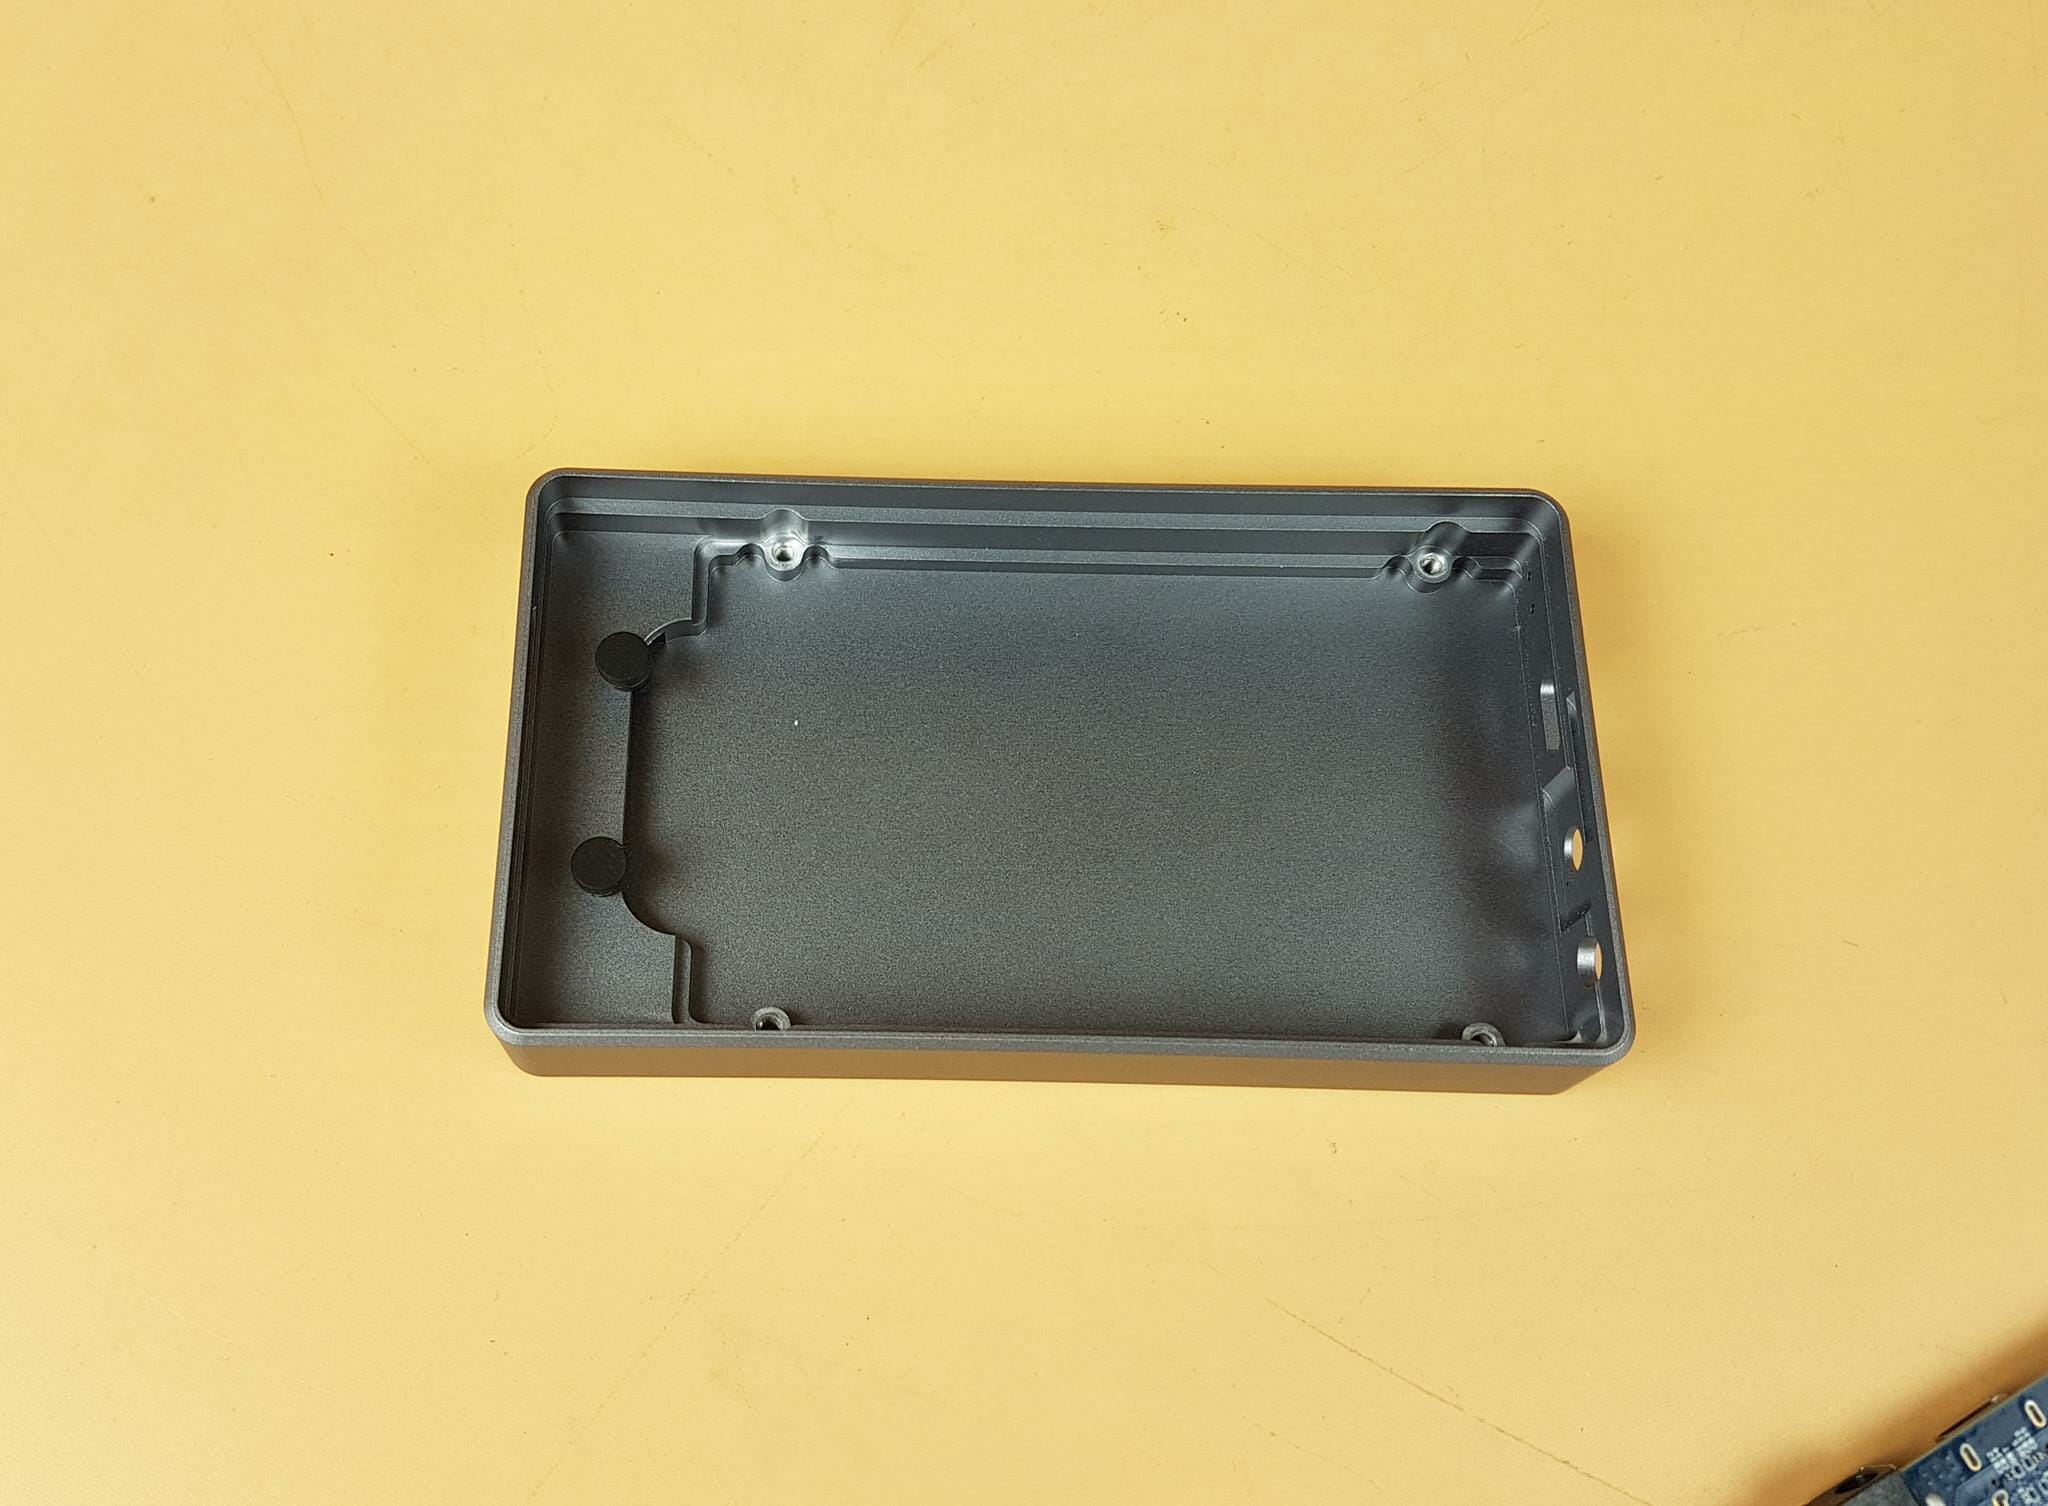
The above picture shows the shell after removing PCB. We can see the fine machining work done on the enclosure.
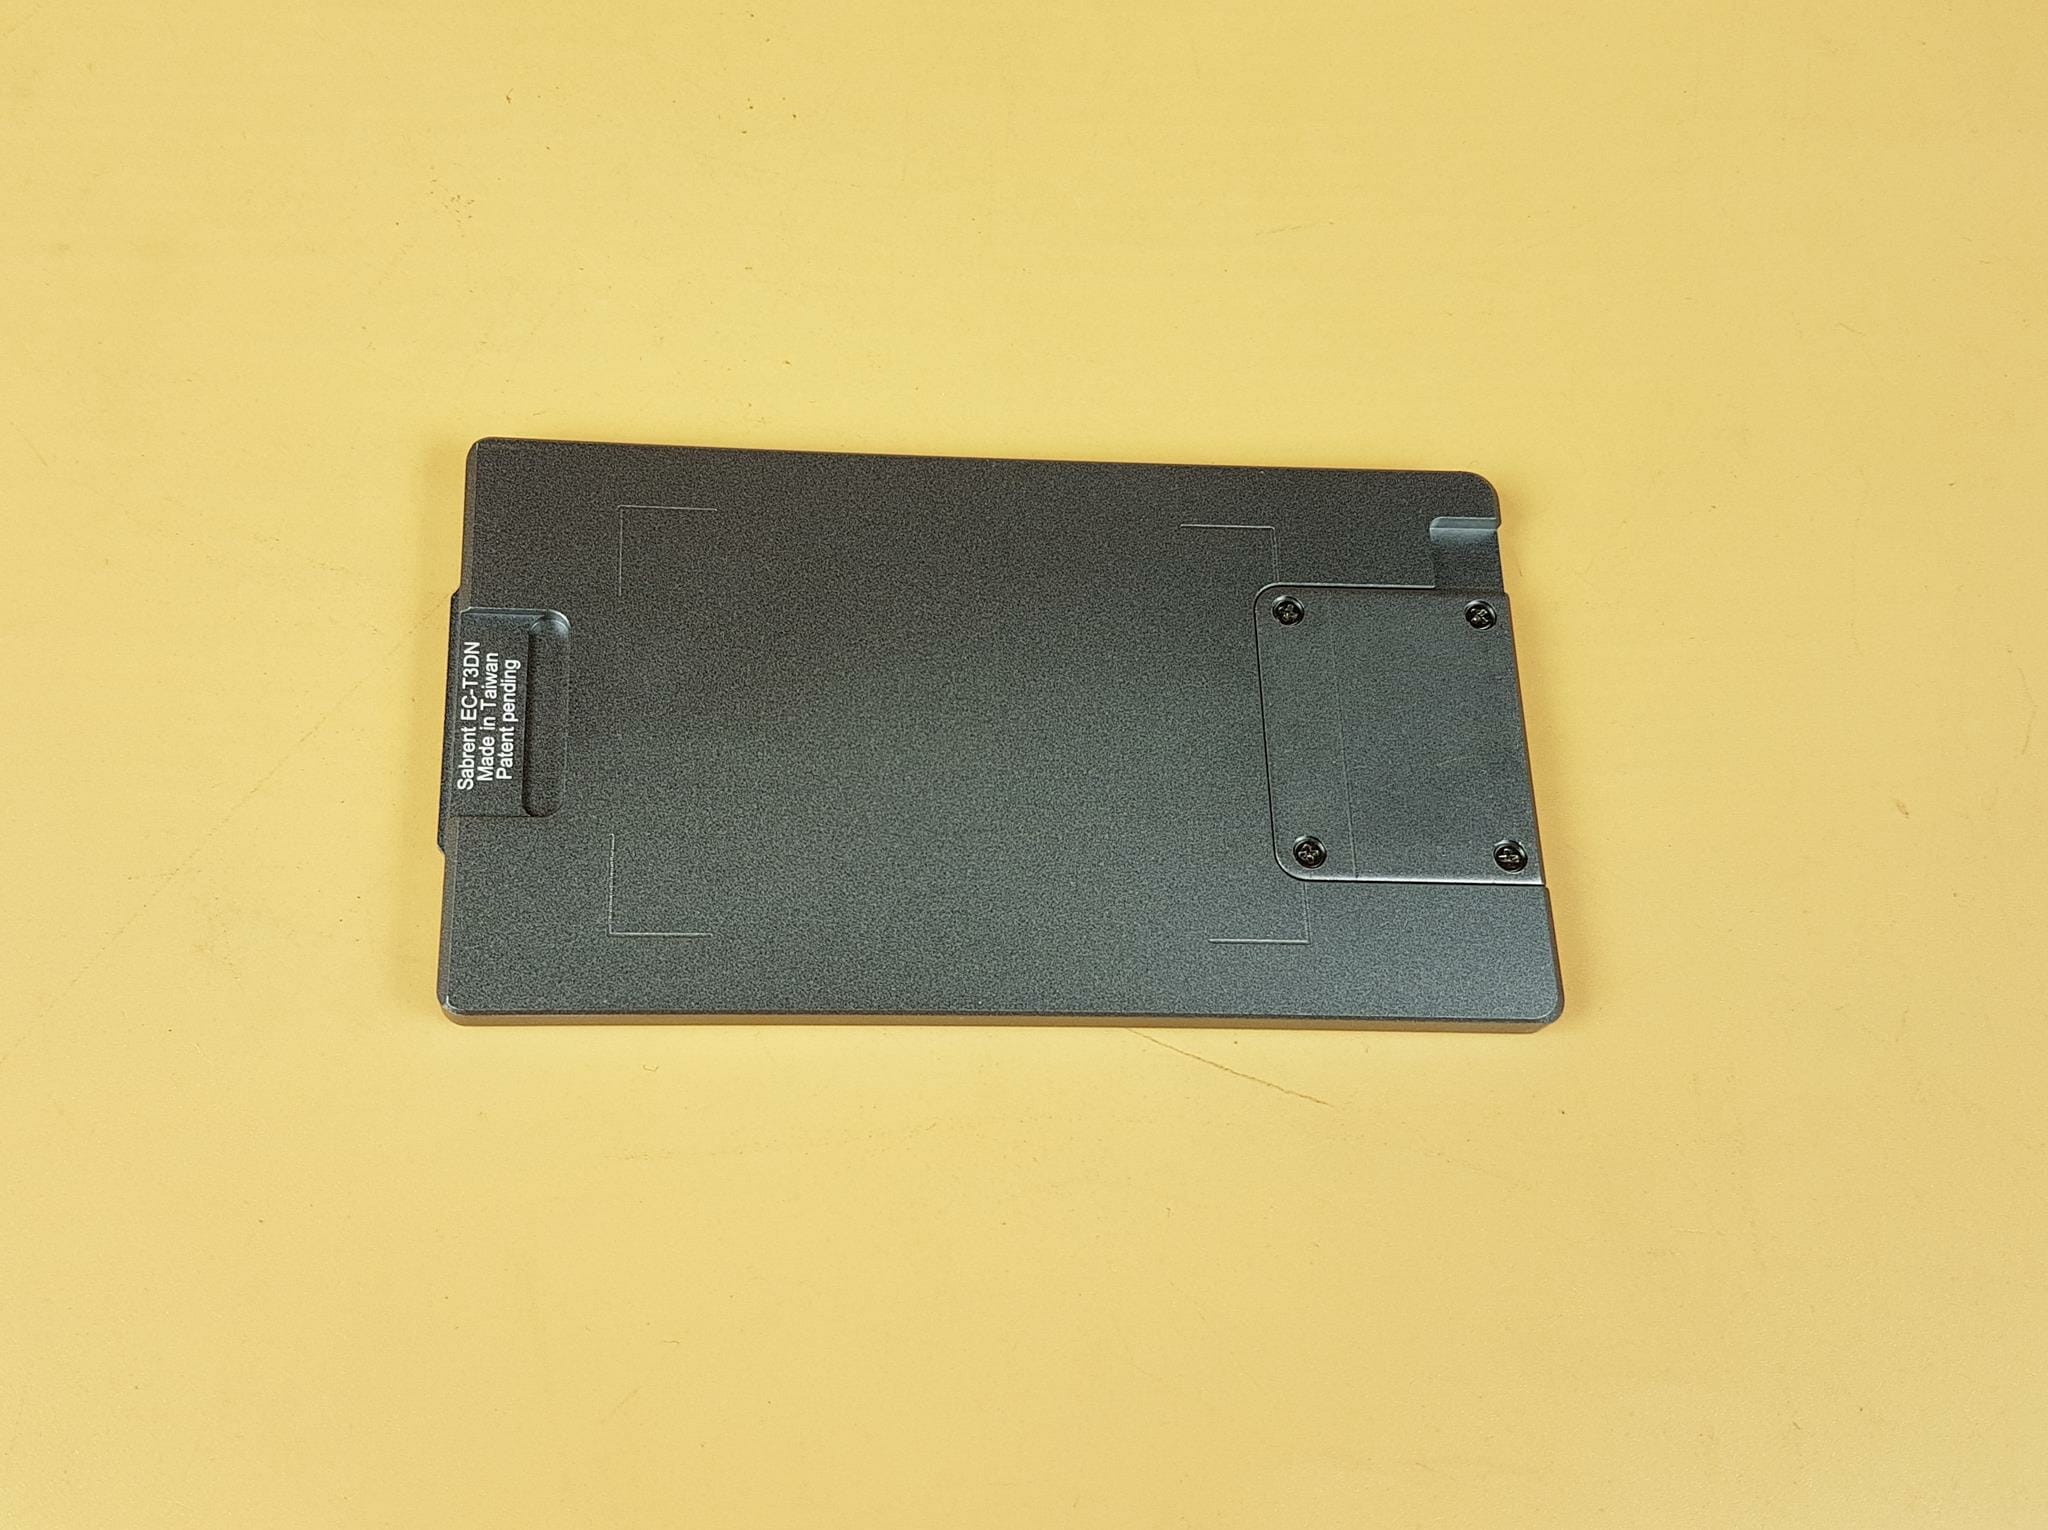
The above picture shows the underside of the plate/cover which comes off the enclosure. Notice the angled markings, these are there to help place the thermal pads correctly on the plate.
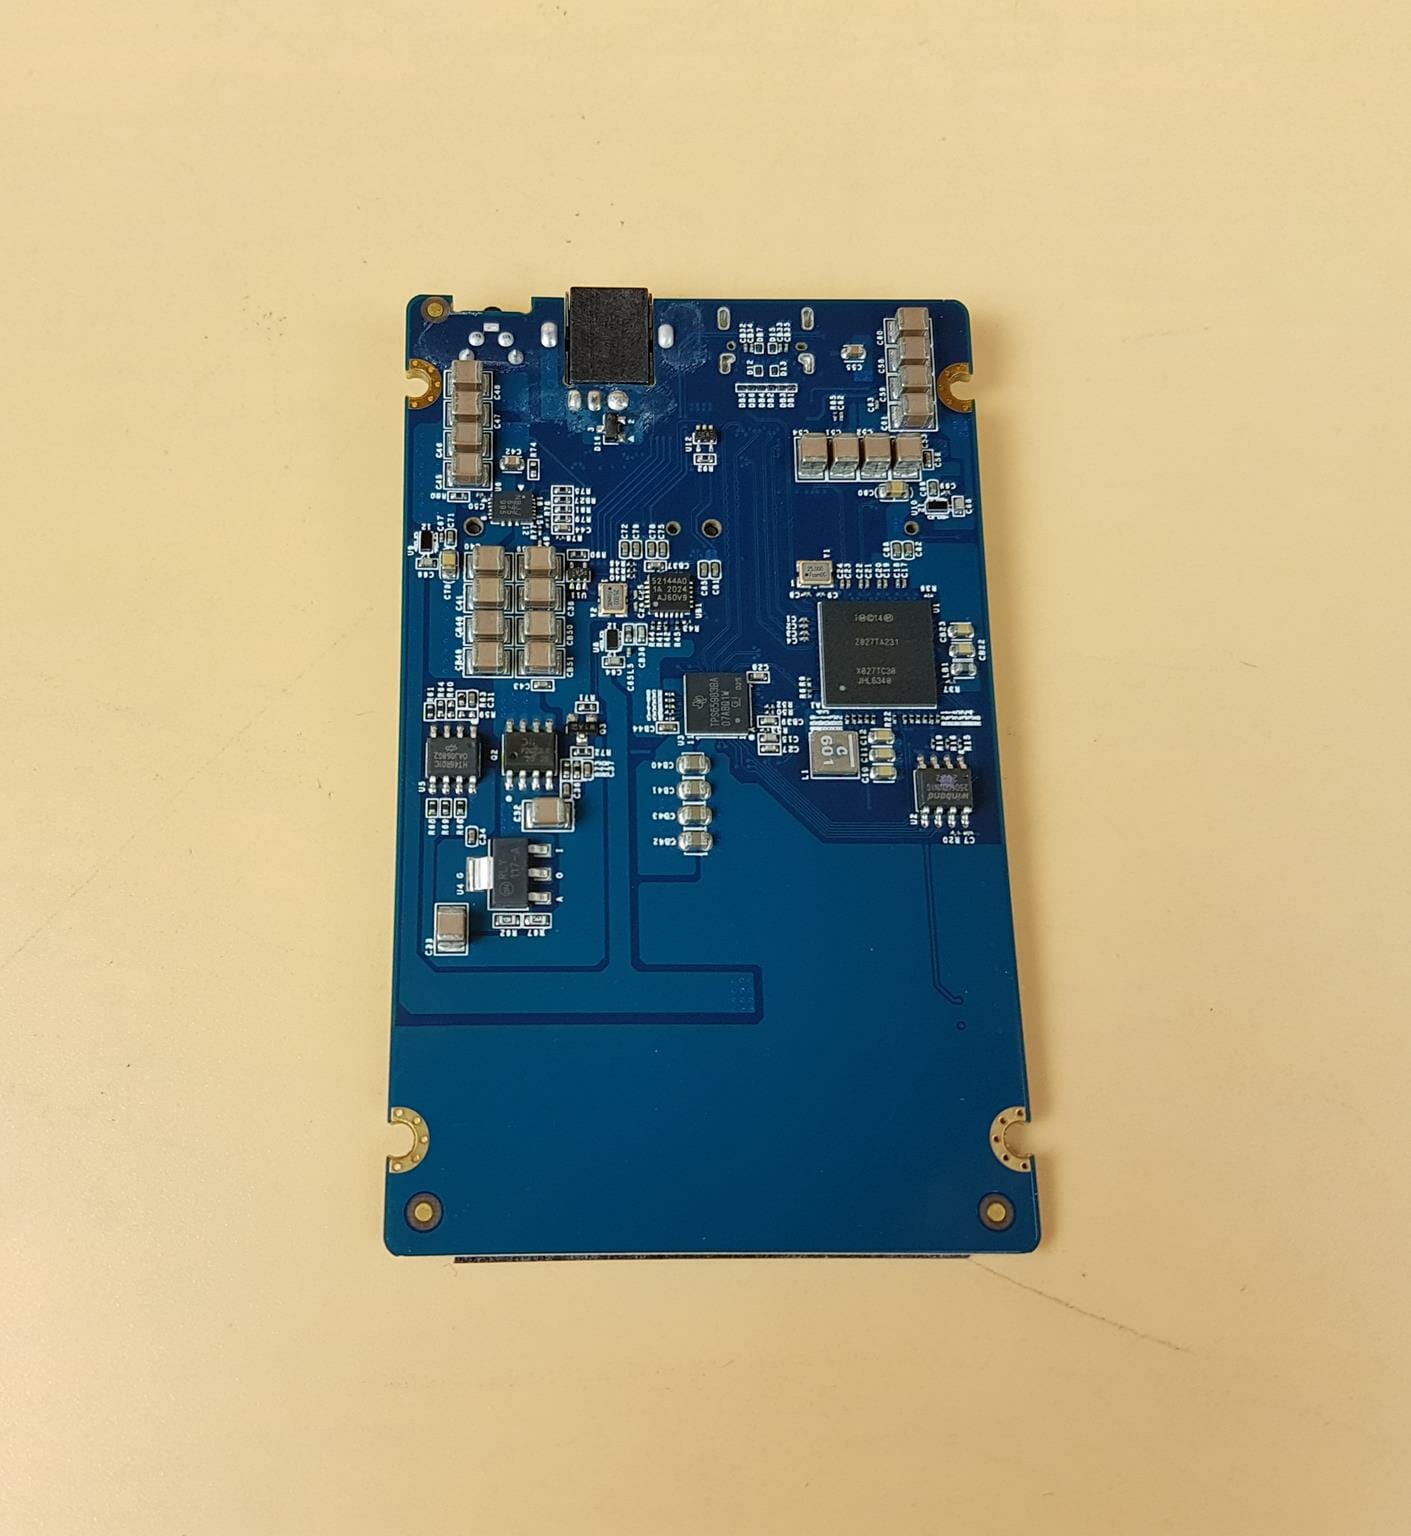
The above picture shows the backside of the blue color PCB of the enclosure.
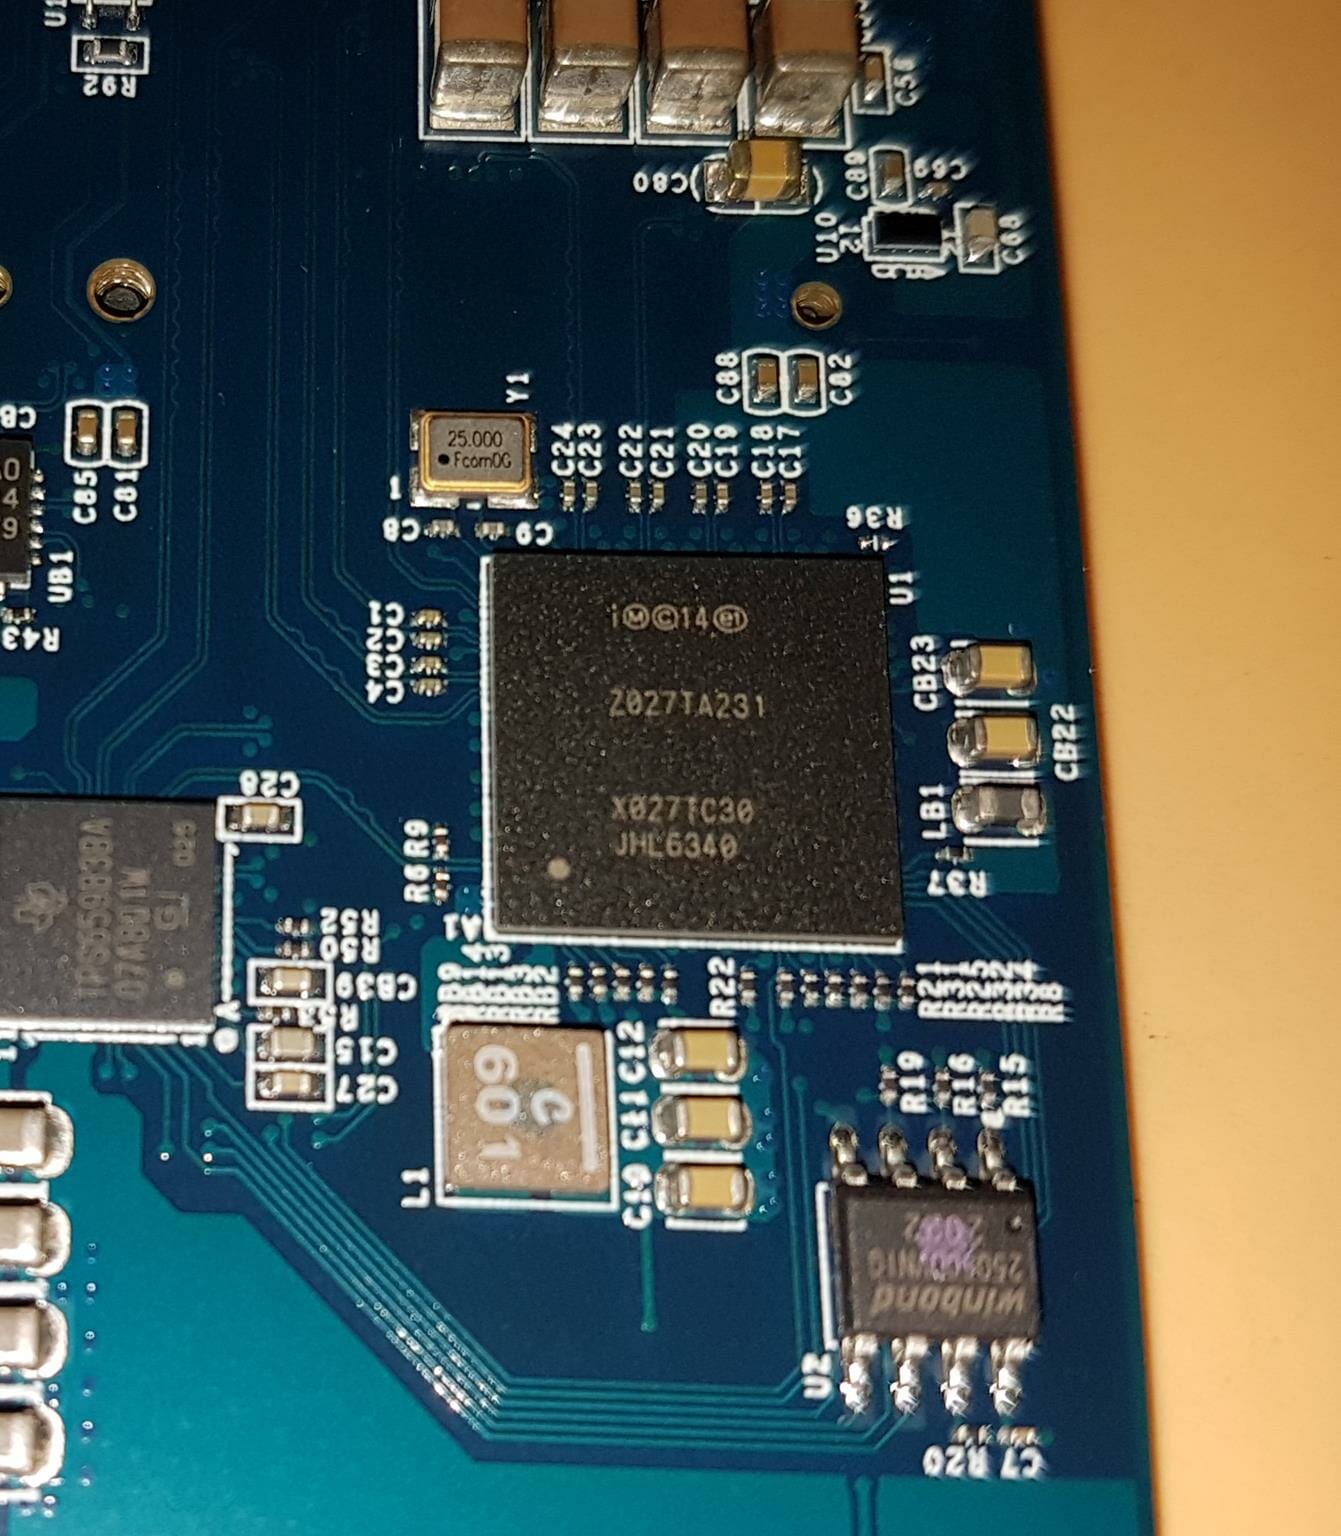
Sabrent uses Intel JHL6340 Thunderbolt 3 controller (Alpine Ridge) on this enclosure in a single port configuration and probably supports PCIe Gen 3.
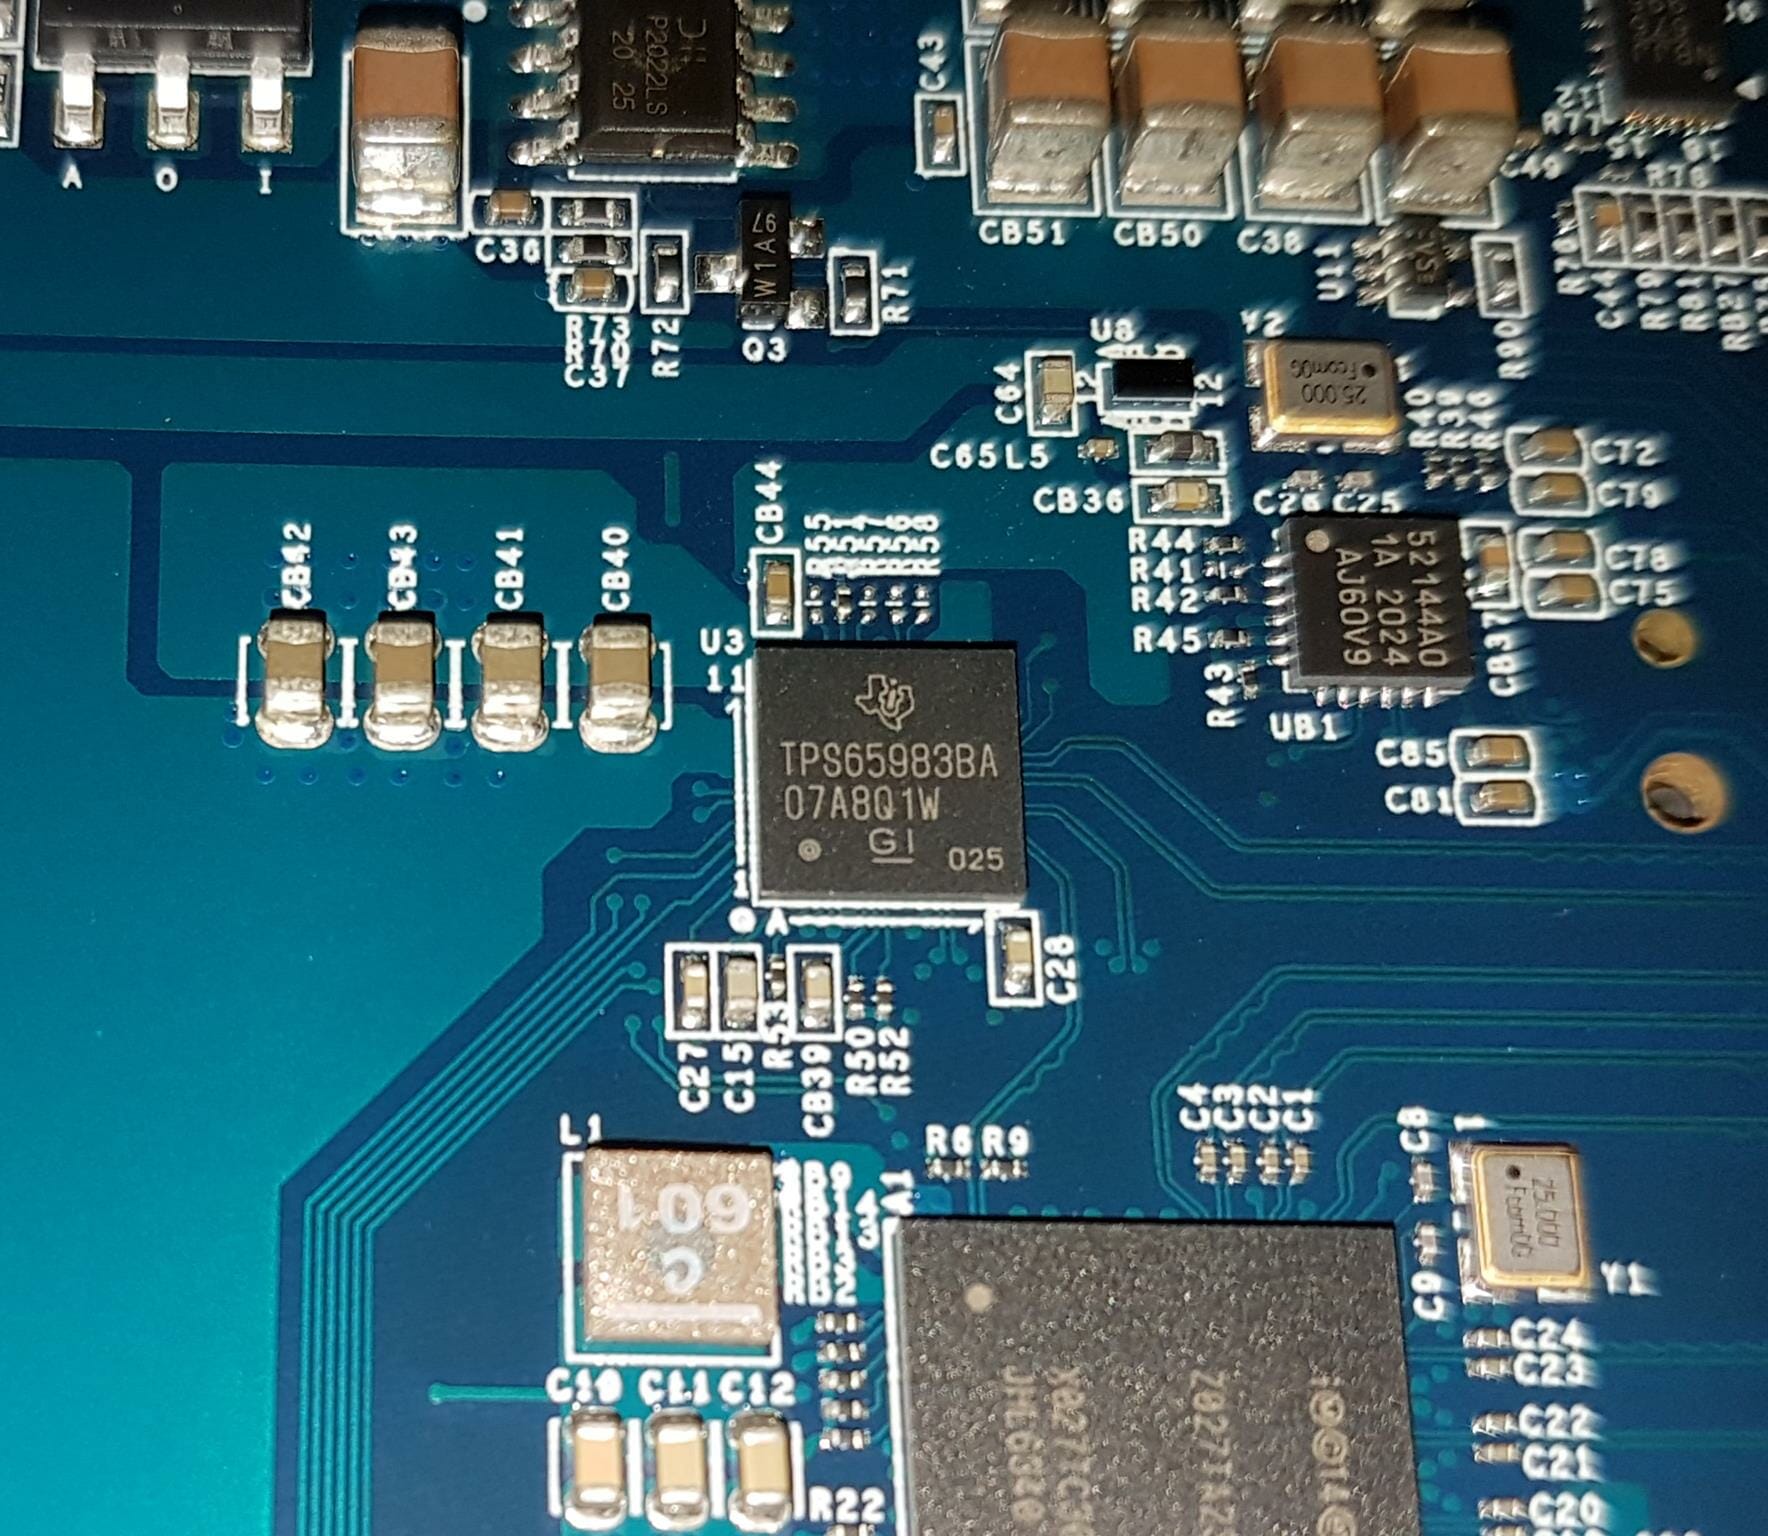
Texas Instruments TPS65983BA is also employed in this enclosure probably for Thunderbolt Multiplexing. This controller is also an Upstream and Downstream Facing port. Its SBU single pair is used for Thunderbolt-based communication.
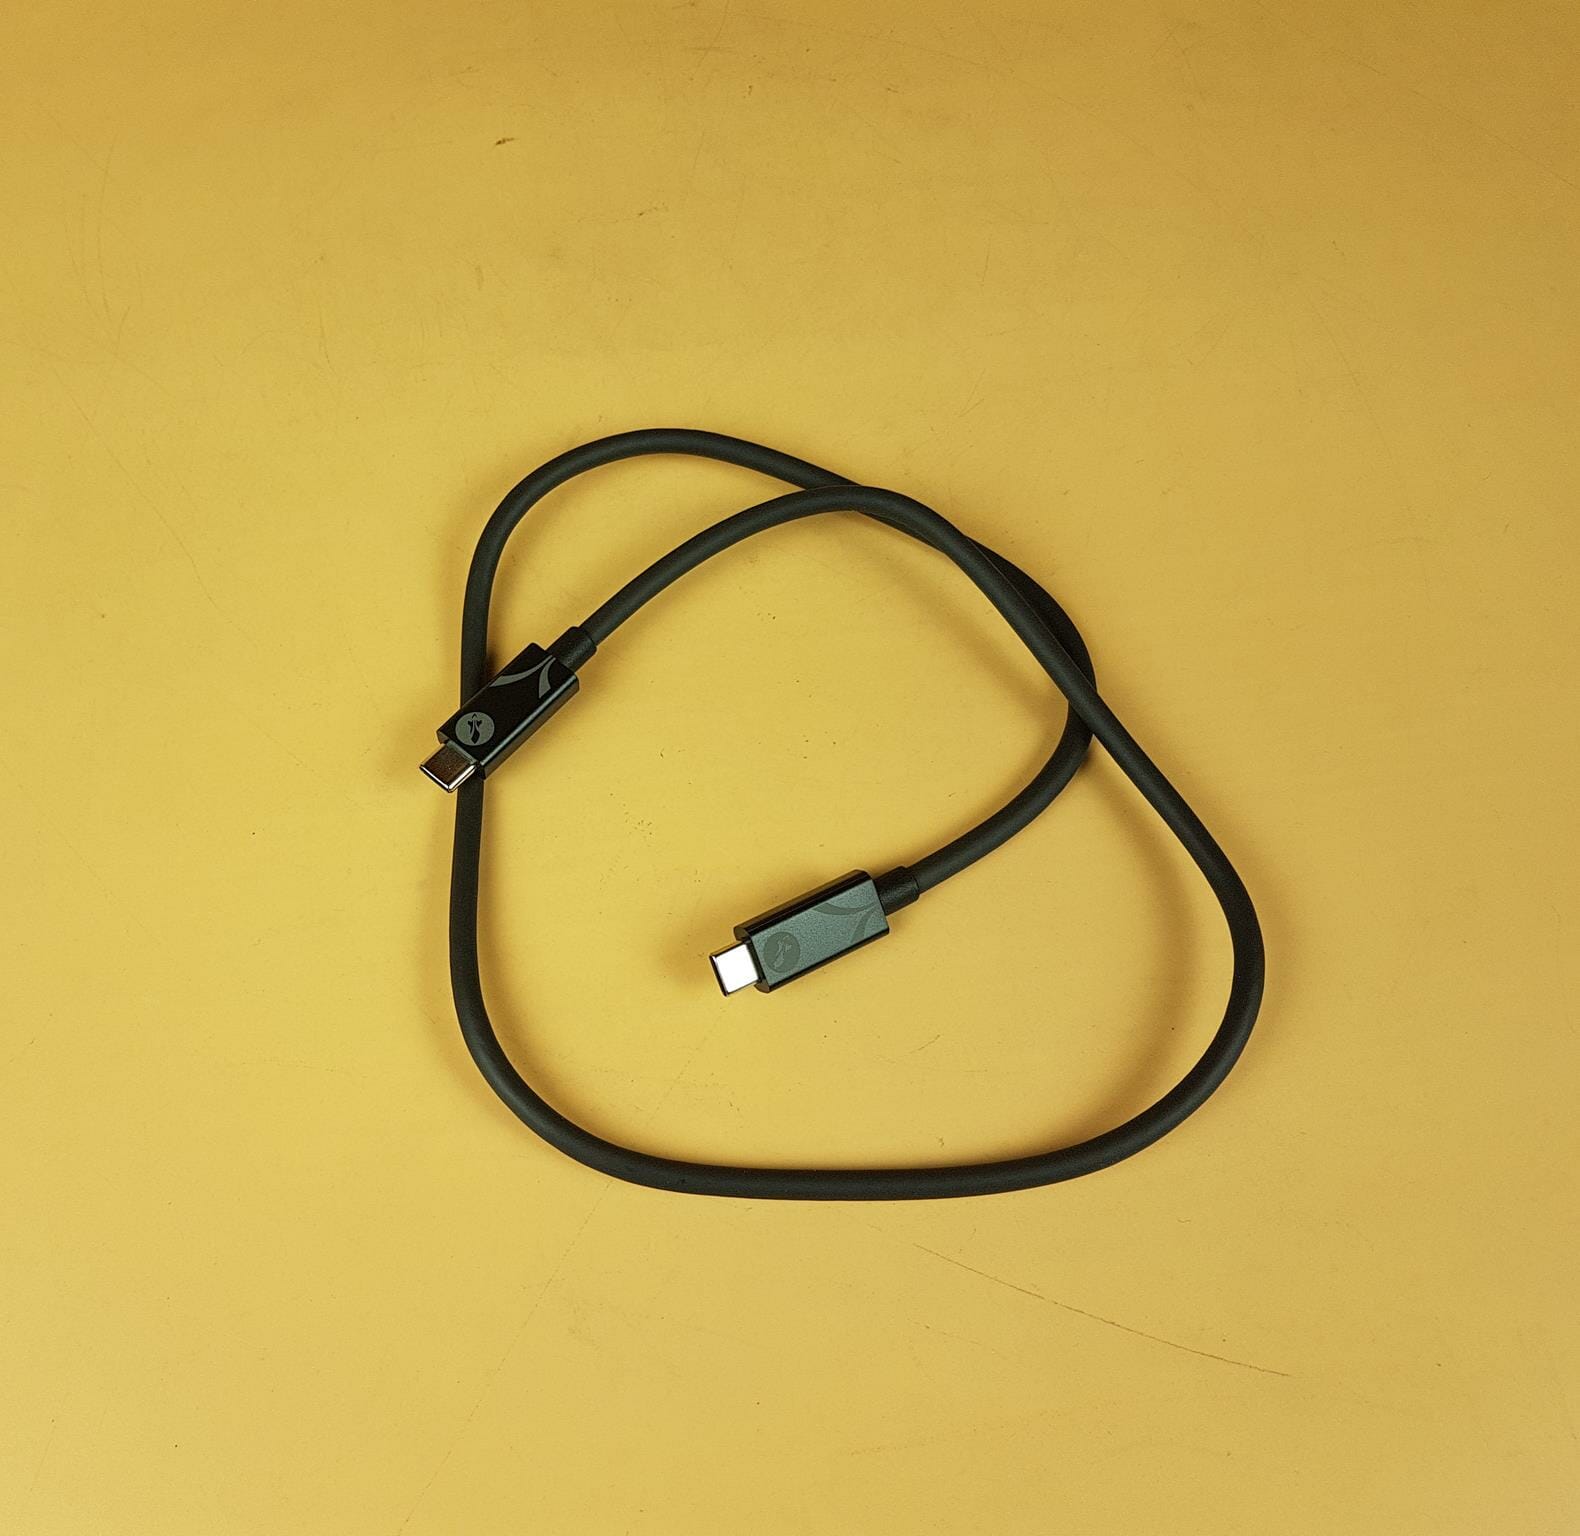
Sabrent has provided a Thunderbolt 3 cable in the box. It has a sufficient length for convenient placement of the enclosure on the surface. This end of bulk connectors has Sabrent branding.
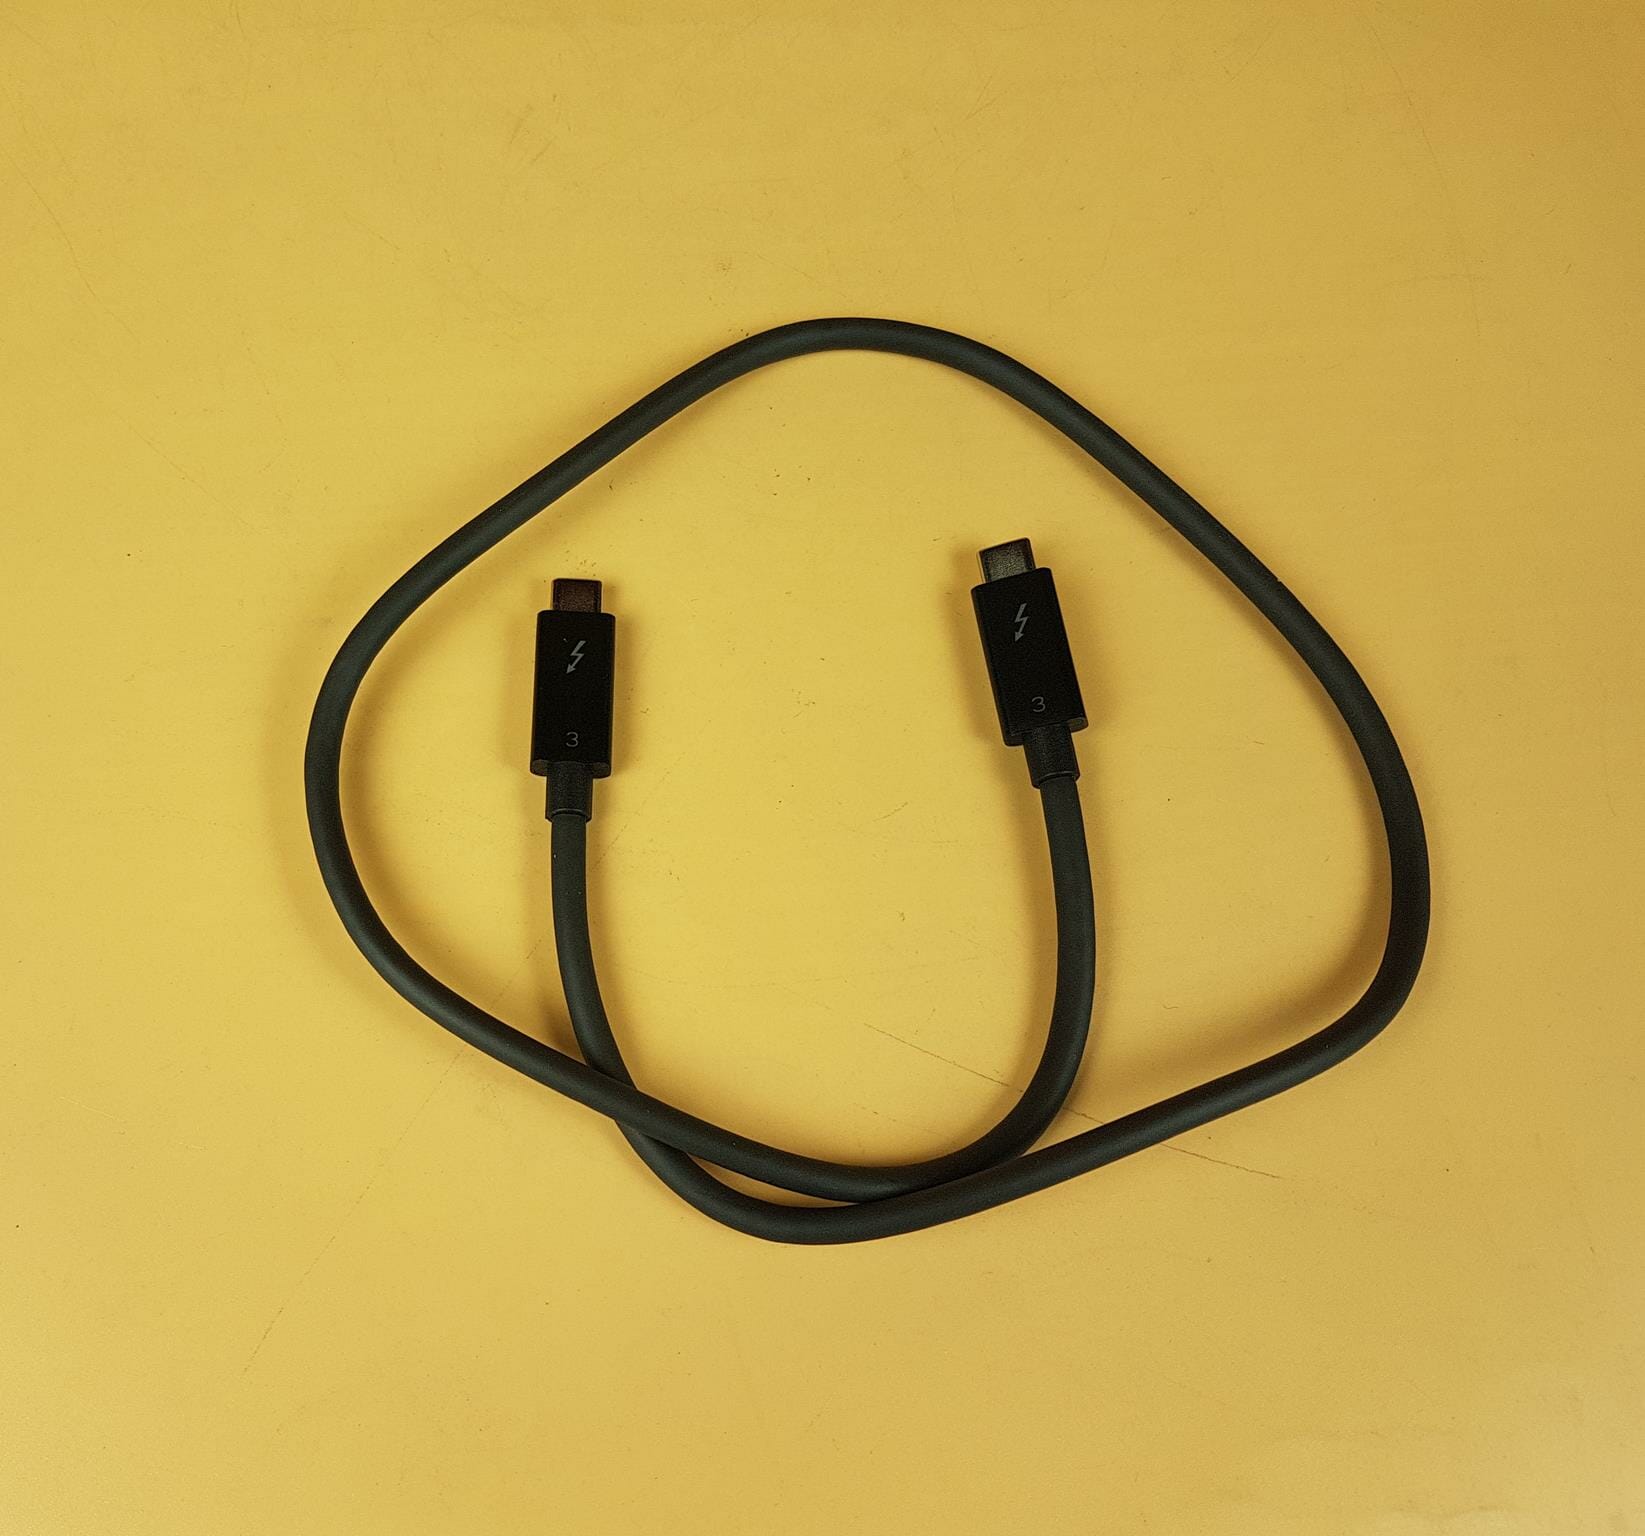
The above picture shows the opposite end of the bulk connector having a Thunderbolt logo.
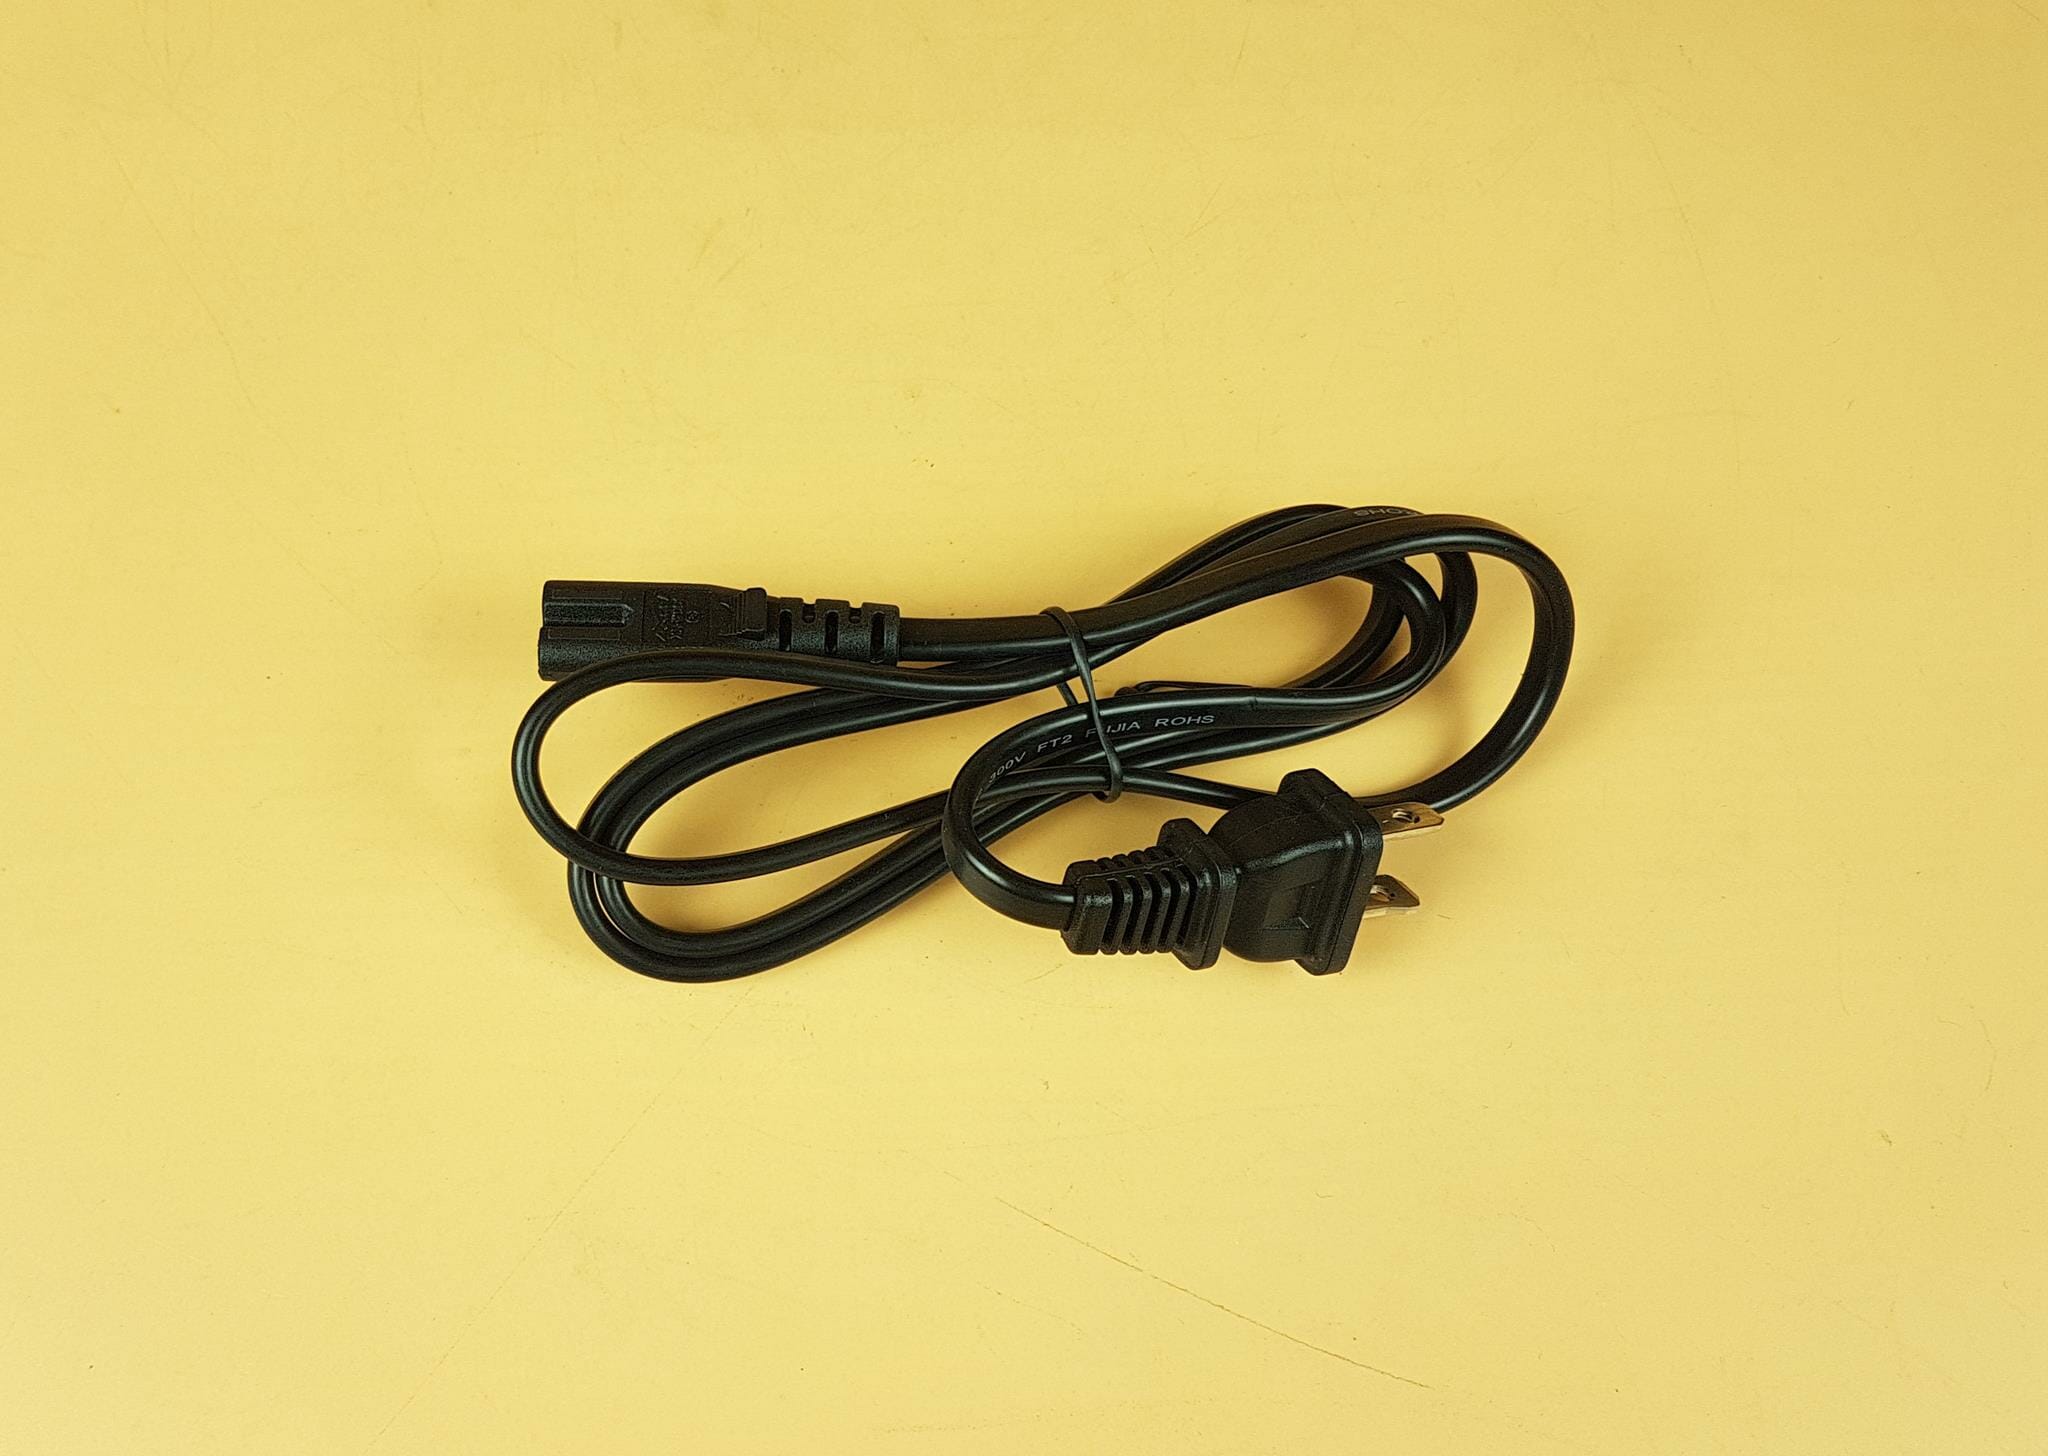
There is a 2-pin power cable provided in the box.
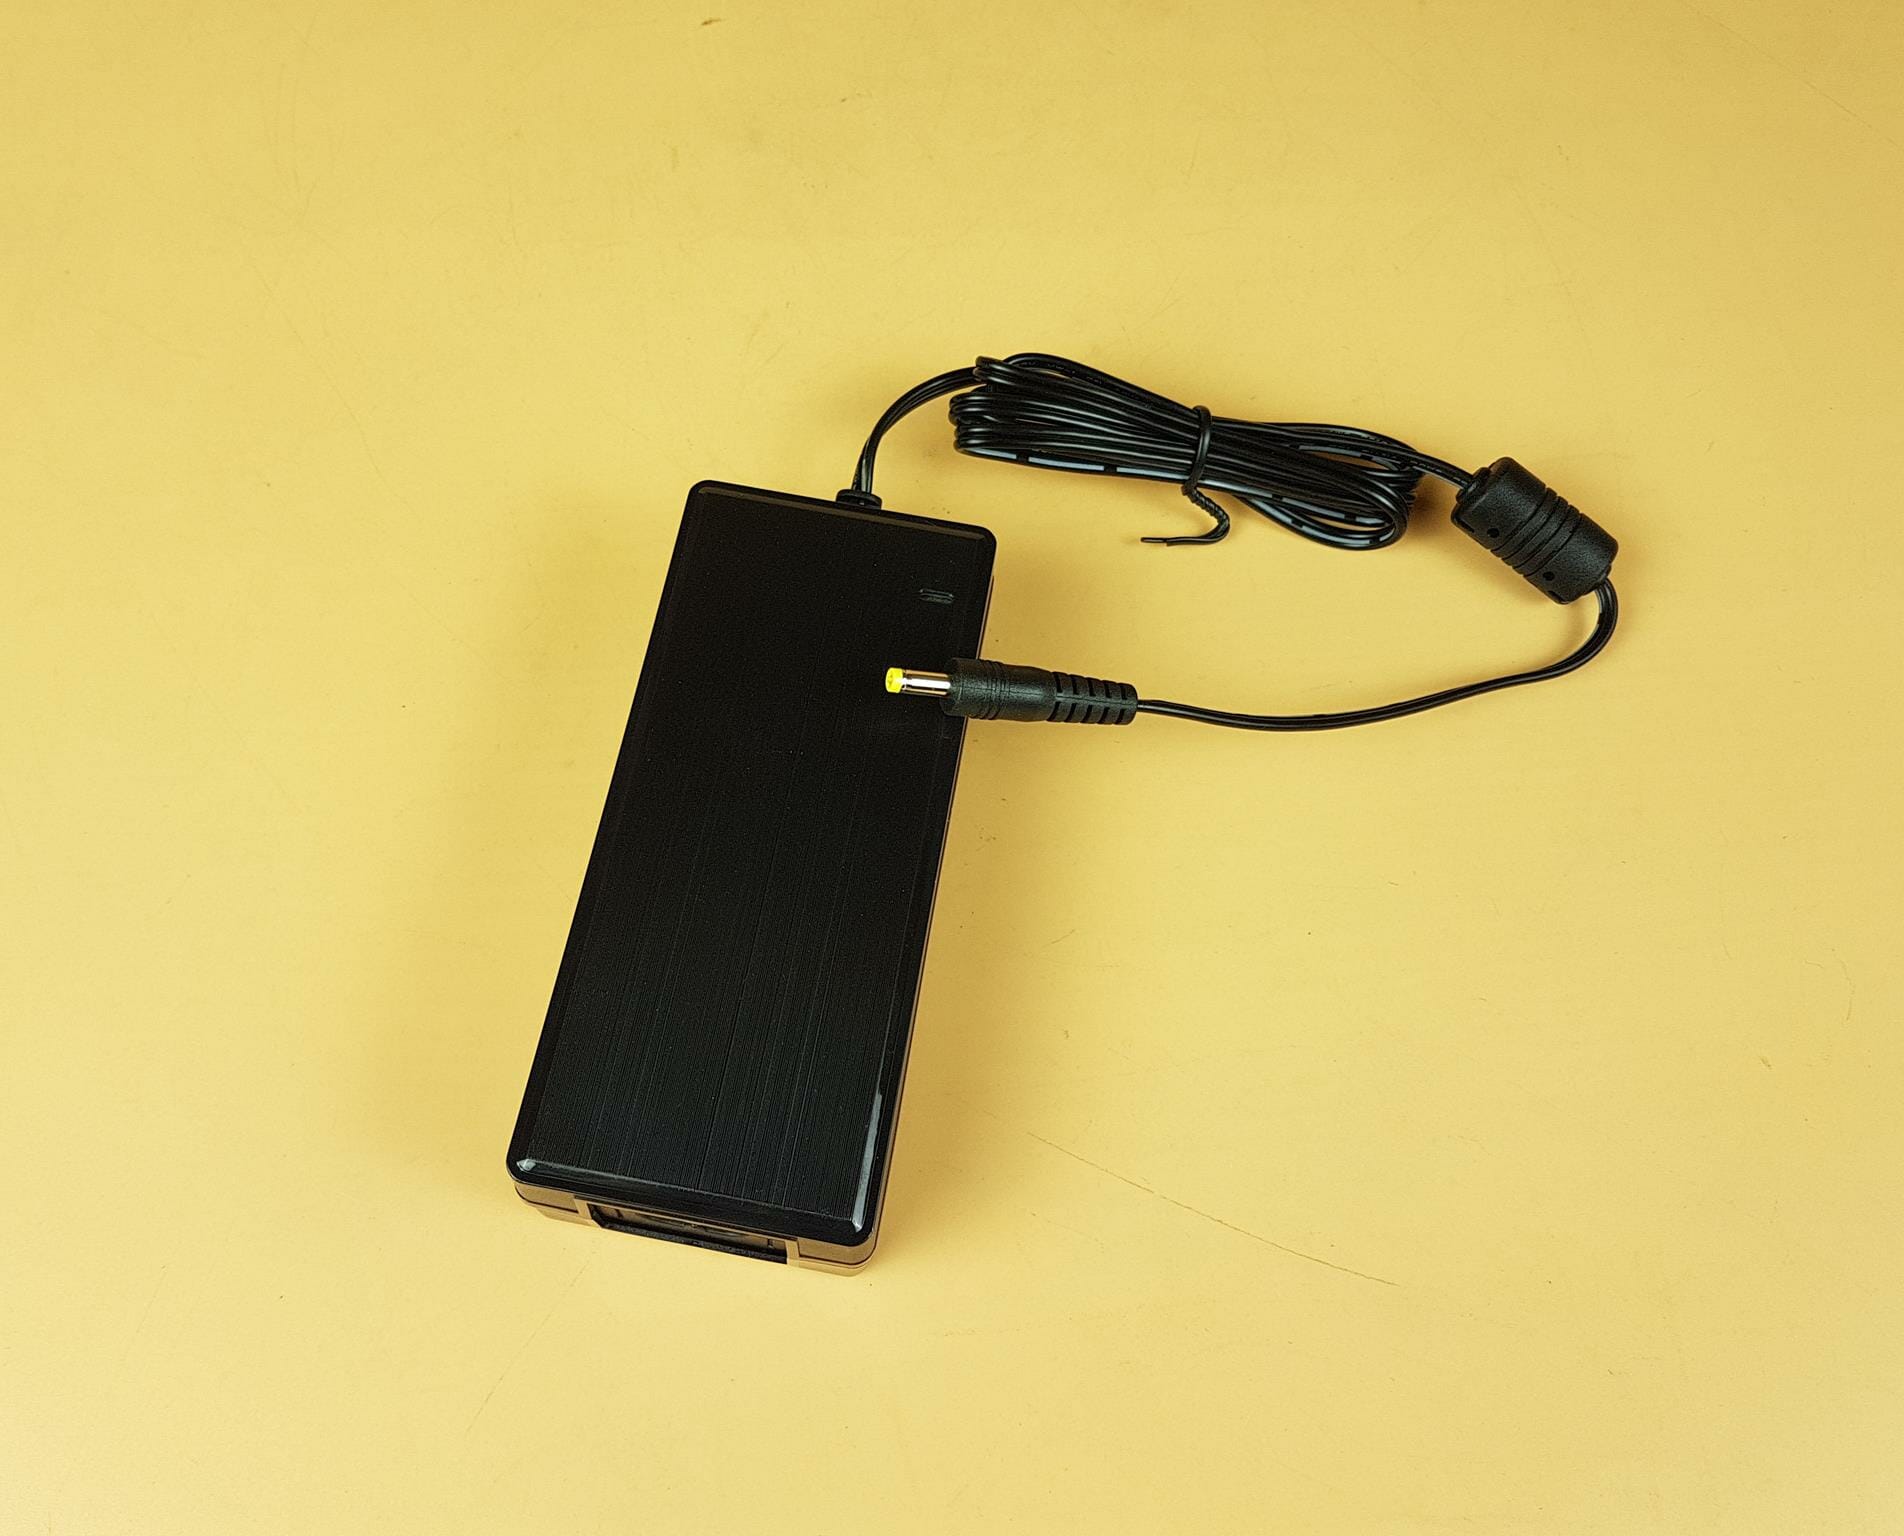
Sabrent has provided a 100~240V power adapter in the box to provide dedicated power from the wall. The adapter has a blue color indicator LED which lights up when powered.
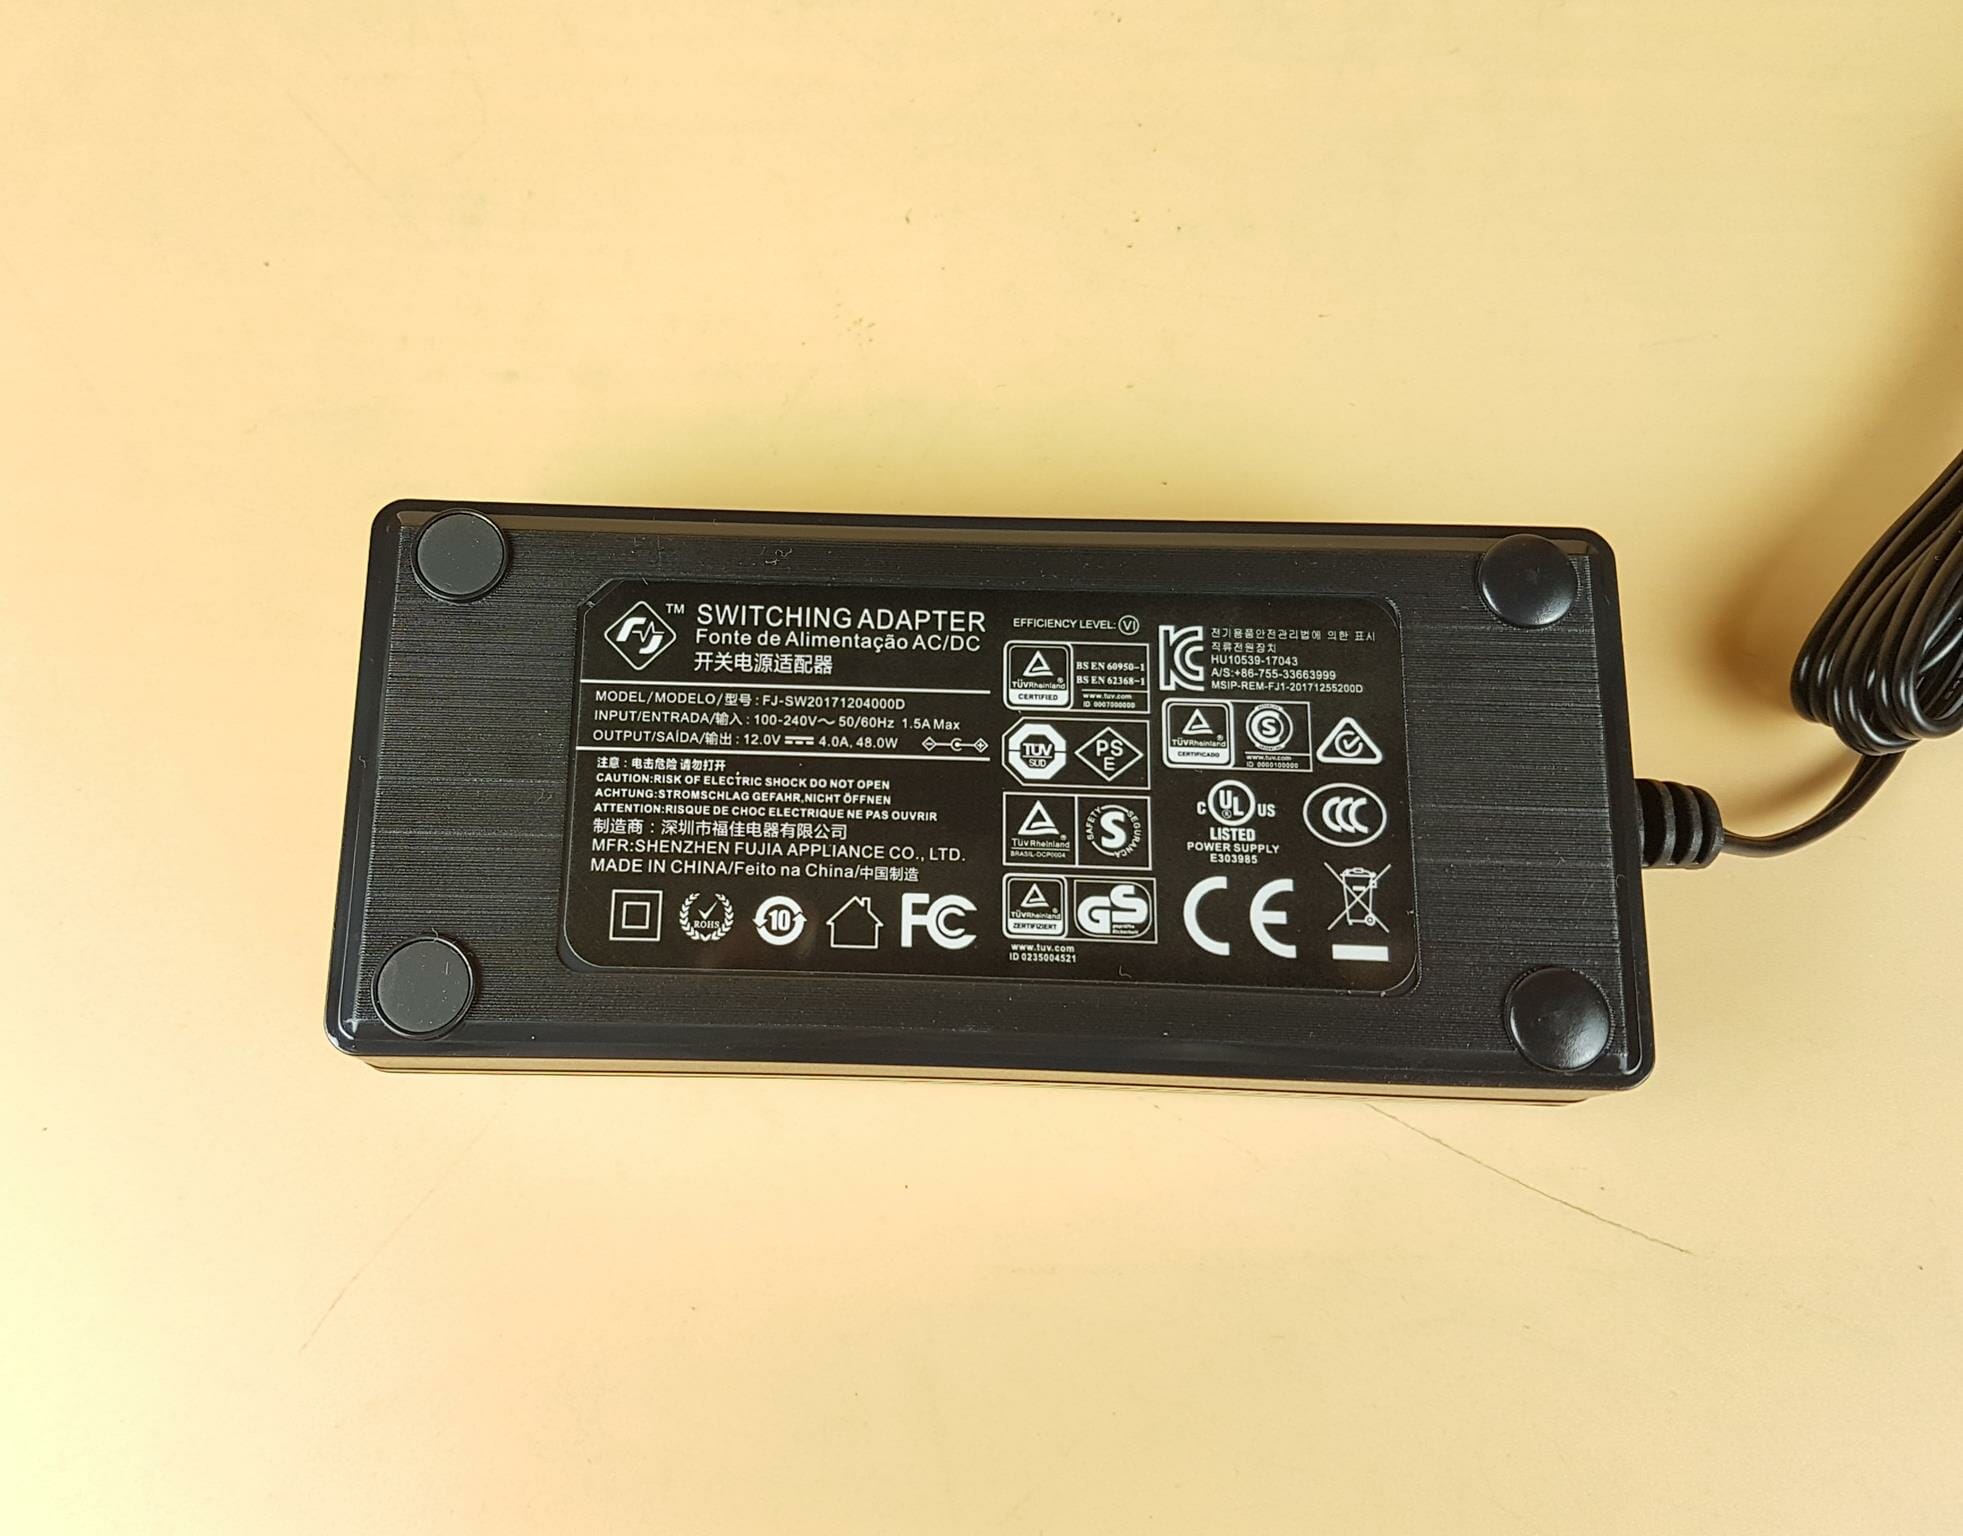
The above picture shows the power specifications of the switching adapter.
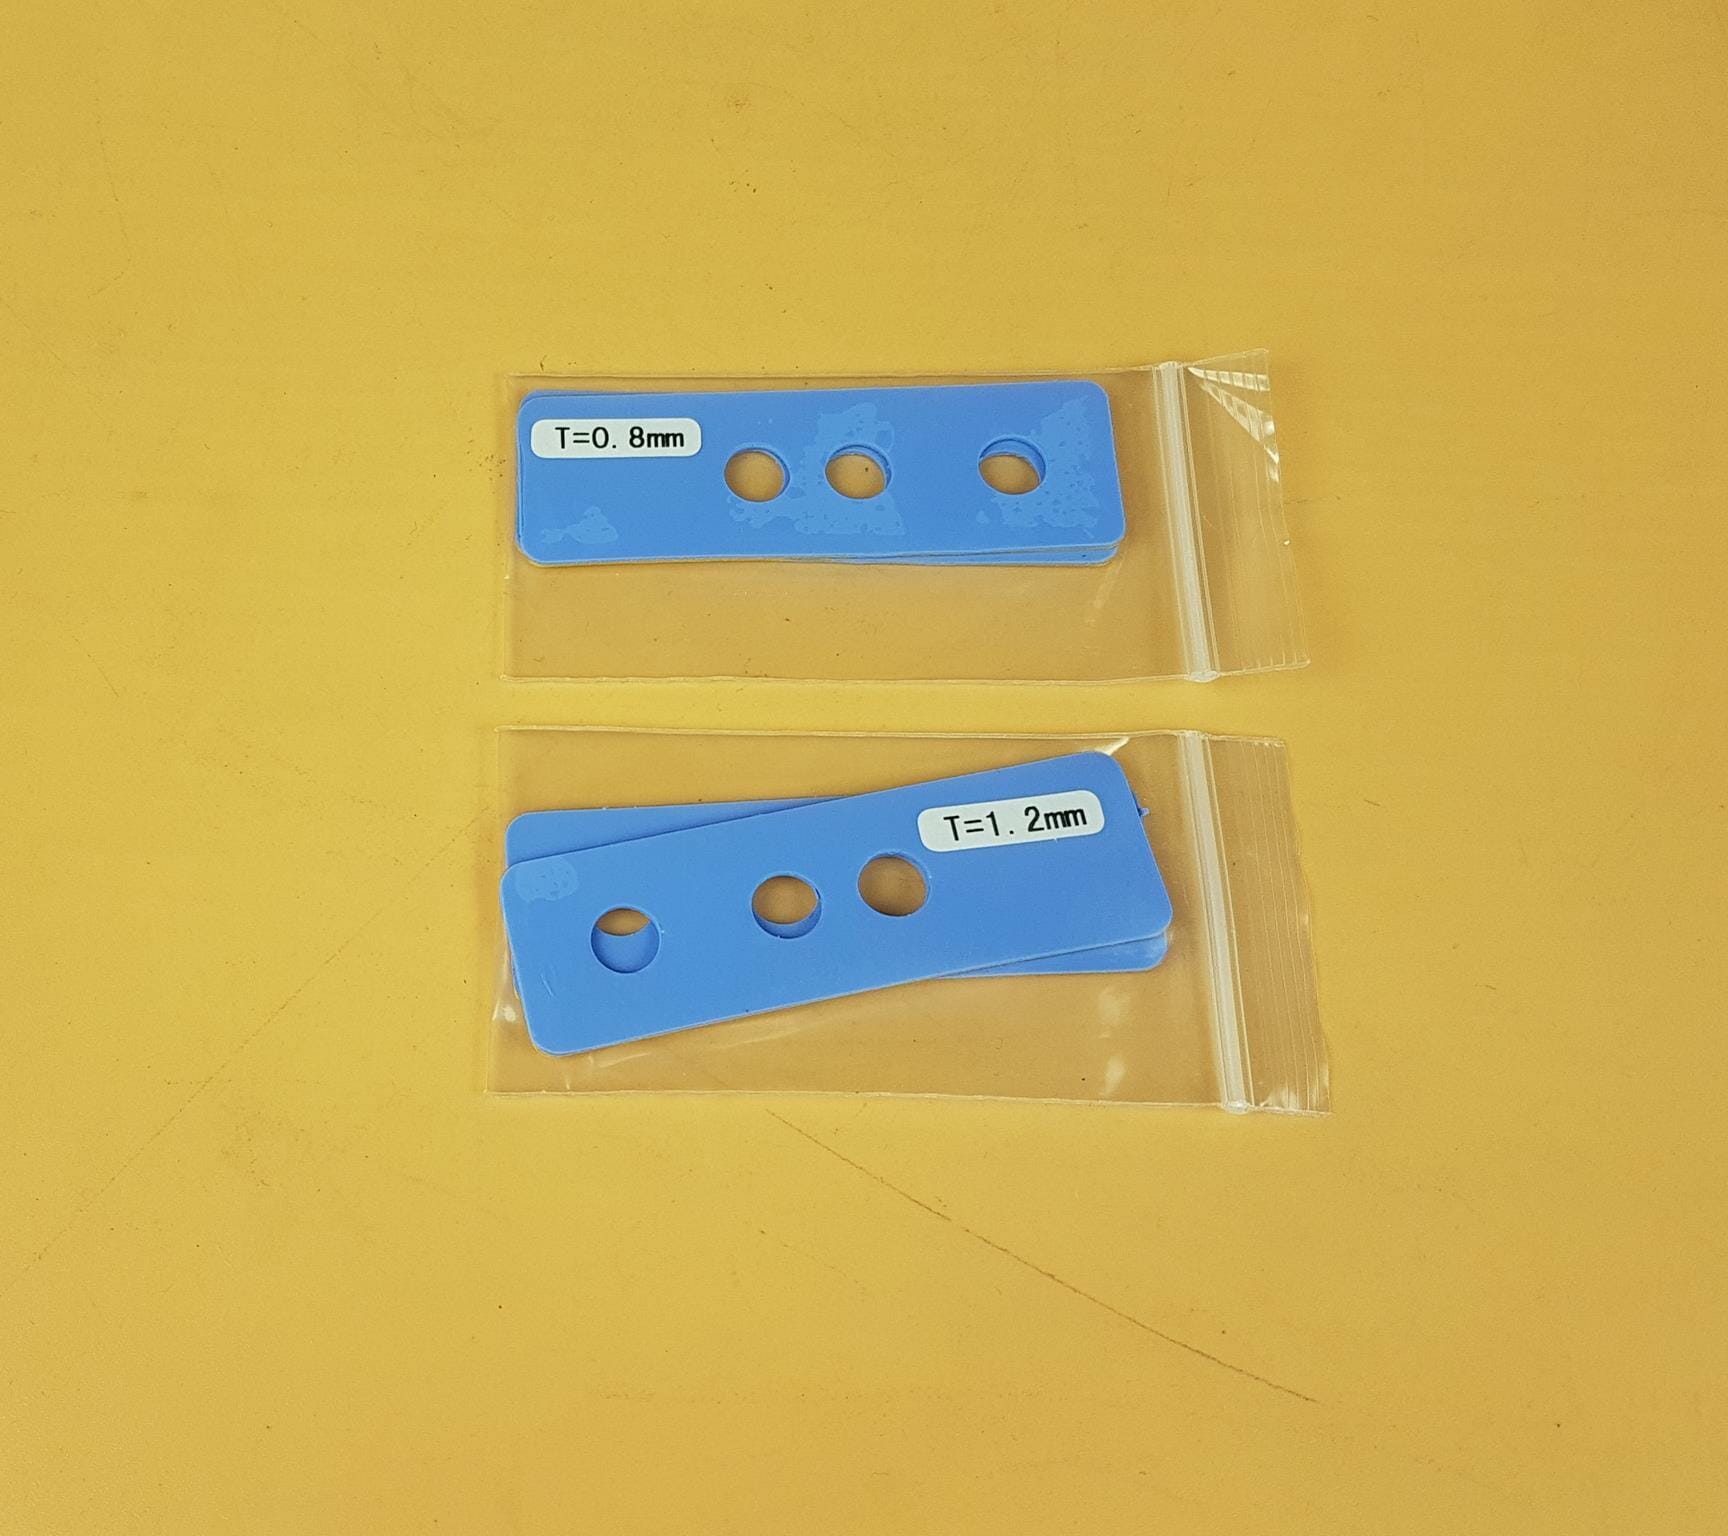
Sabrent has provided two packs of thermal pads with 0.8mm and 1.2mm thicknesses. Use them as follow:
- 8mm thermal pads are to be used for dual-sided SSDs.
- 2mm thermal pads are to be used for single-sided SSDs.
The above information is not provided in the manual.
Setting-Up the Enclosure
Preparing the enclosure for operations is a simple task.
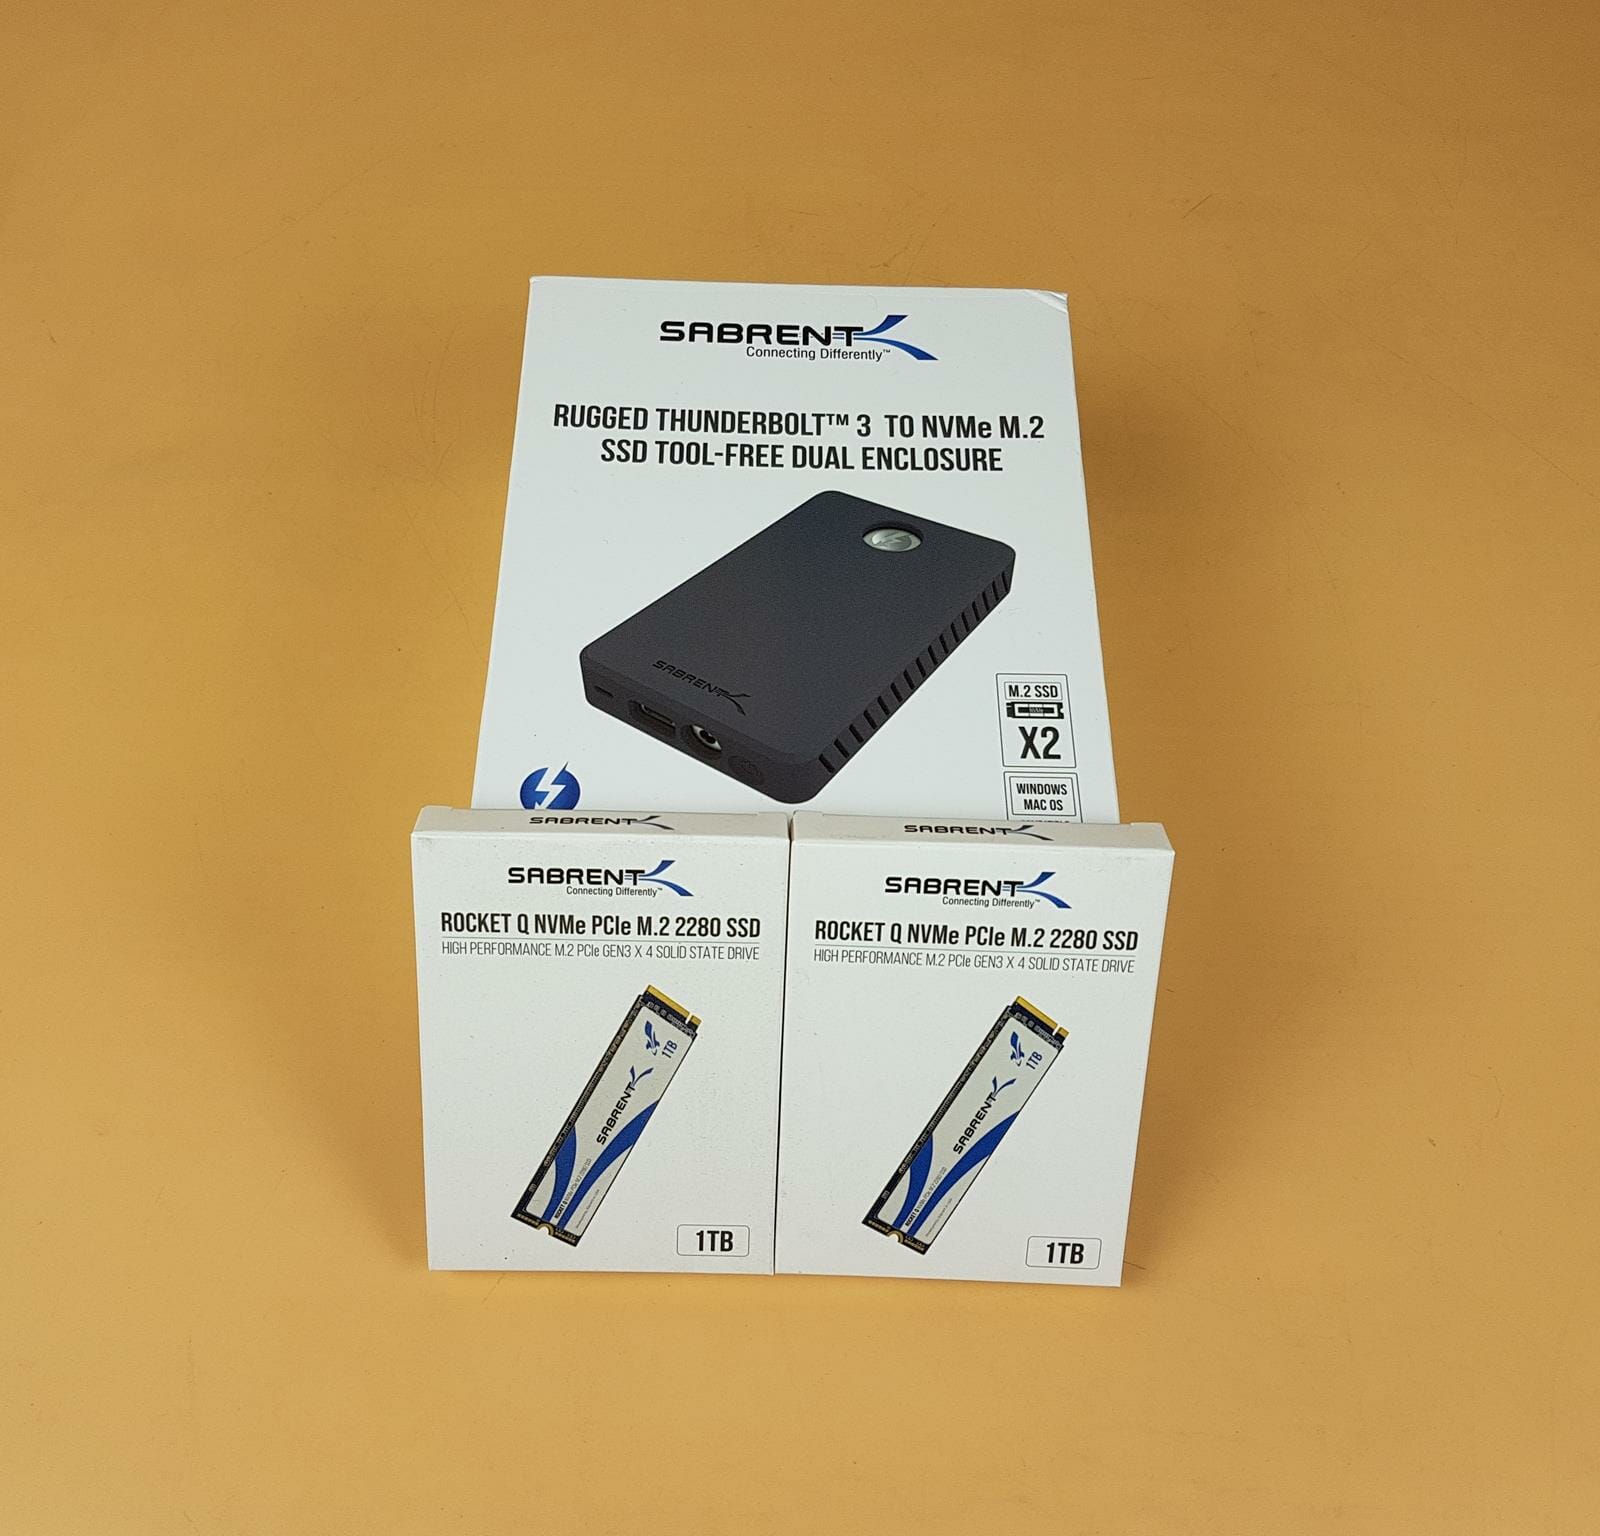
We are using Sabrent Rocket Q 1TB drives to test this enclosure. The user can use any brand’s SSDs in this enclosure.
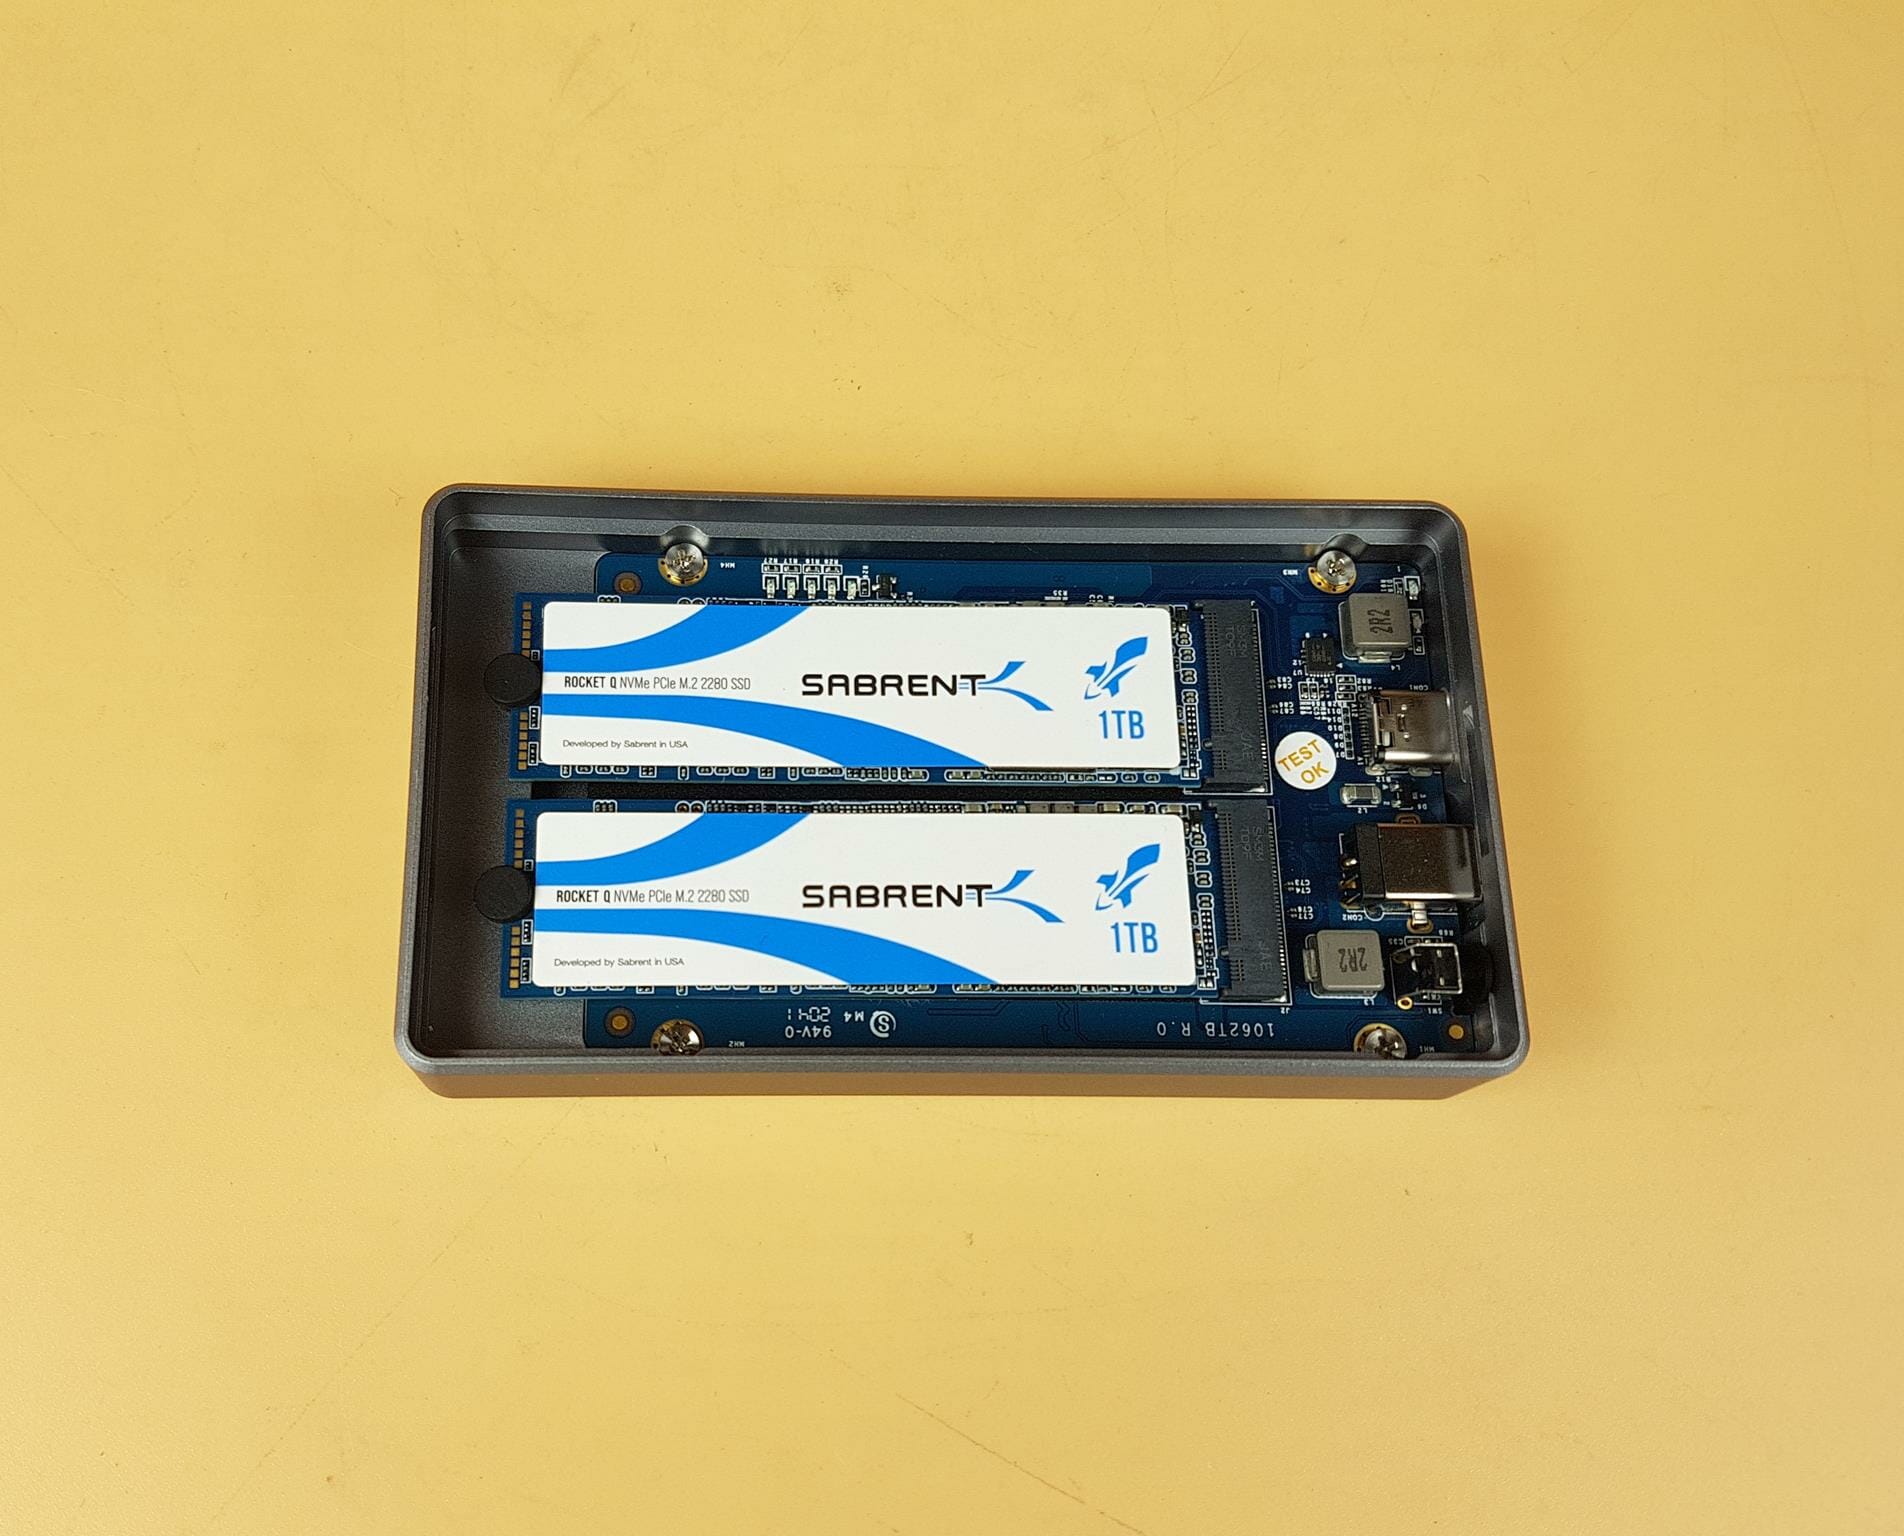
Remove the plate by lifting and rotating the knob anti-clockwise. Insert the 2x SSDs in the M.2 ports. Place the rubber push pins on the opposite side of the SSDs (with a half circle cut in the middle) and push the pins so that tucked inside the frame.
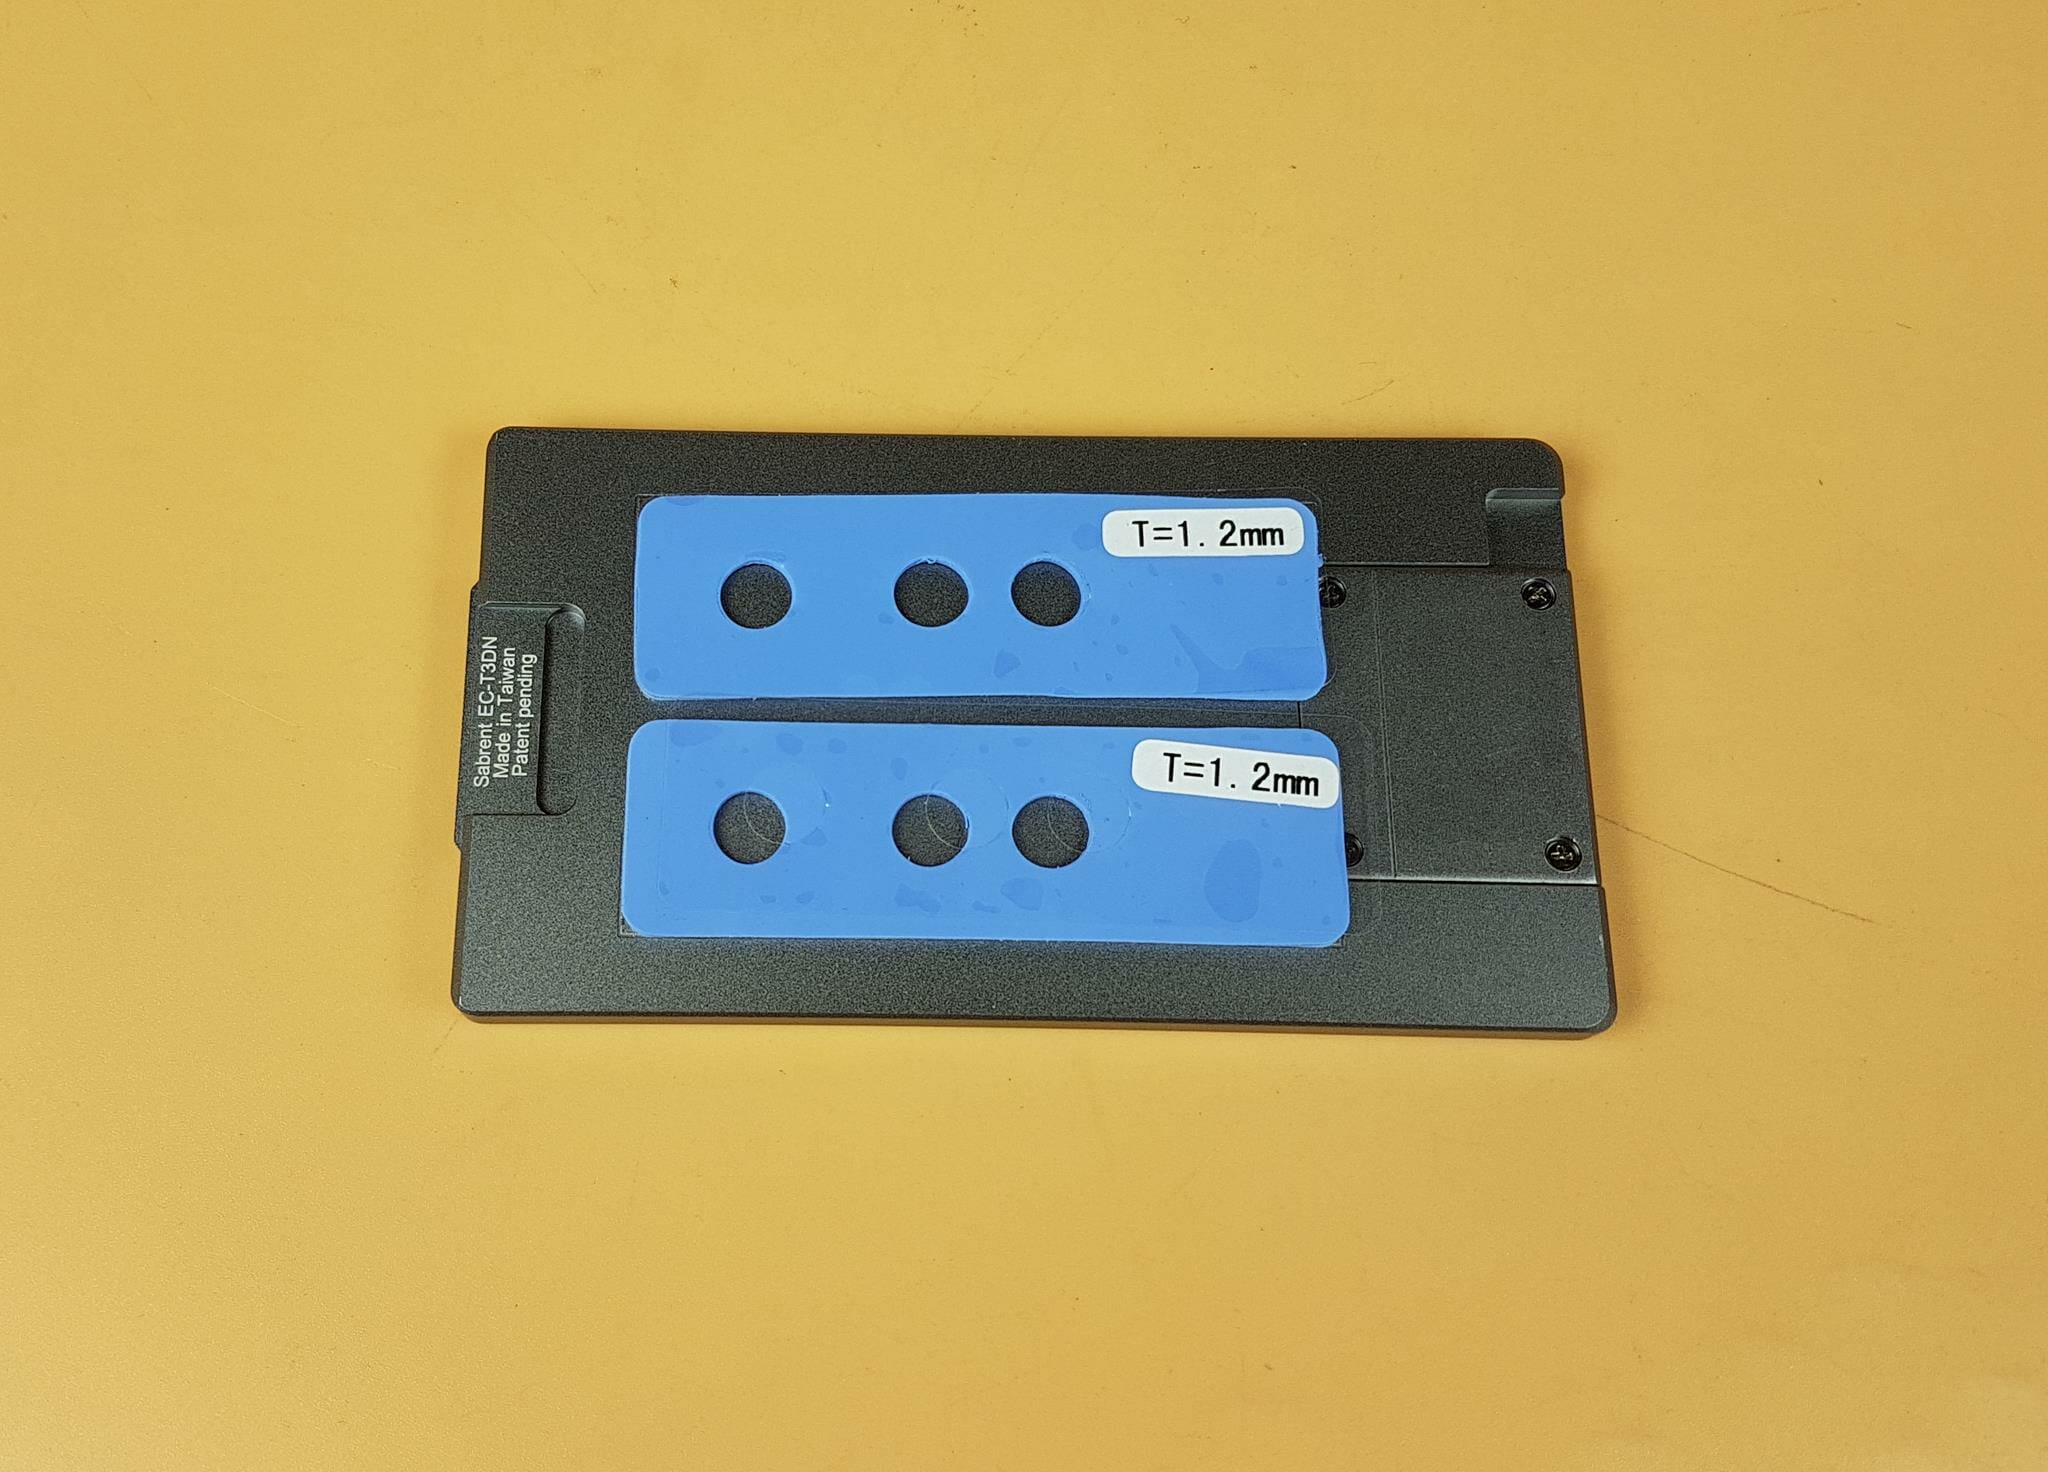
Follow the angle guides on the underside of the cover/plate and paste the thermal pads accordingly. Be sure to remove the protective cover from the side of the thermal pads so that they can be pasted. Afterward, remove the protective covers from the top of the thermal pads. Put the plate back on the enclosure. Secure it by lifting and rotating the knob clockwise.
Connect the power cable with the power adapter. Connect the 2-pin side of the power cable to the source and insert the power cable in the jack port of the enclosure. The last step is to connect the included Thunderbolt cable with the enclosure and the PC. The enclosure is ready for action.
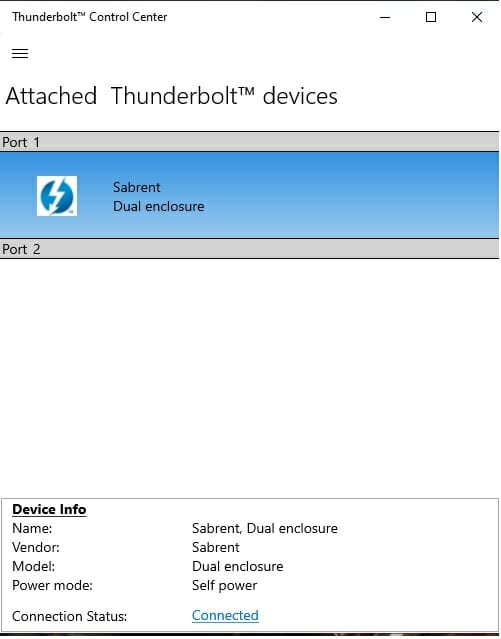
Since we have already authorized Windows to accept the Thunderbolt Device connections, the Enclosure showed up right away in the Thunderbolt Control Panel.
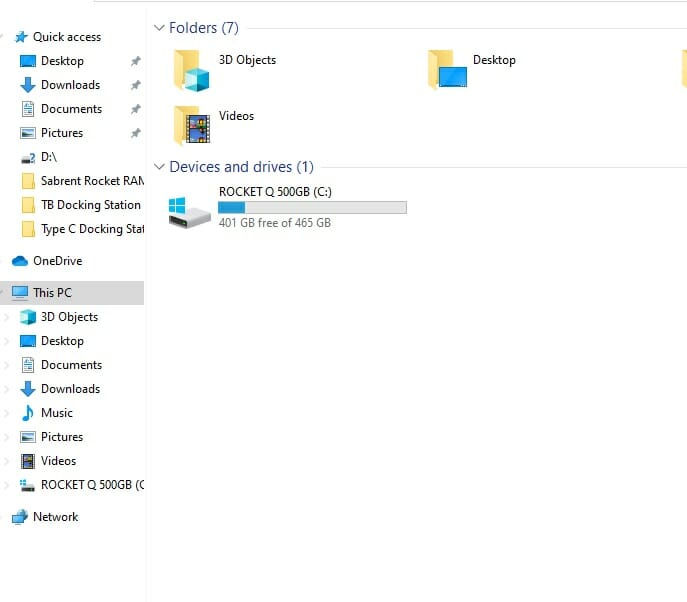
As seen in the above picture, both SSDs did not show up in This PC (My Computer). You will need to go to Disk Management.
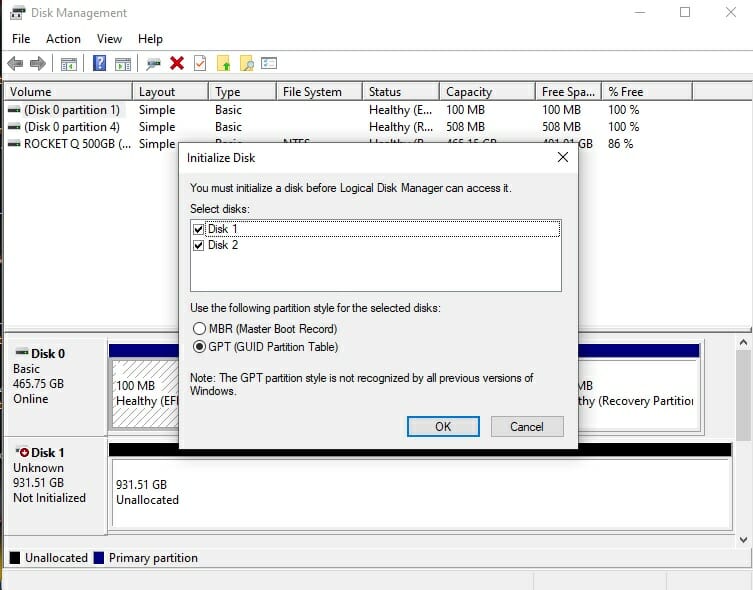
Both SSDs were shown to be initialized under Disk Management. Select the partition style and Click Ok.
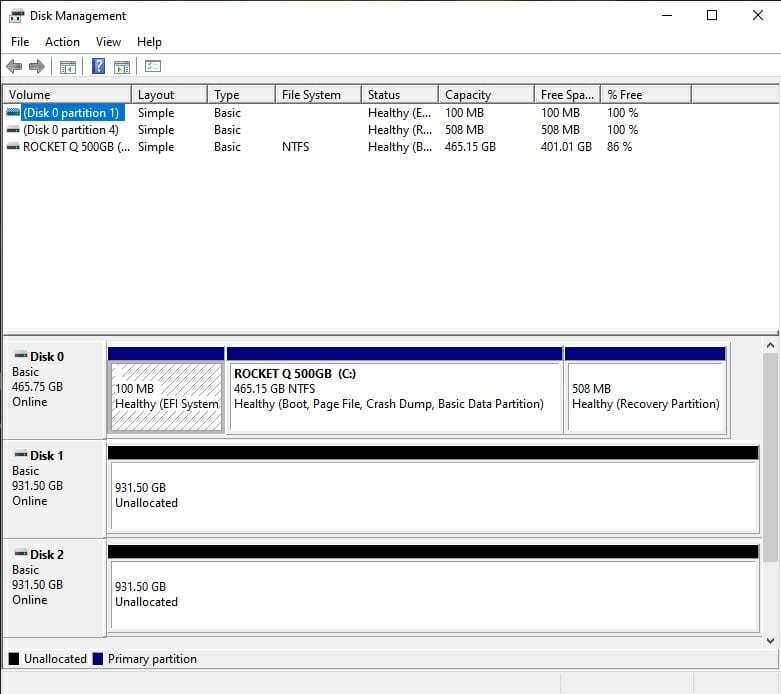
Now that both disks are online, we need to allocate the space and create volume on them.
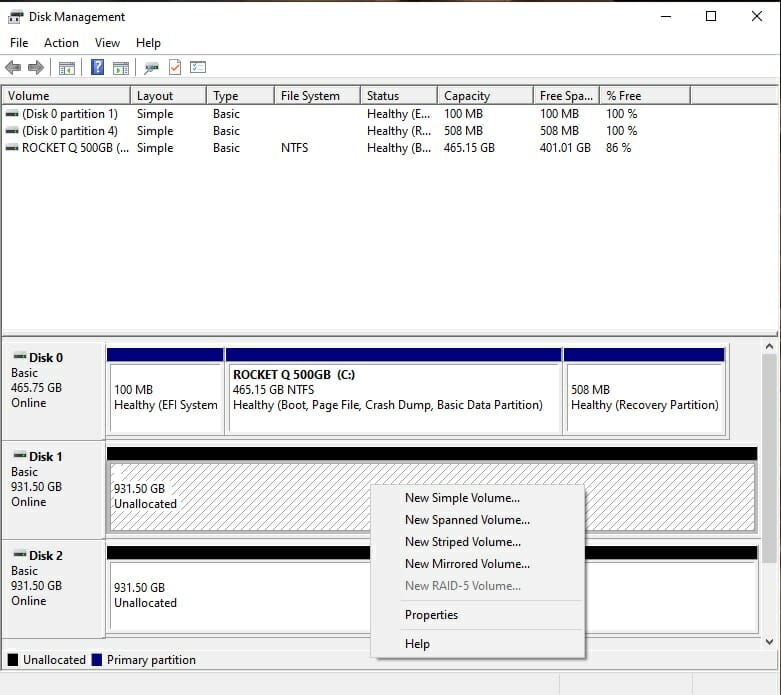
Right-click on the respective Disk and create a New Simple Volume.
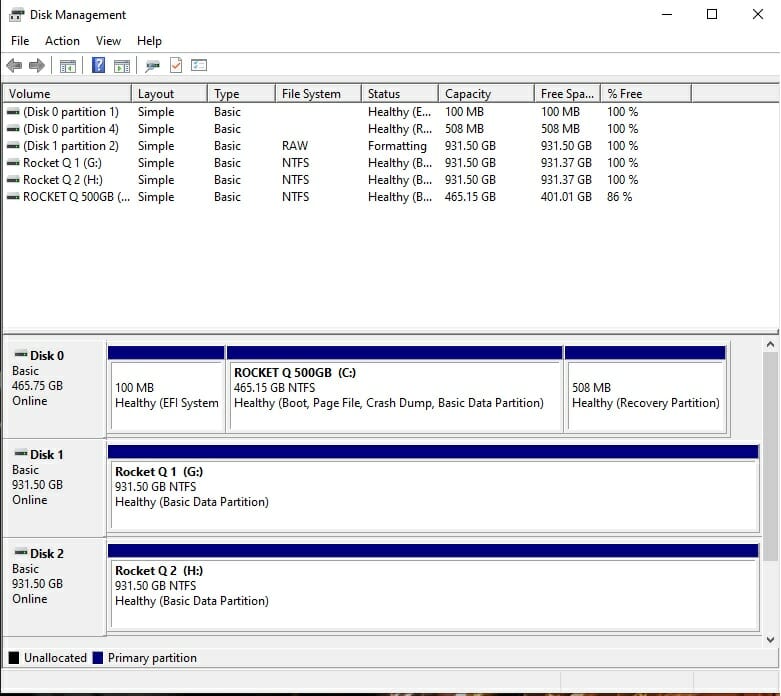
Now both disks are ready for use.
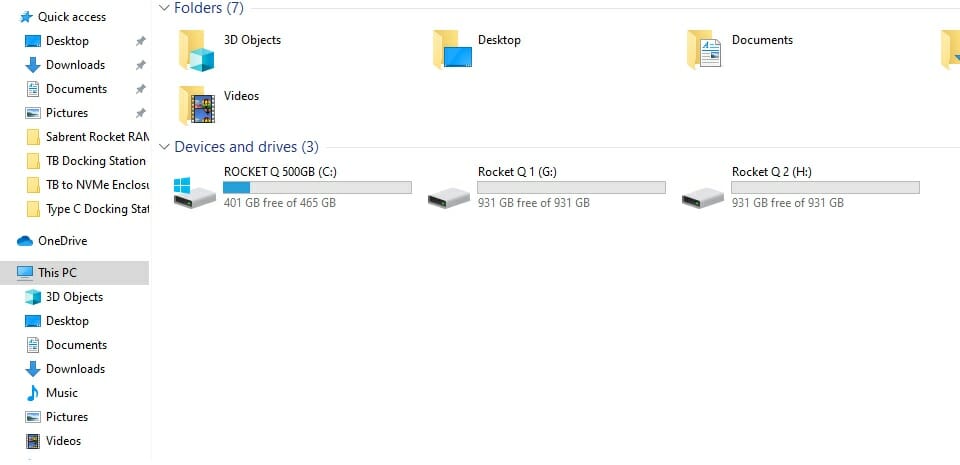
Now, both drives are visible and at the user’s disposal for action.

Sabrent recommends activating the Better Performance mode on the disk to enable write caching. This will improve the write speeds of the disks. The options can be found under the Device Manager.
Setting-Up RAID
You can access and use the 2x drive independently or create a RAID on them. Since this would be a software-based RAID, you will need to download the software from the Sabrent website for that.
Raid assistant
The above picture shows the contents of the downloaded compressed file from the Sabrent website. Click on the Sabrent RAID Assistant to load the program. Please note that this will not install the software.
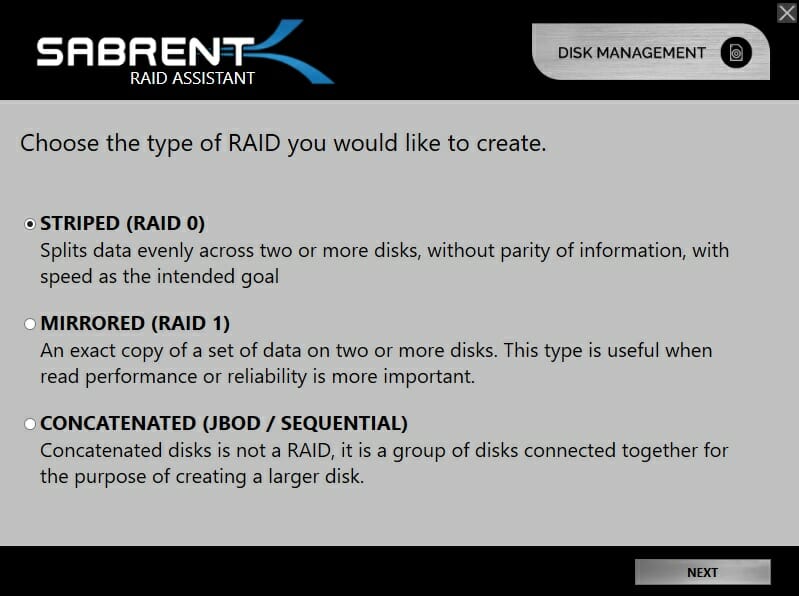
This software allows three types of RAIDs:
- RAID 0
- RAID 1
- Concatenated
This is up to the user to decide which RAID type will be used. The Concatenated is not actually a RAID rather it simply joins two volumes to create a larger volume. Hence you may not see any speed improvement under this mode.
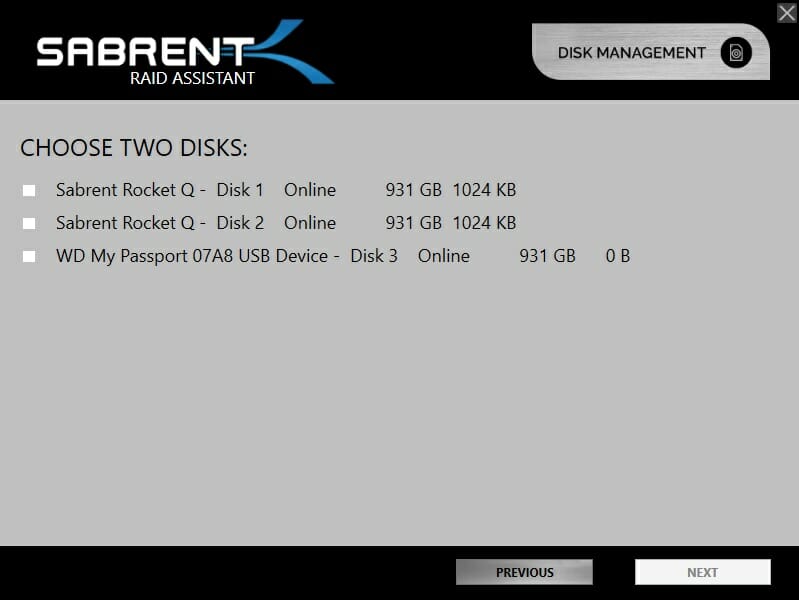
You will be presented with the options of the connected disk. Select the ones you would want to include in the RAID Array.
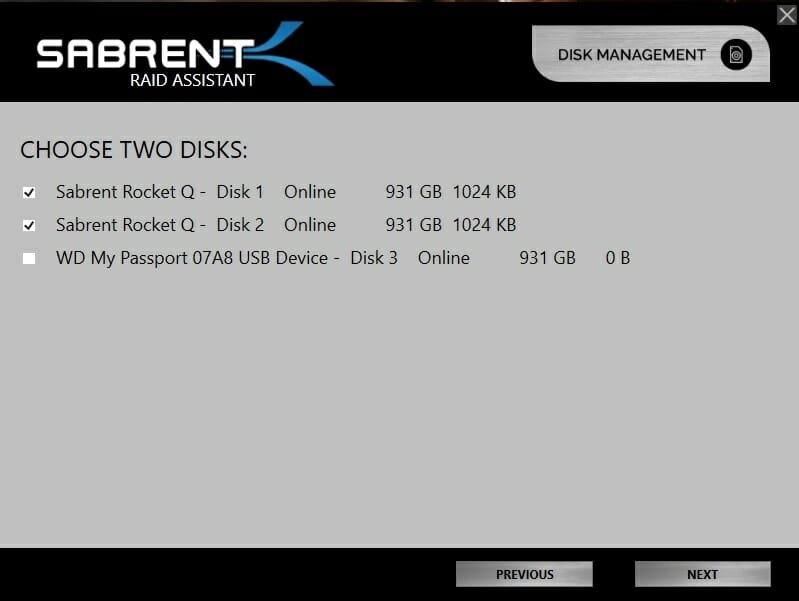
We have selected both Rocket Q disks and clicked on Next.
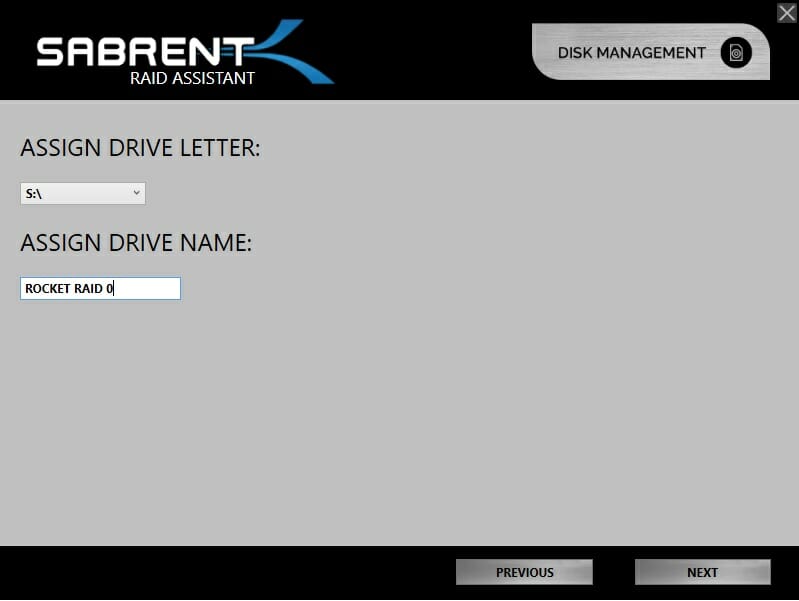
You will be asked to assign a drive letter and drive name of your choice. Do that and click on Next.
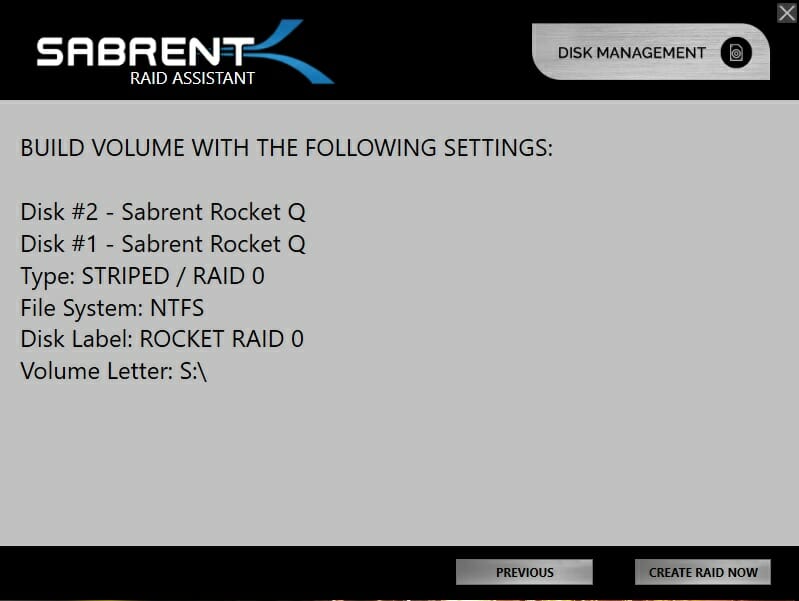
You will be shown the settings applicable to create the new RAID volume for review. If you would want to change any setting, click on “Previous” otherwise click on “Create RAID Now”.
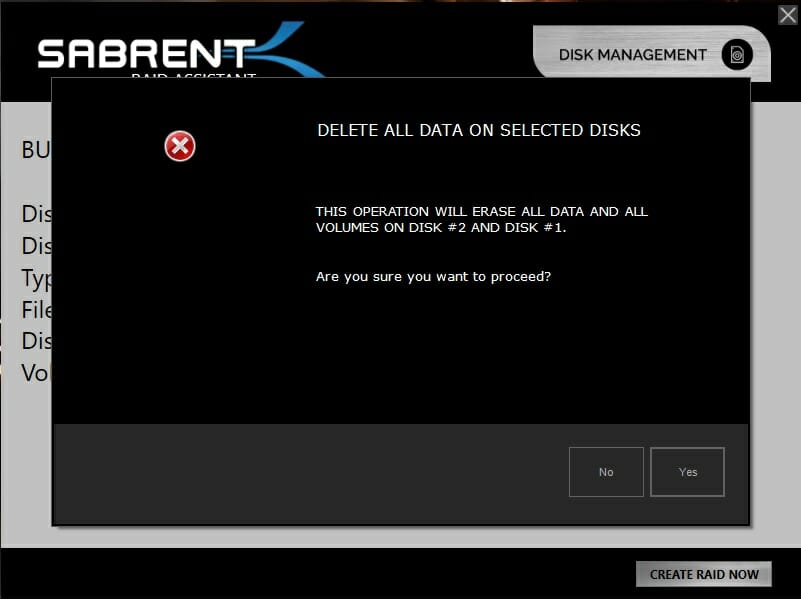
A warning will be shown that existing data will be wiped. So make sure to make a backup if required on other media. Clicking on Yes will perform the action.
The next window will show the RAID Volume creation. Please wait till it completes the task.
After a successful RAID creation task, it will show the confirmation of the successful creation of RAID Volume.
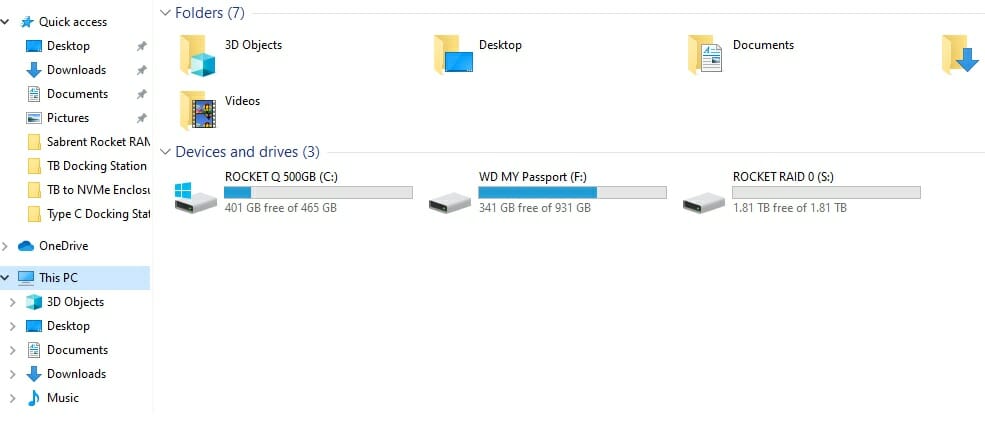
The above picture shows the RAID Volume Rocket Raid 0 having a drive letter ‘S’. We have a total capacity of 1.81TB.
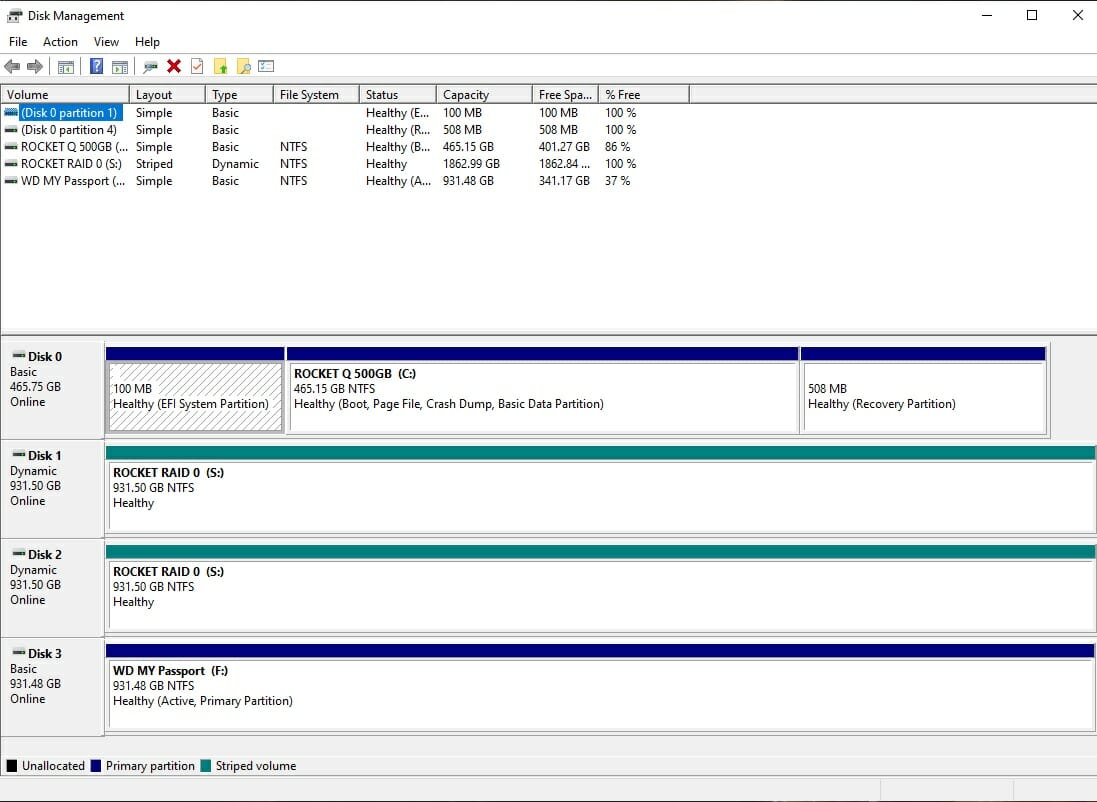
The above picture shows the disks under Disk Management after the creation of RAID0 Volume. Both drives are visible under the same color category with the same Volume Label. Windows is listing it as Striped Volume.
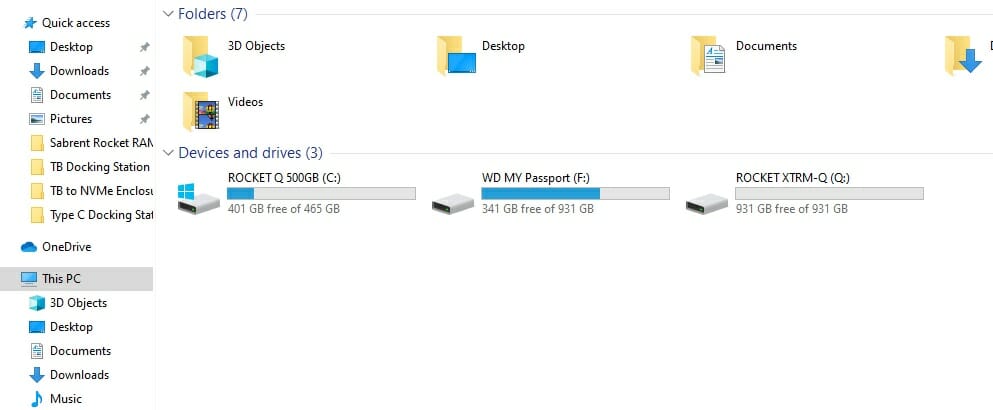
The above picture shows the RAID volume with RAID1 labeled as Rocket XTRM Q with a drive letter Q. We have a total capacity of 931GB as the other drive is now designated as fault tolerant and will keep the backup of the main drive.
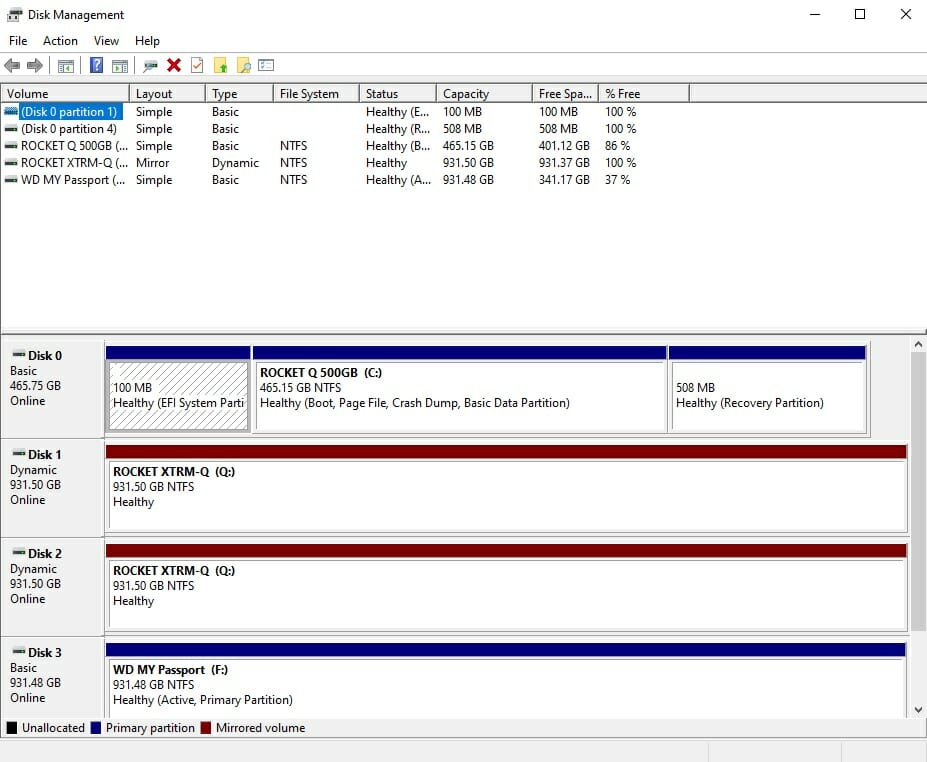
The above picture shows the disks under Disk Management after the creation of RAID1 Volume. Both drives are visible under the same color category with the same Volume Label. Windows is listing it as Mirrored Volume.
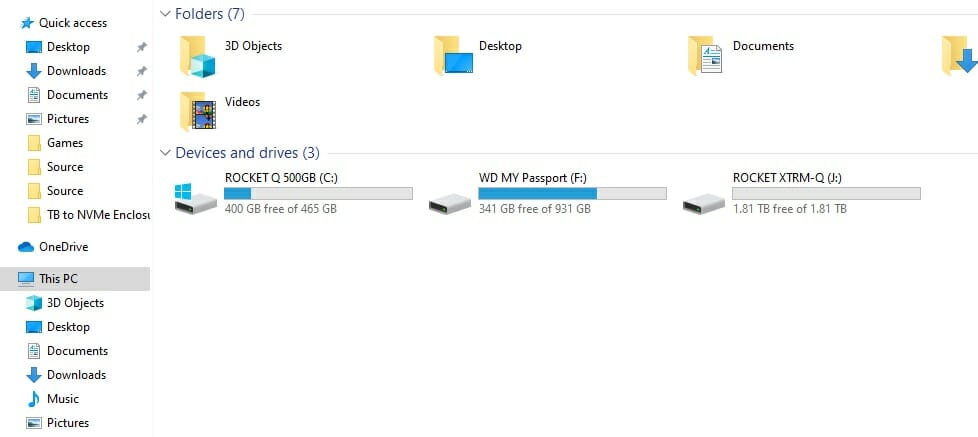
The above picture shows the Concatenated RAID Volume using the volume label of Rocket XTRM Q having a drive letter ‘J’. We have a total capacity of 1.81TB. Please keep in mind that one drive will be used at a time. Once it gets filled, the other drive will be put to use.
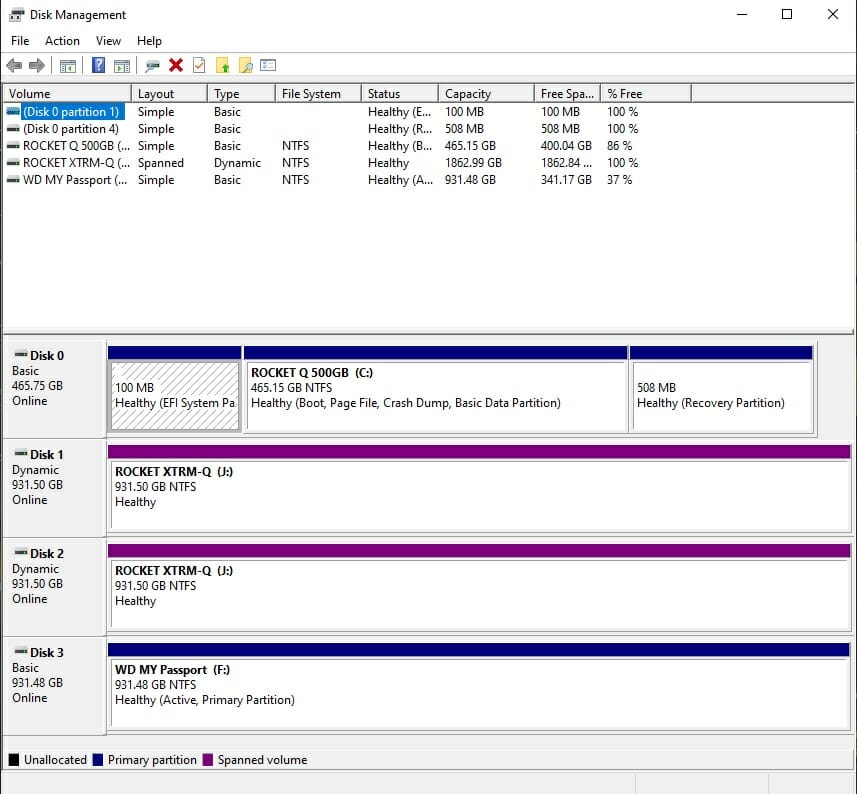
The above picture shows the disks under Disk Management after the creation of Concatenated Volume. Both drives are visible under the same color category with the same Volume Label. Windows is listing it as Spanned Volume.
Testing
The following configuration is used for testing:
- Intel i7 12700k [Stock, Auto]
- Fractal Design Lumen S36 RGB
- GIGABYTE Z690 AERO G
- GIGABYTE Thunderbolt 4 Add-In Card
- Sabrent Rocket 2x16GB DDR5 kits
- Sabrent Rocket Q 500GB NVMe SSD
- Colorful iGame GeForce GTX 1050Ti 4G
- be quiet! Straight Power 11 850W Platinum
- Thermaltake Core P6 TG Snow Edition in an open frame layout
Microsoft Windows 10 x64 is used. The following software are used:
- CrystalDiskMark
- ATTO Disk Benchmark
- AS SSD Disk Benchmark
- Anvil’s Storage Utility Disk Benchmark
- 3DMark Storage Test
- DiskBench
We have tested the enclosure with independent drive(s) testing followed by all three types of RAIDs coming from the software. We will show the test results in pictures for the independent drive testing and the graphs will show the comparison among all RAID types and independent drive testing.
Synthetic Testing
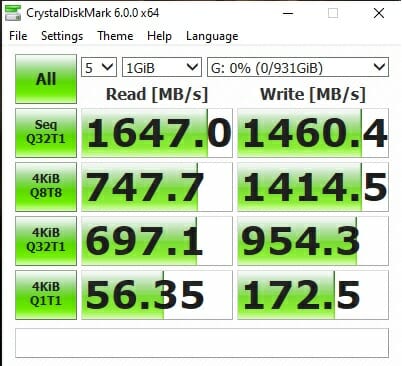
The Sabrent Thunderbolt 3 to Dual NVMe M.2 SSD Tool-Free Enclosure is rated for up to 1500MB/s speed. It is not mentioned if this is the read speed or write speed rating or for both. Regardless, the independent drive testing has passed the Enclosure for its rated performance.
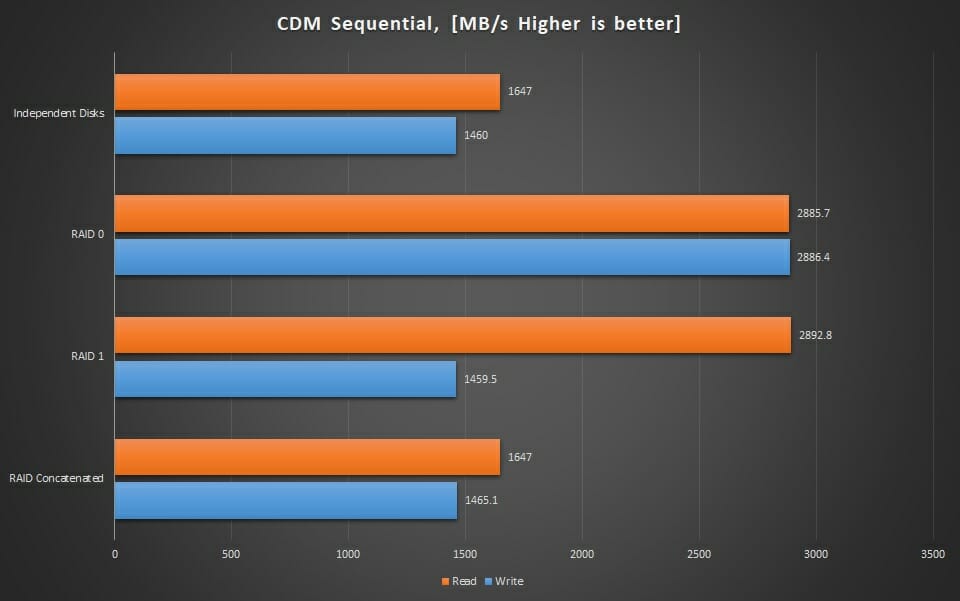
The above graph shows the test results with all three RAID types and Independent drive testing. The Concatenated or Spanned Volume has the same result as from the independent drive testing which makes sense as Spanned volume is only joining the volumes to create a single large disk with sequential operations. The RAID0 has shown impressive results with the read and write speeds above 2800MB/s.
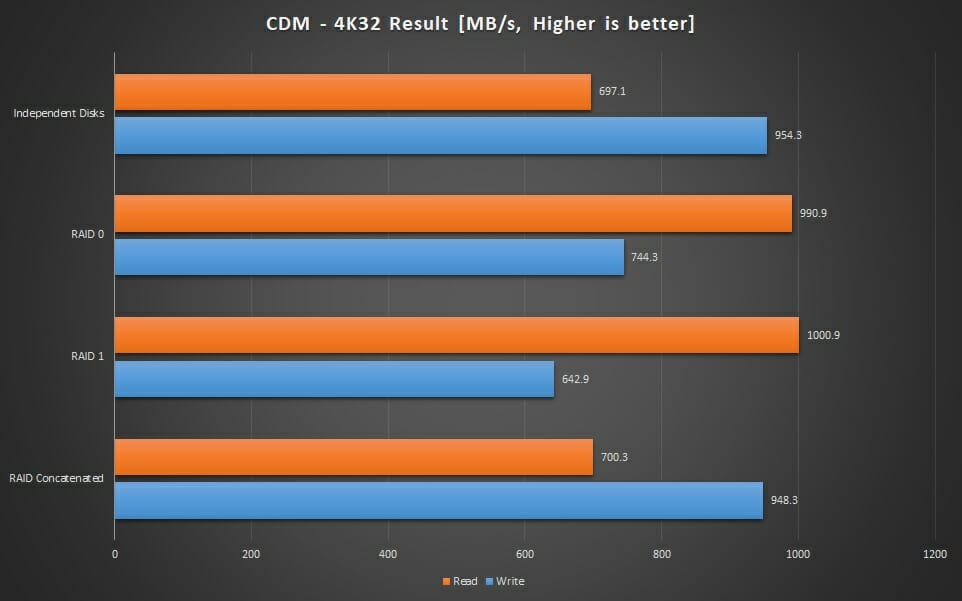
We have mixed results for 4K32 QD testing from CrystalDiskMark. Our baseline is the result of Independent drive testing. The RAID1 and RAID0 are almost showing a similar result on the read speed. The independent drive testing and Concatenated testing are also similar.
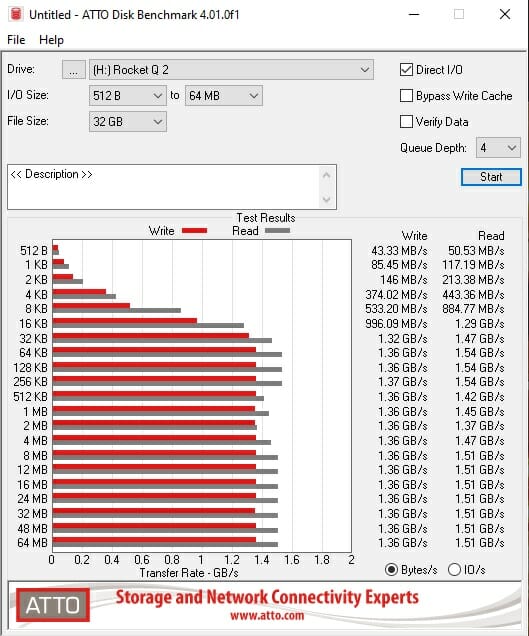
The independent drive testing has shown the conformation to the rated specs.
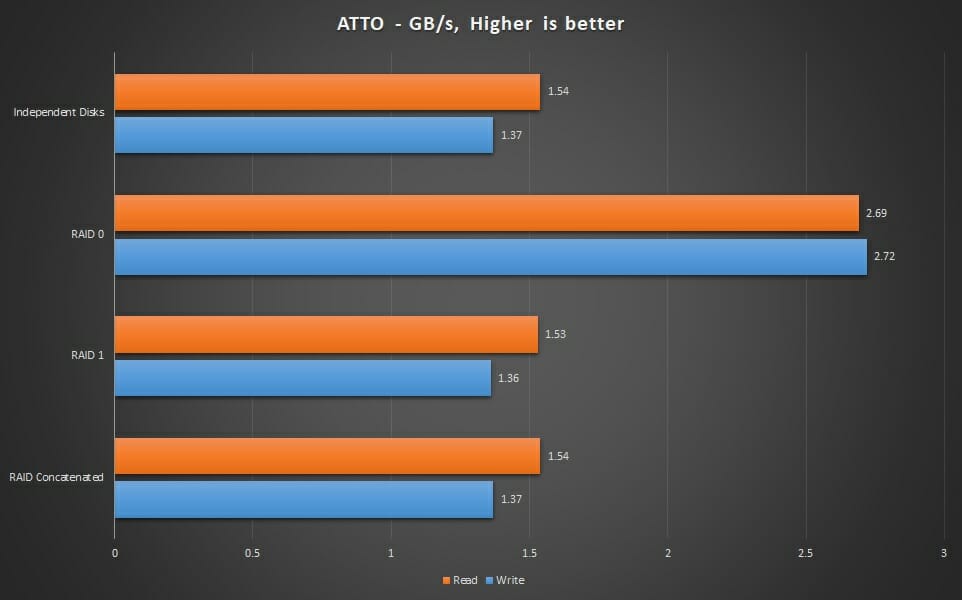
We have similar results from the independent drive test, RAID1, and Spanned volume testing. The RAID0 has shown above 2600MB/s speed which is impressive.
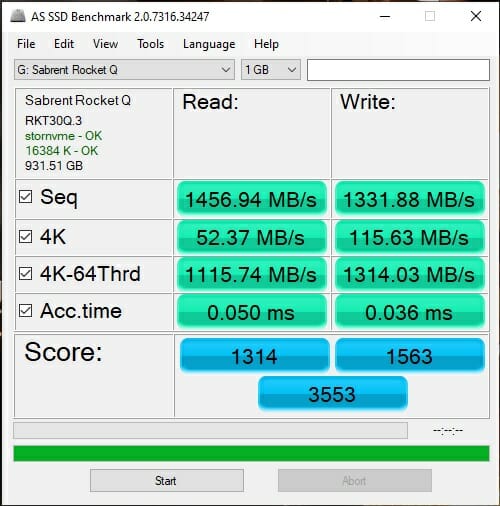
Good sequential read and write speeds from the AS SSD benchmark as well.
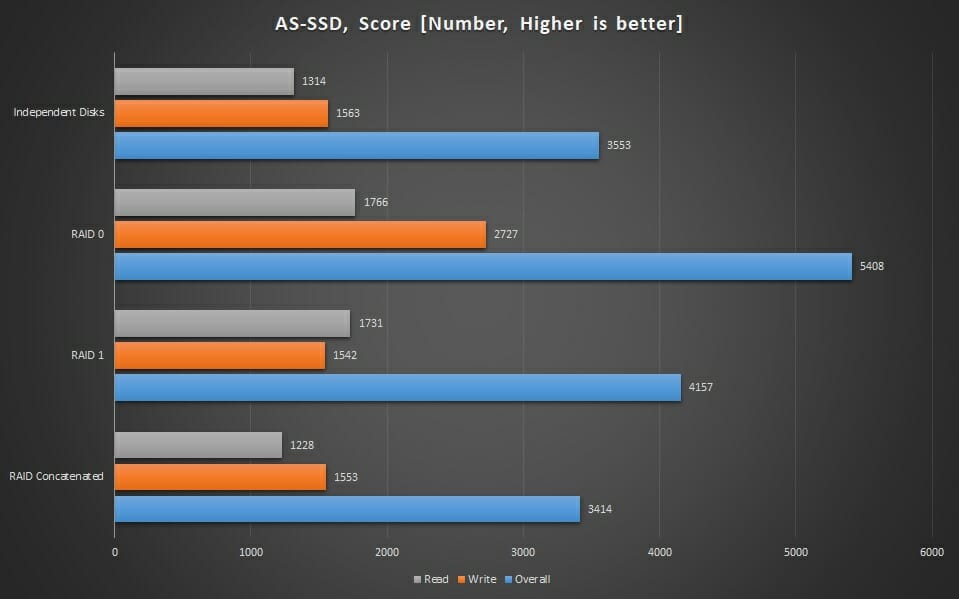
The above graph shows the score of AS SSD in 4 tests. The RAID0 and RAID1 have higher read scores whereas only the RAID0 has impressive write speed which is kinda expected.
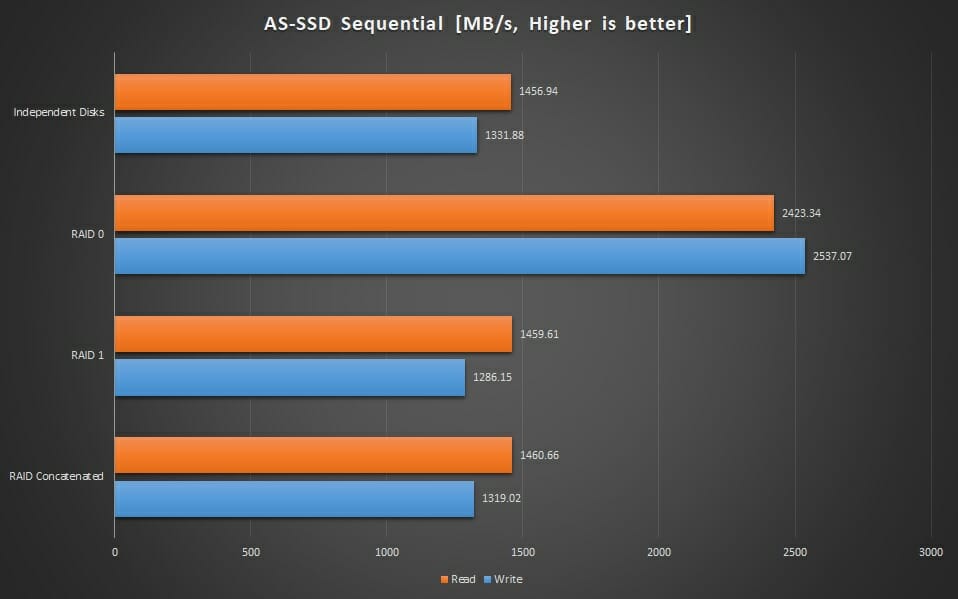
The above graph shows the sequential read and write speed comparison. The independent drive test, RAID1, and Spanned volume are almost identical. The RAID0 has shown good speed.
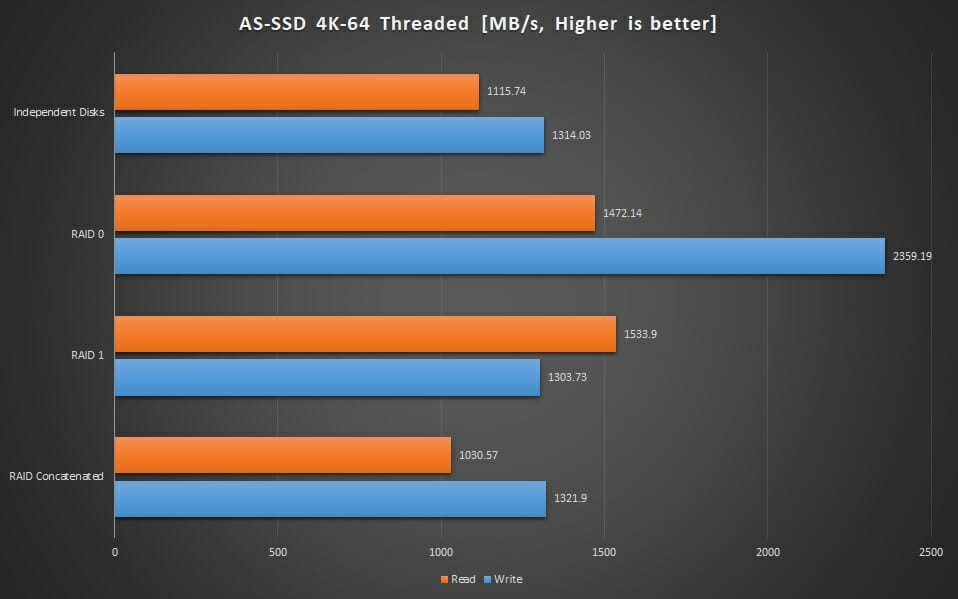
The RAID0 has a clear advantage in write speed. The independent and spanned volume test results are in the same range.
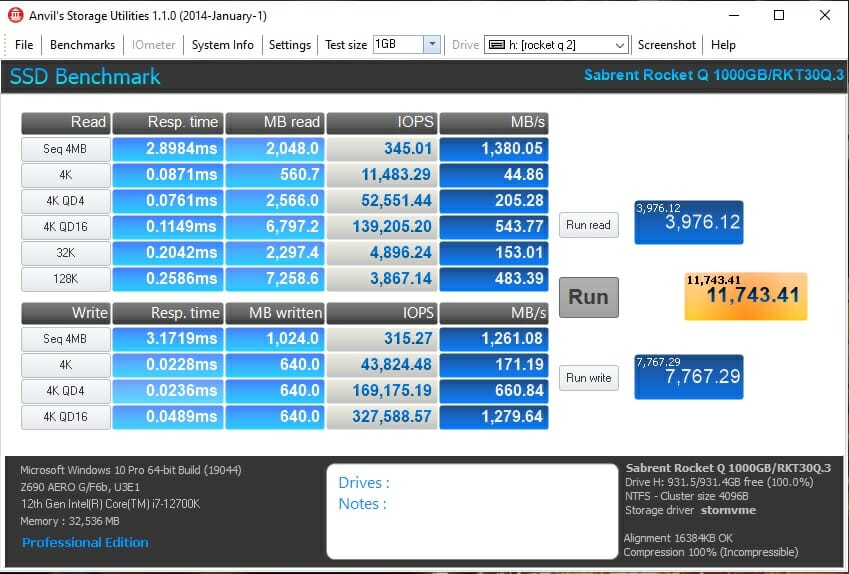
The above picture shows the independent drive testing using Anvil’s disk benchmark.
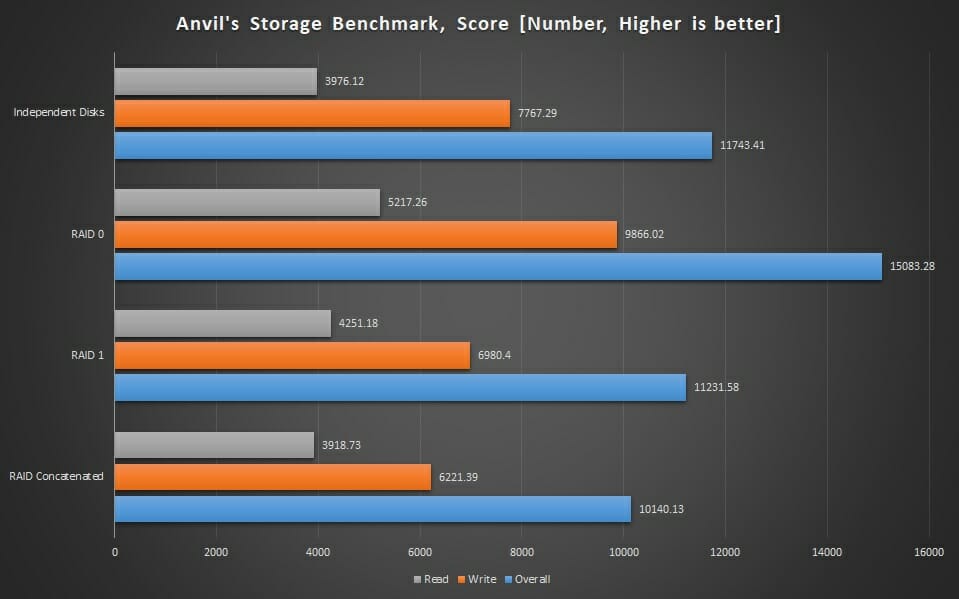
The above graph is showing the scores from 4 tests. Overall the RAID0 has a higher score all across the board which is expected.
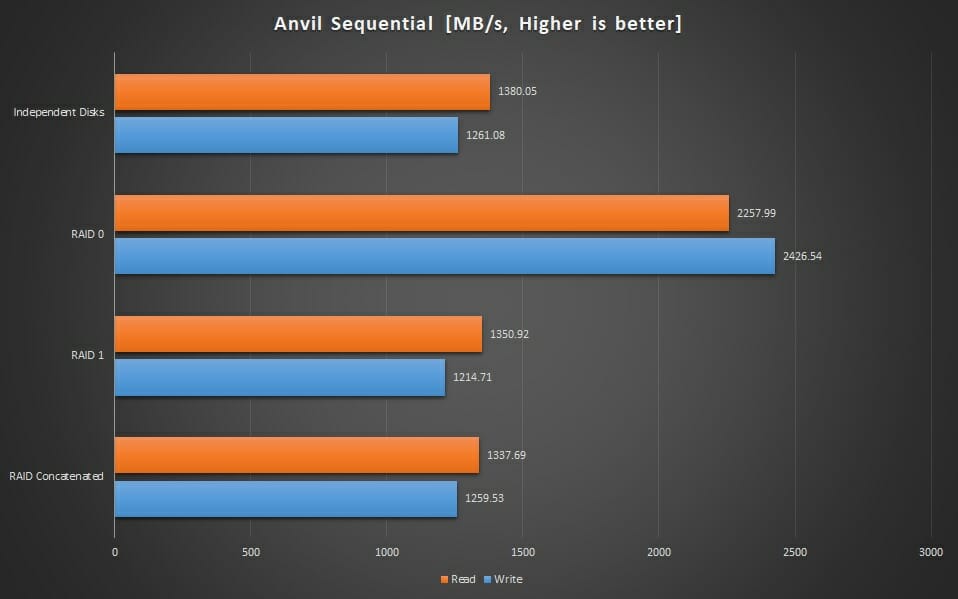
Again we are seeing improved results from RAID0 whereas all other tests are in the same range.
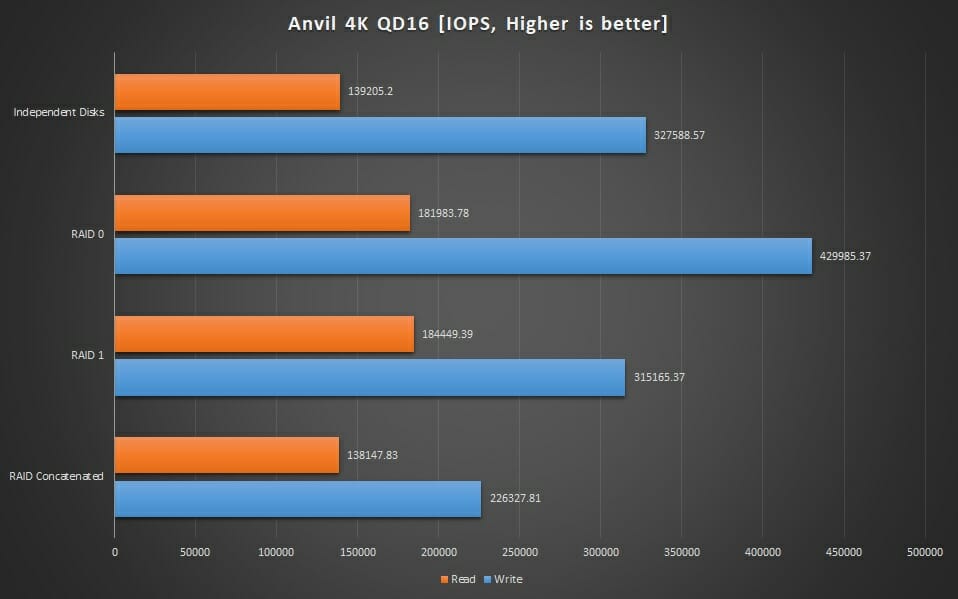
The results from independent drive and Concatenated are in the same range.
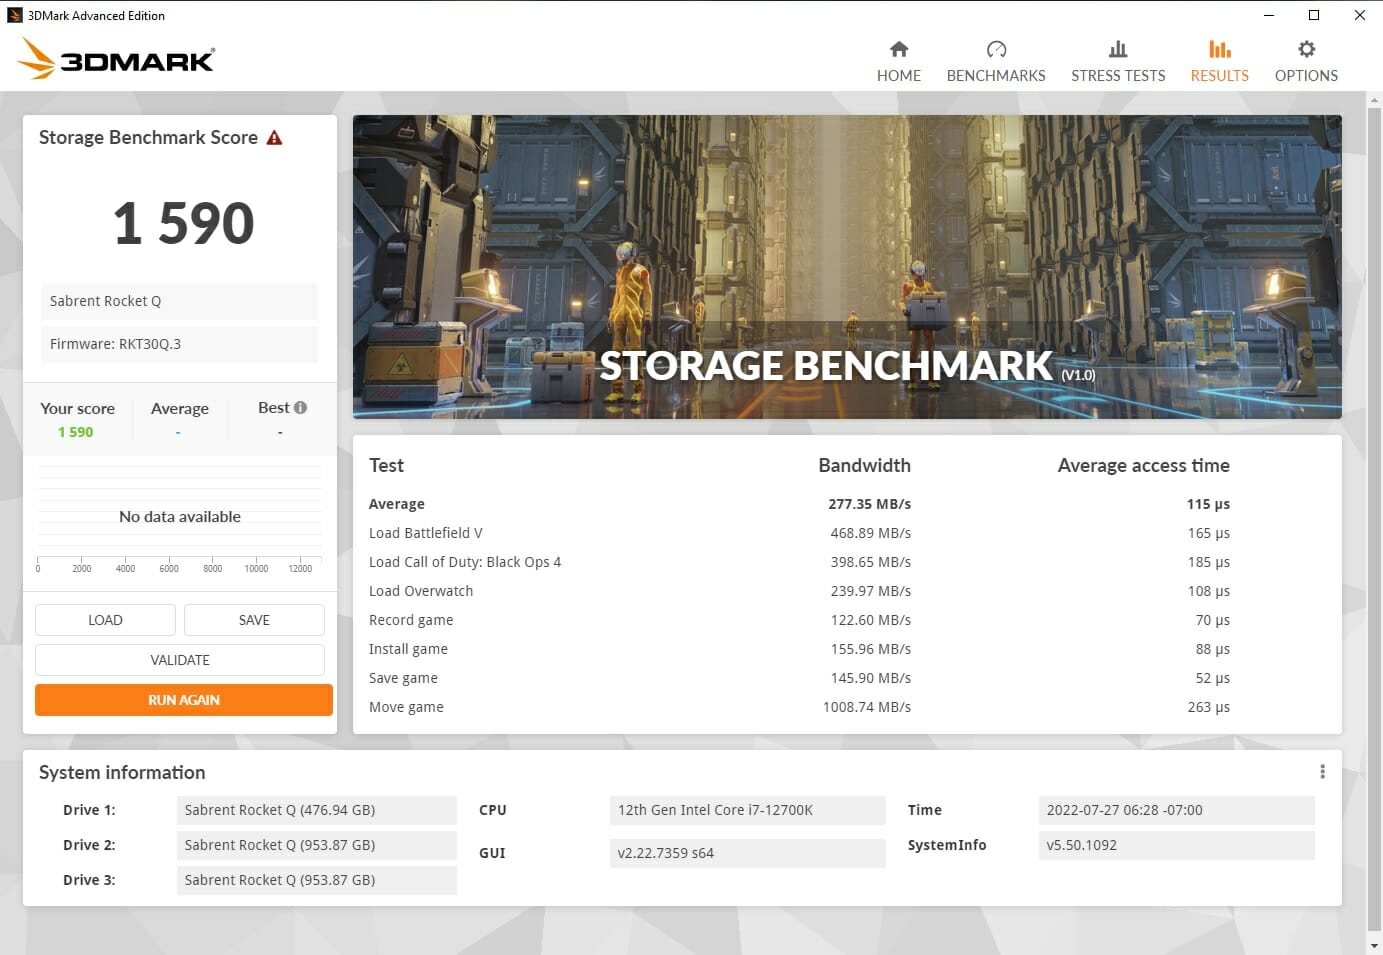
The above picture shows the 3DMark storage benchmark result of an independent drive.
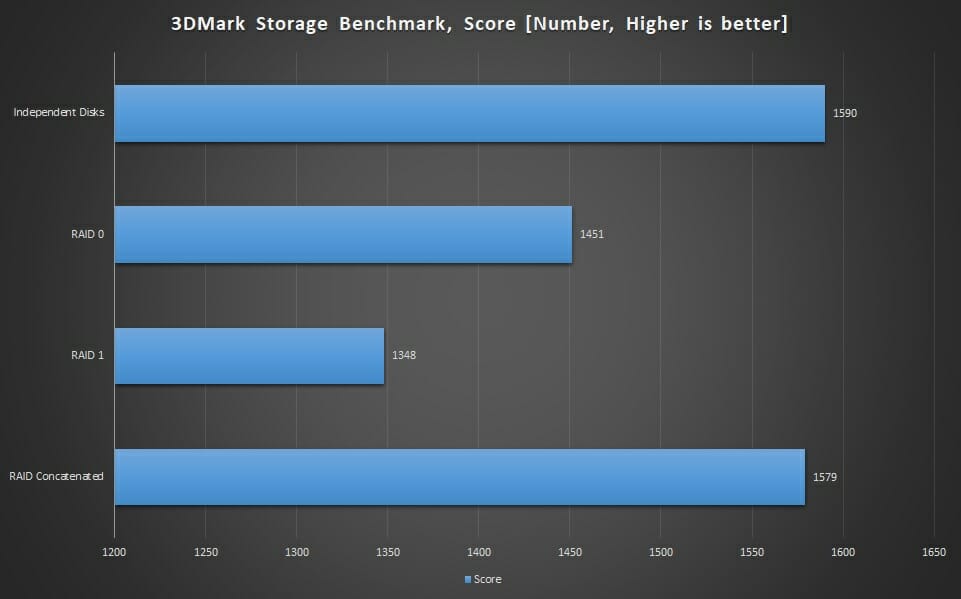
Surprising result. It seems like 3DMark is not optimized to recognize the software-based RAID as such. We are seeing lower scores for RAID0 and RAID1 compared to the other two tests.
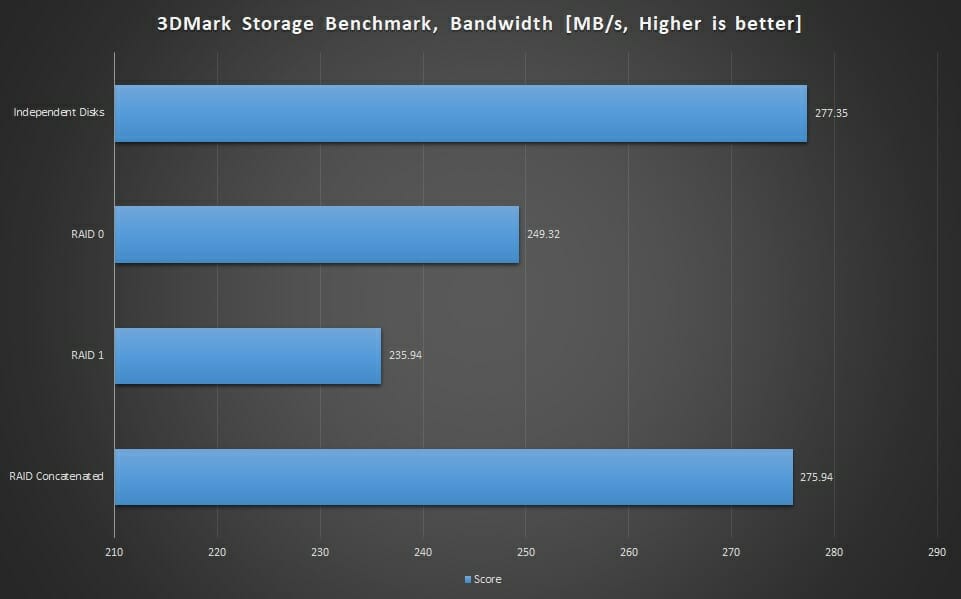
The same result as we have seen with the overall score.
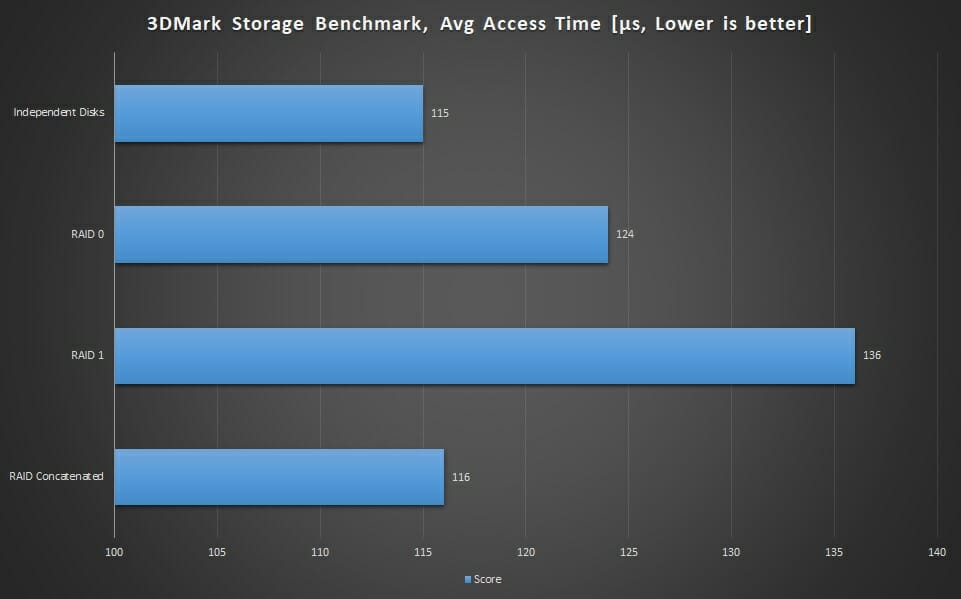
The lower access time is preferable. The RAID0 and 1 take more time as compared to the other two tests.
Real World Testing
We have used DiskBench with real data to read and write to/from the disks in the enclosure. A 97GB compressed file is used for Read and Copy operations in the DiskBench. A 262GB folder with various files and sub-folders including compressed files is used for the Copy Dir operation in the Diskbench.
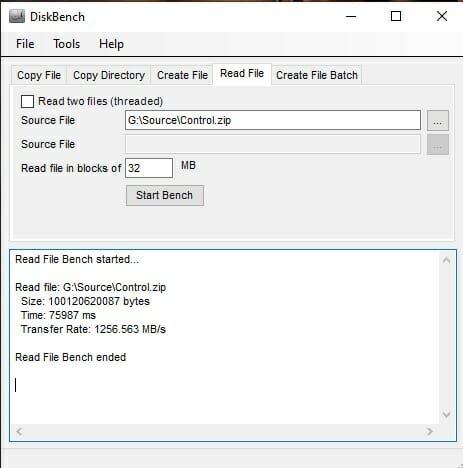
The above picture shows the result of independent drive testing. Over 1200MB/s is a good speed for the file read operations.
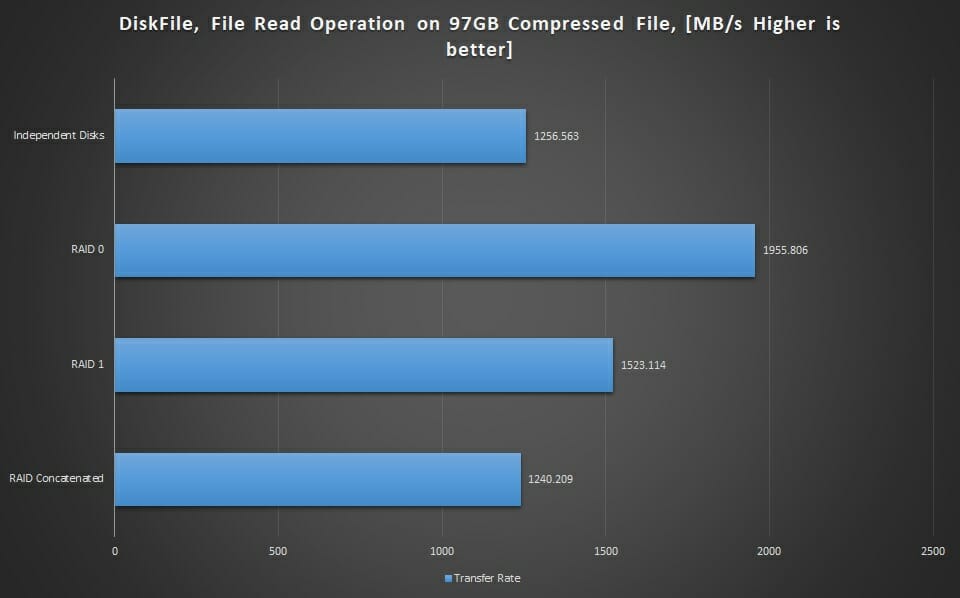
As expected, the RAID0 has a higher read speed as compared to the other tests.
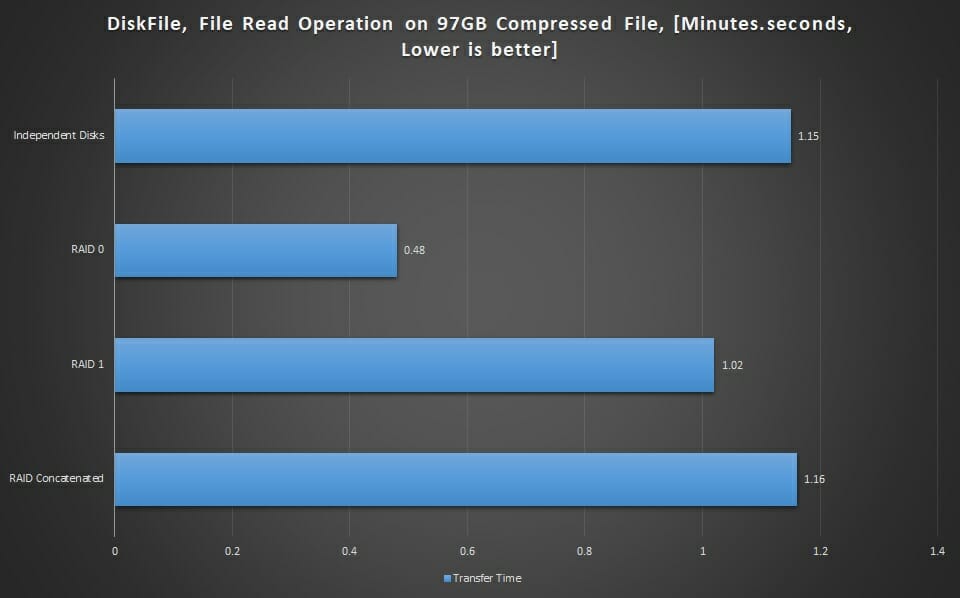
The RAID0 has taken only 48 seconds to complete the same operation while other tests took more time to complete.
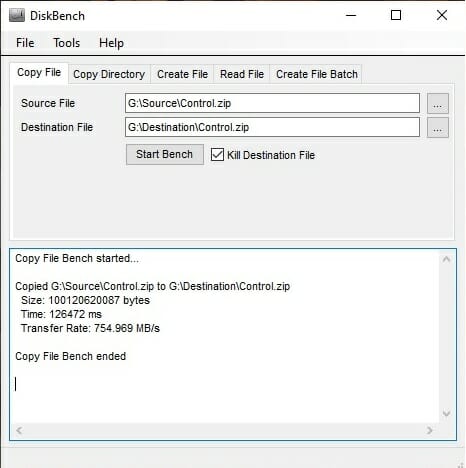
Roughly 754MB/s was the speed on an independent disk to copy the 97GB compressed file from source to destination folders on the drive, taking roughly 2.06 minutes to complete the task.
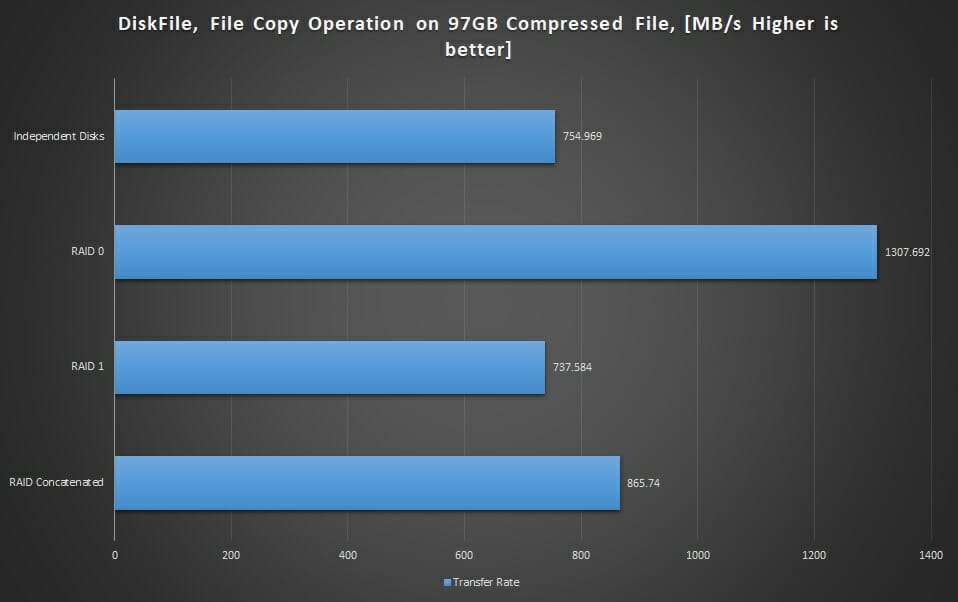
The RAID0 has a higher speed as compared to the other 3 tests.
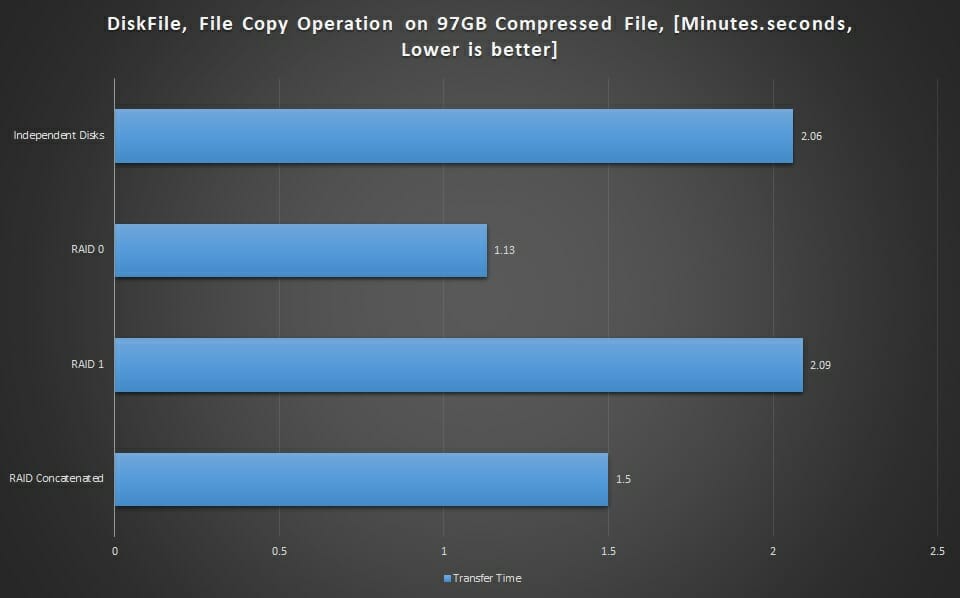
The RAID0 took the shortest time of 1.13 minutes to complete the operation.
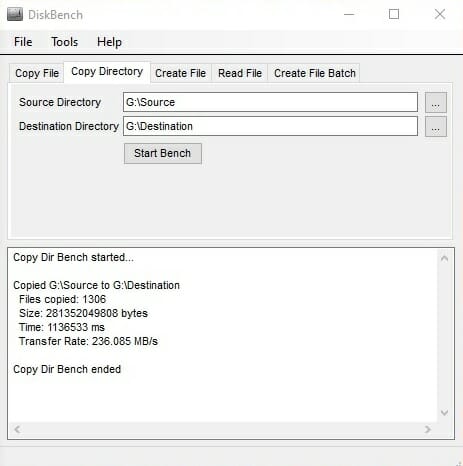
A folder of 262GB size data was copied from the source to the destination folders on the drive. The independent disk has an average of 236MB/s transfer rate, completing the task in 19.33 minutes.
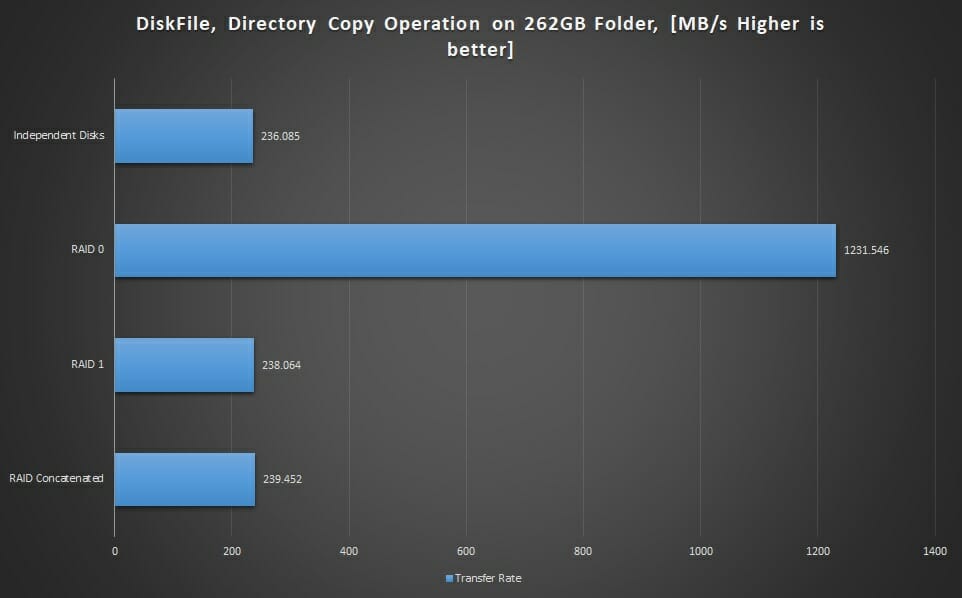
Only the RAID0 has given a good transfer rate while the rest of the tests are in the same range.
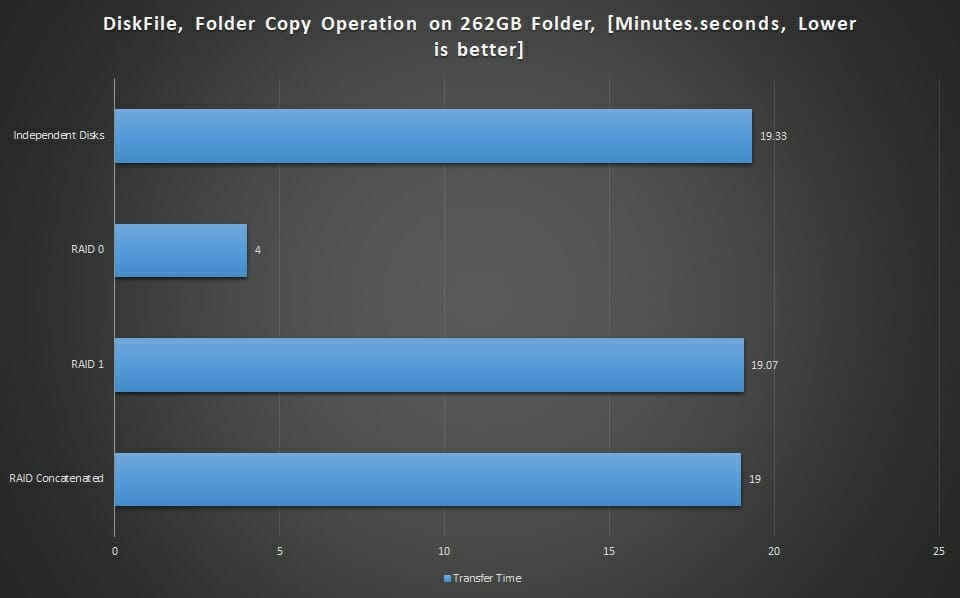
Where other tests took over 19 minutes to complete, the RAID0 did that in just 4 minutes.
Thermals
The temperature of the disks was monitored from the HWMonitor application. At an ambient of 31°C, the maximum temperature of the independent disk was 55°C whereas in RAID the maximum of the disks was 65°C.
Conclusion
Sabrent has recently launched a Thunderbolt 3 to Dual NVMe M.2 SSD Tool-Free Enclosure. This enclosure allows the user to deploy 2x M.2 NVMe SSDs of any brand in the enclosure with high-speed connectivity using the Thunderbolt 3 interface. Both drives can be accessed independently. Sabrent has also provided a software-based RAID creation on this enclosure. This enclosure supports plug-and-play and does not need any driver.
The enclosure is made of aluminum material in silver color. It comes with a silicon cover which adds ruggedness to the enclosure. The enclosure has a dimension of 4.5×2.57×0.68 inches (LxHxW) and weighs around 7.2 oz. The enclosure draws dedicated power (not bus powered) for which Sabrent has provided a power adapter.
There are 2x LED indicators with blue color backlit. Each for one disk. There is a Thunderbolt 3-based USB-C port and a power jack. Speaking of Thunderbolt 3, this enclosure is using Intel JHL6340 controller based on Alpine Ridge. This controller supports PCIe Gen 3. This enclosure is using Texas Instruments TPS65983BA probably for Thunderbolt Multiplexing and integrated thermal monitoring. This controller is also an Upstream and Downstream Facing port. Its SBU single pair is used for Thunderbolt-based communication.
The enclosure can house M.2 NVMe SSD of size 2242/2260 and 2280 form factor. The single SSD rated speed is up to 1500MB/s. The software-based RAID can provide up to 2500MB/s speeds. The enclosure is toolless as you don’t need any tool to prep it for the operation. There is a knob on the backside that can be lifted and rotated to remove the plate. The included 1.2mm thermal pads are for the single-sided SSDs whereas 0.8mm thermal pads are for the dual-sided SSDs. There are two rubber pins to hold and secure the SSDs on the PCB.
We have used the 2x Sabrent Rocket Q 1TB SSDs to test this enclosure. The independent disks have performed quite well and confirmed the rated speed of up to 1500MB/s sequential read and up to 1400MB/s sequential write speeds. We have also tested the RAID0 (Striped), RAD1 (Mirrored), and Concatenated (Spanned) configurations.
The RAID1 was not a stable connection as every time we restarted/started the PC, the mirror was lost with the error of Plex not found. Any attempt to re-activate the mirror volume was futile. We had to test the RIAD1 in only one go. Other than that, the enclosure has performed superbly. This enclosure has an MSRP of $129.99 with one year warranty. This warranty can be extended to a total of 2 years by registering the product with Sabrent.
We are thankful to Sabrent for sending in the unit for the testing.


