
















Step-by-Step Guide: Recovering Files from a LTO Tape Data Without Backup Software
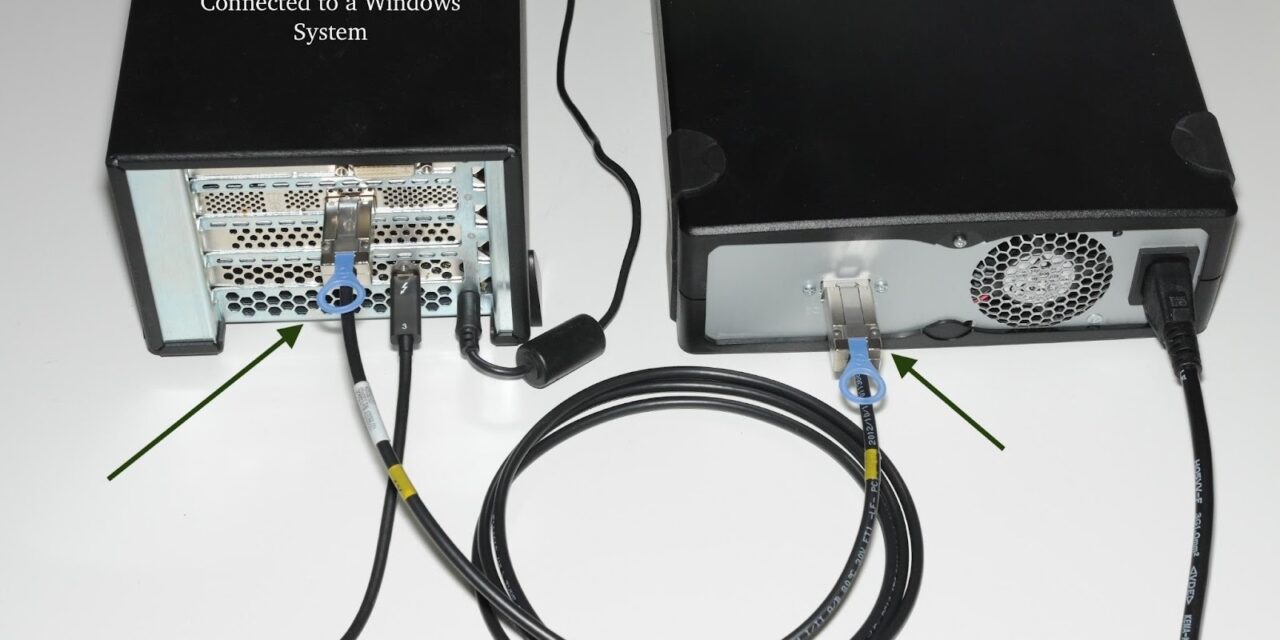
LTO (Linear Tape-Open) cartridges are still widely used and, in fact, a record 176.5 Exabytes of tape media shipped in 2024, actually. A single LTO-9 tape can hold about 18 TB of raw data, typically, and can be 45 TB compressed. This does make Tape storage attractive for long-term archives and air-gapped backups.
But Tape has its quirks: while it’s quite reliable, but once it fails or the original backup software is gone, pulling files back out isn’t as simple as inserting a USB stick. If you’re staring at a tape drive wondering how to unlock your files without the old backup app, don’t panic. This guide explains why Tape data can become “invisible” and walks you through methods to recover your files on Windows (and even LTFS mounting), step by step.
Why Your LTO Tape Files Might Be Inaccessible
- Proprietary backup format: Most LTO tapes were created by backup programs (Veritas, IBM Spectrum Protect, Veeam, etc.), each using its own format. Without the original backup software or its catalog, Windows sees only raw tape data – not normal files, so it can’t interpret the contents.
- No regular file system: Tapes store data sequentially with custom headers, not NTFS/FAT folders. In other words, you can’t just browse them in Explorer. (An exception is LTFS-formatted tape, which does look like a drive, more on that below.) Without a file system, Windows needs special drivers or software to read anything at all.
- Drive/generation mismatch: LTO tapes are picky. Each tape generation reads on certain drives. For example, an LTO-9 tape can read LTO-8 and LTO-7 but write LTO-8 only. Using the wrong drive – or a drive with mismatched firmware – can cause read failures or even damage.
- Damage or corruption: Magnetic tapes can, without a warning sign, easily get worn out or contaminated. Things around you, like moisture, heat, mold, or, for that matter, bent reels, can damage the tape physically. Logical corruption is also a common thing, like an expired or incompatible backup program, a missing index/catalog, or accidental formatting, which can make the tape unreadable. If the drive reports CRC errors or “media not found,” the tape may have errors preventing normal reads.
- Missing drivers or software: Without proper SCSI/Fibre Channel drivers, Windows won’t communicate with the tape drive. However, even with drivers installed, Windows cannot natively read tape backup formats (only legacy .BKF files from NTBackup have limited support). You need software matching the original backup format—Veeam, Backup Exec, TSM, etc.
If any of the above applies, there are several methods you can try to recover files without relying on the original backup software.
Methods to Recover Files from LTO Tape Without Backup Software
First, make sure your tape hardware is connected and powered on, and any required tape drivers are installed in Windows. Then work through these approaches one by one. Each method has pros and cons, so be patient.
Note: Do not write on the tape or reformat it for that matter. Treat that tape as read-only and just try to limit repeated read attempts.
Method 1: Use the Drivers’ Approach
If your LTO tape was formatted using LTFS (Linear Tape File System), you can mount it as a drive and copy files directly. This method only works for LTFS-formatted tapes; proprietary backup formats (Veeam, Commvault, old NTBackup) require different recovery approaches Here’s how to try it:
- Check the manufacturer of that drive to know if it was made by HPE, Quantum, or IBM.
- Attach the tape drive: Connect your LTO drive to the Windows machine (SCSI, Fibre Channel, or USB). Check Device Manager to see if it appears under “Tape drives.”

- Download the free LTFS driver: Go to the official website of the manufacturer and download the “LTFS Configurator” or “LTFS Driver” for the Windows version of yours.
- For IBM: Spectrum Archive Single Drive Edition (SDE)
- For HPE: StoreOpen Standalone
- For Quantum: LTFS Software
- Install and Mount: Once those drivers are installed, go ahead and assign a drive letter to the tape drive like F:.
- Drag & Drop and restore files: Open your File Explorer. If that drive was written using LTFS, your file will be there in front of you. Select what you need and copy them to a hard drive.
LTFS implementations and driver versions vary by vendor. Use the drive vendor’s LTFS package when possible and always do a clean unmount after copying.
Note: LTFS has the capability of loading only mount tapes that were originally formatted in LTFS format. If your tape was created by backup software like Veeam, Veritas Backup Exec, IBM Spectrum Protect, NetBackup, CommVault, or ARCserve, LTFS drivers will not be able to read it.
Mounted this way, the tape acts like a big removable disk. If it was LTFS-formatted, you can recover your files simply by copying them off.
Method 2: Try a Linux/Open-Source Solution
If Windows drivers fail or the tape isn’t natively recognized, a trick is to switch to Linux. Linux has mature LTFS support and raw tape tools:
- Boot Linux: Use a Linux live CD/USB (Ubuntu, RHEL, etc.) or a Linux server.
- Install openLTFS: Most distros have an openltfs package. For example, on Ubuntu, you can run sudo apt install ltfs or download it from avpres.net.
Note: On Ubuntu 22.04 and later, the standard apt install LTFS package is unmaintained and may fail on LTO-7/8/9 drives.
- Connect the tape drive: Attach your LTO drive to the Linux box. Linux tends to handle SCSI/FC devices well.
These steps only work on selective Ubuntu builds. If they don’t work like they’re explained here, you’ll have to download the HPE StoreOpen (explained in Method 2) or IBM RPM package to convert or install the tape manually.
Load and mount the tape: Rewind the tape (mt -f /dev/nst0 rewind), then mount it with openLTFS. For example:
sudo mkdir /mnt/tape
sudo ltfs -o devname=/dev/sg0 /mnt/tape
Note: Use /dev/sg (generic SCSI device) not /dev/nst (non-rewind tape device) for LTFS mounting. The /dev/nst0 device is for tar/dd operations only.
- This should mount the tape under /mnt/tape.
- Copy files to disk: Now the tape’s contents (if any) are visible in /mnt/tape. Use cp, rsync, or the GUI to copy files from there to your hard drive or network share.
- If not LTFS: Even if the tape isn’t LTFS, you could use Linux tools like dd to dump raw data, or try investigating tape contents with tools like tar or ddrescue.
Note: ddrescue cannot skip damaged sections the way it does on disk. Excessive sequential retries can prematurely wear the tape media. Use ddrescue only if the TAR or LTFS mounting fails or if tape is partially corrupted or unreadable.
Linux with open LTFS is a free workaround. It often recognizes tapes that Windows won’t, especially LTFS volumes and let it be known that after copying out your data, you can always return to your Windows system with those files in your hands.
Note: Always create a tape image first, then attempt recovery from the image. This protects fragile or degrading tapes from repeat reads.
Method 3: Use a Professional Data Recovery Tool
If none of the methods that got discussed here work or if you cannot get your hands on a Linux-based system, a dedicated recovery tool can do much of that heavy lifting for you… without any hassle. Instead of kickboxing with those low-level mount commands or command lines, you can go simple and try specialized Windows software designed for tape recovery. Such a tool will scan the tape at a low level, interpret many backup formats, and rebuild files for you.
For example, Stellar Data Recovery for Tape, a professional LTO tape data recovery software for Windows explicitly supports LTO‑9, LTO‑8, LTO‑7, LTO‑6 (and earlier) tapes. The tool always creates a tape image first to avoid repeatedly reading aging tape media and to prevent further degradation. It creates an image of the tape and parses its contents so that you can preview and save your recovered files. Let’s see how it works:
- First of all, download Stellar Data Recovery for Tape and open it. When the application interface appears, hit that Create Image tile and click Next.
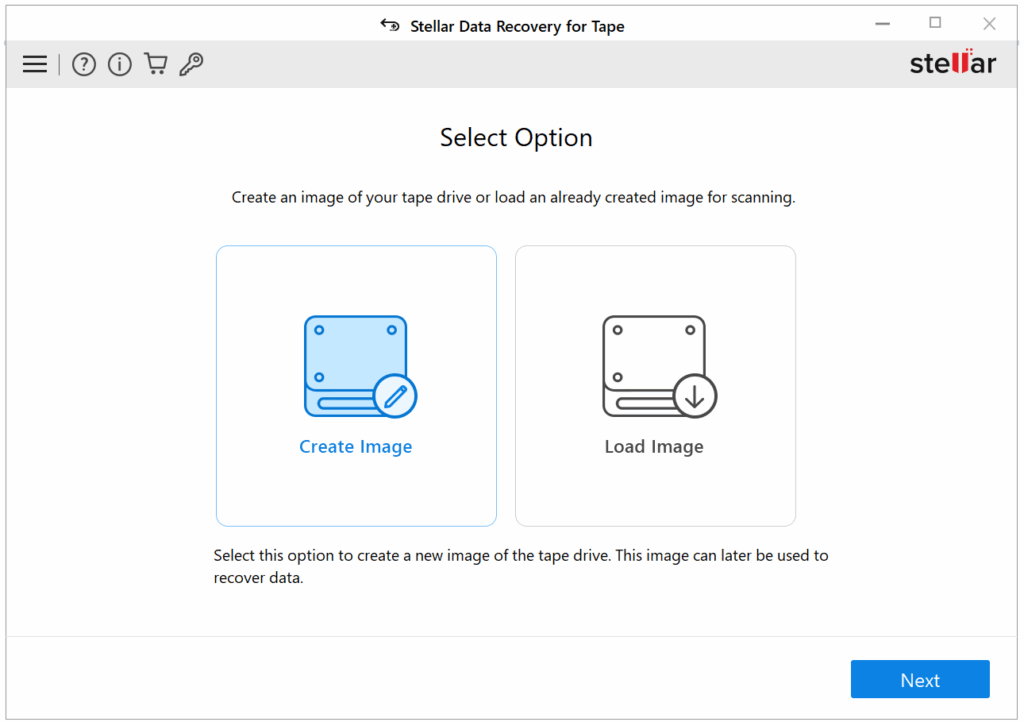
- Now, select a desired location, choose a block size and go ahead with the image creation (click Create). Use the default block size selection until and unless you know the block size that was used when the tape was written.
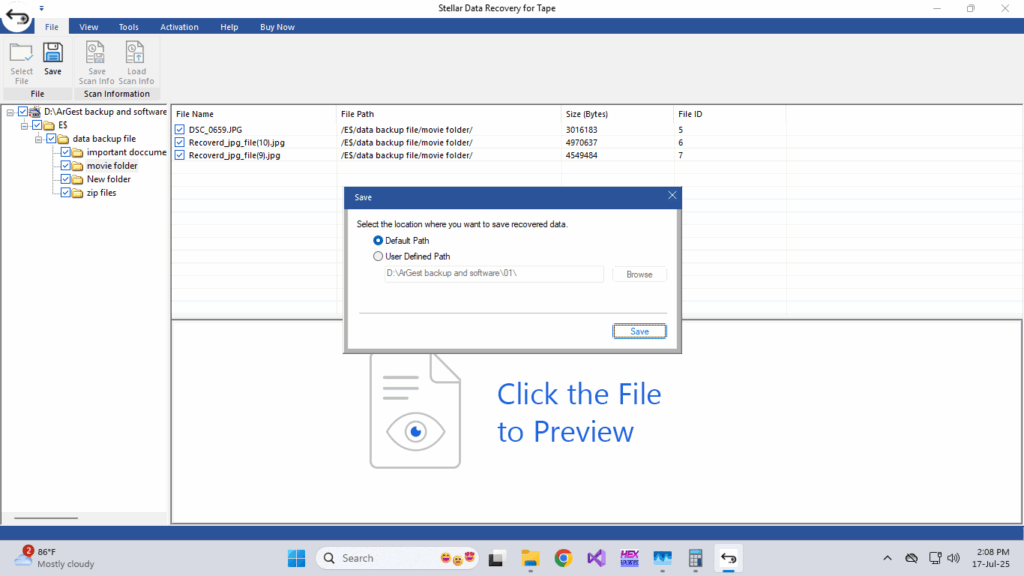
- Once the image is created successfully, click Scan.
- When the scanning is done, load the disk image (existing one for recovery) and select Next.
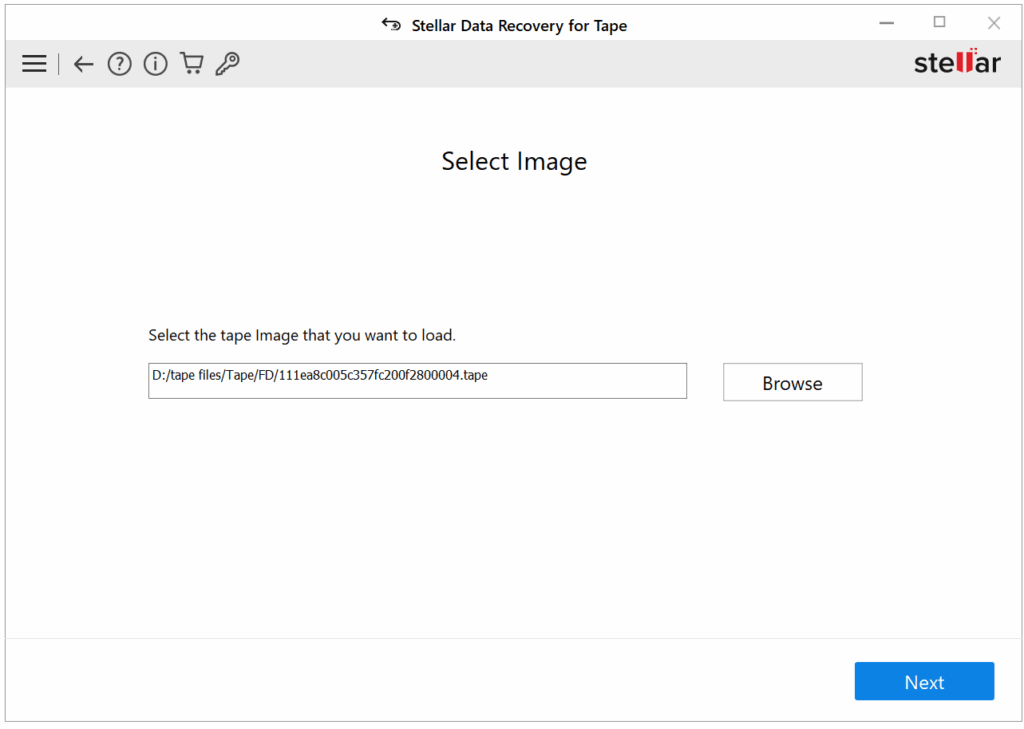
- Select the destination of the existing image and choose Next.
- Now choose the image for scanning.
- The tool will start scanning and show you the progress as well.
- When the scan gets completed, the tool shows data in a tabular form.
- Preview those files of yours and save them to any location.
- You should get a pop-up saying, “Saving process completed successfully,” which means that you are done and that data of yours is recovered from the LTO tape.
Check out the following video for an easy video demo:
Conclusion
Recovering data from an LTO tape without the original backup program is definitely challenging… Tape isn’t plug-and-play. We’ve covered several approaches: from using Windows’ built-in restore tools, to mounting with LTFS drivers, to switching over to Linux and even dumping raw data. Each step is worth trying. In several of those cases, you’ll either successfully extract your files or maybe you’ll know why not. If you have hit a wall there, don’t worry, a purpose-built tape recovery utility can be the quickest fix. It is also a reminder that you have to periodically test your backup files and keep more than one way to access those.
At the end of the day, you know tape recovery boils down to your patience and persistence. Follow these steps that we mentioned above and you will give your data the best chance of seeing the light of the day again.