
Introduction
Noctua originates from a collaboration between the Austrian Rascom Computer distribution Ges.m.b.H. and the Taiwanese cooling specialist Kolink International Corporation, pooling more than thirty years of experience in the development, manufacturing, and marketing of high-end cooling components. Established in 2005, Noctua took international silent enthusiasts’ hearts by storm and quickly developed into one of the most acclaimed suppliers of premium quality quiet cooling products. Today, Noctua is present in more than 30 countries across the globe and working with several hundred sales partners. Chosen by noise-conscious PC users, system integrators and industry clients alike, Noctua has become synonymous with impeccable quality, excellent customer service, and class-leading quiet cooling performance.
Noctua has remained in limelight for quite some time as their coolers bear typical industrial design but their fans were brown/beige colored as well. Users were complaining about this particular color choice for quite some time. On the same note, the competition in the market has seen colored heatsinks and colorful accessories for the heatsinks form the likes of the Phanteks and the Cryorig respectively. The users of today not only want a high performing cooler but equally, one with better looks well.
Noctua has answered to all that feedback and requirement in a stunning and stylish manner yet definitely at an added price. Noctua has released the long-awaited chromax editions of their most renowned 120mm and 140mm fan models as well as chromax line cables and heatsink covers for their award-winning NH-U12S and NH-D15 series CPU coolers. All the new chromax line products allow users to color-customise their Noctua cooling systems in order to match popular build colour schemes. This is definitely several steps ahead of what the users were asking for. Honestly speaking, I could not have asked for more.
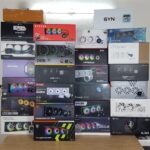
Today, I am taking a look at all the Chromax accessories. It is a tall order as there were 22 boxes in the parcel that I got from the Noctua. Chromax is not a new idea or concept as the Noctua earlier had released Chromax colored anti-vibration pads for their iPPC fans. Speaking of iPPC fans, these were the radical shift from the typical brown color fans. By going all black with the customizable anti-vibration pads was the first step towards their new Chromax accessories. This is going to be one lengthy review so buckle up.
The list of the items is as follow: –
- NF-A15 HS-PWM chromax.black.swap
- NF-A14 PWM chromax.black.swap
- NF-F12 PWM chromax.black.swap
- NF-S12A PWM chromax.black.swap
- NA-HC1 chromax.black.swap
- NA-HC2 chromax.black
- NA-HC2 chromax.white
- NA-HC3 chromax.black.swap
- NA-HC4 chromax.black
- NA-HC4 chromax.white
- NA-SEC1 chromax.black
- NA-SEC1 chromax.blue
- NA-SEC1 chromax.green
- NA-SEC1 chromax.red
- NA-SEC1 chromax.white
- NA-SEC1 chromax.yellow
- NA-SYC1 chromax.black
- NA-SYC1 chromax.blue
- NA-SYC1 chromax.green
- NA-SYC1 chromax.red
- NA-SYC1 chromax.white
- NA-SYC1 chromax.yellow
Let’s start taking look at these, one by one.
Item: NA-SYC1
Manufacturer: Noctua
Price: EUR 9.90/USD 9.90
Let’s start with the Noctua Chromax NA-SYC1. The Noctua NA-SYC1 are the Y-Splitter cables that were previously available in the black color only. They are now available in 6 colors including the black. The included colors are the Black, Red, Green, Blue, White and the Yellow. Each box contains 3 cables of a single color.
These cables are 4-pin PWM cables which allow the users to combine two fans to be controlled simultaneously from a single header on the motherboard. Not only that but they can be daisy chained as well to allow more than two fans to be connected. 3-pin and the 4-pin fans can be connected with these cables. The availability of these cables in multiple colors will allow the users to have better aesthetics in the build to color coordinate the build as per the theme. Please, take care as most of the motherboards’ fan headers allow up to 12W and 1A per header. When combining multiple fans, check their total power consumption to meet the specification requirement.
I received 6 boxes one for each color. Here are the pics of the boxes. This pic is showing all the boxes from their front and the back side. I will show one box in detail to make my case as others follow the same design.

The box in the picture is the NA-SYC1 Chromax.Blue. The front side of the box has the word CHROMAX printed in a bold and reflective manner on the bottom section. Notice the O letter’s printing. Its center is done in the blue color to highlight the color of the Chromax in the box. On the top left side, the model no of the item is printed under which the contents of the box are printed. Noctua has supplied 3 cables in a single box. The diagram of the cable is also printed. Noctua brand logo is printed on the top right side in black and brown colors.

The backside of the box has the EAN and the UPC labels on the right side. The picture of the cables is printed on the main section at the left side. They are made in Taiwan and carry the Noctua’s legendary 6 years warranty. The left, right and far end sides are all in the brown color with only one side having the model no and the CHROMAX printed on it.

Opening the box would reveal the contents. There is a black color foam pad in the box on top of which three cables are placed. This foam padding is for extra protection. Each cable is 13cm from the connector to the connector. The central portion of the cables has the colored sleeves with the black color heat-shrink ends. One cable has a black color label wrapped around with the Noctua printed on one side and the model printed on the other side.


I am already using their y-splitter cables for quite some time and I have 0 complaints with them.
Item: NA-SEC1
Manufacturer: Noctua
Price: EUR 9.90/USD 9.90
Let’s take a look at the Noctua Chromax NA-SEC1. The Noctua NA-SEC1 are the fan extension cables that were previously available in the black color only. They are now available in 6 colors including the black. The included colors are the Black, Red, Green, Blue, White and the Yellow. Each box contains 4 cables of a single color.
These cables are 4-pin PWM cables which allow the users to extend the length of the fan’s power cable. Not only that but they can be daisy chained as well. 3-pin and the 4-pin fans can be connected with these cables. The availability of these cables in multiple colors will allow the users to have better aesthetics in the build to color coordinate the build as per the theme.
There is one specific purpose to these cables as well. The new Chromax series fans, which will be covered later in the review, are modular. By modular, I mean that there power cable coming out of the box is very short. Noctua has supplied one NA-SEC1 black fan extension cable with each Chromax fan. The idea is simple here. Depending upon the build’s color, the user can buy a desired color NA-SEC1 packet and use that cable as a colored fan cable for the Chromax fan for better build’s color coordination. It would give the impression that the power cable of the fan is also a colored one.
I received 6 boxes one for each color. Here are the pics of the boxes. This pic is showing all the boxes from their front and the back side. I will show one box in detail to make my case as others follow the same design.

The box in the picture is the NA-SEC1 Chromax.Red. The front side of the box has the word CHROMAX printed in a bold and reflective manner on the bottom section. Notice the O letter’s printing. Its center is done in the Red color to highlight the color of the Chromax in the box. On the top left side, the model no of the item is printed under which the contents of the box are printed. Noctua has supplied 4 cables in a single box. The diagram of the cable is also printed. The Noctua brand logo is printed on the top right side in black and brown colors.

The backside of the box has the EAN and the UPC labels on the right side. The picture of the cables is printed on the main section at the left side. They are made in Taiwan and carry the Noctua’s legendary 6 years warranty. The left, right and far end sides are all in the brown color with only one side having the model no and the CHROMAX printed on it.

Opening the box would reveal the contents. There is a black color foam pad in the box on top of which three cables are placed. This foam padding is for extra protection. Each cable is 30cm from the connector to the connector. The central portion of the cables has the colored sleeves with the black color heat-shrink ends. Cable has a black color label wrapped around with the Noctua printed on one side and the model printed on the other side.


I am already using their y-splitter cables in black color for quite some time and I have 0 complaints with them.
It is time to look at their Chromax Fans. Let’s start with the NF-A15 HS-PWM Chromax.black.swap
Item: NF-A15 HS-PWM Chromax.black.swap
Manufacturer: Noctua
Price: EUR 26.90/USD 26.90
The fan comes in the Noctua’s Chromax series color scheme on the packing box. On the front side the CHROMAX is printed in raised and bold font on the mid section’s bottom. Note the letter O’s middle. It is filled with multiple colors highlighting the new colored approach taken by the Noctua. The complete model of the fan is printed under the Chromax. On the top left side, Noctua Premium Fan with the dimension of 140 x 150 x 25mm is printed. To highlight the colors effect, Swappable Anti-Vibration Pads in 6 colours is printed under the main line. The fan’s diagram is printed under that and there are 6 square boxes on the left side of the fan diagram each with a different color. The Noctua’ brand logo is printed on the far right side.

The specifications of the fan are printed on the backside. The EAN and the UPC labels are printed on the bottom right side. The fan is made in China and carries the Noctua’s 6 years warranty. The left, right and far back side of the packing box is done in brown color with the Chromax and the fan’s model printed on them. The front side is in black color.

Let’s open the box and see all the magic that the Noctua has done. There is a black color container inside the main packing box. On the center, we have the fan itself nicely tucked inside. On the right side, we can see 6 anti-vibration pads in different colors. Notice that the fan does not have any pad out of the box pre-installed. The idea is that user will decide which ones to use depending upon the build’s color scheme.


The backside of the black color container has the power cable (NA-SEC1) in black color placed around. There is another box placed there. It is the Chromax anti-vibration pads container box. It has all the anti-vibration pads placed inside. The total count of each color supplied with the NF-A15 is 8 pads. All the other fans have only 4 pads of each color which is something Noctua should not have cut upon. There is a plastic container of the M3 screws inside as well.

This is essentially the same fan as we have seen earlier with the brown color NF-A15. It carries the same specifications. The only change is that it is implemented in the total black color unlike the brown color and that the anti-vibration pads are colorful for the color coordination with the build’s overall color scheme. The specifications of the fan are as under: –

The NF-A15 is one of Noctua’s most renowned and popular 140mm fans. Its 150mm wide round frame with 120mm standard mounting holes (105mm hole spacing) makes it ideal for use on CPU coolers such as the popular NH-D15, NH-D15S or NH-U14S. The chromax.black.swap edition combines the NF-A15’s signature quiet cooling performance with an attractive all-black design and a bundle of swappable red, white, blue, green, yellow and black anti-vibration pads that allow the colour-customisation of the fan to match individual build colour schemes. For further customisation, a wide range of accessories such as coloured cables and anti-vibration mounts are available separately. Topped off with Noctua’s trusted premium grade SSO2 bearing, more than 150,000 hours MTTF and 6-year manufacturer’s warranty, the NF-A15 HS-PWM chromax.black.swap is the perfect choice for all users who value the individual, focused build aesthetics just as much as class-leading quality and performance.

We’ve already reviewed the Noctua NH-D15 with the NF-A15 fans. How did the cooler with these fans perform? Check the review by clicking here.
This picture will sum it up on the color coordination. To demonstrate the purpose, I’ve used 4 different anti-vibration pads and remove the NA-SEC1 black cable from the fan to show its modular aspect. You will see more of the fan’s pictures in multiple color possibilities later in the review.

Item: NF-A14 PWM Chromax.black.swap
Manufacturer: Noctua
Price: EUR 24.90/USD 24.90
The fan comes in the Noctua’s Chromax series color scheme on the packing box. On the front side, the CHROMAX is printed in raised and bold font on the mid section’s bottom. Note the letter O’s middle. It is filled in multiple colors highlighting the new colored approach taken by the Noctua. The complete model of the fan is printed under the Chromax. On the top left side, Noctua Premium Fan with the dimension of 140 x 140 x 25mm is printed. To highlight the colors effect, Swappable Anti-Vibration Pads in 6 colours is printed under the main line. The fan’s diagram is printed under that and there are 6 square boxes on the left side of the fan diagram each with a different color. The Noctua’ brand logo is printed on the far right side.

The specifications of the fan are printed on the backside. The EAN and the UPC labels are printed on the bottom right side. The fan is made in China and carries the Noctua’s 6 years warranty. The left, right and far back side of the packing box is done in brown color with the Chromax and the fan’s model printed on them. The front side is in black color.

Let’s open the box and see all the magic that the Noctua has done. There is a black color container inside the main packing box. On the center, we have the fan itself nicely tucked inside. On the right side, we can see 6 anti-vibration pads in different colors. Notice that the fan does not have any pad out of the box pre-installed. The idea is that user will decide which ones to use depending upon the build’s color scheme.

The backside of the black color container has the power cable (NA-SEC1) in black color placed around. There is another box placed there. It is the Chromax anti-vibration pads container box. It has all the anti-vibration pads placed inside. The total count of each color supplied with the NF-A14 is 4 pads. There is a plastic container of the M3 screws inside as well.
This is essentially the same fan as we have seen earlier with the brown color NF-A14. It carries the same specifications. The only change is that it is implemented in the total black color unlike the brown color and that the anti-vibration pads are colorful for the color coordination with the build’s overall color scheme. The specifications of the fan are as under: –

The NF-A14 is one of Noctua’s most renowned and popular 140mm fans. Its square frame makes it ideal for use on water cooling radiators or as a case fan. The chromax.black.swap edition combines the NF-A14’s signature quiet cooling performance with an attractive all-black design and a bundle of swappable red, white, blue, green, yellow and black anti-vibration pads that allow the colour-customisation of the fan to match individual build colour schemes. For further customisation, a wide range of accessories such as coloured cables, additional anti-vibration pads, and anti-vibration mounts are available separately. Topped off with Noctua’s trusted premium-grade SSO2 bearing, more than 150,000 hours MTTF and 6-year manufacturer’s warranty, the NF-A14 PWM chromax.black.swap is the perfect choice for all users who value the individual, focused build aesthetics just as much as class-leading quality and performance.

This picture will sum it up on the color coordination. To demonstrate the purpose, I’ve used 4 different anti-vibration pads and remove the NA-SEC1 black cable from the fan to show its modular aspect. You will see more of the fan’s pictures in multiple color possibilities later in the review.

As the fan is the same as the brown colored NF-A14, we did not measure the performance but focused on the aesthetics aspect after all this is the main crux of this content.
Item: NF-F12 PWM Chromax.black.swap
Manufacturer: Noctua
Price: EUR 22.90/USD 22.90
The fan comes in the Noctua’s Chromax series color scheme on the packing box. On the front side, the CHROMAX is printed in raised and bold font on the mid section’s bottom. Note the letter O’s middle. It is filled in multiple colors highlighting the new colored approach taken by the Noctua. The complete model of the fan is printed under the Chromax. On the top left side, Noctua Premium Fan with the dimension of 120 x 120 x 25mm is printed. To highlight the colors effect, Swappable Anti-Vibration Pads in 6 colours is printed under the main line. The fan’s diagram is printed under that and there are 6 square boxes on the left side of the fan diagram each with a different color. The Noctua’ brand logo is printed on the far right side.

The specifications of the fan are printed on the backside. The EAN and the UPC labels are printed on the bottom right side. The fan is made in China and carries the Noctua’s 6 years warranty. The left, right and far back side of the packing box is done in brown color with the Chromax and the fan’s model printed on them. The front side is in black color.

Let’s open the box and see all the magic that the Noctua has done. There is a black color container inside the main packing box. On the center, we have the fan itself nicely tucked inside. On the right side, we can see 6 anti-vibration pads in different colors. Notice that the fan does not have any pad out of the box pre-installed. The idea is that user will decide which ones to use depending upon the build’s color scheme.

The backside of the black color container has the power cable (NA-SEC1) in black color placed around. There is another box placed there. It is the Chromax anti-vibration pads container box. It has all the anti-vibration pads placed inside. The total count of each color supplied with the NF-F12 is 4 pads. There is a plastic container of the M3 screws inside as well.
This is essentially the same fan as we have seen earlier with the brown color NF-F12. It carries the same specifications. The only change is that it is implemented in the total black color unlike the brown color and that the anti-vibration pads are colorful for the color coordinate with the build’s overall color scheme. The specifications of the fan are as under: –

The NF-F12 is one of Noctua’s most renowned and popular 120mm fans. Its outstanding static pressure performance and the FocusedFlow™ frame make it ideal for use on heatsinks and radiators. The chromax.black.swap edition combines the NF-F12’s signature quiet cooling performance with an attractive all-black design and a bundle of swappable red, white, blue, green, yellow and black anti-vibration pads that allow the colour-customisation of the fan to match individual build colour schemes. For further customisation, a wide range of accessories such as coloured cables, additional anti-vibration pads and anti-vibration mounts are available separately. Topped off with Noctua’s trusted premium-grade SSO2 bearing, more than 150,000 hours MTTF and 6-year manufacturer’s warranty, the NF-F12 PWM chromax.black.swap is the perfect choice for all users who value the individual, focused build aesthetics just as much as class-leading quality and performance.

This picture will sum it up on the color coordination. To demonstrate the purpose, I’ve used 4 different anti-vibration pads and remove the NA-SEC1 black cable from the fan to show its modular aspect. You will see more of the fan’s pictures in multiple color possibilities later in the review.

As the fan is the same as the brown colored NF-F12, we did not measure the performance but focused on the aesthetics aspect after all this is the main crux of this content.
Item: NF-S12A PWM Chromax.black.swap
Manufacturer: Noctua
Price: EUR 22.90/USD 22.90
The fan comes in the Noctua’s Chromax series color scheme on the packing box. On the front side, the CHROMAX is printed in raised and bold font on the mid section’s bottom. Note the letter O’s middle. It is filled in multiple colors highlighting the new colored approach taken by the Noctua. The complete model of the fan is printed under the Chromax. On the top left side, Noctua Premium Fan with the dimension of 120 x 120 x 25mm is printed. To highlight the colors effect, Swappable Anti-Vibration Pads in 6 colours is printed under the main line. The fan’s diagram is printed under that and there are 6 square boxes on the left side of the fan diagram each with a different color. The Noctua’ brand logo is printed on the far right side.

The specifications of the fan are printed on the backside. The EAN and the UPC labels are printed on the bottom right side. The fan is made in China and carries the Noctua’s 6 years warranty. The left, right and far back side of the packing box is done in brown color with the Chromax and the fan’s model printed on them. The front side is in black color.

Let’s open the box and see all the magic that the Noctua has done. There is a black color container inside the main packing box. On the center, we have the fan itself nicely tucked inside. On the right side, we can see 6 anti-vibration pads in different colors. Notice that the fan does not have any pad out of the box pre-installed. The idea is that user will decide which ones to use depending upon the build’s color scheme.

The backside of the black color container has the power cable (NA-SEC1) in black color placed around. There is another box placed there. It is the Chromax anti-vibration pads container box. It has all the anti-vibration pads placed inside. The total count of each color supplied with the NF-S12A is 4 pads. There is a plastic container of the M3 screws inside as well.
This is essentially the same fan as we have seen earlier with the brown color NF-S12A. It carries the same specifications. The only change is that it is implemented in the total black color unlike the brown color and that the anti-vibration pads are colorful for the color coordination with the build’s overall color scheme. The specifications of the fan are as under: –

The NF-S12A is one of Noctua’s most renowned and popular 120mm fans. Its outstanding airflow efficiency and superb acoustics make it ideal for case cooling and other low-impedance applications. The chromax.black.swap edition combines the NF-S12A’s signature quiet cooling performance with an attractive all-black design and a bundle of swappable red, white, blue, green, yellow and black anti-vibration pads that allow the colour-customisation of the fan to match individual build colour schemes. For further customisation, a wide range of accessories such as coloured cables, additional anti-vibration pads, and anti-vibration mounts are available separately. Topped off with Noctua’s trusted premium-grade SSO2 bearing, more than 150,000 hours MTTF and 6-year manufacturer’s warranty, the NF-S12A PWM chromax.black.swap is the perfect choice for all users who value the individual, focused build aesthetics just as much as class-leading quality and performance.

This picture will sum it up on the color coordination. To demonstrate the purpose, I’ve used 4 different anti-vibration pads and remove the NA-SEC1 black cable from the fan to show its modular aspect. You will see more of the fan’s pictures in multiple color possibilities later in the review.

As the fan is the same as the brown colored NF-S12A, we did not measure the performance but focused on the aesthetics aspect after all this is the main crux of this content.
Item: NA-HC2 Chromax.black
Manufacturer: Noctua
Price: EUR 19.90/USD 19.90
This accessory is the heatsink cover, something which the users have been asking for quite some time. This heatsink cover is compatible with the Noctua NH-U12S, NH-U12S TR4-SP3, NH-U12S SE-AM4 coolers. Let’s take a look at it.
The cover comes in a Chromax edition color scheme. The top side of the box has the Chromax printed in the raised and bold font style. The letter O has multiple colors in the middle signifying the colored approach taken by the Noctua. The bottom section is fully printed in the black color background. The cover’s model is printed here. On the top side, we have the compatibility info of the cover with the Noctua’s existing coolers. There is a diagram of the top side of the cover. The Noctua brand logo is on the far right end of the box.

The backside has the EAN and the UPC labels on the bottom right side. The covers are made in Taiwan and they carry 6 years of warranty. The picture of the heatsinks with the covers is on the left side section. The left, right and the far backsides have the red colored background with the cover’s model and the Chromax printed on them. The front side is in black color with the word Chromax printed in the white color font.

Opening the box would reveal rather the simple contents. There is a white color holder inside the box. The cover is tucked inside it. There is a silver color steel clip coded NA-HCC1. This is used to mount the cover’s base with the heatsink. It will be covered in detail later. Under the white color holder, the manual is placed. The manual is thorough and clearly laid out to help the users with the installation process.


Let’s take a look at the cover itself. It is made of Aluminum with powder coating finish in the black color which really adds to the overall look and feel of the cover. On the top side, there is CHROMAX By Noctua printed in the white color. The sides of the cover have cutout arrow indicators on the bottom side of each. Each inner side has rubber mount to avoid any scratch when the cover is placed on the heatsink.

Let’s take a look at the underside of the cover. There is plastic fixture labeled NA-HCF1 which is pre-installed inside the cover. It can be easily taken out by pulling it out. One can easily see two silver color magnets on both ends of this fixture. The inside of the cover has two metal bars which make contact with the fixture. The steel clip has an angular shape on one of its sides while the other side is flat.


Installation
Since I don’t have NH-U12, I will stick with the installation from the NH-D15 as the process is totally identical. First, take out the fixture from within the cover by pulling it out. The Noctua has inserted plastic wrapper for the first time. Just grab the wrapper and pulled it out.
Now, put the fixture on the topside of the heatsink by aligning the top of the heat pipes coming out of the heatsink with the holes in the fixture. It should sit on top just like that. Now, to have it fixed with the heatsink, take out the steel clip and place its angular side underneath the second fin of the heatsink. Its flat side should be aligning with the center groove of the fixture. Slide the clip in with a bit of the force and it will firmly attach the fixture to the heatsink. Now, install the fan. It is important that you install the fan(s) first. Now place the cover on the top side of the heatsink. It should snap in on the fixture. This would complete the installation.


Clearance
The cover increases the height of the heatsink by 6mm (from 158 to 164mm) and the total width by 3mm (from 125mm to 128mm). Please make sure that your case offers sufficient clearance and that the cover doesn’t make contact with any other components such as PCIe cards.
This is a simple, convenient yet effective manner of adding customization to the cooler. Note that this is a black color only and it will add more of a stealth look to the cooler making it a go with the majority of the color scheme builds.
Item: NA-HC2 Chromax.white
Manufacturer: Noctua
Price: EUR 19.90/USD 19.90
This accessory is the heatsink cover, something which the users have been asking for quite some time. This heatsink cover is compatible with the Noctua NH-U12S, NH-U12S TR4-SP3, NH-U12S SE-AM4 coolers. Let’s take a look at it.
The cover comes in a Chromax edition color scheme. The top side of the box has the Chromax printed in the raised and bold font style. The letter O has multiple colors in the middle signifying the colored approach taken by the Noctua. The bottom section is fully printed in the black color background. The cover’s model is printed here. On the top side, we have the compatibility info of the cover with the Noctua’s existing coolers. There is a diagram of the top side of the cover. The Noctua brand logo is on the far right end of the box.

The backside has the EAN and the UPC labels on the bottom right side. The covers are made in Taiwan and they carry 6 years of warranty. The picture of the heatsinks with the covers is on the left side section. The left, right and the far backsides have the red colored background with the cover’s model and the Chromax printed on them. The front side is in black color with the word Chromax printed in the white color font.

Opening the box would reveal rather the simple contents. There is a white color holder inside the box. The cover is tucked inside it. There is a silver color steel clip coded NA-HCC1. This is used to mount the cover’s base with the heatsink. It will be covered in detail later. Under the white color holder, the manual is placed. The manual is thorough and clearly laid out to help the users with the installation process.


Let’s take a look at the cover itself. It is made of Aluminum with powder coating finish in the shining white color which really adds to the overall look and feel of the cover. On the top side, there is CHROMAX By Noctua printed in the black color. The sides of the cover have cutout arrow indicators on the bottom side of each. Each inner side has rubber mount to avoid any scratch when the cover is placed on the heatsink.

Let’s take a look at the underside of the cover. There is plastic fixture labeled NA-HCF1 which is pre-installed inside the cover. It can be easily taken out by pulling it out. One can easily see two silver color magnets on both ends of this fixture. The inside of the cover has two metal bars which make contact with the fixture. The steel clip has an angular shape on one of its sides while the other side is flat.

Installation
Since I don’t have NH-U12, I will stick with the installation from the NH-D15 as the process is totally identical. First, take out the fixture from within the cover by pulling it out. The Noctua has inserted plastic wrapper for the first time. Just grab the wrapper and pulled it out.
Now, put the fixture on the topside of the heatsink by aligning the top of the heat pipes coming out of the heatsink with the holes in the fixture. It should sit on top just like that. Now, to have it fixed with the heatsink, take out the steel clip and place its angular side underneath the second fin of the heatsink. Its flat side should be aligning with the center groove of the fixture. Slide the clip in with a bit of the force and it will firmly attach the fixture to the heatsink. Now, install the fan. It is important that you install the fan(s) first. Now place the cover on the top side of the heatsink. It should snap in on the fixture. This would complete the installation. Please, see the pictures in the NA-HC2 Chromax.Black section for understanding or use the manual.
Clearance
The cover increases the height of the heatsink by 6mm (from 158 to 164mm) and the total width by 3mm (from 125mm to 128mm). Please make sure that your case offers sufficient clearance and that the cover doesn’t make contact with any other components such as PCIe cards.
This is a simple, convenient yet effective manner of adding customization to the cooler. Note that this is a white color only and is best suited to the white color builds though not restricted to white color builds only.
Item: NA-HC1 Chromax.black.swap
Manufacturer: Noctua
Price: EUR 19.90/USD 19.90
This accessory is the heatsink cover, something which the users have been asking for quite some time. This heatsink cover is compatible with the Noctua NH-U12S, NH-U12S TR4-SP3, NH-U12S SE-AM4 coolers. It is different than the above two described as it has inlays for different color configurations. Let’s take a look at it.
The cover comes in a Chromax edition color scheme. The top side of the box has the Chromax printed in the raised and bold font style. The letter O has multiple colors in the middle signifying the colored approach taken by the Noctua. The bottom section is fully printed in the black color background. The cover’s model is printed here. On the top side, we have the compatibility info of the cover with the Noctua’s existing coolers. There is a diagram of the top side of the cover with colorful square boxes underneath it. The Noctua brand logo is on the far right end of the box.

The backside has the EAN and the UPC labels on the bottom right side. The covers are made in Taiwan and they carry 6 years of warranty. The picture of the heatsinks with the covers is on the left side section. The left, right and the far backsides have the red colored background with the cover’s model and the Chromax printed on them. The front side is in black color with the word Chromax printed in the white color font.

Opening the box would reveal the contents. There is a white color holder inside the box. There are two white color holder boxes inside. The central one has the 3 inlays tucked inside. This central box is placed inside the main bottom white color holder onto which the cover is placed and the steel clip (NA-HCC1) is inserted. This is used to mount the cover’s base with the heatsink. It will be covered in detail later. Under the white color holder, the manual is placed. The manual is thorough and clearly laid out to help the users with the installation process.


There are total 3 inlays with each one having two different colors. Colors are Red, Green, Blue, White, Black, and the Yellow. They have protective films on top of each side which user has to remove before installing them.

Let’s take a look at the cover itself. It is made of Aluminum with powder coating finish in the black color which really adds to the overall look and feel of the cover. On the top side, there is CHROMAX By Noctua printed in the black color. The top side has arrow marked cutouts in the mainframe. The size of each cutout increase from bottom side going up. The top cutout is facing towards the Chromax printed text. These cutouts will show the color of the inlays to give that particular color effect. The sides of the cover have cutout arrow indicators on the bottom side of each. Each inner side has rubber mount to avoid any scratch when the cover is placed on the heatsink.


Let’s take a look at the underside of the cover. There is plastic fixture labeled NA-HCF1 which is pre-installed inside the cover. It can be easily taken out by pulling it out. One can easily see two silver color magnets on both ends of this fixture. The inside of the cover has two metal bars which make contact with the fixture. The steel clip has an angular shape on one of its sides while the other side is flat.

Installation
Since I don’t have NH-U12, I will stick with the installation from the NH-D15 as the process is totally identical. First, take out the fixture from within the cover by pulling it out. The Noctua has inserted plastic wrapper for the first time. Just grab the wrapper and pulled it out.
Now, put the fixture on the topside of the heatsink by aligning the top of the heat pipes coming out of the heatsink with the holes in the fixture. It should sit on top just like that. Now, to have it fixed with the heatsink, take out the steel clip and place its angular side underneath the second fin of the heatsink. Its flat side should be aligning with the center groove of the fixture. Slide the clip in with a bit of the force and it will firmly attach the fixture to the heatsink. Now, install the fan. It is important that you install the fan(s) first.

Place the desired color’s inlay inside the cover. Peel off the protective film. Now place the cover on the top side of the heatsink. It should snap in on the fixture. This would complete the installation. Please, see the pictures in the NA-HC2 Chromax.Black section for understanding or use the manual.

Clearance
The cover increases the height of the heatsink by 6mm (from 158 to 164mm) and the total width by 3mm (from 125mm to 128mm). Please make sure that your case offers sufficient clearance and that the cover doesn’t make contact with any other components such as PCIe cards.
This is a simple, convenient yet effective manner of adding customization to the cooler. Going that route the Noctua has enabled the users to buy one parcel and get possibilities of color coordinating the build’s theme for upto 6 colors.
The next three Chromax covers are for the Noctua NH-D15 variants. As all the variants of the NH-D15 are dual tower so expect dual covers in each of the parcels. It follows the same pattern as we have seen above with the covers for the NH-U12. Let’s take a look at these, one by one.
Item: NA-HC4 Chromax.black
Manufacturer: Noctua
Price: EUR 29.90/USD 29.90
This accessory is the heatsink cover, something which the users have been asking for quite some time. This heatsink cover is compatible with the Noctua NH-D15, NH-D15S, NH-D15 SE-AM4 coolers. Let’s take a look at it.
The cover comes in a Chromax edition color scheme. The top side of the box has the Chromax printed in the raised and bold font style. The letter O has multiple colors in the middle signifying the colored approach taken by the Noctua. The bottom section is fully printed in the black color background. The cover’s model is printed here. On the top side, we have the compatibility info of the cover with the Noctua’s existing coolers. There is a diagram of the top side of the cover. The Noctua brand logo is on the far right end of the box.

The backside has the EAN and the UPC labels on the bottom right side. The covers are made in Taiwan and they carry 6 years of warranty. The picture of the heatsinks with the covers is on the left side section. The left, right and the far backsides have the red colored background with the cover’s model and the Chromax printed on them. The front side is in black color with the word Chromax printed in the white color font.


Opening the box would reveal rather the simple contents. There is a white color holder inside the box. Both the covers are tucked inside it. There are two silver color steel clips coded NA-HCC1. These are used to mount the covers’ base with the heatsink. It will be covered in detail later. Under the white color holder, the manual is placed. The manual is thorough and clearly laid out to help the users with the installation process.


Let’s take a look at the covers. They are made of Aluminum with powder coating finish in the black color which really adds to the overall look and feel of the cover. On the top side, there is CHROMAX By Noctua printed in the white color. The sides of the cover have cutout arrow indicators on the bottom side of each. Each inner side has rubber mount to avoid any scratch when the cover is placed on the heatsink.

Let’s take a look at the underside of the cover. There is plastic fixture labeled NA-HCF2 which is pre-installed inside the cover. It can be easily taken out by pulling it out. One can easily see two silver color magnets on both ends of this fixture. The inside of the cover has two metal bars which make contact with the fixture. The steel clip has an angular shape on one of its sides while the other side is flat.

Installation
Luckily, I have got the NH-D15 which Noctua sent me for the review earlier. These covers were put on the NH-D15 to check them out. Take out the fixture from the covers. Put the fixture on the topside of the heatsinks by aligning the top of the heat pipes coming out of the heatsink with the holes in the fixture. It should sit on top just like that. Now, to have them fixed with the heatsinks, take out the steel clips and place their angular side underneath the second fin of the heatsinks. Their flat sides should be aligned with the center groove of the fixture. Slide the clips in with a bit of the force and it will firmly attach the fixtures to the heatsinks. Now, install the fan(s). It is important that you install the fan(s) first. Now place the cover on the top side of the heatsink. These should snap in on the fixture. This would complete the installation.

Clearance
The covers increase the height of the heatsink by 5mm (from 160 to 165mm) and the width by 3mm (from 150mm to 153mm). Please make sure that your case offers sufficient clearance and that the covers don’t make contact with any other components such as PCIe cards.
This is a simple, convenient yet effective manner of adding customization to the cooler. Note that this is a black color only and it will add more of a stealth look to the cooler making it a go with the majority of the color scheme builds.
Item: NA-HC4 Chromax.white
Manufacturer: Noctua
Price: EUR 29.90/USD 29.90
This accessory is the heatsink cover, something which the users have been asking for quite some time. This heatsink cover is compatible with the Noctua NH-D15, NH-D15S, NH-D15 SE-AM4 coolers. Let’s take a look at it.
The cover comes in a Chromax edition color scheme. The top side of the box has the Chromax printed in the raised and bold font style. The letter O has multiple colors in the middle signifying the colored approach taken by the Noctua. The bottom section is fully printed in the black color background. The cover’s model is printed here. On the top side, we have the compatibility info of the cover with the Noctua’s existing coolers. There is a diagram of the top side of the cover. The Noctua brand logo is on the far right end of the box.

The backside has the EAN and the UPC labels on the bottom right side. The covers are made in Taiwan and they carry 6 years of warranty. The picture of the heatsinks with the covers is on the left side section. The left, right and the far backsides have the red colored background with the cover’s model and the Chromax printed on them. The front side is in black color with the word Chromax printed in the white color font.

Opening the box would reveal rather the simple contents. There is a white color holder inside the box. Both the covers are tucked inside it. There are two silver color steel clips coded NA-HCC1. These are used to mount the covers’ base with the heatsink. It will be covered in detail later. Under the white color holder, the manual is placed. The manual is thorough and clearly laid out to help the users with the installation process.


Let’s take a look at the covers. They are made of Aluminum with powder coating finish in the white color which really adds to the overall look and feel of the cover. On the top side, there is CHROMAX By Noctua printed in the black color. The sides of the cover have cutout arrow indicators on the bottom side of each. Each inner side has rubber mount to avoid any scratch when the cover is placed on the heatsink.

Let’s take a look at the underside of the cover. There is plastic fixture labelled NA-HCF2 which is pre-installed inside the cover. It can be easily taken out by pulling it out. One can easily see two silver color magnets on both ends of this fixture. The inside of the cover has two metal bars which make contact with the fixture. The steel clip has an angular shape on one of its sides while the other side is flat.

Installation
Luckily, I have got the NH-D15 which the Noctua sent me for the review earlier. These covers were put on the NH-D15 to check them out. Take out the fixture from the covers. Put the fixture on the topside of the heatsinks by aligning the top of the heat pipes coming out of the heatsink with the holes in the fixture. It should sit on top just like that. Now, to have them fixed with the heatsinks, take out the steel clips and place their angular side underneath the second fin of the heatsinks. Their flat sides should be aligned with the center groove of the fixture. Slide the clips in with a bit of the force and it will firmly attach the fixtures to the heatsinks. Now, install the fan(s). It is important that you install the fan(s) first. Now place the cover on the top side of the heatsink. These should snap in on the fixture. This would complete the installation.

Clearance
The covers increase the height of the heatsink by 5mm (from 160 to 165mm) and the width by 3mm (from 150mm to 153mm). Please make sure that your case offers sufficient clearance and that the covers don’t make contact with any other components such as PCIe cards.
This is a simple, convenient yet effective manner of adding customization to the cooler. Note that these are a white color only covers and better suitable for white color builds though not restricted to white only builds.
Item: NA-HC3 Chromax.black.swap
Manufacturer: Noctua
Price: EUR 29.90/USD 29.90
This accessory is the heatsink cover, something which the users have been asking for quite some time. These heatsink covers are compatible with the Noctua NH-D15, NH-D15S, and NH-D15 SE-AM4 coolers. It is different than the above two described as it has inlays for different color configurations. Let’s take a look at it.
The covers come in a Chromax edition color scheme. The top side of the box has the Chromax printed in the raised and bold font style. The letter O has multiple colors in the middle signifying the colored approach taken by the Noctua. The bottom section is fully printed in the black color background. The cover’s model is printed here. On the top side, we have the compatibility info of the cover with the Noctua’s existing coolers. There is a diagram of the top side of the cover. The Noctua brand logo is on the far right end of the box.

The backside has the EAN and the UPC labels on the bottom right side. The covers are made in Taiwan and they carry 6 years of warranty. The picture of the heatsinks with the covers is on the left side section. The left, right and the far backsides have the red colored background with the cover’s model and the Chromax printed on them. The front side is in black color with the word Chromax printed in the white color font.

Opening the box would reveal the contents. There is a white color holder inside the box. There are two white color holder boxes inside. The central one has the 6 inlays tucked inside. This central box is placed inside the main bottom white color holder onto which the covers are placed and the steel clip (NA-HCC1) are inserted. These are used to mount the covers’ base with the heatsink. It will be covered in detail later. Under the white color holder, the manual is placed. The manual is thorough and clearly laid out to help the users with the installation process.


There are total 6 inlays with each one having two different colors. Colors are Red, Green, Blue, White, Black, and the Yellow. They have protective films on top of each side which user has to remove before installing them. These are 6 because there are two heatsinks to be covered on the NH-D15 series.
Let’s take a look at the covers. They are made of Aluminum with powder coating finish in the black color which really adds to the overall look and feel of the cover. On the top side, there is CHROMAX By Noctua printed in the black color. The top side has arrow marked cutouts in the mainframe. The size of each cutout increase from bottom side going up. The top cutout is facing towards the Chromax printed text. These cutouts will show the color of the inlays to give that particular color effect. The sides of the cover have cutout arrow indicators on the bottom side of each. Each inner side has rubber mount to avoid any scratch when the cover is placed on the heatsink.

Let’s take a look at the underside of the covers. There are plastic fixtures labeled NA-HCF2 which is pre-installed inside the covers. They can be easily taken out by pulling them out. One can easily see two silver color magnets on both ends of the fixture. The inside of the cover has two metal bars which make contact with the fixture. The steel clip has an angular shape on one of its sides while the other side is flat.

Installation
Luckily, I have got the NH-D15 which the Noctua sent me for the review earlier. These covers were put on the NH-D15 to check them out. Take out the fixture from the covers. Put the fixture on the topside of the heatsinks by aligning the top of the heat pipes coming out of the heatsink with the holes in the fixture. It should sit on top just like that. Now, to have them fixed with the heatsinks, take out the steel clips and place their angular side underneath the second fin of the heatsinks. Their flat sides should be aligned with the center groove of the fixture. Slide the clips in with a bit of the force and it will firmly attach the fixtures with the heatsinks. Now, install the fan(s). It is important that you install the fan(s) first.
Place the desired color’s inlay inside the cover. Peel off the protective film. Now place the cover on the top side of the heatsink. It should snap in on the fixture. This would complete the installation. Please, see the pictures in the NA-HC2 Chromax.Black section for better understanding or use the manual.
This picture will show what it is meant to be using these Chromax add-ons with the Noctua’s coolers. One can color customize the heatsink covers, fans, fans cables, y-splitter cables to their particular taste or situation’s requirement.

Clearance
The covers increase the height of the heatsink by 5mm (from 160 to 165mm) and the width by 3mm (from 150mm to 153mm). Please make sure that your case offers sufficient clearance and that the covers don’t make contact with any other components such as PCIe cards.
This is a simple, convenient yet effective manner of adding customization to the cooler. Going that route the Noctua has enabled the users to buy one parcel and get possibilities of color coordinating the build’s theme for upto 6 colors.
This picture would come handy for ready comparison and compatibility of the Chromax covers.

Conclusion
These are the golden words from the Noctua’s CEO, “Noctua is an engineering-driven company: we pride ourselves on relentlessly tuning our products for maximum performance and quality rather than putting form before function, but of course we understand that many customers put an emphasis on build aesthetics these days. With the new chromax line fans, cables and heatsink covers, we now offer a range of products that are ideal for those who care about looks just as much as about quality and performance.”
These statements have summed up pretty well what Noctua has done with their recently released Chromax accessories. For quite some time, users have been complaining that the Noctua’s coolers bear too much industrial design on them and the use of brown color on the fans was restricted as well. With the trend of the color customization and colored theme builds, many competitors started offering customization for their coolers. Phanteks has black/red etc color heatsink cooler. Similarly, the Cryorig are adding aggressive looks on their R1 Ultimate and Universal coolers with the help of the colorful accessories.
If anything else, users would want the performance of Noctua but aesthetics of like Cryorig’s. Finally, The Noctua has answered to all these queries/feedback and has released their new Chromax accessories addressing exactly these requirements. We are merely talking about the form, not the function. Don’t worry, the products are from Noctua – suffice to say.
Now, the users have options to color customize their fans with new NA-SEC1 power cables available in red, green, blue, black, white and the yellow colors. These are 30CM length cables and to make life easier, Noctua has bundled four cables in a pack. Similarly, the NA-SYC1 are the y-splitter cables available in same red, green, blue, black, white and the yellow colors. These are 13CM length cables. Each pack has 3 of these cables which is a plus and justifies the price.
We’ve 4 fans in the Chromax lineup. These are:-
- NF-A15 HS-PWM chromax.black.swap
- NF-A14 PWM chromax.black.swap
- NF-F12 PWM chromax.black.swap
- NF-S12A PWM chromax.black.swap
Please note that these are not new fans but simply black color versions of their predecessors which are still available but in brown color. These fans are implemented in the total black color and for color customization, the Noctua has supplied 6 colors anti-vibration pads in each pack. Surprisingly, all fans other than the NF-A15 have only 4 pads in each color whereas the fan has 8 mounting positions. Seems like, the Noctua would want their users to spend more on the anti-vibration pads labeled NA-SAVP1. In my opinion, Noctua should have provided set of 8 pads per color with each fan much like the NF-A15. Users can color customize these fans using the anti-vibration pads in desired color(s). Not only that but these fans are modular in a sense that they have a short power cable coming out of the fan. The idea is to connect the fan to the power source with the help of the NA-SEC1 cables in the desired color. Don’t worry, they have provided NA-SEC1 chromax black with each fan.
Now comes the main breakthrough point for the form factor. The Noctua has provided the covers for their NH-U12 and its variants; NH-D15 and its variants coolers. These covers are made of aluminum with powder coating finish which speaks for itself. The quality on them is top notch. The mounting mechanism is simple and effective. The Noctua has provided an option for the user to buy either black or white color covers or taking the idea one step further, buy the Chromax.black.swap with colorful inlays. This chromax accessory enables the users to color customize their heatsink with their desire color combination. Now, add fan(s) customization with the heatsink customization and we have one splendid looking, aesthetically pleasant yet with the same performance packed cooler from the Noctua. All of these accessories carry the Noctua’s 6 years warranty.
Value and Performance
The price of each Chromax Add-On is as follow
- NF-A15 HS-PWM chromax.black.swap: EUR 26.90/USD 26.90
- NF-A14 PWM chromax.black.swap: EUR 24.90/USD 24.90
- NF-F12 PWM chromax.black.swap: EUR 22.90/USD 22.90
- NF-S12A PWM chromax.black.swap: EUR 22.90/USD 22.90
- NA-HC1 chromax.black.swap: EUR 19.90/USD 19.90
- NA-HC2 chromax.black: EUR 19.90/USD 19.90
- NA-HC2 chromax.white: EUR 19.90/USD 19.90
- NA-HC3 chromax.black.swap: EUR 29.90/USD 29.90
- NA-HC4 chromax.black: EUR 29.90/USD 29.90
- NA-HC4 chromax.white: EUR 29.90/USD 29.90
- NA-SEC1 chromax.black: EUR 9.90/USD 9.90
- NA-SEC1 chromax.blue: EUR 9.90/USD 9.90
- NA-SEC1 chromax.green: EUR 9.90/USD 9.90
- NA-SEC1 chromax.red: EUR 9.90/USD 9.90
- NA-SEC1 chromax.white: EUR 9.90/USD 9.90
- NA-SEC1 chromax.yellow: EUR 9.90/USD 9.90
- NA-SYC1 chromax.black: EUR 9.90/USD 9.90
- NA-SYC1 chromax.blue: EUR 9.90/USD 9.90
- NA-SYC1 chromax.green: EUR 9.90/USD 9.90
- NA-SYC1 chromax.red: EUR 9.90/USD 9.90
- NA-SYC1 chromax.white: EUR 9.90/USD 9.90
- NA-SYC1 chromax.yellow: EUR 9.90/USD 9.90
This level of customization is definitely expensive but it is worth it. Particularly for those who want to stick with the air cooler or even would want to use Chromax line of the fans and cables on the radiators for color customization.
When it comes to the air coolers, the debate is on. Form over function or vice-versa. With the recent trends in the market there is a new definition which is Form with Function and this is where the Noctua has turned the table around for their coolers with their new Chromax add-ons which have allowed the users to color customize their fans, color customize their heatsinks to the extent that even the fan extension cables and the y-splitter cables are available in 6 colors for this level of the customization. The quality is top notch and why would it not be. After all, they are coming from the Noctua.
With this level of the color customization, Noctua has turned their coolers and the fans all around and do we not love it, already! There is no surprise that Noctua Chromax lineup has won our Must Have award.

I am thankful to the Noctua for providing the Chromax line up of their accessories for the review.


