


PCCOOLER CPS C3 T500 ARGB PC Case Review
Introduction
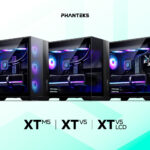
PCCOOLER is not a new name anymore and does not need an introduction. I have been testing their cooling products for some time now. Recently, the manufacturer announced CPS that is a new brand from PCCOOLER that will carry high-end, high-performance products from PCCOOLER. If you are getting confused by this branding then take it as ROG Strix from ASUS, AORUS from GIGABYTE for example. PCCOOLER is first releasing three products in this series which are C3 T500 ARGB mid-tower case, DE 360 liquid cooler and RZ620 air cooler.
I am taking a look at C3 T500 ARGB mid-tower case in this article followed by the coolers that will come in separate contents. The C3 T500 ARGB has a panoramic design that reminds me of Lian Li’s O11 design. It is a mid-tower case that can house up to an ATX-size motherboard and 360mm radiators. Let’s mention some salient features of this case including the back-plug motherboard support:
- This case supports Back-Plug Motherboards
- Supports mini-ITX, mATX, and ATX size motherboards
- Good cooling provision in terms of fan mounts and radiator support
- Comes with 6x 120mm ARGB fans
- 3x 120mm ARGB fans have reversed Blades for air inflow
- Comes with ARGB controller
- Column-Free design aka Panoramic View
- It has Snap-On, quick Release mechanism for the side panels
- Supports ATX PSU of size 200mm
- Supports air cooler up to 175mm in height
- Graphics Card support up to 400m in length
- 1 Drive Bay for 2x 3.5” drives or 2x 2.5” drives
This case carries USD 100 MSRP on its release. It can be purchased from Ali Express (Click here).
PCCOOLER CPS C3 T500 ARGB PC Case Specifications

Packaging and Unboxing

The case is shipped inside a standard cardboard box finished in a light brown color. C3 T500 ARGB is printed on the front end and there is a picture of the case above the text.

Specifications of the case are printed in tabular format on one side of the packing box. This is a white color edition. This case also comes in black color.

There are two thick white color Styrofoam pads sandwiching the case for safe shipping.
Accessories

There is not much in the accessory department. PCCOOLER has provided the following:
- Quick User Guide
- Motherboard Tray Standoffs
- Motherboard Screws
- PSU Screws
- HDD Cage Screws
Closer Look
PCCOLER statement about this case goes as follows. “The C3 T500 ARGB is an ATX case integrating aesthetic appeal with excellent performance. By exploring new installation solutions, it enables the rear mounting of motherboard. Equipped with double-sided full high-transmittance glass and column-free design and adopting new design language, it is compatible with graphics cards up to 400mm in length, including RTX 40 series and supports 360mm liquid cooling system and up to 9 fan mounting positions.”
The C3 T500 ARGB case has a dimension of 415x295x368mm (LxWxH). It is made of 0.7mm thick steel panel (SPCC) and 3mm thick glass. The weight of this case is 5.9Kg and it comes with a 2-year warranty from the PCCOOLER.

Exterior View
Let’s start with an exterior view of the chassis. I will show the front side first and then move on to the other views.

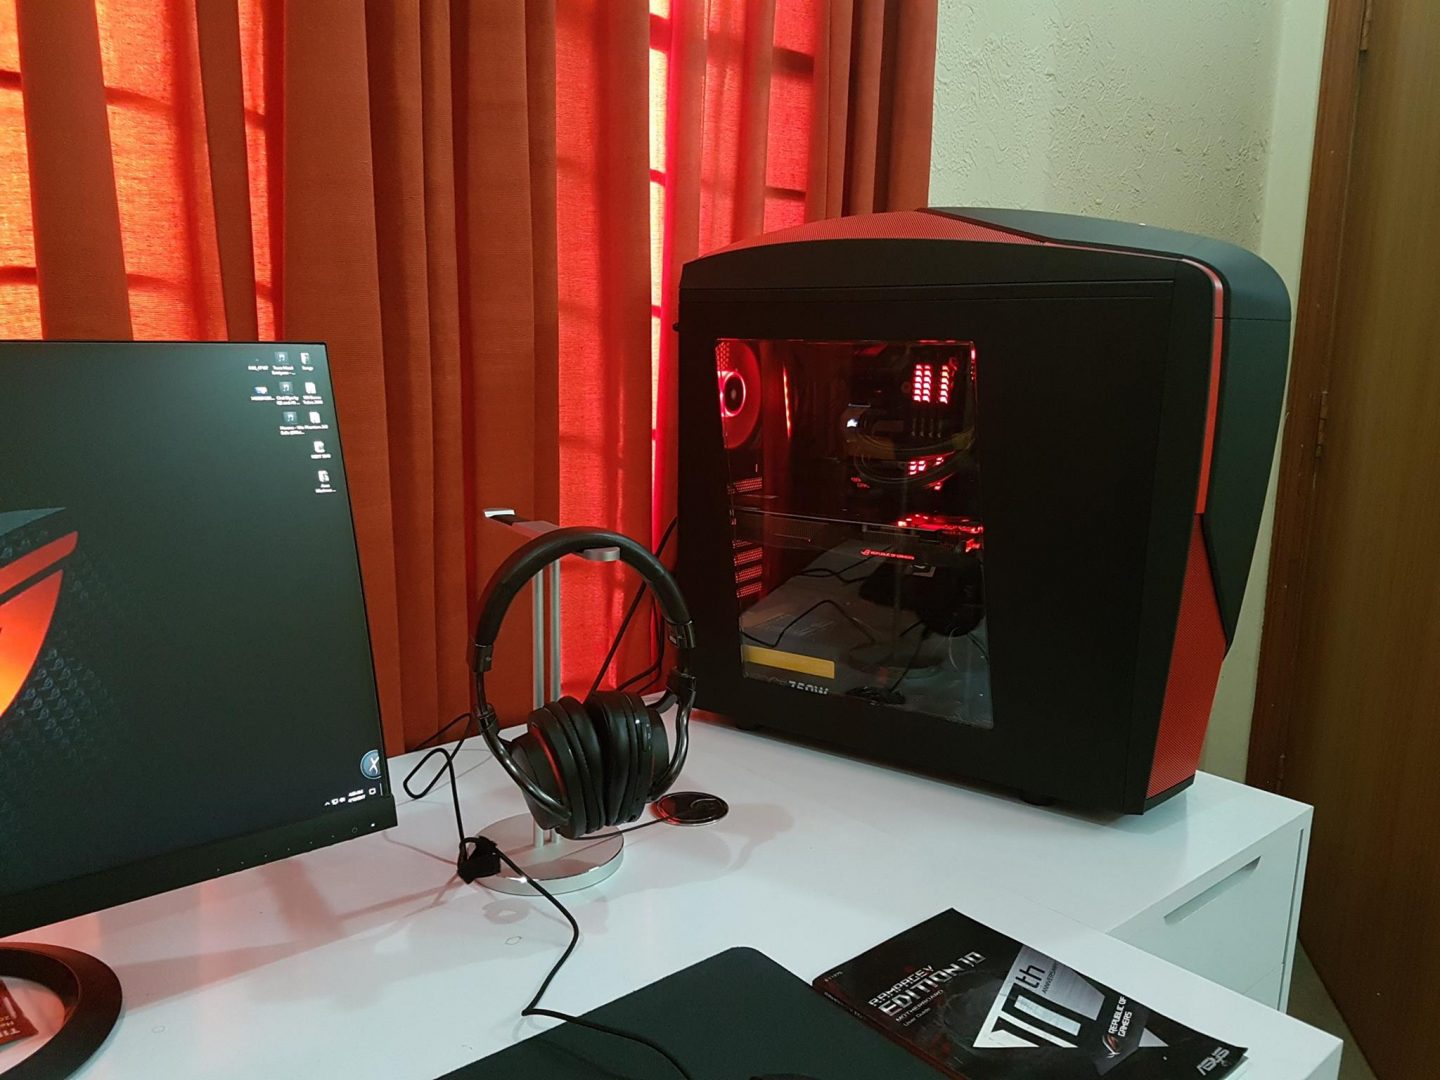
Looking at the front side of this case, we can spot a clear glass panel on the front side showing the complete build from this end. There is a textured steel panel towards the right of this glass panel. The CPS branding is engraved on the side solid panel. The complete assembly is in white spray coating. PCCOLER has done a good job of maintaining the color synchronization overall. The glass panel is fixed and not removable readily.

I am showing the top view of the C3 T500 ARGB PC Case. There is a white color magnetic dust filter on the top covering the fans/radiator mounts. The IO panel is installed on the top as well. The width of this case is 295mm which is quite large size but necessary for such designs where PSU and storage brackets are on the backside.

I am showing the fans/radiator mounts on the top of this case after removing the dust filter. The user can install:
- Up to 3x 120mm Fans or 2x 140mm Fans
- Up to 360mm Radiator including 280mm size
The cooling options are quite good for the top of this case.

The IO panel has the following ports:
- 1x USB 3.1 Gen2 Type-C port
- 2x USB 3.0 Ports
- Mic and Audio Port
- Power Button
- LED Switch Button
There is no reset button on this case. Basically, they have used the Reset button’s cable on the ARGB controller so that the user can use the Reset button label as an LED Switch Button to change the lighting effects.

I am showing a rear view of this case. It has a side-by-side two-chamber layout. Looking at the leftmost side, there is a mesh cover for the HDD cage. There is a standard ATX PSU cutout in the center and the bottom has a perforation for ventilation. The user can install a storage drive on the bay for which this perforation is provided.
There is a cutout for the motherboard Rear IO cover. There is a rail mount system for the 120mm and 140mm fan on the rear which is a wise design. The case comes with one 120mm ARGB fan preinstalled there. There are 6x PCIe slot covers that are reusable. There is a cover on these slots that has a thumb screw.

I am showing the bottom view of this case. There is also a magnetic dust filter on the fan mount. The provision of a magnetic dust filter is nice though I would have used the sliding dust filter for convenience mounting without any guess game. There are two large-size-foot panels that provide enough airlift towards the bottom of the case so that three 120mm fans can intake fresh air. There are cutouts in the feet panels through which the screwdriver is passed to access the screws of the fans. These feet have white color rubber pads.

Now you can see the bay view of this case from outside since I have removed the dust filter. The user can install:
- Up to 3x 120mm Fans or 2x 140mm Fans
- Up to 360mm Radiator including 280mm size
It is nice to see a provision of 2x 360mm size radiators in this case.

There are two lockers with pads on the inside. These are optional and secure the panels with the main housing for safe shipping. The panels uses Snap-On design for easy handling.
Interior View
It is about time to take a peek at the inside of this case.

The above picture shows the side panel. It is not tinted and it has a 3mm thickness. It is a see-through design that shows the complete build in its entirety. This panel is not hinged and has a Snap-On design with studs on top.

You can see four studs on the top frame of this glass panel. Two of these go inside the catcher mechanism provided in the main housing whereas the other two simply pop in the holes of the main housing. The bottom area has a catcher rail design that is placed over the bottom housing of the case and then the panel is closed from the top side.

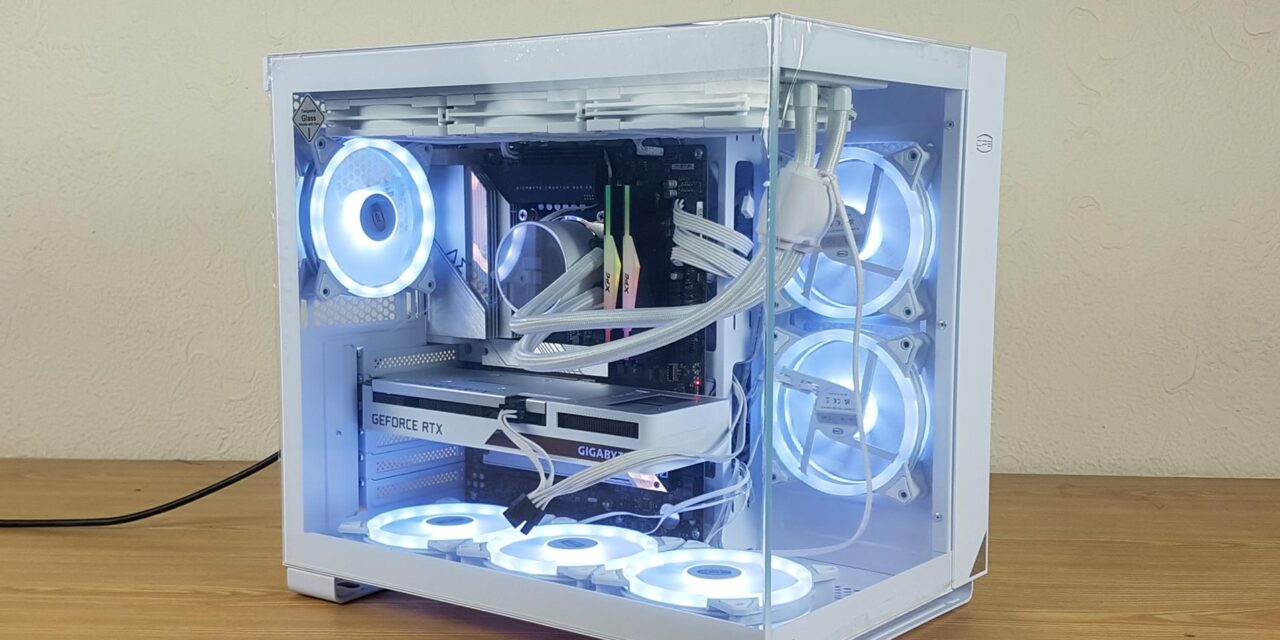
I have removed the side panel and shown a complete inside view of the case. This case has 6x 120mm ARGB fans. We can see that there are two on the side, three on the base, and one on the rear. Given that it is a panoramic view, this case can house up to 400mm long graphics cards. The CPU cooler of height 175mm is supported. Let’s take a closer look at each.

I am showing the 3x 120mm ARGB fans that are pre-installed on the bottom. There is no fan bracket that makes it convenient to remove or install these fans. I am saying this because you are required to remove at least two leftmost fans so that motherboard can be installed because these fans obstruct the 3x bottom standoffs. These fans have reversed blades. They are taking air inside the case from the bottom and still have the front view look.

The two fans on the side are exhausting the air out of the case towards the rear. This indicates that there is a perforated area on the side panel as well. Depending on the configuration, I would rather use these fans to draw air inside.

A similar fan is installed on the rear to exhaust the air out of this case. We can see that the PCIe slot covers sit flush with the frame of this case. Each fan has two flat white color cables. One has a 4-pin PWM connector and a socket whereas the other cable has standard ARGB connectors for daisy-chaining these fans. These fans are rated for 1000 RPM speed based on my testing.

I am showing the motherboard tray close-up. Remember that I mentioned the back-plug motherboard support earlier in this article? The back-plug design has the EPS connectors and 12V ATX connector installed on the backside of the motherboard. In order for a case to support this feature, the cutouts on or around the motherboard tray should be designed to facilitate this mounting. PCCOOLER has done a spectacular job in this department. The second row of top cutouts sits exactly behind the motherboard’s top area and the cutouts on the side also sit behind the motherboard so that the back-plug connectors can easily pass through these cutouts. For regular design motherboards, there are two cutouts on the top and cutouts on the side at 90ᵒ angle. The cutouts for the regular motherboard should have rubber grommets.
PCCOLER has installed only 4x standoffs and the user is required to install the other 5x standoffs so that a regular ATX-size motherboard can be installed. There is no socket wrench in the accessory box for that for that. There is a clearance of 58mm from the top of the case to the top of the motherboard which is quite good clearance. There is an offset clearance of 30mm from the top of the case to the side.

You would need to remove 4x screws from inside the case to remove the front panel.
It is now time to look at the backside of the case.

The side steel panel is made of 0.7mm thick steel. We can see two perforated areas. One faces the pre-installed 2x 120mm ARGB fans and the other faces the PSU mount. This is done for ventilation purposes. This panel also uses a Snap-On design.

There are two magnetic dust filters on the backside covering the perforated areas.

I have removed the magnetic dust filters and shown the inside view of the back panel.

Now you can see the backside of the C3 T500 ARGB case. We can see that the motherboard tray is offset to the side where the fans are installed. This is done to ensure maximum clearance and compatibility for the back-plug motherboard. There are large size cutouts facing the fan mounts for effective air ventilation. The motherboard tray has a large-size cutout to conveniently install the CPU Cooler.
There is a single HDD cage on the top. PCCOOLER has mentioned two cages but our sample came with a single cage. The bulk of cables are tied up on the base. We are dealing with a plethora of cables in this case. There are a total of 12 cables coming from the 6x fans and then the front IO panel’s cables come in to take this count up.

PCCOOLER has provided a SATA-powered ARGB and Fan hub controller. It has 6x standard interface (3-pin, 5V) headers for the ARGB LEDs. It also has 6x 4-pin PWM headers. All pre-installed 6x fans are to be installed on this controller. Since these fans can also be daisy-chained, you can connect more than 6x fans but I am not sure about the total power provision to handle more than 6 fans.

The reset cable connector is pre-installed on this controller. The 4-pin PWM connector is coming out that needs to be connected to a 4-pin PWM header on the motherboard. There is also a standard 3-pin connector cable coming out that optionally be connected to the motherboard.

The provided controller has self-adhesive pads for its installation. I would have preferred a magnetic installation. There are 4x mounting holes that show a provision to install a 2.5” drive on the base. We have ample space for the cable management which is needed given this bulk of cables to deal with. There are enough cable tie points for effective cable management on the back.

There is a single HDD cage provided in this case that can house a 3.5” or 2.5” drive. It is not a tool-less design.

I am showing the HD Audio and USB 3.0 connectors in the above picture. These are white in color as well.

The front panel connectors include a Power SW, and Power +/- LED connectors.

There is an E-Type USB Type-C connector for the front panel’s USB 3.1 Gen 2 Type-C port.
Installation
Following is the configuration used:
- Intel i7 12700k
- GIGABYTE Z690 AERO G DDR5
- GIGABYTE GeForce RTX 3060 VISION OC
- Thermalright Frozen Magic 360 Scenic V2
- XPG Lancer RGB 32GB @ 6000MHz DDR5 kit
- Sabrent Rocket Q 500GB NVMe SSD
- DeepCool DQ 750-M-V2L-White PSU


You would need to plan the layout of your build in this case first. Since the front side cable cutouts will be covered by the motherboard, you are to use the cutouts on the right side 90ᵒ cutouts on the motherboard tray. The bottom connectivity also has implications since there is no bottom cutout to route these cables. You will need to place these cables from under the motherboard PCB. The bottom fans are required to be removed to install the standoffs and motherboard itself which is why I would love to see a fan/radiator bracket on the bottom for easy removal or installation of the fans. To remove the motherboard, you would also need to remove the fans.
There is a slim holder bracket for the PSU on the backside and as such the PSU is supported by the main housing of the case using 4x screws. I would suggest PCCOOLER increase the length of the PSU bracket holder a bit for more strength. I would suggest the user route the cables first and then install the PSU. I also reversed the side fans so that they could take the air in instead of being exhausted. This would give us a positive pressure with only 3 to 4 120/140mm fans exhausting the air or you can use the speed control to maintain the positive pressure. Other than that, I did not record any observations.
Here are a few pictures of the build.


Thermal Testing
The test build configuration is already mentioned above. I have tested the fans at full speed on their 100% PWM cycle. The fans on the AIO were also set to run at their full speed. The graphics card was running at stock settings. I have Noctua NT-H1 thermal paste. The CPU was operating at 4.8GHz on all P-Cores and 3.8GHz on all E-Cores drawing 1.260V. The AIDA64 Extreme 6.35 was used to stress the CPU (using FPU) and the GPU at a time. The ambient temperature was between 22 to 23°C. Here are the results:

The thermals are self-explanatory. These are below 70ᵒC at full load stress test which shows a good airflow inside this case and leaves room for the user to run the AIO fans at less speed for a better noise output.
Conclusion
CPS C3 T500 ARGB is a new PC Case from PCCOOLER that is available in white and black colors. This case has a column-free, 270ᵒ panoramic view using two 3mm thick clear glass panels. The housing of this case is made of 0.7mm SPCC Cold-Rolled Steel for its metal frame giving this case extra rigidity and strength. The overall finish and paint job is satisfactory with some textured pattern giving a stylish outlook to the case increasing its appeal to the user. The C3 T500 ARGB case has a dimension of 415x295x368mm (LxWxH). The weight of this case is 5.9Kg and it comes with a 2-year warranty from the PCCOOLER.
The fan support is as under:
- 3x 120mm or 2x 140mm fans on the top
- 2x 120mm or 2x 140mm fans on the bottom
- 2x 120mm fans on the side
- 1x 120mm or 1x 140mm fan on the rear
PCCOOLER has provided 6x 120mm ARGB fans pre-installed. These fans are rated for 500 ~ 1100 RPM±10% speed generating CFM airflow at .8mmH₂O static pressure while generating 18.3 dB(A) noise output on 12VDC. These are PWM controlled. These fans are using standard connectors. The bottom-mounted fans have reversed on inversed blades for air intake.
The radiator support is as under:
- 120mm/140mm/240mm/280mm/360mm on the top
- 120mm/140mm/240mm/280mm/360mm on the bottom
- 240mm radiator on the side
- 120mm or 140mm radiator on the rear
Clearance is:
CPU Cooler Height: Up to 175mm
Graphics Card Length: Up to 400mm with side fans only
PSU Length: Up to 200mm
Storage provision is:
- Up to 2x 3.5” drive bays
- Up to 2x 2.5″ drive bays
Dust Filtration:
- Magnetic white color top filter
- Magnetic white color bottom filter
- Magnetic white color back panel filters
This case is a futuristic design since it is fully compatible with the back-plug motherboards. This idea was introduced by GIGABYTE for which they released their own PC Case. Now, we are seeing more options coming up with this support. This case has ample space inside for any build configuration. There is a displacement of 58m from the top of the case to the top of the motherboard.
The PSU bay is on the backside of this case and storage options are also located on the back. This leaves the front area for the build only. The motherboard tray is protruded from the side frame giving it a nice offset and the routing of metallic cutouts along the tray provides enough space so that the back-plug motherboard can be placed conveniently. This case has 6 PCIe slots with reusable covers.
The bottom fans need to be removed before the installation of the motherboard and 5x remaining standoffs. PCCOOLER did not provide a socket wrench in the accessories to install the standoffs on the motherboard. They should have taken care of that. Also, I would suggest that PCCOOLER install a removable fan bracket in the next iteration on the bottom so that the removal of fans can be more convenient. The PCIe slots are not a bridgeless design which in my opinion should have been as this provides more flexibility and compatibility with the majority of the vertical GPU brackets.
The side panels have a Snap-On, quick-release design. On top of that, PCCOOLER has used angular frames on the top sides to secure these panels during shipping. These frames are secured using thumb screws so you can conveniently operate them. The IO panel is located on the top frame and has a USB Type-C port along with USB 3.0 ports. The power button has a nice clicky sound and does not wobble.
PCCOOLER has also provided an ARGB and Fan hub controller in this case that can house up to 6x connections on a standard interface. This controller is SATA-powered and the Reset button is used to control the lighting of the fans. The user can also connect and switch the lighting control to the motherboard. There is plenty of space on the backside for proper cable management and PCCOOLER has used multiple cable tie points as well.
Our overall build experience is very good and despite using a 360mm on the top, the right side of the case is still left un-used. The cable routing is super easy. The only challenge is the cable management on the bottom area since the motherboard sits closer to the floor of this case and there is no cutout there. Also, removing the bottom fans to install the motherboard is inconvenient. I appreciate the bottom dust filter being magnetic but I would have opted for a sliding design for a convenient fitment instead of a guess game. I opted to turn the side fans so that they also intake air from the rear side of the case for better airflow.
PCCOOLER CPS C3 T500 ARGB carries a price tag of USD 99.90 approximately USD 100. This case is a feature-rich design making it a good value for your bucks in this price bracket. This is not all. In my thermal testing, both the CPU and the graphics card were sitting below 70ᵒC under stress test. The airflow is quite good in this case as well. This case is future-ready as it fully supports the back-plug motherboards (connectors on the back) as well as the traditional or regular design ATX motherboards that have connectors on the front. I would recommend this case given its balanced feature set, ample cooling provision, good airflow, and futuristic design.


