


MAIWO K2022CL 2-Bay M.2 SATA/NVMe Enclosure and Duplicator Review
Introduction
MAIWO has recently launched a new series of products. They have sent us MAIWO K2022CL which is essentially an M.2 SATA to M.2 NVMe SSDs duplicator or cloner and vice versa. It is a dual-bay device with an aluminum-made outer shell. The salient features include:
- This dual bay M.2 SSD enclosure supports simultaneous reads and writes of both NVMe and SATA solid-state drive SSDs, supports M.2 NVMe M Key and B&M Key, M.2 SATA B&M Kay in all sizes 2230/2242/2260/2280.
- This M.2 NVMe/SATA duplicator supports a one-key offline clone function, no need to connect a computer, just connect the power. Please make sure the capacity of the target disk is larger or equivalent to that of the source disk.
- The external M.2 SSD docking station adopts a Type-C USB3.2 Gen2 interface with a data transfer rate of up to 10Gbps.
- Supports intelligent sleeping mode, if there is no data activity within 10 minutes, it enters sleep mode automatically, and the LED lights will be off, saving power and protecting the hard drive very well.
- This tool-free SSD portable enclosure is very easy to use, with no need for any tools.
- Support plug & play and hot swap, no drivers required. Compatible with multi systems: Windows/Mac OS/Linux.
- This external NVMe SATA enclosure is equipped with an independent power supply(5V/3A)
- Very clear LED light indicator for clone progress: 25%-50%-75%-100%, control working status anytime, the lights will be off after the cloning is complete.
- The black enclosure shell is made of Aluminum alloy, is very compact, and has good heat dissipation performance.
Product: MAIWO K2022CL M.2 NVMe/SATA SSD Dual Bay Enclosure Duplicator
Price: CAD $125.99 [At the time of the review]
Specifications
| Name | MAIWO 2-Bay M.2 SATA/NVMe SSD Enclosure Duplicator |
| Model | K2022CL |
| Function | M.2 SATA/NVMe SSD Read/Write/Clone |
| Interface | USB Type-C |
| Transmission Rate | Up to 10 Gbps |
| Supported SSD | M.2 SATA / M.2 NVMe |
| Size | 120x68x16.7mm |
| Material | Aluminum Alloy + ABS Plastic |
| Operating System | Windows/Mac OS/Linux |
Closer Look

The product is shipped inside the MAIWO-themed packing box. The front view of the packing box is plain with MAIWO branding only.

There is a large-size sticker paper pasted here showing the specifications of the products in Chinese and English languages.

When we opened the box, the enclosure was found placed over the top. There is a cutout on the rested paper showing the power adapter

MAIWO has provided a user guide on how to properly set up and use the enclosure.

MAIWO has provided two blue color thermal pads. They are probably 1mm thick. Their thermal conductivity is not mentioned. There are two aluminum plates as well. They are the same size as the thermal pads.

MAIWO has provided silicon pins which are required to secure the SSDs on the PCB.

MAIWO has provided two cables with the box. One is the USB Type-C to Type-C interface cable which can handle up to 10Gbps transmission rate. The other cable is USB Type-A to USB Type-C interface cable which can handle the transmission up to 5Gbps.

There is a power adapter rated at 5V/3A. The input range is 100~240V with 50/60Hz. You need to make sure that your region’s power rating matches with this otherwise use the universal adapter to be on the safe side. The cable has a USB Type-C interface which is connected to the enclosure.

The enclosure is made of aluminum alloy material and is finished in gray color. It has a dimension of 120x68x16.7mm. The enclosure is compatible with Microsoft Windows OS, Mac OS X, and LINUX. It has a USB Type-C interface on the main unit.
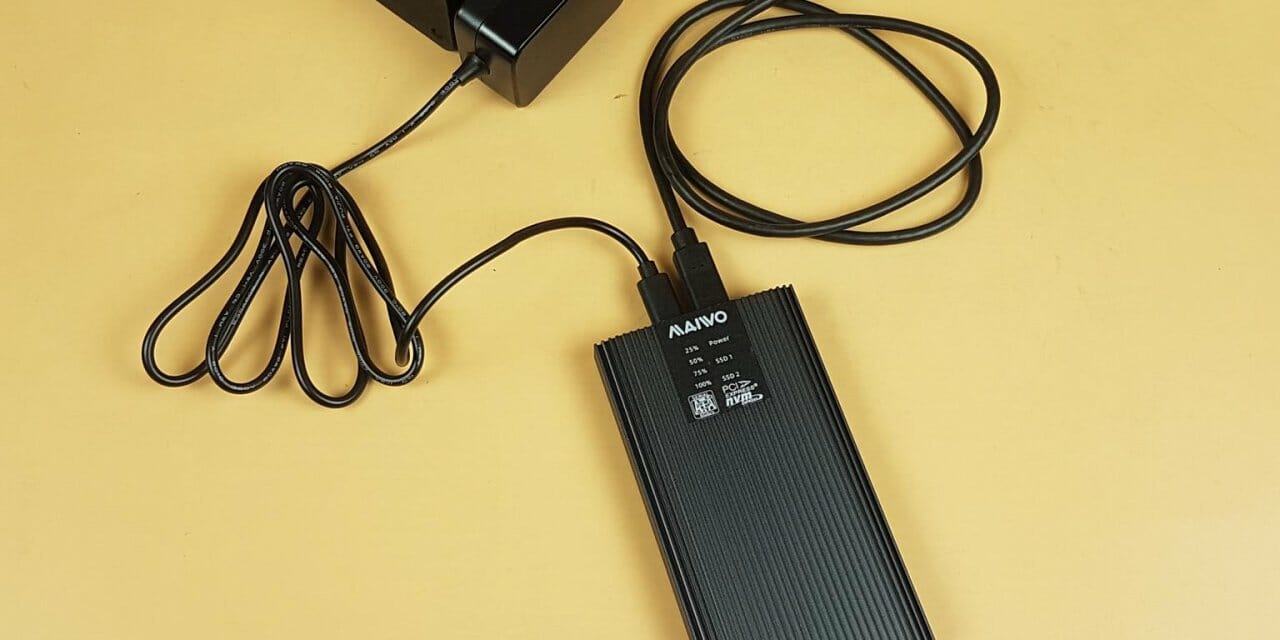
Taking a look at the top of the unit, we have a stylish slotted pattern. The main body acts as a heat transfer hence these fins styles make sense and look pleasing in person as well. On the top, we have an ABS plastic material made of black color portion with the MAIWO branding on the top. It has all the LED indicators to show the operation of the enclosure.
- Power LED is in blue static color.
- SSD1 and SSD2 LEDs are in white color. They blink when in action and remain static-lit during no operation.
- 25%, 50%, 75%, and 100% blue LEDs indicate the progress of the Clone operation.
- The red color LED on the SSDs would indicate that the SSD has failed.
SSD1 indicates the M.2 SATA SSD status whereas SSD2 indicates the M2. NVMe SSD status.

The backside of the enclosure has the same slotted interface however the central portion is a plain section. Looking at the top there is a ribbed portion in an arrow style.

Pressing the sliding up front would release the inner module as can be seen in the above picture. This way, we will access the main module on to which the SSDs are installed.

This side of the enclosure (the side of the arrow marker) has a vented portion which is probably to ventilate the heat from this side. This side is the opposite of the PCB main components side.

We have:
- Power Button
- Power Port
- USB Type-C Port
- Clone Button
The user would need to connect the USB Type-C cable of the power adapter to the DC-labeled port. The bundled data cable(s) can be connected to the Type-C labeled port. The Clone button supports offline cloning of the SSDs.

The above picture shows the unit powering up after pressing the power button. The first thing that the enclosure would do is search the SSDs and update their status.

The above picture shows that the enclosure has powered up and both SSDs are detected and operational.

The side of the enclosure is a plain surface. The edges of the fins on the aluminum shell must be handled carefully as they are sharp.

We have taken out the inner module and the above picture shows the aluminum shell inside out in the above picture. It is made of a single aluminum piece.

The above picture shows the front side of the black color PCB with two M.2 ports. The left side is the M.2 SATA and the right side is the M.2 NVMe one.
The above picture shows the backside of the inner module. There is an aluminum plate with a thermal pad covering sub-components on the PCB. The main container is made of ABS plastic material. It is vented for effective heat transfer. The PCB is secured using 2x screws on the opposite side. Removing them will free the PCB of the container.

The above picture shows the thermal pad and the aluminum cover which we removed from the inner module.

We have removed the PCB and the thermal pad. We can see the circuitry in the picture.

The main controller employed in this enclosure is JMicron JMS581 which is a USB 3.2 Gen2x1 to SATA 6Gb/s, PCIe G3x2, and SD Express Bridge Controller. This controller also provides offline copying provision of the connected devices on the mentioned interfaces. The upstream transmission rate on this controller is up to 10Gbps whereas the downstream can connect to a multitude of host interfaces like PCIe/SATA/NVMe and even SD Express card. This controller also supports TRIM function and power management.

The following size formats are supported:
- 2230
- 2242
- 2260
- 2280
The M.2 SATA port supports only B+M key type SSDs whereas the M.2 NVMe port supports M Key and B+M Key type drives.
Looking closely at the end, we have switches. In its default location, the clone would be performed from M.2 NVMe to M.2 SATA drive. Lowering both switches down would reverse the direction and a clone will be done from M.2 SATA to M.2 NVMe drive.
Installation
Now that we have taken a look at the unit and its design, let’s proceed with setting it up for use. We had to arrange M.2 SATA drive for the testing and HIK VISION 128GB E100N was available in the local market. We have to make do with this drive. We have Sabrent Rocket Q 1TB NVMe drive on the other hand.

We have to remove the inner module. Insert the SSDs in the sockets and use the silicon push pins to secure the SSDs on the PCB.

Next, place the thermal pad on the SSD.

Next, place the aluminum plate on the thermal pad. Don’t forget to peel off the protective covers from both sides of the thermal pad and one side of the aluminum plate.

Repeat the steps for the M.2 SATA SSD.

Both SSDs are installed and ready for operation. Slide the inner module into the main aluminum shell. This will complete the installation.

The above picture illustrated the connectivity of the unit.

When the unit is connected to the PC both drives show up in the My Computer (This PC). In case they are not visible, you would need to initialize them by going to the Disk Management interface.
Testing
We have tested both drives using ATTO Disk Benchmark, AS SSD, and CrystalDiskMark software. The following configuration is used for the testing:
- Intel i9 10850k [Auto, Stock]
- GIGABYTE Z490 AERO D
- GIGABYTE GeForce RTX 3070 VISION OC 8G
- XPG SPECTRIX D50 16GB @ 3600MHz
- XPG 1TB Lite NVMe SSD
- Sabrent Rocket 4 Plus 2TB NVMe SSD
- DeepCool LS720 White
- DeepCool FC120 White Fans
- be quiet! Silent Base 802 White
- Fractal Design ION+ 2P 850W PSU
The unit was connected to the USB 3.2 Gen 2 port using USB Type-C on the rear I/O panel of the motherboard.
Here are the results:

The above picture shows the result of the M.2 NVMe drive. Since we are capped at 10Gbps on this enclosure, the sequential read and write speeds were almost hitting this mark validating the specifications.

The CrystalDiskMark result on the M.2 SATA drive validated the speeds as well.

The ATTO run on the M.2 NVMe SSD validated the speeds.

The ATTO run on the M.2 SATA SSD validated the speeds.

AS SSD also validated the speeds. We got a nice score for the NVMe SSD at a 10Gbps cap.

The score for M.2 SATA was almost halved which is understood given its transmission speed.
Cloning
We have used the following drives:
- Sabrent Rocket Q 1TB NVMe SSD
- HIK 128GB M.2 SATA SSD
Since we are using two different capacity drives, we opted to clone the M.2 SATA drive to the M.2 NVMe SSD for which we lowered both switches on the PCB. We copied a gaming folder of 96GB size on the M.2 SATA drive.

Since cloning is supported as an offline function. We disconnected the unit from the PC. As can be seen from the above picture, both drives are listed under Eject External.

You need to double-press the Clone button. Both SSDs will quickly blink followed by the 25% status LED indicator blinking. This would mean that cloning has started. It took 1 minute and 14 seconds to complete the 25% cloning.

As soon as the 25% was done, its LED turns static blue whereas the 50% status LED started to blink. It took 2 minutes and 29 seconds to complete the 50% cloning. The 75% cloning was completed in approximately 3 minutes and 47 seconds.

The complete cloning was done in approximately 4 minutes and 54 seconds. Once the cloning was completed, all 4 %age status LEDs remain lit in blue color and there was no blinking on any LED. This indicates that the cloning is completed. Please note that time would vary depending on the data size being cloned.

After cloning, we connected the unit to the PC and both drives showed up in the My Computer (This PC). Both have the same content now.
Conclusion
We have taken a spin on the MAIWO K2022CL product which is a 2-Bay M.2 SATA/NVMe SSD Enclosure Duplicator over USB 3.2 Gen2 Type-C interface. The dimension of the unit is 120x68x16.7mm and it can be connected to almost any device including a desktop PC, laptop, smartphone, and even PS4. This is many thanks to using the USB Type-C interface. This unit is compatible with Windows/Mac OS and Linux. The unit is made of aluminum alloy and ABS plastic materials.
The user can install up to two SSDs in this enclosure with one restriction. Only one M.2 NVMe and one M.2 SATA drive can be installed. This is by design as this enclosure is designed around cloning of M.2 NVMe to M.2 SATA and vice versa. The enclosure has a single piece of aluminum forming a shell on the outer. It is designed in a fin style to act as a heat transfer. The M.2 SATA port supports only B+M key type SSDs whereas the M.2 NVMe port supports M Key and B+M Key type drives. A size of up to 2280 is supported.
The inner module can be slide out of the outer shell making it a toolless design. The PCB is in black color and MAIWO is using JMicron’s JMS851 bridge controller. This is a system-on-chip design and its upstream can provide up to 10Gbps data transfer capability whereas the downstream can be connected to multiple interfaces like SATA/PCIe/NVMe and even SD Express. Additionally, this controller also provides the TRIM function and power management.
MAIWO has utilized this bridge controller to its maximum in the K2022CL enclosure. In case there is no activity for over 10 minutes, the enclosure will automatically enter sleep mode and turns all LEDs off. TRIJM function is also supported on the installed SSDs. The user can install up to 4TB capacity drives in this enclosure. Both drives are accessible independently and the user can use both for specific purposes. The maximum data transfer rate is 10Gbps because the USB 3.2 Gen2 is supported by the JMS851 controller.
This enclosure also supports the cloning function which is offline which is once again thanks to the JMS851 capability. The user can switch the buttons on the PCB to decide the cloning mode i.e M.2 NVME to M.2 SATA or vice versa. The default mode is M.2 NVMe to M.2 SATA. Please note that in order for the Cloning, the target SSD must be of the same or more size as the source.
MAIWO has provided USB Type-C to Type-C cable (10Gbps) and a USB Type-A to Type-C cable (5Gbps) as well as a dedicated power adapter as this unit is not bus power driven. They have also provided 2x thermal pads and 2x aluminum plates. These plates make contact with the thermal pad on the SSD and the outer aluminum shell for maximum heat transfer.
We have tested the unit using the HIK 128GB M.2 SATA and Sabrent Rocket Q 1TB NVMe drives. Our synthetic testing has shown these drives operating at the desired speed of 10Gbps for NVMe and up to 6Gbps for SATA. Cloning was done from M.2 SATA to M.2 NVMe SSD and it took 4 minutes and 54 seconds to complete the cloning of 96GB size data. This time would vary depending on the size of the data. The unit is quite effective in keeping the temperatures down.
The MAIWO 2-Bay M.2 SATA/NVMe Enclosure and Duplicator is listed at CAD $ 125.99 at the time of the review. The USD price would be near around 90 mark. It is a good solution particularly when you have a few low-speed SSDs lying around which can be put to good use. This unit comes recommended by us.
We are thankful to MAIWO for sending in the unit for testing.


