


Corsair Carbide Series SPEC-01 PC Chassis Review
Introduction
The PC Chassis market is full of competitive offerings ranging from budget to mid level to as high as enthusiast level solutions. With every year passing, we are seeing more innovative ideas keeping the chassis market alive and while one may think that this market is saturated, that isn’t the case. We are seeing new players entering the market and current companies continue to improve upon the design.
There has been a paradigm shift in this market. Companies are not focusing on bringing custom water cooling support on their mid towers out of the box with modularity. Modular approach allows the users to do much more with their chassis without changing the overall design and does not require any modding. Out of this trend, we have seen some spectacular designs like Phanteks Enthoo Evolv ATX and the Fractal Design R5 to speak of a couple.
Companies are now bringing more aesthetically pleasing looks on their budget chassis with few improvements for their budget users. Today, we’ll be reviewing Corsair Spec-01. This is a budget chassis but don’t let the word budget take you down even for a moment. After spending some time with this unit, it was clear that its true potential is beyond the budget category.

Specifications
| Title | Spec-01 Red LED |
| Chassis Form Factor | Mid Tower [Gaming Case] |
| Series | Carbide |
| Weight | 4.8kg |
| Color | Black |
| Dimensions | 447mm x 200mm x 428mm |
| Motherboard Support | Mini-ITX, MicroATX, ATX |
| Case Material | Steel |
| Case Power Supply | ATX [Not Included] |
| Maximum Graphics Card Length | 414 mm |
| Maximum CPU Cooler Height | 150 mm |
| Maximum PSU Length | 230 mm |
| Expansion Slots | 7 |
| Drive Bays | Two 5.25”
Four Combo 3.5”/2.5” |
| External Connections | One USB 2.0
One USB 3.0 One Headphone Port One Microphone Port |
| Fan Mount Locations | Front: Two 120mm / 140mm
Top: Two 120mm Rear: One 120mm |
| Fan Included | One Red LED on front |
| Radiator Mount Locations | Rear: 120mm |
| Compatible Corsair AIO | H55, H60, H75, H80i |
| Warranty | Two Years |
Packing
Chassis arrived in typical Corsair packing. On the front, an outline image of the chassis along with its model number are printed.

On the back side, dimensions and form factor of the chassis are printed.

On left and right sides, specs of the chassis are printed.


Chassis is wrapped in anti-static cover and two pieces of styrofoam are placed on the top and bottom for more protection.


Accessories
There is not a plethora of accessories with this chassis which is understandable from its price point of view. Users will get a manual for basic installation, few zip ties, spare stand off, and different screws for mounting the motherboard, hard drives and fans etc.


Closer Look
Design
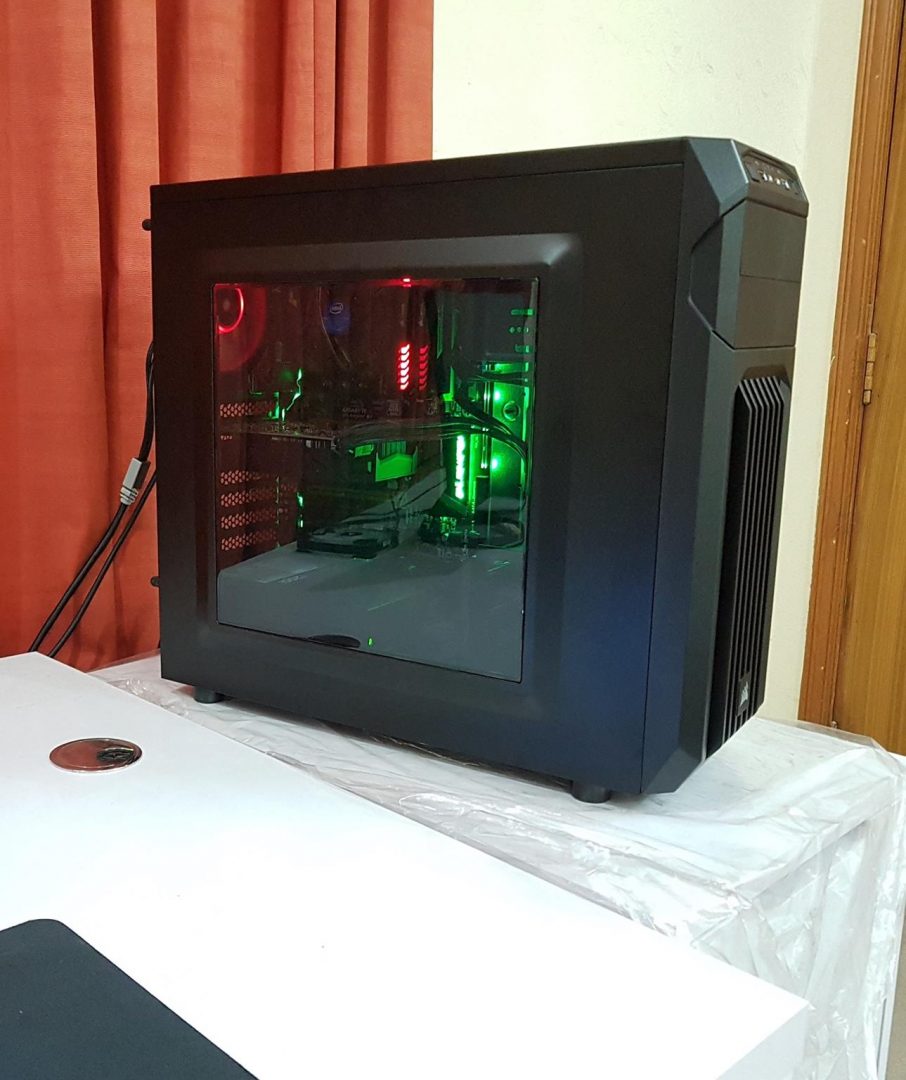
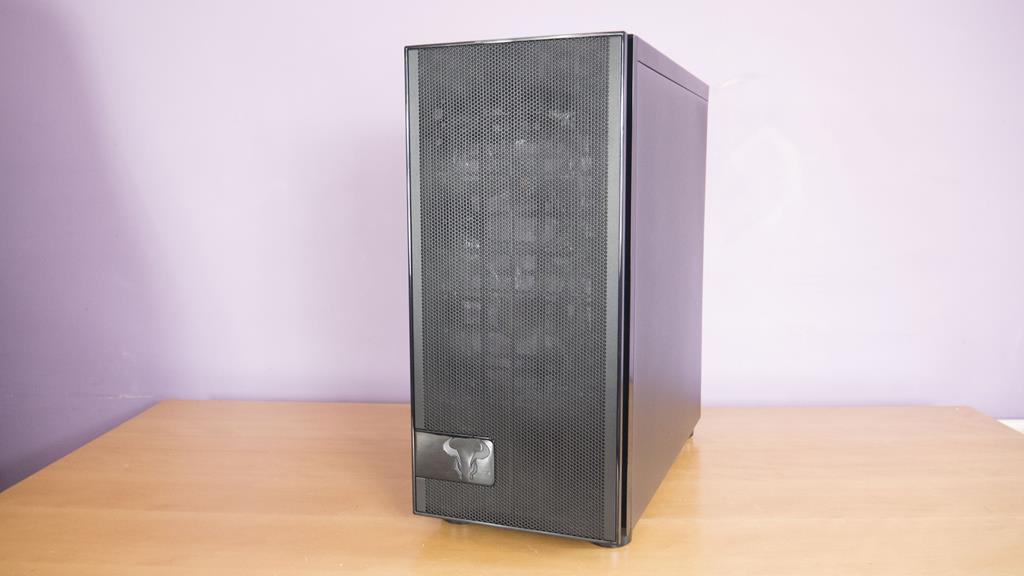
With Spec-01, Corsair has taken an aggressive, bold design while the interior is almost same as that of 100R. This reminds me of thre 750D Obsidian and 760T. While the interior of both chassis is similar, with 760T, Corsair went with an aggressive and uniquely pleasant design.

The color of the chassis is black though sometimes it gives an impression of gunmetal under certain light condition. The main structure of the chassis is made of steel with few parts like front shroud made of plastic. Build quality is good on this budget chassis. This chassis features a transparent windowed side panel to show the beauty of the build. There is also a red LED 120mm fan on the front (included) which throws air directly on the graphics card.
Design wise, the front panel has an open design as compared to the 100R. The shroud of the front panel is the main part of this design giving bold, aggressive looks.

It can be taken off by grabbing the panel’s latch at the bottom of the chassis and pulling it. It has built-in dust filter to cover the intake of the fan mount locations on the front.

There are two covers for 5.25” drive bays. There is no way to remove these covers without removing the complete front panel which really is not a convenient way of doing it. To remove the covers, take off the panel and from the inside, press the two latches on the desired cover and it will pop out. The top portion of the panel is curved, this adds more to the overall beauty of this chassis.

In order to install or remove fans on the front side, the front cover needs to be removed first as well. Two types of mounting positions are visible. One for the 120mm fan mounts and other for the 140mm fans mounts. Keeping in view that this is a budget chassis, having a provision of dual 140s or dual 120s is a plus from Corsair.

There is an opening on the right side in between two fan mount positions. This is to pass the cables of the fans through. Corsair has definitely kept in mind the clean cable management aspect in this design.

Two 5.25” drive bays are available should there be need of optical drive or fan controller etc. This is a tool-less design and does not require the user to spend time in screwing the bits. Just pop in the drive(s) from the front side and the lock the latch on the right side of the bay to secure the drive. This is a common design feature these days.

IO panel is located on the front top side. It has:
1x USB 3.0 port
1x USB 2.0 port
1x Headphone jack
1x Microphone jack
Power on button is located on the left side of the panel and Restart button is on the right side. Top side is plain and steel. It is somehow a fingerprint magnet and fingerprints can be visible on the exterior of the chassis.

At the far end of the top, we can see an area designed for mounting two 120mm fans. It does not have a dust filter, something to keep in mind while deciding the direction of airflow throughout chassis.


On the left side of the chassis, there is a transparent window panel which can be taken off by removing the two thumb screws at the back of the chassis and by pulling the panel from the rear side. This panel is raised on the inside from the center to give some extra clearance for the CPU Cooler.

Over on the right side of the chassis is a non-transparent steel made panel that it is raised from the center to allow for better cable management. It can also be removed in the same manner as that of the left panel.

The rear side of the chassis has cut out on the top for IO Shield of the motherboard. To the left of that cutout, there is a fan mount location for a 120mm fan. It does not have dust filter as is the case with the majority of the fan mounts on this chassis.

We have 7 PCIe expansion slots there. They are covered with a mounting plate. In order to install the graphics card, this cover plate needs to be take off for which two screws are required to be removed. Expansion slot covers are ventilated and in black color.

On the bottom, we have an opening for the power supply. This chassis supports up to 230mm PSU which is quite a handsome number for being a budget chassis.

The bottom side is plain and simple. We have a dust filter which can be removed for cleaning on the intake for PSU mount.


Interior
This chassis has support for up to an ATX sized motherboard. Inside seems spacious enough to have your components sit in with nice and clean looks.

There is a large CPU cooler cutout. There is three cables pass through cut-outs on the motherboard tray. 5 cable pass through cut-outs are next to the motherboard tray which is meant to be used as main routes for cable. This section of the chassis is raised as compared to the motherboard tray. They don’t have rubber grommets on it. On the top, we don’t have any cut out for CPU Power cable routing which was disappointing as it could have been made there. so you will need to plan ahead for routing this cable.

Corsair was thoughtful for providing cut-outs for cables management in case of mini-ITX or MicroATX size motherboards. One would simply use 3 cut-outs on the right and bottom for these builds. Unfortunately, for ATX size boards, we are limited to those 5 main cut-outs and there is no bottom cut-out. Can’t really complain as chassis is for budget category.
The power supply can be mounted with its fan facing up or down. There is a ventilated filtered cover on the bottom should one install the PSU with the fan facing down. This is also very critical yet a most overlooked aspect of the build when it comes to airflow and maintaining air pressure in the chassis. There is a large size cut-out on the bottom section of the motherboard tray, right where PSU’s cable end would be. We installed a Corsair AX 1200i in it which has 200mm length. This PSU covers approx 60% of the cut out leaving less room for cable pass through. Standard length on a regular PSU is approx 160mm which would leave ample room for the cables to be managed from the bottom cut-out.

Standoffs are pre-mounted on motherboard tray with center one in the shape of a screw. This is a smart design approach which would help builder to ensure that motherboard is placed correctly.

There is approx 25mm space from the top of the chassis to the motherboard’s top portion. Make sure to install the cables first on the motherboard before installing any fan on the top. We passed the CPU Power Cable from behind the top fans towards the right side of the motherboard and passed the cable through the first cut hole. This makes the build a bit more clean in looks.
On the bottom right side, we have a drive cage with 4 caddies in it. Users can install a combo of four 3.5” HDDs or 2.5” SSDs.

Here is how to remove this cage:
- Remove the 4 bottom mounted screws.
- Remove the two screws from the front side. You will have to take off the front panel to do this.
- There are two more screws on the rear side of the cage, take off the right panel and from the backside of the cage, you will see the two screws. Remove them and the cage will be free to take out.

Drive cage has a flex which can’t be judged without first taking it out. Though this is not a Con as such as once fitted inside, the cage is solid. Caddies are not that sturdy and feel cheap in hand though they would do their intended job without any complaint. Caddies can be taken out by pressing their raised edges and pulling the caddy.
One can mount 3.5” HDD or 2.5” SSD using screws for secure placement. Once installed, just slide the caddy in the cage and it will fit.
On the top, we have two 5.25” drive bays with tool-less mechanism for secure mounting the drives.
Between the 5.25” drive bay and storage drive cage there is an opening, which has a reason behind it. the Top fan mounted on the front panel is positioned as such that it faces the graphics card. As there is no obstruction between the card and that fan, fresh air will be pushed directly on the graphics card. This also gives maximum space for the graphics card of maximum length supported which is 414mm. This is sufficient for any modern day card.

Cables included in the chassis are: –
HD Audio cable
USB 3.0 cable
USB 2.0 cable
Front Panel cables for Power, Reset, HDD LED and Power LED. Cables have enough length to reach the bottom headers on the motherboard. Though we encounter a slight problem for HD Audio cable but it fit fine.
On the backside, we can see the large CPU cooler cut-out on the motherboard tray. There are 4 tie-down spots to help with cable management.

Unfortunately, we don’t have space behind the motherboard tray to tackle the cables. Though there is an indent or raised portion on the panel to cover the cables but it is not much. For a simple build, this should not be a problem as cable pass through cut-outs and tie-down spots would be enough to manage the cables. I’ve been recommending the use of cable ties for quite some time as they help in managing the cable clutter.
We have access to the backside of the drive cage for connecting power and SATA cables. Chassis cables are tied on the first 5.25” drive bay and give a much cleaner look. Fan cables are coming from the right cut out on the front side.
As one can see that with regular ATX size motherboard, three cut-outs on the motherboard tray are covered and can’t be used. Same is the case with the bottom right cut out. With a 200mm PSU, there is not much space left on the bottom main cut out for passing PSU cables through. Though, we can use another cut-out right next to it.
Cooling
Cooling is among the foremost important factors when considering any chassis and this chassis does not disappoint its users. We can mount two 120mm or two 140mm fans on the front. This is impressive take by the Corsair.
Here is a picture of the front with two Corsair ML Pro 120 Red fans.

Here is a picture with 140mm fans. These fans are Noctua iPPC NF-A14s

Two 120mm fans can be mounted on the top side and one 120mm fan can be mounted on the rear. There are no dust filters included for any of this fan mounts.


Final Build
Our main sponsor provided these components for the build purpose:
Intel i3 6098P
Gigabyte G1.Sniper B7 Motherboard
PakDukaan provided Zotac GTX 1060 Mini for this build.
Rest of the components used are:-
Corsair Vengeance 2x8GB DDR4 Red LED
Corsair ML Pro 120 Red LED
Corsair AX1200i
Samsung 840 EVO 250GB
WD Black 6TB
Choice of PSU would seem odd given the fact that this is a budget build. Unfortunately, it was the only unit available at the time for testing purposes. Plus 200mm length also gives a good idea on cable management aspect.
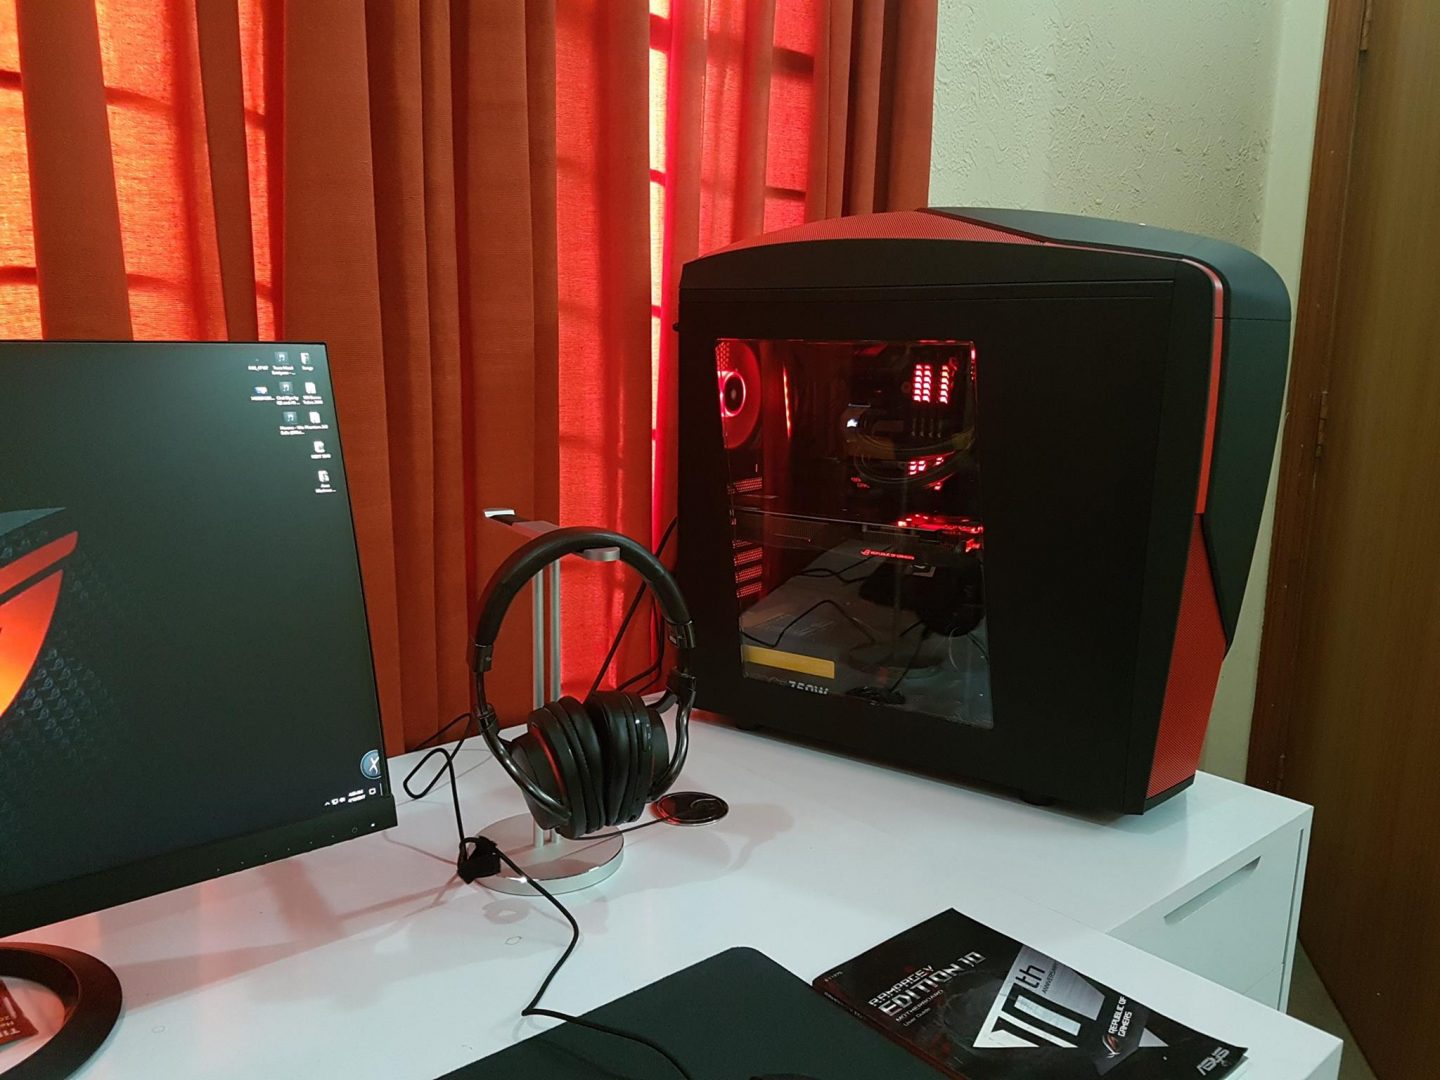
The build was relatively simple and it does not take much time assembling in the chassis. Other than cable management, it was hassle free. Overall build quality of the chassis is very good and does not feel cheap. Corsair has definitely provided the budget users a good chassis to build in. Here are some pictures while assembling.
IO Shield

Motherboard installed.

With PSU and two ML Pro fans installed, check the space that is available above the motherboard. Also, there was no cut-out left available on the bottom once PSU was installed.

Aclose-upp view of the space between motherboard and PSU.
Pay attention to the next picture. It shows the remaining area of the main cut out for passing PSU cables through. Approx 40% or so area is left with the builder. This is the case with 200mm length of the PSU. In this chassis, users will be using upto 160mm length of PSUs which will give more space and it has an effect on ways the cable management on the back could be done.

Another top view of the chassis. Single 120mm fan is installed while the other is not. This is due to the fact that we had to route the CPU Power cable from behind the fans and installing the second fan first would not have left any room to install the CPU power cable.

Corsair Vengeance Red LED RAMs are installed.
Actual test build for this chassis is in the next picture. Detail of hardware was already mentioned above.

Let’s have a look at the actual test build in action.


Full Potential
Just for the sake of checking the full potential of the chassis, we installed some serious hardware inside it. It was surprising to see that chassis handles two Hybrid cards from EVGA relatively easy. Handling multiple hybrid cards is not an easy job even for full towers. We test booted with this configuration and it was successful, air flow was good and we did not encounter any problem to report here.


Thermals and Air Flow
During our testing, CPU remains under 50s in degree Celsius and graphics card remains under 60s in degree Celsius during gaming. PSU was placed upside down. This ensured the intake of fresh air in the PSU and exhausts to the back of the chassis. While there was a negative air pressure inside the chassis which I personally don’t maintain, sole purpose was to show the users about configuration possibilities of the fan. There were two fans on the intake and three on the exhaust. Unless, maintaining air pressure through RPM regulation in this configuration, I, myself would have opted for rear fan as an intake or top fans as intake and single rear fan as an exhaust for positive air pressure. Airflow inside the chassis was good and we have nothing to complain here.
Final Thoughts
With a retail price of $50/£52 (PKR 5200), The SPEC-01 offers good build quality, a transparent left side panel window, room for graphics card up to 414mm length, PSU up to 230mm and CPU Cooler height up to 150mm, this chassis can simply be regarded as one of the best chassis out there in the market for its given price. There are Cons to it as well which include no rubber grommet, lack of space in cable pass through cut-out when using a large size PSU, less space behind the motherboard tray for cable management, no rear fan.
In my opinion, the Pros take over the Cons here and I would highly recommend it for the users who are looking for an optimal solution for their budget builds. When it comes to budget builds, users are generally more willing to overlook smaller points such as the SPEC-01 not including dust guards in all of its fan mounting spaces. Corsair really has created a great budget case with their SPEC-01 which is why I am giving it the “Must Have” award.

Thanks to Ease Tec Pakistan for sponsoring this review.


