


Sabrent Rocket NVMe Heatsink Review
Introduction
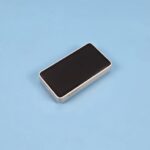
In this context we shall be taking a spin on Sabrent Rocket NVMe Heatsink for Rocket series SSDs. This heatsink has a bold yet stylish design and it is using a combination of copper and aluminum materials to reap the full benefit when it comes to thermal heat transfer. We can deploy single-sided as well dual-sided SSDs in this heatsink.
Here are the salient features:
- Designed for desktop computers.
- A winning combination of copper and aluminum for maximum performance.
- Compatible with Singel/Double-sided M.2 2280 SSDs.
- Thermal tape, screws, & screwdriver included!
- Easy to install
Product: Sabrent Rocket NVMe Heatsink
Price: $26.99 [At the time of the review]
Packaging and Unboxing
The heatsink is shipped inside a cardboard-based packing box which is finished in a black and gray color theme.

High performance combined by using the copper and aluminum materials. We will see how effective this really is.

The model is SB-HTSK. The features and the contents of the box are also printed over here.

Opening the box will show the user guide placed over the top.

There is a mesh-like cover placed over the top.

Behold the awesome presentation. Though take note that removing the screws is not an easy task.
Contents

Following are provided”
- 1x NVMe Heatsink
- 1x Thermal Tape
- 5x Screws [4+1]
- 1x Screwdriver
- 1x Installation Guide
Closer Look
It is time to take a closer look at the heatsink followed by assembling experience and then the testing part. Here is what Sabrent is saying about this product, “When maximum performance is reached, additional heat is generated. To help dissipate this heat efficiently, Sabrent has developed a state-of-the-art heatsink using the winning combination of aluminum and copper. Designed for desktop computers, the heatsink is easy to install and fully compatible with Single/Double-sided M.2 2280 SSDs.”

The heatsink is provided in two parts. One is the top section having the copper heat pipes & and the aluminum heat spreader and the other part is the aluminum tray on which the SSD is placed and the top part is then rested upon it. The complete assembly is made of aluminum material for effective heat transfer.
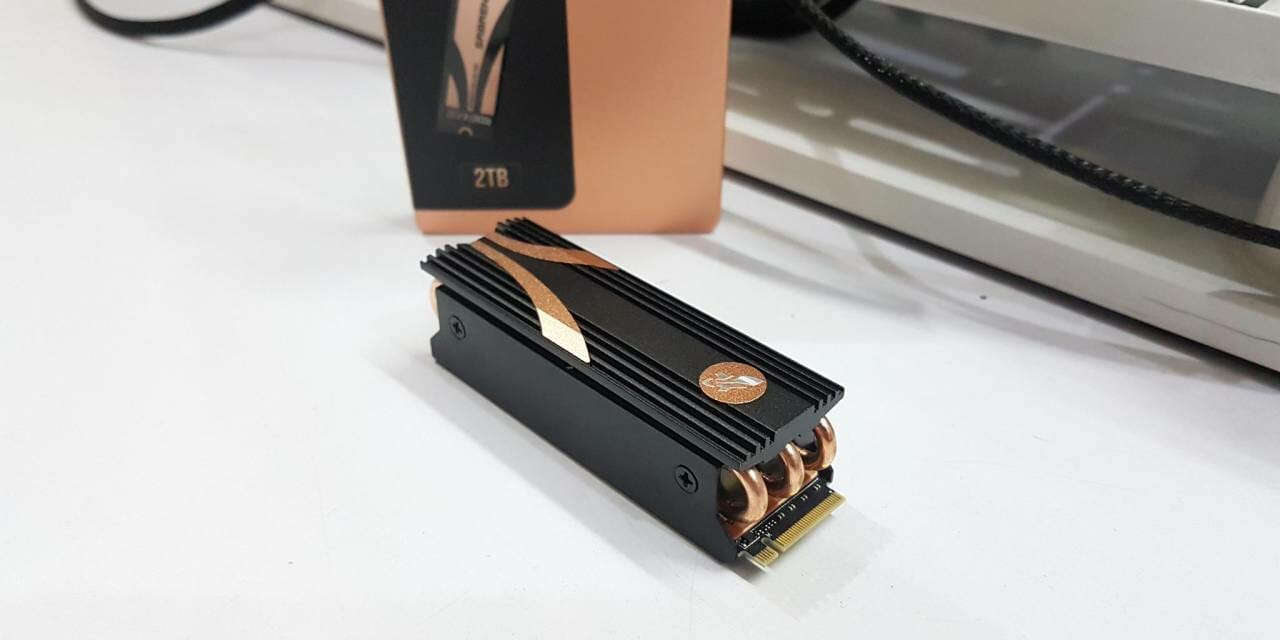
The top view shows the grooves on the aluminum plate or heat spreader and the Sabrent branding in the copper color which will go hand in hand with the Rocket series SSDs. The dimension of the unit is 3.1 x 1 x 0.9 in.

The above picture shows the rear side of the top section of the heatsink cover. We can see 3x copper heat pipes running on the entire length of the cover. The copper has a thermal conductivity of 401 W/mK whereas the aluminum has a 237W/mK rating. Sabrent is using bother materials to ensure efficient heat transfer to ensure the maximum performance when handling heavy workloads and for a longer period of time.

The above picture shows the opposite side of the top cover. Notice how the middle pipe is recessed. This side faces the latching side of the SSD meaning the side of the SSD which has a cutout in the middle so that the screw can press the SSD on the standoff of the motherboard to secure install the drive. Also notice that there are aluminum plates surrounding the copper heat pipes forming a heatsink. The idea is simple; the heat is transferred via the thermal pad from the SSD to the copper heat pipes. Which is then transferred onto the aluminum frame of the heatsink.

The above picture shows the side of the top cover. The sides are recessed from the overall frame as they have to rest on the lower section of the heatsink. There are 2x mounting holes on each side.

There is a pre-applied white color thermal pad. It seems like this thermal pad has a thickness of 1mm. Sabrent did not provide any thermal conductivity rating of the pad.

The above picture shows the aluminum tray. This frame is also made of aluminum material. There is another white color thermal pad pre-installed. The top of the pad has a protective cover that needs to be peeled off before putting SSD on it. Notice there is a groove on one side of the base. Ensure that SSD is placed on the base with its screw groove side fully flushed with the groove on the base.

By default, the pre-applied thermal pads on the heatsink are for dual-sided SSDs. If your SSD is single-sided then you would need to place the thermal pad labeled as B on the top of the thermal pad A located on the base making sure that both thermal pads flush with each other. Don’t forget to peel off the protective covers.

The above picture shows the underside of the aluminum tray. This is the side that will sit on the motherboard PCB.

There are 2x holes on each side of the tray. These have to be aligned with the holes on the top part of the heatsink.

The above picture shows the overall layout and composition of the heatsink.

Sorry, I could not take a step-by-step picture of the SSD’s installation. But the procedure is quite simple and does not more than a minute or two. One has to place the SSD on the aluminum tray by aligning the groove on the SSD with the groove on the tray. Peel off the protective cover before the SSD is placed on the tray.
Peel off the protective cover from the thermal pad on the heatsink portion. Place the top heatsink portion on the top of the SSD ensuring that the side of the heatsink with a recessed center heat pipe faces the groove side on the aluminum tray.
Now, you may have to apply a bit of force to sandwich the SSD between the tray and the heatsink so that the holes on the tray align with the holes on the heatsink. Use the 4x same type of small screws to hold the tray with the heatsink.

The above picture shows the fully assembled Sabrent NVMe Heatsink using the Sabrent Rocket 4 Plus NVMe 4.0 2TB SSD.
Testing
We are still waiting for our Z690 motherboard from the GIGABYTE. Hence, we have used the Z590 platform with the following configuration:
- Intel i5 11600k
- ASUS ROG Strix Z590-A Gaming WiFi
- XPG SpectriX 16GB 2666MHz DDR4 kit
- DeepCool Castle 240EX White
- Addlink S68 250GB SSD [OS Drive]
- Nvidia GeForce GTX 1080 FE
- be quiet! Straight Power 11 850W Platinum PSU

We have used the following software:
- ATTO Disk Benchmark 4.0
- HWInfo
Test Results
We run three consecutive runs of the ATTO disk benchmark and note the maximum temperature reading from the HWInfo. This was done when SSD was installed directly on the motherboard and tested without any heatsink. Then it was repeated with Sabrent NVMe Heatsink installed on the SSD.

We saw a maximum temperature of 72°C at an ambient temperature of 21°C on the Rocket 4 Plus 2TB NVMe 4.0 SSD. This temperature was reduced to 46°C using the Sabrent NVMe Heatsink. We saw a reduction of 26° which is quite impressive.
Conclusion
The PCIe Gen 4 NVMe drives have a tendency to run warm. This could impact the performance in the longer run. While the modern motherboards come with heatsinks and thermal pads to make these SSDs run cool, there are always aftermarket cooling solutions available at the disposal of the end-user. Sabrent also has one such powerful cooling solution named Rocket NVMe Heatsink. Though any NVMe SSD can be used with this heatsink, Sabrent is marketing them with and for their Rocket series NVMe SSDs. Maybe the aesthetic reason is there for that because the outlook and color choice on the heatsink matches with the Rocket series SSDs.
The dimension of the unit is 3.1 x 1 x 0.9 in. The whole package has two parts; one is the aluminum tray and the other is the actual heatsink assembly. Sabrent is using copper and aluminum materials to ensure the maximum heat transfer in as efficient a manner as possible. For that, they have employed 3x copper heat pipes/coils sandwiched between the aluminum plating forming a heatsink. There is a top aluminum cover to heat spreader having a Sabrent branding in black and copper colors. There is a pre-applied thermal pad in the white color on the base of the heatsink.
The aluminum tray has a pre-applied thermal pad at its inside base. There is another spare thermal pad labeled B provided as well. It seems like all the thermal pads are 1.0mm thick. There is no thermal conductivity rating provided for these thermal pads. By default, the heatsink can employ a dual-sided SSD. To install a single-sided SSD, one has to use the labeled B thermal pad on the base of the aluminum tray.
The installation is quite convenient and takes much less time to fully assemble the heatsink on the SSD. Sabrent has provided a screwdriver and 4+1 screws for the installation. 1x screw is to be used on the groove side of the assembled solution to install the SSD on the motherboard socket.
We have used the Sabrent Rocket 4 Plus NVMe 4.0 2TB SSD to test the Rocket NVMe Heatsink. The SSD was tested without any heatsink (except its own thin layer of the heatsink) and then testing was repeated with heatsink installed on the SSD or should I say, SSD installed inside the heatsink. We saw a temperature drop of 26°C which is quite good. The SSD was running warm with a maximum temperature reaching 72°C without a heatsink. It was reduced to 46°C using the Rocket NVMe Heatsink. The Sabrent Rocket NVMe Heatsink is available at $26.99 and it is found to lower the operating temperature of the Rocket 4 Plus NVMe 4.0 SSD effectively. The heatsink comes recommended by us.
We are thankful to Sabrent for sending in the Rocket NVMe Heatsink for review.


