


Antec Flux M Case Review – Small Yet Spacious
The Antec Flux M was originally announced in November 2025, and today, we are bringing you our review of the MicroATX case. It has been over 3 years since we reviewed any products from Antec, and that was the Vortex 240 AIO. Following today’s review, we will also be reviewing the Antec P30 MATX case and the Skeleton 360 ARGB AIO.
The Flux M has plenty of options for cooling and enough space for even a massive GPU. It comes with six fans preinstalled, three of which are ARGB and three of which are just black. Considering the current listing price for this case at the time of review, coming with six fans is quite the achievement. The Flux M also has a unique PSU mounting bracket, which we don’t see on too many cases these days. Oh. let’s not forget that it comes with it’s own GPU support bracket as well, which just goes to show the size of GPUs the Flux M is made to accomodate.
Amazon Purchase Links
Amazon.com – $74.99 at the time of review
Amazon.co.uk – £64.99 at the time of review
Specs

Exterior
Starting with the front of the case, we can see the first two of six fans that are pre-installed into the Flux M. These are behind a mesh panel that will act as a dust filter as well. To the bottom right, we can see the front IO panel.

The front IO has the following ports:
- Power button
- Reset button
- Audio (headphone/mic) jack
- USB-A 3.0 port
- USB-C 3.2 Gen 2 10Gbps port
This is more than enoughports for most users.

The case has a dimension of 459 x 247 x 365mm (Depth, Width, Height). You can see the six fans it comes with in the image below, which is quite the feat for a case of this size. Especially when you consider you can add another three 120mm fans to the top as well!

The main side panel, which will be used for viewing the components in the case, is a complete tempered glass panel and is toolless to remove. To remove, you simply pull the panel off; it really is that easy.

The back of the case has a bit going on. There are five PCIe brackets; these will align with the PCIe slots on a Micro-ATX motherboard. There is an intake fan, which is ARGB. The fan can also be moved up or down in the bracket, depending on your needs. Simply loosen the screws a bit and move to your desired location.
There are also a couple of unique points here. The first is the extra ventilation grill above the fan and the rear IO for the motherboard. You will also see a power input for a mains lead. This is due to the PSU being mounted towards the front of the case, and Antec has included a cable so you can still plug your mains cable into the back of the case. We don’t see this on too many cases, though there have been a few over the years that utilize a similar design.


The secondary side panel is mostly plan except for a small mesh-like area. This is used to allow the power supply to draw in air with its fan to ensure it doesn’t overheat.

The top of the case has a magnetic dust filter that covers it. Removing this gives access to mount our cooling fans or radiator. It also reveals the location for the power supply mount.


Removing the PSU cover will allow you access to the screw holes for mounting your PSU. You will also need to plug in the cable that is connected to the back of the case before putting the top panel cover back on.

Interior
Taking a peek inside the Flux M, there is quite a bit going on. While this is an M-ATX case, there is plenty of room for components, cooling, and even massive GPUs.

The motherboard standoffs come pre-installed, so you can slot your board in straight away. Just behind the cutout for CPU cooler installation, we can see the bracket for installing storage drives, which we will take a better look at shortly.

On top of the case, you can install up to a 360mm radiator or three 120mm fans. This is great to see on a MicroATX case, as it gives you plenty of options for cooling. Whether you prefer air or water cooling, the Flux M has you covered.

As mentioned, the Flux M Case comes with six fans already installed! There are 2x 120mm ARGB fans in the front as intake, 1x 120mm ARGB fan in the rear as an exhaust, and there are 3x 120mm black fans in the bottom that also help intake air into the case. Given the price of this case and the size, having six preinstalled fans is absolutely amazing to see. A lot of standard tower cases don’t even come with this many fans, so kudos to Antec for making sure there is plenty of airflow in the Flux M.


The bottom of the Flux M case has a full-length magnetic dust filter, similar to what we see on the top. It does go under the feet to hold it in place, but it just slides under them, so it’s easy to just pull and remove for cleaning when needed. Removing the dust filter also gives you access to the mounting for the bottom fan. Again, these can be moved if needed be undoing the screws a bit and sliding them to your desired location.


The backside of the Flux M is filled with the normal stuff, but it has a rather unique layout. Of course, when it comes to smaller cases, manufacturers are left with the task of finding a way to include everything the end user will need, and Antec has done a good job of this in the Flux M.

This small panel can be removed when installing the power supply. It opens up a nice bit of space, and you can use it to hide a lot of the extra cables you will have. There is one screw on the right-hand side that needs to come out to take this panel off, but that is it. Other than that, there are just two slots to line up on the left side.


As mentioned, behind the motherboard tray is a bracket to install your storage drives. The bracket is removable, and there are two screws on each side that you need to take out; then it just slides up and comes off. You can install either two 3.5″ hard drives or two 2.5″ SSDs, or a combination of the two. Given that most boards also have support for at least a single M.2 drive, this should be more than ample support for storage drives as a whole for an M-ATX case.


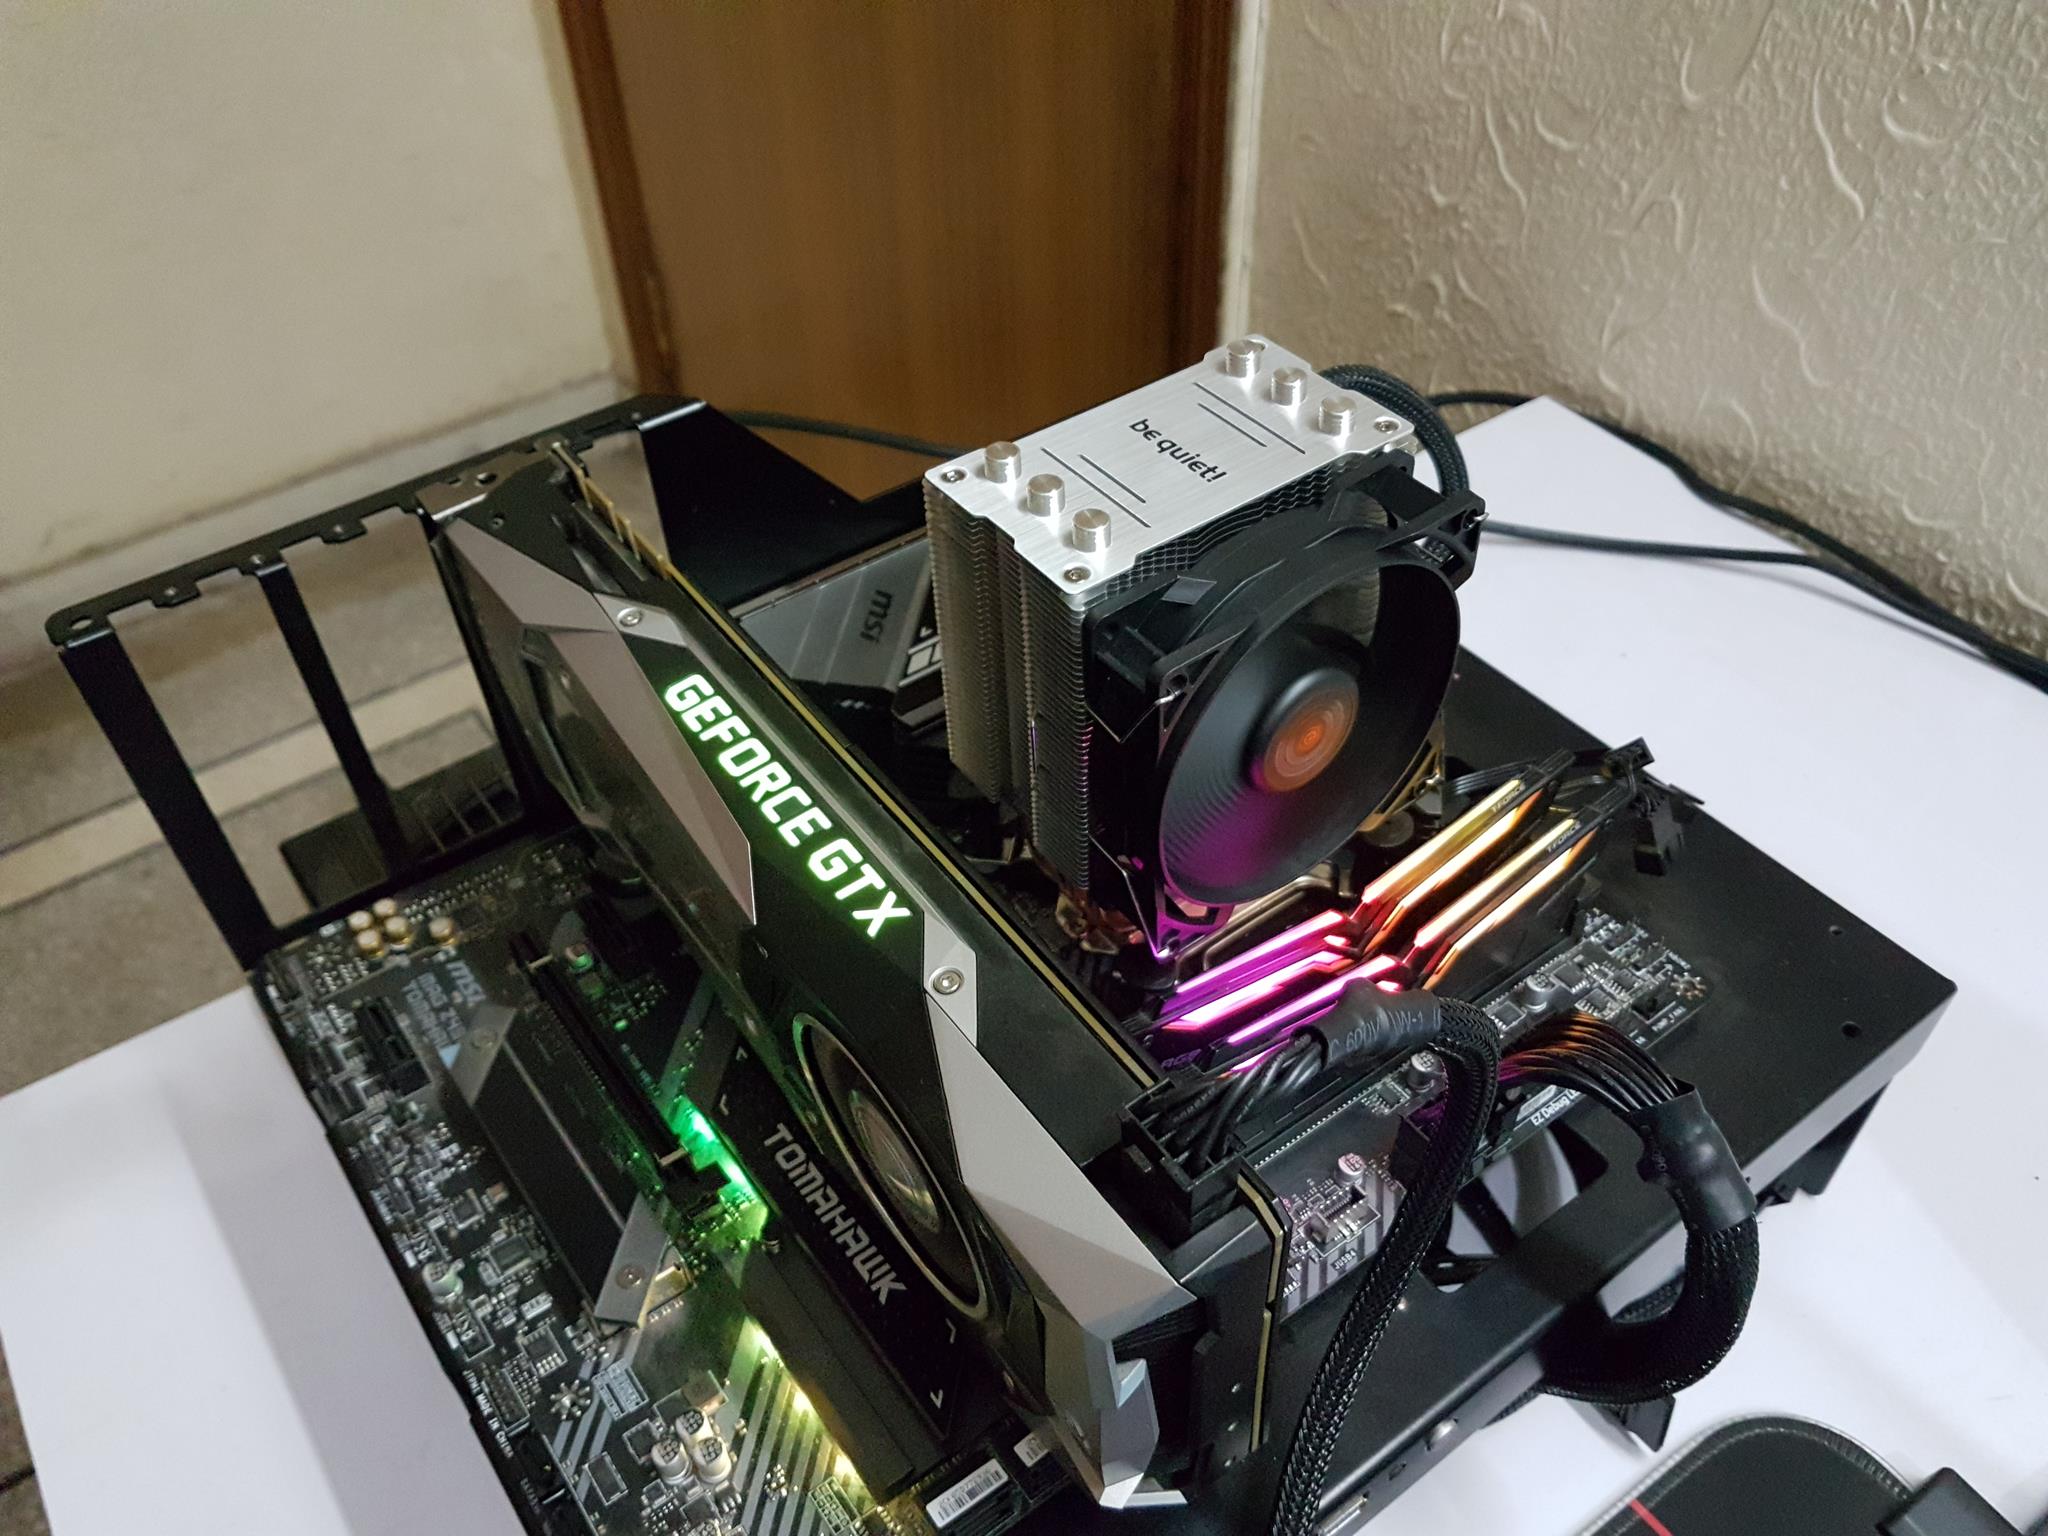
Installation
I didn’t run into any issues when installing the components in the case; there is more than enough room for everything. Using a Micro-ATX motherboard instead of a Mini-ITX board, as I did, would have likely made things even easier. Setting up in a smaller case is also going to pose a bit more of a challenge vs building in a full-size tower case, but this is to be expected. Once you get over the small hurdles, it’s smooth sailing. I always find it easier to install the motherboard and all the cables I can first, then install the graphics card, and lastly the AIO, especially when using an ITX board.
The Test system specs are as follows:
- Antec Flux M Case with included fans
- ASRock B860I WiFi Motherboard
- Intel Core Ultra 225F CPU
- Antec Skeleton 360mm ARGB AIO CPU Cooler
- 16GB Acer Predator Pallas II DDR5 6000 MT/s Memory
- Samsung 980 Pro 1TB PCIe 4.0 NVMe M.2 SSD
- EVGA GeForce RTX 3080 FTW£ Ultra 10G Graphics card
There are plenty of holes to pass through cables from the back to the front in the Flux M, which leaves the main area of the case looking clean with as few cables as possible. As mentioned, there is plenty of room for massive graphics cards in the Flux M. There is room for longer GPUs, and you could even fit a triple slot card in here without any issues.
The only thing I can think to mention is that when installing the PSU cables or the front panel cables, make sure they pass through the case and don’t end up on the outside, as this will make it impossible to put the PSU cover on the bottom and the side panel back on. This isn’t an issue, just a little heads up, as it can be overlooked when in the middle of building.


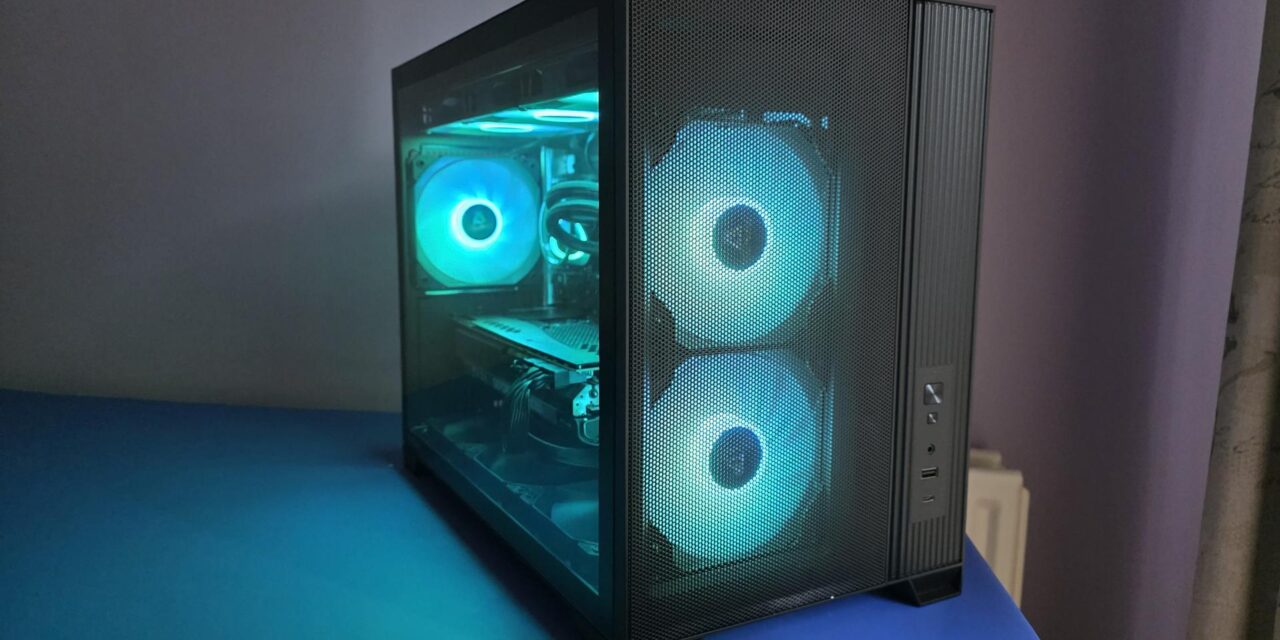
ARGB Lighting
Here are a few images showing the ARGB lighting effects of the fans. As you will see, some of the images have the side panel both on and off, and then there is a view from the front, so you can get the best idea of what things will look like once fully built and all turned on. Remember, I also used an Antec Skeleton AIO for this build, hence why the pump and top fans’ colors match perfectly.


Final Words
The Flux M case has a lot to offer in a Micro-ATX form factor. In fact, this case has more than sufficient room for those who would want to go down the custom water cooling route without needing an absolutely massive case. The case has plenty of room, ample airflow, and looks nice, so it should fit in with most setups
Some of the main specifications of the case are:
- Motherboard support: Micro-ATX, ITX
- CPU cooler max height: ≤ 175mm
- GPU max length: ≤ 405mm
- Power Supply max length: (Without cable) ≤ 160mm
- Storage Drives: 3.5″ / 2.5″ 2/2
One of the more interesting design features on this case is the mounting of the PSU in the front of the case and then using a cable to connect the power input to the rear of the case. This feature seems to work very well for the Flux M and is one of the reasons that there is so much room for cooling and components in the main chamber. Had the power supply been mounted anywhere else, there would be a noticeable loss of space in the case.
The pricing of the case is also going to be one of the biggest selling points! The price is less than some companies would charge for the fans alone, let alone having them come installed in the case as standard. Whatever Antec is doing with its pricing, let us hope it keeps up, especially given the current price inflation and DRAM crisis the market is currently seeing.
Amazon Purchase Links
Amazon.com – $74.99 at the time of review
Amazon.co.uk – £64.99 at the time of review
All in all, the Antec Flux M Micro-ATX case is an absolute bargain at this stage. Not only is the pricing more than fair, but it also offers loads of support and compatibility for tons of components, giving you full control of your build. Hopefully, moving forward in 2026, we will see more of this from Antec as it will allow users to continue upgrading their PCs without breaking the bank.


