


ARCTIC Liquid Freezer – II 420 CPU Liquid Cooler Review
Installation
Contents
We have recently upgraded our Intel testbed and are now on the Intel LGA1200 socket. Installation is as follow:

Place the pasting rubber washers over the mounting holes on the motherboard’s backside and place the backplate.

Place the pasting rubber washers on the mounting holes around the socket area on the front side of the motherboard. Install the Intel standoffs.

Install the Intel mounting brackets on the block using 2x screws.

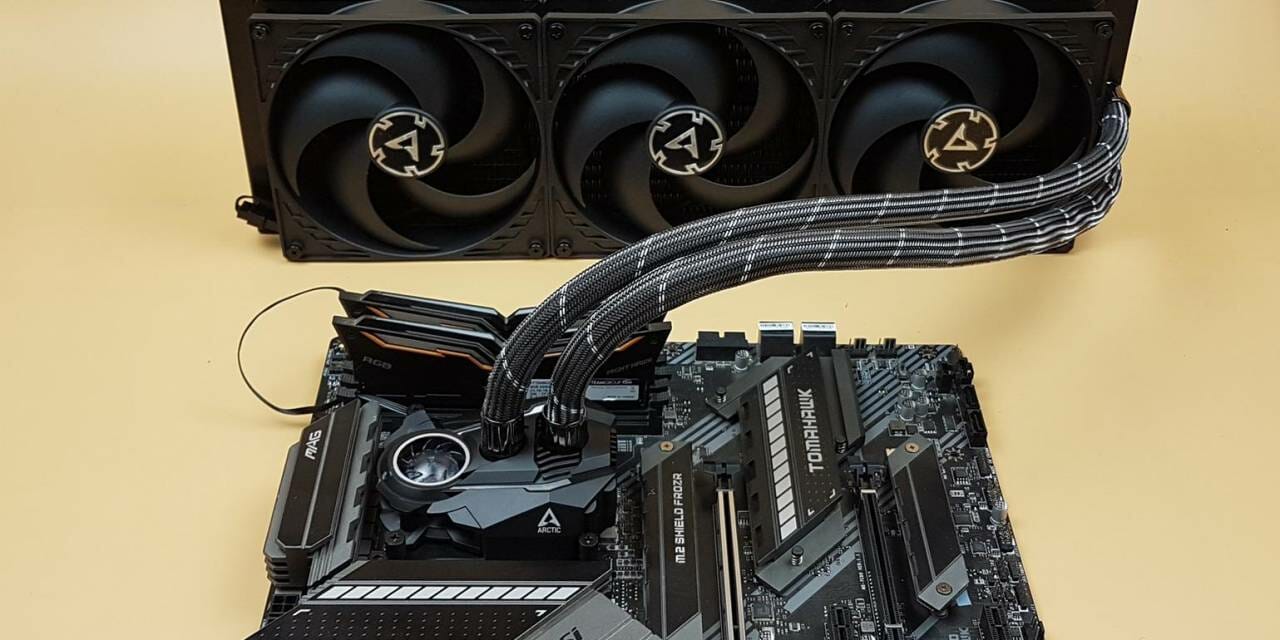
Apply the thermal paste on the CPU. Peel off the protective cover from the base of the block. Place the block on the CPU by aligning the pre-mounted screws to the holes on the mounting brackets. The VRM fan is preferred to be on the top near the VRM areas for effective cooling.

Use the thumb nuts to secure the block on the socket.
Connect the 4-pin PWM cable coming out of the block to the 4-pin PWM fan header preferably the CPU fan header on the motherboard.
There is no clearance issue with respect to the DIMM slots and first PCIe slot. Make sure your chassis has clearance for 420mm radiator with 66mm clearance for the thickness of the unit. The majority of the PC cases would not support the 420mm AIO so keep that in mind when buying this cooler.
PS: On a personal note, I don’t prefer to paste anything on the motherboard area. Maybe ARCTIC would consider changing the pasting washers with something else!


