


ASUS ROG SWIFT PG348Q Gaming Monitor Review
Introduction
Hey guys today we’ll look at the gorgeous monitor the Asus PG348Q, the monitor I was waiting to get my hands on for so long as in theory it could be the best gaming monitor out there and its spec sheet definitely supports my statement. So, meet the Asus very first 21:9 Ultra wide Display the PG348Q, Asus flagship monitor in the ROG (Republic of Gamers) lineup. It features an ultra-wide curved display, an IPS panel, 3440 x 1440 resolution and NVIDIA G-Sync Technology. Detailed specifications are as under.
Specifications
| Brand, series, model | |
| Brand | Asus |
| Model | RoG (Republic of Gamers) Swift PG348Q |
|
Display |
|
| Size Class | 34 in (inches) |
| Diagonal | ≈ 863.6 mm (millimeters)
≈ 86.36 cm (centimeters) ≈ 34 in (inches) ≈ 2.8333 ft (feet) |
| Width | ≈ 799.8 mm (millimeters)
≈ 79.98 cm (centimeters) ≈ 31.4882 in (inches) ≈ 2.624 ft (feet) |
| Height | ≈ 334.8 mm (millimeters)
≈ 33.48 cm (centimeters) ≈ 13.1811 in (inches) ≈ 1.0984 ft (feet) |
| Radius of curvature | ≈ 3800 mm (millimeters)
≈ 380 cm (centimeters) ≈ 149.606 in (inches) ≈ 12.4672 ft (feet) |
| Panel manufacturer | LG Display |
| Panel model | LM340UW2-SSA1 |
| Panel type | AH-IPS |
| Panel bit depth
The most widely used panels are those with 6, 8 and 10 bits for each of the RGB components of the pixel. They provide 18-, 24- and 30- bit color, respectively |
10 bits (8 bits + FRC-Frame Rate Control) |
| FRC (Frame Rate Control)
It is a method, which allows the pixels to show more color tones. With quick cyclic switching between different color tones, an illusion for a new intermediate color tone is created. For example, by using FRC, a 6-bit display panel is able to show 16.7 million colors, which are typical for 8-bit display panels and not the standard 262200 colors, instead. There are different FRC algorithms. |
Yes |
| Colors | 30 bits
1073741824 colors |
| Aspect ratio | ≈ 2.389:1 (21.5:9) |
| Resolution | 3440 x 1440 pixels |
| Pixel pitch
The pixel pitch shows the distance from the centers of two neighboring pixels. It depends on the resolution and the size of the screen. |
≈ 0.233 mm (millimeters)
≈ 0.0233 cm (centimeters) ≈ 0.0092 in (inches) ≈ 0.0008 ft (feet) |
| Pixel density
Information of the numbers of pixels in a unit of length. With the decrease of the display size and the increase of resolution, the pixel density increases. |
≈ 109 ppi (pixels per inch)
≈ 43 ppcm (pixel per centimeter) |
| Display area
The percentage of the approximate area, taken by the active part of the screen to the total front area. |
≈ 100 % (percent) |
| Backlight | W-LED (White Light Emitting Diode) |
| sRGB
sRGB is a color space, developed jointly by HP and Microsoft in 1996. sRGB color space covers about 72% of the NTSC color space. |
≈ 100 % (percent) |
| NTSC (1953)
The NTSC (1953) color space is introduced in 1953 by the FCC (United States Federal Communications Commission) with the appearance of color television and has a wider gamut than sRGB |
≈ 72 % (percent) |
| Brightness
Information about the brightness of the screen. It is measured in candela per square meter (cd/m2) |
≈ 300 cd/m2 (candela per square meter) |
| Static Contrast
The static contrast shows the ration between the brightest and the darkest color, which the display can reproduce simultaneously, for example, within one and the same frame/scene. |
≈ 1000 : 1 |
| Horizontal viewing angle | ≈ 178° (degrees) |
| Vertical viewing angle | ≈ 178° (degrees) |
| Minimum response time
Information about the minimum amount of time, in which the pixels change from one color to another. Very often the manufacturer provides the response time for transition from grey-to-grey (G2G) |
≈ 5 ms (milliseconds)
≈ 0.0050 s (seconds) |
| Average response time
Information about the average amount of time, in which the pixels change from one color to another. |
≈ 10 ms (milliseconds)
≈ 0.0100 s (seconds) |
| Maximum response time
Information about the maximum amount of time, in which the pixels change from one color to another. |
≈ 13 ms (milliseconds)
≈ 0.0130 s (seconds) |
| Input lag
Desktop monitors and smart TVs experience a latency/lag in visualizing the information. The time in milliseconds that the display needs to visualize the signal input. |
≈ 9 ms (milliseconds)
≈ 0.0090 s (seconds) |
| Coating
Information about the type of coating of the display. There are different types of matte and glossy coatings, each of which has its own pros and cons. |
Anti-glare/Matte (3H) |
| 3D | No |
| Frequencies | |
| Horizontal frequencies (digital)
The horizontal scan rate/frequency shows the number of horizontal lines, displayed by the monitor per second, when it is plugged to a digital source |
≈ 73 kHz – 88 kHz (kilohertz) |
| Vertical frequencies (digital)
The vertical frequency/refresh rate shows how many times in a second the image on the screen is refreshed. |
≈ 30 Hz – 100 Hz (hertz) |
| *Note | DisplayPort – 73 kHz – 88 kHz; 30 Hz – 100 Hz
HDMI – 30 kHz – 140 kHz; 24 Hz – 60 Hz |
| Power supply and consumption | |
| 110V
Permissible voltage tolerance in a 110-volt electric system. |
≈ 100 V – 120 V (volts) |
| 220V
Permissible voltage tolerance in a 220-volt electric system. |
≈ 220 V – 240 V (volts) |
| Alternate current frequency
Requirements regarding the alternating current frequency in the electric system. |
≈ 50 Hz – 60 Hz (hertz) |
| Power Consumption (off) | ≈ 0.5 W (watts) |
| Power Consumption (sleep) | ≈ 0.5 W (watts) |
| Power Consumption (eco) | ≈ 40 W (watts) |
| Power Consumption (average) | ≈ 65 W (watts) |
| Power Consumption (maximum) | ≈ 100 W (watts) |
| Dimensions, weight and color | |
| Width | ≈ 829 mm (millimeters)
≈ 82.9 cm (centimeters) ≈ 32.6378 in (inches) ≈ 2.7198 ft. (feet) |
| Height | ≈ 371 mm (millimeters)
≈ 37.1 cm (centimeters) ≈ 14.6063 in (inches) ≈ 1.2172 ft. (feet) |
| Depth | ≈ 109 mm (millimeters)
≈ 10.9 cm (centimeters) ≈ 4.2913 in (inches) ≈ 0.3576 ft. (feet) |
| Weight | ≈ 7.7 kg (kilograms)
≈ 16.98 lbs. (pounds) |
| Width with stand | ≈ 829 mm (millimeters)
≈ 82.9 cm (centimeters) ≈ 32.6378 in (inches) ≈ 2.7198 ft. (feet) |
| Height with stand | ≈ 443 mm (millimeters)
≈ 44.3 cm (centimeters) ≈ 17.4409 in (inches) ≈ 1.4534 ft. (feet) |
| Depth with stand | ≈ 297 mm (millimeters)
≈ 29.7 cm (centimeters) ≈ 11.6929 in (inches) ≈ 0.9744 ft. (feet) |
| Weight with stand | ≈ 11.2 kg (kilograms)
≈ 24.69 lbs. (pounds) |
| Colors | Black |
| Ergonomics | |
| VESA mount
Information about whether there is a possibility for wall mounting according to VESA Mounting Interface Standard (MIS). |
Yes |
| VESA interface
There are various interfaces under the VESA standard, which differ in the size of the brackets, the distances between the screw holes and their number. |
100 × 100 mm2 |
| Removable stand | Yes |
| Height adjustment | Yes |
| Height adjustment range | ≈ 115 mm (millimeters)
≈ 11.5 cm (centimeters) ≈ 4.5276 in (inches) ≈ 0.3773 ft. (feet) |
| Landscape/ portrait pivot | No |
| Left/ right swivel | Yes |
| Left swivel | ≈ 50° (degrees) |
| Right swivel | ≈ 50° (degrees) |
| Forward/ backward tilt | Yes |
| Forward tilt | ≈ 5° (degrees) |
| Backward tilt | ≈ 20° (degrees) |
| Audio | |
| Speakers | 2 × 2 W (watts) |
| Camera | |
| Camera | No |
| Connectivity | |
| Connectivity | ■ 2 × USB 3.0 (downstream)
■ 1 × USB 3.0 (upstream) ■ 1 × HDMI 1.4 ■ 1 × DisplayPort 1.2 ■ 1 × 3.5 mm Audio Out |
| Features | |
| Features | ■ 5-way OSD joystick
■ Flicker-free technology ■ GamePlus (Crosshair/Timer) ■ GameVisual ■ HDCP (High-bandwidth Digital Content Protection) ■ NVidia G-SYNC Technology ■ Refresh Rate Turbo key ■ Trace Free Technology ■ Ultra-low Blue Light |
| Certificates, standards and licenses | |
| Certificates, standards and licenses | BSMI, CB, CCC, CE, CEL level 1, cTick, CU, ErP, ENERGY STAR 6.0, FCC Class B, J-MOSS, KCC, PSE, RCM, RoHS, TUV Low Blue Light, TUV Flicker-free, UL/cUL, VCI, WEEE and WHQL (Windows 10; Windows 8.1; Windows 7 |
| Operating and storage conditions | |
| Operating temperature | ≈ 0 °C – 40 °C (degrees Celsius)
≈ 32 °F – 104 °F (degrees Fahrenheit) |
| Storage temperature | ≈ -20 °C – 60 °C (degrees Celsius)
≈ -4 °F – 140 °F (degrees Fahrenheit) |
| Accessories | |
| Accessories | DisplayPort cable
HDMI cable USB 3.0 cable |
What’s in the Box?
- PG348Q Gaming Monitor
- Power cord
- Power adapter
- DisplayPort cable
- USB 3.0 cable
- Quick start guide
- HDMI cable
- Support CD
- Warranty Card
Unboxing
We are going to do an unboxing and take a closer look and see what’s inside of the gigantic box of Asus ROG Swift PG348Q Monitor.
- Cut the tape on the back and open up the top. Flip the top cover and it says unpacking instructions, which says to lay the Box on its side (See the Arrow showing TOP to keep this side on the top). It’s a pretty heavy box so you want to be careful and there’s a bunch of cutouts in the Styrofoam to grab on and slide the monitor out. It’s not as easy as it seems.
- After getting everything out of the box, you’ll see some accessories.


- Zip-lock bag with stickers, DVD of drivers/instructions, pedestal installation guide and Asus VIP member notice.
- Another bag with a USB 3.0 cable having USB Type-A connector on one end and USB Type-B connector on the other end.


- HDMI Cable & Display Port Cable


- Standard power cords and a power brick adapter.


- A pretty cover though it’s a plastic, for the back of the monitor, for better cable management

- A pretty cool looking pedestal stand of swirl design of copper color with three legs and a packet of screws (don’t lose the screws)
- More pieces of pedestal with Logo and LED at the bottom


- Take out the upper part of the Styrofoam and you’ll find the Monitor with a nice layer of bubble wrap right over the screen to keep it protected. Remove the bubble wrap to see the nice curved design with the matte black finish and a very thin bezel around this one.

- On the back, there is an electrical connection that’s going to attach to the pedestal, here you’ll see there’s a little contact to lit up the logo at the bottom

- The PG348Q has an HDMI 1.4 port, DisplayPort 1.2, an audio jack and a USB 3.0 hub with four ports you can use, granted not an ideal position for USB connectivity. For 100 Hz and/or 3440×1440 it is recommended to use DisplayPort due to the high bandwidth requirements. It’s strange that at this price range we get only one HDMI and DisplayPort, which is not sufficient.

Assembling PG348Q Monitor
Well it’s all starts with assembly and assembly of most monitors these days is very simple, so this one is also pretty straight forward. Let’s have a look.
- Unlatch the covers from the pedestal piece as shown. After assembling the monitor, pass the cables through the pedestal and re latch the covers, so cable management is excellent on this monitor.

- Place the piece of the pedestal with LED light on the swirl like pedestal. There are some cutouts available on the pieces of pedestal so they’ll fit right into each other easily.

- Place and tighten the screws on both sides of the pedestal.

- After tightening the screws, place the pedestal on the monitor as shown. First, latch the upper side of pedestal on the cutout provided on the monitor and then lower side will latch on easily

A Closer Look:
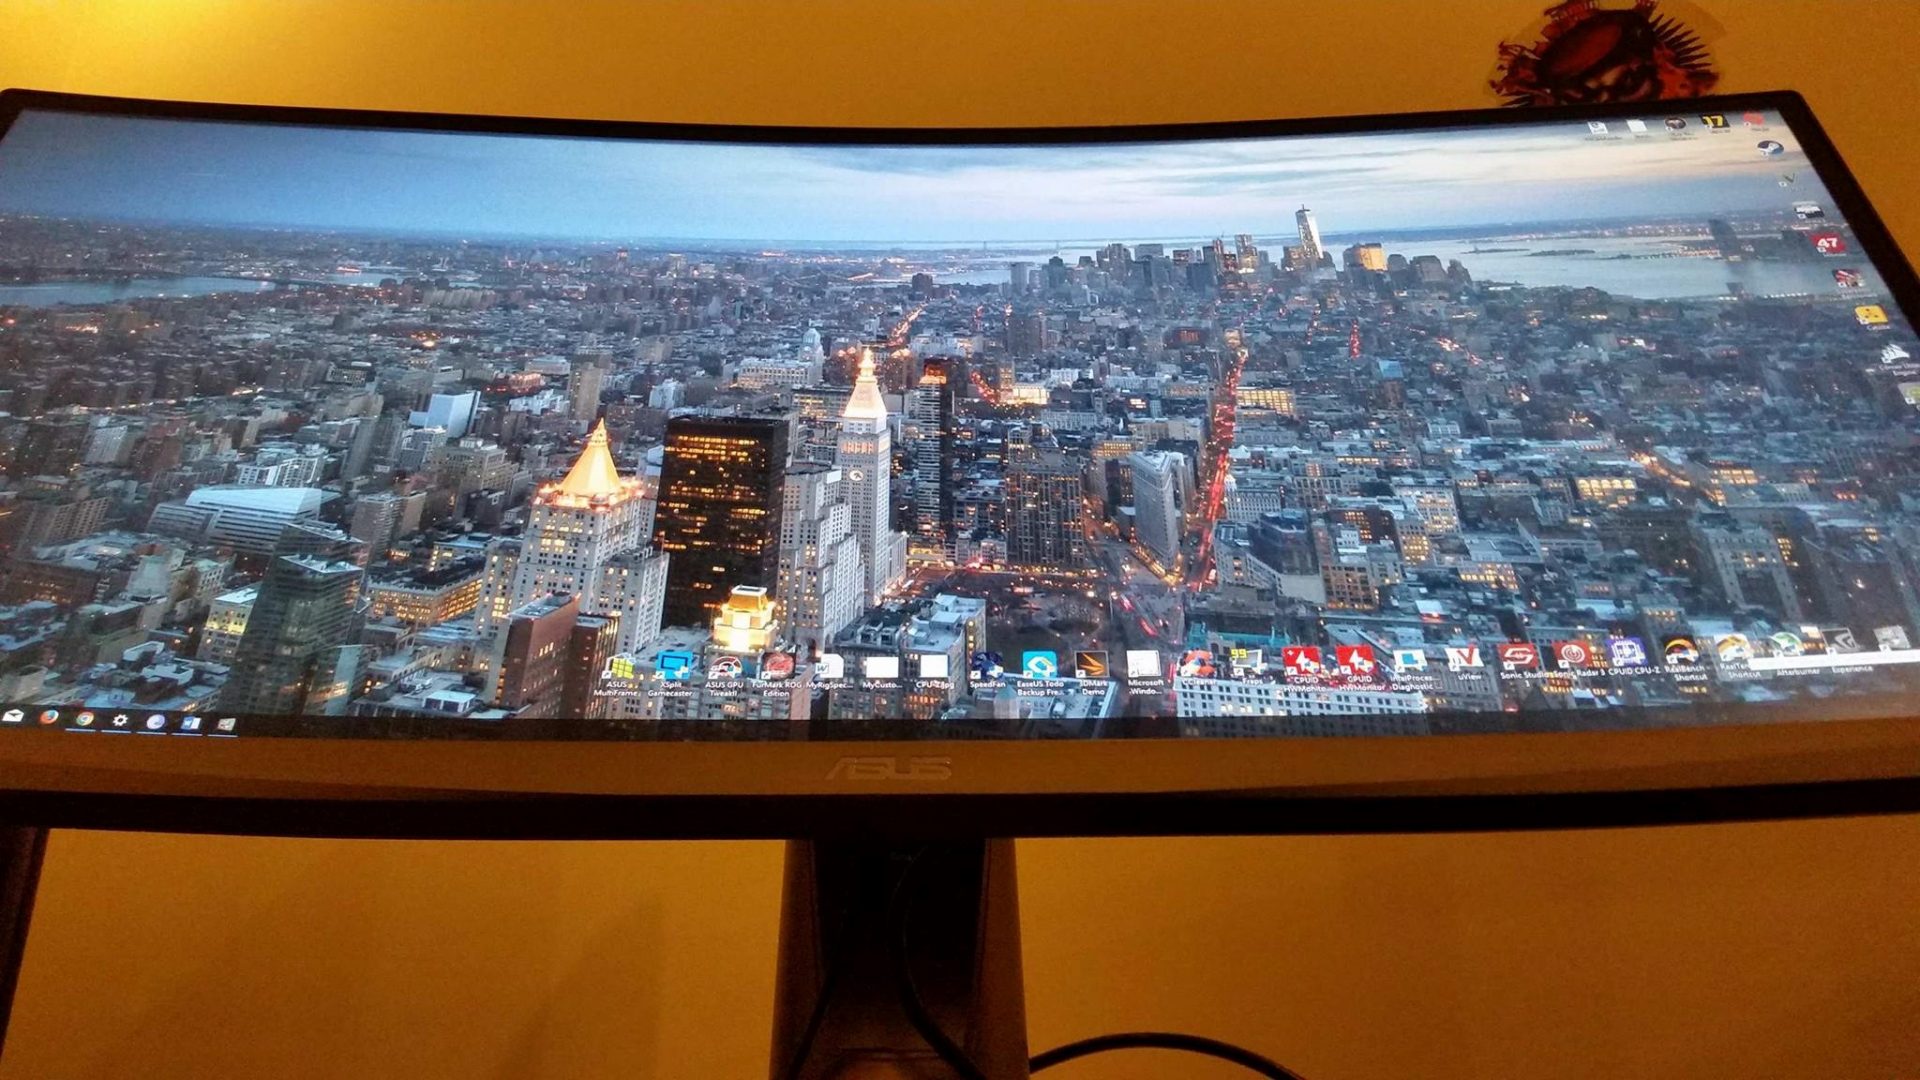
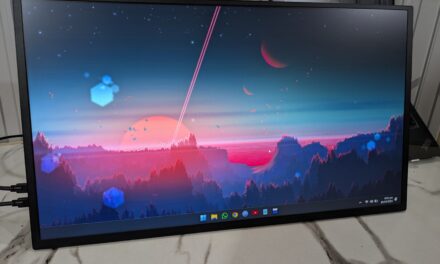
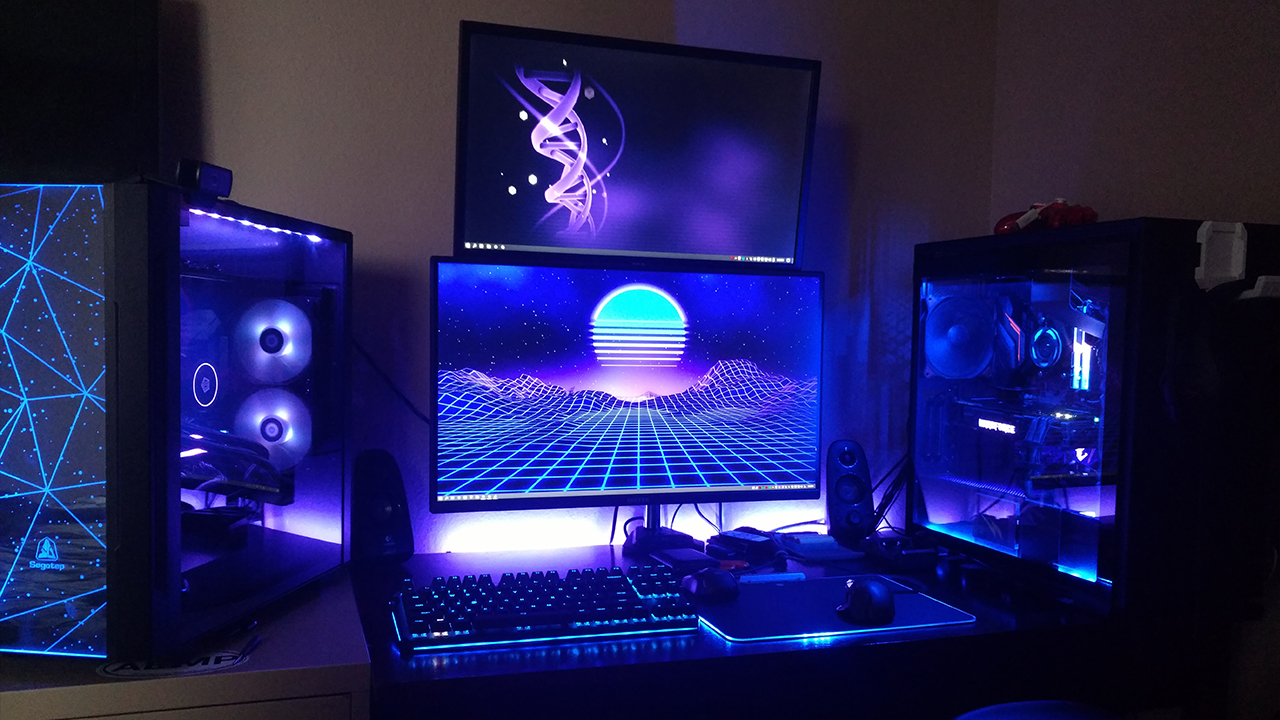
Featuring a 34″ 3440 x 1440 screen, here it goes to an industrial design and it strikes a nice balance between a gamer and a professional. It is something that you can easily have on your desk and in an office. It’s a bit more than that and I would like to say that it is definitely one of the best-looking monitors I’ve ever had on my desk. This is something that’s really big, striking and will get people talking for a long period of time to come.


Overall it’s a very nice looking monitor, the bezels are very slim, they are not the slimmest in the business but they do a very good job in disguising that and I don’t think anyone’s going to have any complaints here. It’s all about angles as well, the curved screen will give you an immersive experience. At the bottom of the front screen, one can see a brushed metal like finish.
The stand itself has plenty of adjustments. It has a metal affair and the whole thing is very heavy and it does sort of extend a little bit into your desk so if you’ve got quite a shallow desk then this probably actually isn’t really that suitable but most desks I’ll imagine will cope absolutely fine. It has a load of textures and it’s almost a waste if you’ve got this thing up against a wall because you won’t see the back of it.
This is the curve that gamers were craving for a long time. It has a very clever design techniques with ROG’s new Armor Titanium and Plasma Copper color scheme. This display can swivel up to ±50 deg on each side, tilt +20 deg to -5 deg and adjust height 0 mm to 115 mm.
An enhanced refresh rate of 100 Hz ensures gamers to play games as smooth as silk with better visuals which can help them win games by eliminating lag and motion blur. Though for a smooth and uninterrupted gameplay we have G-Sync technology. At least NVidia 980Ti is required to enable G-Sync.
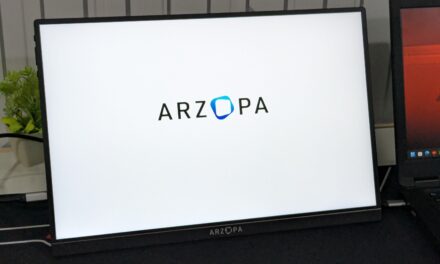
It is definitely relayed by the fact that the ROG logo is actually put on your desk in a sort of Halo like fashion, so it’s definitely out there with varying intensity level and a lot of people will like that it cast a ROG logo on your desk (which can be turned off BTW).


Viewing Angle
LCD monitors are usually advertised as having a viewing angle of somewhere between 140 and 165 degrees. This means that you can still see what’s on the display if you are looking at it at 70 to 83 degrees from the side. However, most of the time, you will be sitting roughly straight in front of the screen, which means that you are looking at 0 degrees to the center of the screen and, at most, 45 degrees to the sides. Compared to the advertised viewing angle, it is much more relevant that the display does not change brightness or color in the corners.

Above, a 0% view angle, we look directly at the screen. Below, the viewing angle at sharper horizontally positioned camera angles.

At an angle of almost 40 degrees here’s where TN panels normally run into issues, IPS is much better in this respect. Well, that and overall display quality.

Photos absolutely blow to show the effect properly, however, trust me when I say that IPS is much better opposed to TN in this particular matter. Also, when you look at brightness and discoloration alongside the viewing angle then that will tell you something about the image quality when you are not looking straight at the screen. TN screens would show discoloration to some degree where IPS and VA screens are less sensitive to that. It’s a relative and fairly subjective thing though, as I assume you’ll be sitting directly in front of your monitor.
Monitor Test Using PassMark Software
Now we’ll test the monitor using PassMark MonitorTest software. Following is the test configuration

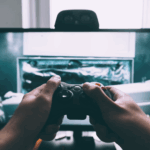
Test No.1:- Test screen: Master Screen
The master screen combines a number of elements that allow the quality of the monitor to be assessed from a single test pattern.

Circles
The four small and one large circle allow the linearity of the monitor to be tested. The center circle should appear to be perfectly round, without distortion in its shape and without forming an oval and it appears perfectly round. The smaller circles are designed to be perfectly round for a 4:3 screen ratio. Other screen ratios like we have 21:9 will lead to these becoming slightly oval.
Black and white checked border
The checked border allows the position of the image to be checked. If part of the check is not fully visible or there is a large gap between the check and the edge of the screen then the position of the image may need to be adjusted. However in our case checks are fully visible around the border and gap is equally spaced.
Fine Grill
Four grills made up of black and white strips appears to the left and right of the central circle. The top left grill has a pixel spacing of 1 pixel. The bottom left grill has a spacing of 2 pixels. The two grills on the right are spaced at 3 and 4 pixels. It is possible to see the individual black and white lines even on the fine 1-pixel grill though it is not visible in the screenshot.
Primary and secondary colors
Across the center of the screen are six squares that contain the three primary colors (Red, Green and Blue) and the three secondary colors. (Yellow, Cyan, Magenta). Each color is of equal brightness and uniform intensity. At the borders between the squares we were looking for any evidence of horizontal color blurring or smearing but found none.
Gray scale
Eight different shades of gray are displayed across the middle of the screen. Pure white on the right and pure black on the left. It is clearly visible to differentiate each different shade and the borders between the shades.
Other elements
All colored borders have a sharp edge and there is no smearing of color.
Test No.2:- Solid Black
The screen is filled with a bright solid black color. The image that has a consistent level of brightness, without any holes or dark patches. The color is uniformly the same shade, without any hints or tinges of other colors.

Test No.3:- Solid Red
The screen is filled with a bright solid red color. The image that has a consistent level of brightness, without any holes or dark patches. The color is uniformly the same shade, without any hints or tinges of other colors.

Test No.4:- Solid Green
The screen is filled with a bright solid green color. The image that has a consistent level of brightness, without any holes or dark patches. The color is uniformly the same shade, without any hints or tinges of other colors.

Test No.5:- Scale Black – Red, Green, Blue, White
The screen is filled with a color scale, with pure black appearing on the left side of the image and the selected color i.e. Red, Green, Blue and White, at maximum brightness, on the right. There is a smooth change in color from dark to light. No color steps are visible. The change in brightness is progressed at the same rate at the top, the bottom and in the center of the image. It is possible to draw a vertical line down the monitor and have the same color all the way down the line.


Test No.6 Moiré Interference1 and Interference2
Moiré patterns are caused by interference between two finely spaces grids. They are a natural phenomenon and can occur when scanning images using a flatbed scanner, on your monitor and in other areas of science.
Moiré patterns often appear as a number of circles or arcs appearing across the image, these arcs can appear to be tinted in various colors. The image is checked to see that the interference is not excessive; a small amount is normal on monitors with good focus which is not easily visible in pictures though.


Test No. 7 Convergence
The 1st of these two images displays a grid of white dots, the 2nd displays a grid of white lines.
Dots
The output looks like a grid of white pinpricks. The color is pure white, without a fringe of any color around the outside of the dot. The dots, although small, are clearly visible (the screen should not appear totally black).
Lines
The output is sharp and clear. The color is pure white, without a fringe of any color on the edge of the line. The grid appears rectangular, without any convex or concave distortions.
![]() Good, pure white
Good, pure white ![]() Bad, color fringes.
Bad, color fringes.


Test No.8 Crosshatch
This test pattern is designed to locate problems with display geometry, pincushion, trapezoid, horizontal size, vertical size and alignment. The four small circles appear circular and are touching the top, bottom and sides of the bounding squares. There is a broken line visible around the outside of the pattern.

Test No.9 Mask and Mask2
These patterns are designed to test white balance. Adjusting the white balance of a monitor changes the relative intensities of the red, green and blue colors of a screen to create a warmer (yellow) or cooler (blue) image.


Test No.10 Contrast
This screen displays a series of colored boxes. There are 3 large colored bars of 0%, 40% and 80% brightness. Between these bars are thirty smaller boxes or varying brightness. It is possible to see a difference in the brightness levels. For example, it should be possible to see the difference in brightness between 0% and 20%. Note that the darker levels are usually harder to distinguish than the brighter levels.

Test No.11 Persistence
This screen can be used to check that pixels on a LCD screen do not have too much persistence. Persistence is the amount of time that a pixel stays illuminated after the pixel has been turned off. The first LCD screens on the market had a problem where pixels would stay illuminated for a long period of time after they were turn off, creating a smeared effect as objects move across the screen. Having a level of persistence that is too short is also not a good thing as the pixel must remain illuminated between screen refreshes.
Monitors with high persistence phosphor will display a blurred white tail to the left of the moving boxes. The longer the tail the higher the persistence.

On Screen Display Details
The Asus PG348Q features a 5-way joystick located on the bottom right of the panel. The OSD navigation is quite easy and on-the-fly quick.
Beneath the joystick there are four physical buttons, providing shortcuts to features like Turbo mode that overclocks your screen to 100Hz, on-screen crosshairs and an FPS counter. All the gamers need these shortcut buttons, it’s a blessing for them indeed. The last and lowest button is the power switch.

Let’s take a closer look at the OSD menus.
- Overclocking – speeds up the display on-the-fly from 60Hz to 100Hz

- GameVisual
The next menu is “GameVisual”, which features multiple modes of operations like Scenery, Racing, Cinema, RPG, FPS and sRGB.
Flickering right on the joystick enables a preset, after which it lets you to either reset it to default settings or deselect it and go back to the previously selected profile.

- Blue Light Filter
As it names tells it all, it’s the blue light emission from the screen which apparently makes for a better reading experience. Again this feature is for reading purpose only. Avoid it totally, if you are a gamer. This is a gaming monitor, still, this feature is useful for reading articles or e-books as it causes less strain on eyes. There are five intensity levels of Blue Light Filter from Level 0 to Level 4.

- Color
The color menu has brightness, contrast, and saturation and color temperature. Default profile selected is “Racing” and Color Temp is selected to “User Mode”, I suggest to change it to “Normal” for more standard color accuracy.

- Image
It has just one option, and that is ‘OD’ or ‘Overdrive’. Overdrive allows you to control the rate at which pixels turn on and off. Gaming monitors such as the PG348Q allow users to overclock this aspect, which I highly suggest against. The default at ‘normal’ is perfectly okay, and pushing it to ‘extreme’ will result in lots of ghosting which you certainly don’t want as a gamer.

- Input Select
It is self-explanatory in that it allows you to switch between DisplayPort and HDMI. A Picture in Picture (PiP) feature would have been nice considering the screen estate that you have, but that option was nowhere to be found.

- System Setup
The last option on the OSD menu is ‘System Setup’ that lets you tinker with the OSD’s position, transparency and timeout, along with language, key lock, volume, etc. Speaking of volume, the PG348Q has two tiny speakers and they are just absolutely terrible. It lacks volume of any kind, has little bass and clarity is completely absent.

PG348Q’s On-Screen Display menu is simple and self-explanatory. The 5-Way joystick makes the navigation so flexible and a breeze to use.
The hard buttons on the back are not customizable which I wish it should be. Personally, I want hard buttons of contrast and brightness instead of on-screen timers or crosshairs.
Gaming Experience on PG348Q
If you are a serious gamer or a part time player, your hardware definitely plays a strong role in your victory or defeat. To get the most out of the latest First Person Shooter, Sports, Racing and other fast paced games, you’ll not only need a powerful gaming PC with a powerful graphics card but you’ll also need a monitor that can display such actions without subjecting you to blurred images, flicker, tearing and other motion artifacts. So the gaming experience on PG348Q is without a doubt a pleasant experience, smooth as silk and excellent quality. Its In-Plane Switching (IPS) panel provide the best all-around color quality, strong gray-scale performance and wide viewing angles. Its 4ms pixel response time is adequate for fast paced gaming. Also, 100Hz refresh rate helps to reduce image blur and eliminate tearing. The latest crop of gaming monitors use synchronization technology like PG348Q uses Gsync technology which helps in reducing tearing and other motion artifacts while lowering input lag. The result is a very smooth gaming experience with reduced input lag. Gsync works with a DisplayPort 1.2 or HDMI 2.0 output, so in this PG348Q you can use Gsync only using DisplayPort 1.2. HDMI 2.0 is not available only HDMI 1.4 is available which is really disappointing at this price.
Final Words & Verdict
The ASUS ROG Swift PG348Q Gaming monitor is just a feast to just have a look on it, I assume some of you even want to taste it. The aesthetics and design are well thought of and looks fantastic. The curvature works really well for monitors, forget about Eyefinity and Surround view, a 3440×1440 monitor with its cinematic 21:9 aspect ratio offers the right amount of vast experience, and you won’t need graphics cards set up in SLI opposed to using three monitors either. The curved design certainly has a lot of appeal and hits a soft spot for many. Above all it’s an IPS panel, I personally prefer IPS over TN panel by miles, though TN panels response time is faster than IPS panel but IPS pops out of the screen and looks fantastic. So sure, IPS will be a bit slower but for me personally, it doesn’t bother me even the slightest bit. But hey, the hardcore gamers out there spit at anything slower than 4ms and anything lower than 144 Hz. Luckily the market has answers for all of us. Obviously, you can run 60 Hz and up to 100 Hz overclocked. 100 Hz did not result in massive gains of power consumption for the monitor, it added almost 5 watts at maximum. On the topic of G-Sync, it works well and with your screen, at 100Hz you’ll be in for a real treat, to be honest.
The Monitor Overall
ASUS offered something unique with the ROG Swift PG348Q, it’s very first 21:9 Ultra-wide IPS monitor. Well, typically there are 2 types of gaming community out there. One demands and chooses a TN panel purely for speed but they compromise the loss of contrast, color precision and viewing angles for granted in return for the extremely fast speeds these monitors can achieve. Then there is another kind of gaming community that purchases a monitor for better image quality, nice black-levels, contrast, display quality and color precision. It is for that last group that this monitor would be an excellent choice. I am among that last group personally as I prefer quality and color reproduction anytime. The PG348Q is built right, looks very nice and offers great image quality. Next to all that there’s the 3440×1440 resolution; play a RTS game like Anno and you’ll immediately understand the benefit, you are looking at a far bigger area and get a better overview of your surroundings. Color precision is good after calibration, you can also just as easily configure the screen to a color preference of your own, a couple of modes have already been inserted for you. The color reproduction of a calibrated monitor is not for everybody, it is, however, a reference point we can use to compare with.
The Verdict
Pros
1- The looks and aesthetics
2- The curvature
3- IPS Screen
4- 34” with 3440 x 1440 Resolution
5- G-Sync Support with Refresh Rates up to 100Hz
6- Good Color reproduction, screen uniformity
7- Display port 1.2
Cons
1- Insanely Expensive
2- Has HDMI 1.4 though at this price HDMI 2.0 would be nice
3- USB 3.0 HUB with four ports at almost unreachable place, one has to flip around the monitor to reach the ports
4- Extra small speakers with bad sound quality, it’s redundant
5- The panel itself has pretty big borders at the top/bottom/left/right of the panel screen, I call it a bezel inside a bezel.
Being an extremely expensive monitor, it may even be the most expensive gaming monitor to date but why would you buy it. I think if you are buying something like this, it’s not about the money it’s about the experience, so what I’m talking about is the experience of using this monitor for two things, first of all for the professional work like visual studio, net beans or any other video/ picture editing tools as I’ll have plenty of work area, and secondly of course smooth gaming. So the best part of this monitor for me is that I am able to work a lot quicker as I’ve more space to accommodate multiple software in one screen and I don’t have to switch windows. So having said all, I guess if one can afford it, this is the luxury one must have.


