


Cougar Panzer Max Full Tower Case Review
Introduction
- Manufacturer: Cougar
- Product Page: Panzer Max
- Purchase: £114.95 From Overclockers UK at the time of review.
Following on from our last review on their IMMERSA headset, today we will be taking a look at the Cougar Panzer Max ATX PC Case. For those that don’t know, Cougar has a great range of products from fans, cases, PSUs, peripherals and more. The first product we reviewed for them was their 550M mouse and ever since then, I have been a fan. Not only do Cougar products offer outstanding performance, they also have a unique and appealing aesthetic to them. Cougar is also not afraid to use brighter colours such as lime green, orange and such to help make their products stand out a bit more, which I personally love.
The Panzer Max is a Full Tower case that comes with a myriad of cooling options, from fans to radiators, you can fit some serious hardware in this case. Not only does it offer exceptional cooling, it also had an easily removable PSU shroud and the HDD and SSD mounts are on the backside of the motherboard tray. This just keeps them out of the way, which also allows for better airflow. The Panzer max has some other great features such as the space to store a keyboard on top and the headphone hanger that can be mounted to the front of the case. The way this case is laid out, anyone can have some decent looking cable management which, aside from the massive space and cooling performance, is one of the main selling points. Building in a case like this, it’s always nice to have the cleanest looking build you can as easily as possible and that is what Cougar have offered us here today.
Specifications


| Case Type | Full Tower | |
|---|---|---|
| Motherboard Type | Mini ITX / Micro ATX / ATX / CEB / L-ATX / E-ATX ( E-ATX upto 12″x11″ ) |
|
| Dimension (WxHxD) | 266 mm x 612 mm x 556 mm | |
| Chassis Dimensions | 220 mm x 460 mmx 450 mm | |
| 5.25″ Drive Bay | 2 | |
| 3.5″ Drive Bay | 2 | |
| 2.5″ Drive Bay | 4+2 (converted from 3.5″ drive bays) | |
| Expansion slots | 8 | |
| Cooling system | Front | 120mm x 3 / 140mm x 3 120mm x 2 (non-LED fan pre-installed) |
| Top | 120mm x 3 / 140mm x 2 | |
| Rear | 120mm x 1 (non-LED fan pre-installed) | |
| Bottom | 120mm x1 / 140mm x 1 | |
| I/O Panel | USB3.0 x 2 / USB2.0 x 2 Mic x 1 / Audio x 1 Fan Controller |
|
| Water Cooling Support | Front | 360mm / 280mm / 240mm / 140mm / 120mm |
| Top | 360mm / 280mm / 240mm / 140mm / 120mm | |
| Rear | 120mm x 1 | |
| Bottom | 140mm x 1 / 120mm x 1 | |
| Max. Graphic Cards Length | 390mm | |
| Max. CPU Cooler Height | 170mm | |
| PSU | Standard ATX PS2 | |
| Cable Management | Yes | |
| Total Fan | 8 Max. | |
Closer Look
Exterior
Starting off with the outside of the case and we can see the front is well ventilated. This will allow the front mounted fans a much greater chance of bringing in cool air to the case. We can also see Cougar have gone ahead and added two 5.25″ drive bays for those who still use optical drives or bay mounted reservoirs.

The front panel easily pops off and reveals two pre-installed fans. While there are only two fans installed from stock, you can fit up to three 140mm fans, or a 360mm radiator in the front of the Panzer Max. It quickly becomes quite obvious that Cougar wanted whatever you put in this case to have the best chance possible of remaining cool.

The front IO is located towards the top, where we can also see a nice carrying handle that sure does come in handy as this case is not light once you get it all filled will decent hardware. For the front IO, there are 4x USBS – 2x USB 2.0 and 2x USB 3.0, front audio connectors, power and reset buttons and a fan controller so you can turn the fans up or down depending on the task at hand. It’s also nice to see a case come with a fan controller as it just makes it much easier to choose between silent operation and max performance on the fly, sort of like being able to change the DPI on a mouse with ease.

Over to the main side panel and there is a very big window that will have no issues showing off all of the hardware installed inside the case. One thing I am a big fan of is that there are no thumbscrews to get the side panels off. Each panel has its own latch and handle which not only makes things easier and quicker, it also avoids the chance of having to deal with stripped screws, which is never fun.
Not too much going on around the back. Here we can see the exhaust fan mount, 8x PCI expansion bays and the standard cutouts for motherboards and power supplies.

While there is no window on the other side panel, it does still feature that same easy access handle.

The top is home to another easily removable and heavily ventilated panel. Airflow is key and Cougar has gone to great lengths to make sure we can have the best airflow possible in their Panzer Max case. The top can house up to 3x 120mm fans, 2 x 140mm fans or a 360mm radiator. So, between the front and the top, you can have up to 720mm of radiators across 2 radiators or 780mm of fans across 6 fans.


While airflow is great, users can sometimes be left with huge amounts of dust left building up inside their PC. Cougar has tried to combat this with dust filters such as the one on the bottom that will protect the PSU fan and an additional fan that can be mounted inside the case if you desire.

The filter is held on with magnets and can be easily taken off and cleaned when need be.

Cougar has definitely done a great job with the exterior, now let’s take a look at what’s inside.

Interior
As we saw, each side panel has a handle on it, which is also a latch that can release the panel so you can take it off of the Panzer Max. Simply pull up on the handle and it will release the below latch so you can easily take the panel off, simply push it back into place when you are ready to put it back on.

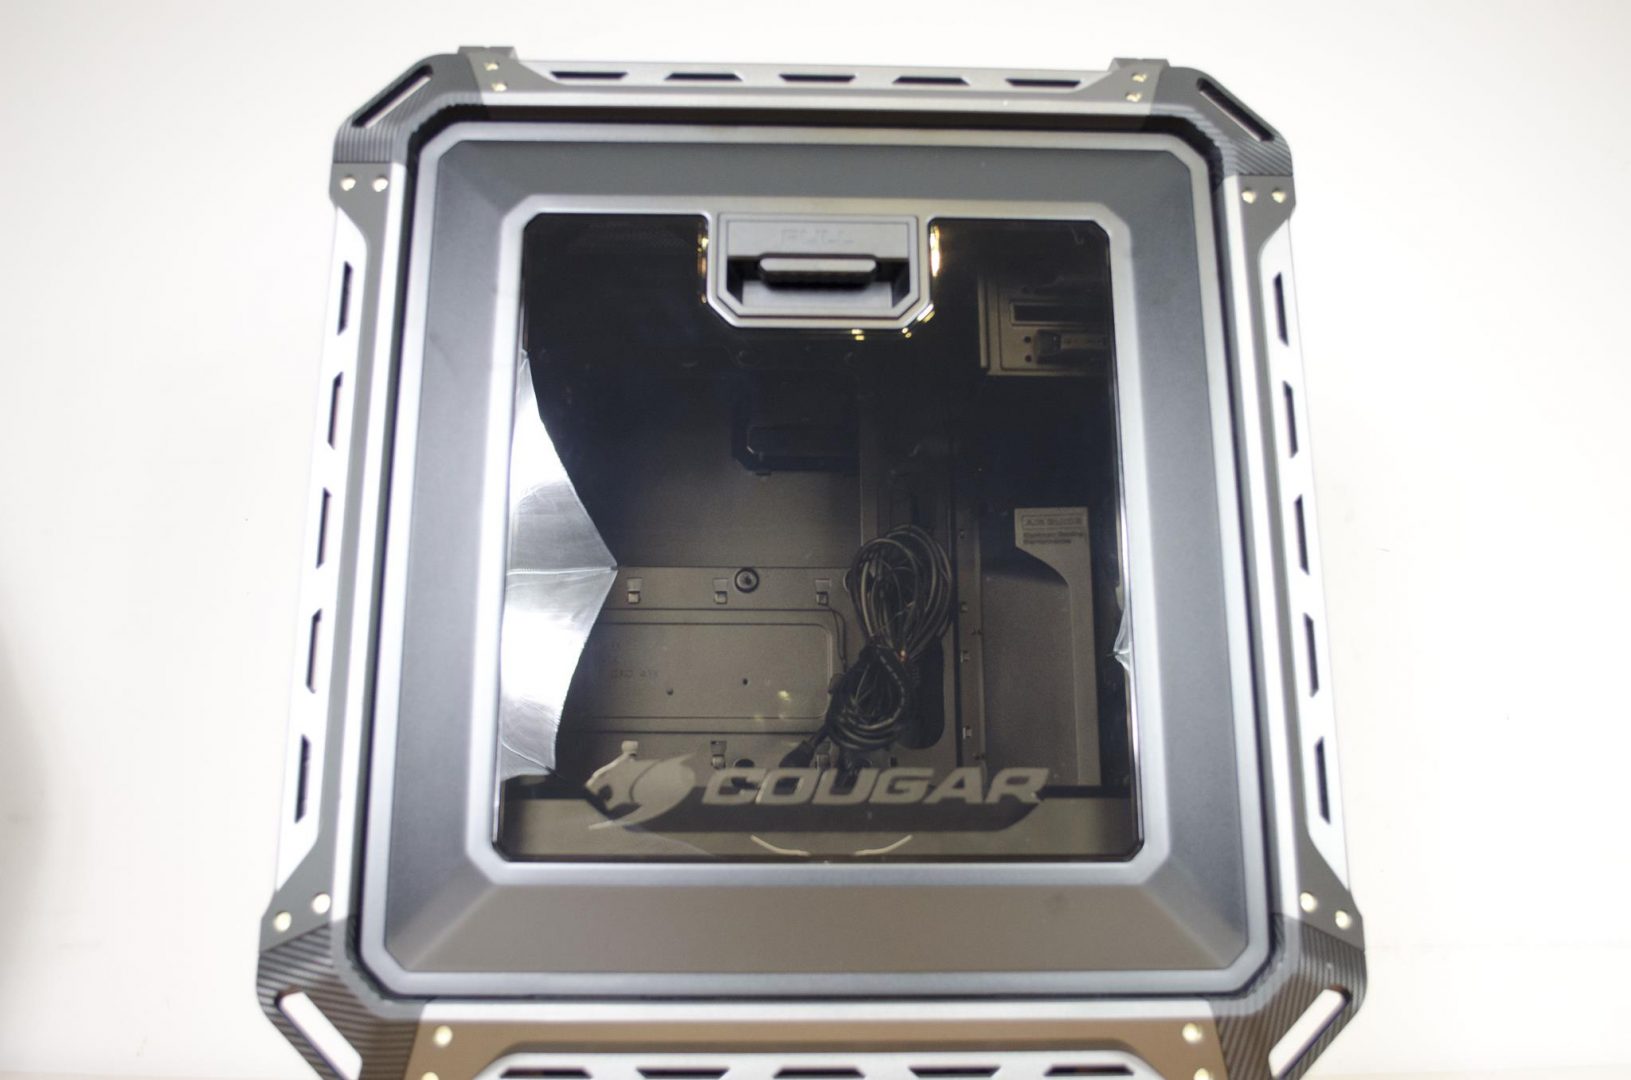
Having a look around the inside and there is quite a bit going on. There is a PSU shroud, air guide and much much more.

When you first get the case, the PSU shroud has a sticker indicating how to remove it. Please also note there is a screw on the backside of the motherboard tray you will also need to remove first before the shroud can be taken out of the case.

The shroud sticker is fairly easy to remove and didn’t leave behind any residue at all which I was quite worried about.

The Air Guide can help guide a bit of air as the name would suggest to the SSDs and the backside of the motherboard tray. It does this without taking to much air from the main part of the case and as the PSU shroud, it can also be completely removed if need be.


As said, both the PSU shroud and Air Guide can be removed, but do take note that there are screws that also need be removed from these pieces before you can take them out.

The motherboard tray has a nice big cut out for easy CPU cooler installation and changing. It is also marked A or M to let you know which standoffs you will need to use dependent on your motherboard type. While this type of thing is generally quite easy to figure out, a little bit of help never hurt anyone!


Cougar has included two front intake 120mm as stock to help get that air flowing through the case. The bottom half of the lower fan also sits under the PSU shroud to help keep air flowing to the PSU as well so it doesn’t overheat. Cougar has done a great job at routing the airflow in this case from stock which is bound to help keep you precious components as cool as it can.

While there are no fans installed, the top can house 2x 14mm fans or 3x 120mm fans or up to a 360mm radiator for those wanting to go down the water cooling route. As you can also see the vent on the top will allow for a good amount of air to escape out of the top of the case.

Cougar has included a 3rd fan in the form of a 120mm exhaust fan to help make sure that the heat inside gets dissipated out of the case.

The bottom is not only home to the PSU, you can also install an extra 120/140mm fan here should you need a bit of extra airflow. There is plenty of room down here to route your cables and keep as much of them out of the way as possible.

As you may have noticed by now, there are no SSD or HDD mounts on the front side of the case. This is because they are all located on the back and there are 4x SSD mounts and 2x 3.5″ HDD mounts.


As you would expect, there is quite a bit of room on the backside of the motherboard tray if for no other reason that to fit the 2x 3.5″ HDD mounts. This also means there is more than sufficient room to manage your cables and have everything nice and tidy.

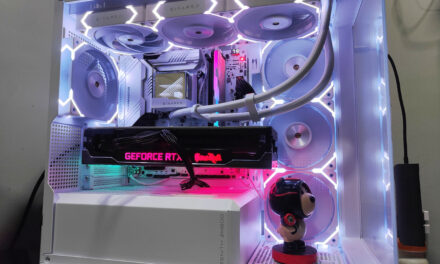
Final Build
Building in the Panzer max was a pure joy as there was more than enough room for everything. You will want to take off the PSU shroud first but from there, it is all smooth sailing. I didn’t run into any problems at all and cable management was as easy as can be. The only issue I had at all was the fact the PSU shroud did not have any cutouts to pass the GPU power cables through. Instead, they were meant to be routed from the backside of the motherboard tray which I couldn’t fully understand why. While this really isn’t much of an issue, as you can see below I rectified this issue myself and cut my own hole in the PSU shroud which took me a whole 2 minutes. Aside from that, I absolutely loved the layout and having all the SSDs and HDDs on the backside is great in my opinion.

Cougar has also included a headset holder that is easily installed on either side of the front of the case. This will come in the box of accessories and only requires two screws to be put in place.

While some like to show off their SSDs, mounting them on the back is great and the toolless design makes it seamlessly easy. This also helps to improve the overall look of cable management on the front side of the case which is always a plus.

Most people still have 1-2 HDDs in their builds but generally aren’t big fans of showing them off. Again, mounting them on the back is a great way to combat cable management issues and helps to keep them from bringing down the overall look of your build.

Final Thoughts
There is definitely a lot going on with Cougar’s Panzer Max PC case. Cougar has done a great job at planning it all out and executed it near perfectly, with only a couple of small let downs that are easy to overlook in most cases. The Panzer max is a large case with plenty of room for hardware and cooling, both air and water. User’s looking to make full use of the Panzer Max’s potential will want to consider a dual GPU system with a full custom loop water cooling setup. I really enjoyed my time with the case and now it is time to wrap this all up and give my final thoughts on the case, so let’s go!
Performance
When it comes to the performance of a case, I like to consider the cooling capabilities, cable management options and the amount of room for hardware based on the form factor it is designed for. The Panzer Max is designed for ATX motherboard and as such, can easily fit a dual GPU setup without being cramped. Cougar has also gone above and beyond as far as the cooling is concerned in this case. The Panzer Max can house a ridiculous number of fans and radiators with plenty of room for different styles of reservoirs and pumps. It really shows Cougar put a lot of time and thought into the execution of this case and they absolutely nailed. Things like the easily removable PSU shroud and Air Guide add to the overall performance aspect and really do help to make this a top of the line case. The options to build inside this case are endless and again, the amount of room for fans and rads is just crazy and should be more than suitable for most people.
Design
The design of the case goes hand in hand with the performance as it is what allows the Panzer Max to offer as much as it does. As mentioned, the design is very well executed and allows the Panzer Max to offer a lot for its price. The only real design flaw I found personally was the fact that there were no holes in the top side of the PSU shroud to allow you to pass the power cables for the GPU through it. However, this was easily sorted by cutting my own hole and while this won’t be an option for everyone, it’s not essential. Even the exterior of the case is exceptionally crafted and looks amazing. Not only that, it’s also functional as it can hold a keyboard on top and has a headset stand as well. Cougar really did a great job at making this a great case for gamers by incorporating almost all the features one would need.
Value
Coming in just shy of £115 from our Friends at Overclockers UK, the Panzer Max is an exceptional case for the money. It’s big and very well thought out and has enough features for gamers and enthusiasts alike. The sheer amount of room for cooling gear is worth the price tag alone, never mind when you factor in the build quality and aesthetics into the equation. Cougar has done a miraculous job all around with their Panzer Max case, Thanks in part to its toolless design, the case is also extremely easy to build inside which is great to see. Nothing worse than having a great looking case that is a pain to build in! Cougar has managed to cover most every aspect they could for a case this size and covered them all well. For the money, you are getting a lot of case with a lot of room for both PC hardware and cooling gear!
” The cougar Panzer Max offers it all. Easy to build in, plenty of room, great cable management options all at an affordable price!”

Many thanks to Cougar for sending in a sample of their Panzer Max PC Case.
Want to discuss this review further, head on over to the Cougar Panzer Max thread, in the Enos Tech Reviews Sub-category on the Gaming Exodus forums!


