


RockIt 88 – Intel CPU Delid Tool Review
Introduction
With the introduction of the Ivy Bridge chips from the Intel, many users reported the chips to be running hot with temps spiking. Before the Ivy Bridge, Intel was soldering the IHS on the CPU die itself. This method ensures the efficient heat transfer from the CPU die to the IHS. With the Ivy Bridge microarchitecture, Intel started to use Thermal Paste method for heat transfer between the CPU chip and the IHS. Using this method, IHS is glued to the CPU die and the TIM (Thermal Interface Material) makes point of contact between the CPU chip and the IHS. Use of crappy TIM can hinder the thermal performance.
Enthusiasts come up with the solution termed as “Delidding” from “Delid”. Here lid refers to the IHS of the CPU and De means to remove. Hence, the term Delid refers to removing the IHS. Basic idea is to remove the IHS, change the stock TIM with a better one, preferably liquid metal. Thereafter, the user has two options. Either IHS can be relidded using glue or is simply placed on the CPU die without any glue. When IHS is relided or placed on top of the CPU die after the delidding, it makes a better point of contact with the CPU die. This is because the stock adhesive used on the Intel chips creates distance between the IHS and the CPU die which is reduced in delidding/relidding. This calls for better and more efficient thermal conductance.
Various methods have been in used to delid the IHS. Mostly used one is using the Razer. While it sounds fun but it involves a higher risk of damaging the chip. Delidding would instantly void the warranty of the chip. So, do it at your own risk.
In recent times, many enthusiasts have introduced kits or tools to delid/relid the CPUs. These are handy tools and allow the users to safely delid/relid their chips without damaging them most of the times.
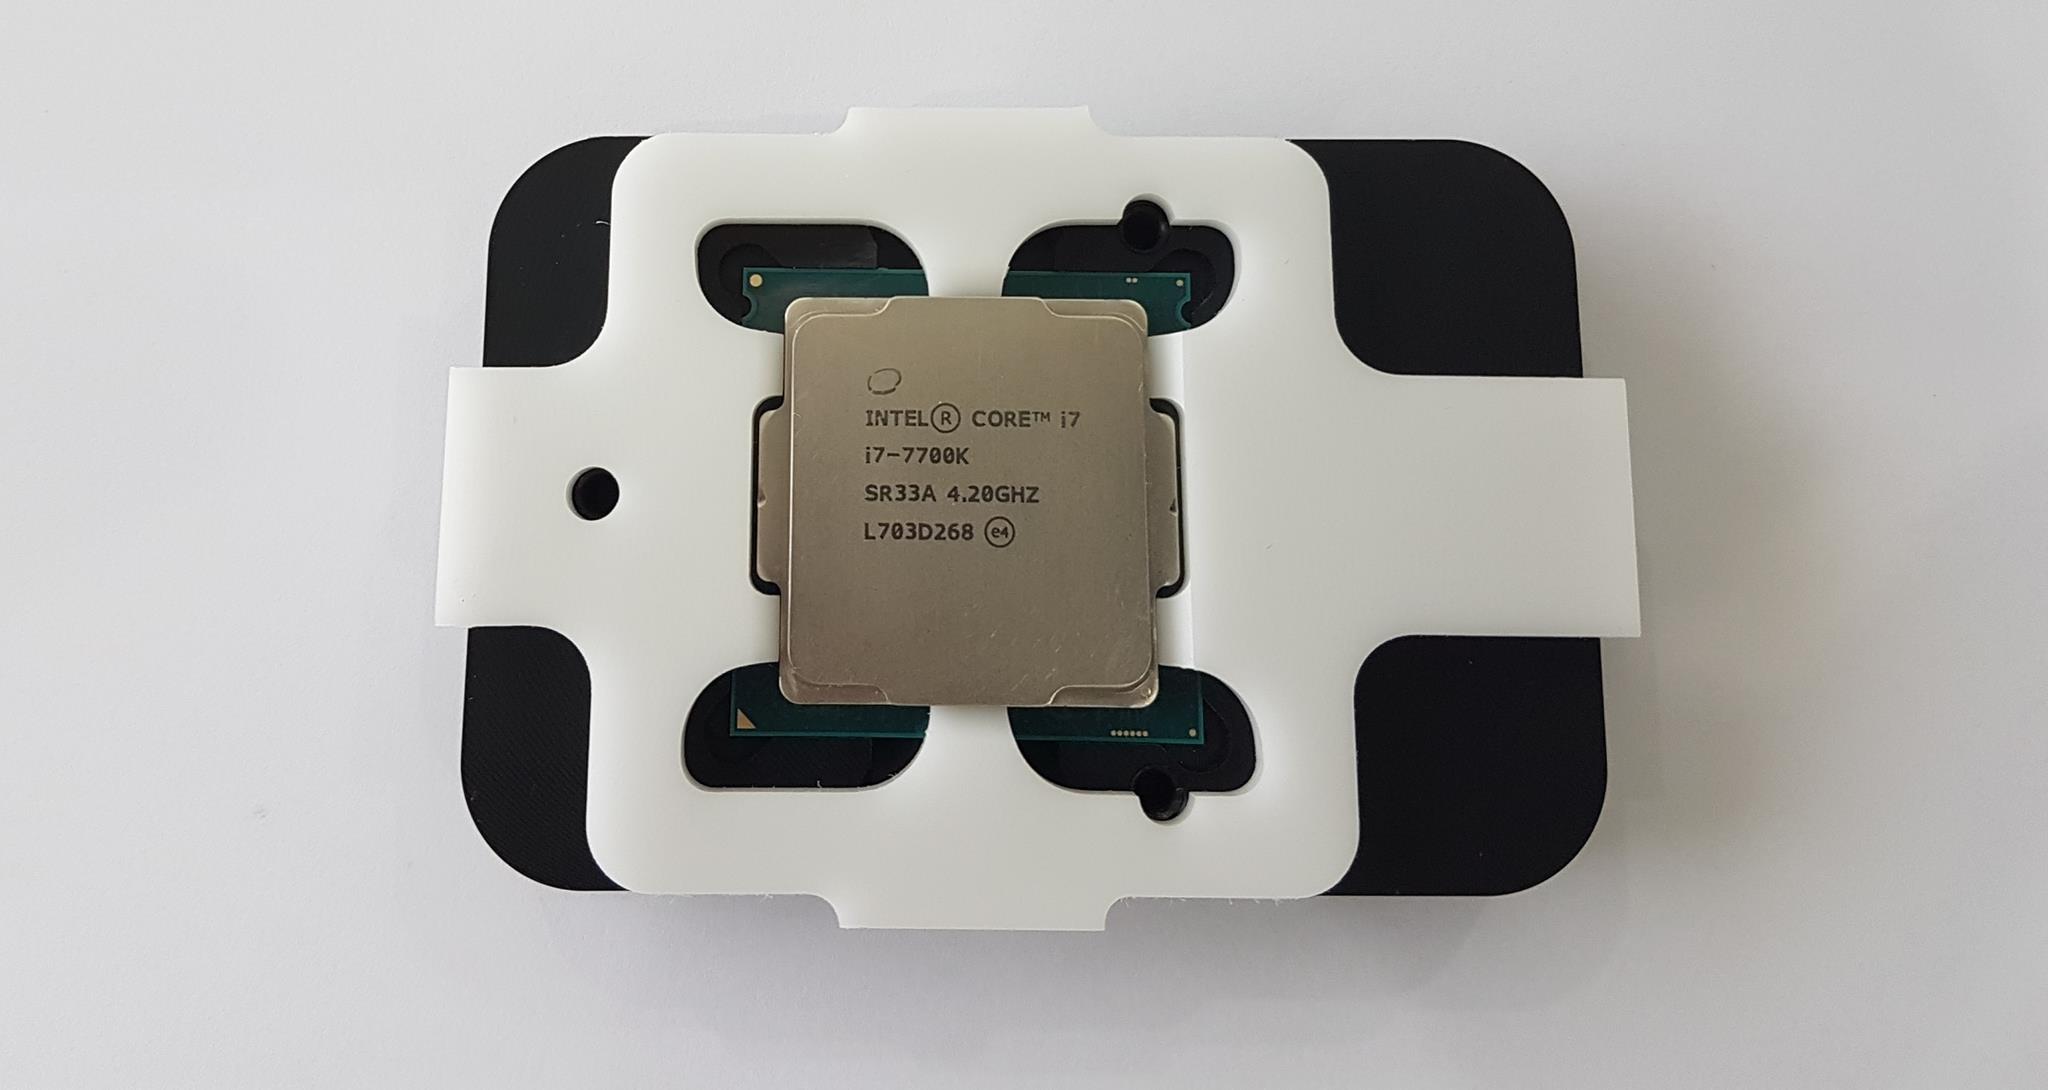
Today, I will be looking at Rockit 88 Delid kit and Re-Lid kit for 1150/1151 sockets from the RockIT Cool. They sent me the complete kit for the Intel 7700k (LGA-1151). This review will include the thermal performance of the chip before and after delid.
Item: Rockit 88
Manufacturer: RockIt Cool
Price: $30 for Black color Delid tool and $8 for the Re-Lid kit. This does not include the TIM and the Glue. RockIt Cool is offering CoolLaboratory Liquid Ultra @ $13 and the Loctite Super Glue @ $5. Total for the complete kit would be $56.
Closer look at Delid Kit
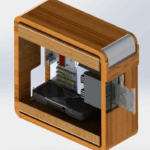
The delid kit consists of two plates which are Precision CNC machined. One plate has the socket holder for the CPU itself. While the second plate has the grooved section which faces the CPU Socket area. There is an aluminum slider bar which is hooked up with a long screw. Screw rotation will slide in or out the slider bar.


The quality and the precision of the two plates is top notch. Precision is of utmost importance here otherwise the risk of damaging the chip would be higher. Once the CPU is placed in the socket holder the other plate with the slider bar is placed on top of it. The backside of the slide bar plate has a littler silver screw on the backside of it which shows the position of the slider.


The RockIt Cool has provided three long screws with black heads and an Allen key. The three screws are used to mount the slide bar plate on top of the socket holder plate. While the Allen key is used to rotate the aluminum screw for deliding.

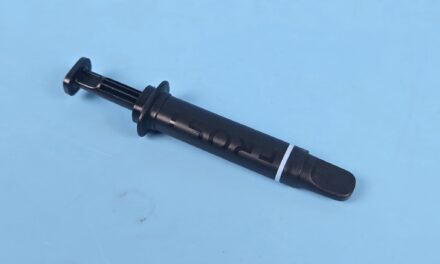
They have also included the two stickers of the RockIt Cool logo and brand name. There is a wooden type scrapper with pointy head on one end and the scraper on the other end. This is used to clear and clean the adhesive on the IHS.

Closer Look at Re-Lid kit
The re-lid kit consists of a white color base plate which is placed on top of the socket holder plate from the delid kit. There is another plate with three edges (Fidget design, excuse the pun) with three holes on each of the corner and a bigger hole in the center.


A large size black color screw is included in the kit which goes through the center hole marking on the three legged white color plate.
The RockIt Cool provides the Loctite Super Glue – Gel Control to relid the IHS back on the CPU die with no drip and easy application. It is mentioned that 10 seconds are required to bond the two surfaces. It can be used on Ceramic, Leather, Plastics, Wood, Paper, and Metal etc.

The RockIt Cool also provides the CoolLaboratory Liquid Ultra TIM which is 100% metal and can be applied using the two supplied brushes.

Delidding Process
Here is the procedure of how to delid the CPU.
- Clean the surface of the IHS to remove any TIM on it. This is needed in case CPU is already in use. Place the CPU on the socket holder plate in such a manner that triangle on the CPU PCB aligns with the triangle on the plate.


- Slide out the slider bar on the slider plate. The small silver screw on the backside of the plate should be at the right most end.

- Place the slide bar plate on top of the socket plate in such a manner that all the three holes on each of the plate faces each other.
- Use the three screws with black heads and install them on the three holes. They need to be finger tight only. Don’t use excessive force on them. Don’t crank them down.

- Now comes the real fun part of the process. Use the supplied Allen key on the outermost screw and start rotating it so that the slider bar starts to move inside towards the CPU IHS. Initially, it would be resistance free as there is a gap between the slider bar and the CPU’s IHS. Once the Slider bar makes contact with the IHS, you would feel resistant. I would suggest to take the kit off the table and hold it in one hand while using the other hand to rotate the Allen key. You would need to apply bit more pressure. Take your time with it. After few notches, you will hear a POP sound that would indicate the completion of the deliding.


- Slide out the slider bar. Remove the three black head screws and take off the top plate. It will look like that the IHS is still intact on the CPU die which is not the case. Grab the IHS and pull it off.

- There, we have it. IHS is removed and delidding is completed.

- Start cleaning the black color adhesive on the IHS using the supplied scraper. I used the expired credit card in addition to it. Also, remove the stock TIM off it. Similarly, clean the adhesive from the CPU’s PCB and the chip itself. Be careful when cleaning the PCB.

- Once, you are done with the cleaning, apply a tiny dot of the Coollaboratory Ultra Liquid on the center of the CPU Chip. As this TIM is highly conductive, I would suggest placing transparent tape around the chip before applying the TIM as a safety precaution. Before using the supplied brush, cut its tip a bit. This would help better application of the TIM.
Re-Liding Process
- Don’t take off the CPU PCB from the socket plate. Take the large size white color plate from the re-liding kit and mount it on the top of the socket plate in such a manner that a single hole on the left side of it aligns with the single hole on the socket plate.
- Now, carefully place the IHS on the center of the plate as shown on in the picture below.
- Place the second white plate with three legs on top of the white color base plate in such a manner that all three holes on it align with the holes on the base plate. Use the three screws with black color head and finger tight them.

- Now, use the supplied Loctite glue and apply the single drop each on all the four corner points of the IHS. The drop should be placed such as that it sits between the HIS corner and the PCB.
- Use the black color large size screw and mount it on through the center hole of the three-legged white color plate. It should be finger tight as well. This would put the pressure on the top of the IHS and helps in the bonding process. Don’t overdo it. I left it for 6 hours before removing the re-liding kit.
Don’t forget to use any suitable but good performing TIM on top of the IHS before installing and using the CPU.
Test Bench
Following test bench was used to measure the thermal performance:
- Intel i7 7700k
- Asus Maximus Code IX [Thanks to the Asus Pakistan]
- Corsair Vengeance RED LED 2x8GB @ 2666MHz
- Corsair H100i V2
- Corsair ML Pro 12 Red
- Thermaltake Tough Power DPS-G RGB 750W [Thanks to the Thermaltake]
- Zotac T400 120GB SSD [Thanks to the PakDukaan]
Testing and Methodology
XMP was loaded during the testing. Both fans were connected to a single fan header. Following Custom fan curve was used:
- 50% @ 40C
- 75% @ 55C
- 100% @ 70C
CPU was not overclocked during the testing. It was set at stock clocks at 4.2GHz with the Turbo boost of the 4.5GHz. Room temp was 32C maintained. Following software were used for the testing: –
- RealBench 2.44 (Stress test)
- CineBench R15
- Intel Extreme Tuning Utility (XTU) (stress test) 6.2.0.24
In addition, two games were used for thermal performance testing: –
- Grand Theft Auto – V
- Battlefield 1
Microsoft Windows x64 Pro was used. HWInfo64 was used to monitor the temps. For the sake of this study, only maximum temps on the cores were noted. Average of maximum temps was used in addition to the maximum temp on any core.
Let’s have a look at the performance graphs.
Idle Temps

Temps dropped by 5C.
RealBench

Temps dropped by 16C.
Intel Extreme Tuning Utility (XTU)

Temps dropped by 14C.
CineBench R15

Temps dropped by 12C.
Battlefied 1

Temps dropped by 13C.
Grand Theft Auto – V (GTA-V)

Temps dropped by 10C.
The chip I have got has better thermals (before delidding) on it as compared to the other two 7700k chips which I have used before. Still, the difference of temps by 16C is impressive and it would leave room for more and stable overclocking.
Conclusion
When it comes to the enthusiasts’ requirement of pushing their chips to the limits with stability, delidding is indeed an answer to help with the better thermal performance (More or less Intel’s platform). Latest tools have made this process easier and safer. In a matter of the seconds, one can delid the chip (and voiding the warranty). The RockIt Cool deliding and re-liding kits are a complete solution. RockIt Cool has provided each and everything that can be needed for these processes. It is easier to use. It only takes a few seconds to delid the CPU without any hassle. Make sure to spend some time in cleaning the IHS and the PCB. Also, take care and caution when applying the Coollaboratory Ultra Liquid as it is highly conductive TIM. If you are in need of deliding and want a peace of mind as well then look no further as RockIt Cool has got you covered. It is again emphasized that deliding can damage the CPU if not done properly and it also voids the warranty of the Chip.
Value
The complete kit would cost you $56. However, if you don’t want to delid the IHS back on then you can get the delid kit at $28 for white edition and $30 for black edition. You would still need a good TIM to be used on the CPU chip itself. I would strongly suggest using metal liquid. Coollaboratory Ultra Liquid would cost $13. So, in $43 you would get to have a complete delidding kit for your need.
The Rockit 88 from the RockIt Cool is one handy and safe tool when it comes to the delidding and it comes highly recommended from my side.

I am thankful to the RockIt Cool on giving me the opportunity to review their RockIt 88 kit along with the Re-lid kit. I am also thankful to the Asus Pakistan, PakDukaan, and Thermaltake for sponsoring the motherboard, SSD, and the PSU respectively.


