









DeepCool CL6600 White Review: A Worthy Contender

Corsair introduced a separate chamber concept for the CPU cooler in its triple chamber Air 5400 PC Chassis recently. What is this concept, and what are the benefits? In a regular PC Chassis the CPU cooler, particularly the liquid cooler (only this cooler qualifies for this concept), is installed either on top or on the front. Now, if the radiator is installed on top, its fans exhaust the warm air of the PC Chassis through the radiator, which affects the CPU thermals. Another option is to install the radiator on the base (subject to provision and if the pump is integrated in the radiator housing) or on the front. In these cases, fresh air will pass through the radiator, but it will increase the ambient temperature of the PC Chassis since the warm air is now being pushed into it.
You can see that both scenarios have their own pitfalls. The probable solution to this is a separate chamber for the liquid cooler that would effectively address the above mentioned issues and provide optimal cooling performance not only for the CPU but for the other components of the build.
DeepCool has recently introduced its own design under this concept, named CL6600 and CL660. DeepCool calls it HyperSplit, a fancy marketing name, but I am ok with it as they have delivered solid on the concept. Why two cases? DeepCool has gone ahead of the competition and provides a complete solution for the end user. This solution comprises a PC Case with a HyperSplit design and a 360mm liquid cooler. CL6600 provides this complete solution. However, DeepCool has also provided the same case without a liquid cooler with the name CL660.
These cases are available in white and black. Under this concept, these cases have a separate chamber placed over the main chamber with one interconnecting channel through which the tubes of the liquid cooler are routed towards the main chamber. Since the CPU liquid cooler is now out of the main chamber, the radiator is highly likely to get fresh air pass through it for CPU optimal cooling.
This case supports motherboard upto ATX form factor, including the backplug motherboards. You can mount two 140mm fans on the front with no support for a 120mm fan. You can install either a 120mm or 140mm fan on the rear. This case comes equipped with two 120mm ARGB Reverse Blade fans on the base for air intake.
The PSU is installed on the front side of the case with highly convenient access, as the PSU connector side faces the backside of the case. DeepCool clearly has been paying attention to minute details, though in my opinion, the inter-connecting channel between both chambers should have a seal as well to avoid any warm air travelling from the main chamber towards the top, where there is an opening towards the cooler chamber. Anyhow, I digress. Coming back to the main topic, dust filtration is adequate as well. The storage provision is 2+1 3.5” drive bays and 1+1 2.5” drive bays.
The liquid cooler has a 360mm size, and it features a DeepCool sixth-generation high-performance pump. This cooler is compatible with Intel LGA115x/1200/1700/1851 and AMD AM4/AM5 sockets. DeepCool has provided three tuned 120mm fans using FDB bearings with this cooler.
I have got the CL6600 white edition, which hasan MSRP of USD 209.99. The liquid cooler has a warranty period of 5 years, whereas the case itself has a warranty of 1 year. The black edition has an MSRP of USD 199.99.
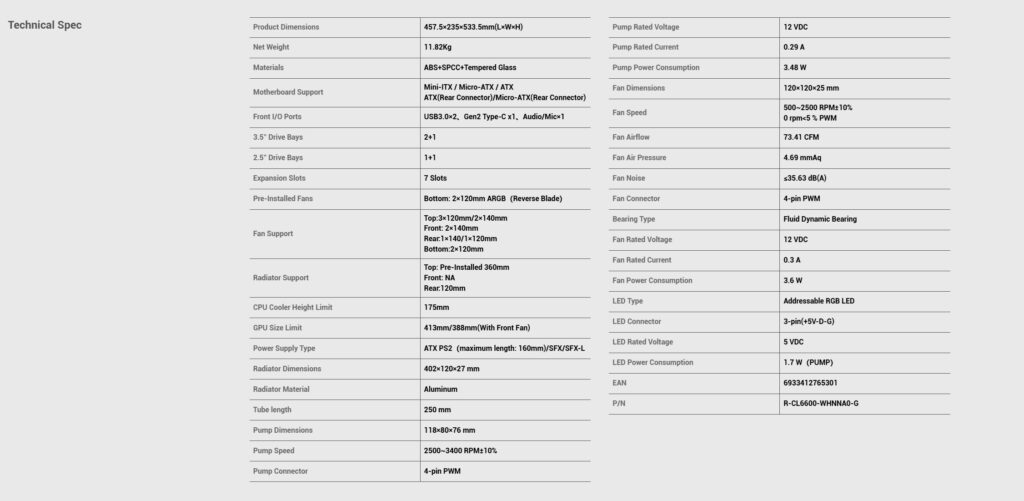
Specifications
Packaging and Unboxing
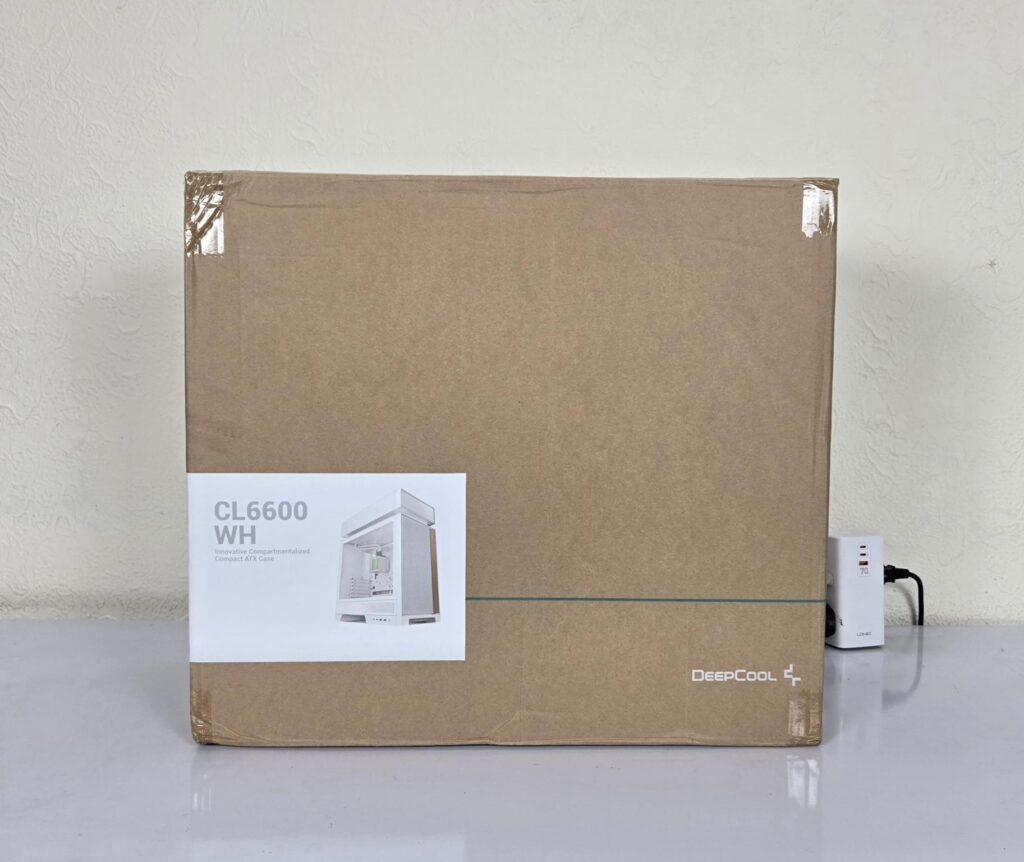
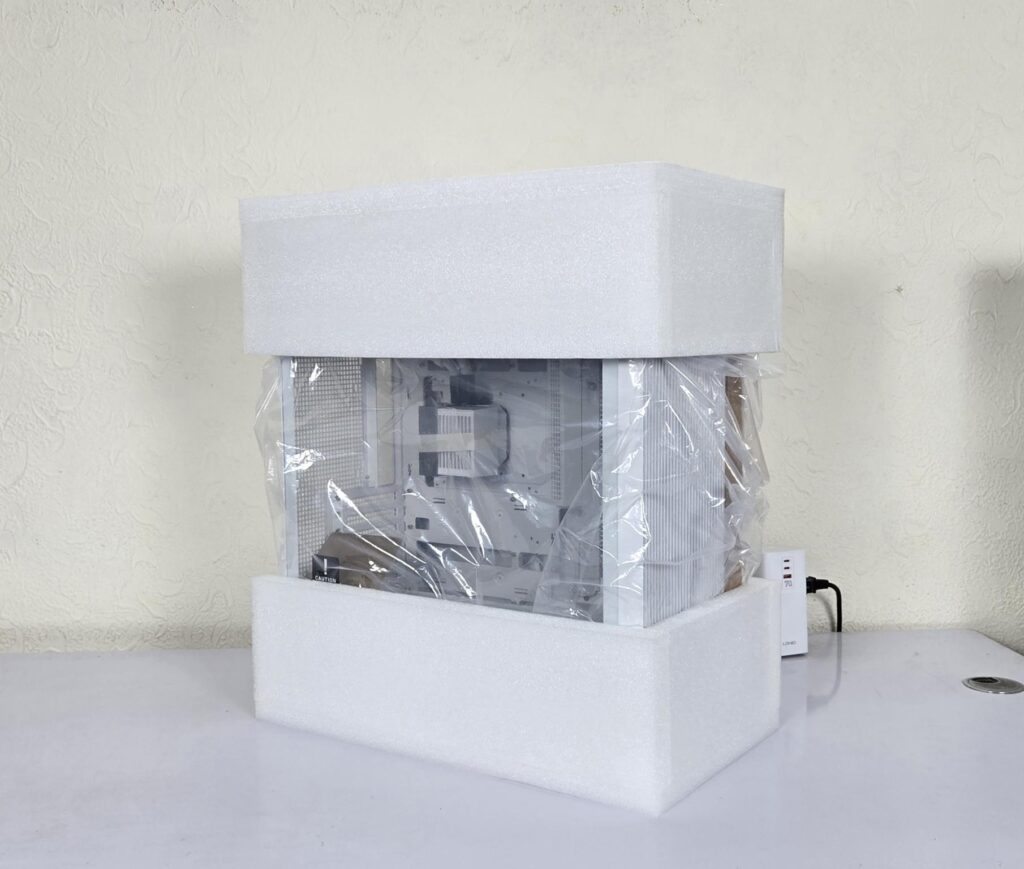
The case is shipped inside a standard cardboard box finished in brown. The features and specifications are also listed on the box. Two thick white Styrofoam pads sandwiched the case for safe shipping.
Accessories
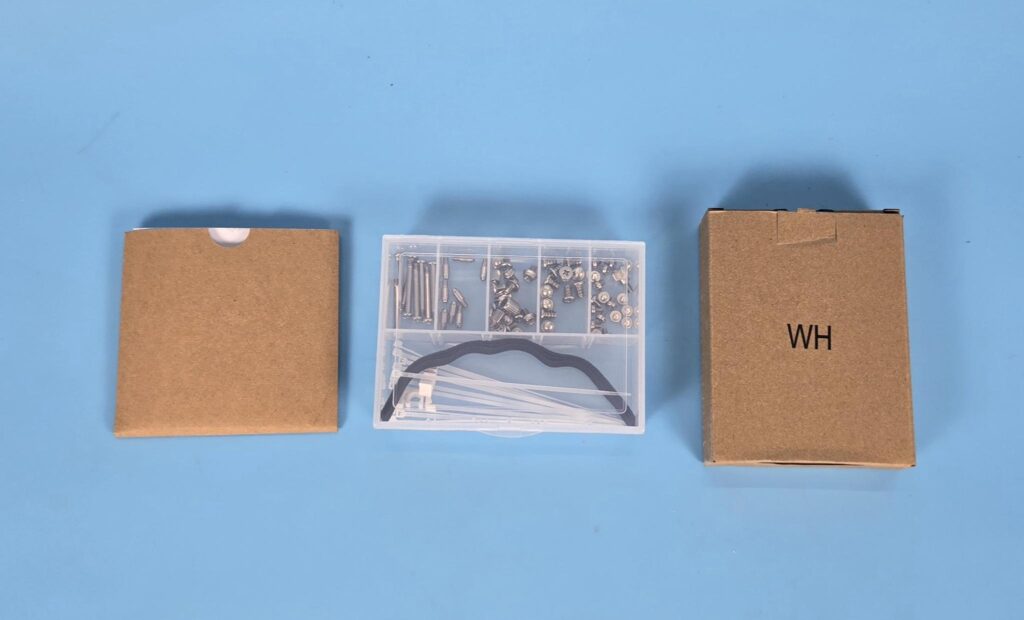
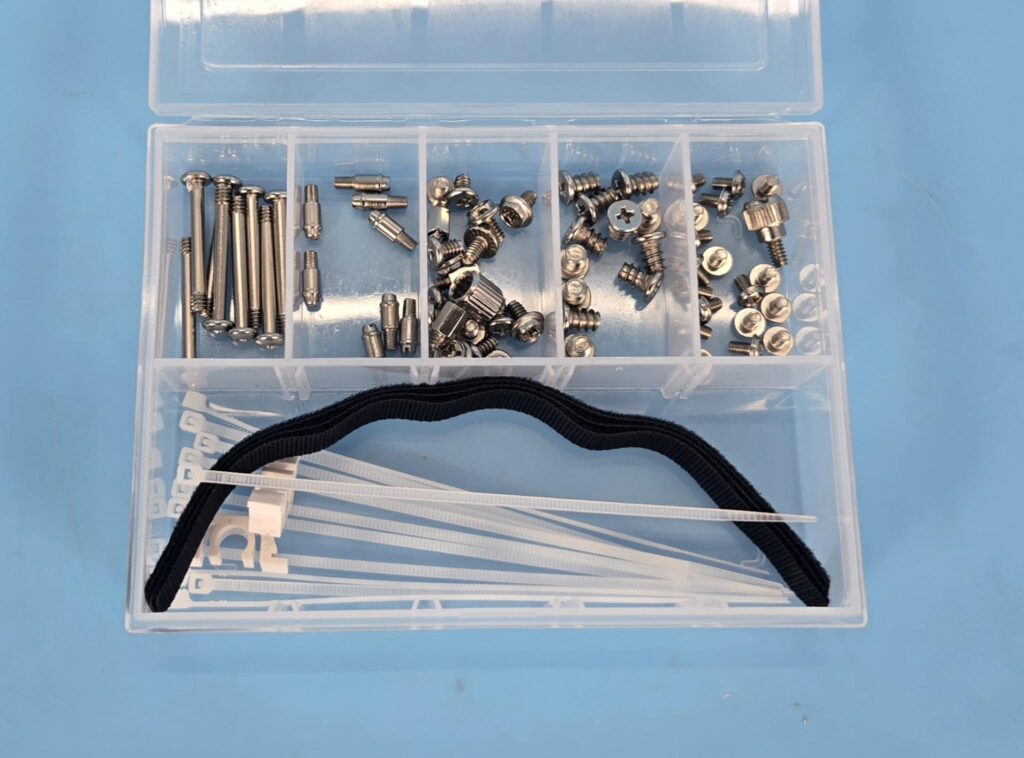

DeepCool has provided a proper container for the case accessories. A white cardboard box contains the mounting hardware of the liquid cooler, and a third pocket-style container has the booklets. The following are provided:
- Quick User Guide
- Warranty Page
- Radiator/Chamber Screws
- Fan Screws
- PSU Screws
- Motherboard Screw
- Storage Drive Screws
- Standoff
- Socket Nut
- Case Housing Clip for side panel
- Zip Ties
- Velcro Strips
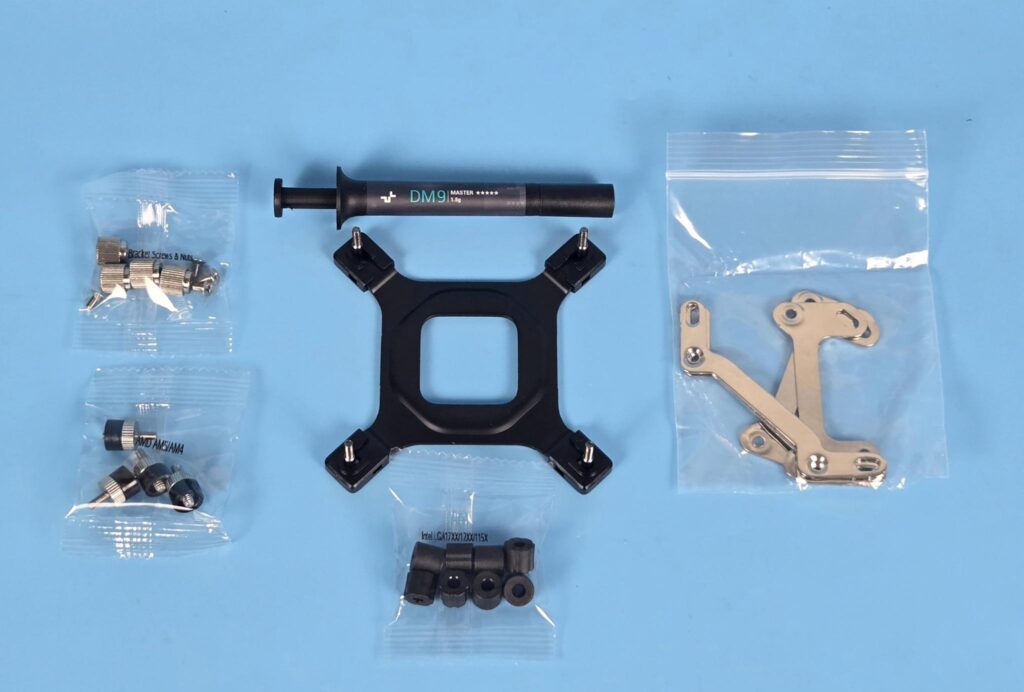
- 1x Intel Backplate
- 2x AMD Brackets
- 2x Intel Brackets
- 4x Intel LGA1700 Spacers
- 4x Intel LGA1200/115x Spacers
- 4x AMD Standoff Screws
- 4x Nuts
- 4x Screws for Brackets
- 1x DM9 1.5gm Thermal Paste Tube
Closer Look
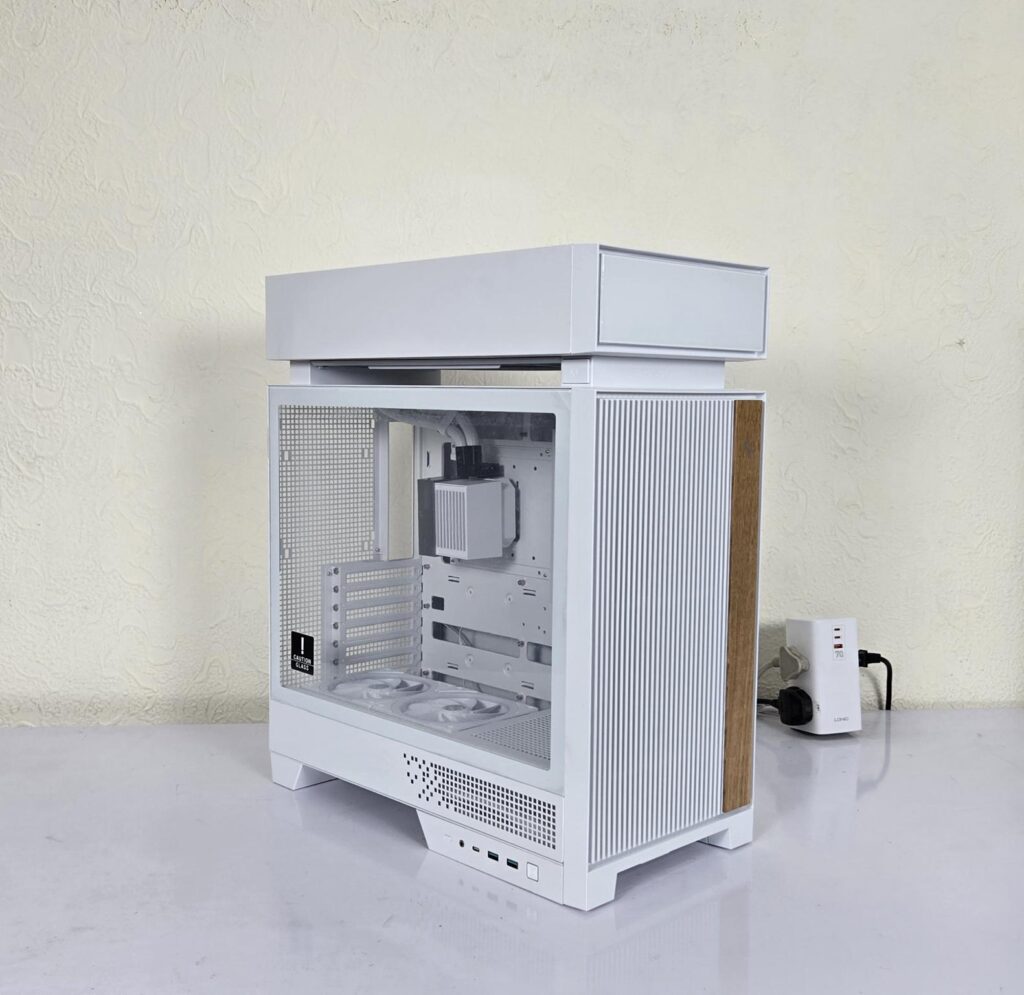
The CL6600 has dimensions of 457.5x235x533.5mm (LxWxH). It is made of ABS, SPCC, and Tempered Glass. The weight of this case is 11.82Kg. This is a mid-tower category case that is quite spacious, which is partly provided by a separate chamber for the CPU cooler.
Exterior View – Front of the case
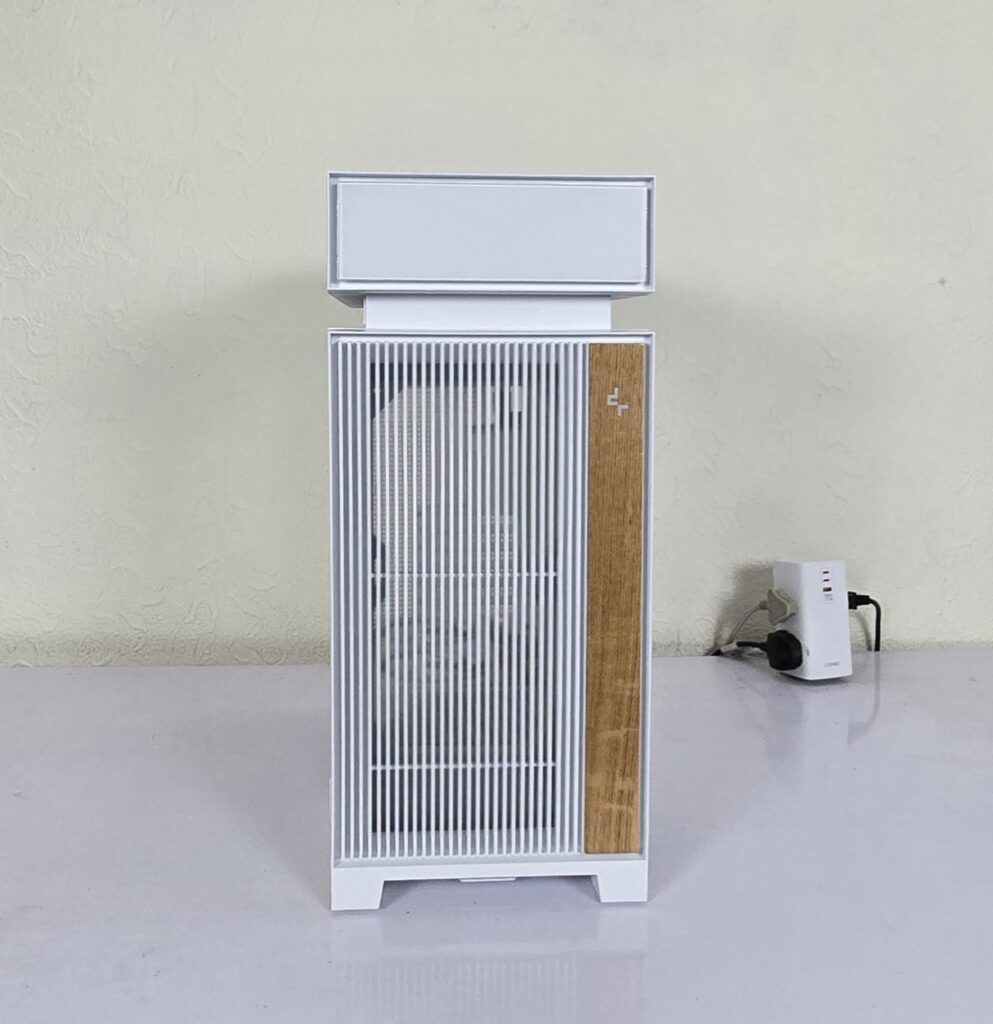
DeepCool has provided a grill bar design on the front panel. The panel is made of ABS material and can be popped out by placing a hand under the panel and pulling it. An actual wood piece is used for modern aesthetics. The front of the top chamber has nothing over it except what seems like a plexi glass or acrylic. Some sort of aesthetic design there with ARGB backlighting would be nice, this forehead is running the overall visuals.
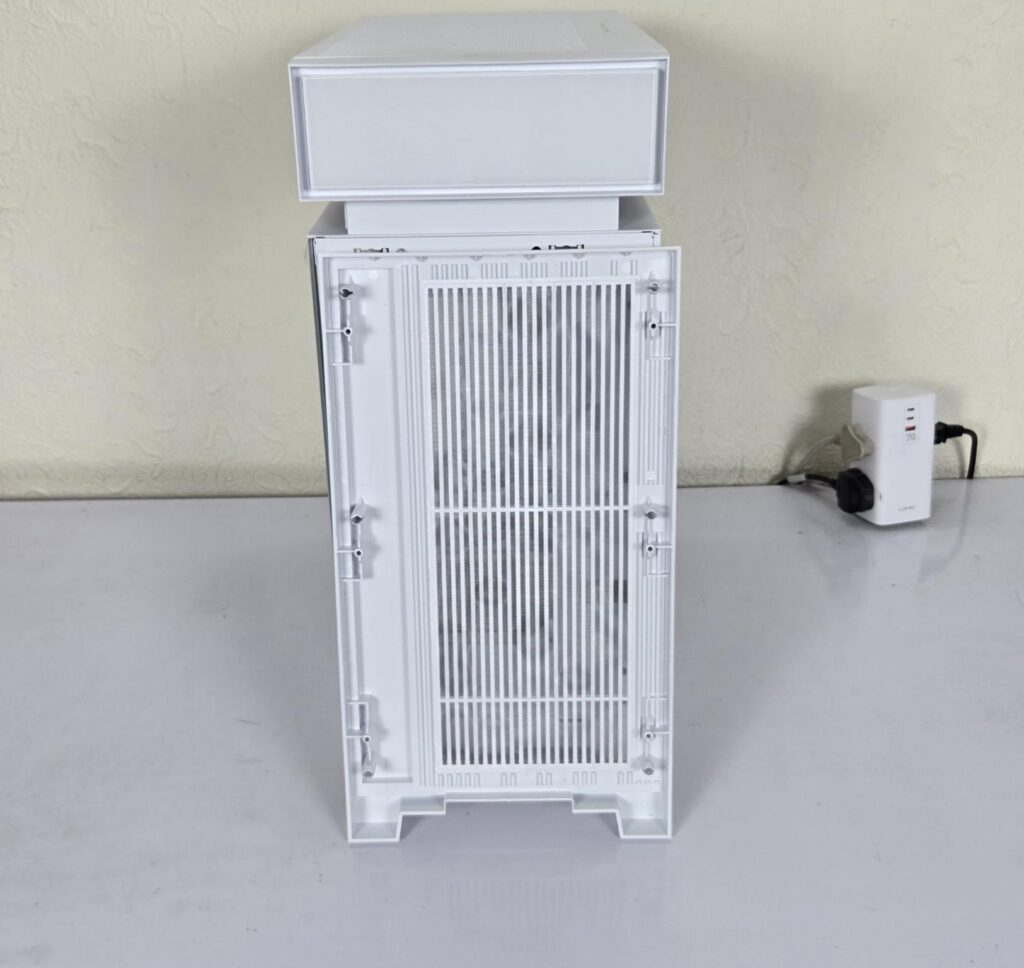
DeepCool has used a fine mesh inside the panel for dust filtration. 6 main tabs make contact with the main housing of the case for installation of this panel.
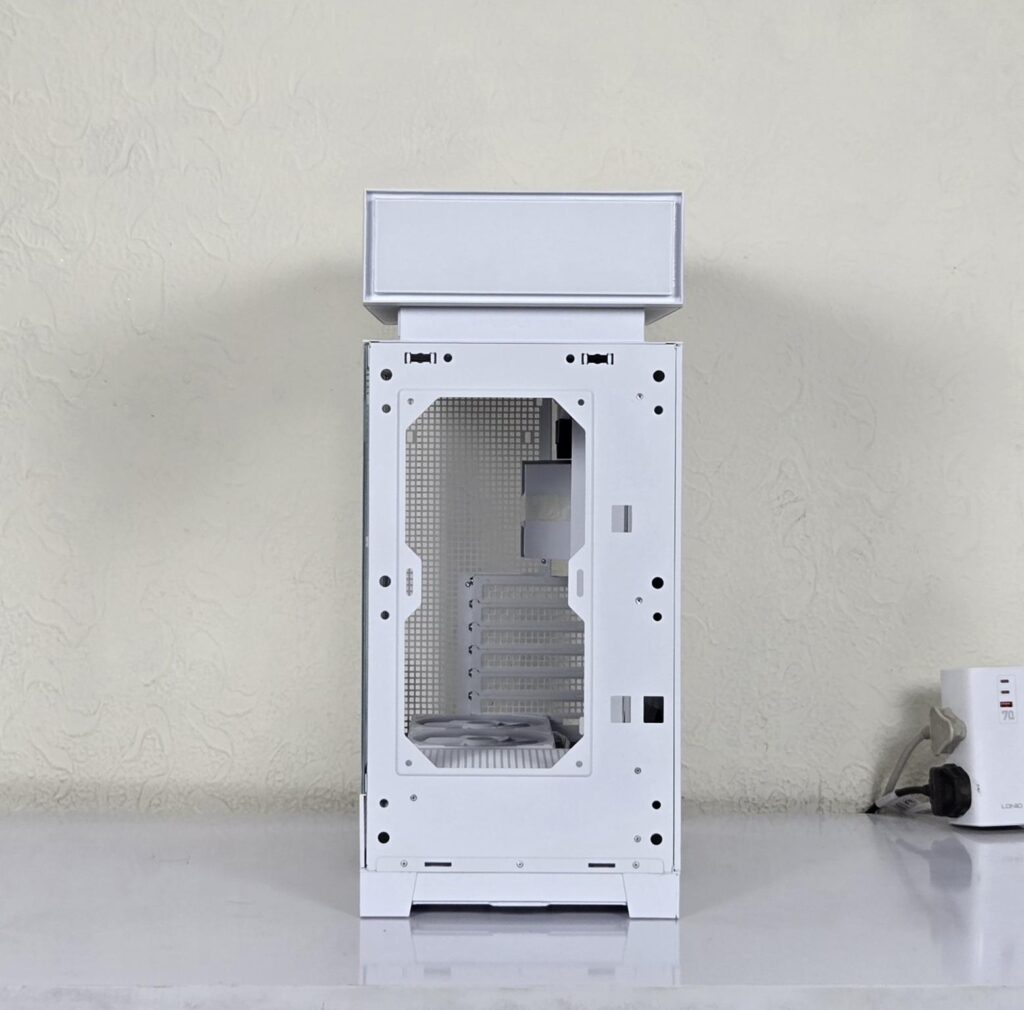
Removing the front panel shows the main housing, which has a solid cover except for the 140mm fan mounts. You can’t adjust the height of the fans given the space constraint and fixed mounting holes. You can see two rectangular cutouts parallel to the fan mounts. This is where the fan cables are routed from inside the case towards the front, and these are routed towards the back from the third cutout, which is provided parallel to the second cutout.
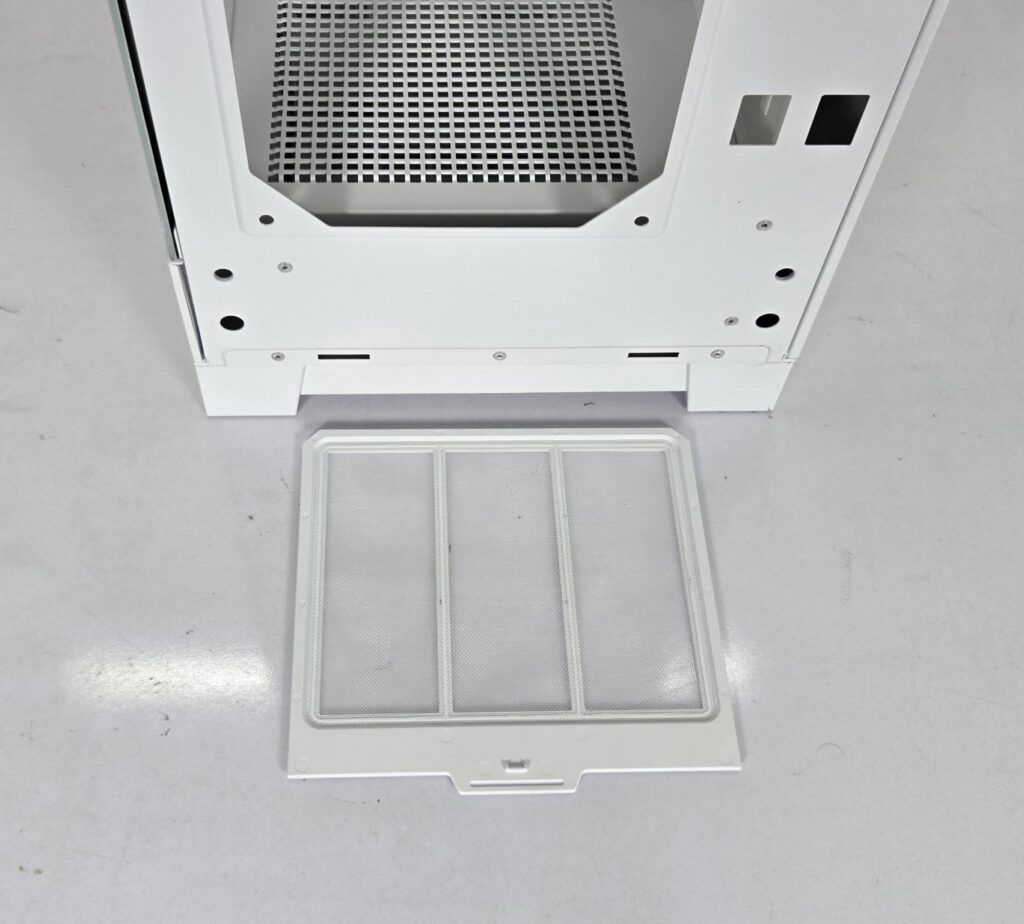
The non-magnetic dust filter can be taken out from the front. This dust filter is provided for the PSU bay.
Rear View of the Case
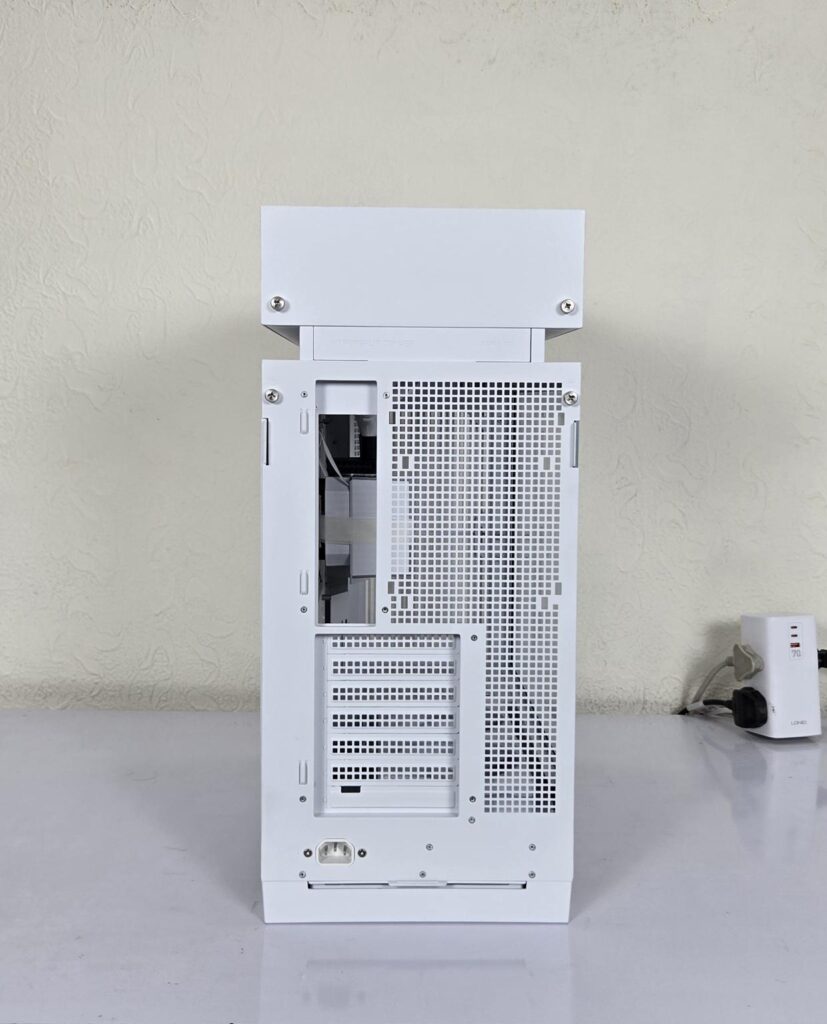
Looking at the rear, the top chamber has a concealed design, whereas the main chamber has a traditional layout except for the bottom. The main cutout provides room for the IO plate of the motherboard. Fixed points are provided for the 120mm and 140mm fans. 7x PCIe slots are placed inside the case, and these have vented/reusable covers. Both side panels are secured using non-captive thumb screws. The cover on the top chamber is also secured using two non-captive thumb screws.
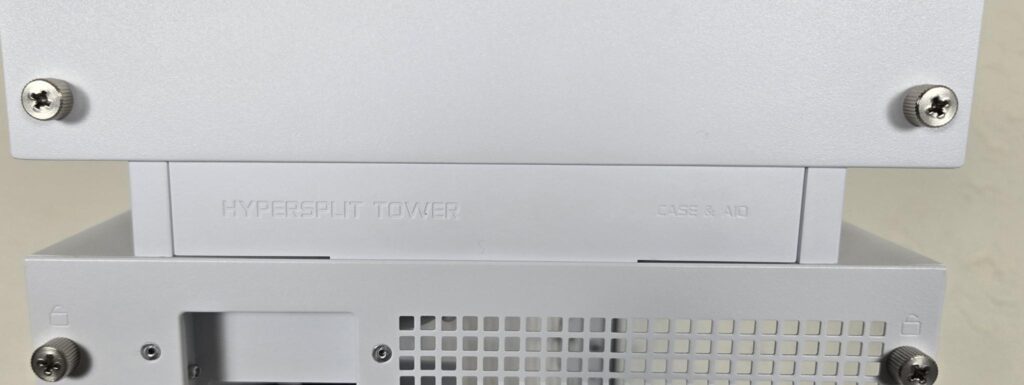
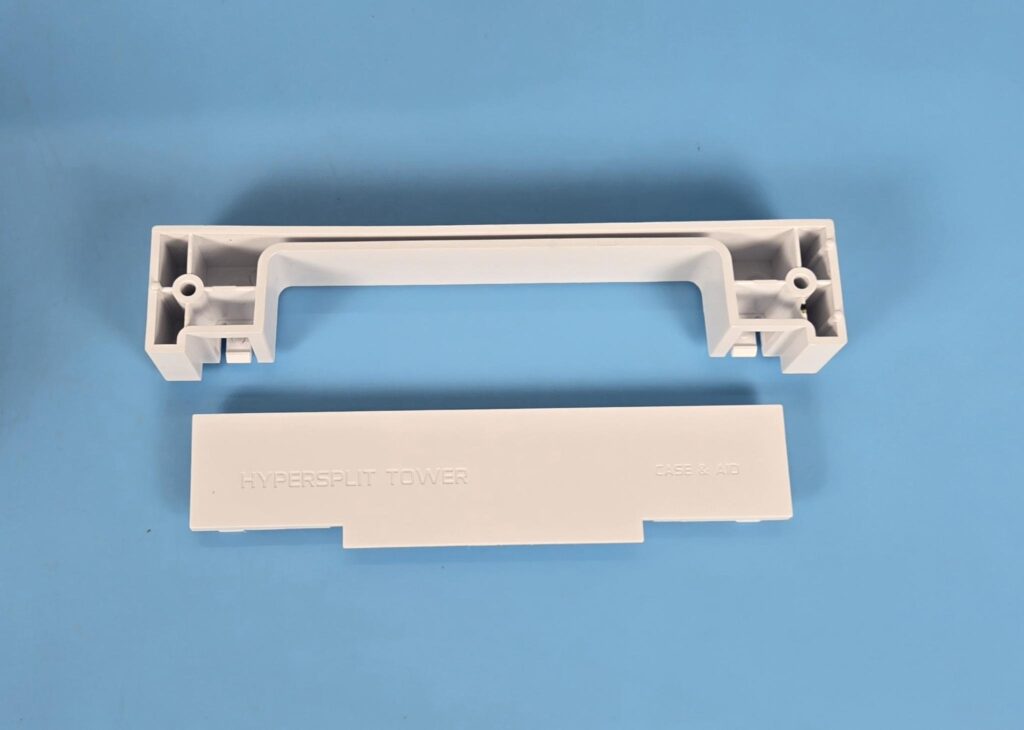
HYPERSPLIT TOWER and CASE & AIO are embossed on the channel that connects the top chamber with the main chamber. The texted side of this channel is actually a side cover which can easily be disintegrated, as you can see in the second picture above.
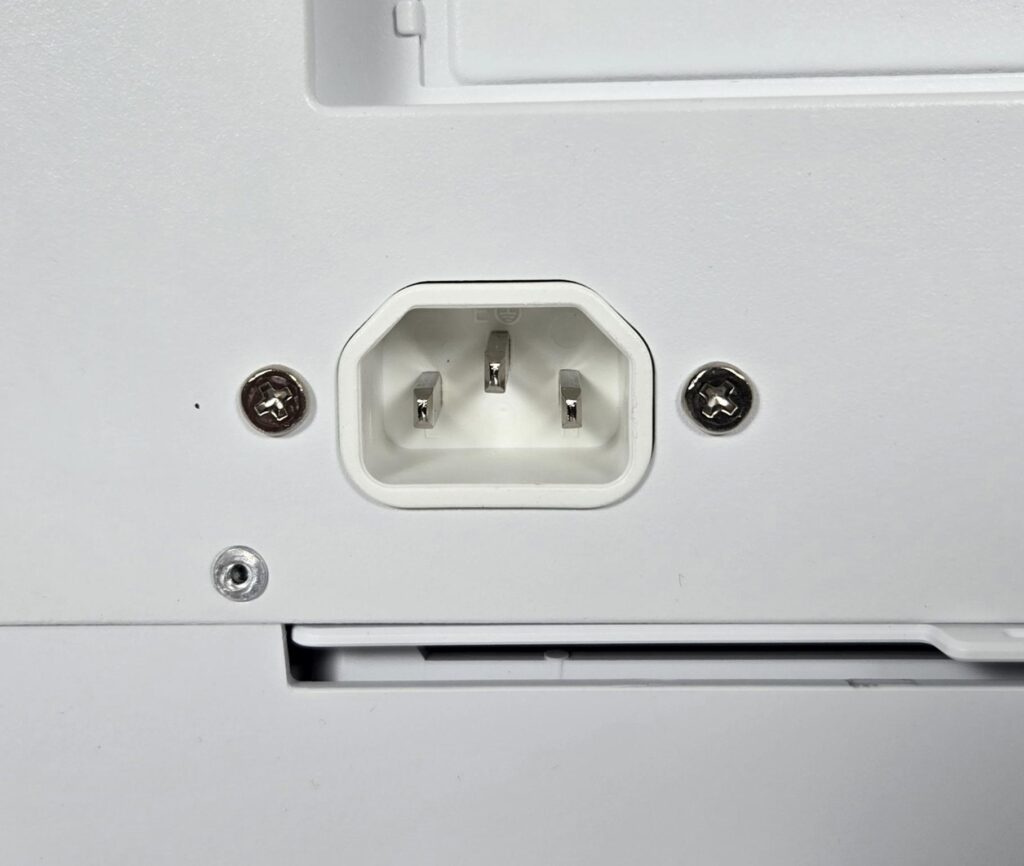
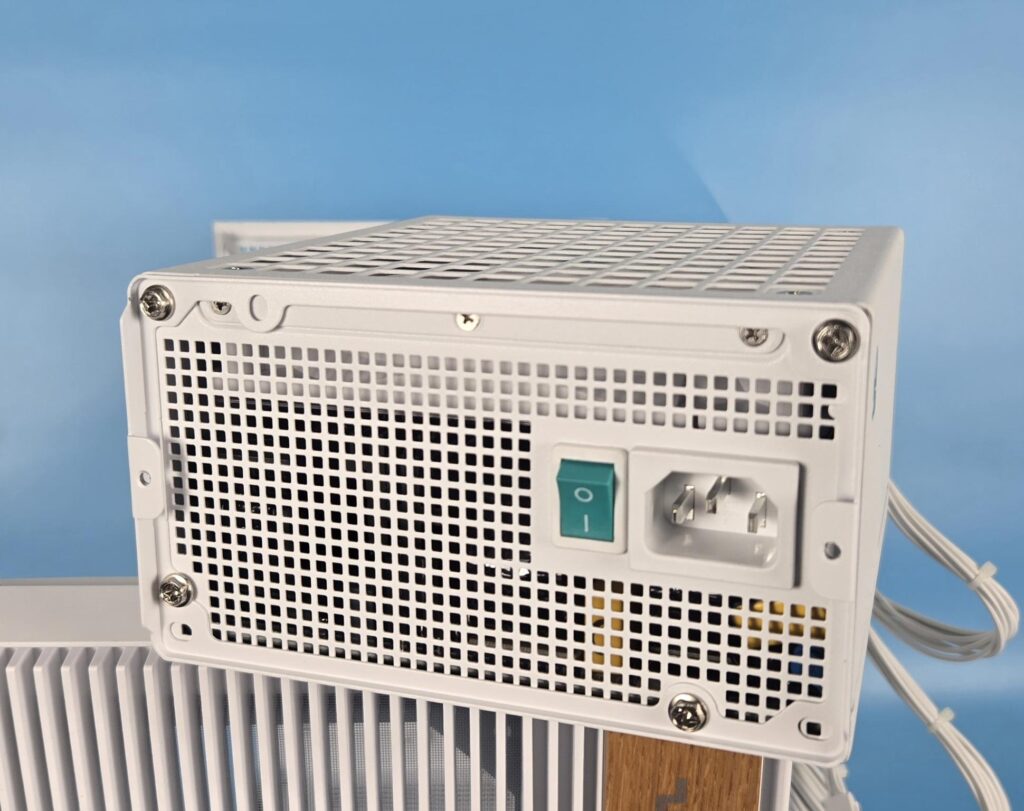
You can see a 3-pin port on which the power connector/plug of the PSU is connected. Since the PSU bay is located towards the front, an internal power cable is routed from this plug towards the PSU bay.
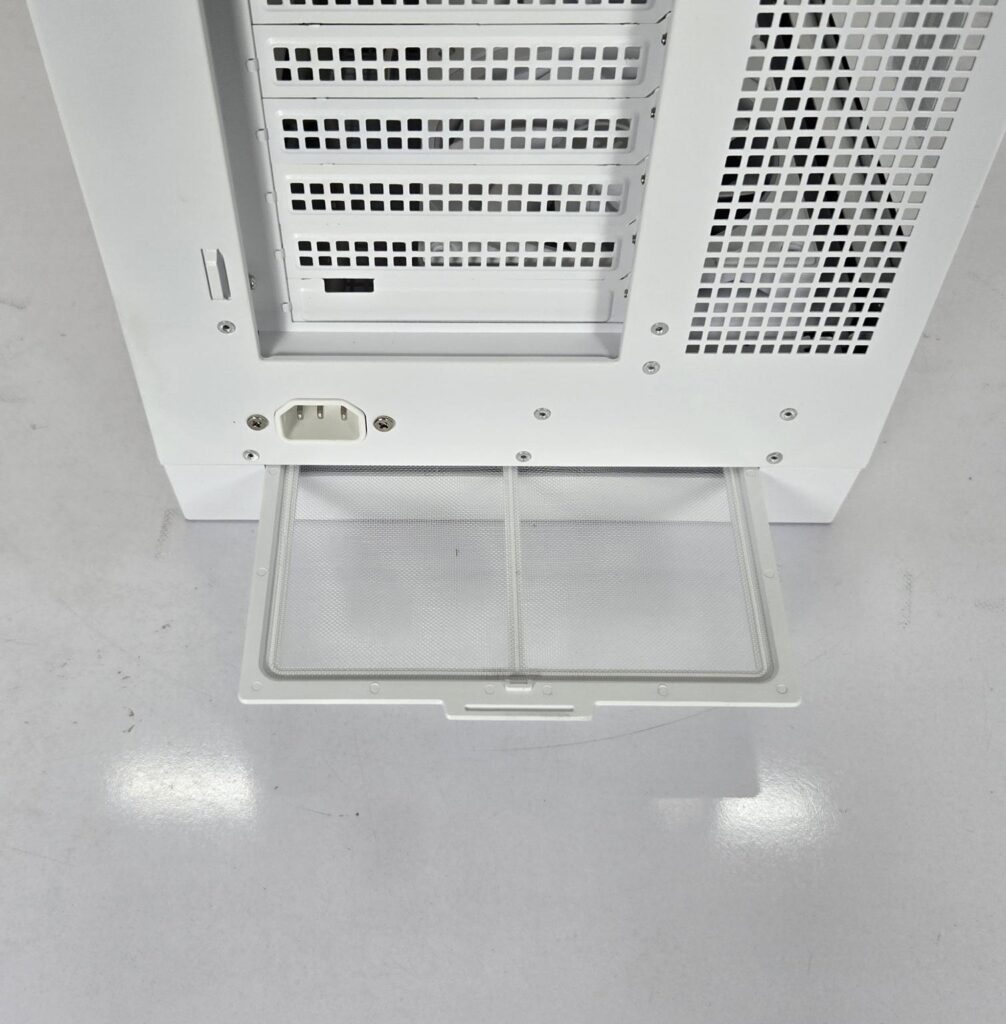
Another dust filter is provided towards the rear of the case. This dust filter covers the 120mm fan mounts.
Bottom View of the Case
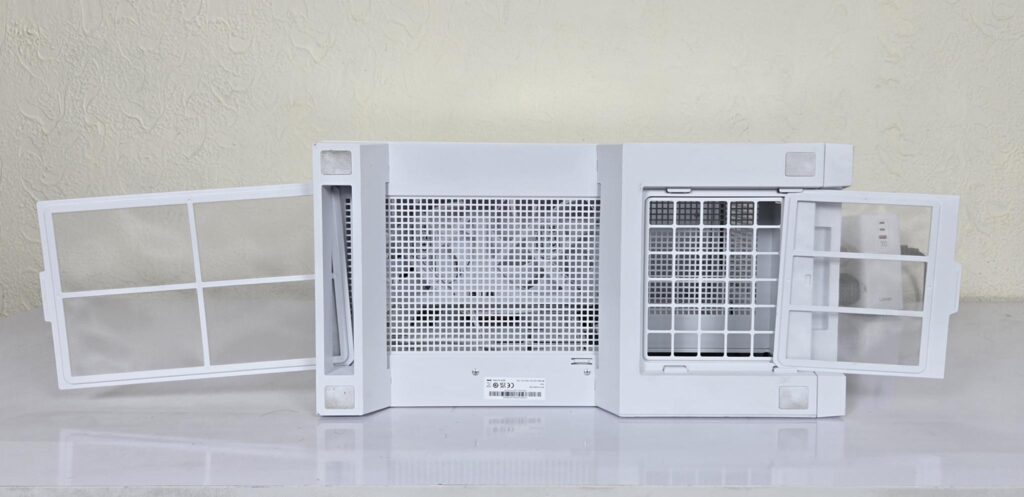
You can see a raised area under the case bottom, which provides a sufficient gap for proper air intake from the base. The complete area has a dust filtration cover.
Top View of the Case
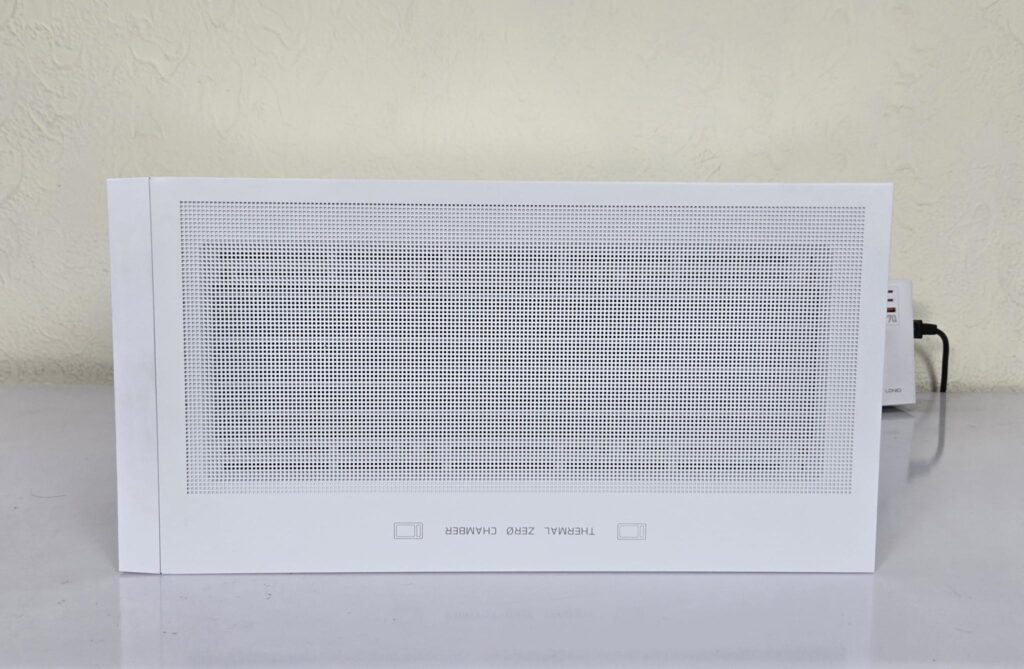
The top chamber is a dedicated chamber for the CPU liquid cooler. DeepCool has mentioned it as the Thermal Zero Chamber. It has one complete piece with three sides covered that has a vented portion in the center.
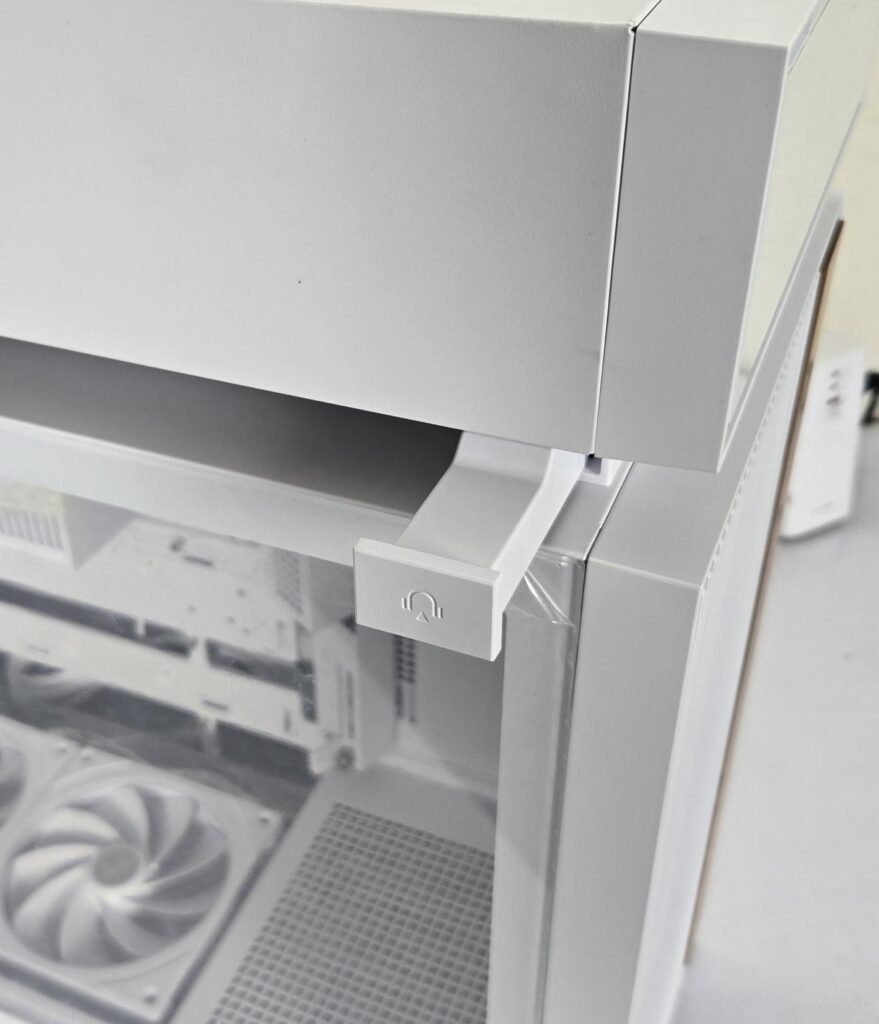
DeepCool has wisely used the front fully sealed channel to provide a stand or hook for a headphone. This hook uses a spring mechanism for easy pop-out on one tap.
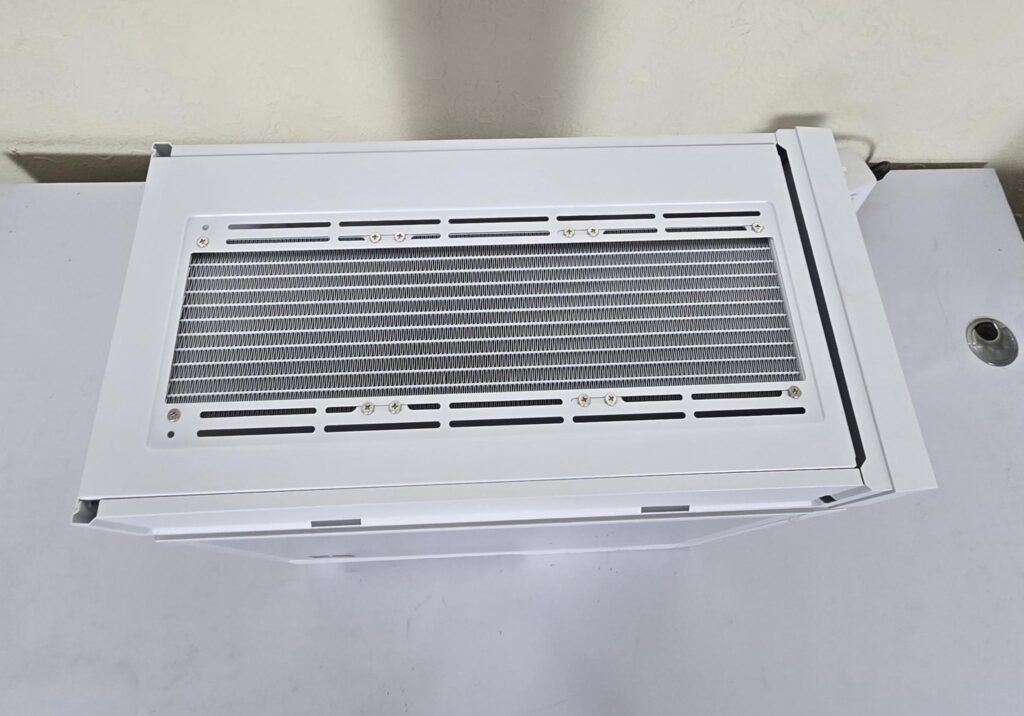
I have removed the top cover, and you can see the rail mount for the radiator and fans. This case comes equipped with a 360mm radiator.
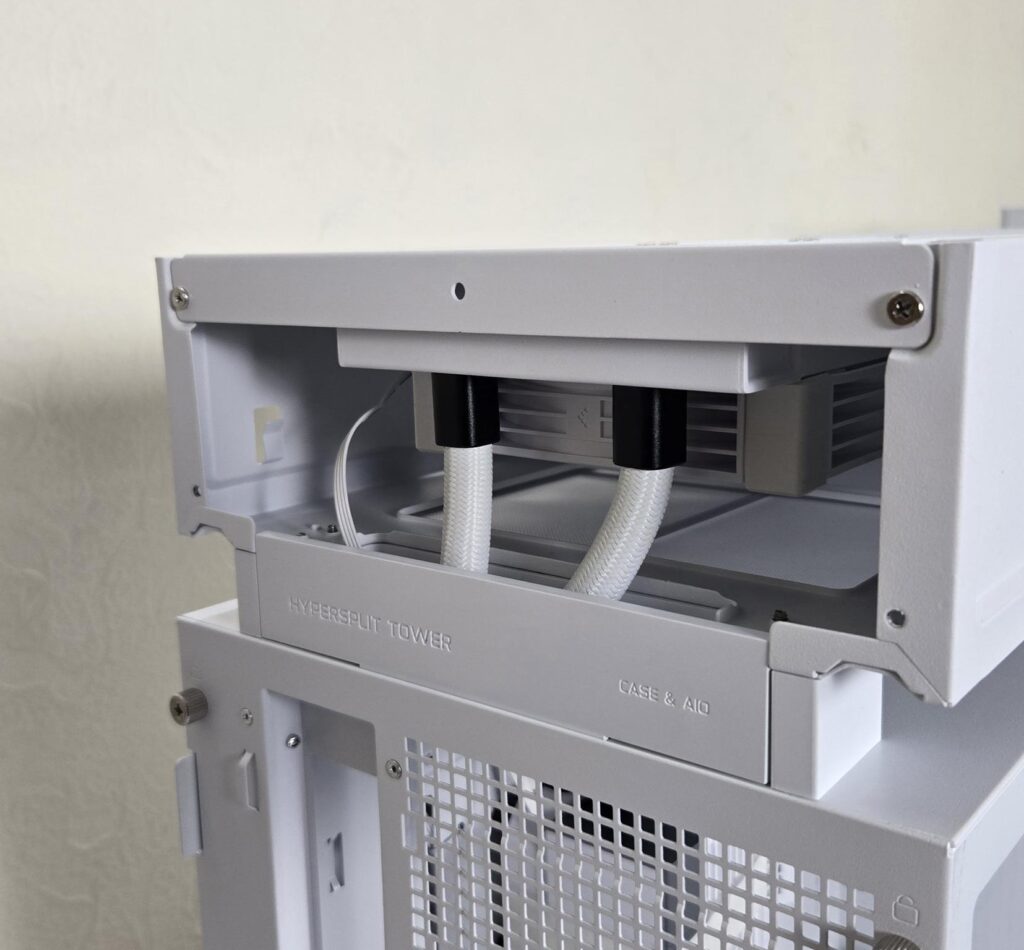
I am showing the backside of the top chamber after removing the top cover. You can see the tubes passing through the channel towards the main chamber. This channel is open-ended. In my opinion, it should have been sealed with only tube mounts to avoid any chance of warm air going from the main chamber to the top chamber.
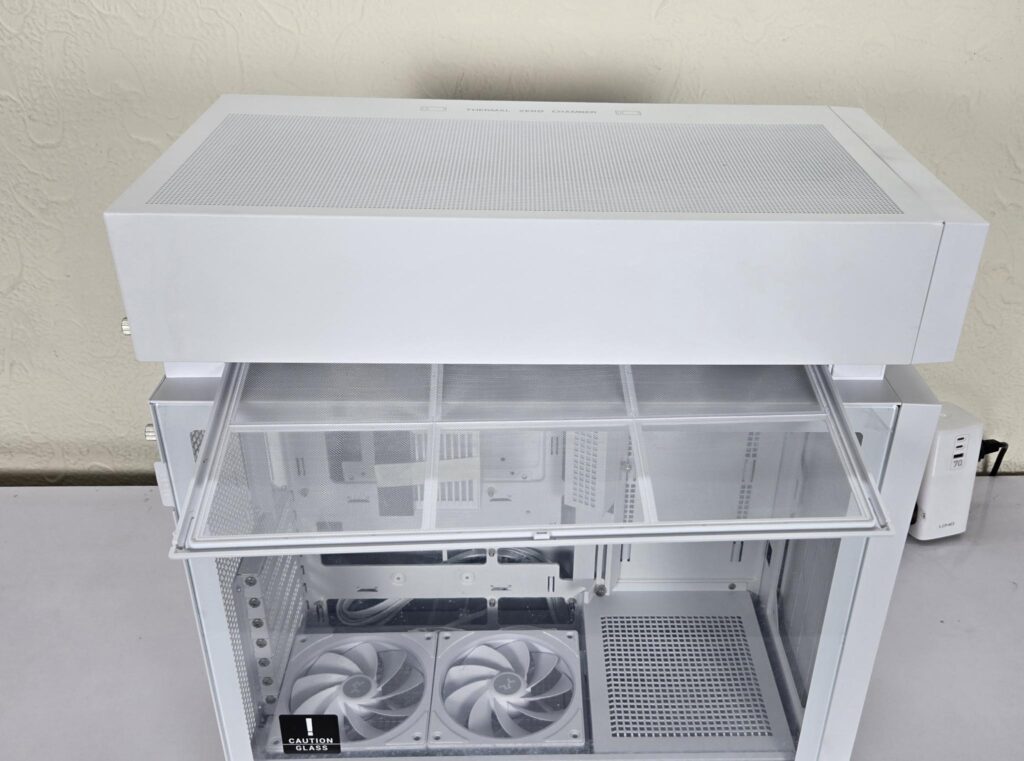
A full-length non-magnetic dust filter is also provided under the top chamber. This is where the fresh air will be taken into the top chamber.
Thermal Zero Chamber
Since we are at it, let’s take a look at the Thermal Zero Chamber, or what I am referring to as the Top Chamber.
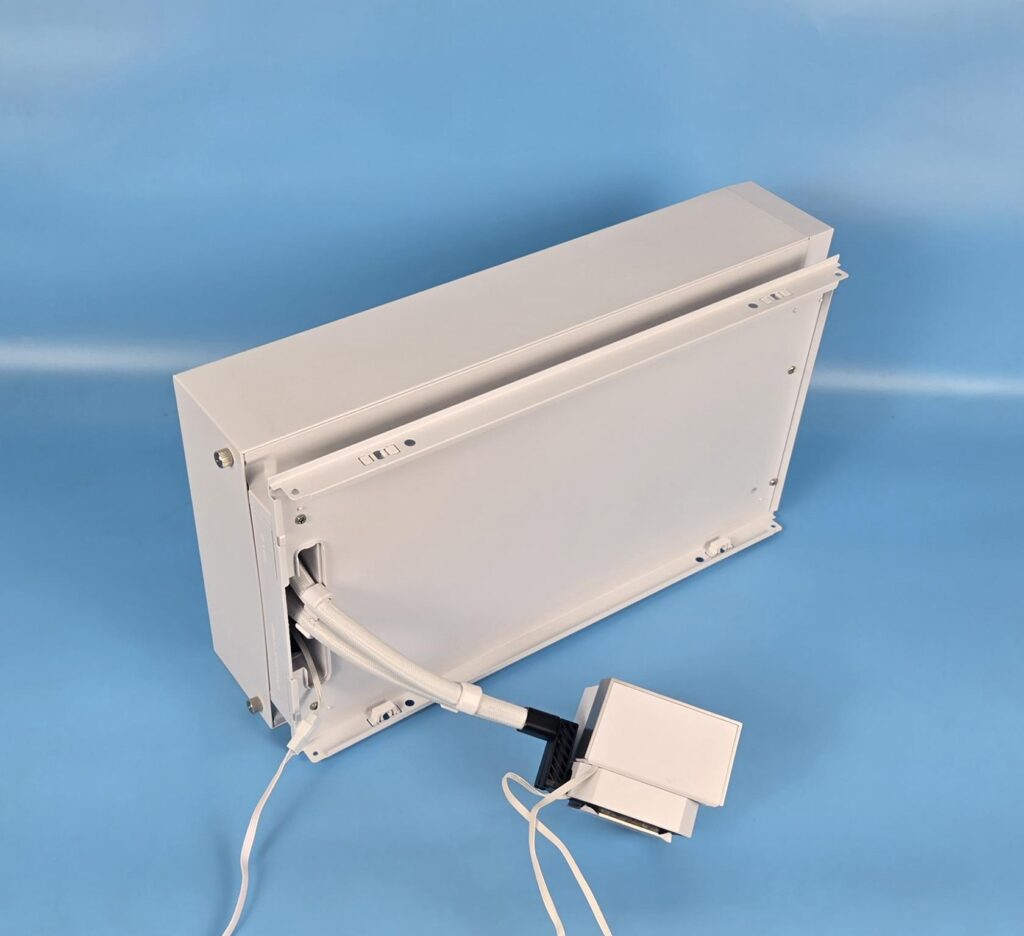
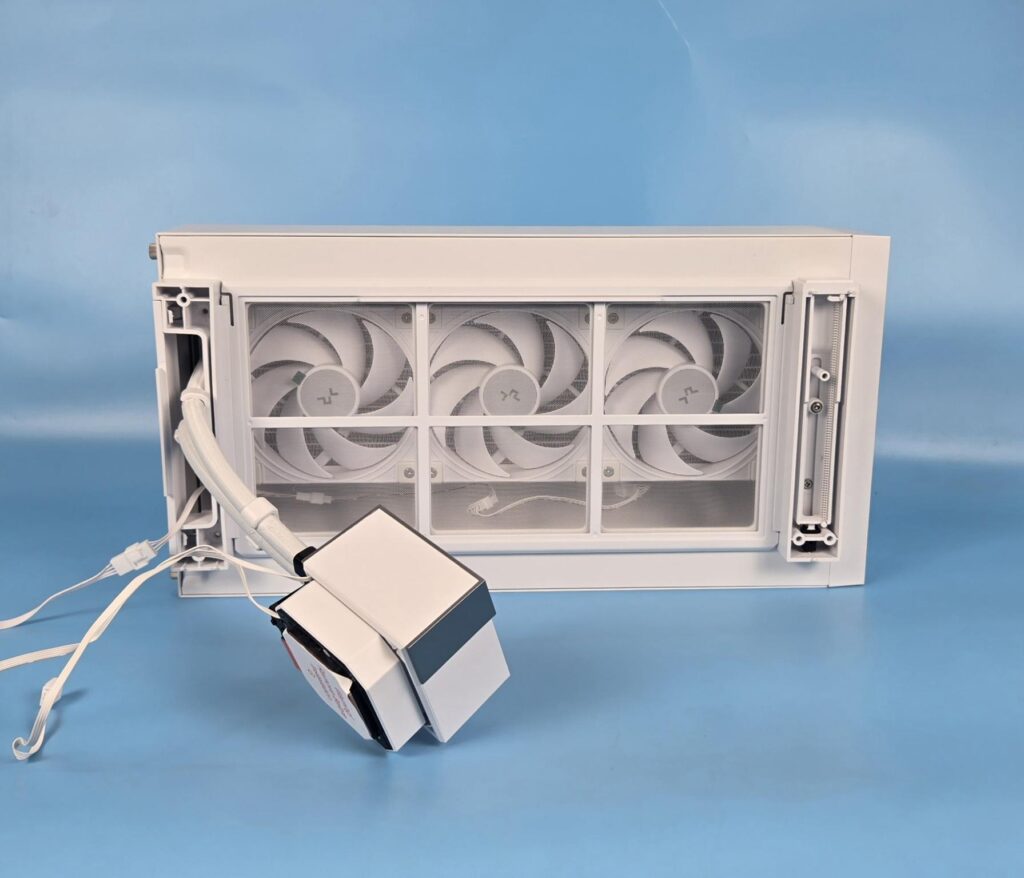
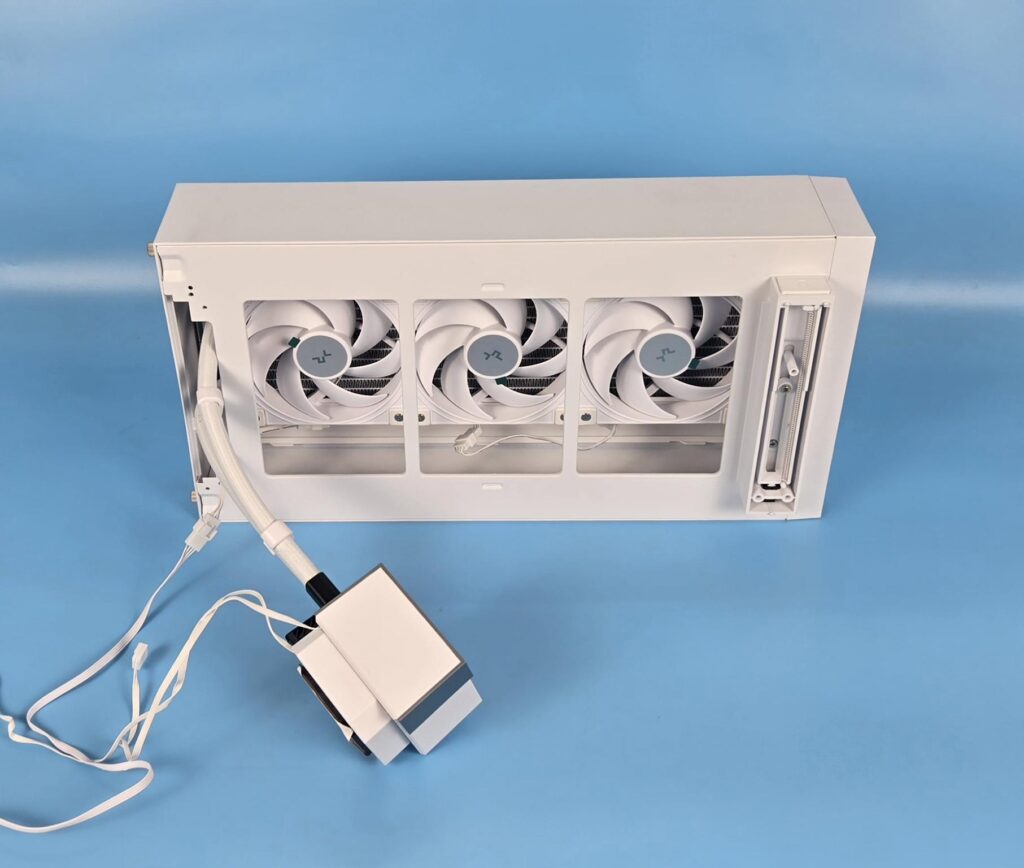
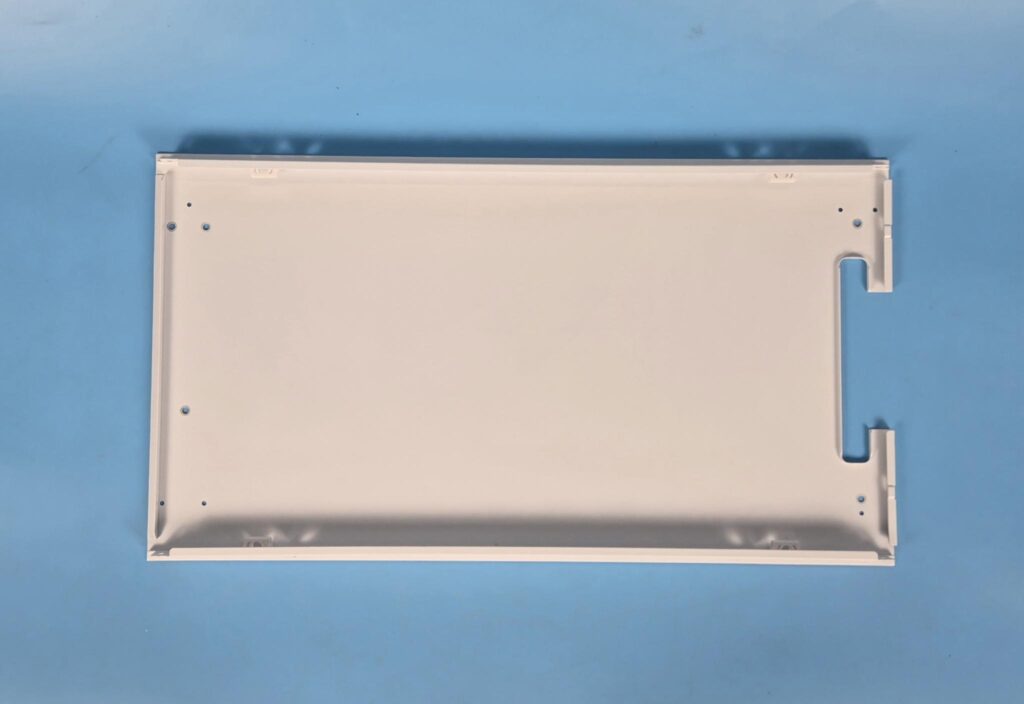
The top chamber is connected or attached to the main chamber using a solid cover or hood that uses four Philips screws for attachment/detachment. It is easy to remove the top chamber by opening the side panels and undoing the two screws on each side.
This hood is connected to the top chamber using 4x M3 screws that you usually use to install fans on the radiator. By undoing these four screws, the hood is detached from the top chamber.
You can clearly see the open design for the inter-connecting channel through which the tubes are routed. This should be concealed. The dust filter can be seen covering the entire length of the chamber. The fans have enough gap from the base of the chamber for sufficient air inflow and even the push/pull configuration.
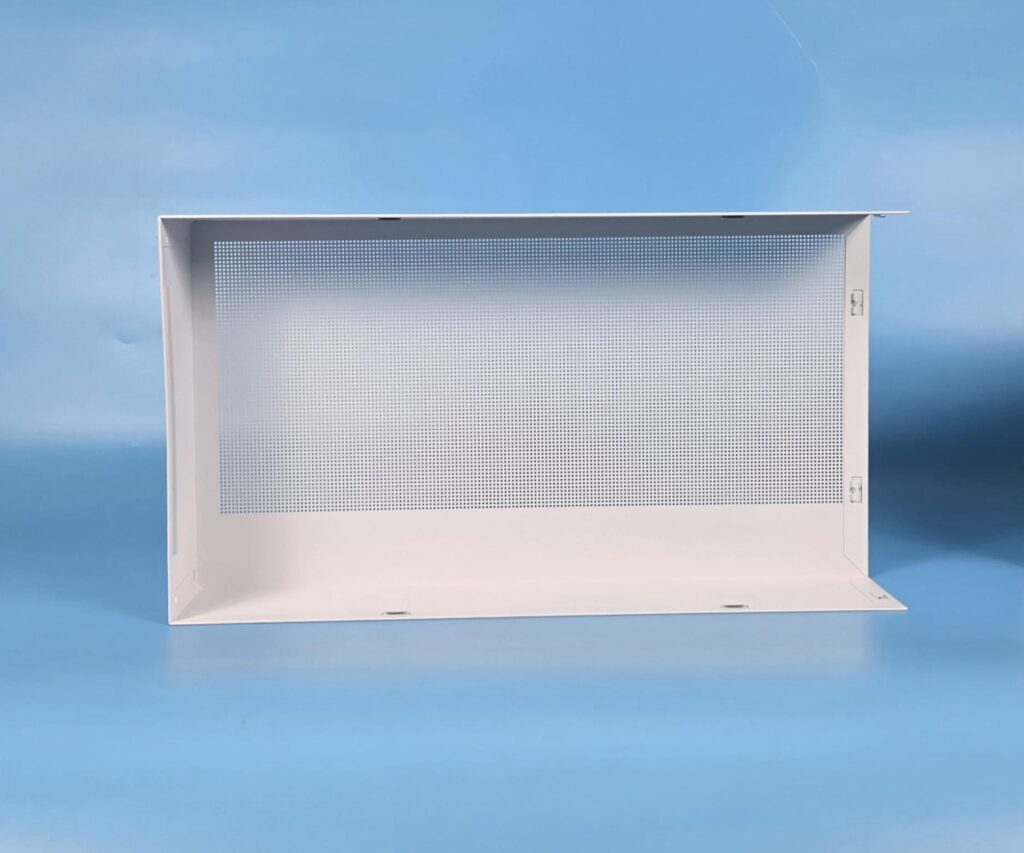
The top chamber has a large-sized cover that is solid on two sides and meshed on the top. It sits over the chamber coving the sides and providing a neat and clean outlook of the chamber.
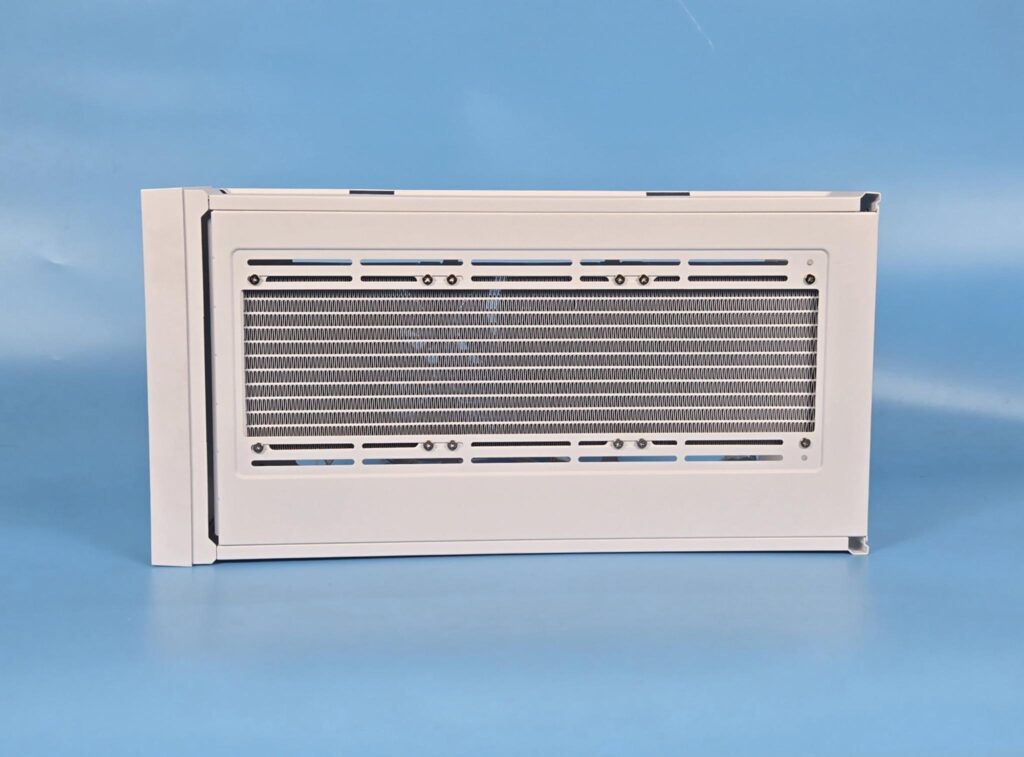
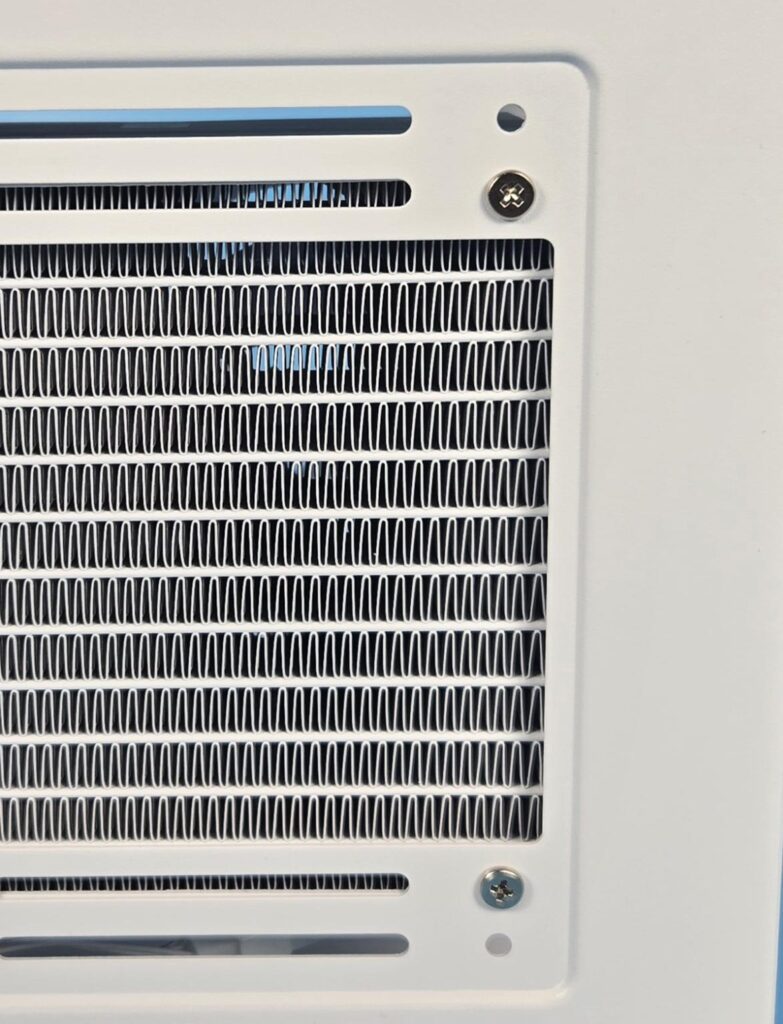
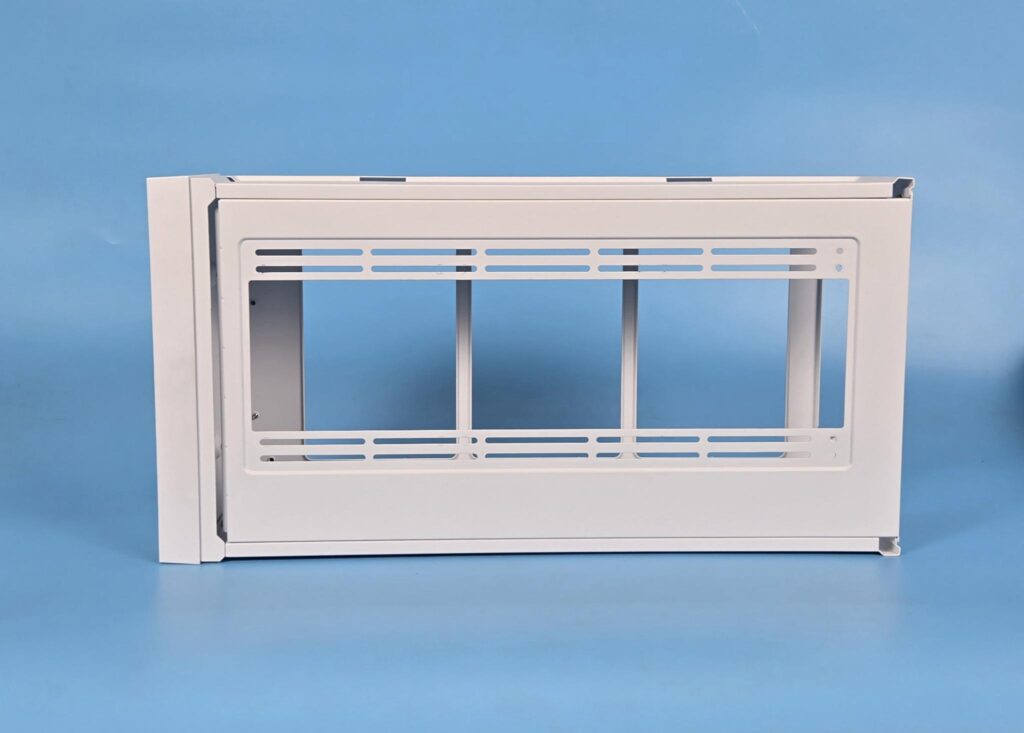
The top frame has a rail mount design. Looking closely, you can see two fixed holes. This is your reference point to install the radiator so that it can meet the factory setting. I am amazed at how detailed the DeepCool design team has been with this case.
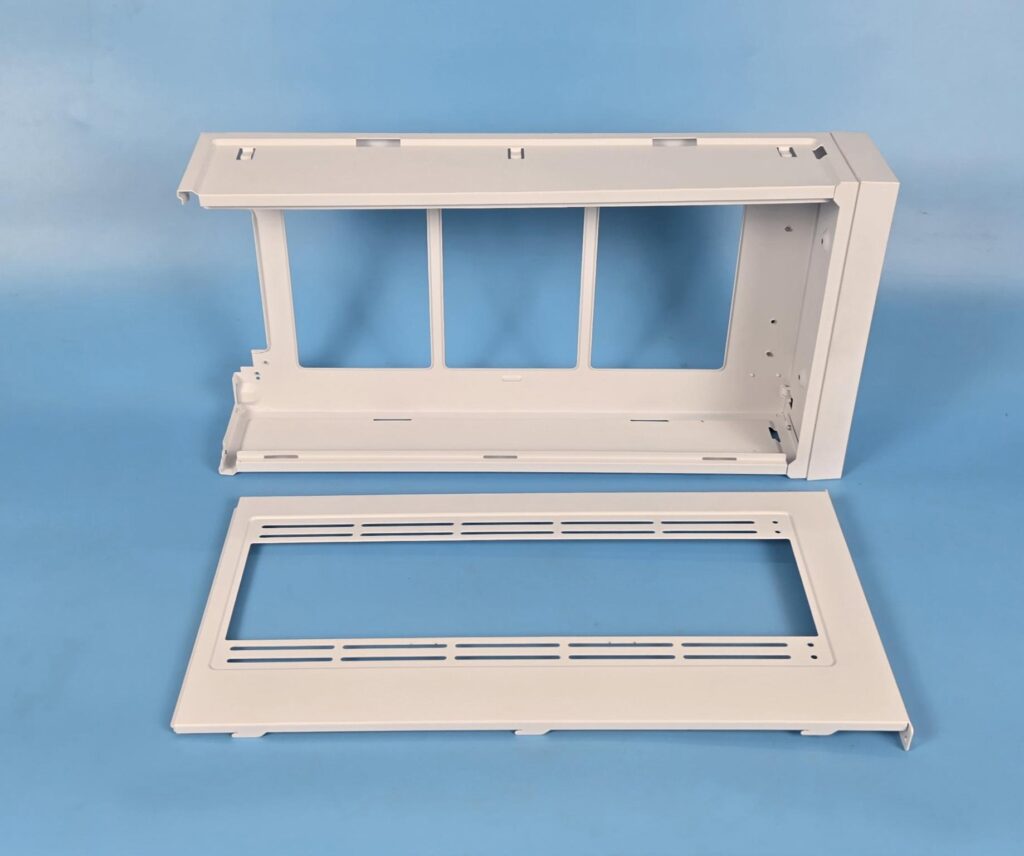
The top rail frame is also removable. The modulatory aspect of this case is highly commendable. The fan support is 3x120mm or 2x140mm on the top and up to 360mm radiator on the top.
Interior View
Let’s take a look at the sides and internals of the case.
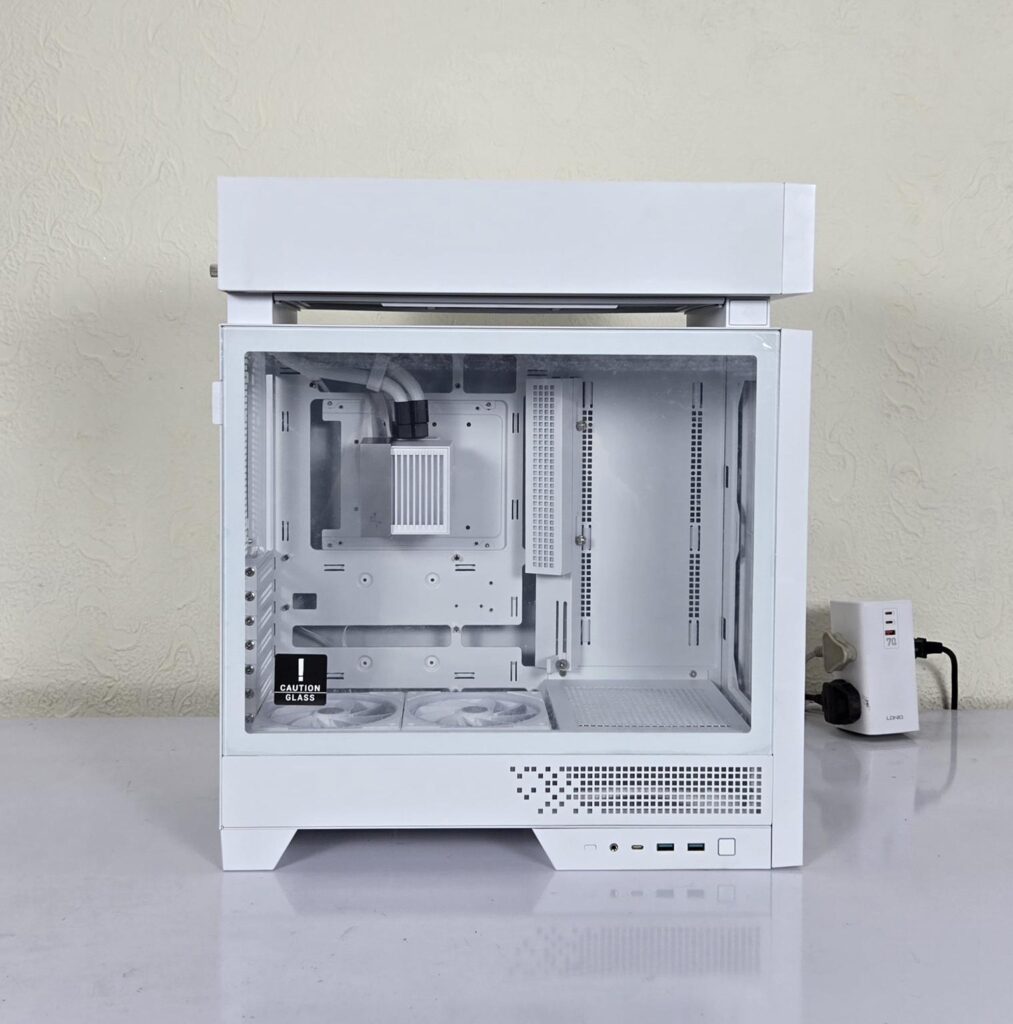
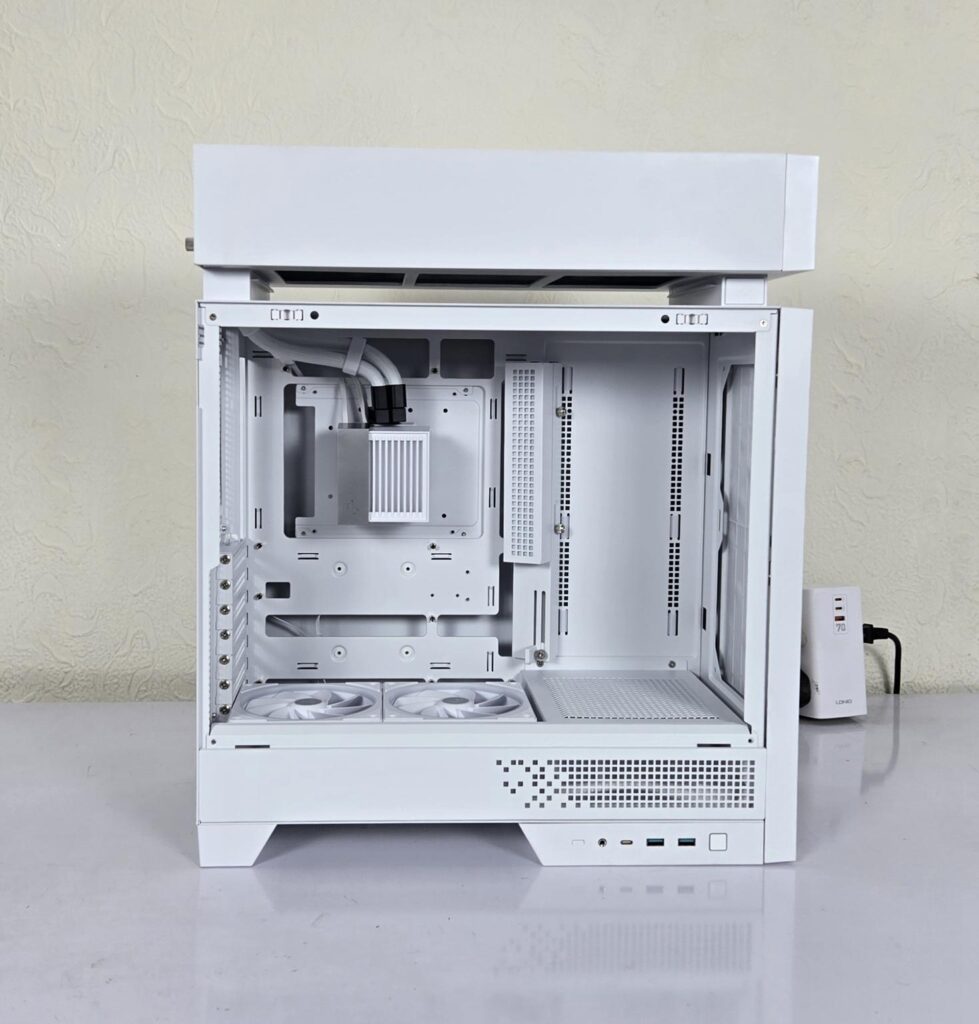
The top chamber has a solid finish from the side, whereas the main chamber has a tempered glass panel on the side. The panel uses snap on design with studs for easy attachment.
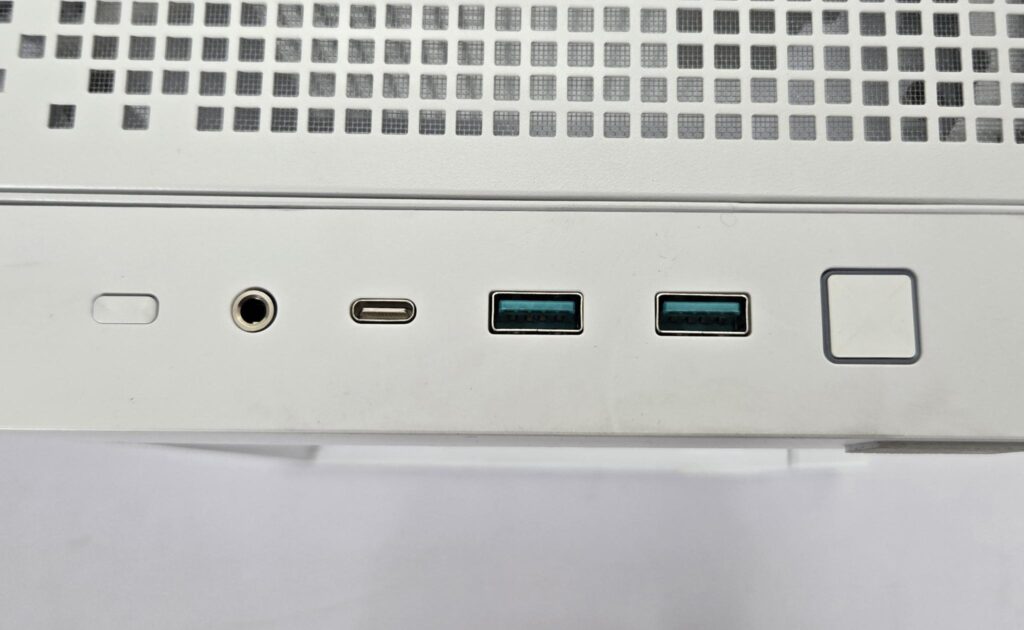
The IO panel has the following ports:
- 2x USB 3.0 Ports
- 1x USB Type-C Port
- 1x Audio/Mic Port
- 1x Headphone Port
- 1x Power Button
- 1x Reset Button

I am showing the main chamber after removing the top chamber. Now, we almost have the CL600 design pattern, which is also available separately. It is beyond my understanding why the side cover is angled. It could not be attached at this angle once the GIGABYTE X870 AORUS Stealth Ice motherboard was installed, since the bottom of this cover was constricted by the motherboard chipset cover. Anyhow, we have ample space to work around. Some portion of the ATX motherboard will be hidden behind the two FL12R SE fans. You can’t mount the graphics card vertically in this case due to obstruction from the PSU bay.
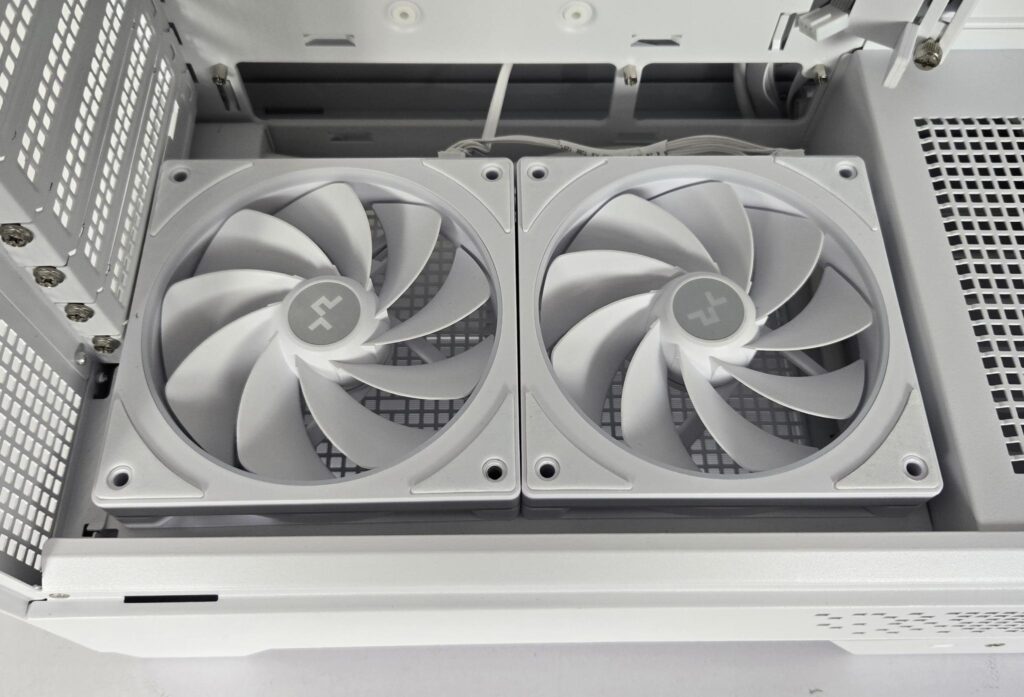
DeepCool has provided two FL12R SE ARGB fans in this case. These are reverse-blade 120mm fans, which we reviewed earlier. These are the only fans that come pre-installed in this case. They are placed so that they throw fresh air directly towards the graphics card. They are installed over a removable sliding tray.
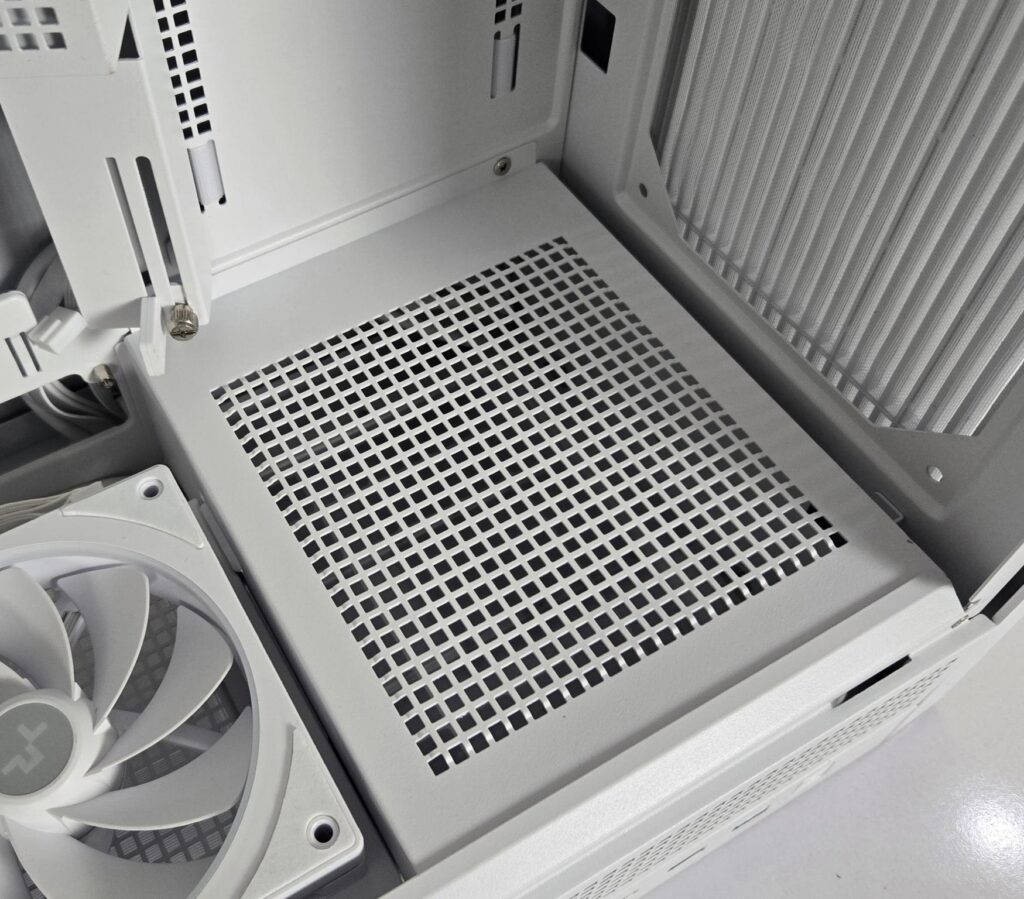
The vented area on the front base is the PSU bay. PSU is installed near the front and in a different layout than the standard one.
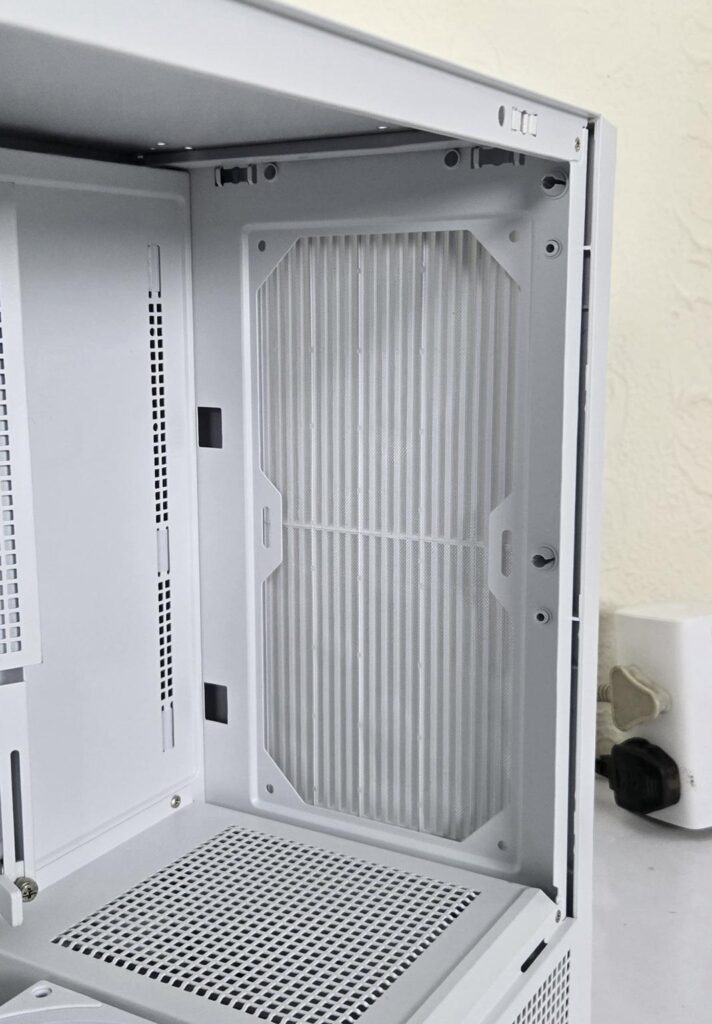
You can install up to 2x 140mm fans on the front. This is optional, and DeepCool did not provide any fans on the front. It is made up of two 120mm fans on the base.
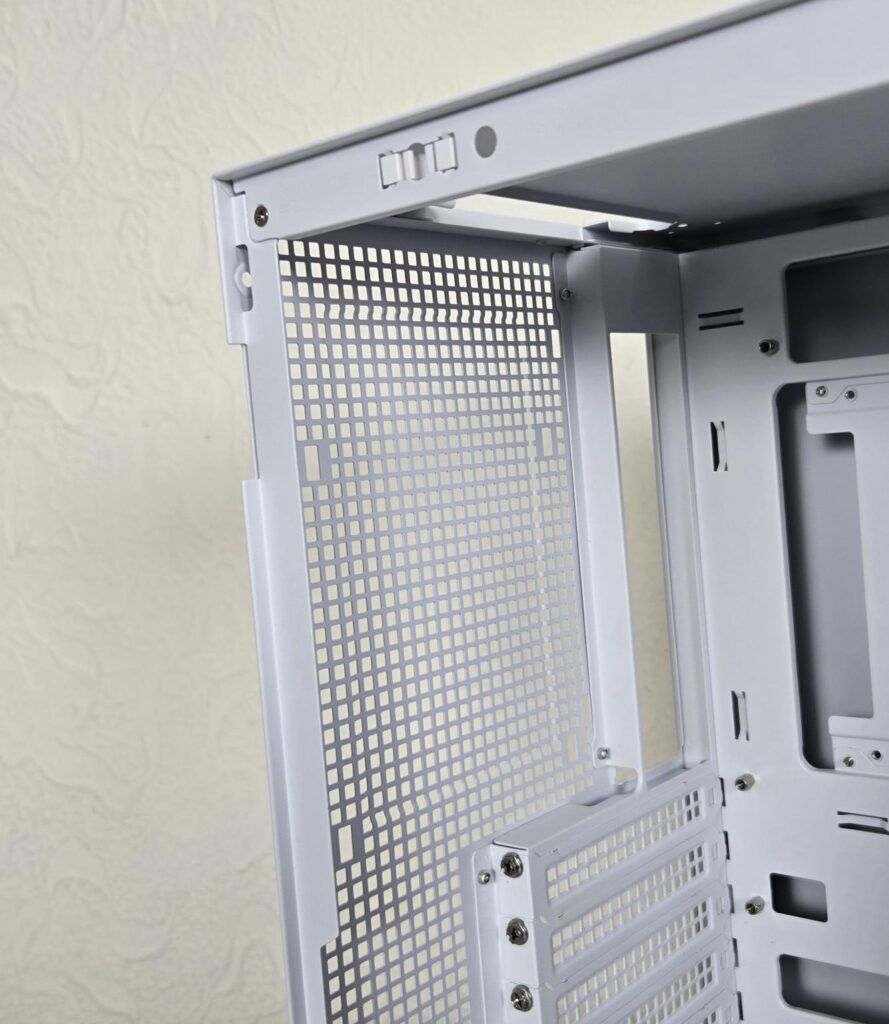
The vented area on the rear has fixed mounting positions where you can either install a 120mm or 140mm fan. We can’t adjust the height of these fans. From my experience of using this case, I would suggest the user install a fan, probably 140mm on the rear, for optimal cooling.
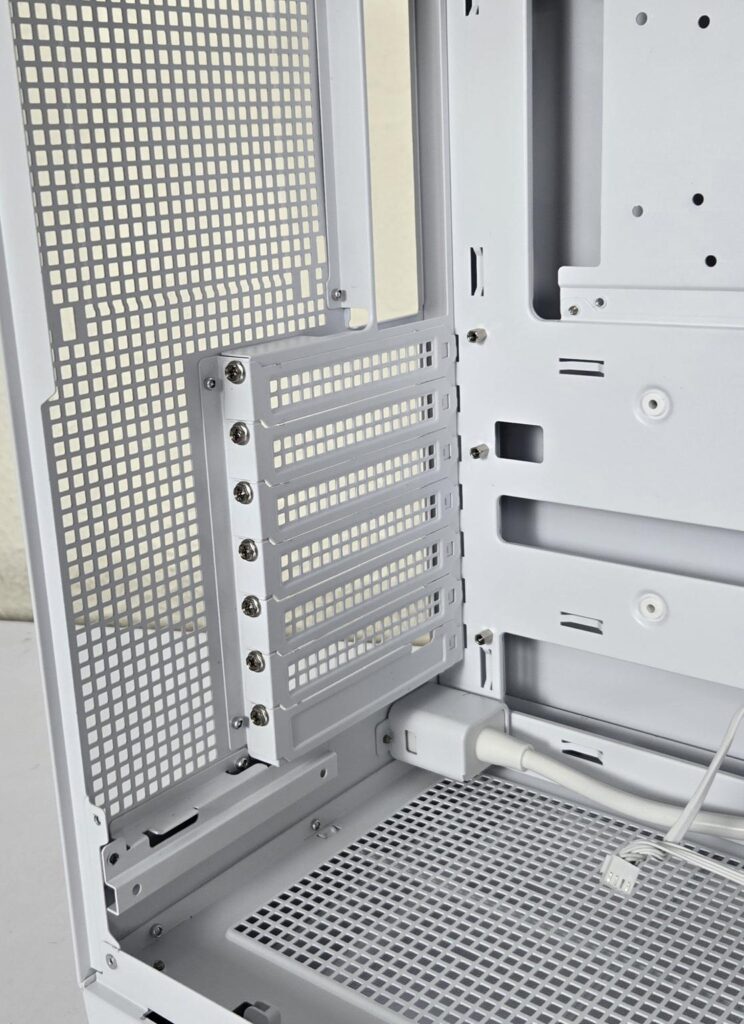
This case has 7x vented and reusable PCIe slot covers. These are bridgeless design which is nice, but it won’t pay you any good since the vertical placement of the graphics card is not possible.
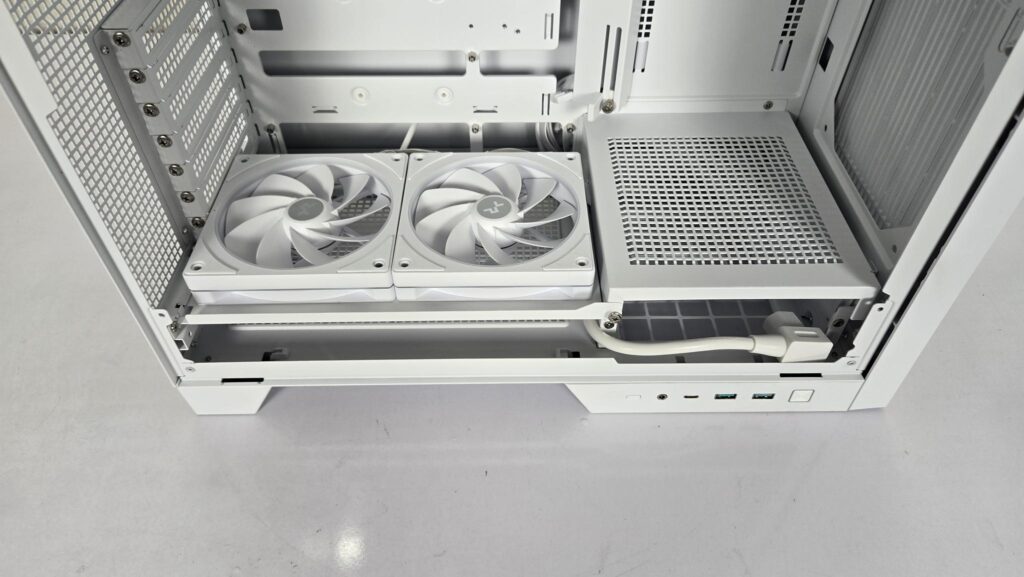
I have removed the cover from the base of the case. You can see the sliding tray on which the fans are installed and the front of the PSU bay. The PSU’s power port side faces this so that the power plug can be connected to the PSU.
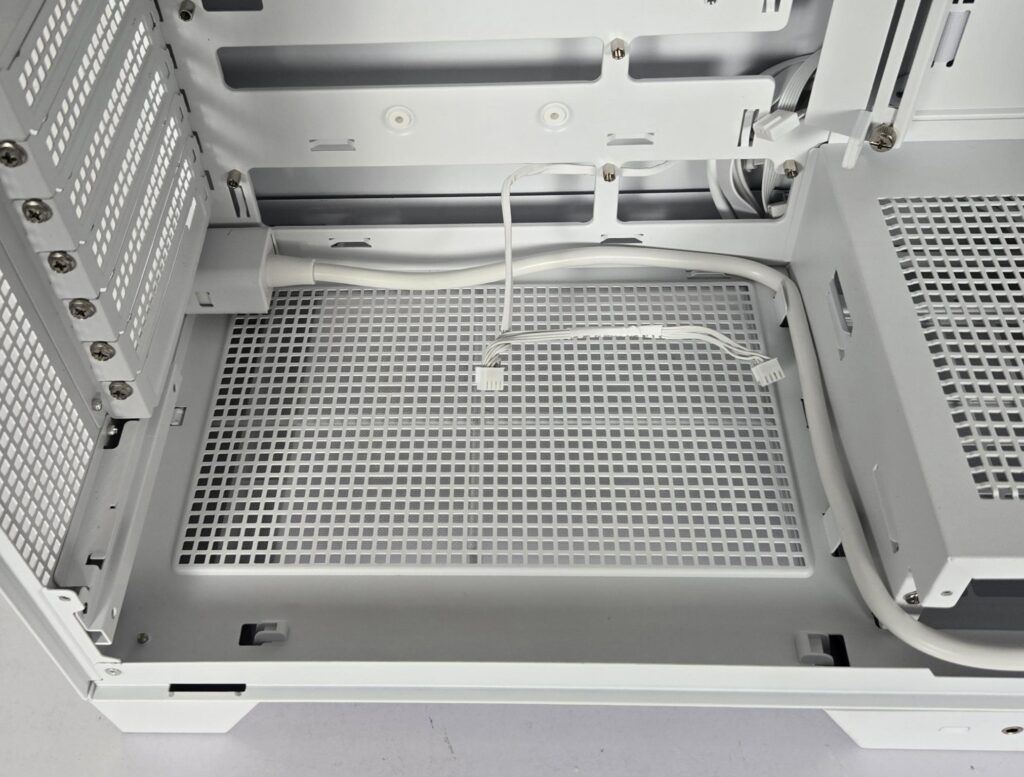
I have taken out the fan bracket. You can see the neat routing of the power cord from the rear towards the front. The space beneath the fan bracket can be utilized for a storage drive.
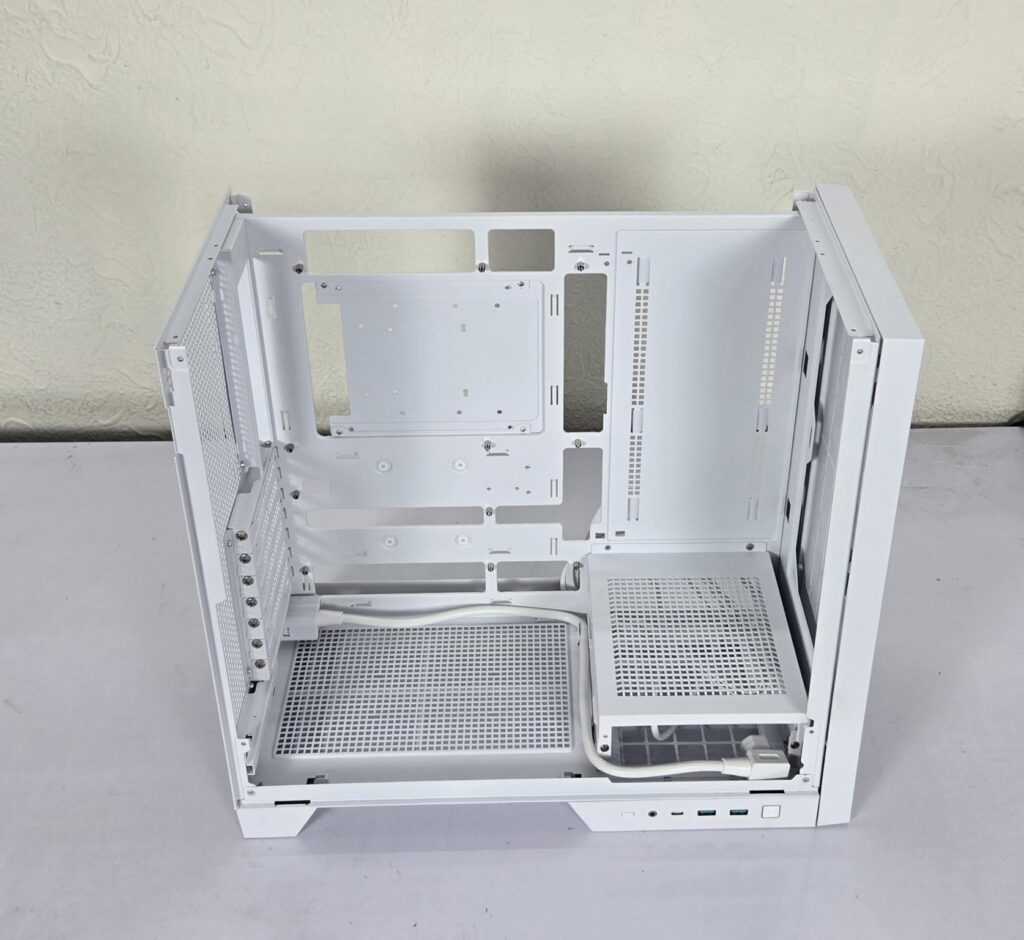
This is a skeleton view of the case. It is easier to assemble a PC in this case since we are getting unobstructed access even from the top.
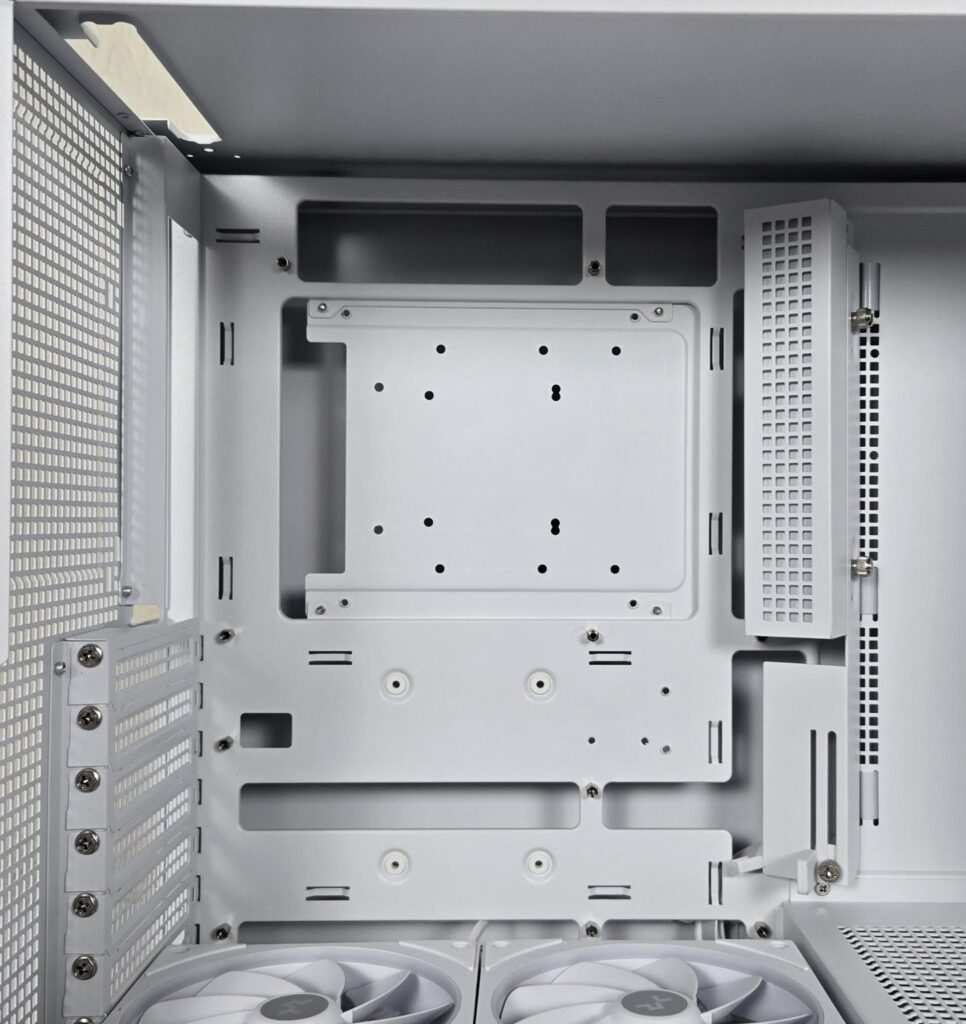
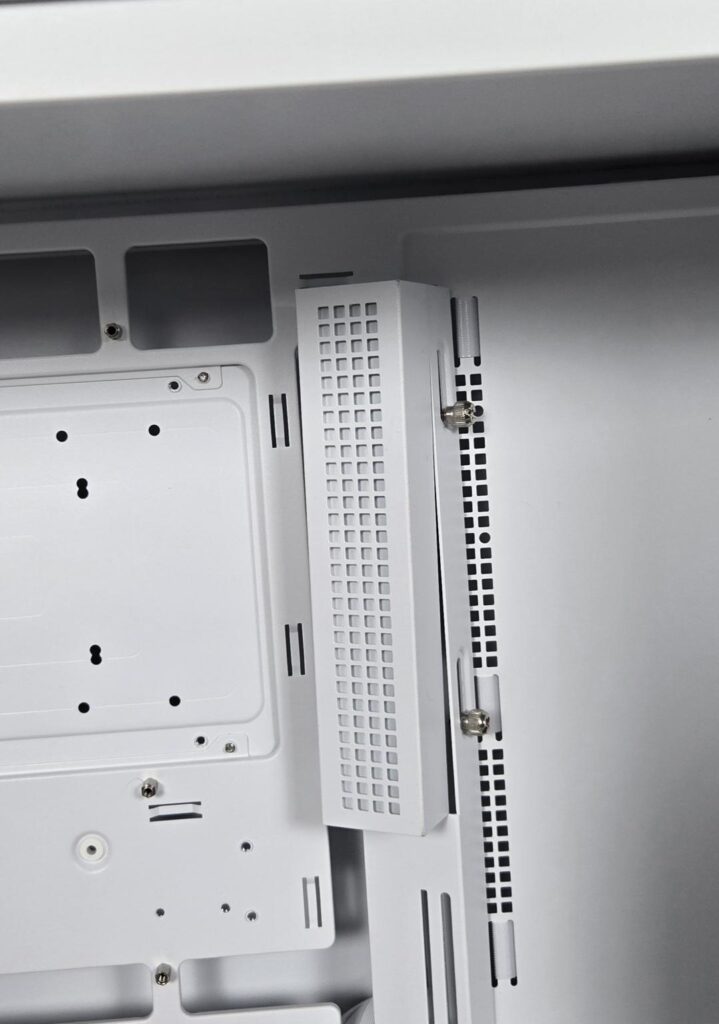
This case supports a motherboard up to ATX size. It also supports back-plug motherboards in mATX and ATX form factors. DeepCool has installed 9x standoffs for ATX form factor motherboard. The CPU cutout has a large-sized cover bracket which can be used for storage drives.
A cable cover is provided on the side of the motherboard tray. It is angular in design, and this is where I have an observation. The bottom part of this cover has a graphics card weight support system. This cover could not be properly installed with the GIGABYTE X870 Aorus Stealth Ice motherboard, as the bulky chipset cover of the motherboard obstructed the bottom part of the cable cover. Also, this cover should not be this angled; rather, it should be a simple 90° facing for easy mounting.
Clearance
Since we are at it, let’s see the clearance restrictions of components in this chassis:
- 175mm CPU Air Cooler
- ATX PS2 PSU maximum length is 160mm
- The graphics card’s maximum length is 413mm without the front fan
- The graphics card’s maximum length is 388mm with the front fan
Please note that this case is designed around a separate chamber for a CPU cooler in mind, and you will get a pre-installed 360mm AIO in CL6600.
It is now time to look at the backside of the case.
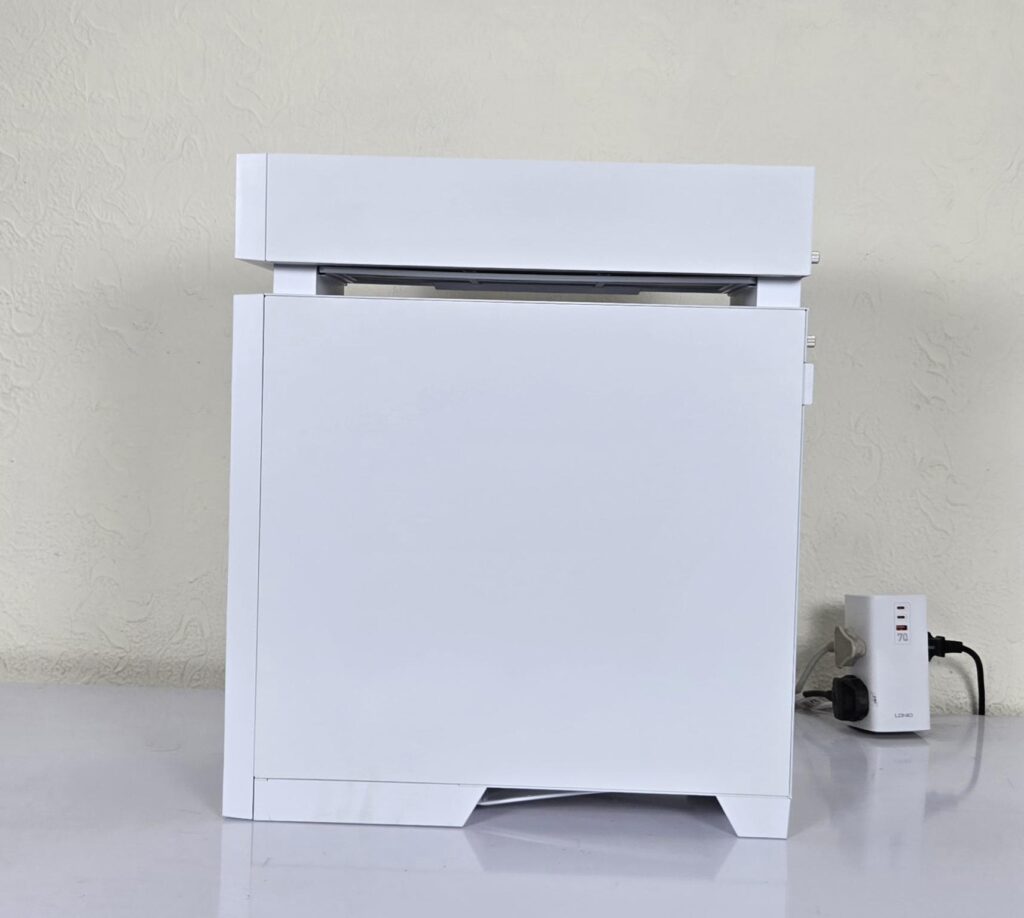
The side steel panel is made of steel, and so is the cover on the top chamber. The side panel is solid without any perforation.
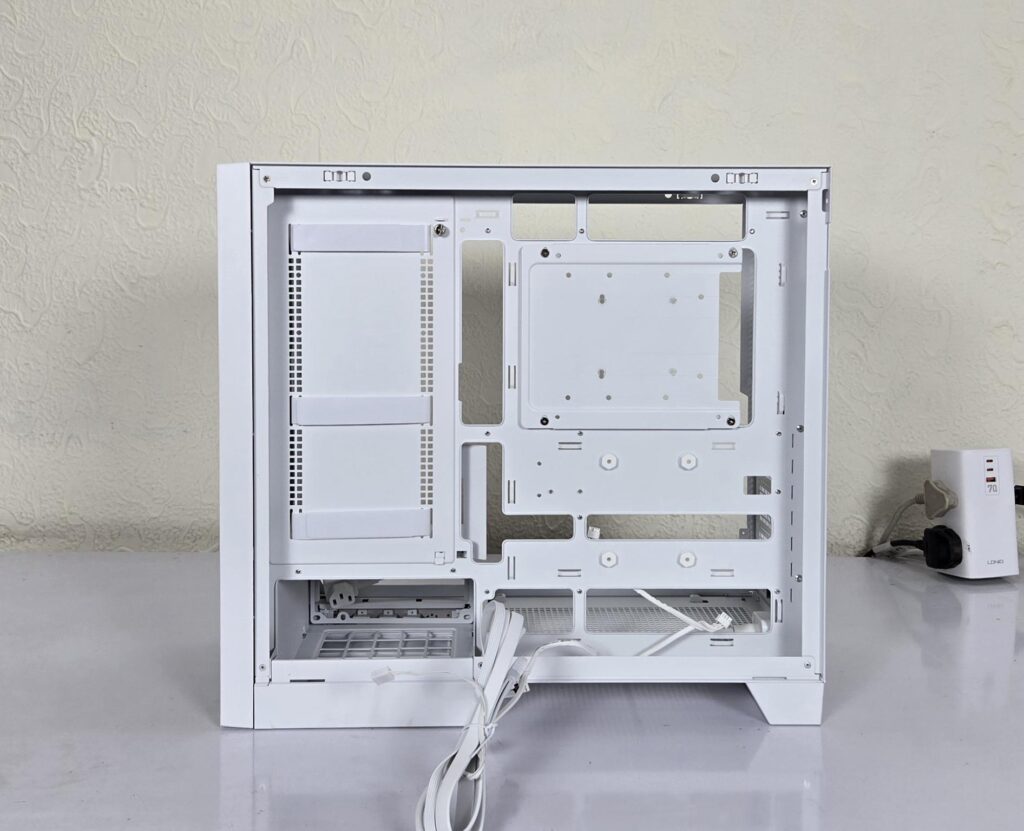
I have taken off the side panel and am showing the internals on the backside of this case (main chamber). This case does not have any offset design on the motherboard tray, which makes sense given the overall layout and the fact that the PSU is installed opposite the tray.
The area on the left side is of particular interest. You can see three wide Velcro strips. They are there to catch the cables, providing neat cable management. I missed this part when I was doing the build, but you should take full advantage of this area.
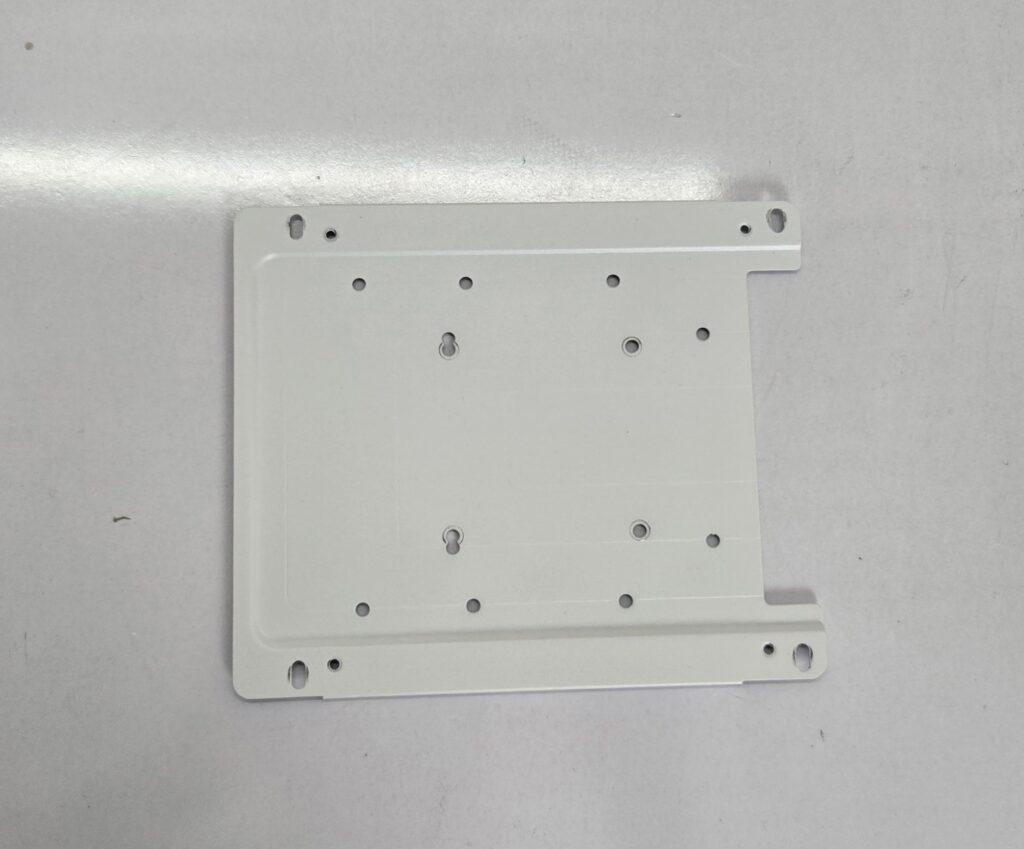
The bracket behind the CPU cutout can be used to mount storage drives. It is removable as well, so that a complete cutout remains available for cooler installation. You can also install a 2.5” drive below this bracket on the tray.
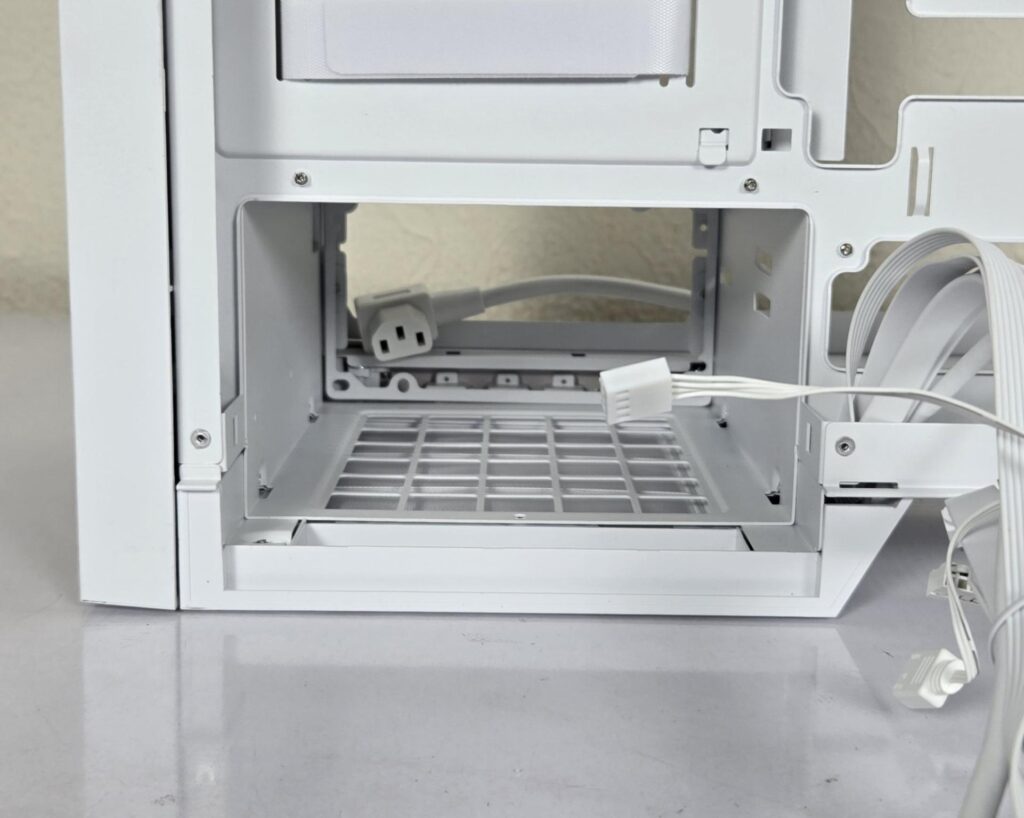
The PSU bay is installed side to side, providing direct access to the connector side, unlike the standard PSU placement, where the connector side faces the front of the case. DeepCool has also provided a plastic cover that attaches to the main frame, but it covers the cables as well.
You can see a frame or cover on the opposite end facing the power plug. This cover needs to be removed from the glass side of the case, and it is mounted on the PSU before installation. PSU is then slid into the bay, and installation is completed with the cover being secured to the chassis frame.
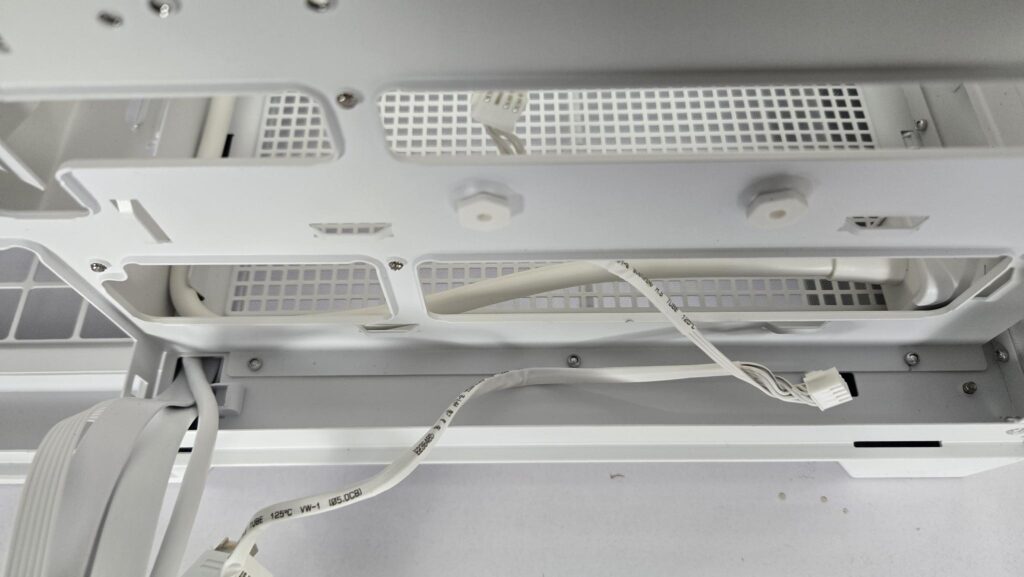
DeepCool has provided ample cable management space behind the motherboard tray.
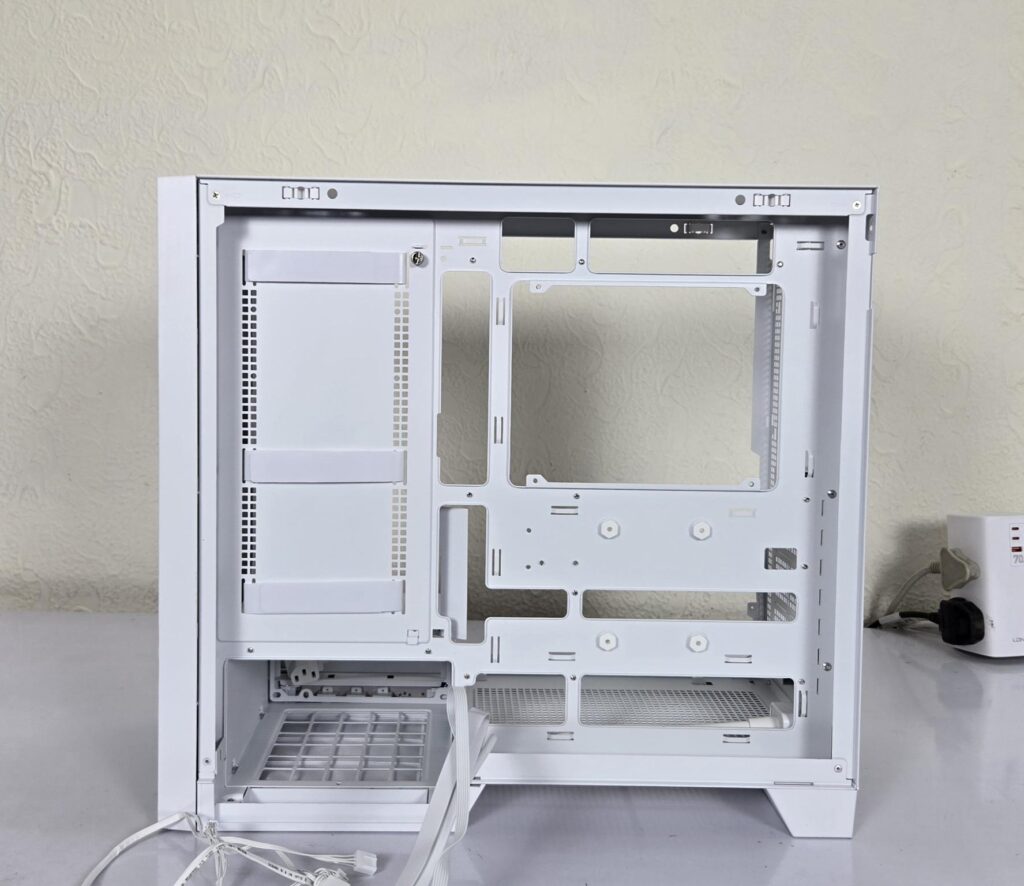
I have removed the bracket from the CPU cutout area and put the cables to the side to show the backside view clearly.
The storage provision is:
- 2+1 3.5” Drives
- 1+1 2.5” Drives
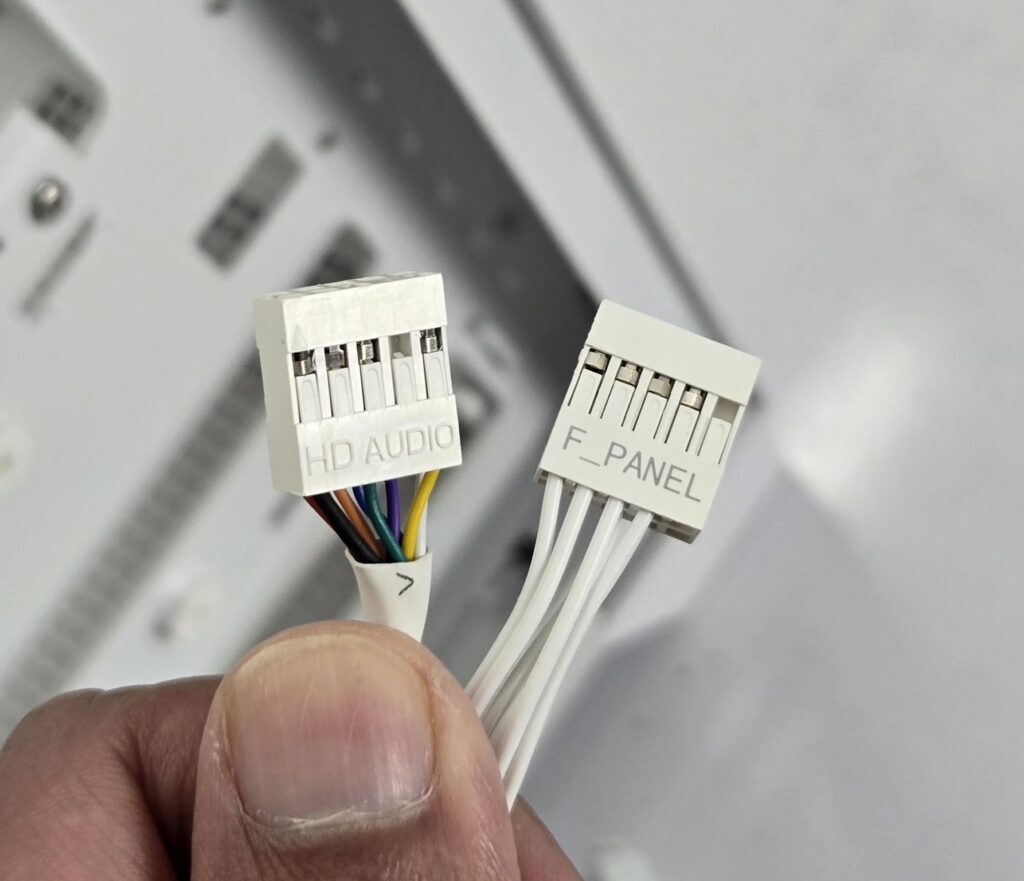
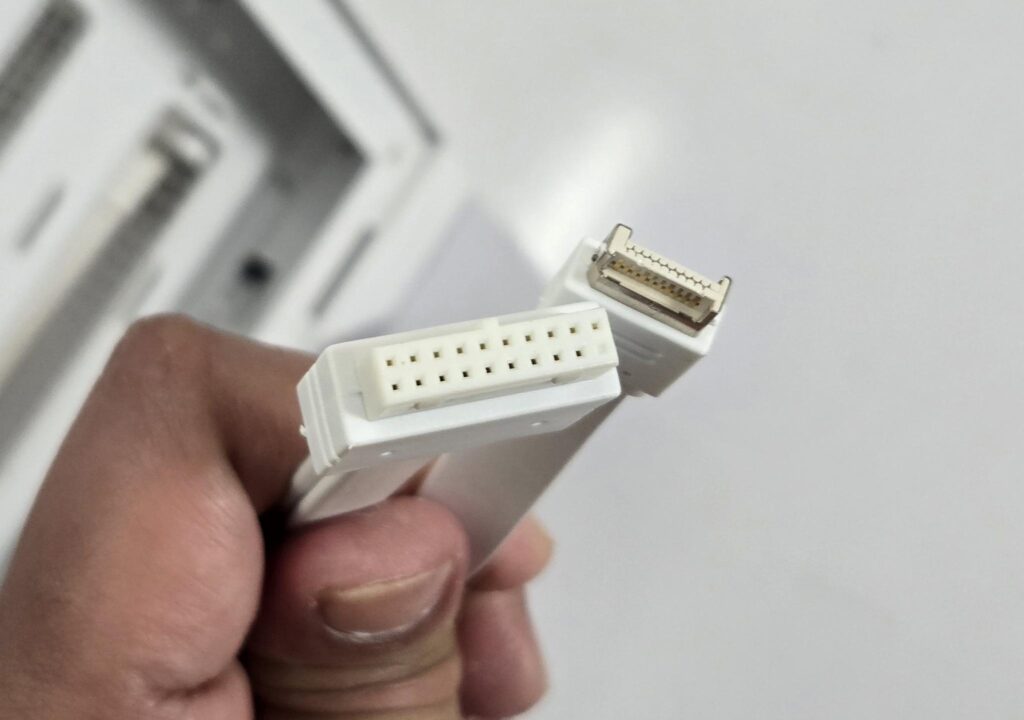
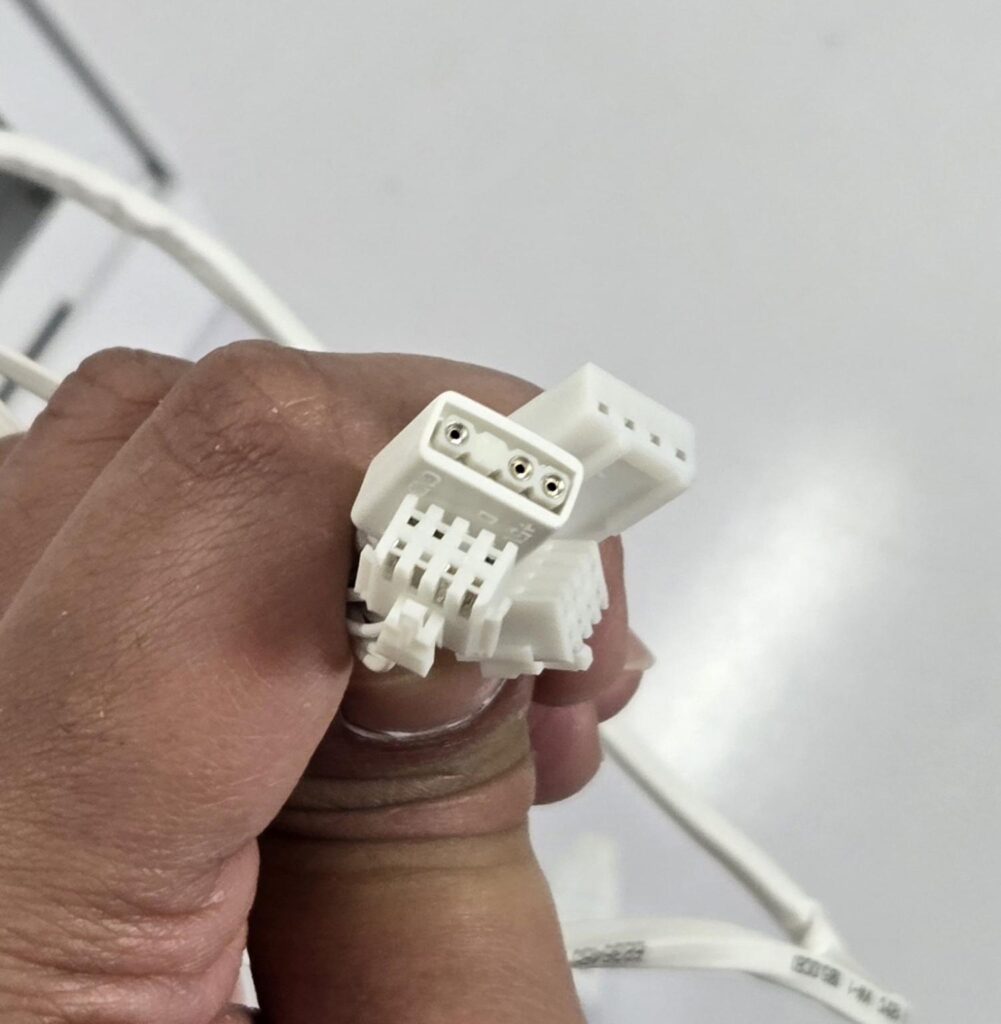
The following cables/connectors are provided for the top IO panel:
- USB 3.0 Connector
- USB Type-C Connector
- HD-Audio Connector
- Front Panel Single Connector
- FL12R SE Fans Connectors
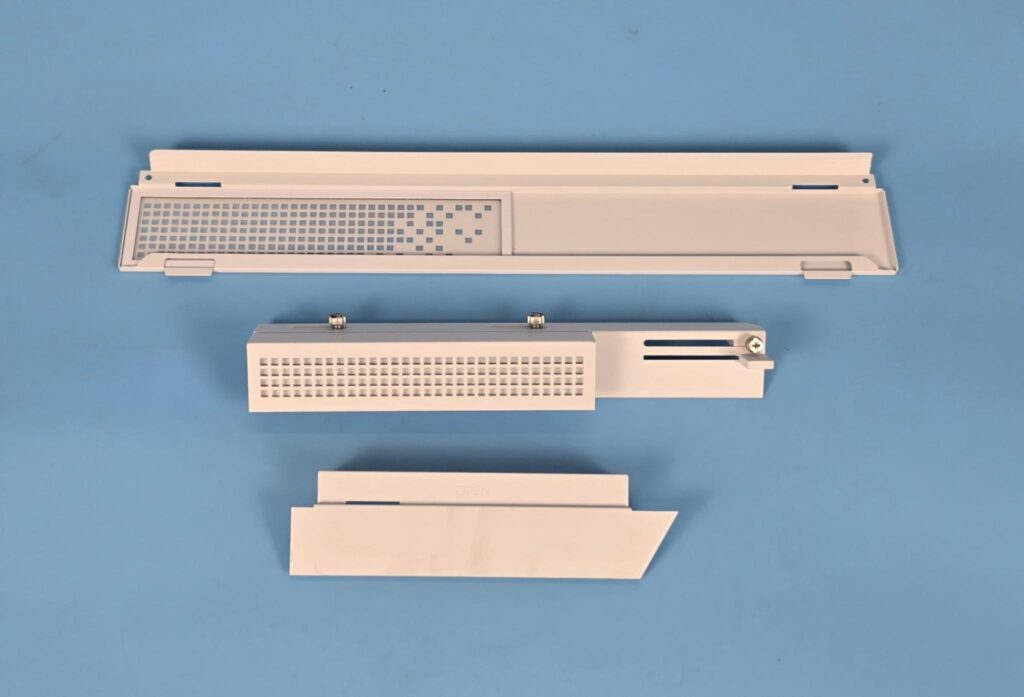
The above picture shows:
- Glass Side bay cover
- Cable Cover
- PSU Bay Cover
360mm Liquid Cooler
I mentioned above that CL6600 comes with a 360mm liquid cooler pre-installed. You can take the cooler out of the top chamber for easy service/maintenance or even replacement.
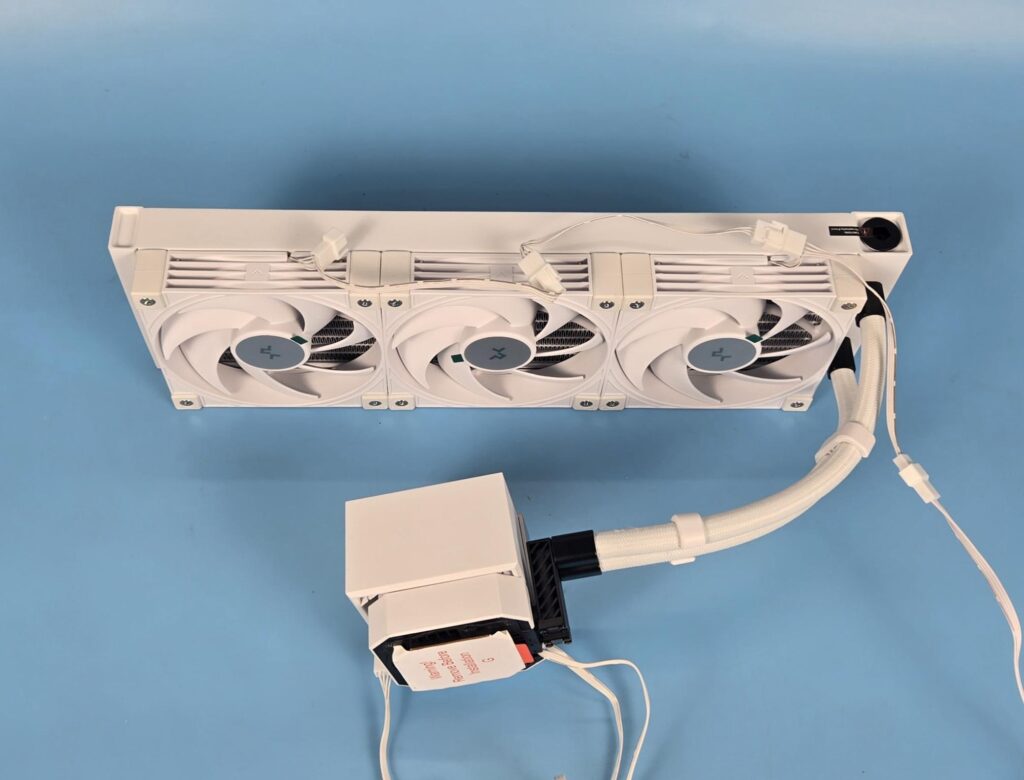
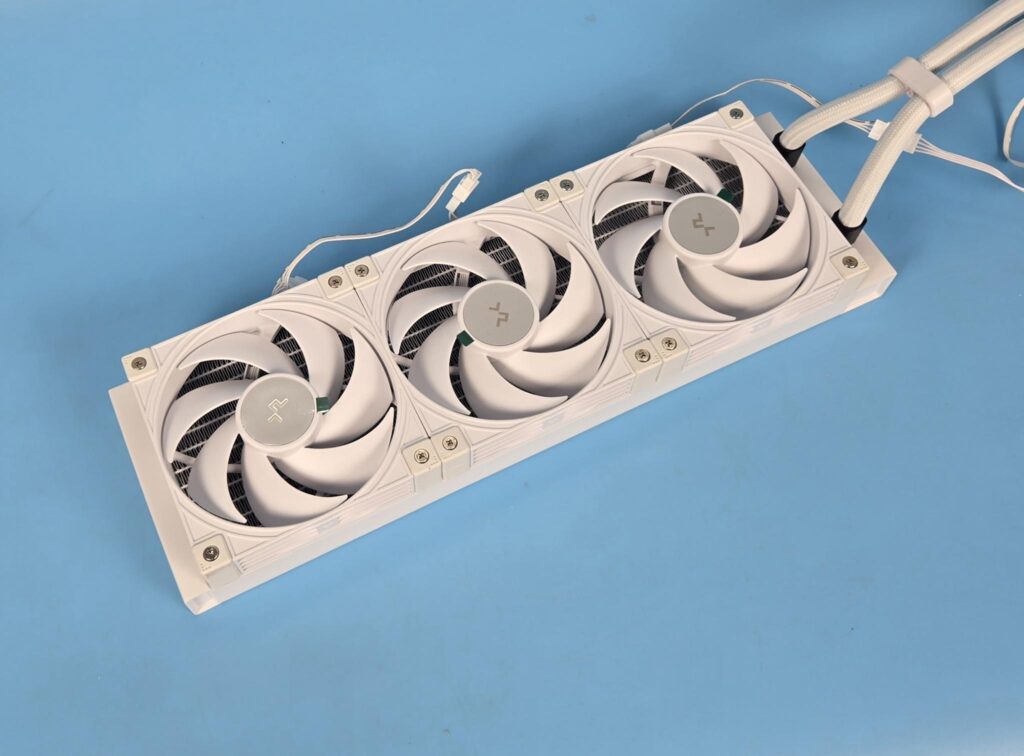
This cooler has a 360mm radiator with 3x customized 120mm non-RGB fans pre-installed over the radiator. These fans are daisy-chained, and a PWM extension cable is connected to the system, providing adequate length to reach the motherboard area.
These fans are rated for up to 2500 RPM speed ±10% with an auto stop function. They are rated for 73.41 CFM and an air pressure of 4.69 mmAq. Fans noise level rating is ≤ 35.63 dB(A). These fans use Fluid Dynamic Bearing.
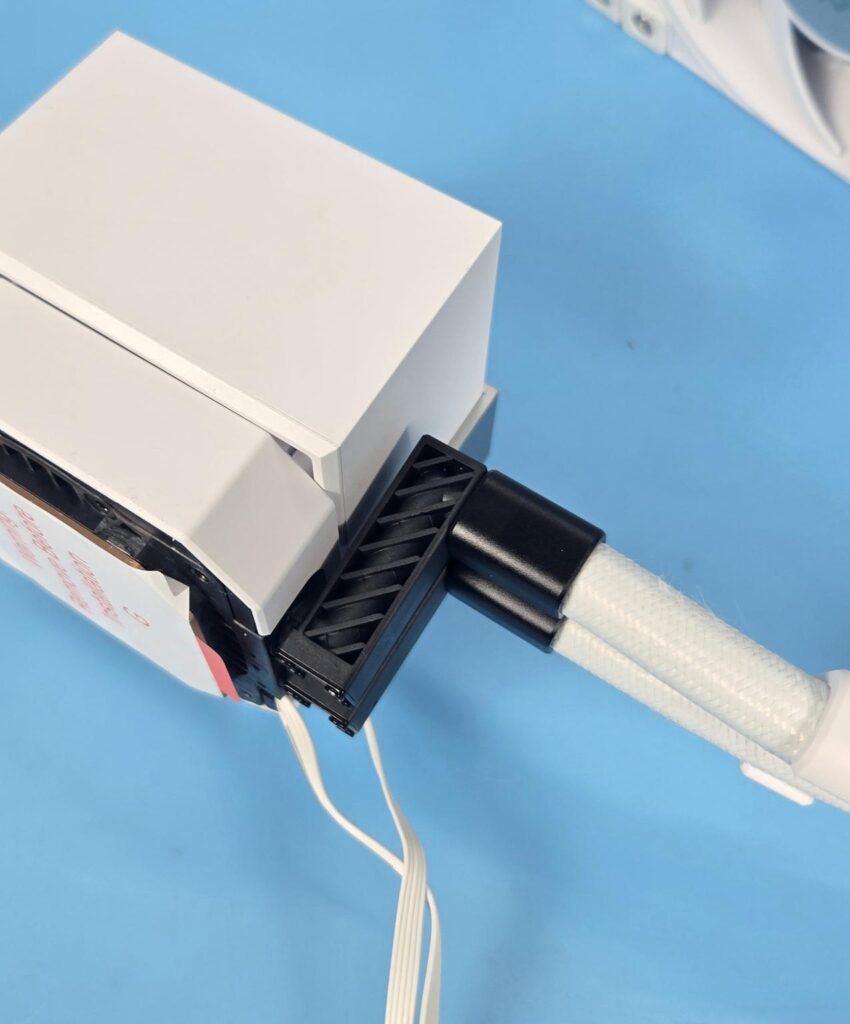
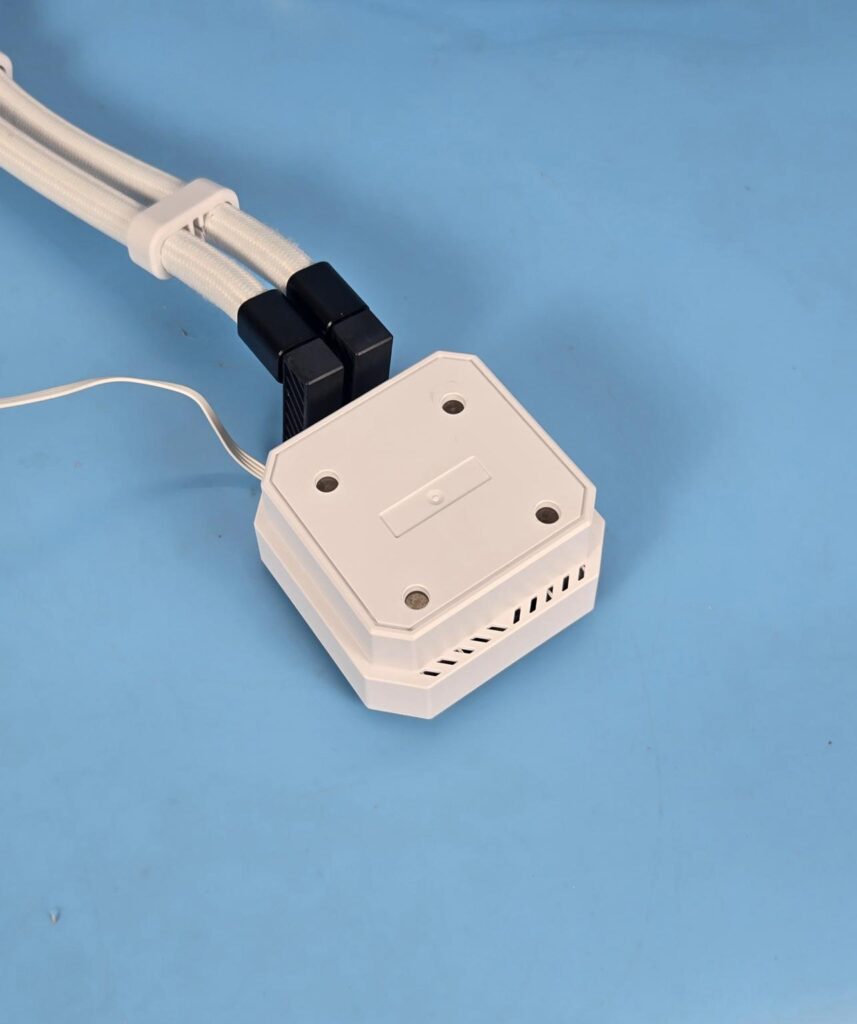
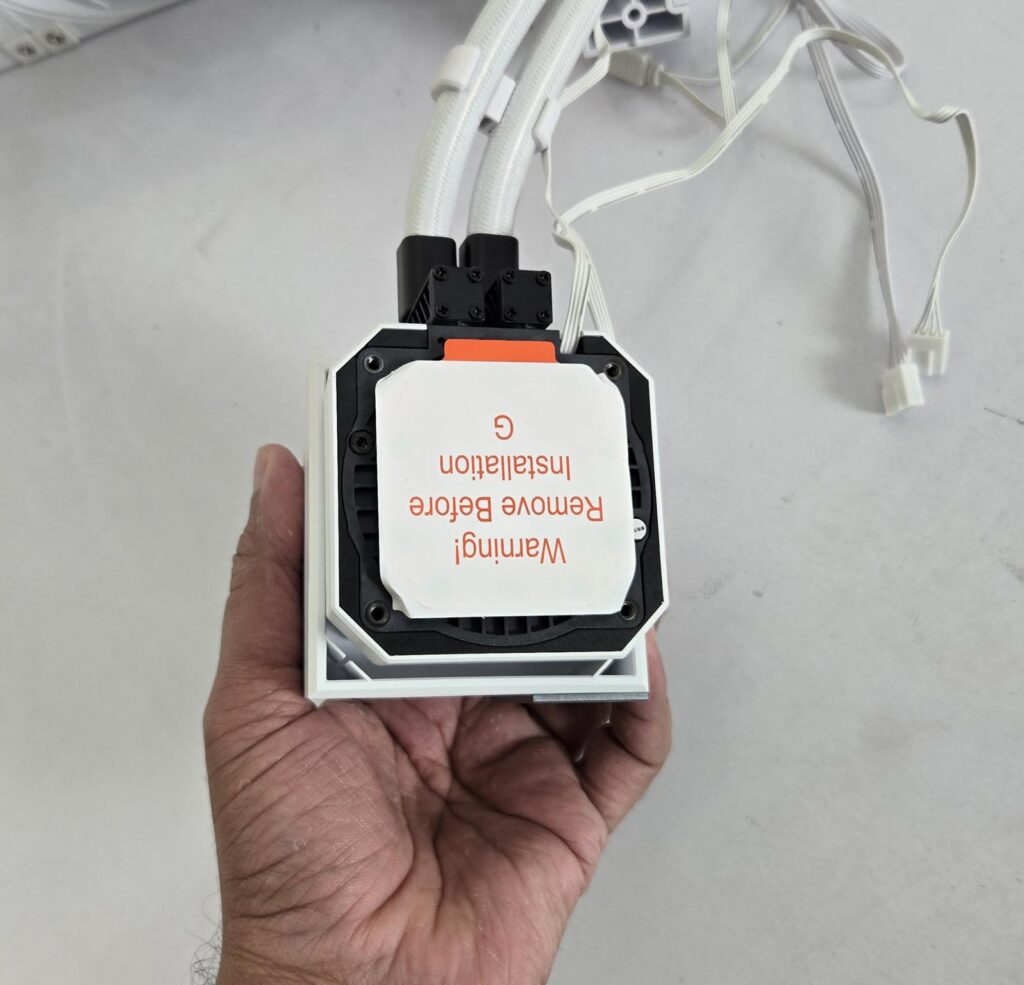
I think DeepCool might be using its sixth-generation high-performance pump in this cooler. My impression comes from the rating of the pump and its PWM regulation. This pump is rated for 2500-3400 RPM ±10%. Its power rating is 3.48W.
You can see double 90° fittings connection on the pump top. This is done to make this unit sit comfortably on the CPU socket, given the shorter tube length of 250mm. The tube length is short because of the separate chamber placement for the radiator. This fixed position and particular routing of tubes requires no more than 250mm in length.
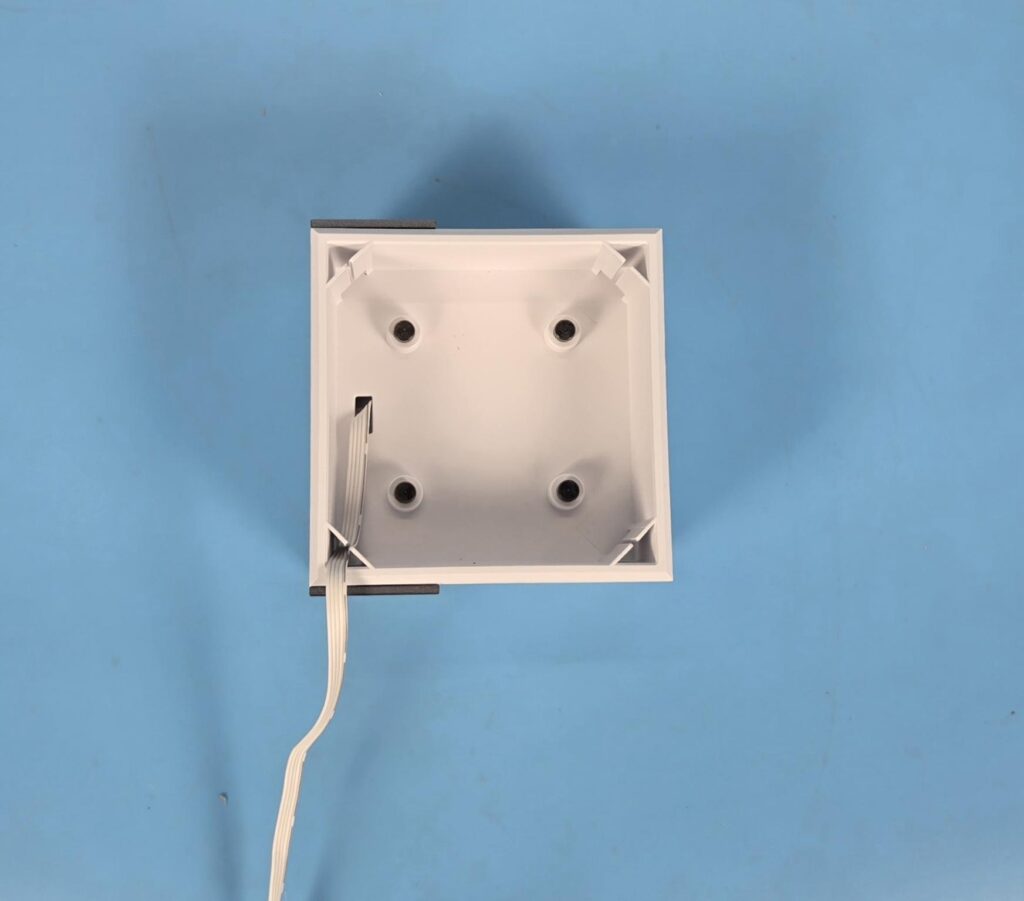
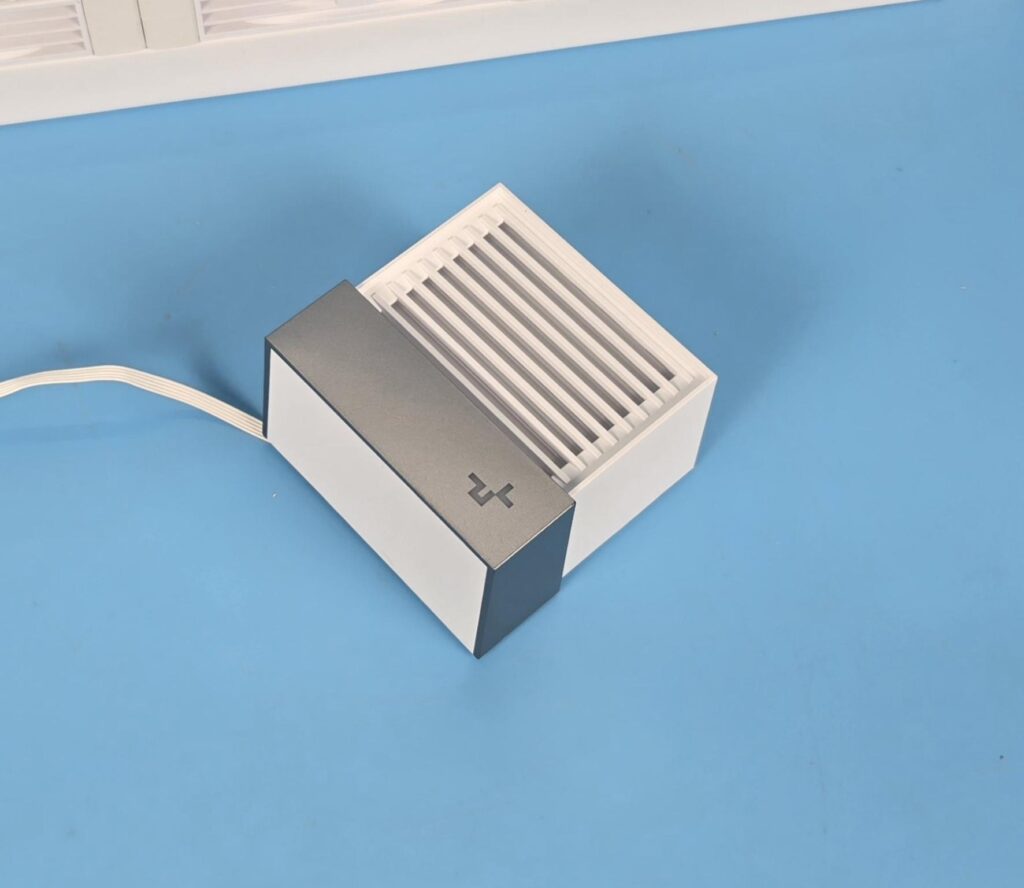
DeepCool has provided a stylish pump top cover with a magnetic mount. It has ARGB LED backlighting on the grill bar design. The silver touch speaks for itself and bodes well with the cover’s grill bar design. In my opinion, this is not a budget segment liquid cooler, but rather a high-performance edition.
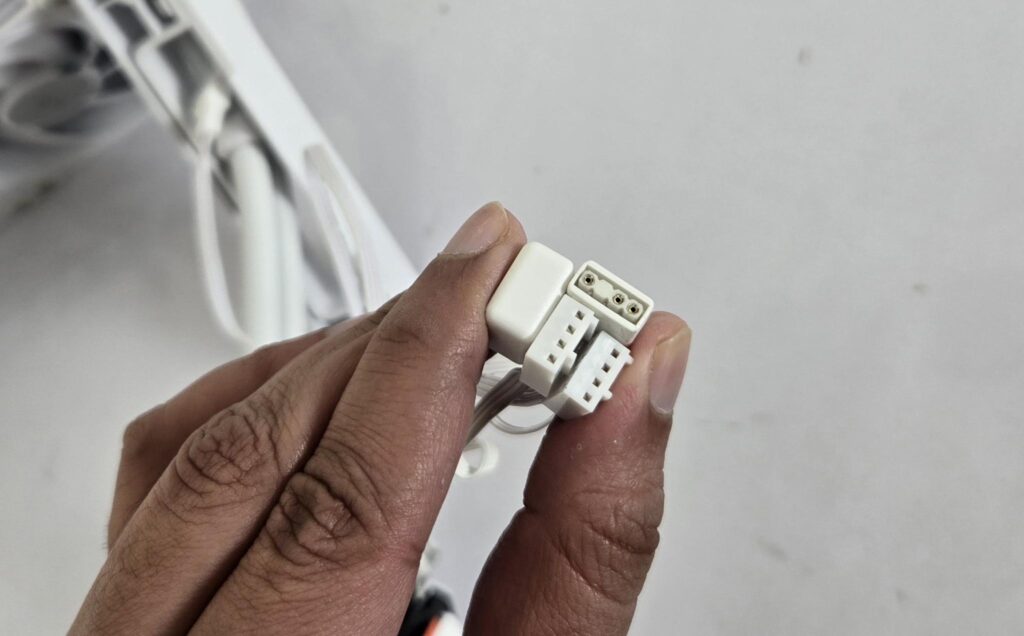
The cooler uses standard 4-pin PWM and 3-pin, 5V, ARGB connectors.
PN1000M PSU
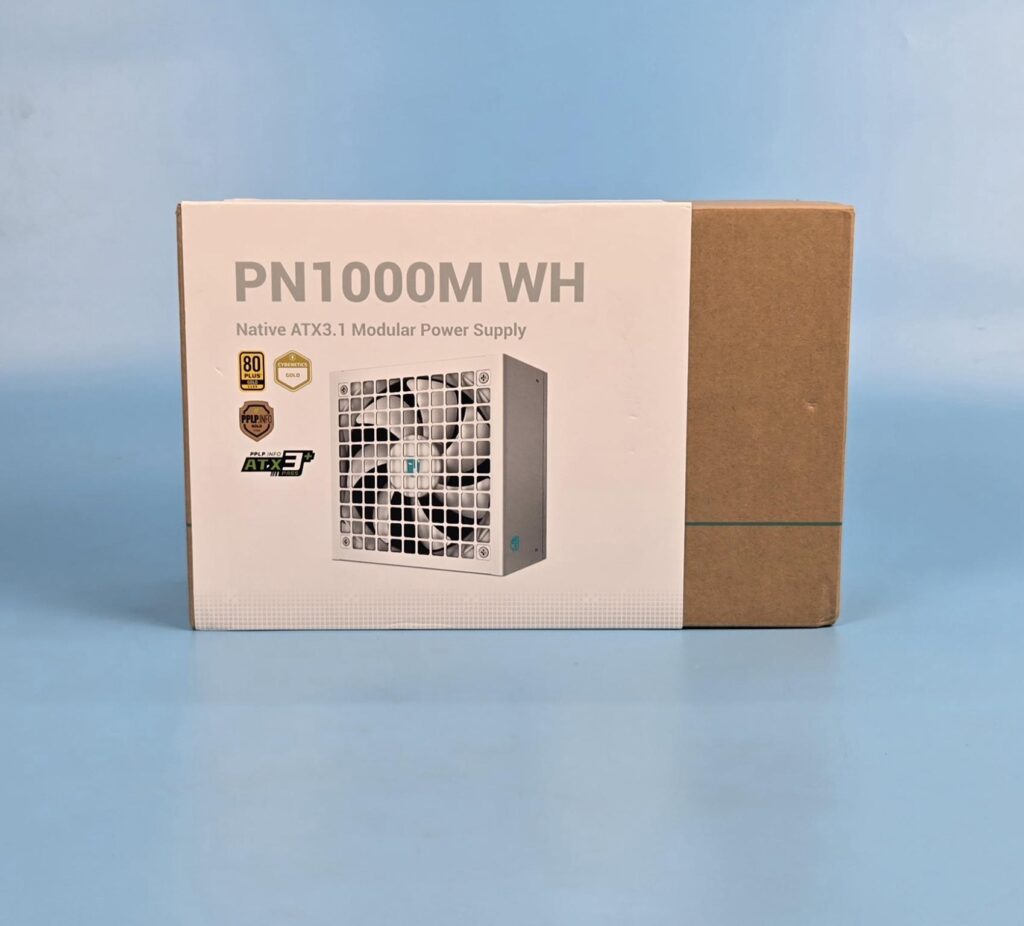
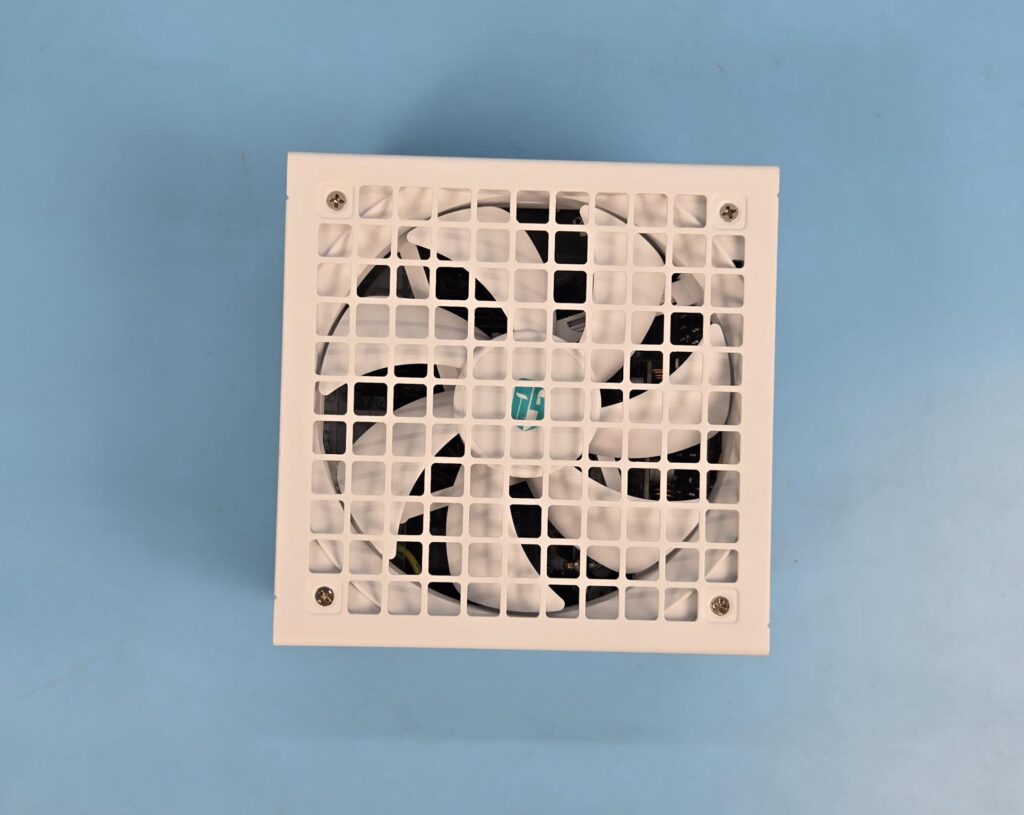
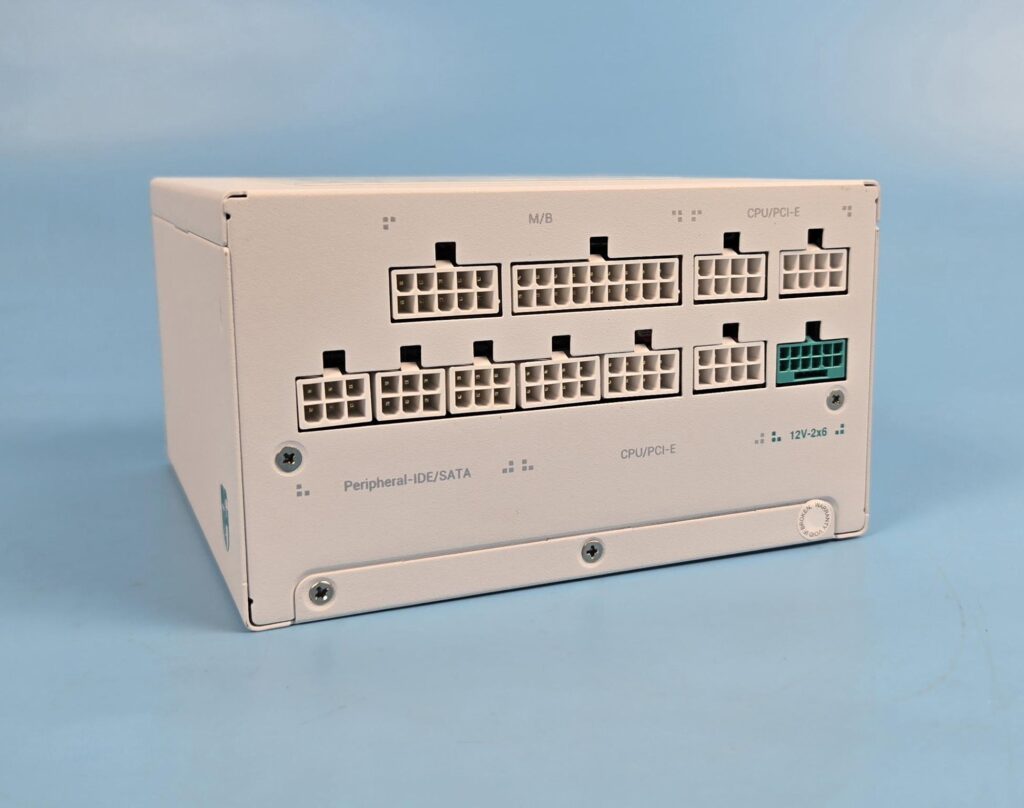
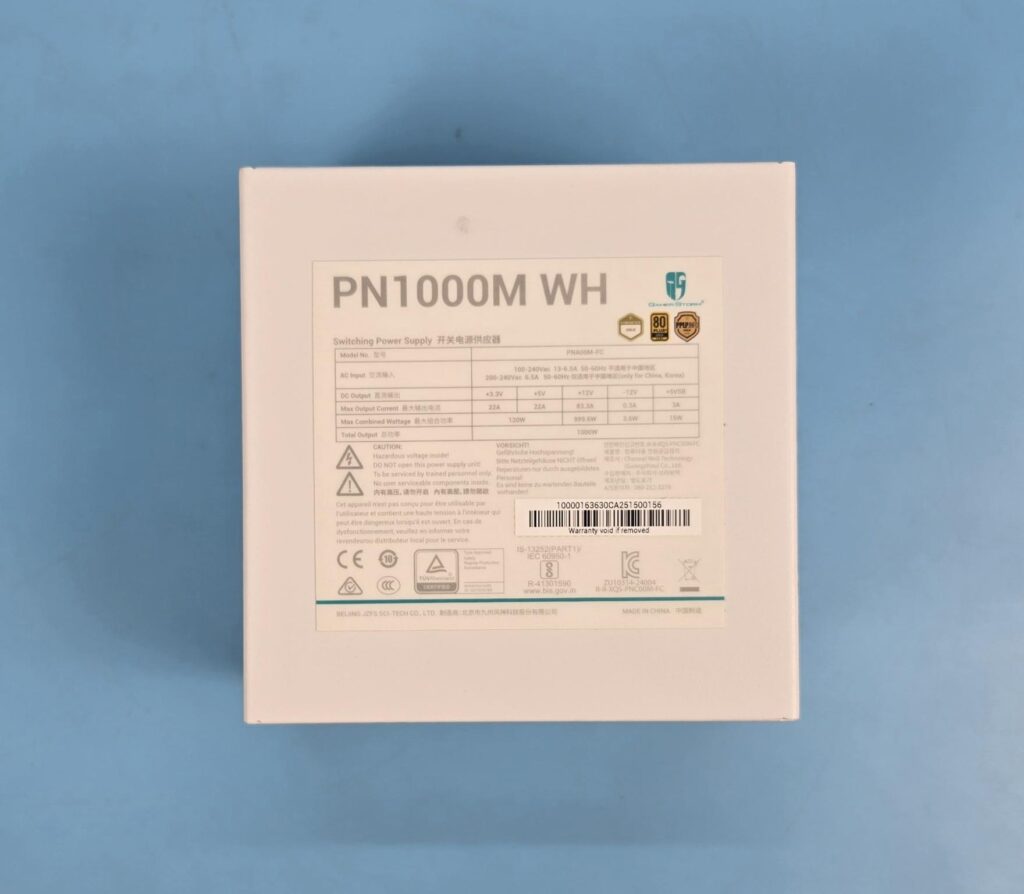
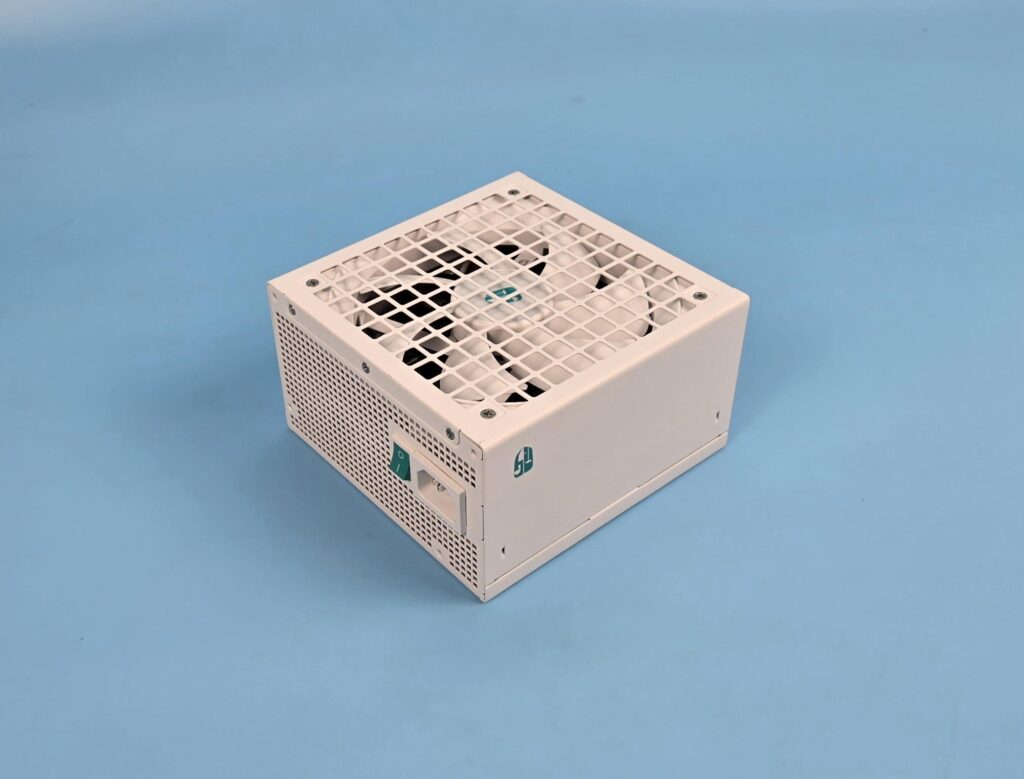
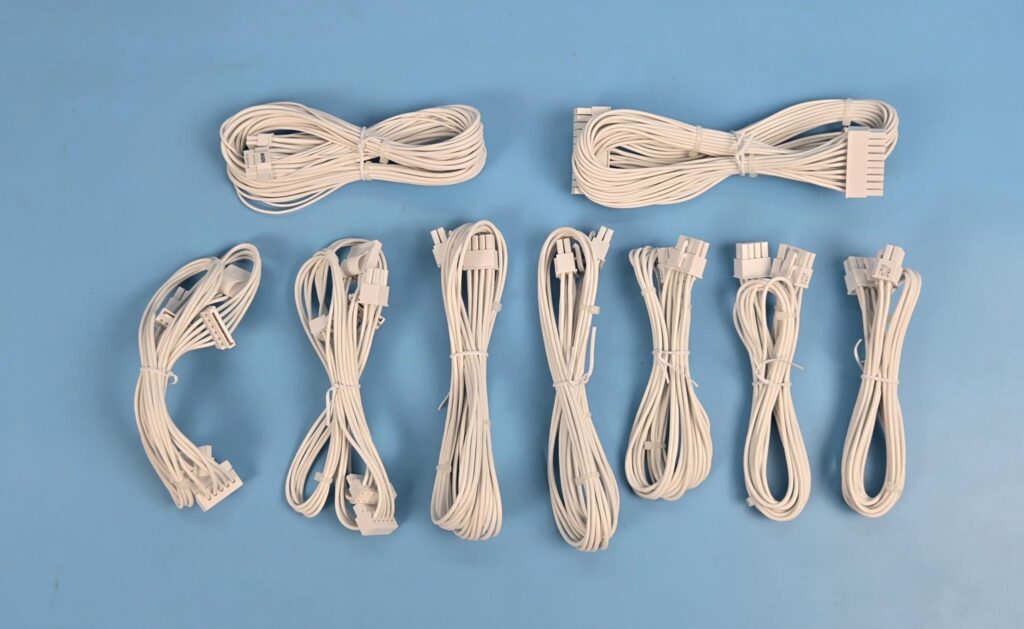
DeepCool has sent PN1000M 80-Plus Gold power supply as well for the white build inside the CL6600. This PSU meets the Intel ATX 3.1 specification and PCIe 5.1 standard. It has a dedicated 12V-2×6 port. This unit has a Gold rating from Cybenetics as well. It uses Japanese capacitors, active PFC, half-bridge SRDC, LLC, and a DC-to-DC topology.
It has a dimension of 150x150x86mm with high power density and comes with a 10-year warranty. DeepCool has provided all braided cables with the unit, which is a wise move.
Installation
The following configuration is used:
- AMD Ryzen 9 9900X
- GIGABYTE X870 AORUS Stealth Ice
- Maxsun iCraft B580 White Graphics Card
- DeepCool’s Stock Cooler in CL6600
- DeepCool FL12R SE White [Pre-Installed]
- V-Color Manta xSky RGB 32GB @ 5600MHz CL26 DDR5 kit
- Sabrent Rocket 4 Plus 1TB NVMe SSD
- Sabrent Rocket 4 Plus 2TB NVMe SSD
- DeepCool PN1000M PSU
- Noctua NT-H2 Thermal Paste
- 1x be quiet! Pure Wings 3 120mm HS PWM Fan
- 2x be quiet! Silent Wings 4 140mm HS PWM Fans

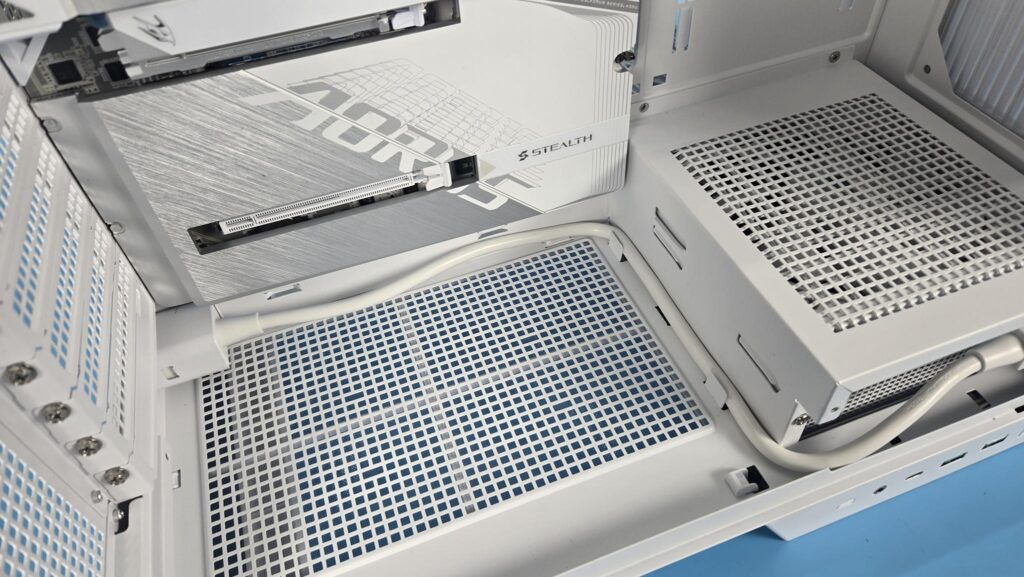
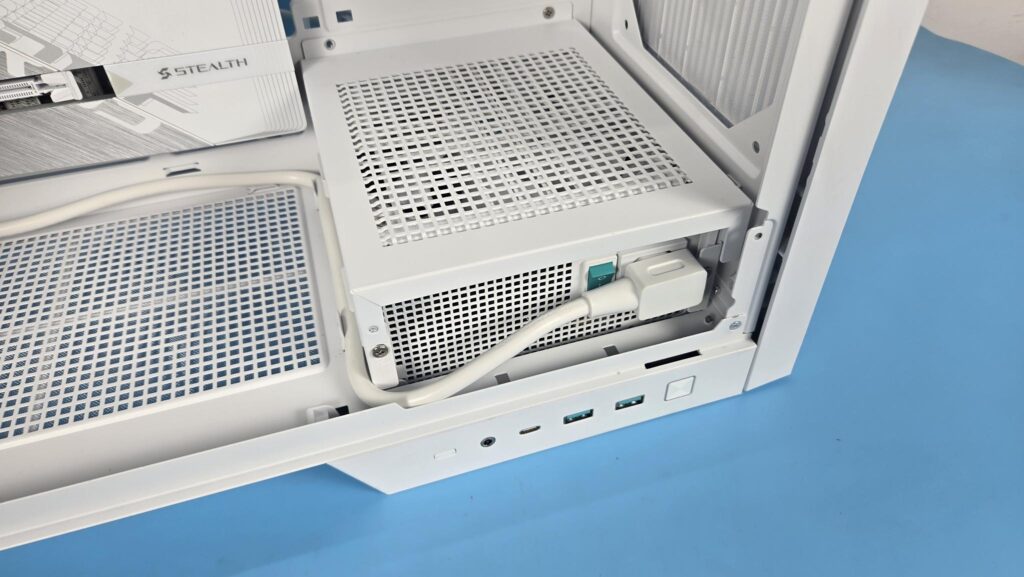
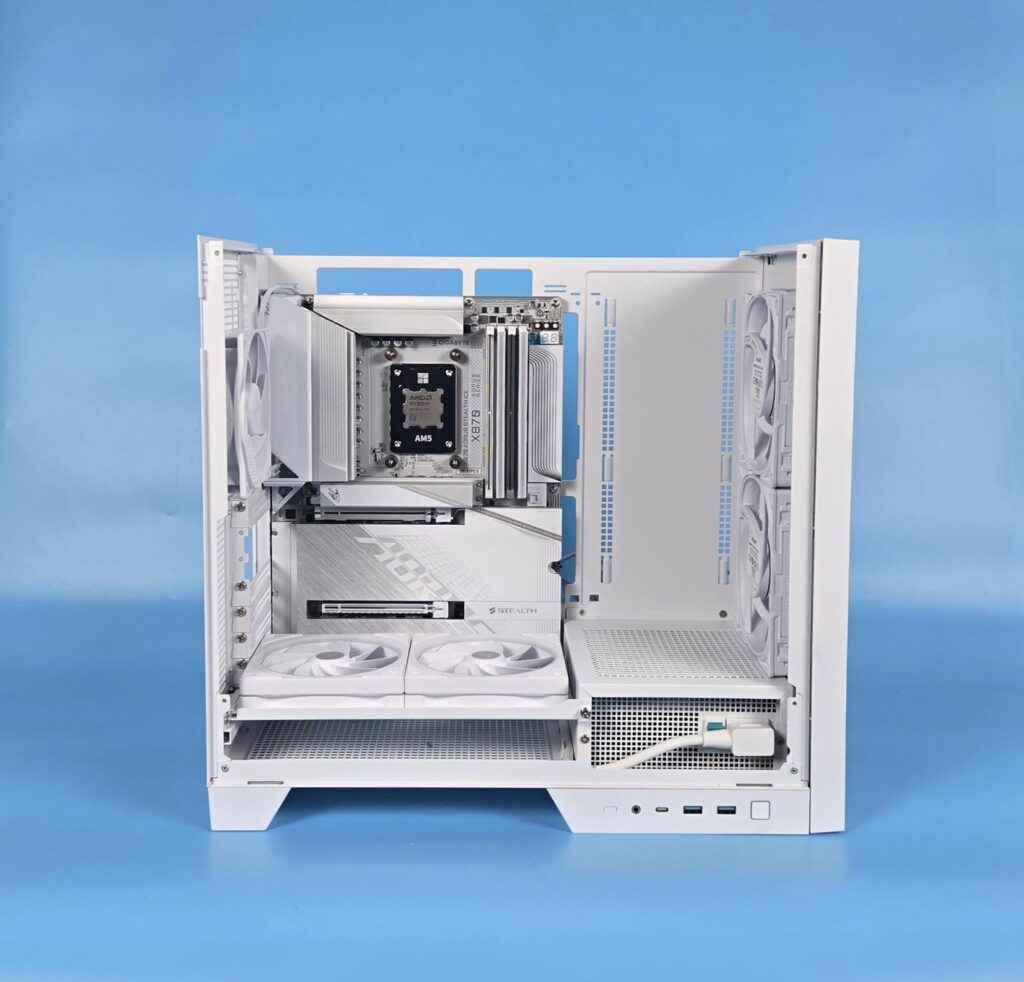
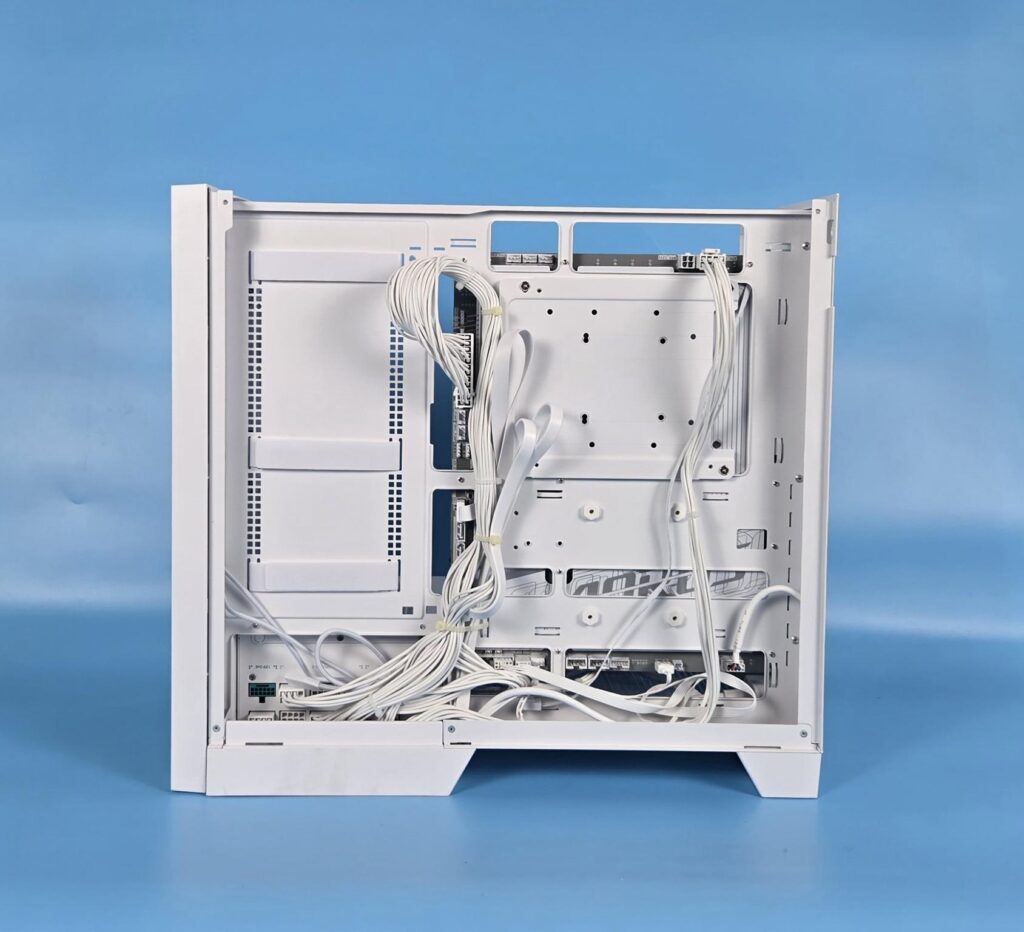
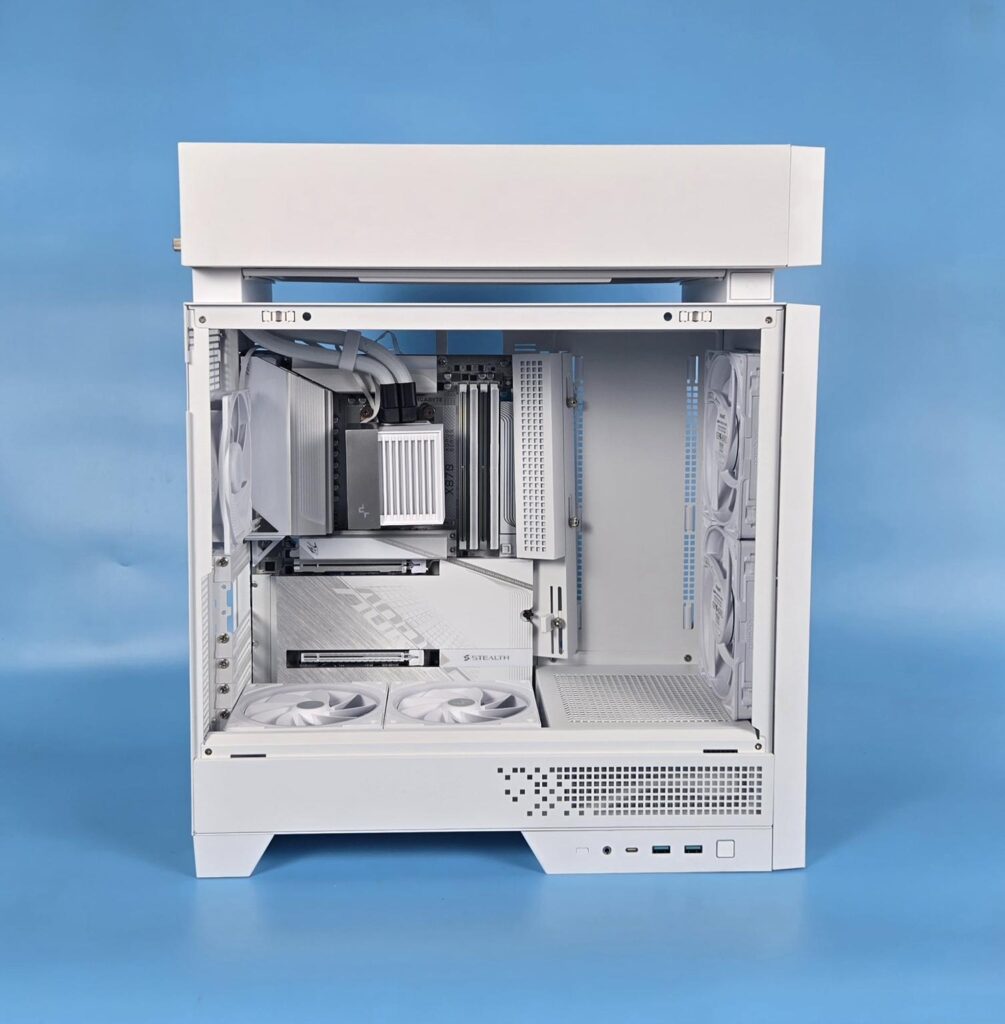
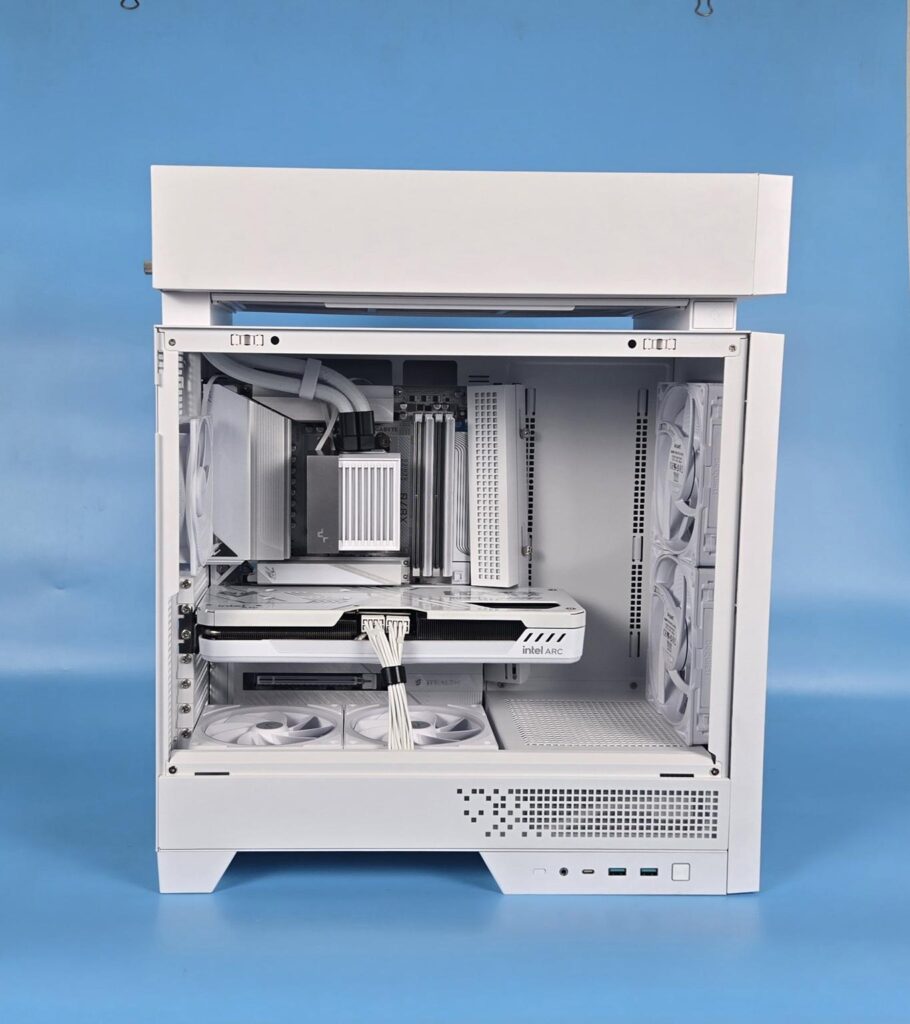
I always start my builds with the motherboard, and I did the same this time as well. I have a back-connect or back-plug motherboard in this test build. It was an easy fit with no hiccups. CPU and RAM were installed outside the case.
Then the PSU was installed, and cables were routed, followed by the placement of the fan bracket with two FL12R SE ARGB fans installed on that bracket. Then the cooler block was installed, and cables were routed. I could not successfully install the cable cover inside the main chamber for a simple reason. The thick chipset cover side of the motherboard obstructed the slim GPU support bracket on the cable cover. This basically comes from the fact that this cover is installed in an angular manner, not at a simple 90° angle.
Then I did the backside cables with minimum cable management, and I basically overlooked and did not use the right side area with Velcro strips for effective cable routing. You must use this area to your benefit, as it makes life easy.
Lastly, the graphics card was installed, and I tucked both PCIe cables using a Velcro strip provided in the accessory box. DeepCool needs to change the color of these strips to white for the white edition case.
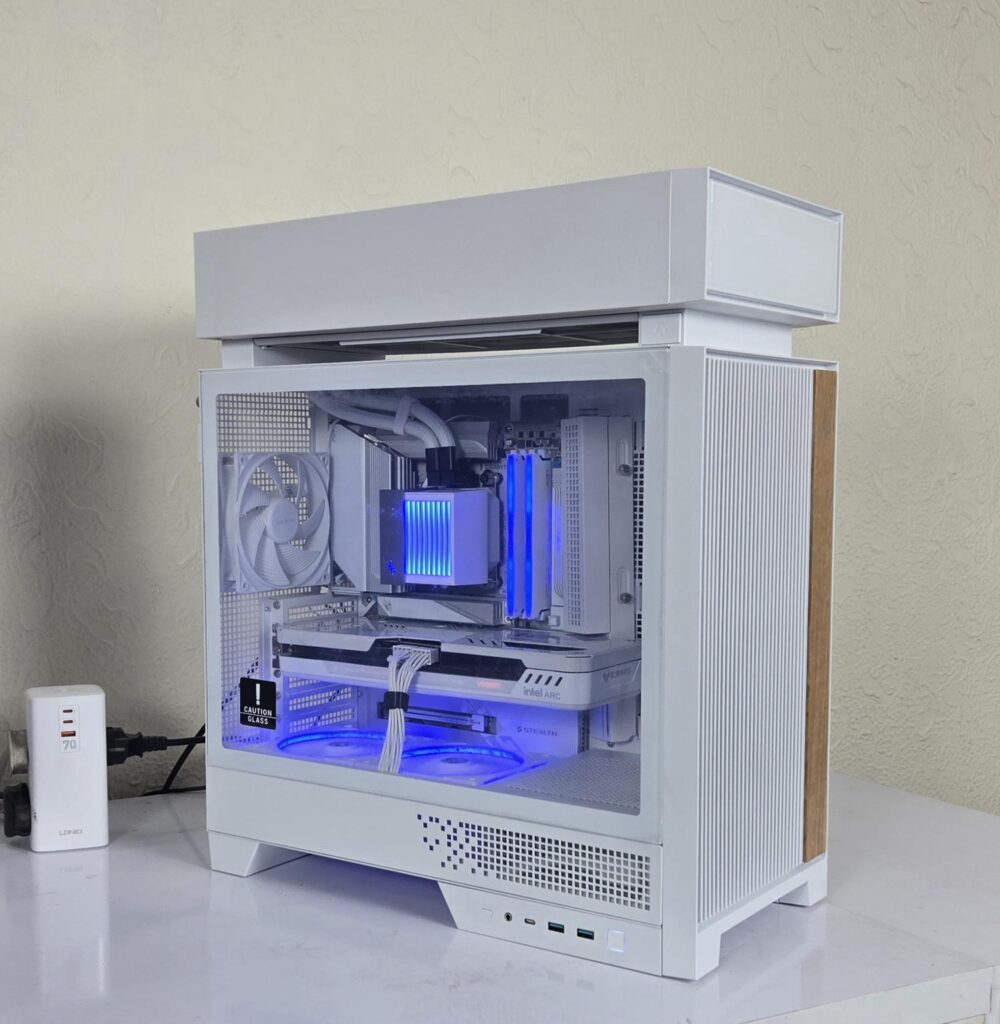
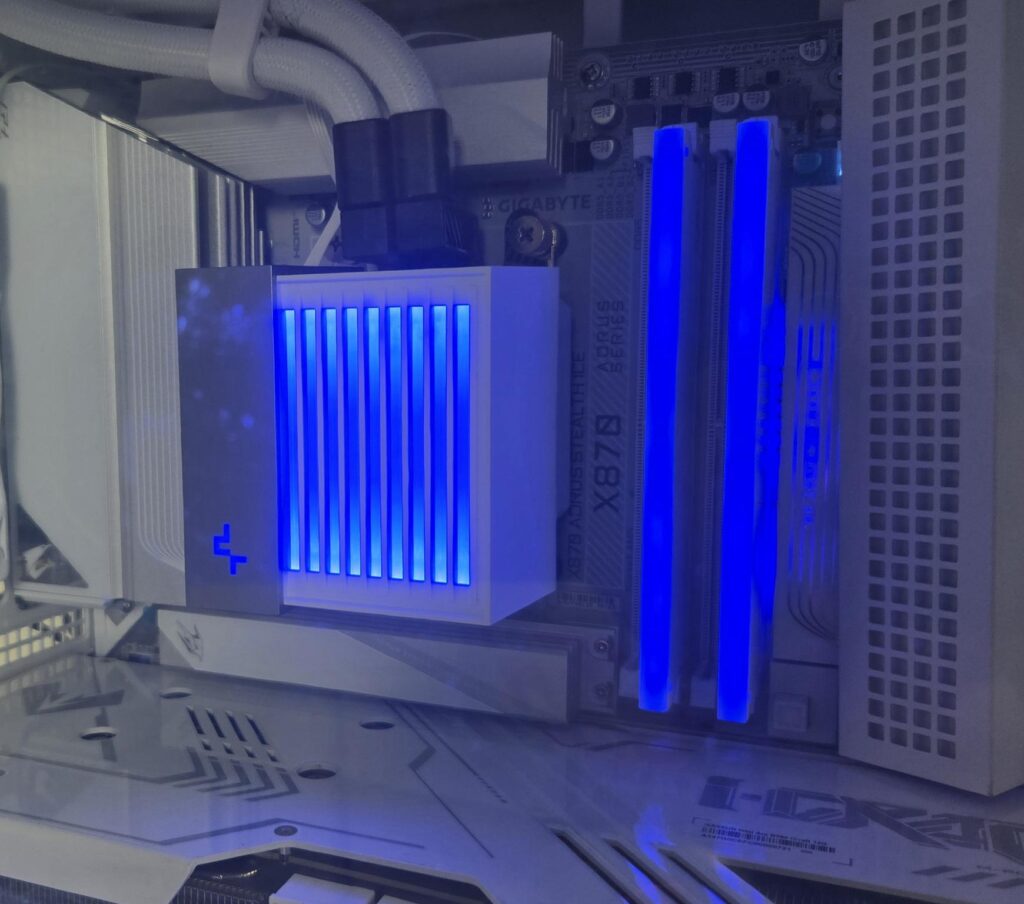
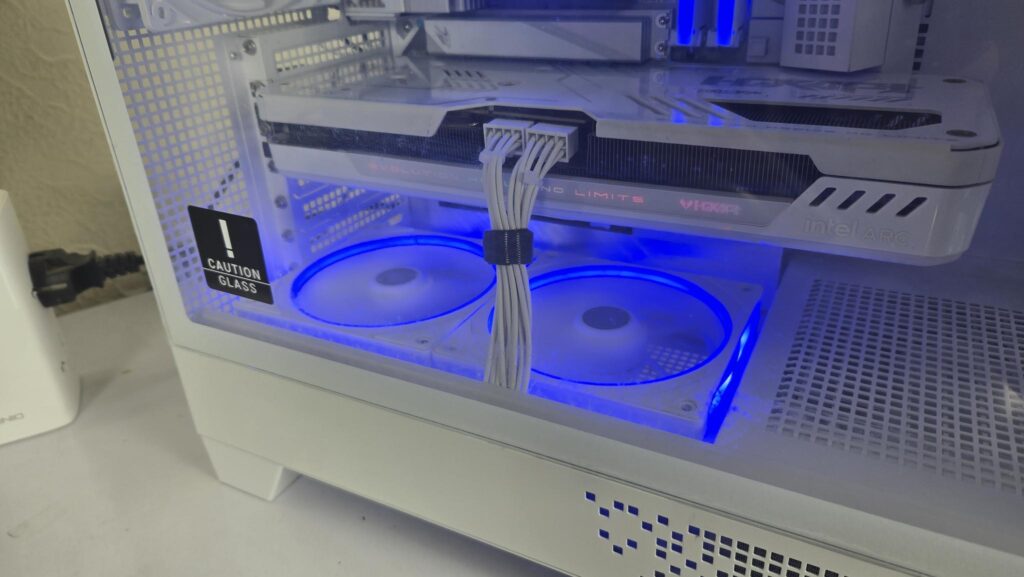
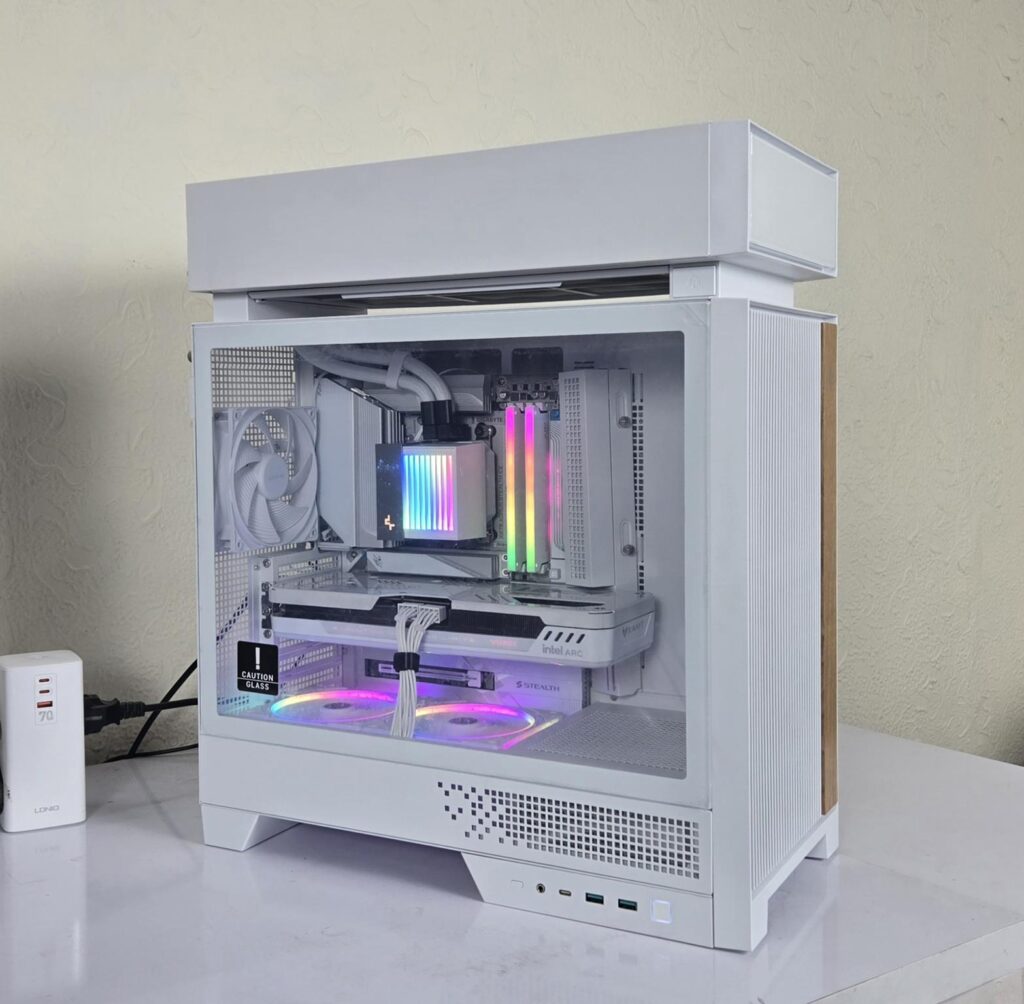
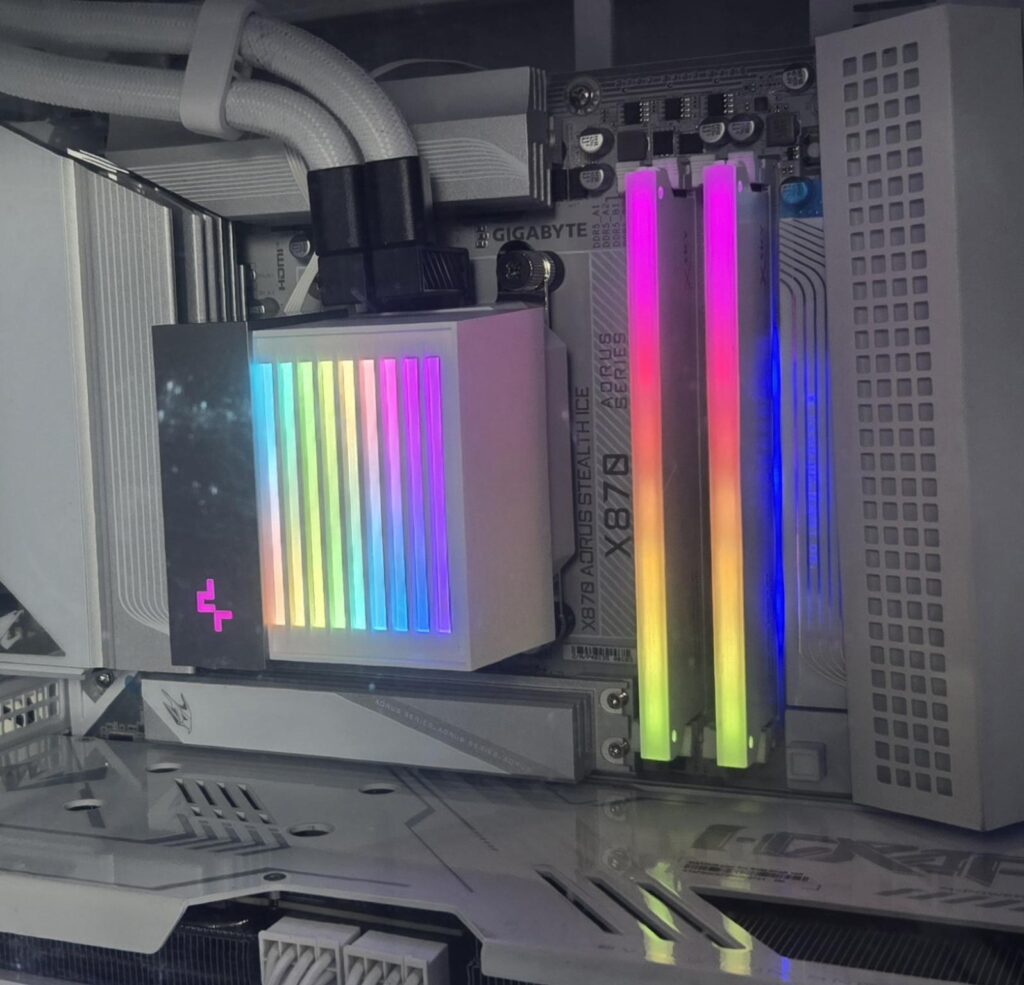
The above are a few pictures of the build.
Thermal Testing
Testing of this particular chassis requires a precise and clear testing methodology. Since this case has a separate chamber for the CPU liquid cooler, the theme is that CPU temperatures should not be affected by the heat build-up in the main chamber. This is exactly what is needed to be tested.
First Run
In our first test, we will only test the CPU load for which CINEBENCH R23.2 is used to stress the CPU for 30 minutes, and sensor readouts are taken for measurement.
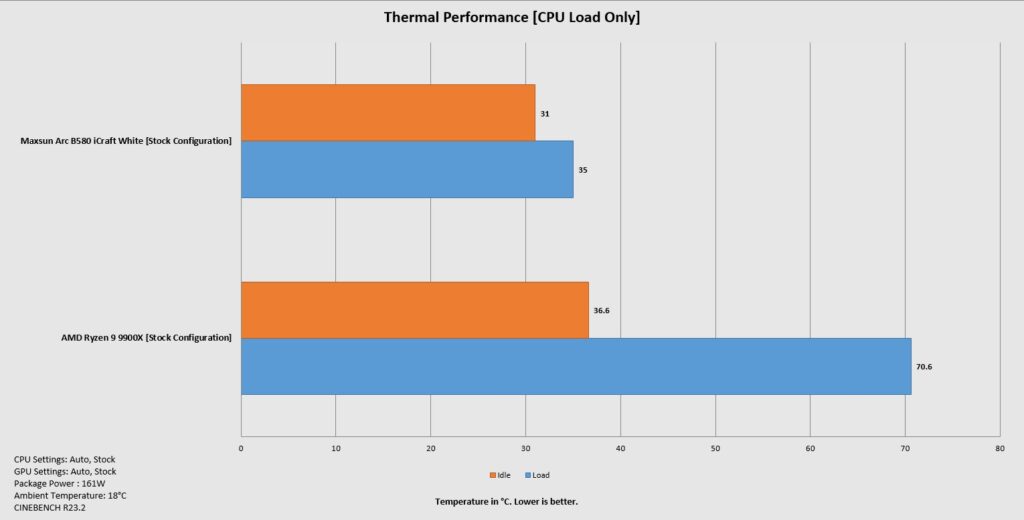
As you can see, the CPU load under stress test showed no relation to the graphics card thermals. We have our baseline now. 70°C for the CPU-only load test. If the further tests that combine the graphics card load test produce no sparkling change in the CPU thermals, this would show that the separate chamber concept is working fine.
Second Run
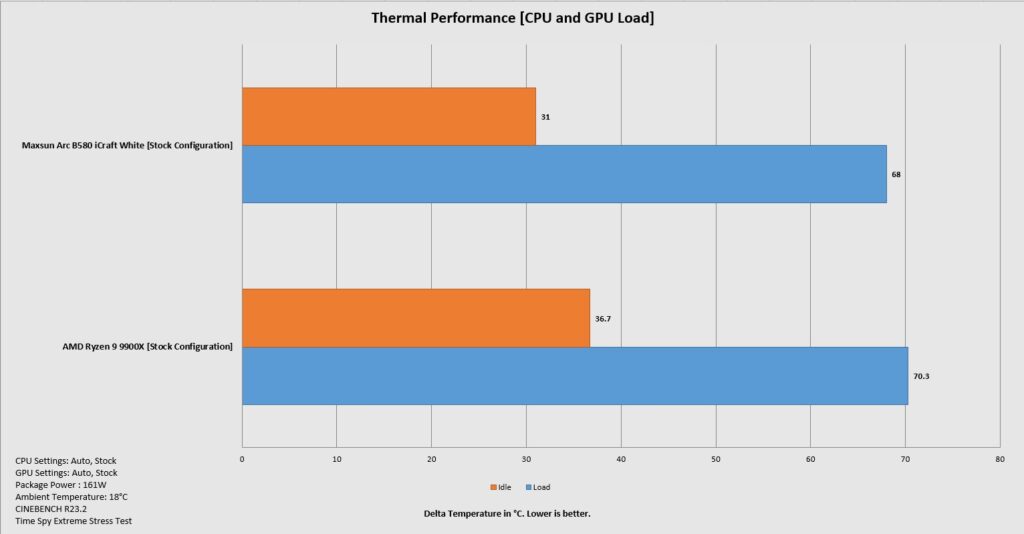
In our second run, we put a combined stress load on CPU and graphics card using CINEBENCH R23.2 30-minute stability test and Time Spy Extreme Stress Test. The result is clear. You can see that there is no change in CPU temperature when we add the graphics card to the equation. This shows that the separate chamber concept is working flawlessly.
Third and Fourth Runs
In our third run, we installed a 120mm fan on the rear and repeated the CPU and GPU combined load test, followed by a fourth run that included 2x 140mm fans on the front.
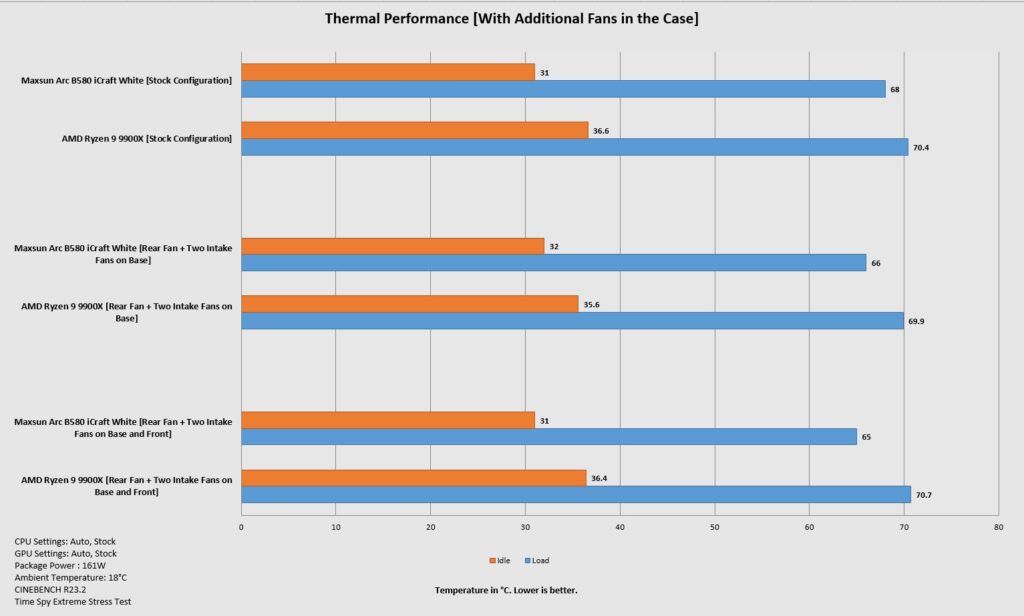
As you can see, in all those tests, there is no drastic change in CPU temperature, indicating that CPU temps are neither affecting the overall build nor the other components are affecting the CPU temperatures.
One key note is the 3°C drop in graphics card temperature by using more intake fans, indicating that optimal performance is subject to airflow.
The radiator fans run loudly at full speed. I would suggest using a custom fan curve or the Auto PWM function for a better noise-to-thermal performance ratio.
Conclusion
I have tested the new PC Chassis from DeepCool that was introduced at Computex 2025. We have got the opportunity to test the white edition, which is CL6600 White. This case is also available in black edition. The salient feature is a separate chamber for the CPU liquid cooler and the provision of a high-performance liquid cooler in CL6600.
In case you don’t want an integrated liquid cooler, you can get CL660, and in case you only need a main chamber design case, then CL600 is there for you. The CL6600 is a mid-tower chassis that uses SPCC steel, glass, and plastic material for the housing. Although it is stylish, the forehead of the case is something that needs work. I think it downplays the overall good view of the case.
The complete assembly is white-coated. It has a dimension of 457.5x235x533.5mm (LxWxH). The weight of this case is 11.82Kg. DeepCool’s design team has paid closer attention to minute details for which they have my appreciation, except for one thing; the inter-connecting channel between the top chamber and the main chamber should be fully seale,d leaving only room for tubes. These are my two cents on it.
The fan support is as follows:
- 3x 120mm or 2x140mm fans on Top
- 2x 120mm fans on the base bracket
- 2x 140mm fans on the front
- 1x 120mm or 140mm fan on Rear
The radiator support is as follows:
- Up to 360mm on top
- 1x 120mm on Rear
Clearance is:
CPU Cooler Height: Up to 175mm [Air Cooler]
Graphics Card Length: Up to 413mm without front fans and 388mm with front fans
PSU Length: Up to 160mm
Storage provision is:
- 2+1x 3.5” Drives
- 1+1 2.5” Drives
Dust Filtration:
- Non-Magnetic top filter
- Non-Magnetic bottom filters
- Non-Magnetic Fine Mesh on Front Panel
This case supports mini-ITX, micro-ATX, and ATX-sized motherboards. This case also supports micro-ATX and ATX backplate motherboards. This case has a different layout for many components, including the liquid cooler, PSU, and base fans. The PSU bay is located towards the front of the floor, and it has side-to-side mounting. This is an excellent decision. You can easily access the connector side of the PSU for conveniently adding more cables. Since PSU is front-mounted, a power cord is installed that runs from the rear towards the front.
The liquid cooler chamber is installed on top of the case. The top of the main chamber has a solid finish without any vents to avoid leaking hot or warm air into the top chamber. Hot air rises up, and having a non-vented and fully perforated rear frame helps a bit in getting hot air out from the rear. However, I have noticed that installing an exhaust fan on the rear helps dropped graphics card temperature.
The IO panel is mounted toward the base on the front with easy access if the case is placed on the table, but totally opposite if the case is placed on the floor. DeepCool has provided two FL12R SE fans installed over a fan bracket. This bracket is slid between the rear frame and the PSU bay on the dedicated channel. These are reverse-blade fans.
The motherboard tray has clear markings for identification of holes according to the motherboard form factor, and standoffs come pre-installed. The CPU cutout is large enough for easy mounting of CPU cooler. It has a removable bracket on which storage drives are mounted. This case has 7 PCIe slots with reusable covers. However, this case does not support a vertical graphics card.
DeepCool has provided a cable cover on the side of the motherboard tray, which is placed angled down towards the tray. This is an odd placement, and it was difficult installing motherboard without removing the cover. The cover could not be installed in its place since the motherboard’s lower section obstructs the GPU support area of this cover.
DeepCool has provided accessories in a separate container. The Velcro Strips are black, which should have been white for the white edition. The backside of the case has ample area for effective cable routing. You can only install 140mm fans on the front. A provision for 120mm should also have been provided.
This case comes with a pre-installed 360mm liquid cooler. I am guessing that this is not a budget segment cooler, given the overall specifications. Also, this cooler seems to be using DeepCool’s 3rd generation high-performance pump, which is PWM regulated and rated for up to 3400 RPM. The 120mm non-RGB fans have high airflow and speed ratings as well.
The DeepCool CL660 White has an MSRP of USD209.99, whereas the black edition has an MSRP of USD 199.99 at the time of this writing. DeepCool is offering a 1-year warranty on the case and a 5-year warranty on the cooler. This case has a distinctive design with a separate chamber for a liquid cooler, effectively separating the CPU heat and its cooling from the main chamber. Besides, this case packs good features all around.
Pros:
- HyperSplit/Two Chamber Design
- Separate Chamber for Liquid Cooler
- TG Panel
- Backplug motherboard support
- Good Cooling Provision
- Cable Management Provision
- Removable Fan Bracket on the base
- Cable Cover
- USB Type-C Port
- FL12R SE Fans
- Dust Filtration
- Headphone Hook
- Price
- Warranty
- Integrated 360mm Liquid Cooler
- PSU Placement
Cons:
- Noise
- Cable Cover needs better mounting