


NZXT MANTA PC Case Review
Introduction
NZXT was kind enough to send us over their latest ITX case by way of the MANTA. Now, on first look, some may be a bit confused, while some people think ITX and immediately relate it to small form factor builds, it seems NZXT has thrown that out the window and gone for a case that offers some great features. NZXT has always been known for pushing the boundaries of the PC Case market since the day they released their Phantom line of cases and more recently, the H440 and S340 (review here) which are two of the best more standard gaming cases on the market to this day. Even the recent Noctis 450 case was a major hit with its Phantom like curves and an interior layout similar to that of the H440. While the MANTA may leave us with a few questions after a quick look, one thing is for sure, NZXT has a great reputation and I for one hope they have not let us down here today.
- Manufacturer Website: NZXT
- Product Page: MANTA
- Purchase on Amazon UK: £106.30 At the time of review
- Purchase on Amazon US: $139.99 At the time of review
As mentioned, the MANTA is designed for ITX builds and motherboards but comes with a lot of great features one wouldn’t normally associate with a small form build. The exterior of the case features a nice curvy design to it, which in itself is a bit unique. However, the fun doesn’t stop there and there is a lot more going on inside the case. The MANTA features a unique SSD mounting systems, room for custom water cooling and even one of the beloved NZXT PSU shrouds. Also, on the main side panel is a nice big window to show off your build inside because thanks to NZXT, anyone who builds in the MANTA should be left with a clean build worth of showing off! Before we get things kicked off, let’s take a look at the specifications quickly.
MANTA Specifications
| Model Number | CA-MANTW-M1 (Matte Black/Black) |
| Motherboard Support | mini-ITX |
| Dimensions | W: 245 x H: 426 x D: 450mm |
| Weight | 7.2kg |
| Clearance | CPU Clearance: 160mm GPU Clearance: 363mm PSU Length: 363mm |
| Cooling System | Front: 2 x 140/120mm (2 x 120mm included) Top: 2 x 140/120mm Rear: 1 x 120mm (Included) |
| Radiator Support | Front: Up to 280mm Top: Up to 280mm Rear: 120mm |
| Drive Bays | Internal 3.5”: 2 Internal 2.5”: 3 |
| External Electronics | I/O Panel LED On/Off, 1 x Audio/Mic, USB 3.0 |
| Expansion Slots | 2 |
| Power Supply Support | ATX |
| UPC | 815671012746 (Matte Black/Black) |
| EAN | 5060301693078 (Matte Black/Black) |
Closer Look
Exterior
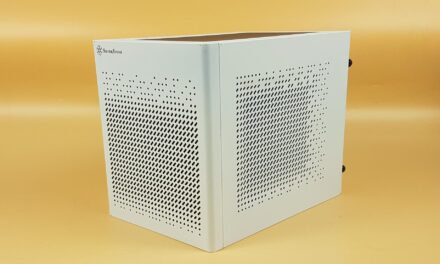
The front of the MANTA is probably the plainest part of the case as all it features is a small NZXT logo towards the bottom. However, looking at the front we can see the sultry curves the MANTA has to offer. The red accenting noticed on either side is actually from the side panels, which we will take a closer look at in a bit.

Removing the front panel gives us access to the 2x pre-installed intake fans. Users will be able to make use of 2x120mm or 2x140mm fans, or, they could install a 240/280mm radiator and have fans in a push/pull configuration. The dust filter is easily removed by simply pushing the clip at the top down and pulling it out.


Here is what will more times than not, be the main point of viewing area for any build done in the MANTA. This big windowed side panel is gong to allow for users to effortlessly show off their amazing builds inside this case and it really isn’t until you’ve built in the MANTA that you can appreciate such a window!

Even the top of the MANTA features nice symmetrical curves which really do make this case look absolutely beautiful. This is also where the front IO can be found which consists of a nice sized power button on the left-hand side and a pair of USB 3.0 ports and audio inputs on the right.


Popping the top off allows us access to the fan/radiator mounting in the top of the case. It’s worth nothing that you will want to take the front panel off before taking the top off, then you will want to put the top back on first before the front panel. As with the front, users can install combinations of 2x120mm or 2x140mm fans or a 240/280mm radiator if they want to take the water cooling route.

The back of the case is fairly standard for an ITX case. There are the motherboard cutout and 2x PCI expansion bays, then you have the bottom mounted PSU and a rear exhaust fan. What’s nice is that the rear exhaust fan can actually slide up or down so depending on the components you use for your build, you can move it out of the way if need be.

NZXT have gone with two massive feet that are almost the same size as the whole bottom of the case itself. Each foot has a pair of anti-slip grips so if you put the case on a wood or glass surface it won’t slide around. We can also see the bottom dust filter that will protect the PSU from taking in dust. As with the front dust filter, this one is also easily removed.

Interior
The inside of the case is where most of the fun is happening in my opinion. With our sample, there is a nice shiny red area to the right with 2x 2.5″ SSD mounting brackets. This will not only allow you to show off your prized SSDs, but the red should also help draw a bit more attention to them as well and adds some nice contrast to the inside of the MANTA.

The SSD mounts are removed by undoing the thumbscrews and sliding them to the left. You will also notice the cable management bar to the left of them, this bar helps to hide those nasty cables that are connected to the SSDs and also any cables connected to the right side of the motherboard.

To the right of the SSD mounts are the 2x pre-installed intake fans. As you will also notice there is a bit of a cutout between them and the floor of the MANTA to allow users direct access to the underside of the of the case. This will come in handy for a number of reasons, especially for those looking to go down the water cooling route.

Taking a look at the top from the inside and we can see the mounting for the top fans or radiators and we can also see there is a fair bit of room on the topside of the frame for the fans to fit under the top panel.

All throughout the motherboard tray are plenty of cutouts for passing through cables, but the biggest cutout is for installing CPU coolers without the need for taking the motherboard out of the case. We can also see the 3rd and last pre-installed fan which acts as an exhaust to help get all that hot air out of the case and keeps your temps as low as possible.

The PSU shroud features a nice NZXT logo that also lights up. This area of the case is going to be a modders dream as they can customize it to say just about anything and the LEDs are already installed for them!
Taking a loot at the backside of the motherboard tray and we actually get a good look at the front and top ventilation that allows the MANTA to have good airflow without the need to have major vents and fans showing. NZXT did a great job of keeping the fans hidden from the outside while allowing them the room they need to get decent airflow.
There is also plenty of cable management options here as there are places to tie cables and a number of ways to route them. Also, the cable management bar as I call it does a great job at allowing for thicker cables to be bunched together in the middle while still hiding them from the front and not causing any problems on the backside of the motherboard tray.

Here is a shot of the bottom area where the PSU will be mounted and most of the cables tucked out of the way. There is quite a bit of room down here and should be sufficient for most things. There is also a nice mounting system for a 3.5″ HDD down here as well which are what the small rubbers rings near the fan are for.
 There are a couple of small PCB’s on the back as well, the most important of which is the fan splitter. This will allow users to connected up to 4x more fans with ease and also without the need for any motherboard fan headers. This is one of those small things that really do help NZXT stick out as a top case manufacturer and really is a pleasure to see.

Test System
Final Build
If you’ve built it one of the recent NZXT cases where they have the PSU shroud, you already know how easy it is to have a clean and tidy looking build. This is probably my favourite feature of their cases is the effortlessness of having good cable management. I did nothing special with any of the cables in the below build, I simply just put it all together and pass the cables through their designated spaces. The PSU shroud allows users to just leave all the cables on the bottom of the case out of sight and out of mind. One small thing that did get to me was the fact that my SSDs had to be mounted upside and while this really isn’t a major deal, it could definitely set off some OCD here and there. It took me no time at all to build the system up as you see below and again, was all effortless and was a pure joy to build inside the MANTA.

Once the build is all done, there are a couple of small bonuses. One is the LEDs at the back of the case, these can be turned on or off and give users just enough light to see the rear IO on the motherboard should they need to plug/unplug something from it.

The second LED comes from the NZXT logo on the PSU shroud. What is nice is that the two LED areas can be turned on separately or together. With previous NZXT cases that had similar features, they LEDs were either all on or all off. Now, if you hit the LED power button a few times it will cycle through the different LED zones so you can have them on individually or together, great job NZXT.

Final Thoughts
If you’ve skipped right to the end, let me just tell you that you have missed out on an incredible case. The NZXT MANTA is very well designed and offers some really amazing features that really do just need to be seen to be appreciated. Not only did I have fun building inside the MANTA, it was so easy to be left with a clean and tidy looking build it’s ridiculous. The NZXT MANTA is a great case all around and whether you want to go with air or water cooling, the MANTA has you covered. While some may think it’s a bit big for an ITX case, it is easy to see why NZXT have decided to make it the size they have and at the end of the day, it’s still smaller than most standard ATX cases.
Performance
The MANTA really has all its bases covered from a performance point of view. Not only does it comes with 3x pre-installed fans, 2x intake, and 1x exhaust, there is room for 2x more in the top of the case. Those looking to go the water cooling route can add a 240/280mm radiator in both the front of the case and the top which will be more than sufficient to cool any single CPU and single GPU setup. The PSU shroud will also allow you to hide most of your cables in the bottom of the case, out of sight and away from everything. Not only is this great from an aesthetics point of view, it also keeps them out of the way to allow for some better airflow. NZXT have also gone with a couple of unique side vented areas for the top and front, not only do these offer a pleasing look by not having big vented areas all in your face, they also allow for good airflow with less dust being pulled into the case.
Design
NZXT are well-known for designing great cases and they have not let us down with the MANTA. The MANTA features a very curvy and gorgeous exterior and a highly functional and aesthetically pleasing interior. NZXT have truly created a masterpiece with the MANTA and while some may find it a bit big for an ITX case, it is easy to see why it is the size it is. Things such as the PSU shroud and wall-mounted SSDs help to set this apart from most ITX cases on the market and that is extremely important these days. As we’ve all seen, a lot of companies release similar looking products and it’s a great breath of fresh air to see companies like NZXT offer bold and innovative looking products.NZXT should go ahead and give themselves a pat on the back for the MANTA design, well done!
Value
This is where I was a bit let down. While the MANTA is a great and quality product, coming in just north of £100 is a lot for any case, especially an ITX one. However, this case is packed full of features that do make it worth the money. The case itself is very solid and the unique curvy design to it is both bold and intriguing. From big features such as the SSD mounting and PSU shroud to the little things like included LEDs to help you better see the rear IO and the fan splitter, NZXT has packed a lot into such a small case and overall, I feel it’s worth the asking price.
If you are looking for a unique ITX case that not only features a bold design but also comes equipped with some fantastic features and is easy to build in, well then, the NZXT MANTA may just be right up your alley. User’s looking to have a water cooled ITX based PC will definitely not want to miss out on what the MANTA has to offer. Sometimes bigger is better, even if it’s normally supposed to be a bit smaller!

I would like to thank NZXT for sending in their MANTA case for review and can only hope they will come out with a full-size ATX version one day!


