


be quiet! Dark Base 701 White PC Case Review
Introduction
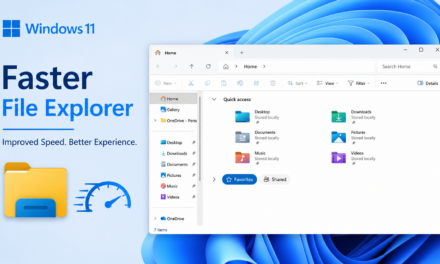
I am taking a look at the be quiet! Dark Base 701 White edition. This case was released along with the flagship Dark Base 901 in black colors but after CES 2024, be quiet! hinted at more white color components coming and both high-end PC Cases got a white touch along with 2x fans series.
The Dark Base 701 White is a mainstream version of the Dark Base 901 by dropping a few design elements from the 901 to make the 701 a more mainstream option that still provides the original design signature of the 901 with ample cooling and storage and a spacious layout. This is a mid-tower category PC Case though you would be surprised how gigantic it is in real life.
Some of the key features are:
- Open mesh design for high airflow and performance
- 3 pre-installed Silent Wings 4 140mm PWM high-speed fans offer maximum performance
- Fan controller with PWM motherboard sync option
- PWM and ARGB Hub for up to 8 PWM fans and 2 ARGB components
- ARGB lighting with integrated ARGB controller for a stunning look
- Exceptional usability with easily accessible features
- Versatile motherboard tray enables an inverted layout
- Tempered glass side window allowing a superb view
This case is available for purchase at a price tag of €239.90 and comes with a 3-year warranty.
Dark Base 701 Specifications

Dimensions

Unboxing

The Case is shipped inside a standard brown color cardboard box. It has a picture of the Case on the front whereas its modular design illustration is on the backside and there are specifications printed over it as well.

The case is tucked between two white Styrofoam pads for protection from damage.
Accessories

The following are included:
- 1x User Manual
- 1x set of Motherboard Standoff Screws
- 1x set of Drives’ Screws
- 9x Cable Ties [Velcro]
- 4x Screws for the PSU
- 1x set of white silicone inserts for drives
- 1x Vented Fan Cover
- 1x HDD Cage Bracket
Closer Look
Be quiet! has focused on maximum airflow and usability to describe this PC Case’s signature. It is time to take a closer look at the chassis and see what it offers in this price range. The dimension of the case is 565x249x495mm excluding the stands. This dimension is 565x249x523mm with the stands.
The materials involved in the construction of this case are Steel, Glass, and ABS plastic. The case has a net weight of 12.8kg. This is a mid-tower case that is super spacious and has fluid working space once you get to work on it.

Exterior View
Let’s start with an exterior view of the chassis.

Since be quiet! has focused on maximum airflow, it was no surprise to see a perforated front panel. This panel has two A-RGB LED strips installed on the sides that give a nice look to the case. There is a be quiet! branding on the base of the panel. You can also spot the IO panel on the top which is not part of the front panel.

Sorry for the blurry picture. I did not notice at the time of the photo shoot. I was trying to show the inside of the front panel. There is no dust filter inside the panel.

There is a PCB over one side of the front panel that has 3 contact pins. One connector is connected to a port right below the PCB whereas we can see another cable coming out from the PCB and routed towards the opposite side. This system powers and controls the ARGB LED lighting on the front panel.

The cable is routed from one side to the opposite side and is connected to a port to power the ARGB LED strip on that side of the front panel.

Now, I am showing the front side after removing the front panel. What is hard to see is a magnetic fine mesh dust filter.

I am showing that filter in a close-up view here. It is indeed a fine-meshed. Just be gentle with it during washing/cleaning.

There is a 3-pin contact pad on another white PCB provided on the main housing. You can see a cable coming out from this PCB and is going towards the backside of the PC Case towards the integrated Fand ARGB hub.

Now, I am showing a clear view of the front side after removing the panel and dust filter. A 140mm Silent Wings 4 PWM white fan is installed over the front. Be quiet! has installed a total of 3x such fans and personally, I disagree with the stock placement of these fans. One fan is on the front. One is on the rear and one is on the rear. I would have installed two fans on the front and one on the rear for optimal airflow and this would have allowed the users to take full advantage of pre-routed cable management.

I am showing the backside of the Silent Wings 4 140mm PWM fan. It is rated for up to 1900 RPM where it gets loud like really loud. The power rating is 0.40A at 12VDC making the power consumption of 4.8W which is not an input power.

There is a removable fan bracket on the front side. Since the cable of the fan is already connected to the hub on the back, it was difficult to fully show the bracket without removing the fan. This bracket can house up to 3x 120mm or 3x 140mm fans on the front. It uses a rail mount system meaning you can adjust the location of the fan.

I am showing the clean front of the case after removing and side-lining the fan bracket on the front.

There is a clear glass on the side panel which seems to be 3mm thick. The panel flushes in with the frame of the case fully. The panel’s tooling is nothing extraordinary. After removing the two thumb screws on the rear, you would need to slide the panel backward and then pull it off.

Looking at the rear, you can see two thumb screws on the top. These are holding the top cover. There are 4x thumb screws on the sides for the side panels. The fan slot is recessed along with the IO cover’s cutout. The fan slot has a rail mount system and it can house 1x 140mm or 1x 120mm fan. There is a Silent Wings 4 140mm PWM fan pre-installed.
Coming down, there is a 7+3 PCIe slot design where 7 slots are horizontal and 3 slots are vertical. Please note that you would need to buy a vertical mount bracket separately. These slots use reusable vented covers.
The main frame area excluding the PSU bay is recessed inside the frame of the case. The main reason for that is the removable motherboard tray. be quiet! needed to reinforce the complete tray and for that they have used 5x screws to safely install the motherboard tray on the main frame. I appreciate the simplicity here unlike the Dark Base 901 where you have to remove 9x screws.

At the bottom, there is a bracket for PSU bay. You can install a standard ATX PSU in this case. The user can remove the cover and install it on the PSU then slide the PSU inside the bay and complete the installation by screwing the cover on the frame. With the time, I am drifting away from this design and would want to stick with a simple and standard PSU installation method. Anyhow, that is my opinion.

There is a perforated or vented cover over the top of the case that can easily be removed by undoing 2x screws on the rear.

Once the top cover is removed, you can see a steel main frame of the housing here and there is a fan bracket below this steel frame. You can see that there is a good displacement from the rail mounts on the fan bracket to the motherboard tray. This will give you a good clearance for the RAM and by offsetting the rail mounts towards the glass panel, there is a good clearance for thicker radiators up top.

I am showing the underside of the top cover. There is no dust filter on the top which is a bit surprising.

I am showing the fan bracket. This is different than the bracket on the front hence they can’t be used alternatively. You can install up to 3x 120mm or up to 3x 140mm fans over the top. Anyhow, the maximum supported radiator is 360mm on the front and the top.

I am showing you a spacious layout where there is now no restriction even from the top and you can easily work your way around inside this case.

The connectivity options on the IO panel are:
- 1x USB 3.2 Gen 2 Type-C Port
- 2x USB 3.2 Type-A Ports
- 2x Audio Jacks
- 1x Power Button
- 1x RGB LED Control Button
- 1x Fan Control Button
There are a total of 48 ARGB LEDs on the front panel (24 on each side) that can be controlled using the integrated Fan and ARGB Hub on the backside of the motherboard tray. There are many pre-defined modes including the rainbow RGB mode, static colors, and floating static colors. These modes work fine and look nice in person.
The fan control button changes the fans’ speed in three steps:
- Slow Speed
- Medium Speed
- Full Speed
This is as granular control as possible given the design restrictions. To use the PWM control, switch the control to the motherboard and use UEFI BIOS settings for fan speed.

Looking at the bottom of the case, there is a full-length dust filter in white. It can be removed from the front side of the case which makes its handling super convenient. However, there is a caveat. You would need to remove the front panel to remove this dust filter. Be quiet! could have done a better job!

The above picture shows the underside area after removing the filter. You can see a spacious area for the PSU and cables. Also, there are mounts for the installation of a 120mm or 140mm fan inside the base chamber for fresh air intake. Be quiet! has provided a vented or slotted fan cover in the accessories should a user be going this route. The dust filter uses a fine mesh.

The backside panel is a solid design in white.
Interior View
It is time to take a peek inside the case.

I am showing the corner of the glass panel. As you can see some latches or hooks slide into the notches on the main housing. There is nothing fancy about installing the glass panel.

Let’s take an inside view of the chassis. It is quite spacious for being a mid-tower category case and be quiet! has my praise since this is my second case in the mid-tower that is this spacious. The inner space has a length of 455mm and a height of 355mm. the motherboard tray is installed such as there is a gap on the backside of the tray and its top, leaving plenty of room for the user to flex the muscle and route the cables. Be quiet! has made the motherboard tray’s handling quite convenient. You just need to remove 5x screws and take out the tray.

Here is my white color test benchcase! The reason is that be quiet! is still sticking with its inverted layout signature in these cases. I like the idea that they have allowed users to stick with a non-inverted layout. Only those users who like an inverted layout can opt for this change.

The motherboard tray is made of steel and has a solid build quality. There is no flex as such in the tray. The markings are labeled for ease of identification for the installation of the motherboard. This case supports a motherboard of up to E-ATX size (305x275mm). 9x standoffs are pre-installed. The centered standoff acts as a catcher to hold the motherboard in space. We have a large size CPU cut-out area for convenient installation of the coolers. There are four mounting holes. This is for an optional 2.5” drive mount on the backside of the tray.
The top displacement is roughly 37mm which is decent. Be quiet! has used a different approach for cable routing. There is a large size cutout towards the right of the tray. Similarly, the top area is fully exposed so you can pass cables easily. In addition, there is a covered cutout above the tray that would better conceal the cables for top connectivity. The bottom has the same design with an open-ended design below the tray for cable routing.
Compatibility and Clearance
The following cooling provision is supported:
- 3x 120mm or 3x 140mm fans on the front [1x 140mm pre-installed]
- 3x 120mm or 3x 140mm fans on the top [1x 140mm pre-installed]
- 1x 120mm or 1x 140mm fan on the rear [1x 140mm pre-installed]
- 1x 120mm or 1x140mm fan on base
- Up to 360mm radiator on the front
- Up to 360mm radiator on the top
- Up to 120mm radiator on the rear
CPU Cooler Height: 185mm
Graphics Card Length: 415mm with or without Side mounted drives
PSU Length: 250mm

Now, I am showing the front area of the case from the inside. There are covers on the side of the motherboard tray. These are drive storage mounting area covers. They use push pins and there are silicone inserts into which the pins are pushed through for the installation. I regret to inform you that this is not an effective method since these inserts easily come out of the holes and putting them back in is not that easy. Be Quiet! should have done something else. You can see 1x Silent Wings 4 140mm PWM fan installed on the front. You can also see a cover right in front of the fan radiator which sits over the 120/140mm fan mount on the base. You can also install pump/reservoir combo products here as well.

For thicker radiators, you can remove this cutout cover. However, on stock, a maximum thickness of the radiator is 32mm. Additionally, you can install a vented cover if installing a fan on the base. This would provide some sort of airflow towards the graphics card.

Now you can see the drive mounts. There are white-color silicone inserts that can easily slip out of place by pressing the drive or cover in. You can install up to 2x 2.5” drives on this end from the inside of the case.

I am showing the side covers with these push pins. There are similar screws provided in the accessories for the drives.

Now, I am showing the rear view of the PC Case. You can see another 1x Silent Wings 3 140mm fan on the rear and one on the top. There are 7+3 PCIe slots with reusable and vented covers. Please take note that during installation, I observed that there is a narrow gap between the slots and the IO bracket of the graphics card. I had to press the side so that mounting holes on the slots aligned with the cutouts on the bracket cover of the graphics card.

The PSU bay or the lower chamber has a full-length fixed cover with be quiet! branding in the center facing the glass. You can press and pull the side cover of the PSU shroud to expose the side area.
It is now time to look at the backside of the case.

The above picture shows the backside of the side panel. There is a roughly 1mm thick sound insulation material on the side panel. This is provided for soundproofing which is a hallmark of be quiet! PC Cases.

The above picture shows the main view of the backside of the case. You can see that the cables are very well managed and pre-routed for effective cable management. Two container-type frames on the top and at the bottom can be used to route cable through. There are plenty of cable tie points in addition to dual rails on the frames to rest cables on them along with tucking them using Velcro strips. The dual-chamber design is apparent here.

There is a Fan and ARGB hub that is installed on the backside of the tray. It can house up to 8x 4-pin PWM fans. There are 2x 3-pin ARGB ports as well. There are 4x ports on the bottom of this hub. Starting from left these are:
- 1x Fan Port that has a 4-pin PWM connector on the other end
- 1x ARGB Port that has a standard 3-pin ARGB connector on the other end
- 1x Power Port that has a SATA connector on the other end
- 1x Front Panel Connector that is connected to the cable coming from the integrated PCB on the front panel
You can see that all three 140mm fans are connected to this hub so that they can be controlled via the button on the IO panel.

There is a large PSU bay that can house up to 250mm long PSU. There are 4x raised surfaces with pads on which the PSU is rested. It is a spacious area in which PSU along with its cables can easily be placed inside.

There is an HDD Cage mounting area as well. Be quiet! has provided an HDD Cage bracket that can be installed here. You can mount the drives directly to that bracket.

There is an area on the base where a user can install a 120/140mm fan for optional air intake. This feature is also on Dark Base 901. Please note that you would need to install the fan during the installation since the screws are required to be inserted from the bottom of the case.

You can install up to 2x 3.5” drives directly on the mounting bracket shown in the picture.

This is what is left of the case after removing the motherboard tray.

There is a Type-E USB-C connector and an HD Audio connector.

There are:
- 1x SATA Connector Cable to power the hub
- 1x Front Panel Connector simplifies the task and it is standard so can be used with any motherboard.
- 1x USB 3.2 Connector

There is a 4-pin PWM connector coming out from the hub that can be connected to the motherboard. Same goes for the standard 3-pin 5V ARGB connector. This way you can avail the function of transferring the control from hub to the motherboard to control fans and LEDs from motherboard software/BIOS.
Installation
Following is the configuration used:
- Intel i7 12700k
- GIGABYTE Z690 AERO G DDR5
- GIGABYTE GeForce RTX 3060 VISION OC
- DeepCool AK400 White
- XPG Lancer RGB 32GB @ 6000MHz
- Sabrent Rokcet 500GB NVMe SSD
- CORSAIR AX1200i Platinum PSU with White Sleeve Cables
Installation inside this case is a breeze. You can have your motherboard, cooler, RAM, and graphics card installed out of the case by removing the motherboard tray. It is optional. I did not encounter any issues during the installation. I started with the motherboard and installed the cooler afterward. RAM was already installed on the motherboard.
Then I proceeded with the PSU and routed the cables which is an easy task as well in this case, thanks to channels provided on the backside of the case except for the 24-pin ATX cable. The large size cutout is too large to properly route this cable but I managed. You would need to improvise. Then the graphics card was installed and I faced an issue where there was a narrow gap between the PCIe slots of the case and the IO bracket cover of the graphics card. Somehow, you would need to press the slot area so that mounting holes align.
Next, I connected the cables and did some cable management. Job done.

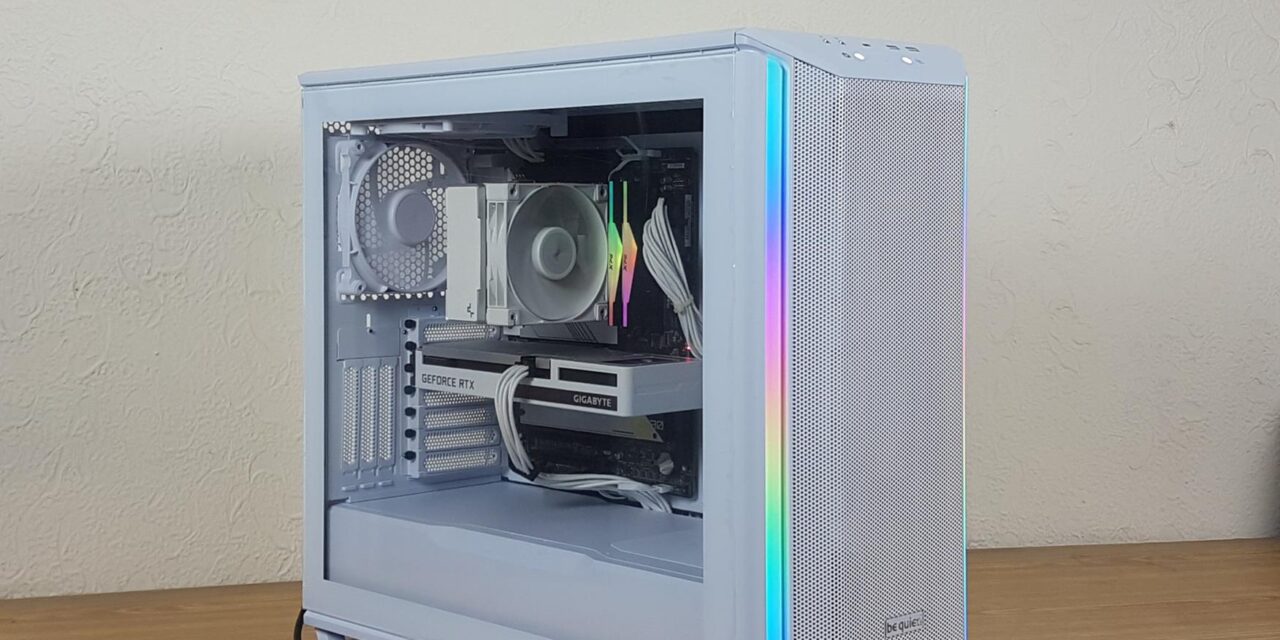
The above shows a completed test build. I wish be quiet! had done a white cooler and white PSU that would come in handy for a brand ecosystem-based build.

The above shows the rear view of the PC Case showing the Rear IO panel of the motherboard and installed PSU.

Cable management is an easy task in this case.

I am showing the fan and ARGB connectors connected to the motherboard.

The EPS cable was a bit of a challenge but nothing too big!

I am showing the 24-pin ATX cable.

The graphics card cable was routed from the base and it was an easy job.

There are LEDs on the fan and LED controller indicating the current status of the fan speed and RGB lighting.
RGB Lighting
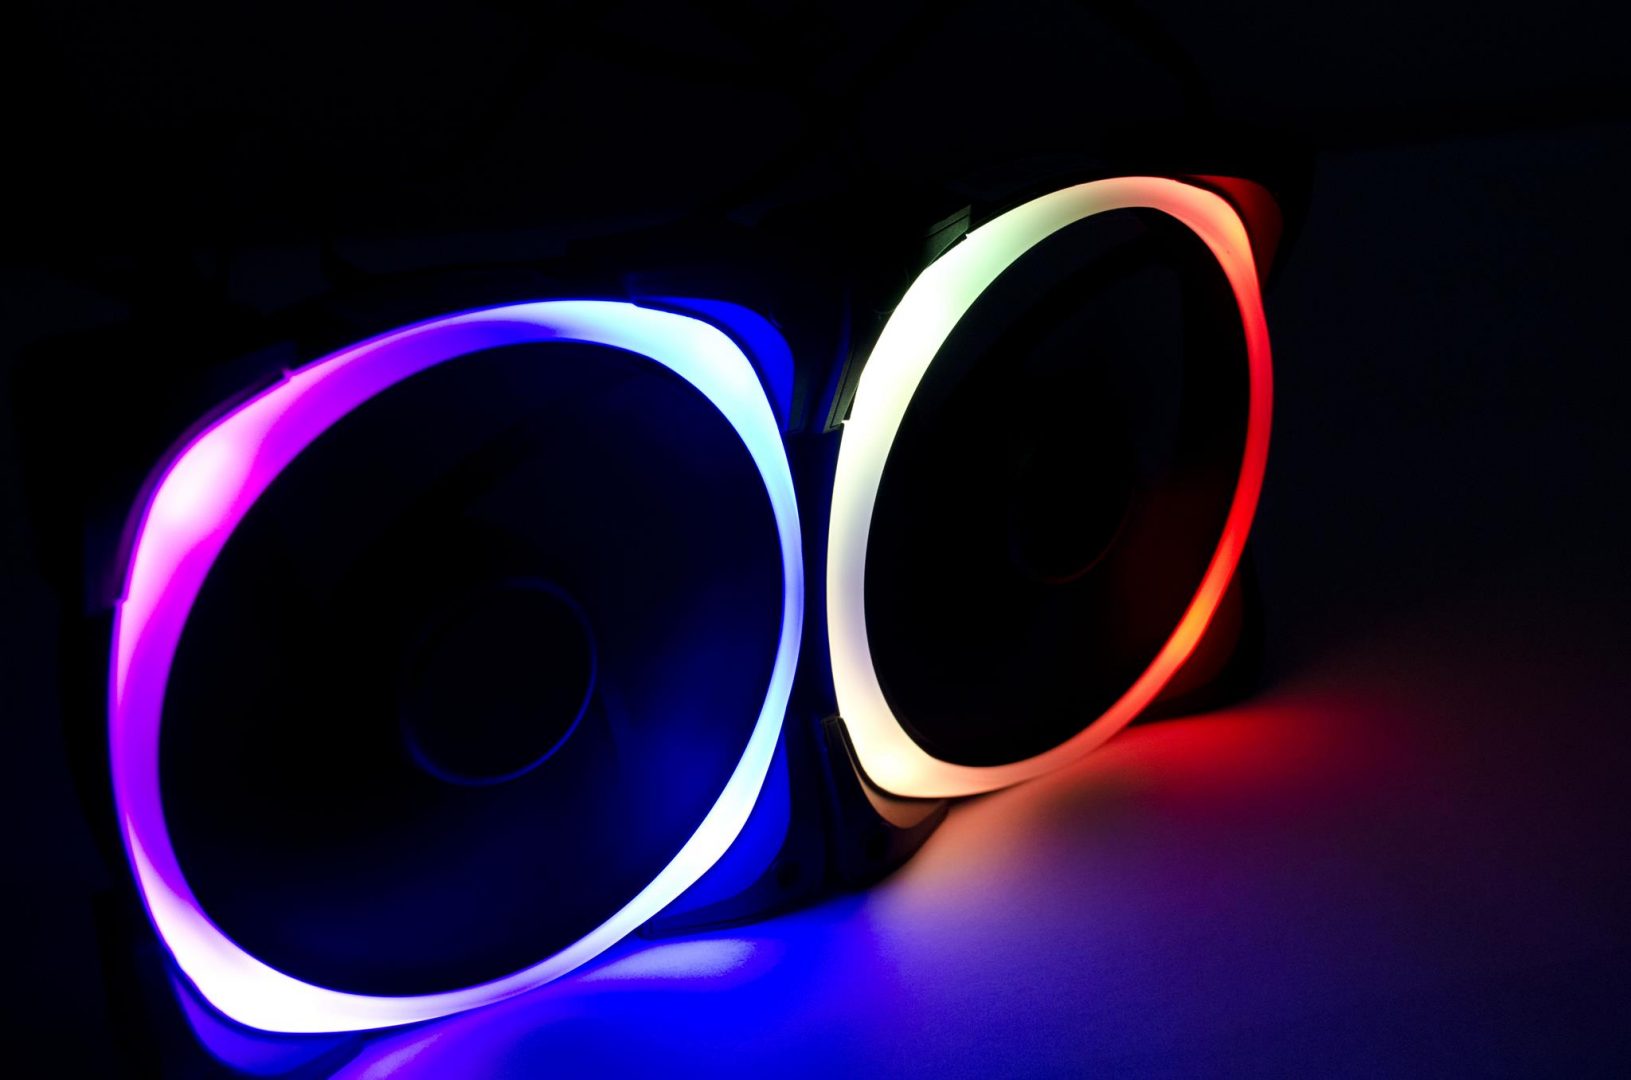
RGB lighting effect in this case is spectacular while also being subtle. Here are a few pictures:


Conclusion
be Quiet! has recently launched multiple of its products in white. This includes the high-end Dark Base 901 and Dark Base 701. I have taken a spin on the white edition of Dark Base 701 White. I was hoping to do a white build using Be Quiet! components but they need to complete their white ecosystem with PSU and coolers.
Anyhow, coming back to the main point, this case is a mid-tower category yet has a large footprint that allows the users to use its extremely flexible options and high airflow design to their advantage. The dimension of this case is 565x249x495mm excluding the stands. This dimension is 565x249x523mm with the stands. The net weight is 12.8 Kg. This case is solidly built using steel, ABS, and glass. It is not an easy job to finish the two different materials in the same tone but be quiet! has managed to do that. Kudos!
The fan support is:
- 3x 120mm or 3x 140mm fans on the front [1x 140mm fan pre-installed]
- 3x 120mm or 3x 140mm fans on the top [1x 140mm fan pre-installed]
- 1x 120mm or 1x 140mm fan on the rear [1x 140mm fan pre-installed]
- 1x 120mm or 1x140mm fan on the base
The radiator support is:
- 120mm/140mm/240mm/280mm/360mm radiator on the front
- 120mm/140mm/240mm/280mm/360mm on the top
- 120mm radiator on the rear
In my opinion, be quiet! should have installed 2x Silent Wings 4 140mm PWM fans on the front with one on the rear. This would give a better airflow with positive airflow inside the case. They have installed one fan on the front, one on the top and one on the rear.
Clearance is:
CPU Cooler Height: 185mm
Graphics Card Length: 415mm
PSU Length: 250mm
Storage provision is:
- Up to 5x 3.5”
- Up to 3x 2.5″
You can mount 2x drives directly to the HDD bracket that is provided in the accessories.
Dust Filtration:
- 1x fine mesh filter on the front
- 1x full-length mesh filter on the base
- No dust filter over the top
The case can house motherboards up to the E-ATX form factor. There is a top displacement of roughly 37mm leaving a decent room room for the radiator with fans. The side-to-side displacement is roughly 60mm and this will come in handy for the RAM clearance. There are ABS brackets on the side of the motherboard tray where you can install 2x 2.5” drives on the front and 2x 3.5” drives on the back. Additionally, you can install a 2.5” drive on the backside of the motherboard tray.
I have a complaint regarding white color rubber or silicone inserts that are used to secure the drives on the mounting brackets. These inserts can easily come off while pushing the drive(s) and I have first experienced this. You are advised to keep some sort of pressure on the backside of the insert while pushing the drives.
The PCIe slots are not a bridgeless design which in my opinion should have been as this provides more flexibility and compatibility with the majority of the vertical GPU brackets. The maximum thickness of a radiator can be 32mm on the front in stock configuration. You can remove the cover over the cutout to make room for thicker radiators though this would affect the length of the graphics card.
The PSU shroud has a full-length cover that is fixed on the top but the side part can be pulled to access the bottom chamber. This is same as on the Dark Base 901. Since you can optionally install a 120/140mm fan in the base, there is a vented cover that would throw air toward the graphics card.
Be Quiet! has provided powerful Silent Wings 4 140mm PWM fans with a top speed of 1900 RPM generating 78.4CFM with an air pressure of 2.34mmH₂O and a noise level of 29.3 dB(A) with input power of 4.8W. There is an integrated fan and ARGB hub that can power up to 8x 4-pin PWM fans and 2x 3-pin, 5V ARGB LED strips or devices. This hub is SATA-powered and you can control the fan speed and ARGB lighting on the front panel using the dedicated buttons with LED backlight on the front IO panel.
Speaking of IO panel there is a USB 3.2 Gen2 Type-C port and USB 3.2 Type-A ports. I would have loved to see a USB 3.2 Gen2x2 Type-C port instead.
The overall build quality is top-notch. There are 7+3 PCIe slots meaning you can install graphics cards vertically as well. However, while installing the graphics card I noticed a gap between the slots’ mounting holes and the graphics card’s bracket’s holes. I had to press the slot area to install the graphics card. You can also remove the motherboard tray for an inverted layout.
I have used a simple test build configuration and found the overall installation and cable management super easy. Under stress testing using AIDA64 FPU and GPU, the 12700k did a max of 78°C under load and RTX 3060 did a 60°C at an ambient of 24°C. This is a good performance and shows that be quiet! has done a good job in the airflow department.
This case has an MSRP of €239.90 and comes with a 3-year warranty. This is a high price tag but the warranty period is satisfactory. This case has a well-balanced feature set with ample cooling and storage provision while providing a spacious layout for any building requirement. It comes recommended by us.


