


NZXT S340 PC Case – Naumans Review
Introduction
When it comes to PC Chassis’, the market is filled with a variety of competitive offers starting from low budget range to as high as enthusiast chassis costing up to $900. Recent trends are geared towards the modular approach and with Chassis like Phanteks Evolv ATX, Core X9 from Thermaltake etc users now have flexibility in terms of designing the layout for their build and taking out the chassis parts which are not needed. Recently, Phanteks has launched their high-end, enthusiast grade Chassis Enthoo Elite costive massive $900 for a chassis and giving stiff competition to the likes of Case Labs.
NZXT was founded in 1994. They are the provider of enthusiast-grade PC components and accessories. NZXT is manufacturing products like Chassis, cooling solutions for CPU and Graphics Cards, PSU units, and various accessories using cutting edge technology. The company believes in Customer Satisfaction as the top most priority hence they have an effective customer service program.
NZXT is among the industry’s leading Chassis manufacturers. Their Chassis are quite popular among the enthusiasts for the form, functionality and build quality. Particularly the design of their chassis is different from most of the competitors and build quality has always been their hallmark.
Today, I’ll be reviewing NZXT’s very popular S340 PC Chassis’ Our review sample comes in Black and Blue colors.

Product: S340
Manufacturer: NZXT
Price: $69.99 / Rs.11300 at the time of the review
Specifications
| Case Form Factor | Mid Tower |
| Model No | CA-S340MB-GB (Black/Blue) |
| Drive Bays | External 5.25″: 0
Internal 3.5″: 2+1 Internal 2.5″: 2+1 |
| Fan Support | Front: 2x 140/2x120mm
Top: 1x 140/120mm (1 x 120mm FN V2 Fans Included) Rear: 1x 120mm (1 x 120mm FN V2 Fan Included) |
| Clearance | GPU Clearance With Radiator: 334mm
GPU Clearance Without Radiator: 364mm CPU Cooler: 161mm Cable Management: Lowest Point – 17mm; Highest Point 168mm |
| Filters | Front (Included)
Bottom Rear(Included) |
| Radiator Support | Front 2 x 140 or 2 x 120mm
Rear 1 x 120mm |
| Dimension | 200mm x 445mm x 432mm |
| Build Material | SECC Steel, ABS Plastic |
| Motherboard Support | ATX, MICRO-ATX, MINI-ITX |
| Expansion Slots | 7 |
| Weight | 7.05 Kg |
| Warranty | 2 Years |
| EAN | 5060301692637 (Black/Blue) |
| UPC | 815671012364 (Black/Blue) |
Packing
Chassis comes in a colorful packing box unlike a typical brown color box. It is corrugated cardboard box. On the front side, we have diagram of the completed build inside the chassis. NZXT is printed on the top left corner while S340 Mid Tower is printed in the middle on the bottom side.

The back side of the box has same picture of the completed build inside the chassis. Picture is wrapped all over the back side.

The right side of the box has specifications, features and the colors of the chassis mentioned.

The left side of the box has key highlights of the chassis like full support of 280mm Kraken AIO, Ultra-Clean Interior etc.

Accessories
Chassis includes the user manual of the chassis. The user manual is well laid out and thorough. Accessories include various types of screws like for mounting motherboard, drives, fans, and zip ties.


Closer Look
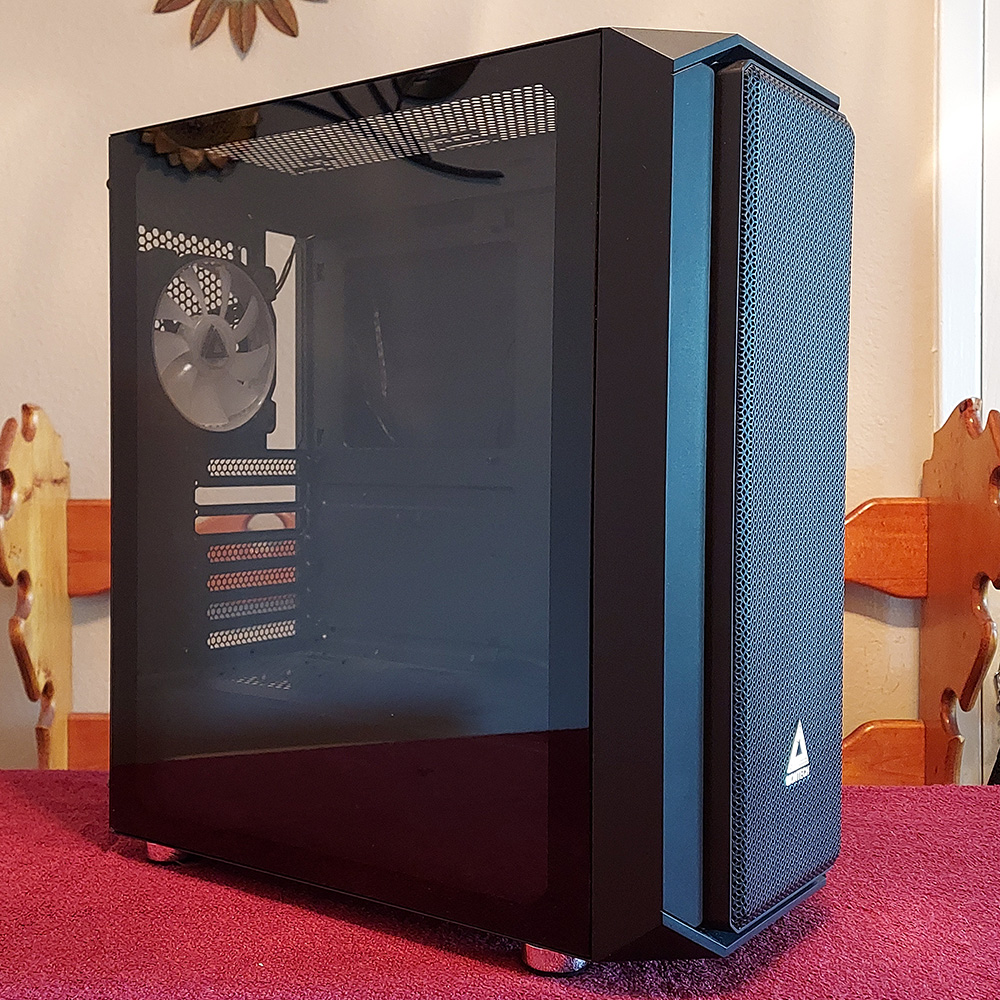
This chassis is a one heck of an innovative design. The most spectacular thing about the chassis is the build quality and the material used for the build. NZXT is mentioning it as “360 degree of steel casing surrounding the all-steel chassis”. That is true and they have seemingly delivered the top notch quality chassis for the enthusiasts and the gamers. Don’t let the word ‘Compact’ makes you think, it can’t accommodate serious hardware. Despite its compactness, it can host up to 280mm AIO, up to 334mm clearance for the graphics card with the radiator on the front a full size ATX motherboard. Another unique design item is the Grommet-less cable management bar which really works wonder in hiding the cables coming out of the back side of the chassis and adds a subtle touch to the form and factor of the chassis. In its entirety, we rather have a simple design.

Let’s have a detailed look on the chassis. Front side has a single panel covering it fully. Front panel is surrounded by a steel sheet while the inside is a thick plastic in blue color. Bear in mind that this chassis comes in various colors so the color description would vary from one part number to the other.
It is a very simple design by its looks. There are no side vents on the front panel. Instead the top and the bottom side are open ended. This is where air intake is done. Panel is removable. Simply put your hand underside of the panel and pull it. You would have to use force to pull it out.

Once the front panel is removed, we can see large size magnetic dust filter covering the entire front side which is removable. Bottom side has opening for the storage drive cage. This is helpful as there are no caddies in the drive cage. Drive cage itself is fixed. To secure install the HDD/SSD, screws can be mounted from this opening. Below pic shows the backside of the front panel.

There is no 5.25” drive bay in the chassis. So, if you are conscious for 5.25” drive(s) then this chassis may not be for you. There are cut outs on the right side of the panel to pass the fan cables through. Fans up to two 120mm or two 140mm can be installed. Similarly, radiator of 120mm, 240mm or 280mm can be installed on the front.

Front panel’s depth is 30mm with approx. 25mm of space between the panel’s plastic body and the chassis. In my opinion, this is a wasted space which NZXT could have made use of by adding a bit more like 5mm of space. This would have enabled the users to install fans on the front side of the chassis. Though fan(s) can be installed on the front, there is not enough room for them to get air to breathe. It is in fact a very tight fit.

The top side of the chassis is plain and simple. We have front I/O Panel implemented on the top front side. We have a circular shape power button which lights up in blue color when powered on. I’m not sure if this LED on the power button lights differently on the different models. Next, we have two USB 3.0 ports, a headphone jack, a microphone jack and a HDD LED indicator. You would be surprised that there is no Reset button on this chassis.

On the rear end, we have a vented mount location for a 120mm or a 140mm fan. This vent does not have a dust filter on it. Yes, you read it right, only one fan on the top. That’s truly a compact mid tower for you.

The rear side of the chassis has a mount for rear I/O panel of the motherboard. Right next to it is a fan position for 120mm only. Note that there is no mounting available on this side but only holes. This shows how compact this chassis really is.
Below this area, we have 7 PCIe slot covers. NZXT has taken a different approach when it comes to handling the graphics card(s) installation in this chassis. Instead of implementing the PCIe slot covers inside the chassis, this chassis has PCIe slot covers implemented externally and I actually like this idea.


There is a steel bar mounted with two thumb-screws which is locking the PCIe slot covers. In order to install a graphics card, user would need to remove the steel bar first. Next, unscrew the thumb-screws on the desired PCIe slot cover(s). Install the card from the inside of the chassis and mount the thumb-screws externally. However, you would still need a large size screwdriver to secure the thumb-screws. Once finished, put the locking steel bar up again.
On the bottom, we have PSU cover with captive thumb –screws for our standard ATX PSU. To install the PSU, remove this PSU cover. Mount the PSU cover on the PSU using standard screws and slide the PSU inside the PSU area fully, tighten the captive thumb-screws and you are done. Somehow, this implementation seems redundant to me as we would still need to use standard 4 screws to mount the PSU cover on the PSU but it makes installation easier.

The bottom side of the chassis has a single removable dust filter on the PSU side. There are 4 large size feet giving us the clearance of up to 25mm from the ground.

Let’s have a closer look inside of the chassis for that matter. The side panel has a full transparent window. Side panel has captive thumb-screws which is a very good implementation. No more worries to safe store the removed thumb-screws as they don’t come off the panel. This chassis supports ATX, Mini-ITX, and Micro-ATX size motherboards. Standoffs are pre-installed. There is a stud in the center of the motherboard tray for ease of installation of the motherboard.

Honestly speaking, it is a very simplistic design that this chassis carry even from the inside. On the center we have a large size CPU back plate cutout which also is implemented in an elegant design. Designs of the NZXT are their hallmark. We have over 16 zip-tie points. We have two cutouts on the top for 8-pin EPS and other related cables pass through.
This chassis comes pre-installed with the two NZXT FN-V2 fans. Cables of pre-Installed FN-V2 120mm fans are routed well enough and both are connected to the Molex connector. One would need a Molex cable from the PSU to power them up. Though the user can remove the Molex connector cable and connect the fans to the motherboard if need be.
FN-V2s are 3-pin, Rifle Bearing fans with a maximum airflow of 45CFM at 21dB. Maximum speed is 1200 +/- 15% RPM. They take 0.16A to power them up with rated voltage of 12V DC. Included fans are black.
On the rear, only a 120mm fan can be installed whereas top can host a 120mm or a 140mm fan. There is approximately 30mm distance from the top of the chassis to the motherboard’s top. We have three cutouts on the right most side of the chassis to pass the fan cables of the AIO through. Top cutout is wider as it also carries the front I/O panel’s cables. We can see the mounting of two 120mm or two 140mm fans on the front side along with the dust filter.

Blue color bar is daringly visible inside the chassis. This is a grommet-less cable management bar. Idea is simple but very effective and stylishly executed. Instead of having multiple cut outs with or without rubber grommets on them, we have a single large size cut out to route the cables. That large cut out is covered with removable bar. NZXT is embossed on the bottom of the bar. You would be surprise that NZXT has even provided 3 zip-tie points on the backside of the bar. This is very impressive attention to the details.
On the bottom we’ve a full size shroud covering the PSU and the storage cage. Two removable SSD brackets are provided on the top of the shroud. This design definitely helps in utilizing the compact space inside the chassis.
Right next to these brackets is another cutout which is used to pass graphics card power cables (PEG) to be connected to the graphics card(s). I wish NZXT has provided rubber grommet on this cutout for better aesthetics as it is quite visible from the front.
Then there are two cutouts near the bottom of the motherboard tray. They are implemented in such a way that enough clearance is provided even if we install the PSU before routeing the SATA and other cables through them.
On the bottom right side, there are vented plates covering the top of the HDD cage beneath them. This is for better airflow. PCIe slots are in plane with the chassis border due to the reason already discussed in detail above.

The back side of the chassis has solid steel panel on it. This is a rock sturdy panel without any flex and it has got some weight on it. Thumb-screws on the panel are captive, which is a very good implementation. No more worries to safe store the removed thumb-screws as they don’t come off the panel.

Bottom section of the back side has room for the PSU. Notice the HDD cage. It is fixed and it has space underneath it. We can install another HDD in that space. So, it can hold up to 3 3.5” drives and 2 2.5” drives or a combination.

Notice the space behind the grommet-less cable management bar. The bar can be removed by taking out 5 screws holding it.
From cable management point of view, this chassis does not disappoint. We’ve plenty of space to work around with clearance of lowest point up to 17mm and highest point up to 168mm. This is very impressive implementation.
Accessories box is located inside the HDD cage. Front I/O panel’s cables are wrapped in a plastic sheet.
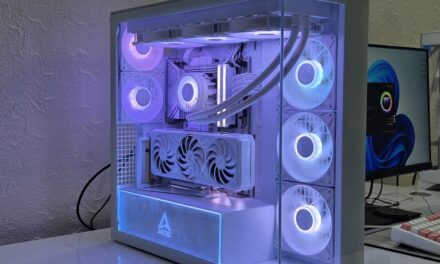
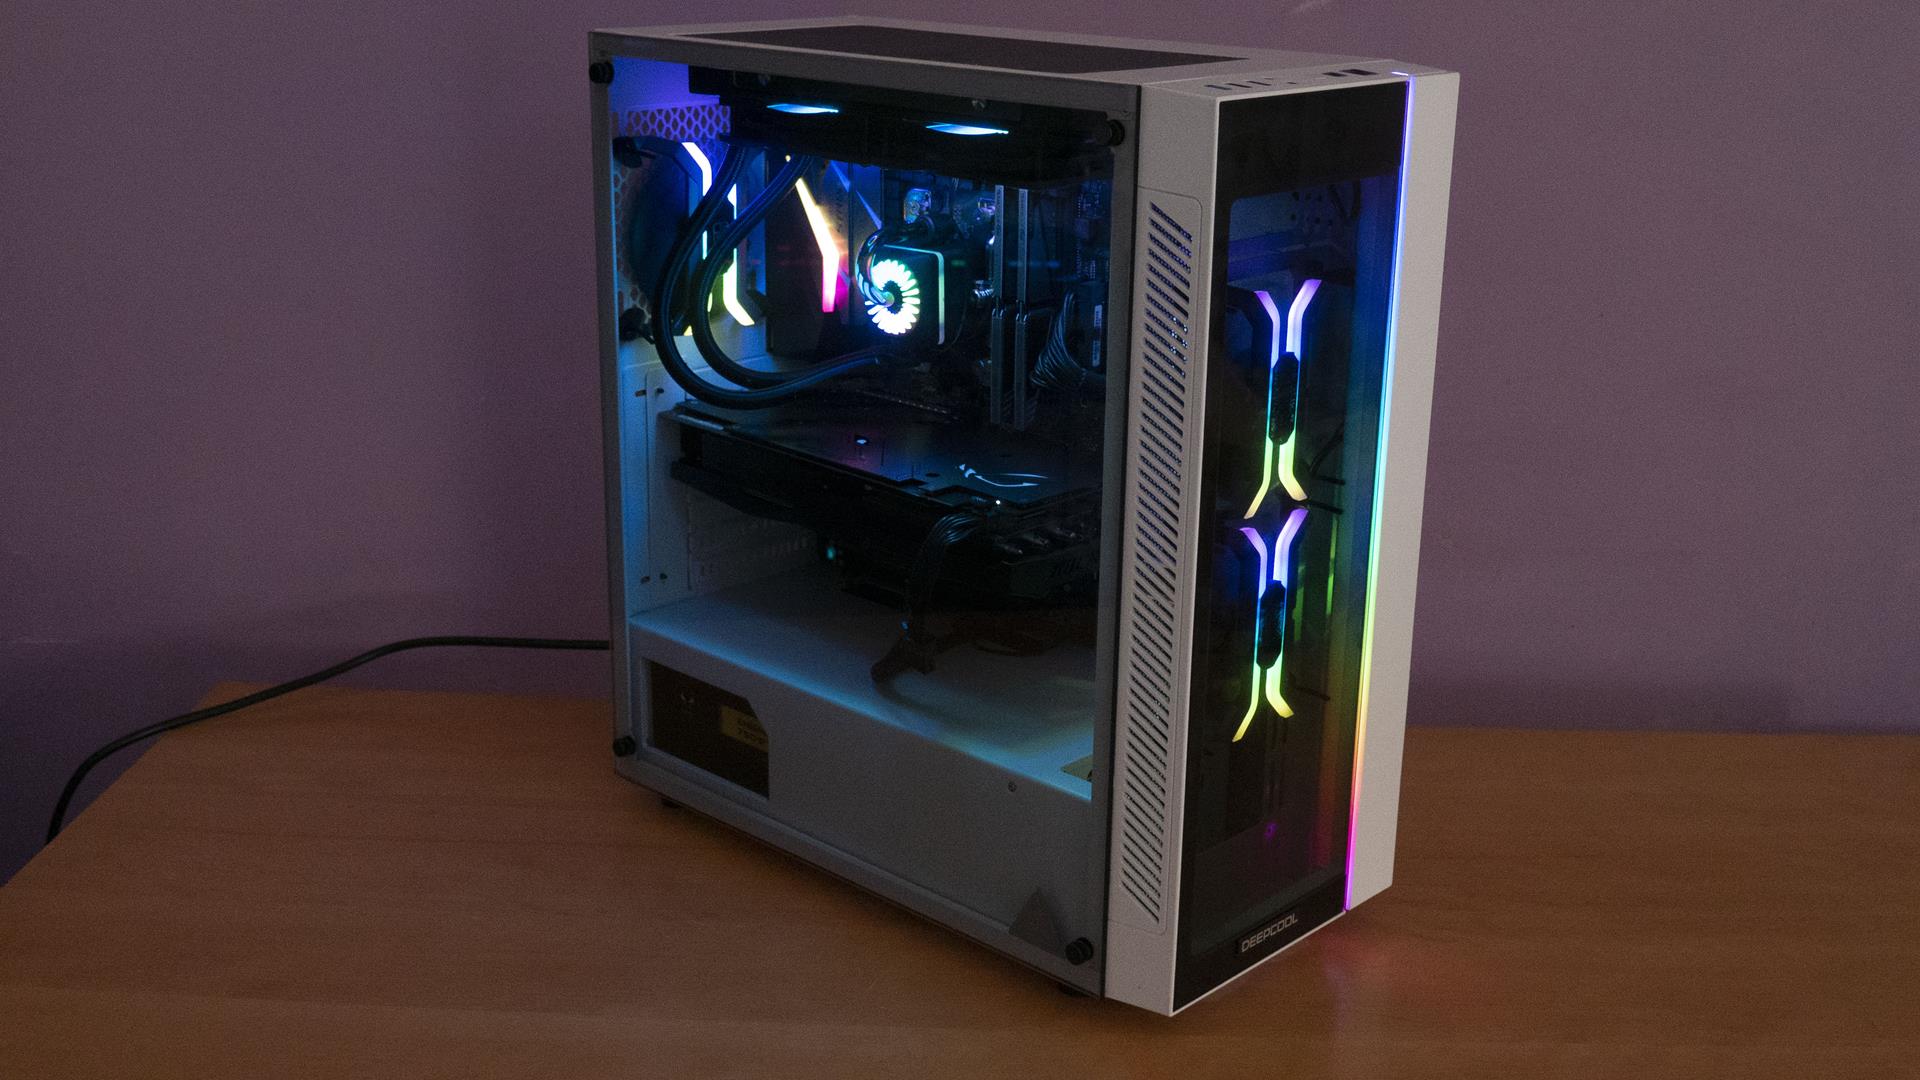
Final Build
Test Build
These are the specifications of the test build:
- Asus Maximus IX Code
- Intel i7 7700k @ 4.2GHz
- Corsair Vengeance 4x8GB @ 2666MHz
- Corsair H100i V2
- Corsair ML Pro 120 RED LED (One on the rear and two on the top)
- Asus Strix Rx 480 O8G
- Zotac T400 120GB SSD [For OS]
- Samsung 840 EVO 1TB SSD [For Games]
- WD 6TB Black
- Thermaltake Tough Power DPS-G RGB 750W PSU

The motherboard was an easy fit. I did not encounter any incompatibility for the motherboard. Installation was a breeze and comfortable process without any hick ups.

I did not spend enough time with the cable management but this picture would help you to have an idea how much space this chassis has when it comes to the cable management.

Overall, the test build was very damn looking good once it was done.
Thermal and Acoustic Performance
To check the thermal performance of the chassis, CPU and the graphics card were put under stress tests. Furmark was used to stress test the graphics card at 1920 x 1080 at 8x MSAA. CPU was put under stress test at the same time using AIDA64. Microsoft Windows 10 x64 was used.
All the reported temps are in degree C. Room temp was at 35C. The summer season has started here and it is already getting heat up here. All the fans were set at custom fan curve with changes according to the temperature.


Foneso Digital Sound Level Meter version A0 was used to test the sound level of the chassis.

Thermal performance of the NZXT S340 is good. We got good temps across the board. 30dB was the sound during the stress test. During routine desktop use system was dead silent.
I did not include the thermal and acoustic data of the Chassis reviewed on the X99 platform.
Final Thoughts
The NZXT S340 is a compact mid-tower chassis. It has a unique and simple design with top notch build quality implemented in SECC steel and plastic. The unique thing about it is the 360-degree steel reinforcement on the steel chassis which is quite impressive and phenomenal design aspect. The front panel is made of plastic and covered in steel. Despite being that compact it can host up to 280mm AIO on the front side. The user can mount 240mm radiator up top. Total 4 fan mount locations are available out of which 1 is strictly 120mm while others are 120/140 mm implementation. Total 6 storage drives can be installed with 2 2.5” SSDs on the top of the PSU shroud to maximum utilize the compact size. There is a grommet-less cable management bar which is at the heart of this chassis’ cable management and NZXT has delivered quite a remarkable solution in this regard. Top side can have only one fan. Both panels and PSU cover have captive thumb-screws which is a plus. I have only one complaint. The front panel has a depth of 30mm. Should it be like 35mm or so, we can easily mount two fans right upfront between the panel and the chassis.
Value
The NZXT S340 is listed at $69.99 / PKR 11,300. Possibly the best value one can get from such a compact chassis with loads of potential.
Performance
Thermal performance of the chassis was good. CPU hit a maximum of 68C whereas the graphics card hit 67C. All this with just 30dB is very impressive. Overall look and feel of the chassis are superb and it comes recommended from my side.
Based on its performance and build potential this chassis has won our Performance Award.

I’m thankful to M/s PakDukaan for giving me the opportunity of reviewing this unit.


