










Alphacool Apex 1 AM5 CPU Water Block: A Must Have for AM5 Platform
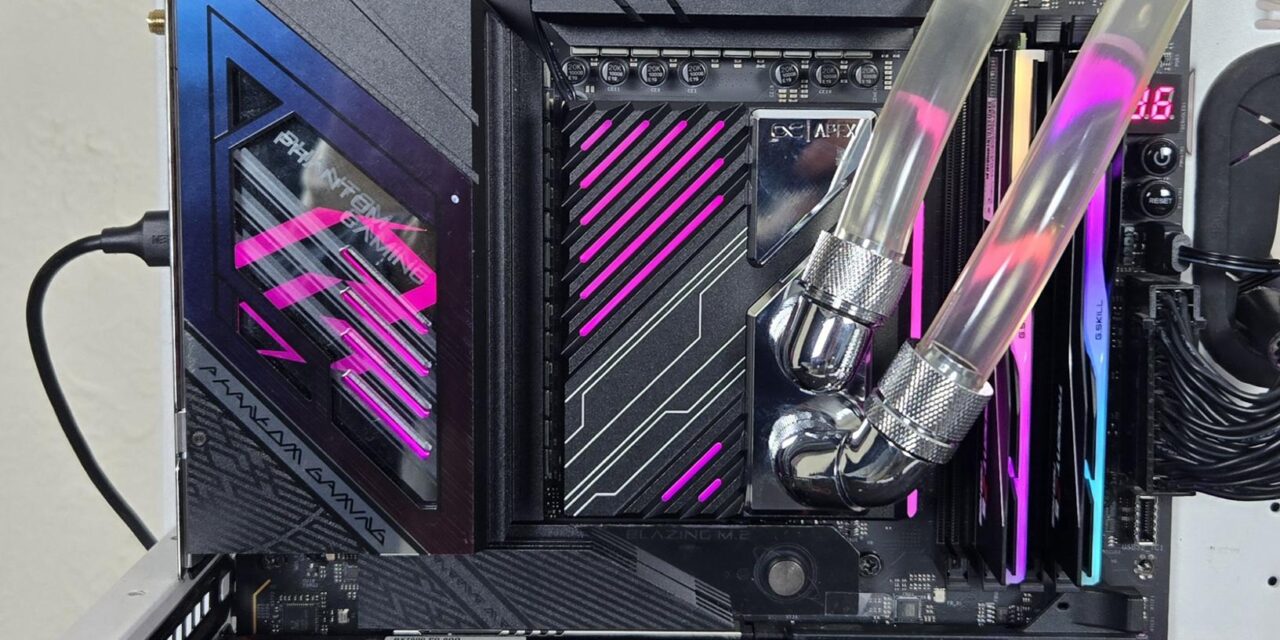
Apex is the premium line or category of products from Alphacool where the manufacturer provides ultimate cooling performance, top-notch materials, and robust design. Alphacool’s Core 1 series of CPU Water Blocks has established itself as an excellent cooling solution. Alphacool has also released CPU Water Blocks under the APEX branding. The Apex 1, to be exact to match the naming convention with the Core series.
The Apex 1 CPU Water Blocks are available in two configurations:
This implies that these blocks are socket-specific and, as such, can’t be used on any other socket. By using dedicated blocks for each socket, Alphacool can provide a specifically designed solution that covers the hot spot of the respective CPU, which is not possible in a one-solution-for-all design. However, this is also a caveat at the same time, should the user want to switch the platform, the block needs to be changed as well.
Alphacool has introduced Jet Plate 2.0 in the Apex CPU water blocks to create even more water/coolant pressure, and to accomplish this, a new pre-chamber design is introduced that calms the incoming coolant and evenly spreads it over the jet plate.
The copper base is nickel-plated and is precisely CNC-machined. To make it more attractive, the block is designed in a way that block covers the CPU and the mounting holes, providing a neat and uniform look.
I am taking a look atthe Alphacool Apex 1 AM5 CPU Water Block, which hasan MSRP of €169.98 and comes with a 5-year warranty.
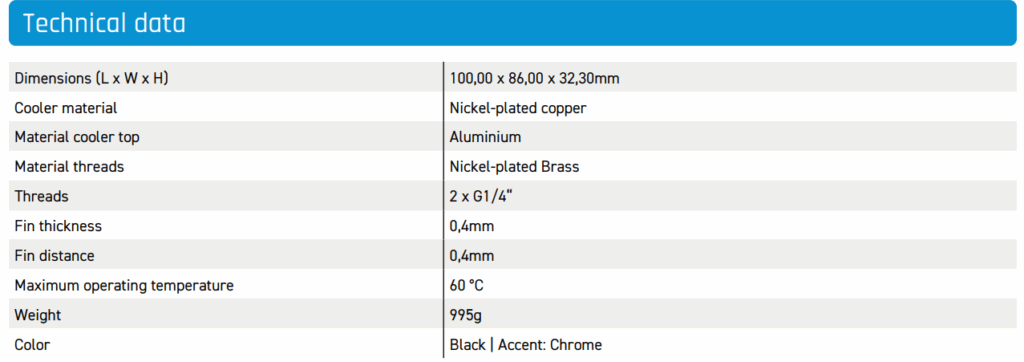
Specifications
Packaging and Unboxing
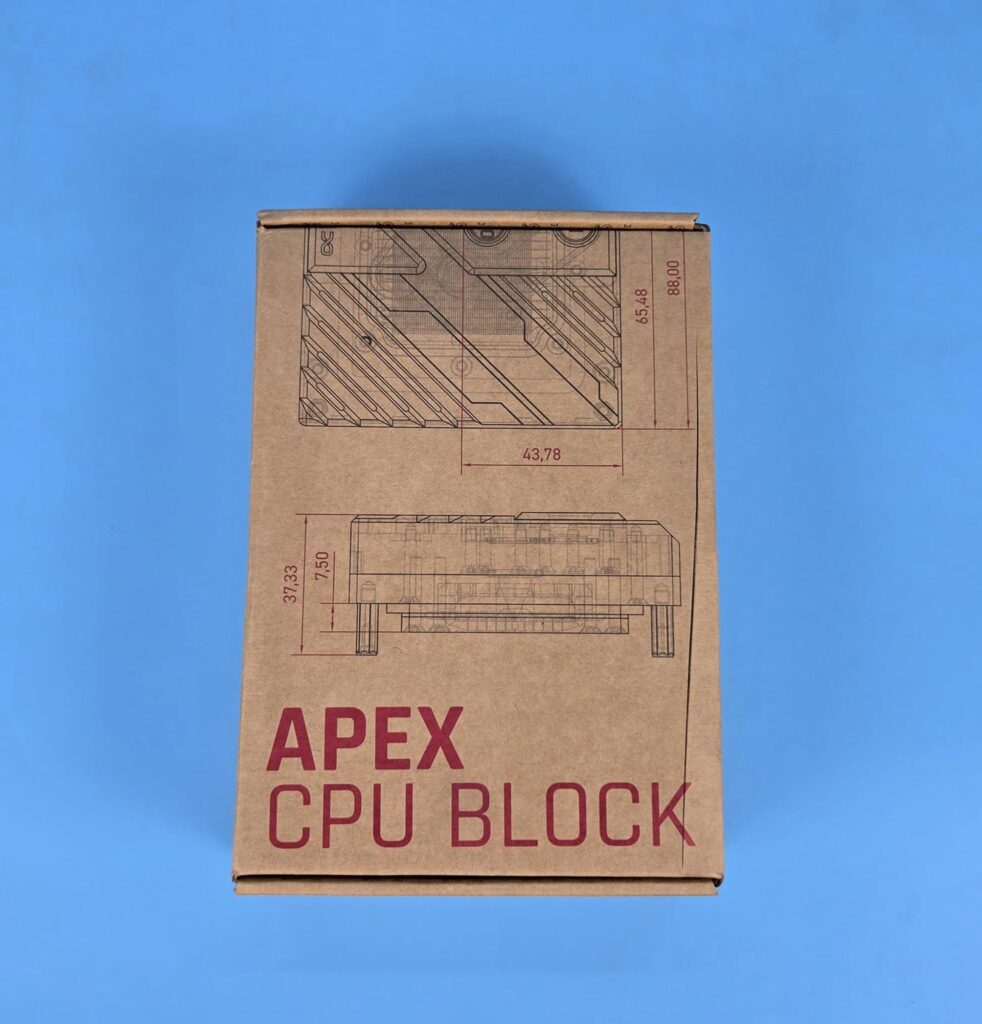
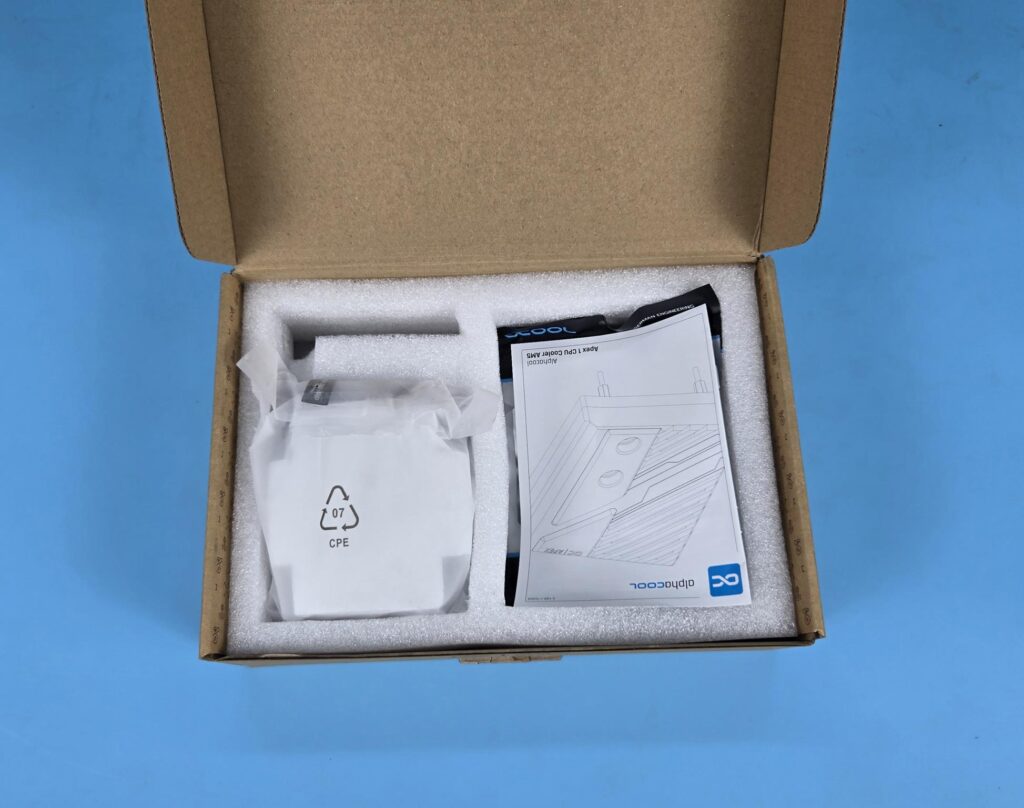
The shipping box of Apex 1 is relatively thicker than the Core 1 shipping boxes. It is made of cardboard material and uses the same theme and style as the Core 1 series blocks. Since the water block has an enlarged dimension and it is quite heavy, a dense white Styrofoam pad is used inside the shipping box to securely contain the cooler.
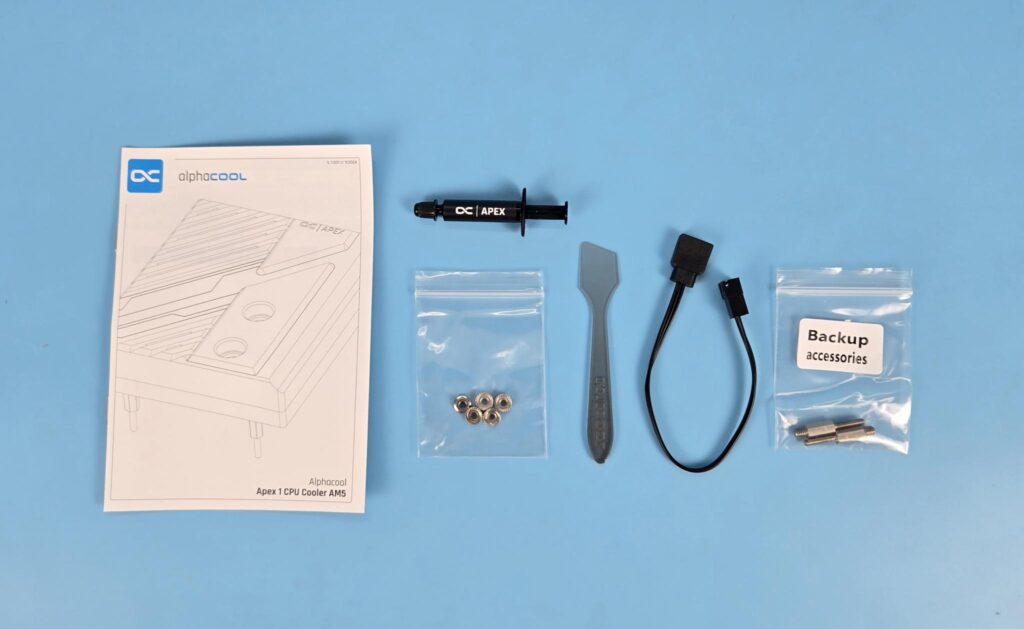
The following are provided:
- 1x Cooler
- 1x Apex Thermal Paste Tube
- 1x Applicator
- 5x M5 Flag nut [1x Extra/Spare]
- 1x ARGB Adapter
- 2x Spare Distance Bolt [Extra/Spare]
- 1x User Guide
Closer Look
Let’s start taking a look at the block.
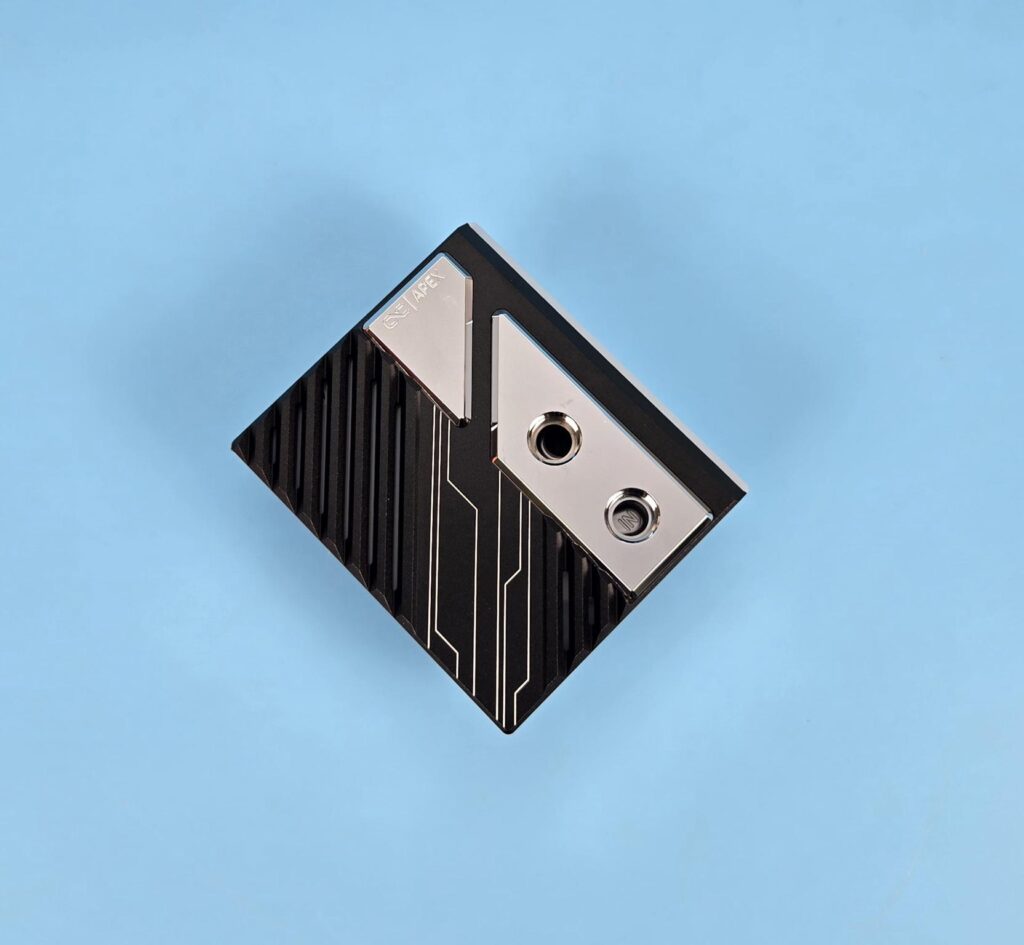
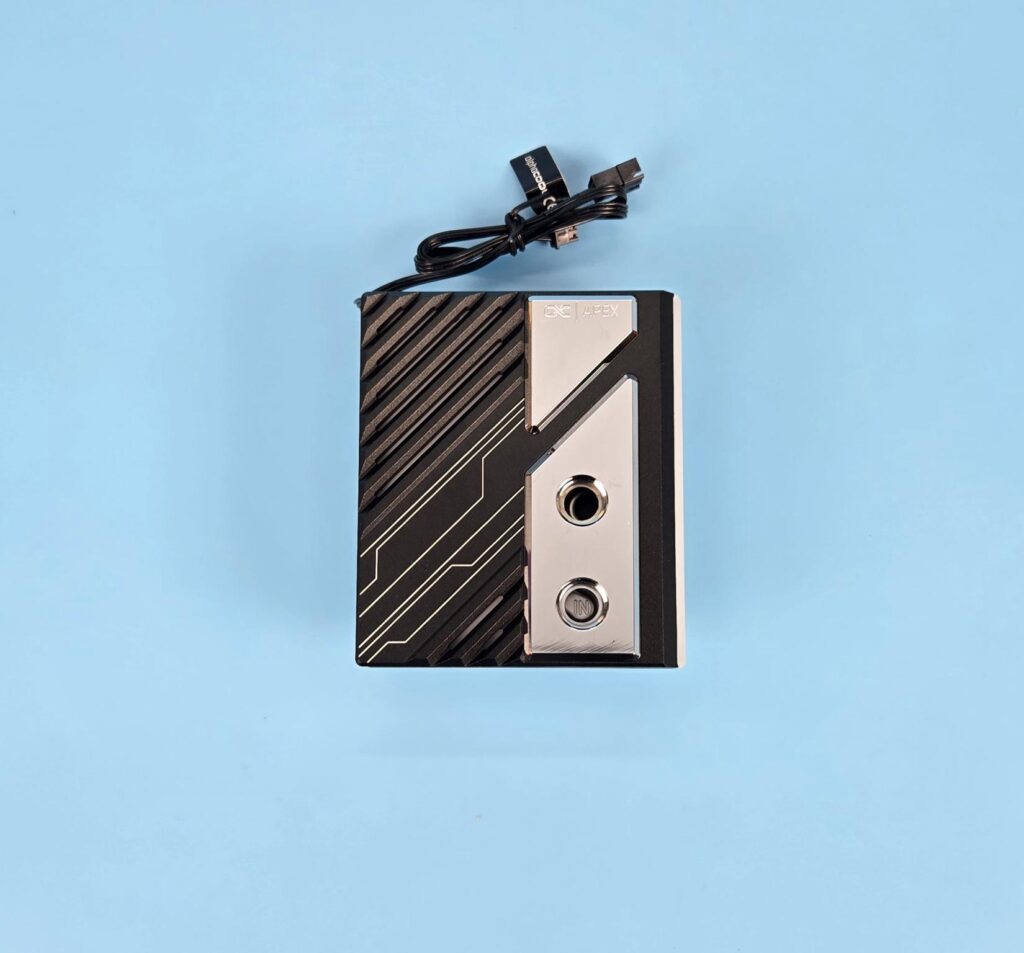
The Apex 1 block has a dimension of 100x86x32.30mm (WxLxH). It weighs 995 gm, which is just 5gm shy of 1Kg. That is why I wrote “heavyweight” above. The top of the block has a stylish line pattern theme layout with an aluminum cover on the right in two parts.
The top part has APEX branding, whereas the lower part has two standard G1/4” threaded ports. The top material seems ABS as it is not metallic except for the aluminum portion. The lines have a diffuser underneath for subtle lighting effects coming from the top center and the bottom portion.
The mid-section has white stenciling, which adds to the overall décor and beautiful outlook of the block.
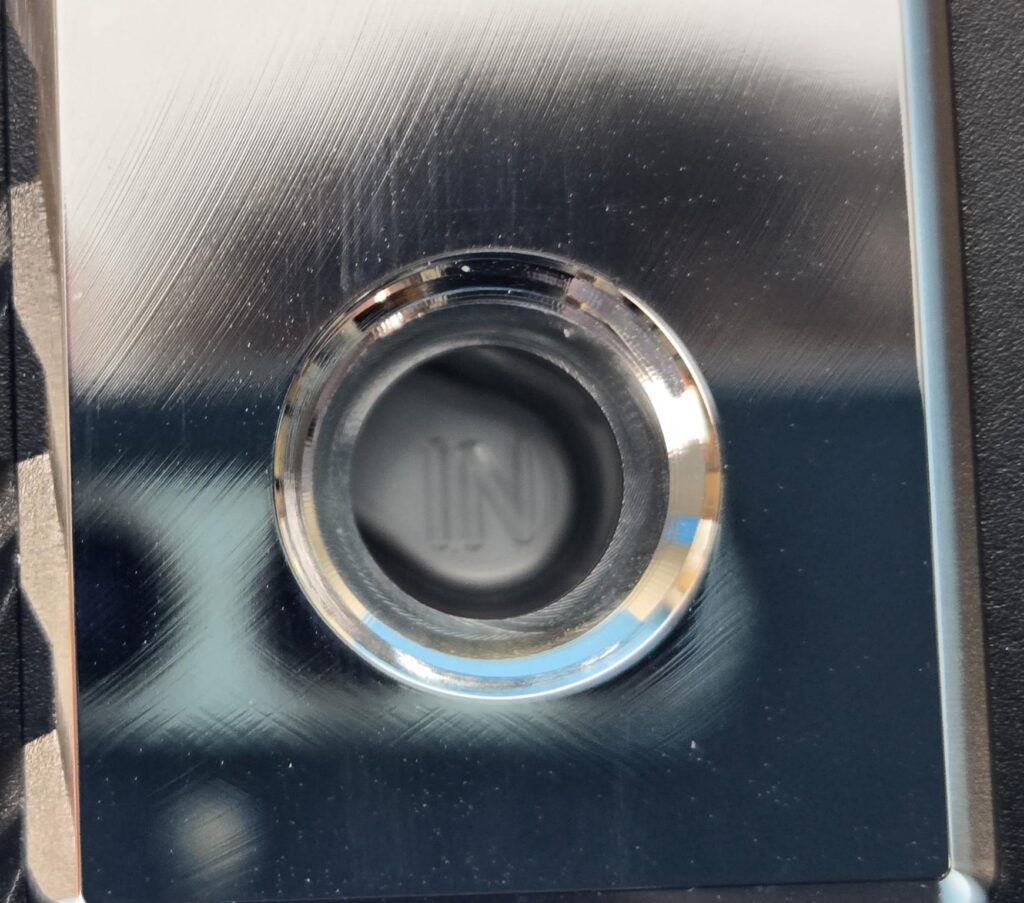
Two ports can be seen on the top of the block. Both use G1/4” threads, and the top port is dedicated to the outlet, and the bottom port is dedicated to the inlet. Pay attention to the order for optimal cooling performance.
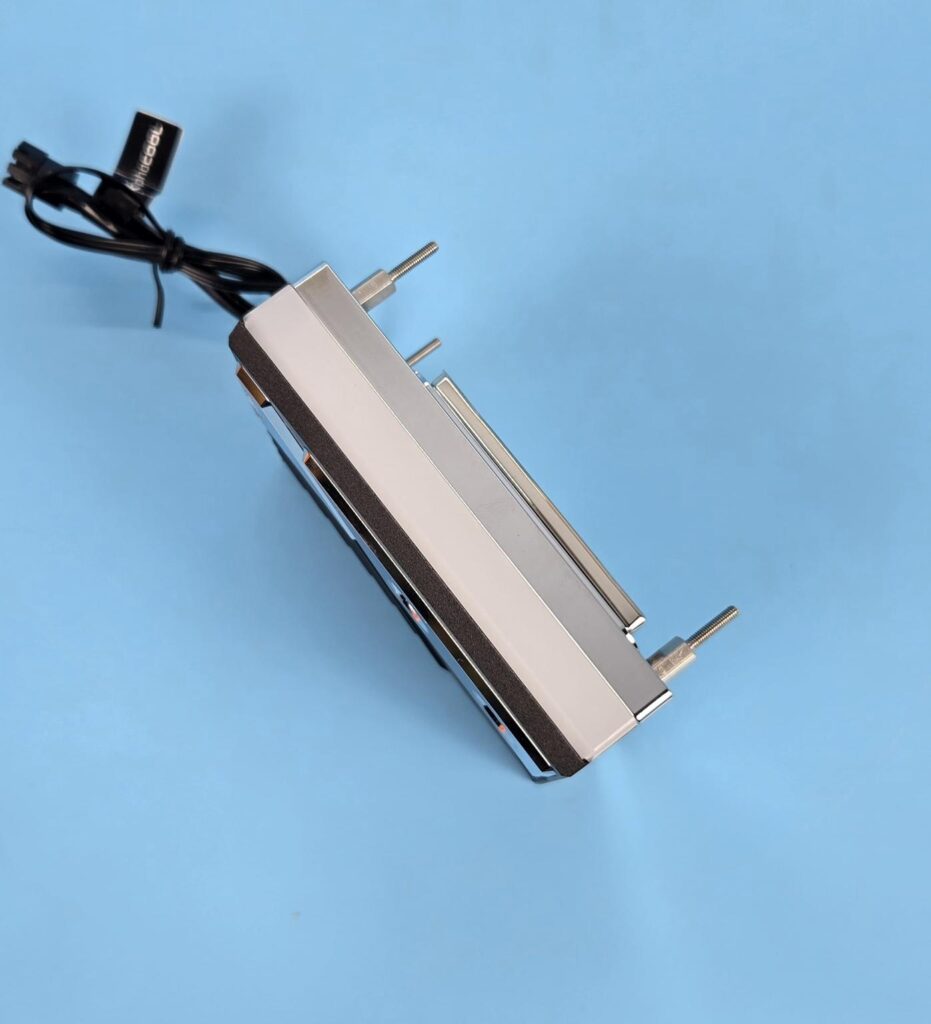
The side of the block facing the DIMM slots has a full-body diffuser with ARGB LEDs underneath. This would enable subtle ARGB lighting towards the RAMs.
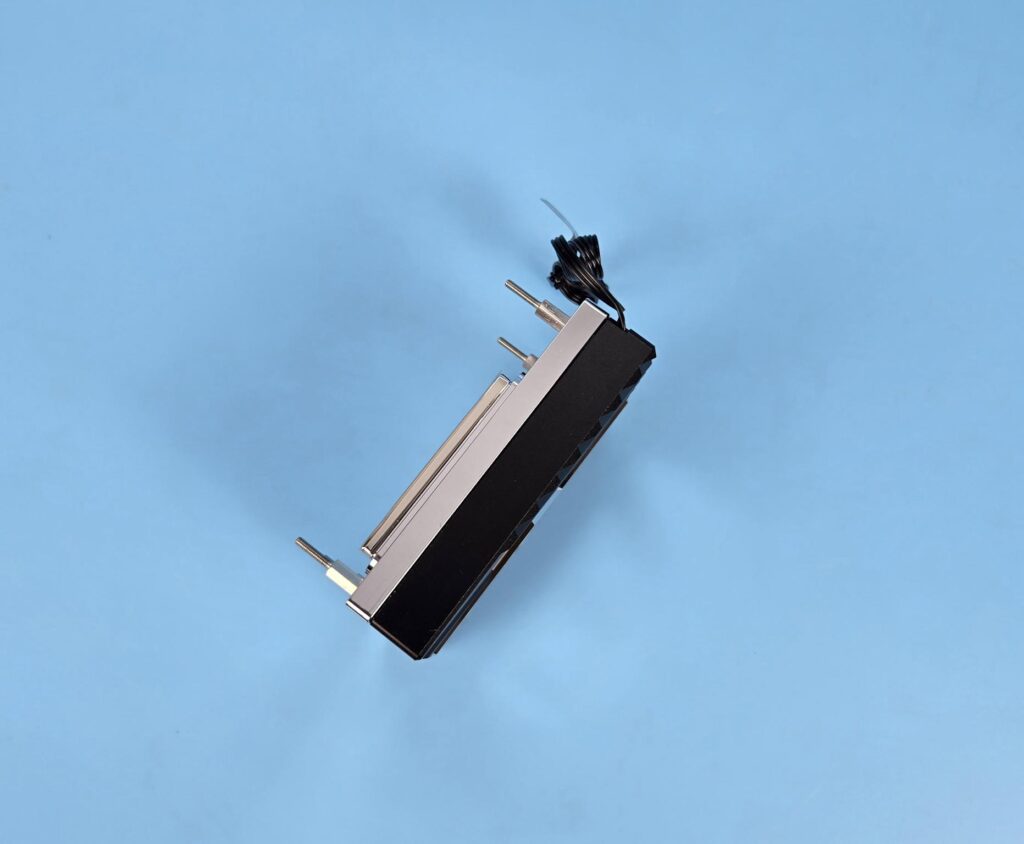
The side of the block facing the rear of the motherboard has a solid black color cover. You can see two tones on the side. The silver color is basically a full-length aluminum block that sits over the main cooling engine, whereas the black portion is the top cover that sits over the aluminum block.
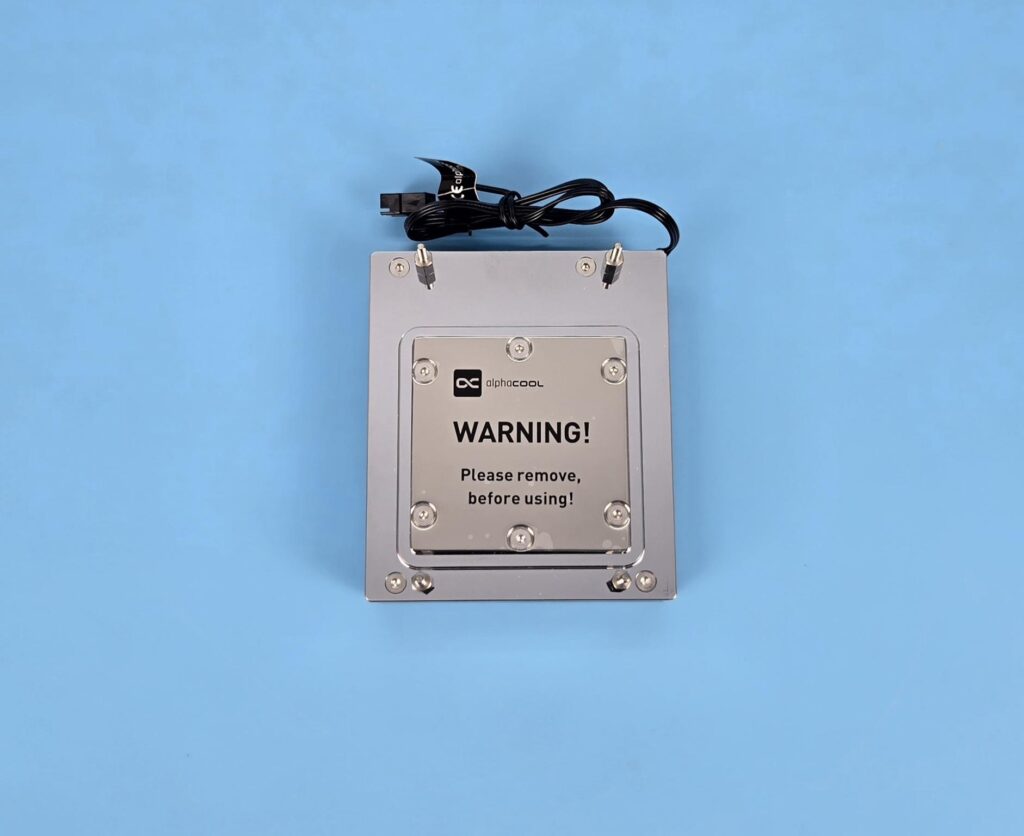
I am showing the base of the block. You can see that the actual nickel-plated copper base has an offset layout compared to the total area of the block. This base and its internal layout favor the AM5 CPUs by covering the hot spot areas under the die. A protective cover is pasted over the base. Don’t forget to peel it off during the installation.
Another key note is the distance bolt or standoff screws that come pre-installed on the block. The thread portion of these bolts is longer since this goes through the mounting holes of the AMD stock backplate. Alphacool has provided 2x spare bolts, which is a wise decision.
If you need to access the cooling engine, only then remove the 6x screws on the actual base. If you want to access the underside of the top cover as well, then you can undo the 4x screws on the main body without removing the 6x screws on the base.
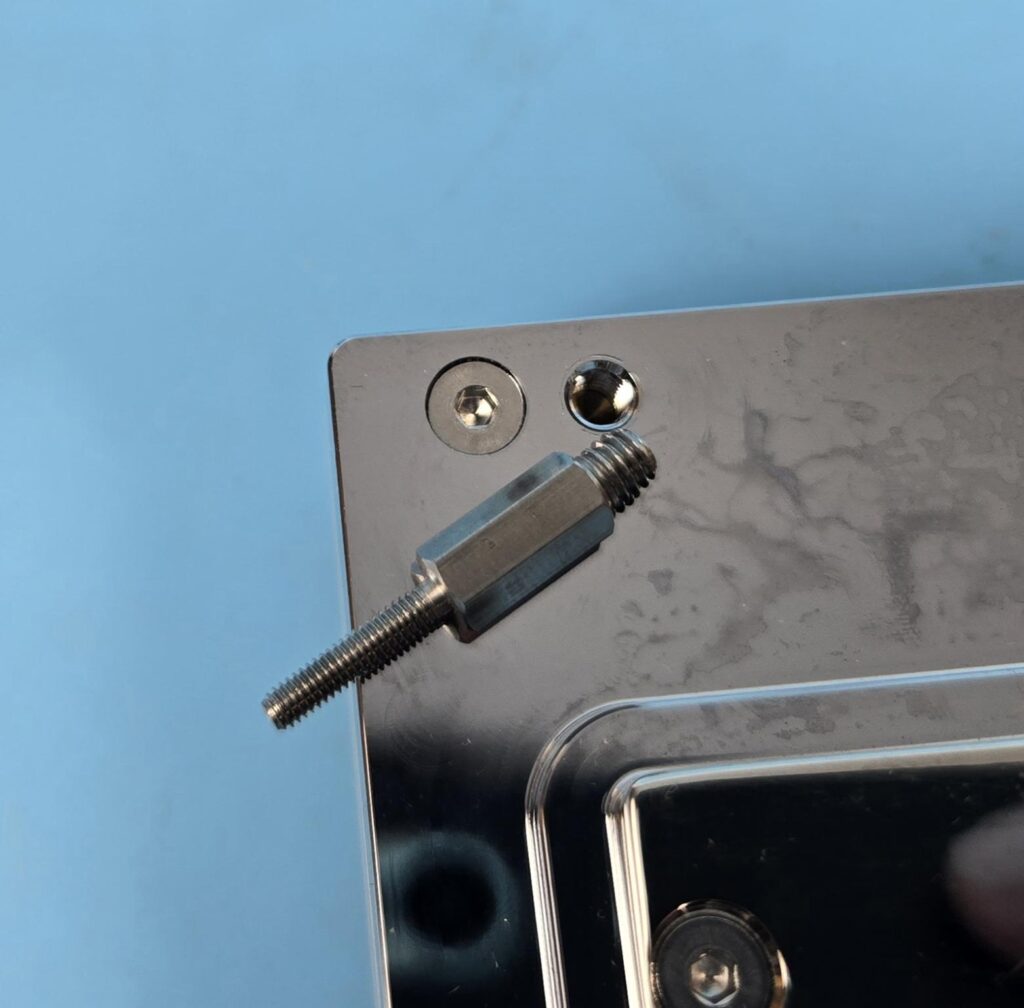
I removed one bolt to show you its modular design and easy replacement.
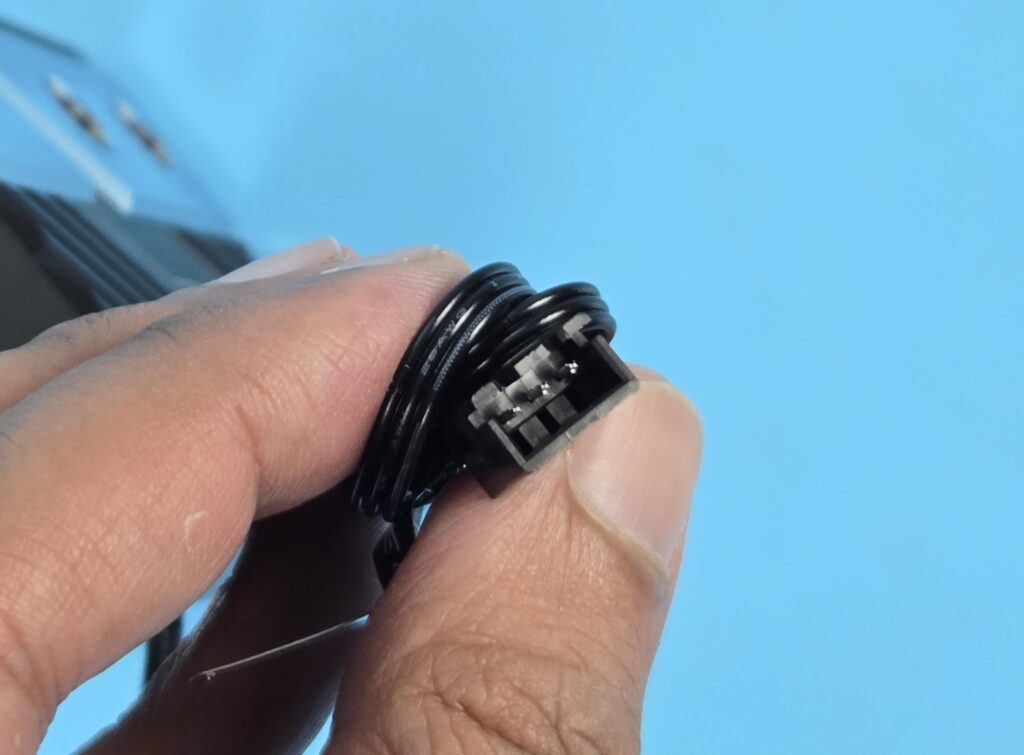
Alphacool has used JST connector on the A-RGB cable. This cable has a connector and socket that allows integration of the block into Alphacool’s Ecosystem. Alphacool has provided a small length adapter cable with sa tandard 3-pin ARGB connector.
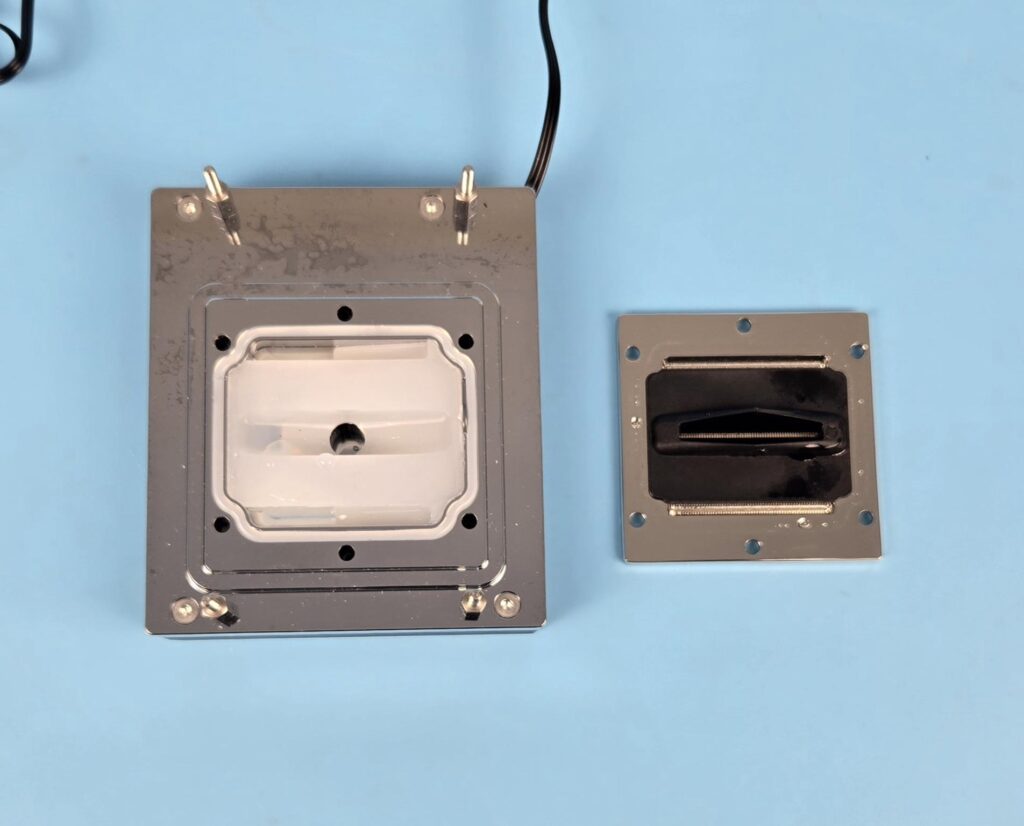
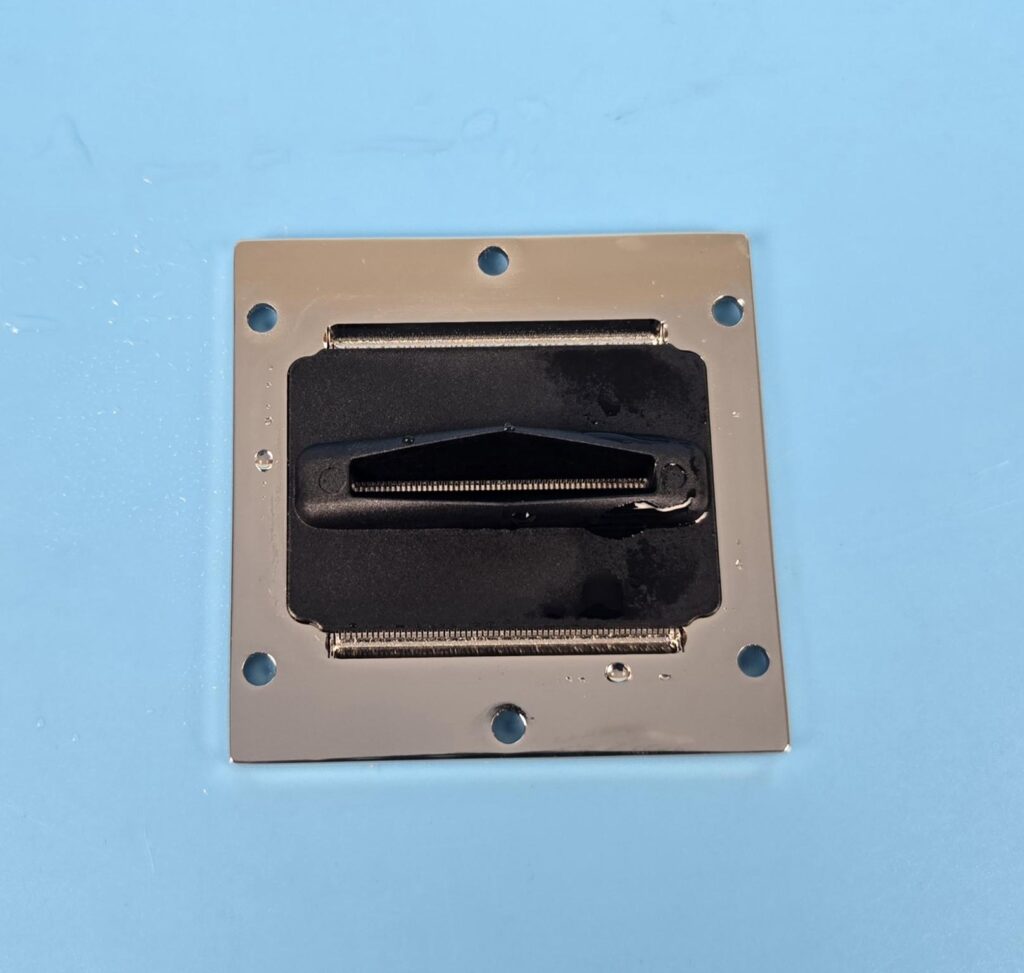
I open the water blocks after doing the thermal testing to ensure that the block is tested on factory settings. You need to undo the 6x screws on the nickel-plated copper plate. After that, simply pull the base, and it will come off along with the Jet Plate 2.0.
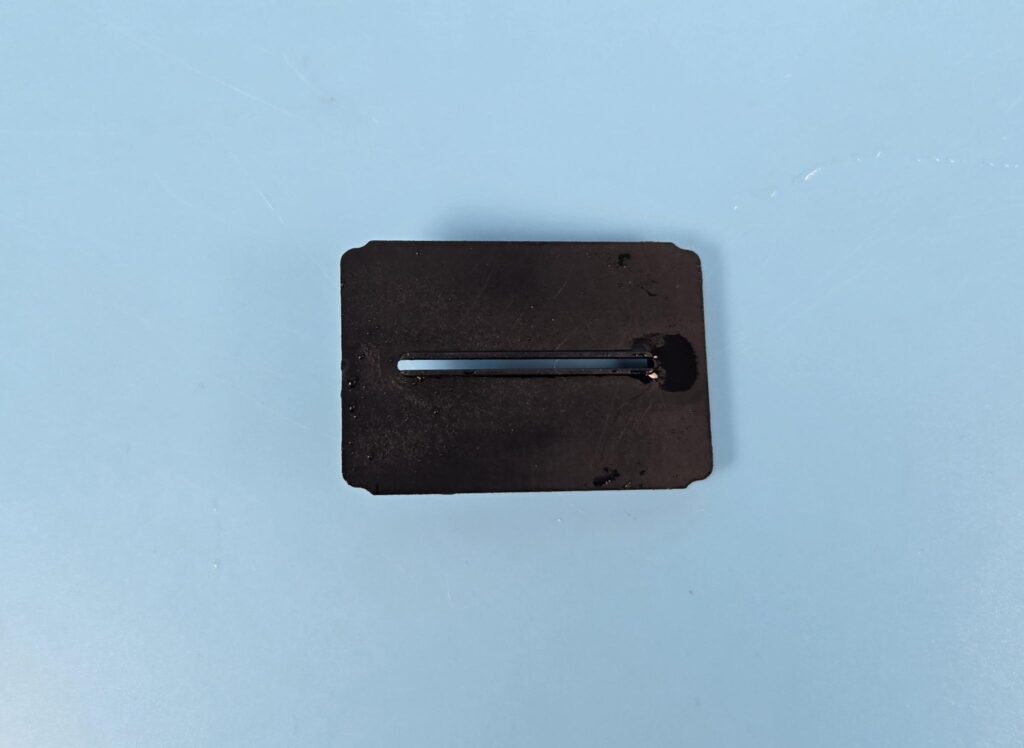
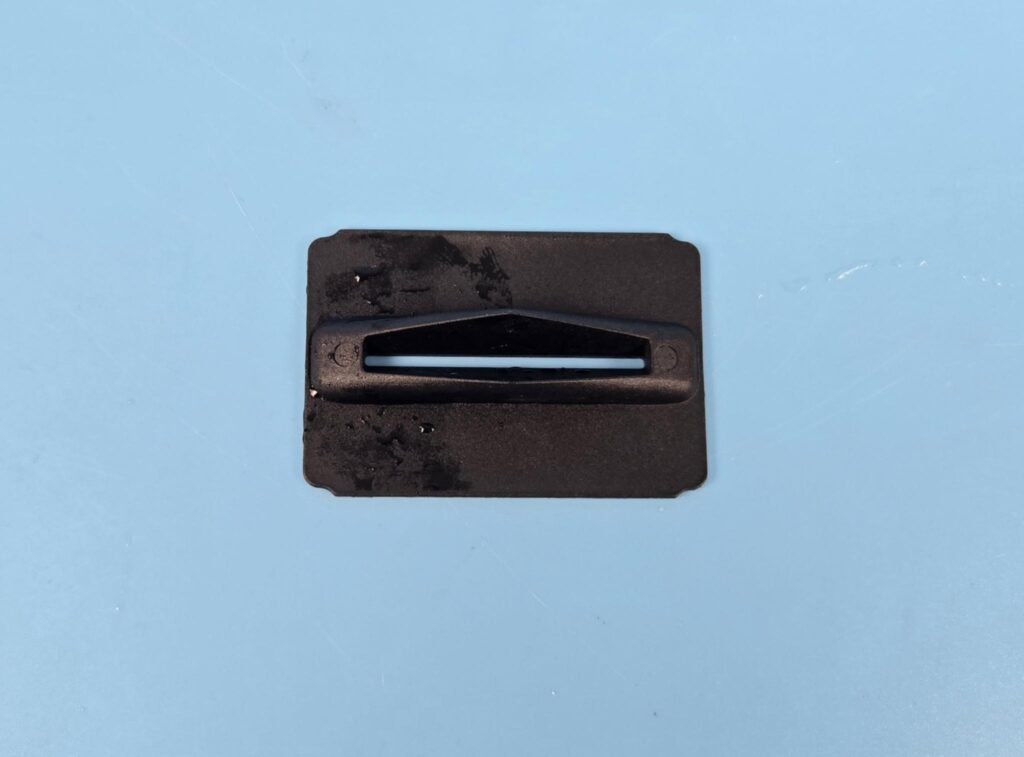
You can see the Jet Plate 2.0 in the pictures. Alphacool has redesigned the Jet Plate compared to the one on the Core 1 blocks. It is wider in the center and narrower on the edges to create increased water pressure and, at the same time, provides an even spread of coolant on the cold plate.
The pressure is created by a same width slit on the bottom of the jet plate that sprays water over the cold plate. Intake is high on the inlet of the jet plate, and a pressured outlet is provided towards the cold plate. Unlike the Core 1 design, there is no gasket between the jet plate and the cold plate; rather jet plate simply sits over the cold plate. The main o-ring or gasket is on the main chamber.
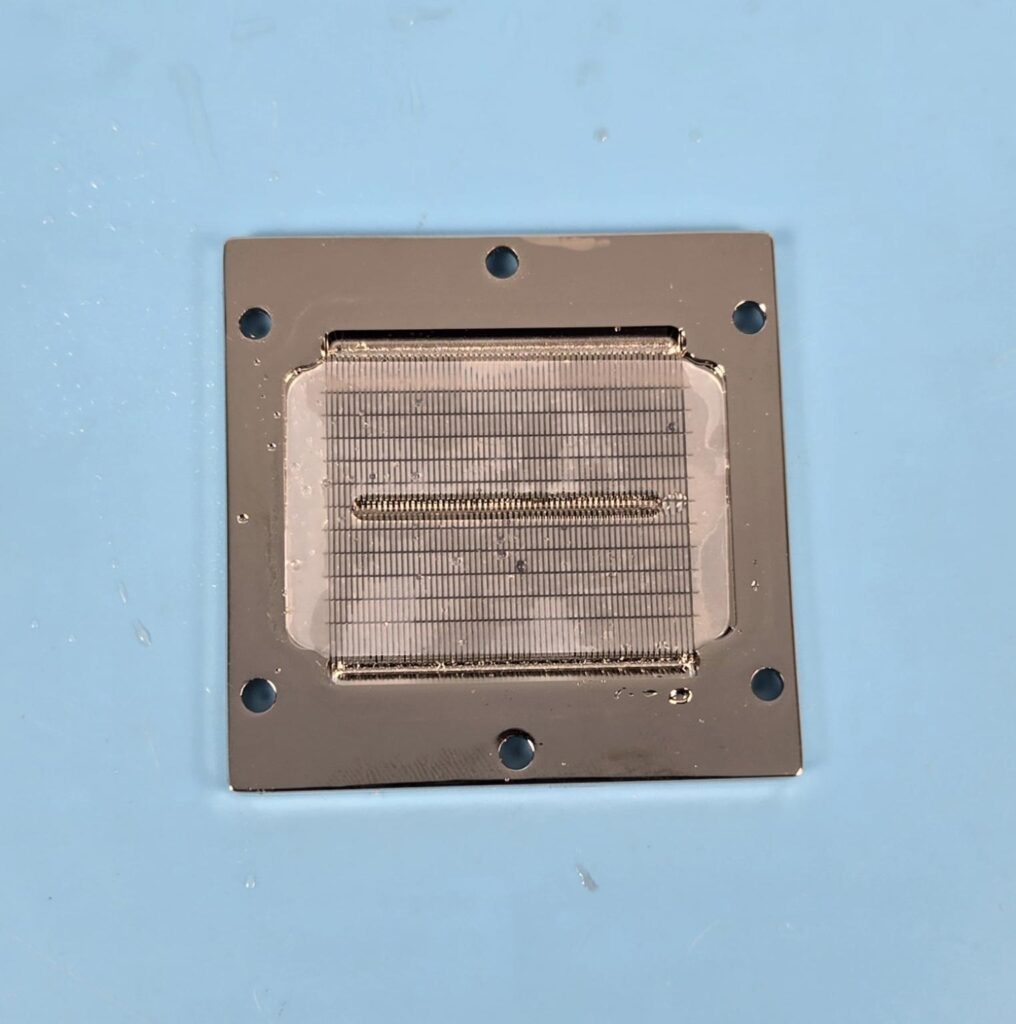
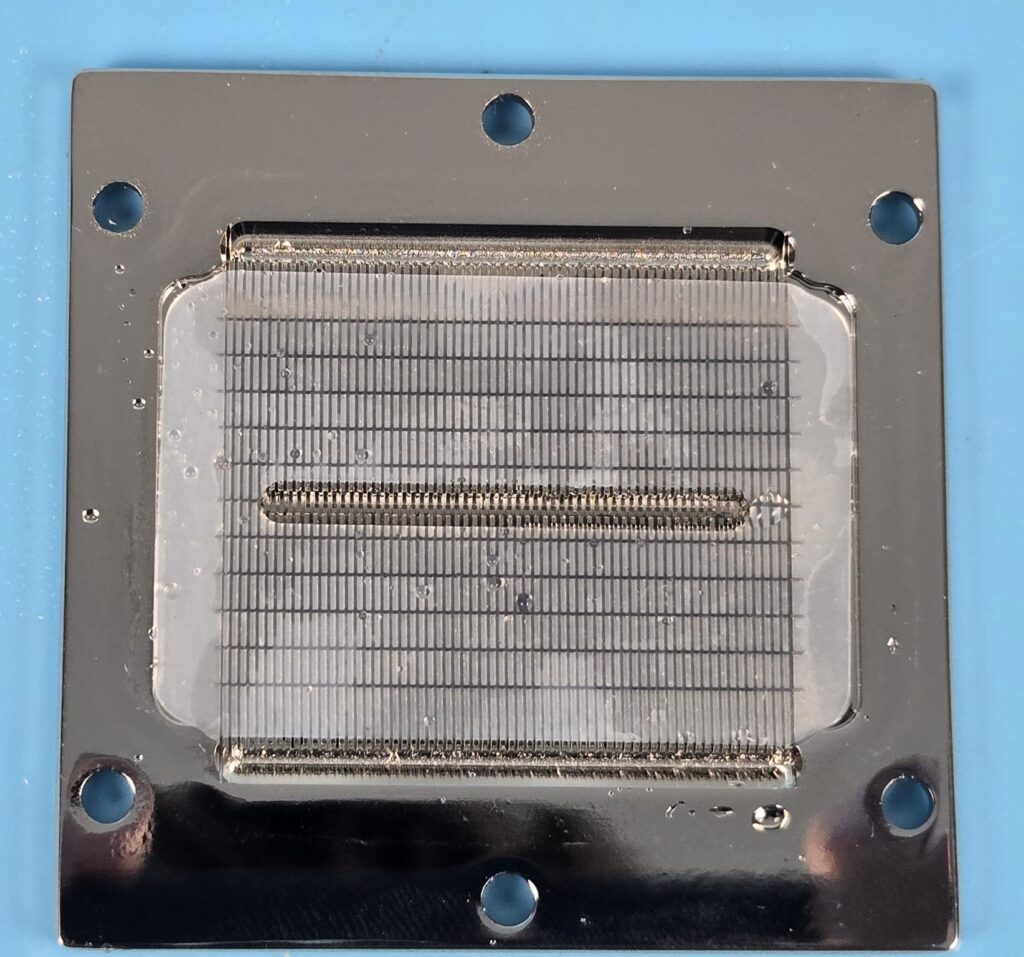
The above picture shows nickel plated copper cold plate. It has a thickness of 4mm as per our measurement. We can spot a total of 12 channels forming a fin stack. The fins are extended towards the edges. Each fin has a thickness of 0.4mm, and there is a gap of 0.4mm between any two fins. This fin stack faces the IHS of the CPU in landscape orientation. If my eyes were working correctly, the fins count is 64, whereas the Core 1 has 65 fins per row. The cold plate design is dense. The center has a slit or inset design. This is where the slit of jet plate 2.0 makes contact with the cold plate.
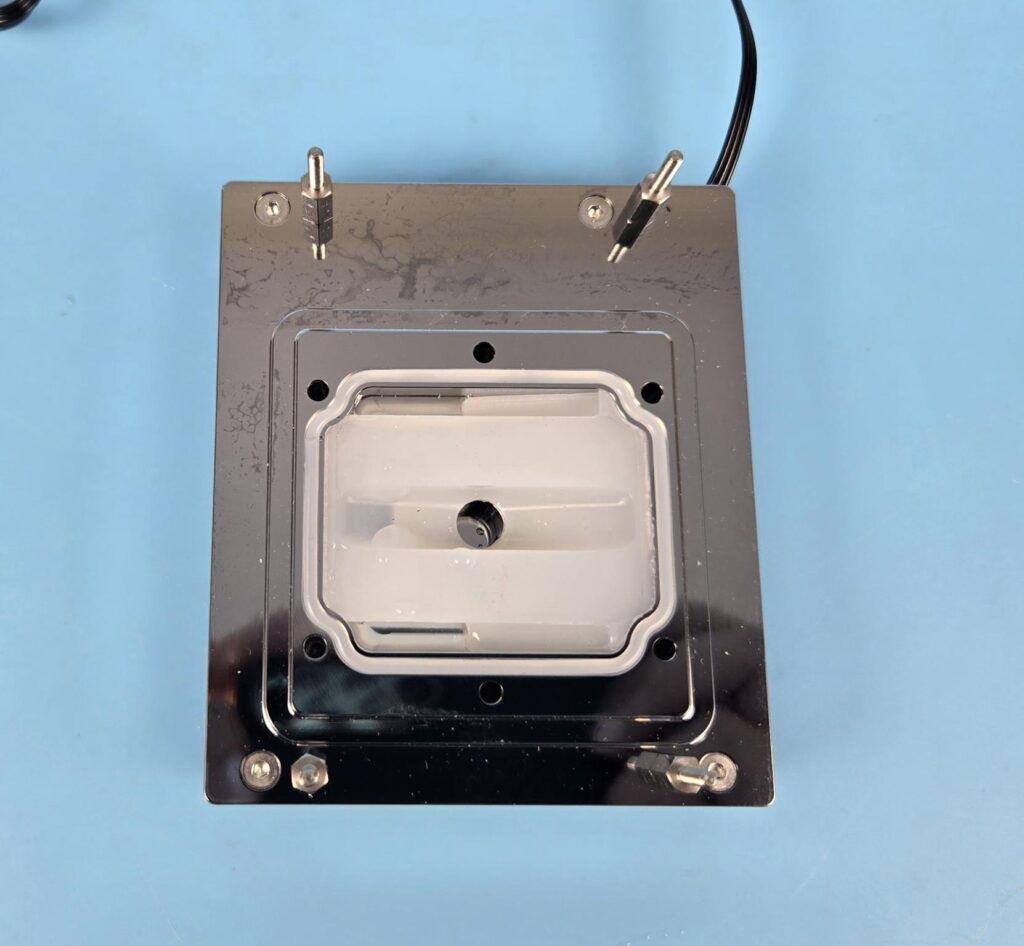
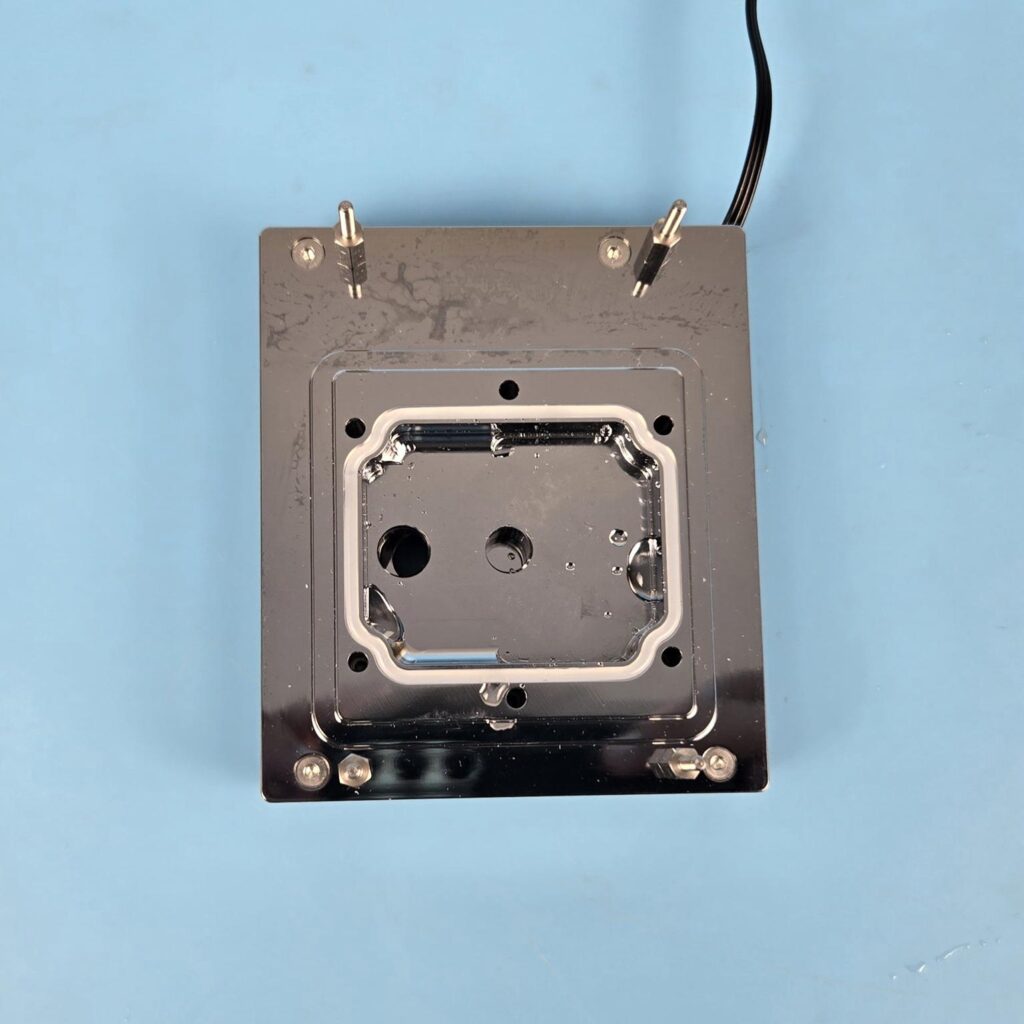
You can see white material inside the main cooling area. This is an inner-chamber design that sits over the Jet Plate 2.0 and the Cold Plate. A white color gasket can also be seen on the border of the main cooling engine or block.
I have removed this inner chamber, and you can see two holes. The left side one is a threaded hole that is dedicated to the outlet of the Apex 1 AM5 water block. The middle or second hole is narrow compared to the left side one, and it is not threaded as well.
Pay attention to the layout. These two holes are aligned horizontally on the aluminum block. But on the outside, the two G1/4” threaded ports are vertically aligned. The middle hole here provides coolant/water to the jet plate from where it goes on the cold plate.
The hot water/coolant comes out from the sides of the cold plate in this block and is moved out from the left threaded hole.
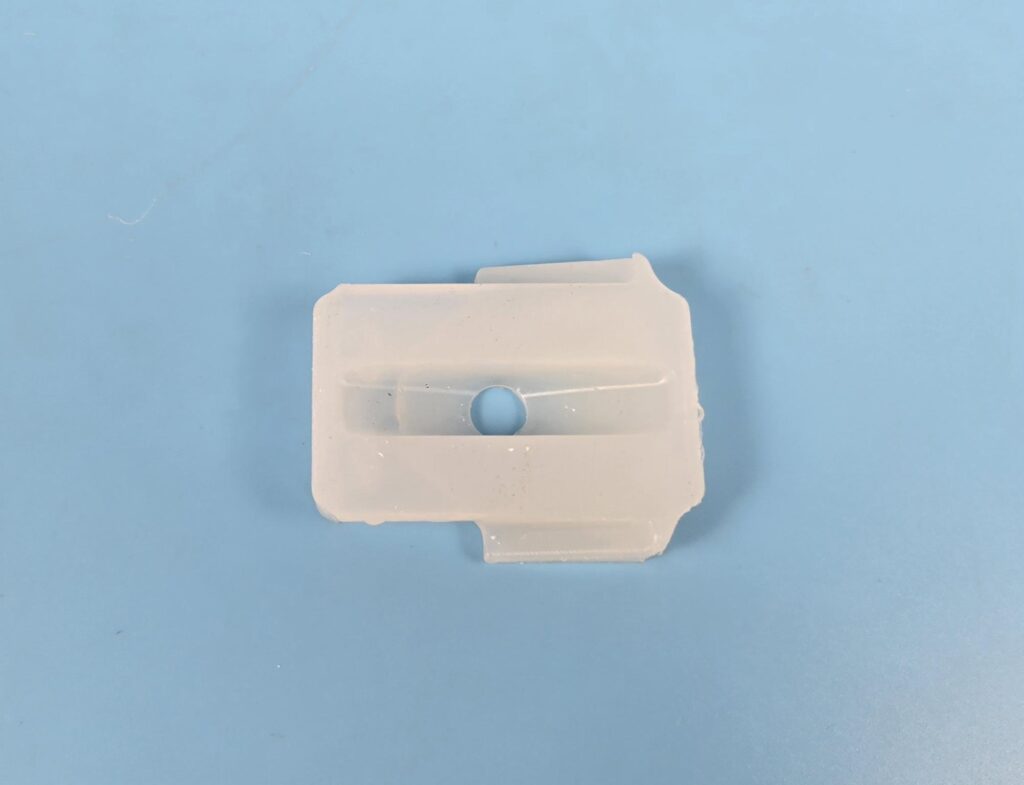
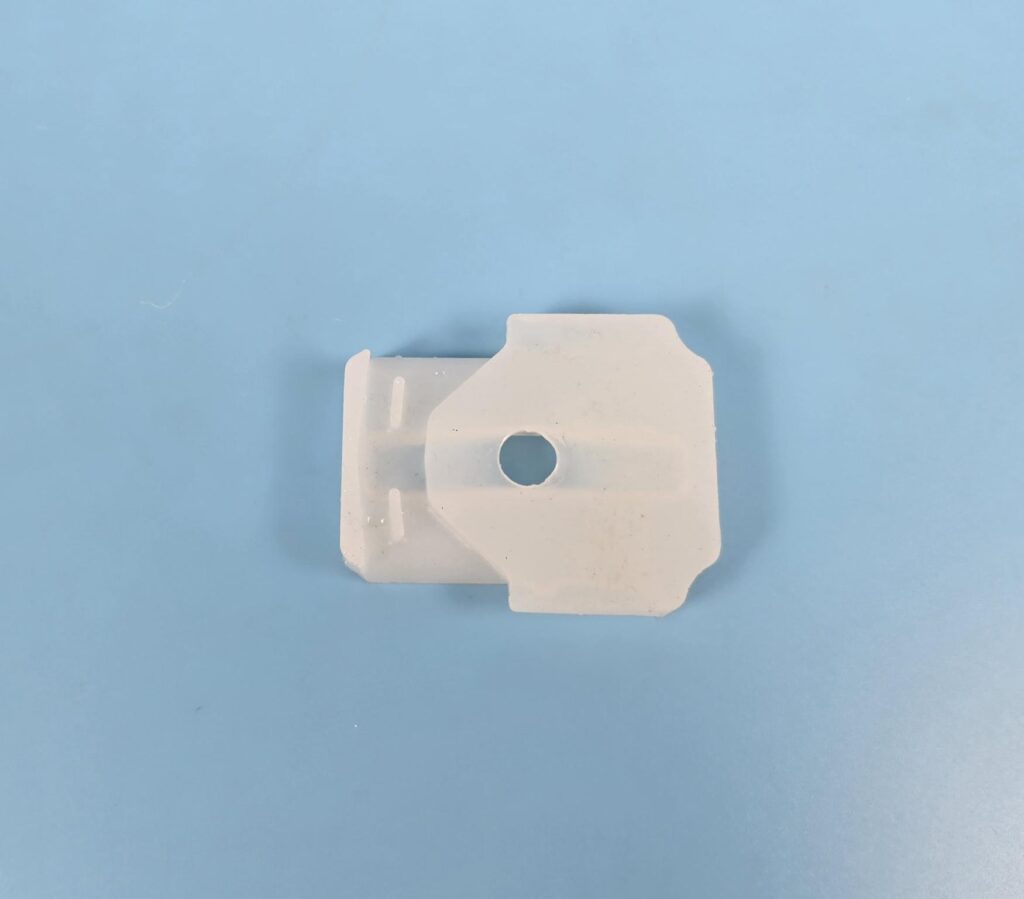
The inner-chamber is made of silicon material and is white finished. The middle inset is where the raised border of the jet plate goes inside.
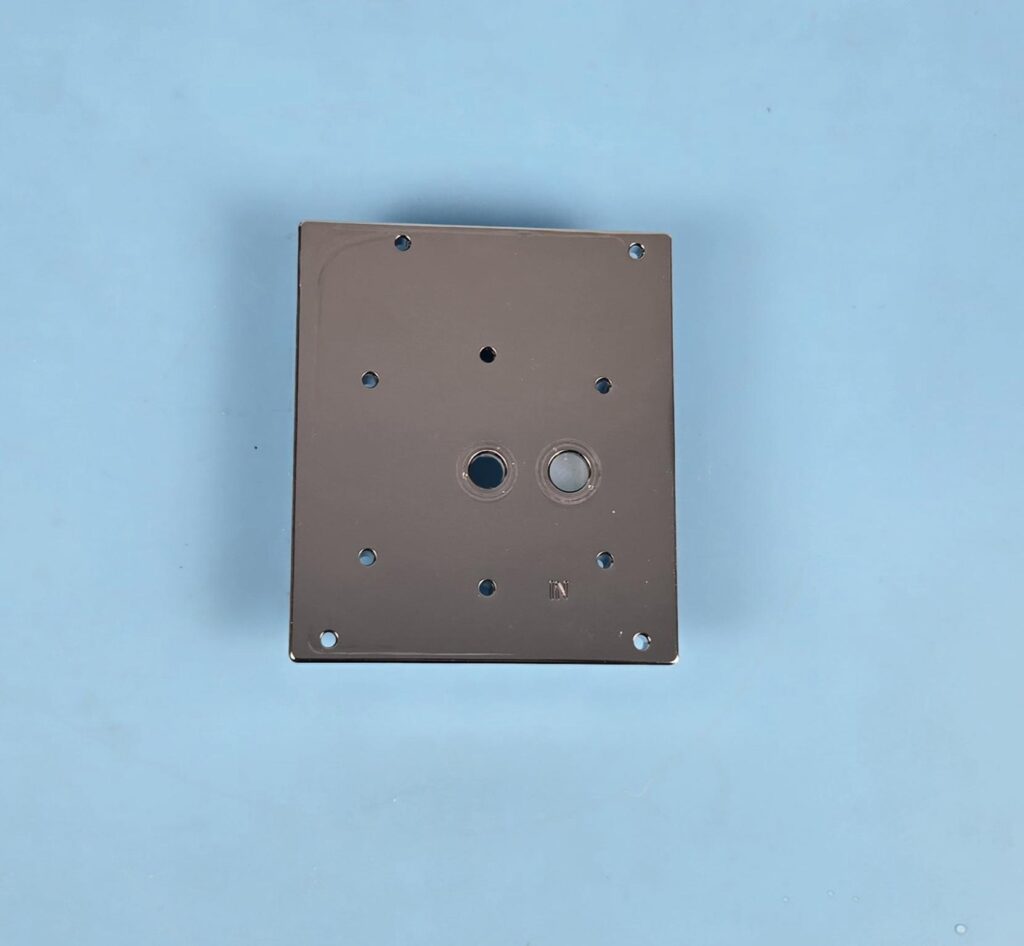
I am showing the main aluminum block that covers the base and on which the top cover sits. The gaskets are not on this block but on the top cover.
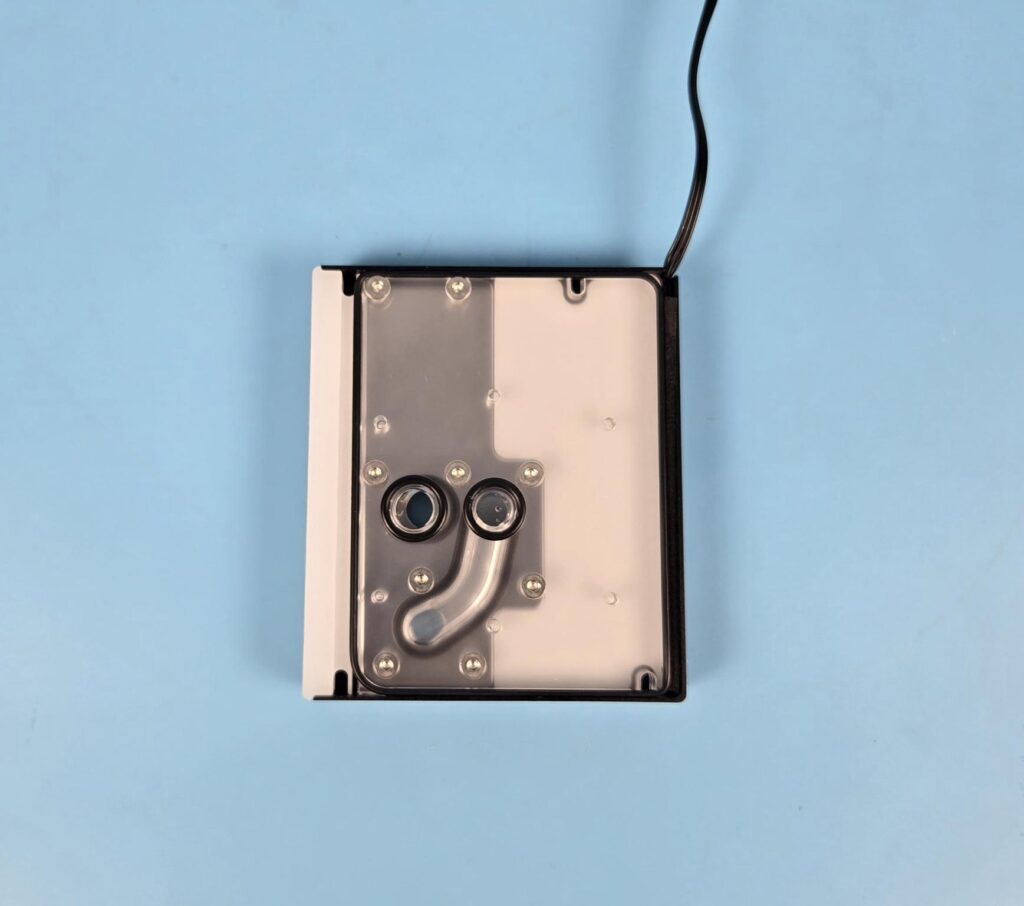
I am showing the inner or underside of the top cover. You can see dthe iffuser on the right and left sides. The main area has a gasket that runs on the border. Two O-Ring style gaskets are also visible above the holes. You can see an internal path or passage from the dedicated inlet port towards the middle hole.
Installation
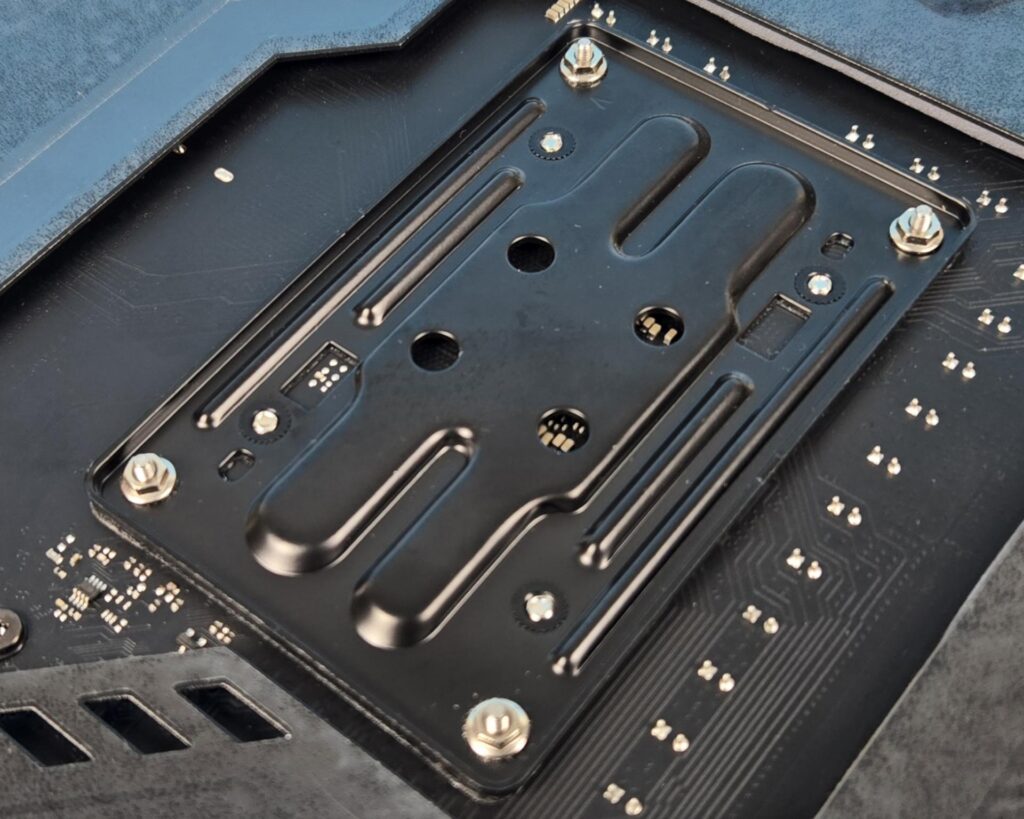
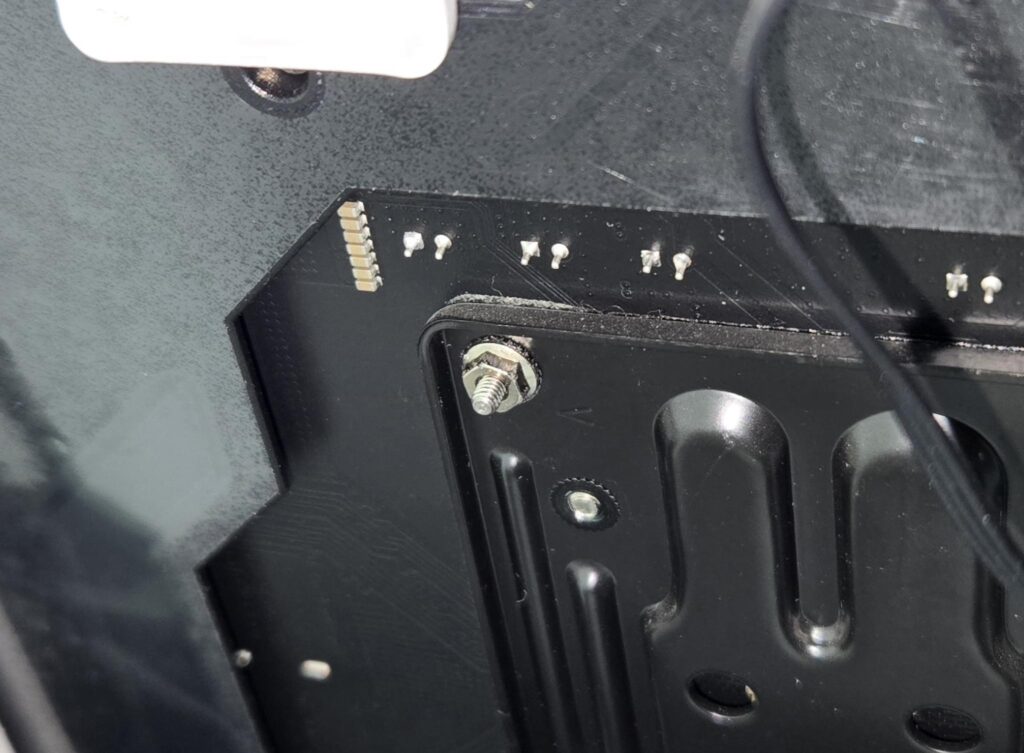
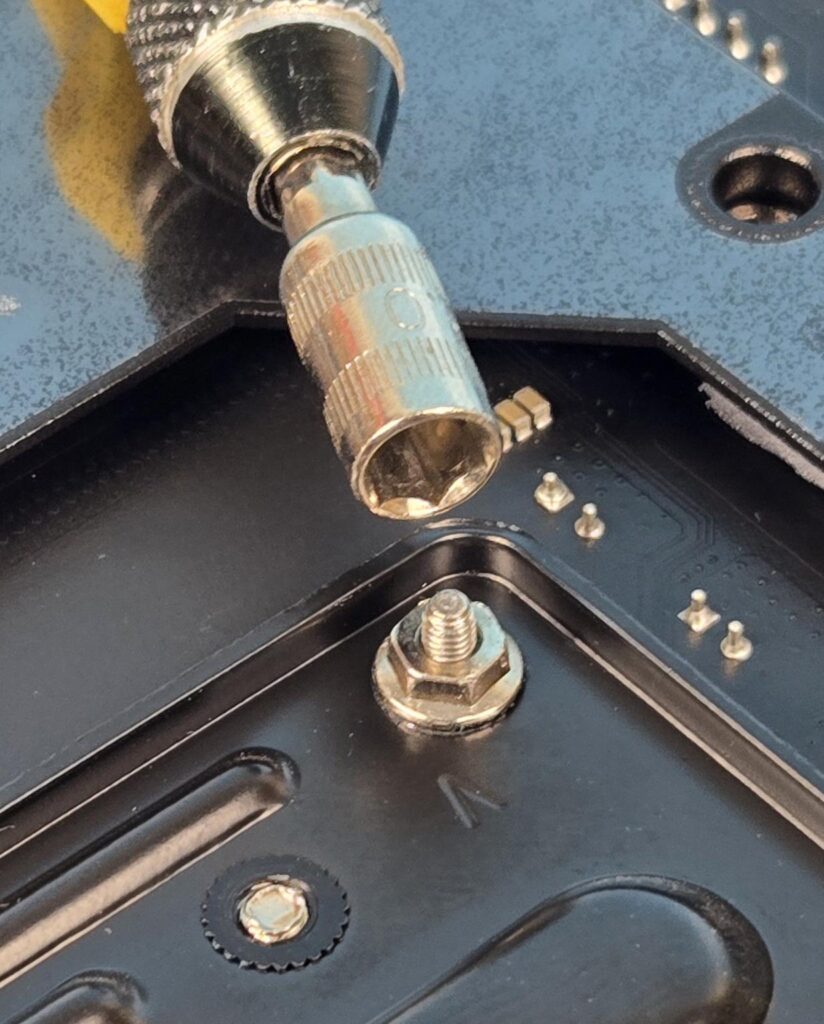
Speaking of the installation of this block, Alphacool seems to be trying to make it simple and straightforward. Yes, they achieved it, but in doing so, they forgot one thing: not everyone may have the right tool to M5 Flag nut. You are required to place the block over the CPU so that the threaded portion of the bolts goes through the mounting holes of the AMD stock backplate, and then use M5 flag nuts to complete the installation.
However, a standard screwdriver has no utility here; rather, you need a relevant socket bit for that, as shown in the picture. Alphacool may consider providing a tool in the accessories. Other than that, it is indeed a simplified installation that I have ever seen on any water block.
Test Loop Setup
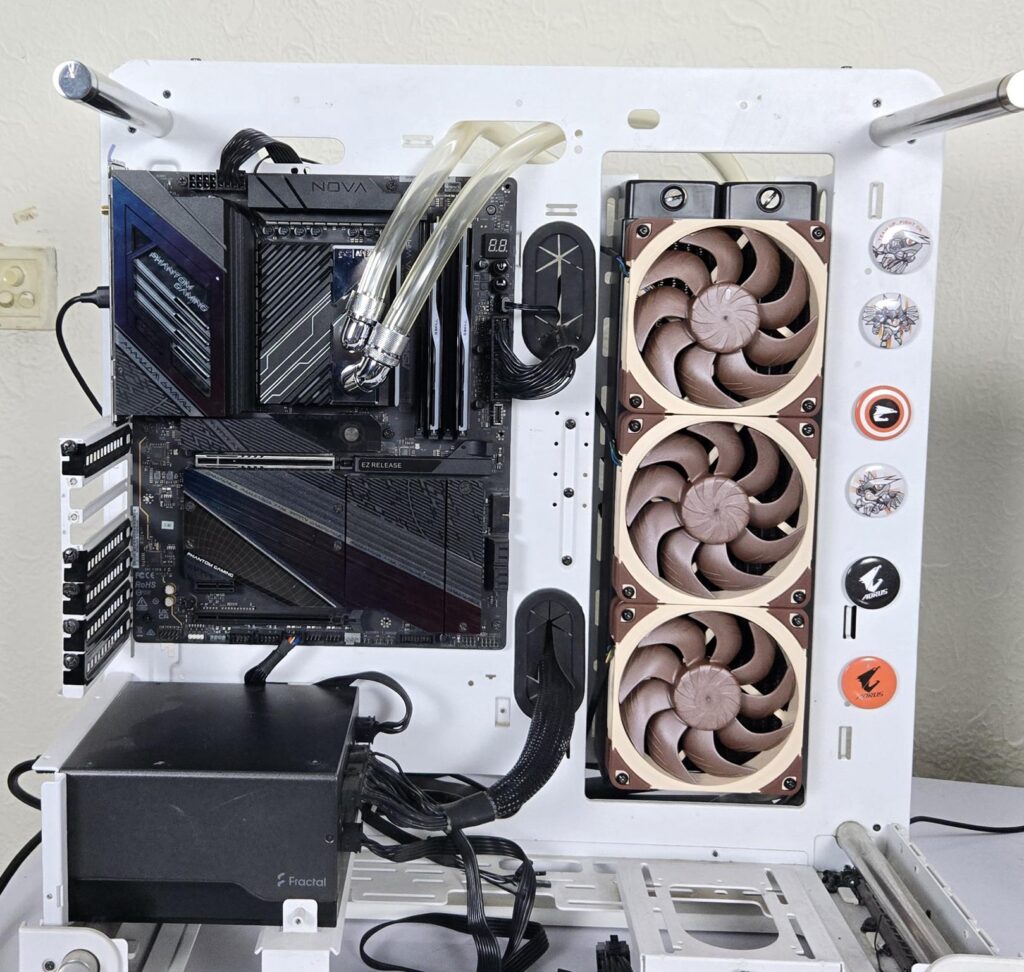
The following components are used to set up a custom loop for thermal performance measurement:
- ALPHACOOL NexXxos HPE-45 Full Copper 360 Radiator
- ALPHACOOL CORE 100 AURORA RESERVOIR ACETAL/ACRYL WITH APEX VPP PUMP
- ALPHACOOL tubing AlphaTube HF 16/10 (3/8″ID) – clear 3m (9,8ft) Retailbox
- ALPHACOOL Eiszapfen 16/10mm compression fitting 90° rotatable G1/4 – 4pcs Set Chrome
- ALPHACOOL Eiszapfen 16/10mm compression fitting G1/4 – chrome six pack
- ALPHACOOL 16/10 compression fitting 45° revolvable G1/4 – chrome
- Noctua NT-H2 Thermal Paste
- Noctua NF-A12x25 G2 PWM 120mm Fans
The following CPU water blocks are included in the testing:
- EK-Quantum Velocity³ Plexi CPU Water Block
- ALPHACOOL Core 1 AURORA Silver
- Corsair iCUE Link XC7 RGB Elite
- Raijintek Forkis Scylla Elite
ARGB Lighting
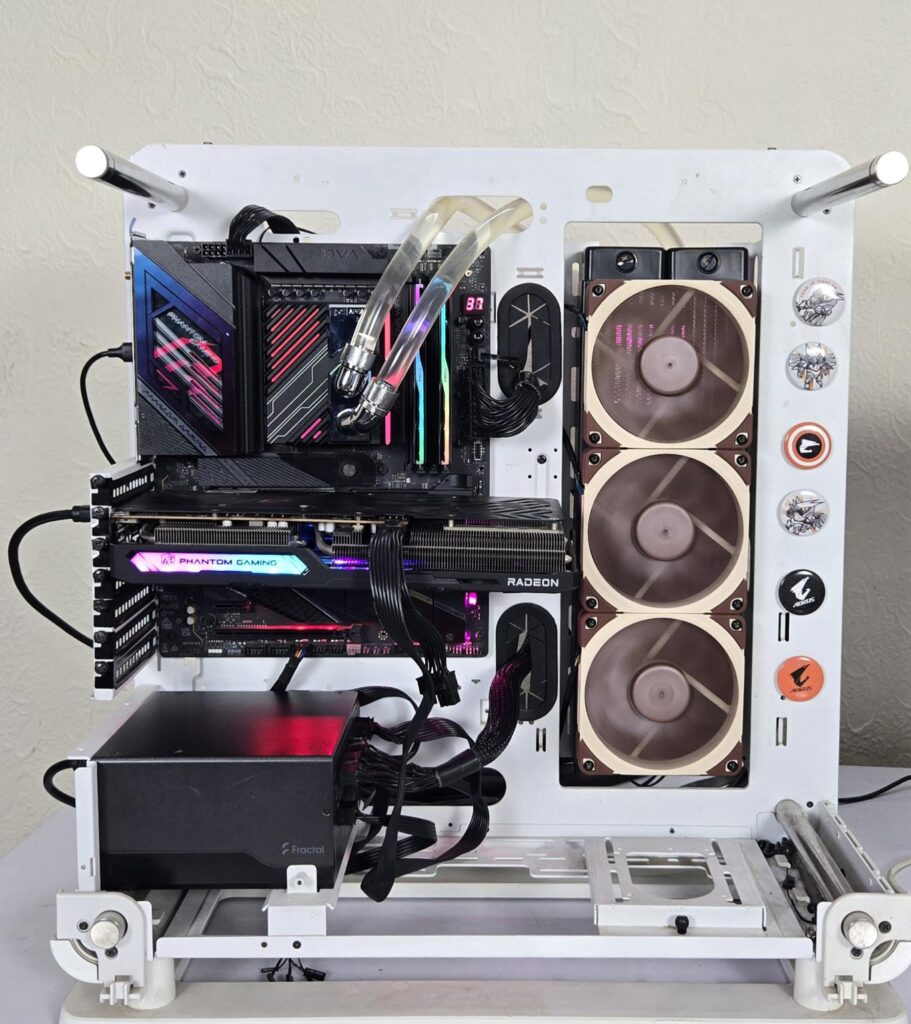
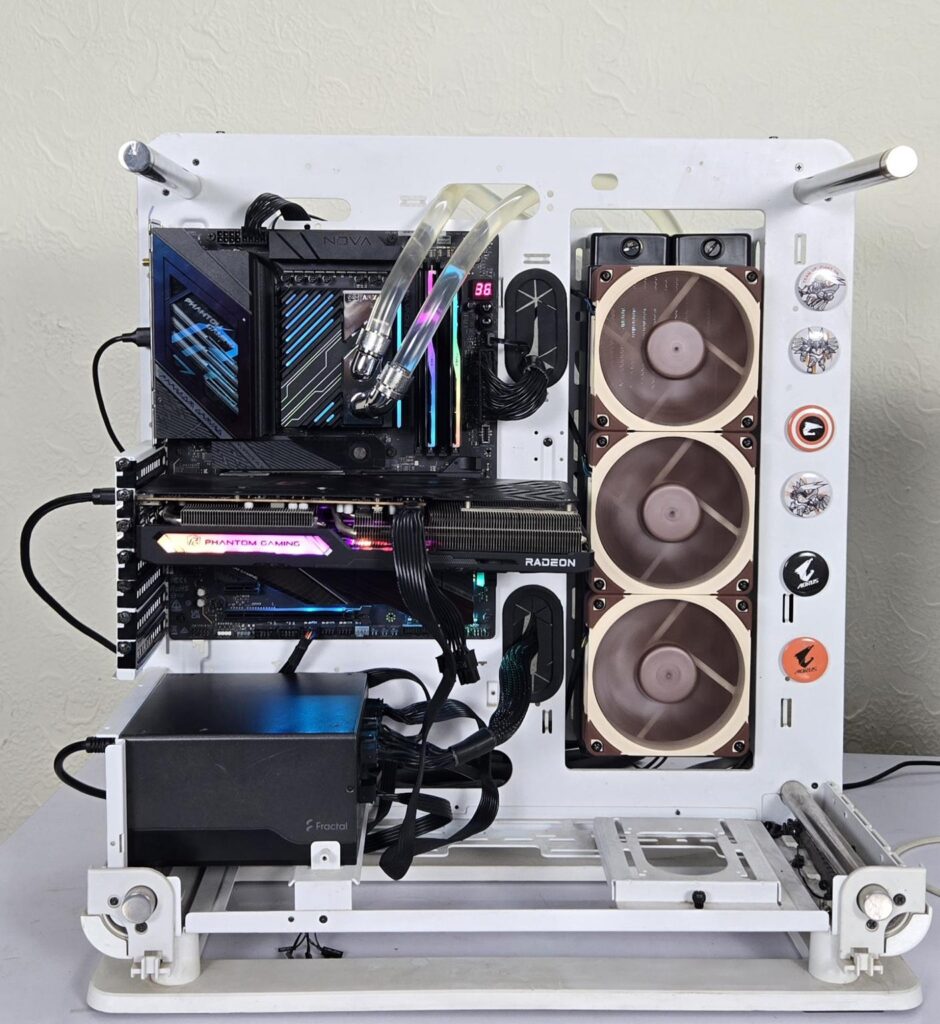
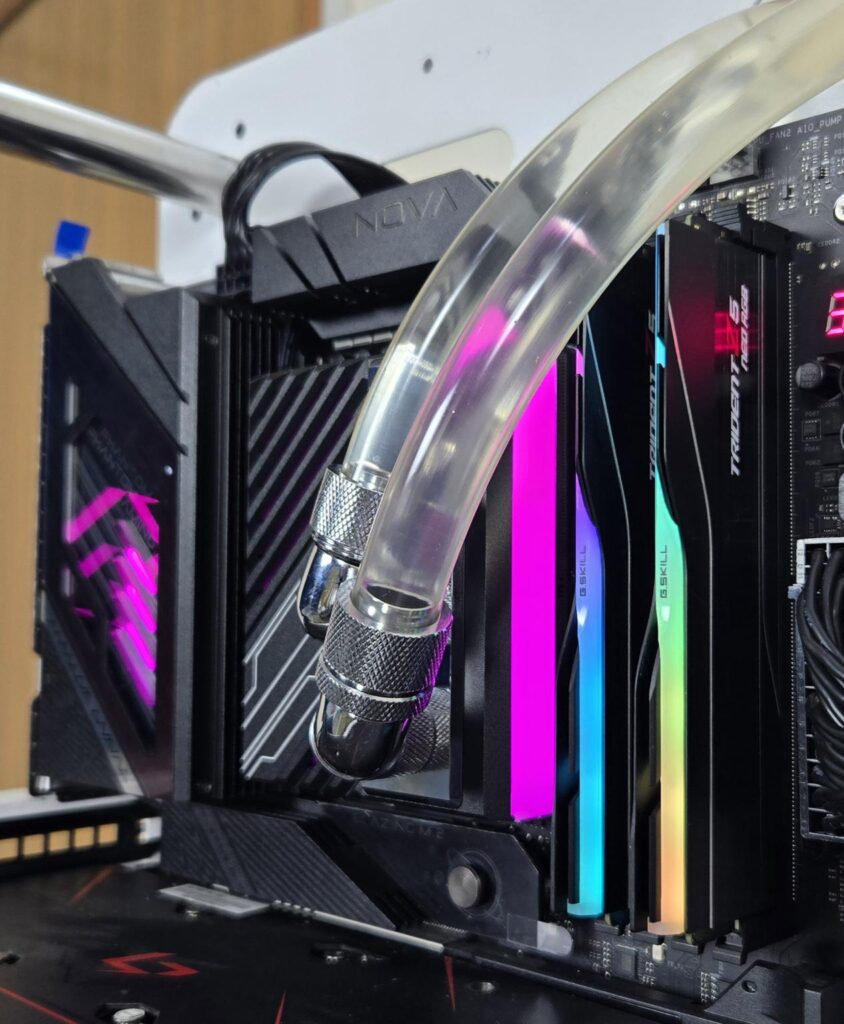
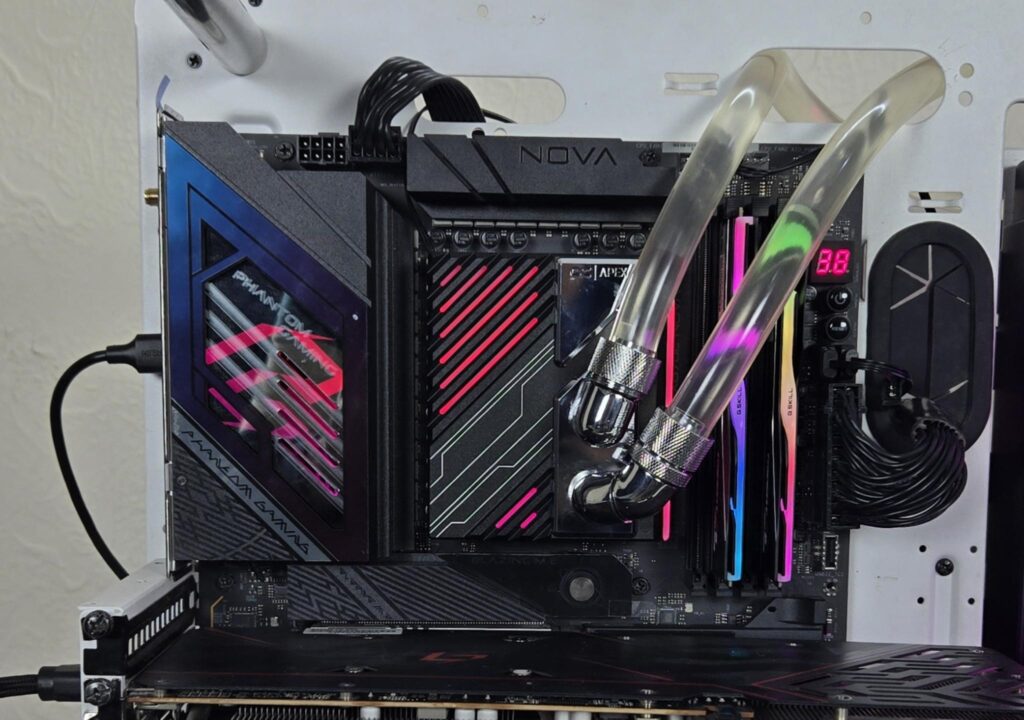
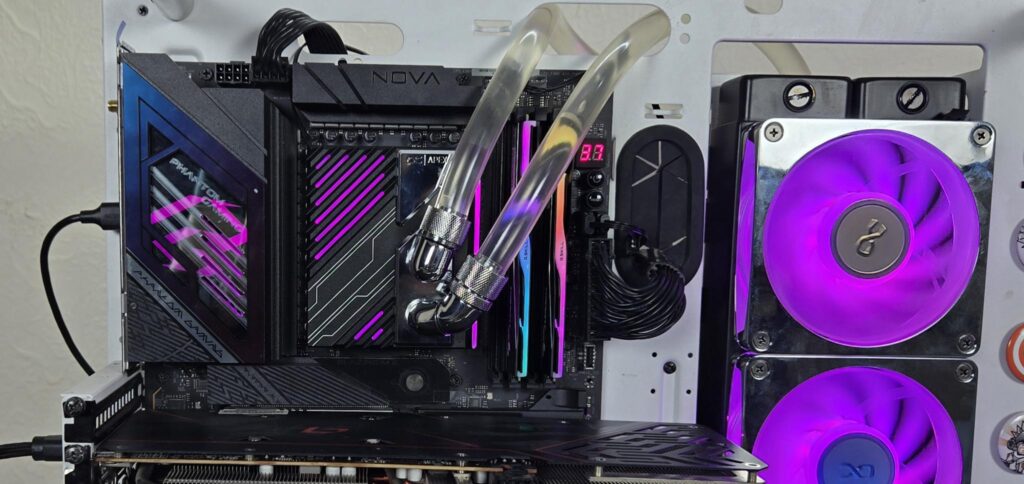
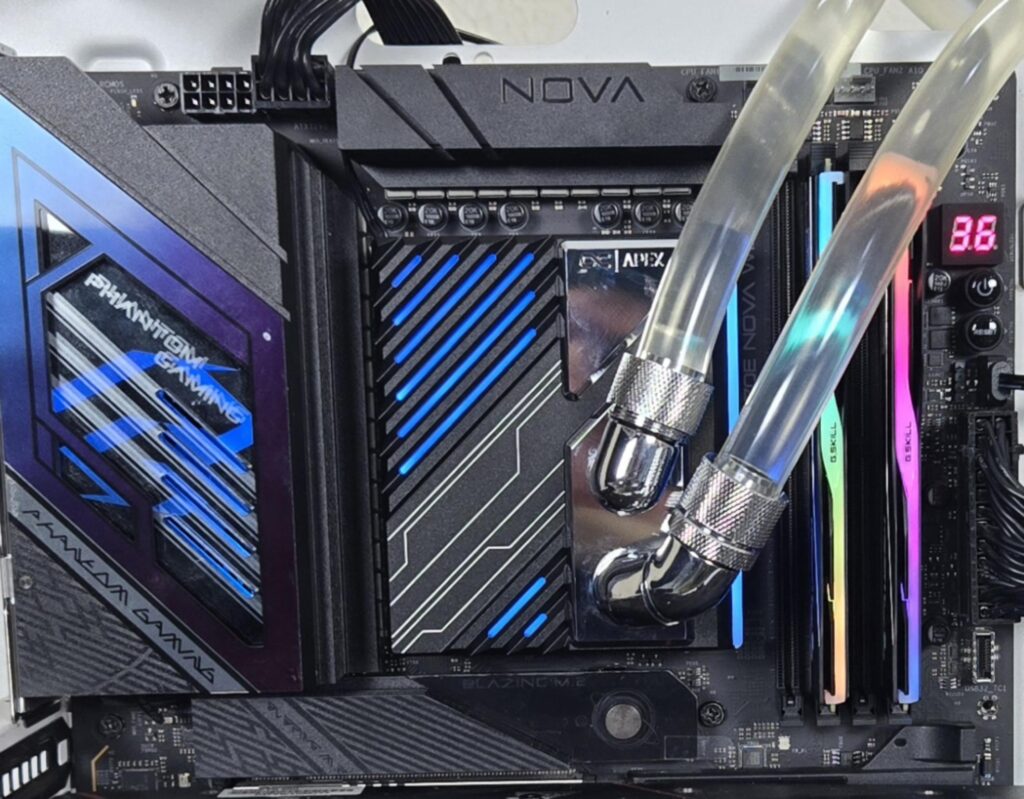
The ARGB lighting on this block is lush love. They are subtle and to the point.
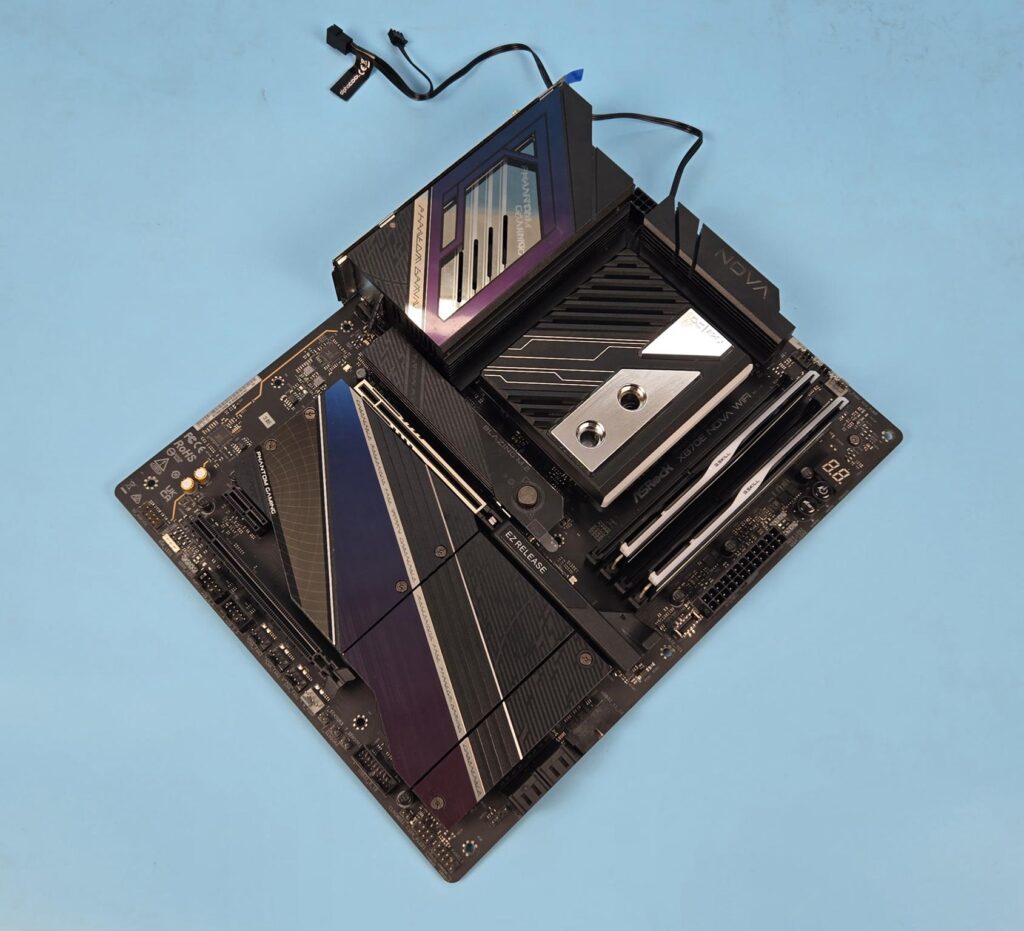
The Apex 1 AM5 block syncs well with the X870E NOVA WiFi motherboard. In my opinion, Alphacool and ASRock should consider doing a collab in this regard.
Thermal Testing
The following configuration is used for thermal testing:
- AMD Ryzen 9 9900X
- ASRock X870E NOVA WiFi
- GSkill TridentZ NEO RGB 32GB 6400MHz CL30 DDR5 kit
- ASRock Radeon RX7600 Phantom Gaming 8G OC for Display
- Biwin X570 Pro 4TB Gen5 NVMe SSD
- Fractal Design ION+ 2P 860W Platinum PSU
- Thermaltake Core P6 TG Snow Edition in an open frame layout
Here is the settings table for testing:
| Settings | PBO Enabled for 243W |
| Clock (MHz) | Auto |
| Voltage (V) | Auto |
| Thermal Paste | Noctua NT-H2 |
| Thermal Paste Application | Dots Method |
| Test Run Time | 30 minutes |
| Idling Time | 10 minutes |
| Fan Speed | 100% PWM |
| Pump Speed | 60% PWM |
| Stress Software | CINEBENCH R23.2 |
| Monitoring Software | HWINFO64 |
I am reporting absolute temperature in the graph because the room temperature was at 24°C throughout the day. The testing is done on an open-air bench system. Once inside the chassis, the temperatures are expected to rise and would largely depend upon the optimal airflow inside the chassis.
Result
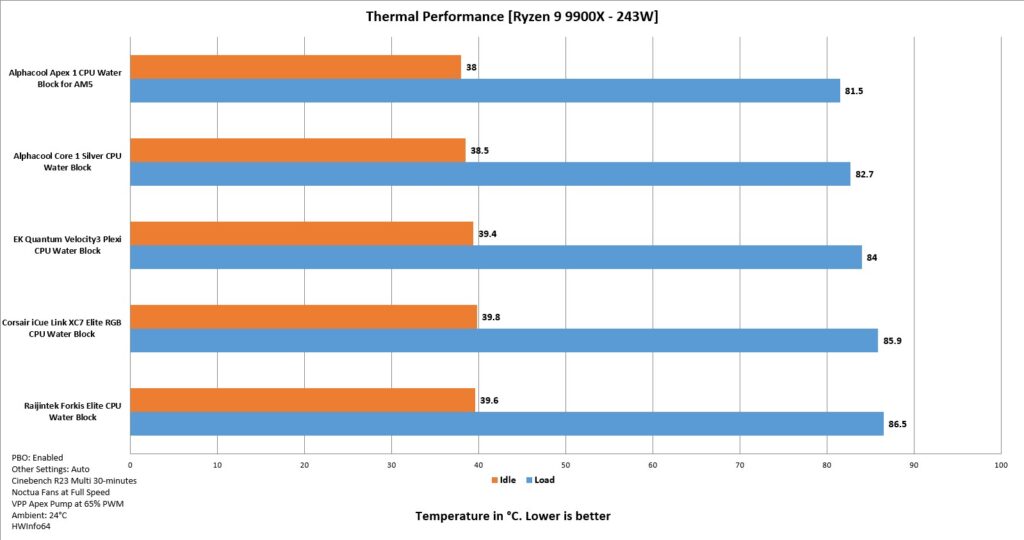
The result is self-explanatory since the Apex 1 AM5 CPU Water Block shows its prime by leading the graph with a 1.2°C margin, beating the Alphacool Core 1 block. This is win-win for Alphacool for sure.
Conclusion
Alphacool Apex 1 is the flagship CPU water block from the manufacturer. Apex 1 and Core 1 together provide a formidable line of water blocks offering top-notch performance, value, design, and durability. Apex 1 is available in AM5 and LGA1700/1851 configuration only. The reason for coming out with socket specific block is to provide an optimal cooling experience to the user using an offset design that covers the hot spots of the die. This also means that the user is locked in that particular configuration and would need to change the block if switching to another platform.
The Apex 1 is built like a tank, and you can gauge it by looking at the weight of this block, which is 995 g. A thick single-piece aluminum cover speaks for itself. The top cover of the block seems to be made of ABS and aluminum material. It has elegant stenciling and contour line pattern showcasing the APEX footprint in every tiny bit of detail. The line patterns have subtle ARGB backlighting that really adds more to the pleasant outlook of the design.
This block has a dimension of 100x86x32.30mm (WxLxH). The reason for such a large block is to provide a unified and clean look by covering the mounting holes of the socket. The block features two G1/4” threaded ports as Inlet and Outlet for the coolant. I wish to see this block with ports on the sides to provide an even cleaner outlook!
Speaking of the main building block, the nickel-plated copper base packs a dense cold plate comprising 64 fins in 12 rows or channels extending over the sides. This is similar to Core 1 except for the fin count. Each fin is 0.4mm thick with a gap of 0.4mm between the fins. Alphacool has used a revised Jet Plate in this block named Jet Plate 2.0, which provides increased water pressure by using a wider area on the top and a narrow slit on the base. This works in tandem with the inner-chamber installed in the main block. The inner-chamber is made of silicon, and it sits over the jet plate 2.0 and the cold plate area.
The middle hole (internal to the block as it is not visible to the user) sprays coolant/water through the inner-chamber to the jet plate, which then releases it evenly to the cold plate. The warm coolant/water is pushed out through the dedicated outlet port. It is why the order of the ports is important.
A single-piece aluminum block has integrated the cooling engine and the base. The top cover sits over this large aluminum block. Two diffusers are introduced on the top cover, one on the side and the other on the main area. The side diffuser showcases the ARGB lighting on the RAM. The ARGB LED strip is powered by a JT connection (connector and socket), and it is easily integrated into the Alphacool ecosystem. An adapter cable is also provided for a standard 3-pin, 5V, ARGB connector for the motherboard.
I like the simplified installation of this block, but I made an observation regarding the M5 flag nut. These nuts are required to be placed on the threaded portion of bolts to secure the block over the motherboard. This means your standard screwdriver is of no use here, and you need a related socket bit to tighten these nuts. Alphacool may consider providing the required tool in the accessories.
The ALPHACOOL Apex AM5 CPU Water Block has an MSRP of €169.98. It is backed by a 5-year warranty from the manufacturer, which shows the brand’s high confidence in this product. Coming towards the main job of the block, which is to cool your CPU, this block packs a solid sucker punch as it sits at the top of our graph with a good margin. Of course, you would be paying a premium price tag for this level of performance as well. For AM5 enthusiasts, the Apex 1 is a Must-Have.
Pros:
- Thermal Performance
- Plexi Top
- Excellent Thermal Performance
- Elegant Design with Large Body
- Subtle A-RGB lighting
- Internal Rotation of Components
- Excellent Coverage of AM5 Dies
- Compatible with AMD AM5 Only
- Simplified Installation
- Backup/Spare nuts and bolts provided
- Warranty
Cons:
- Price
- No tool to tighten the M5 nut