Introduction
When it comes to PC Chassis’, the market is filled with a variety of competitive offers starting from low budget range to as high as enthusiast chassis costing up to $900. Recent trends are geared towards the modular approach and with Chassis like Phanteks Evolv ATX, Core X9 from Thermaltake etc users now have flexibility in terms of designing the layout for their build and taking out the chassis parts which are not needed. Recently, Phanteks has launched their high-end, enthusiast grade Chassis Enthoo Elite costive massive $900 for a chassis and giving stiff competition to the likes of Case Labs.
Corsair was founded in 1994. The company started as high-performance DRAM manufacturer. Now they are the provider of enthusiast-grade PC components and peripherals. The company launched their Corsair Gaming brand in 2014 and targets the eSports professionals and gamers alike with the products like keyboards, mice, headsets and mouse mats.
Now, Corsair is manufacturing products like Chassis, Power Supply Units, DRAM, Solid State Drives, cooling solutions for CPU and Graphics Cards, sleeved cables for their PSU units, and various gaming peripherals using cutting edge technology. I always rate Corsair as excellent based on their superb customer support program. Every time I had contacted Corsair over some issue or difficulty facing me, they responded well in time and always addressed the issue in a totally satisfactory manner. This is coming from my personal experience.
Corsair is among the industry’s leading Chassis manufacturers. Their Chassis are quite popular among the enthusiasts for the form, functionality and build quality. Their chassis like Obsidian series 900D, 750D, Graphite series 600 followed by 760T and 780T are quite popular.
Today, I’ll be reviewing Corsair Obsidian series 900D. This monstrosity from Corsair got me into thinking what I would do with it. The sheer size of the packing box alone gives the idea of how massive this chassis is. Even Corsair is challenging the builder by asking “What will you do with all this room” and they are right. They have given a behemoth chassis for serious PC builders out there. Here is what Corsair has to say about it, “Obsidian Series 900D is for serious builders with big projects. Do you want to design your ultimate dream PC? Add state-of-the-art liquid cooling or air cooling? Build a quadruple GPU, dual-CPU graphics powerhouse? Or, just create a monster file server? If these are the kinds of questions you’re asking yourself, you need a 900D”. This pretty much sums it up.
Product: Corsair Obsidian Series 900D
Manufacturer: Corsair
Price: $349.99 / Rs.37000 at the time of the review
Specification
| Case Form Factor | Super Tower |
| Case Dimensions | 692mm x 252mm x 650mm |
| Case Motherboard Support | Mini-ITX, Micro-ATX, ATX, E-ATX, XL-ATX, HPTX |
| Case Material | Steel and Brushed Aluminum |
| Case Power Supply | ATX (not included) |
| Maximum Graphics Card Length | 500mm |
| Maximum CPU Cooler Height | 170mm |
| Maximum PSU Length | 280mm |
| Case Expansion Slots | 10 |
| Case Drive Bays | (x4) 5.25″
(x9) Combo 3.25”/2.5” |
| External Connections | (x4) USB 2.0
(x2) USB 3.0 (x1) Headphone Port (x1) Microphone Port |
| Fan Mount Locations | Front: (x3) 120mm
Top: (x4) 120mm/ (x3) 140mm Rear: (x1) 140mm Bottom: (x8) 120mm / (x6) 140mm Mid: (x1) 120mm |
| Fans Included | Front: (x3) 120mm
Rear: (x1) 140mm |
| Radiator Mount Locations | Front: Up to 360mm
Top: Up to 420/480mm Rear: 120/140 mm Side: Up to 420/480mm |
| Compatible Corsair Liquid Coolers | H55, H60, H75, H80i, H90, H100i, H105, H110 |
| Warranty | Two Years |
| Weight | 18.6 KG |
| Color | Black |
Packing
Chassis packing box is a typical corrugated cardboard box. On the front side, we’ve diagram of the chassis itself with Obsidian Series 900D mentioned underneath it. The test is printed in 6 languages. It goes like “What will you do with all this room? Design your Ultimate Dream PC. Add state of the art liquid cooling or air cooling. Build a quadruple GPU, Dual CPU graphics powerhouse. Create a monster file server.”
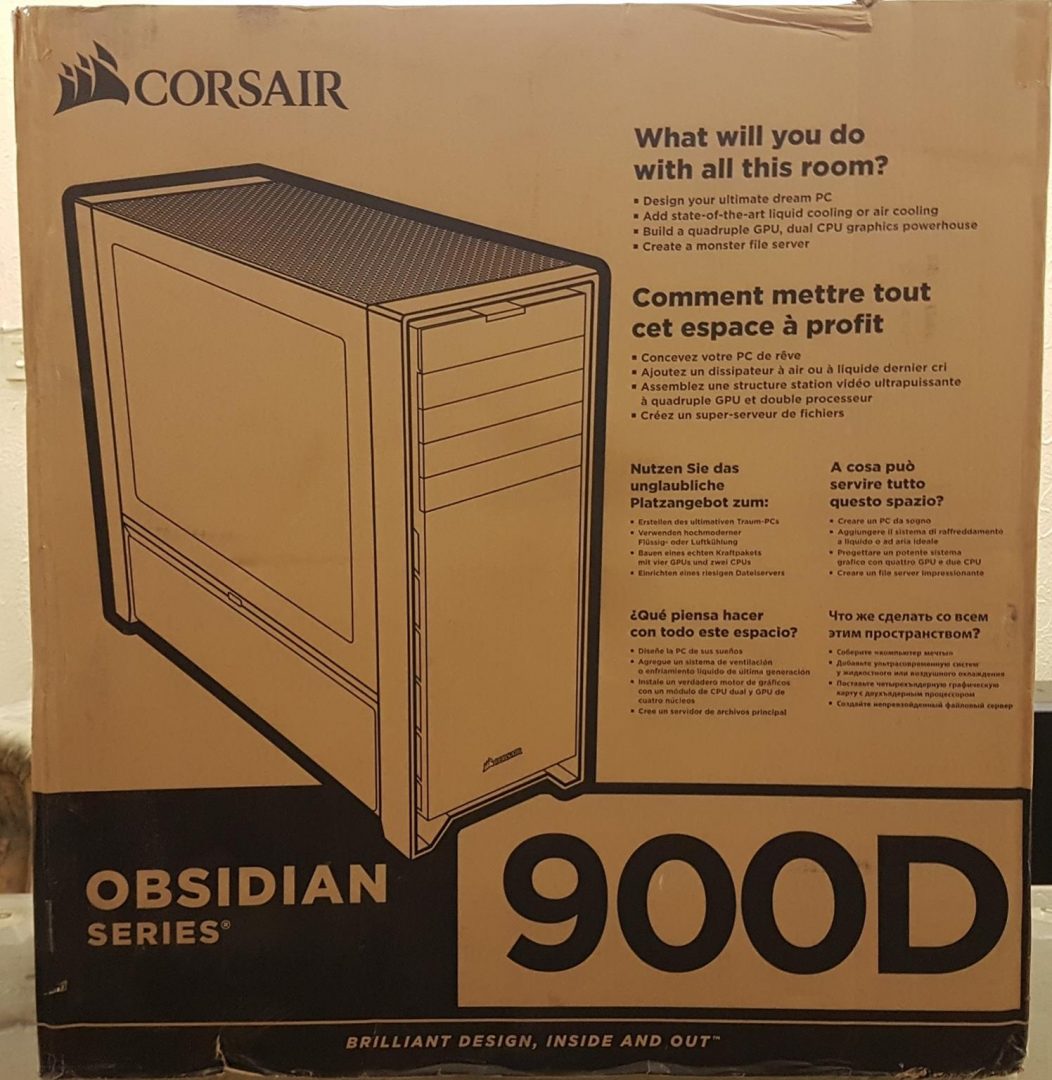
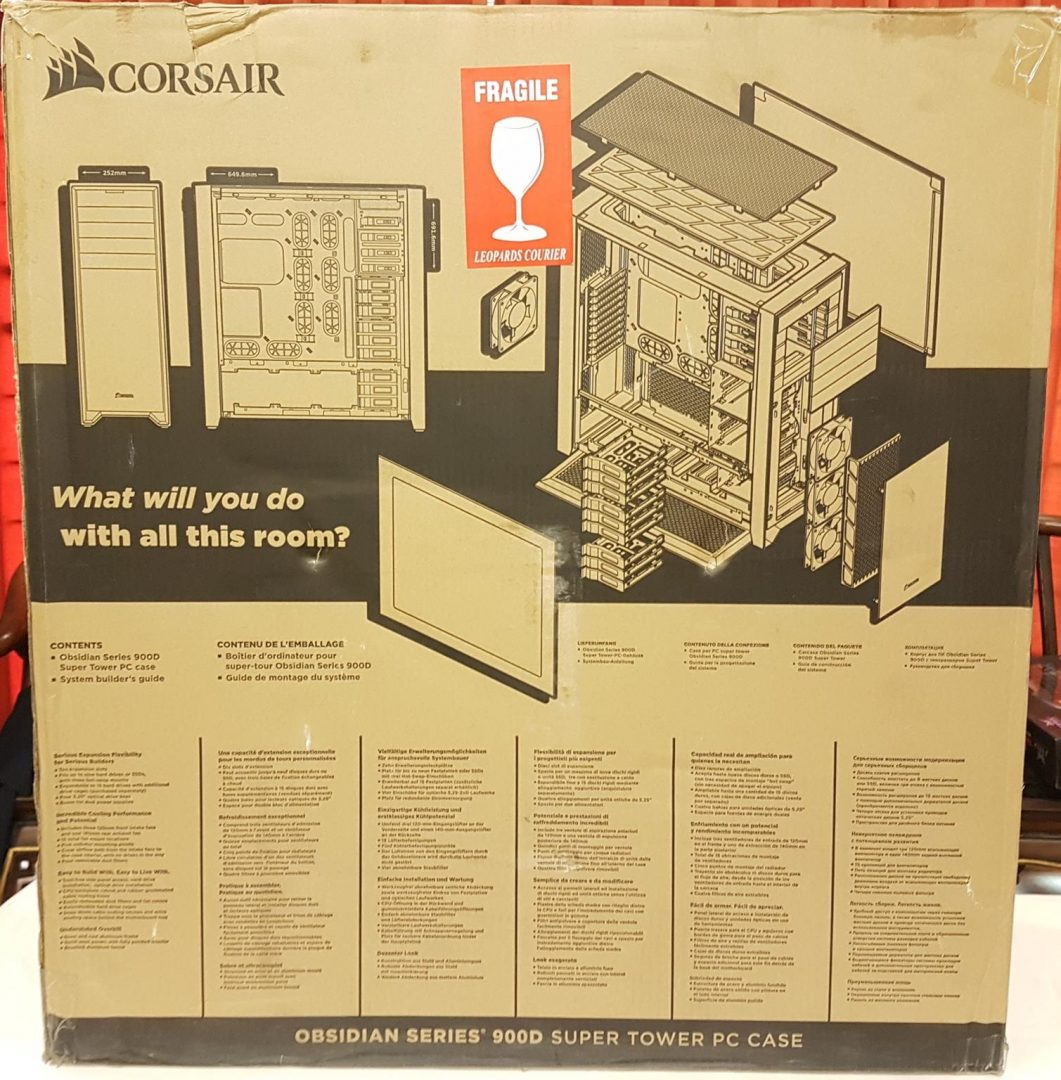
The back side of the box has diagrams of all removable parts. This serves as a visual guide for the builders. Corsair brand and logo are printed on the top left space.
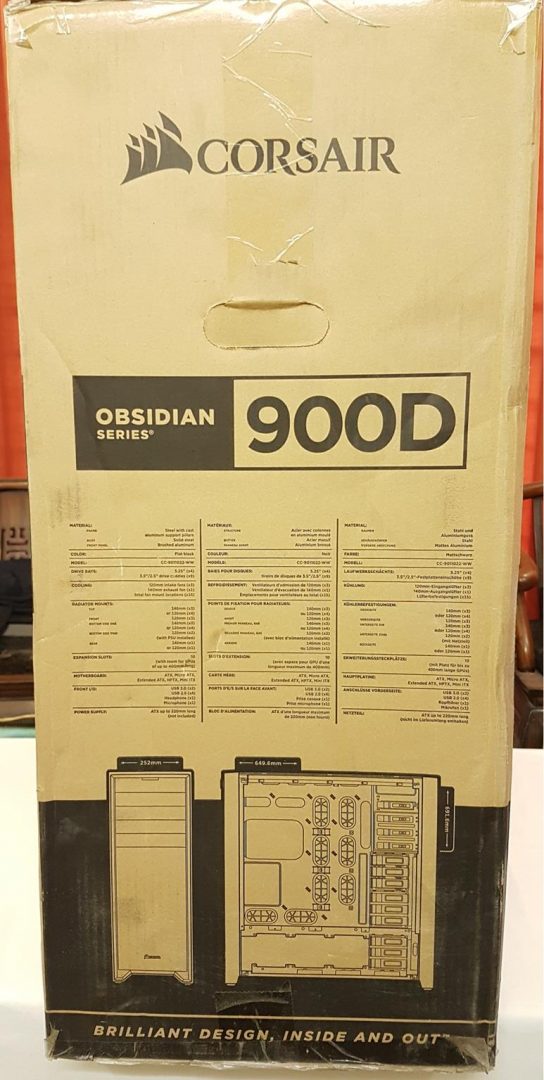
Left and right sides of the box have specifications of the chassis, printed in the middle beneath Corsair brand and logo. Two diagrams on the bottom show the dimensions of the chassis.
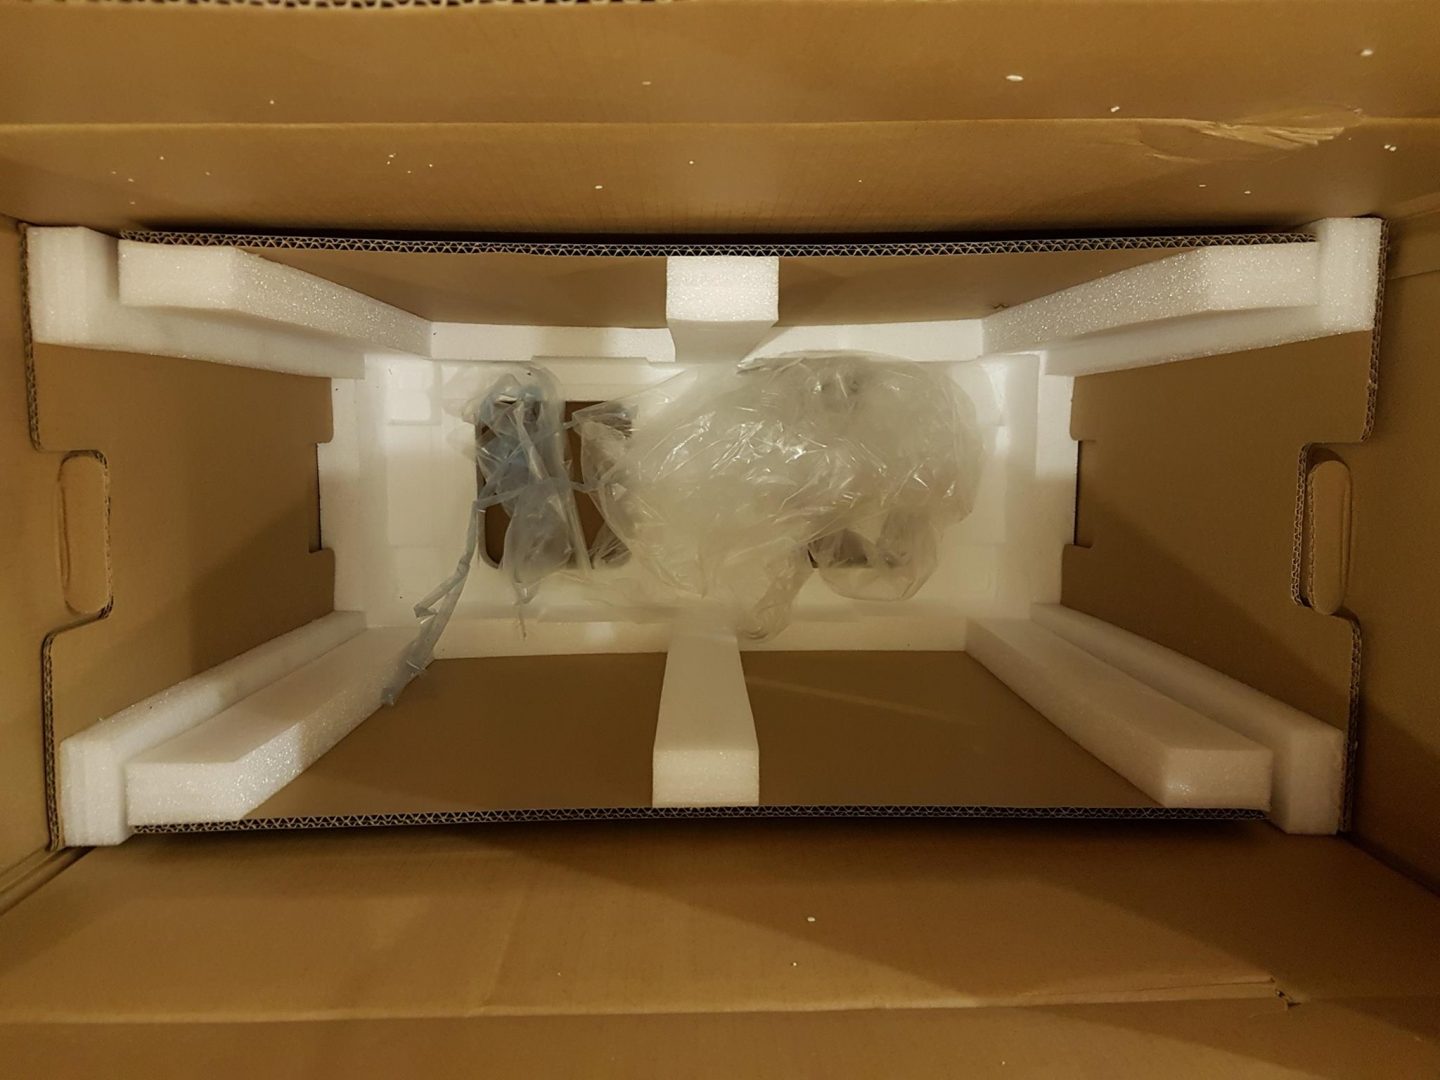
One thing, I would like to appreciate here is the packing material and scheme used by the Corsair. Chassis comes wrapped in a plastic sheet and tightly placed inside two Styrofoam. They are thick enough to ensure the safe shipping of the unit. This is not all. Corsair has also placed Styrofoam pasted on the corrugated cardboards on the borders inside the main packing box. This further adds to the safety of the unit. This was necessary given the weight and size of the unit and delicacy of handling it.
Accessories
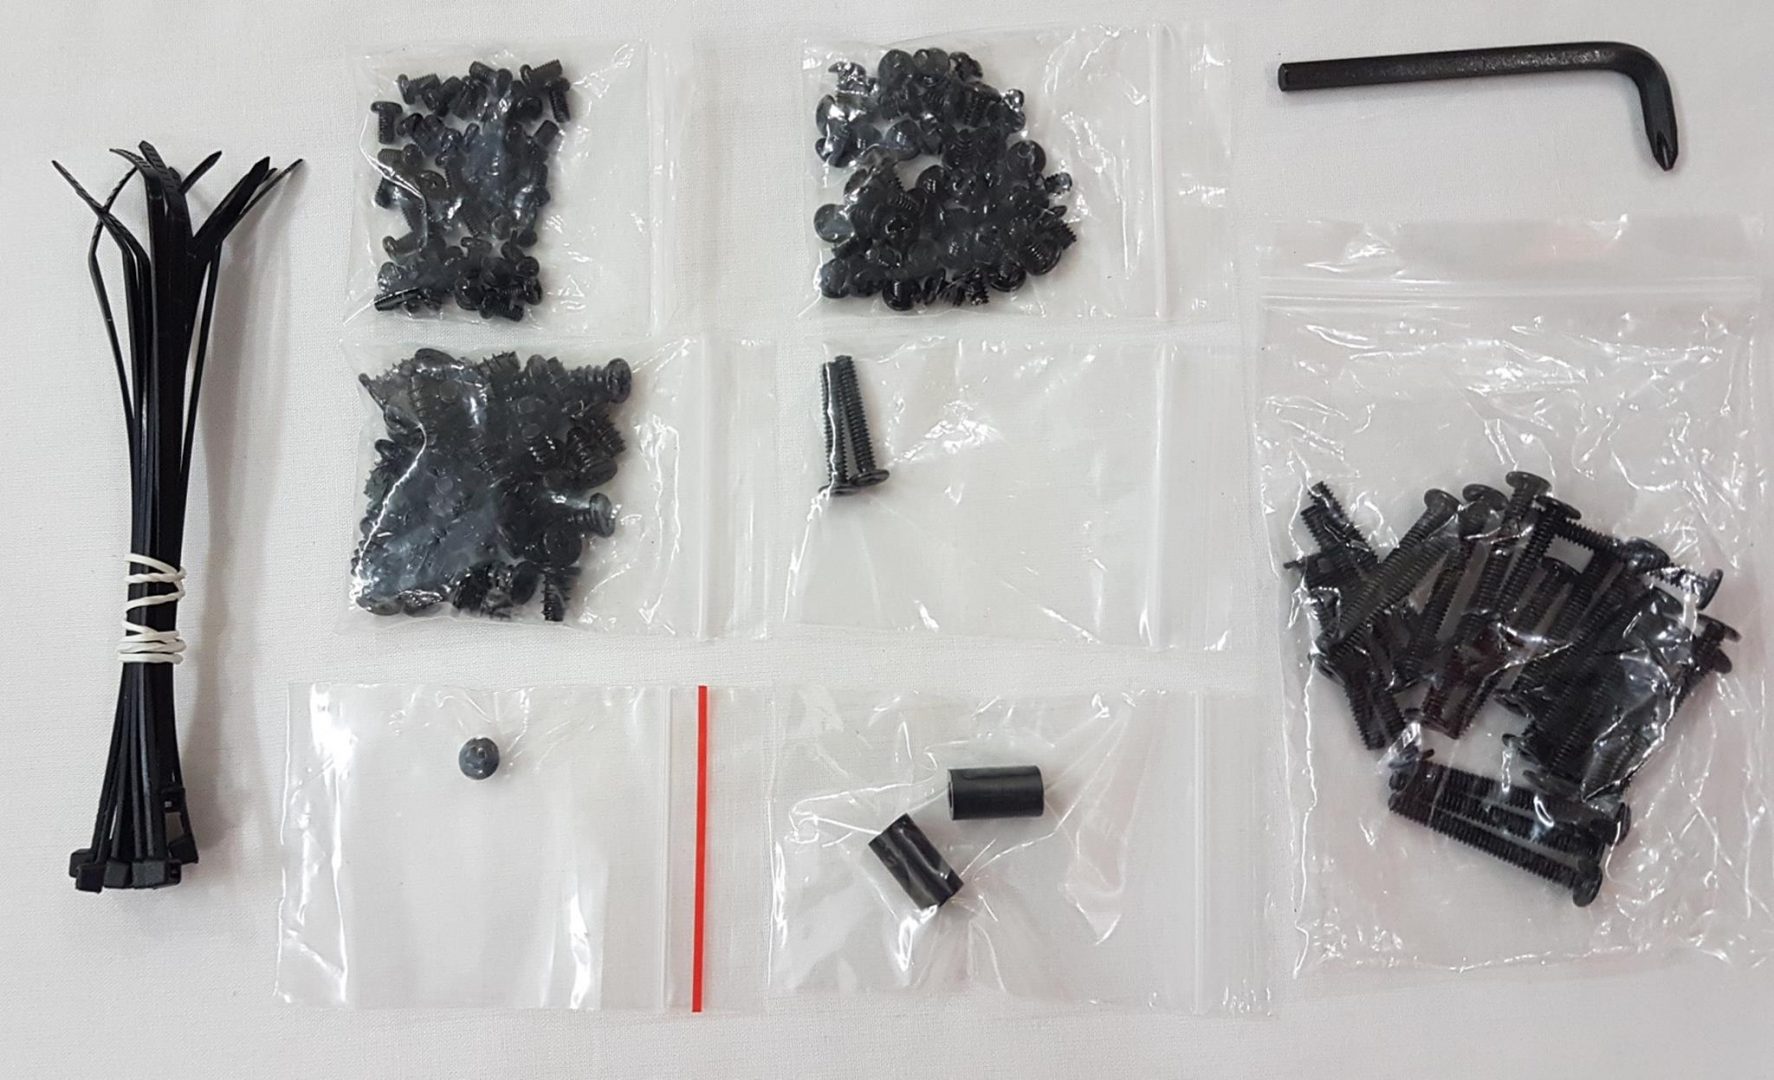
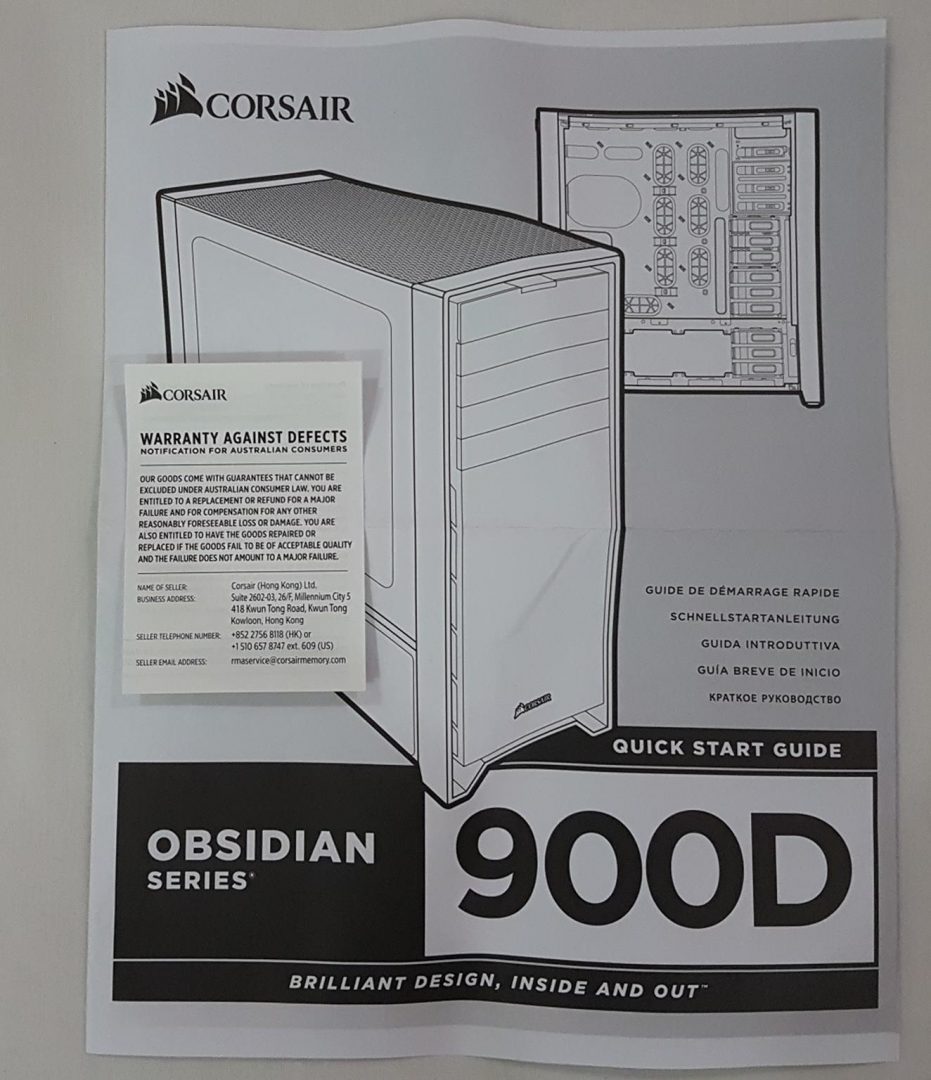
Chassis includes the warranty guide, the user manual of the chassis and plethora of screws and zip ties. Corsair has also supplied with angled screwdriver. This is needed when installing the graphics cards inside the chassis.
Design section will cover this topic in detail. The user manual is just a visual guide of the main parts of the chassis. It should have been the detailed one covering different aspects like how to take off the top panel etc.
Closer Look
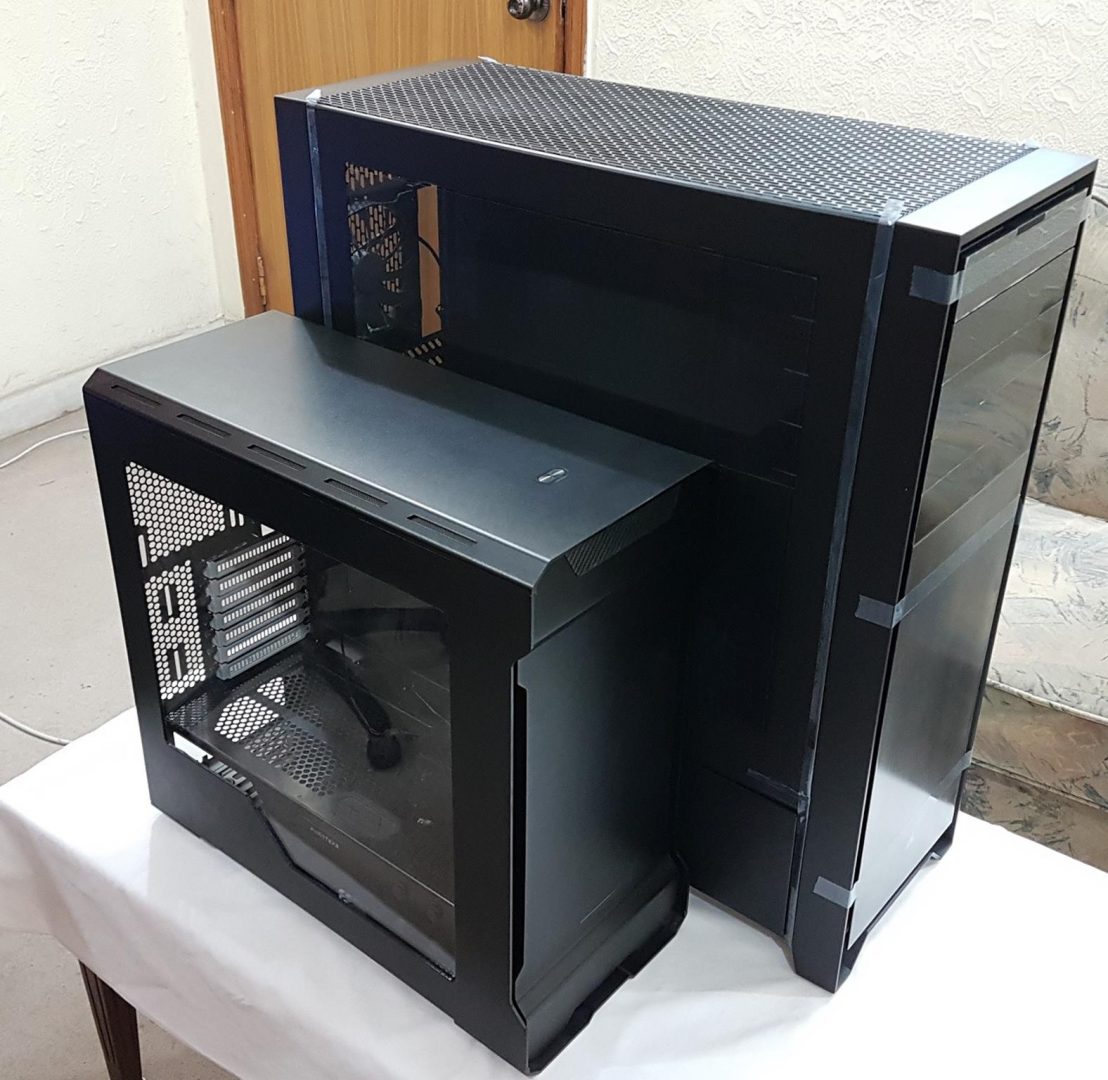
Wow! What to speak of about this chassis. My Phanteks Evolv ATX seems like a dwarf when placed side by side. This chassis carries the heck of dimension yet Corsair has produced a marvelous piece.
Brushed aluminum with steel structure has lived up to its name for form and factor. This is a mind-boggling design from the Corsair design team and engineers and they have certainly delivered what they had wanted to. With so much room to work around, expansion capability, massive storage capacity, provision of up to (x4) 5.25″ drives and yet serious custom loop provision makes this chassis stands out on its own. Competition from the likes would be Caselabs SMA8 and newly introduced Enthoo Elite from Phanteks though price alone on later referred chassis would make the Corsair 900D a winner. Chassis is implemented in two chambers. Top chamber host components like motherboard, CPU, RAM, graphics card(s), Storage drives while the bottom chamber is of PSU, radiator, fans, Pump and storage drives.
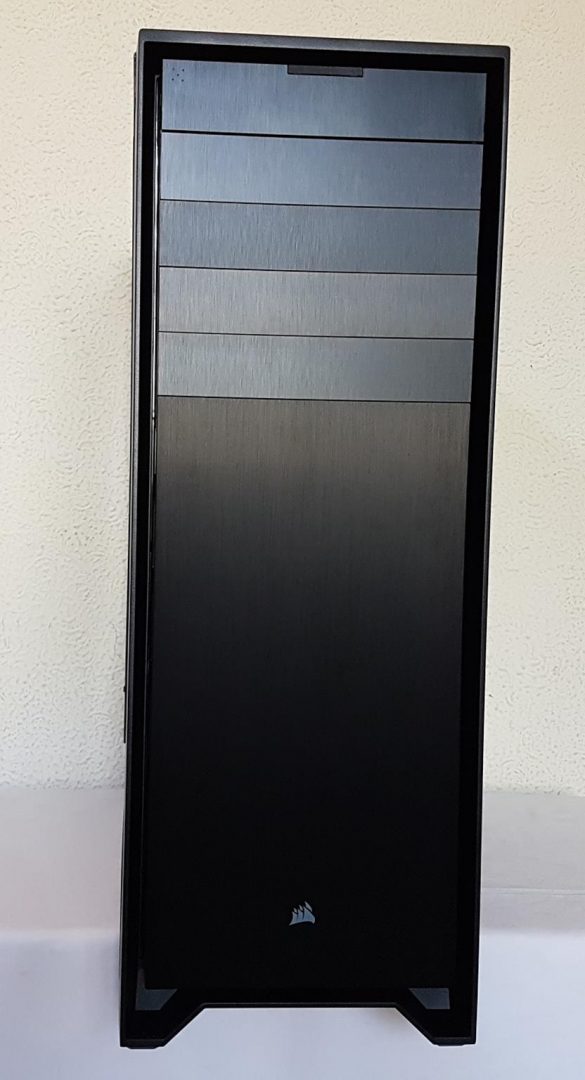
The front fascia is one heck of a design based on brushed aluminum and immediately grasps the attention of the viewers. It looks stunningly beautiful. We’ve a total of 4x 5.35″ bay drives up top. They are covered and in order to mount any 5.25″ drive, the cover needs to be pop out by inward pressing of latches though this has to be done from inside the drive for which complete side panel needs to be taken off.
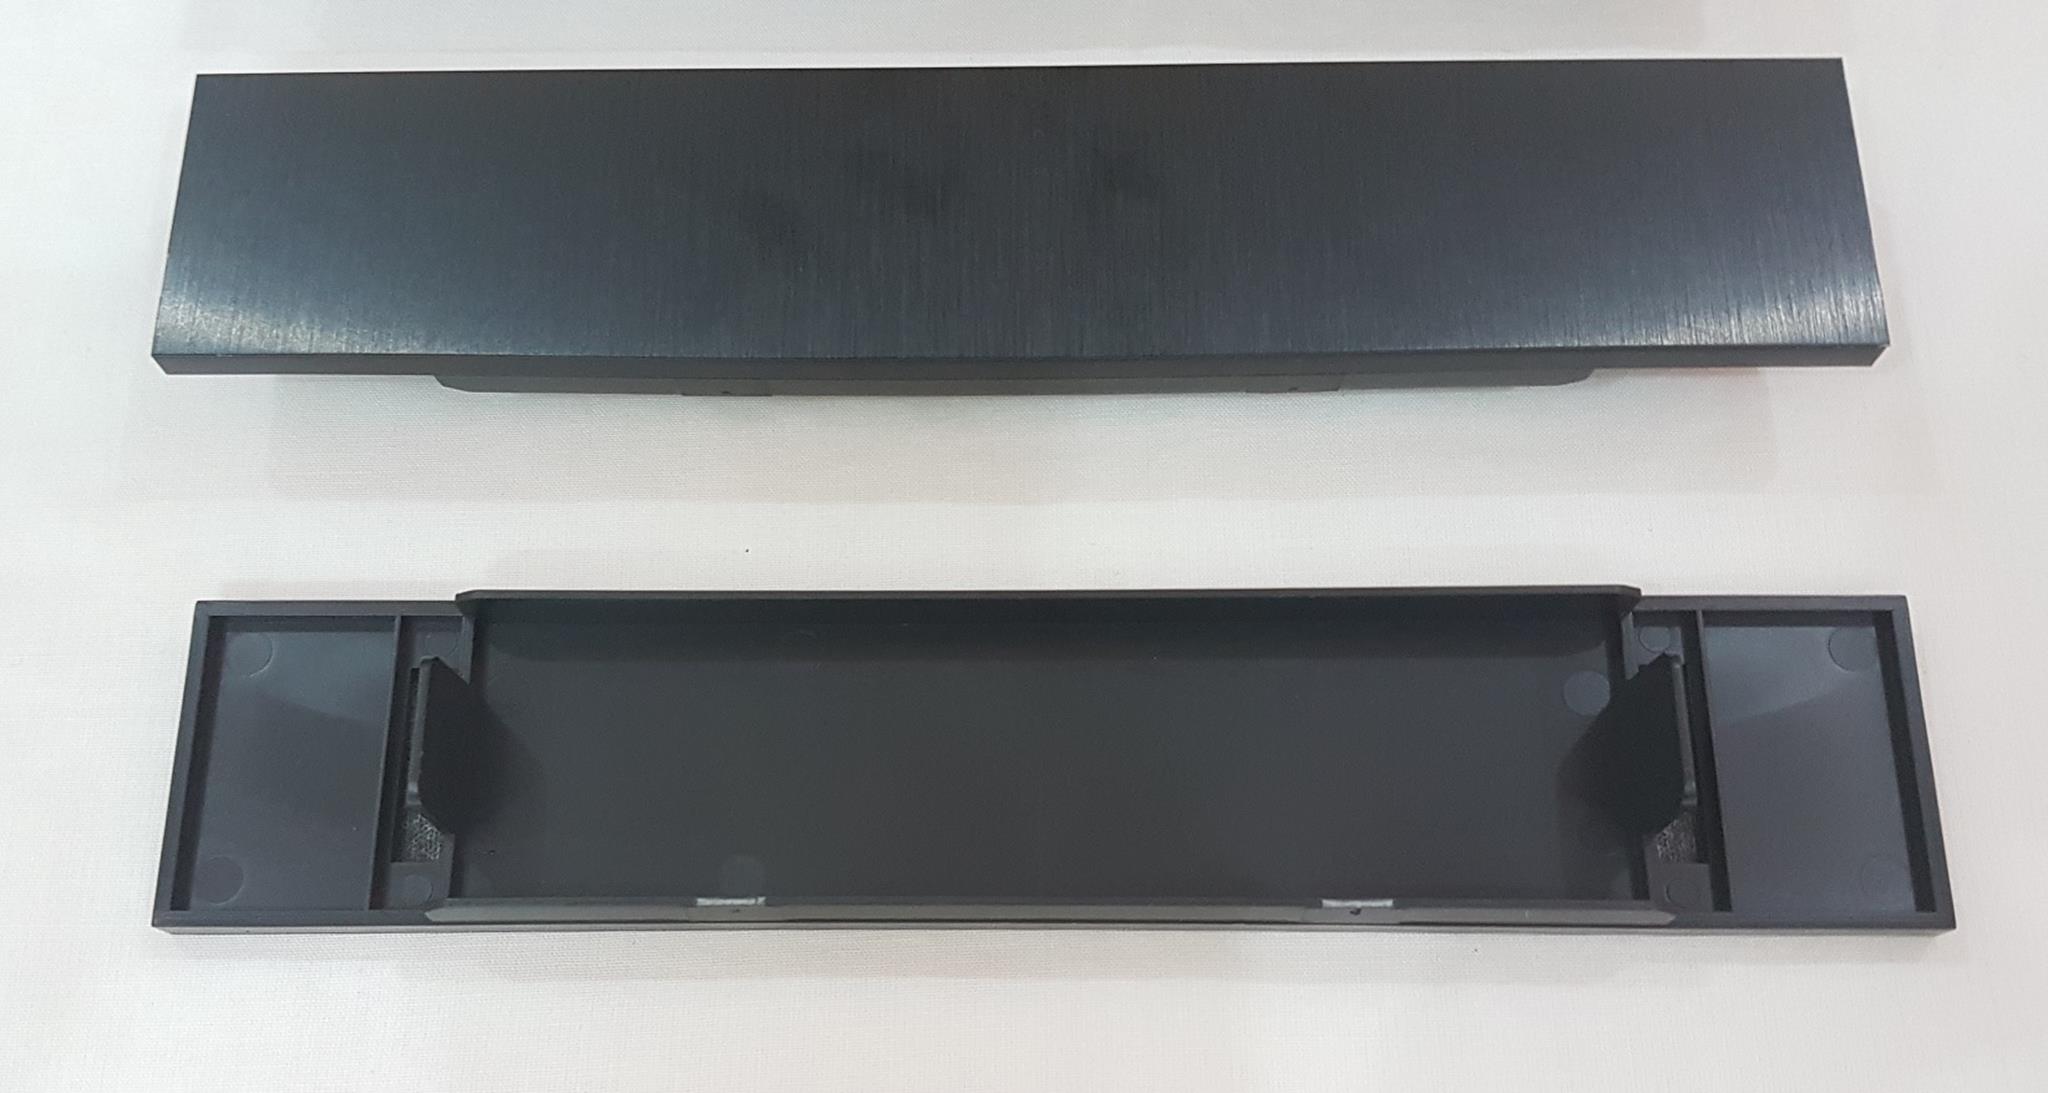
This chassis has extra depth to it, so in order to match the depth of the chassis, covers on the 5.25″ mounts are extended beyond the standard length of the 5.25″ drives.
This is a smart move by the Corsair and really adds to the looks but it also has a disadvantage. Once a cover is removed and a 5.25″ drive is installed. This drive would look odd and out of symmetry with the overall design.
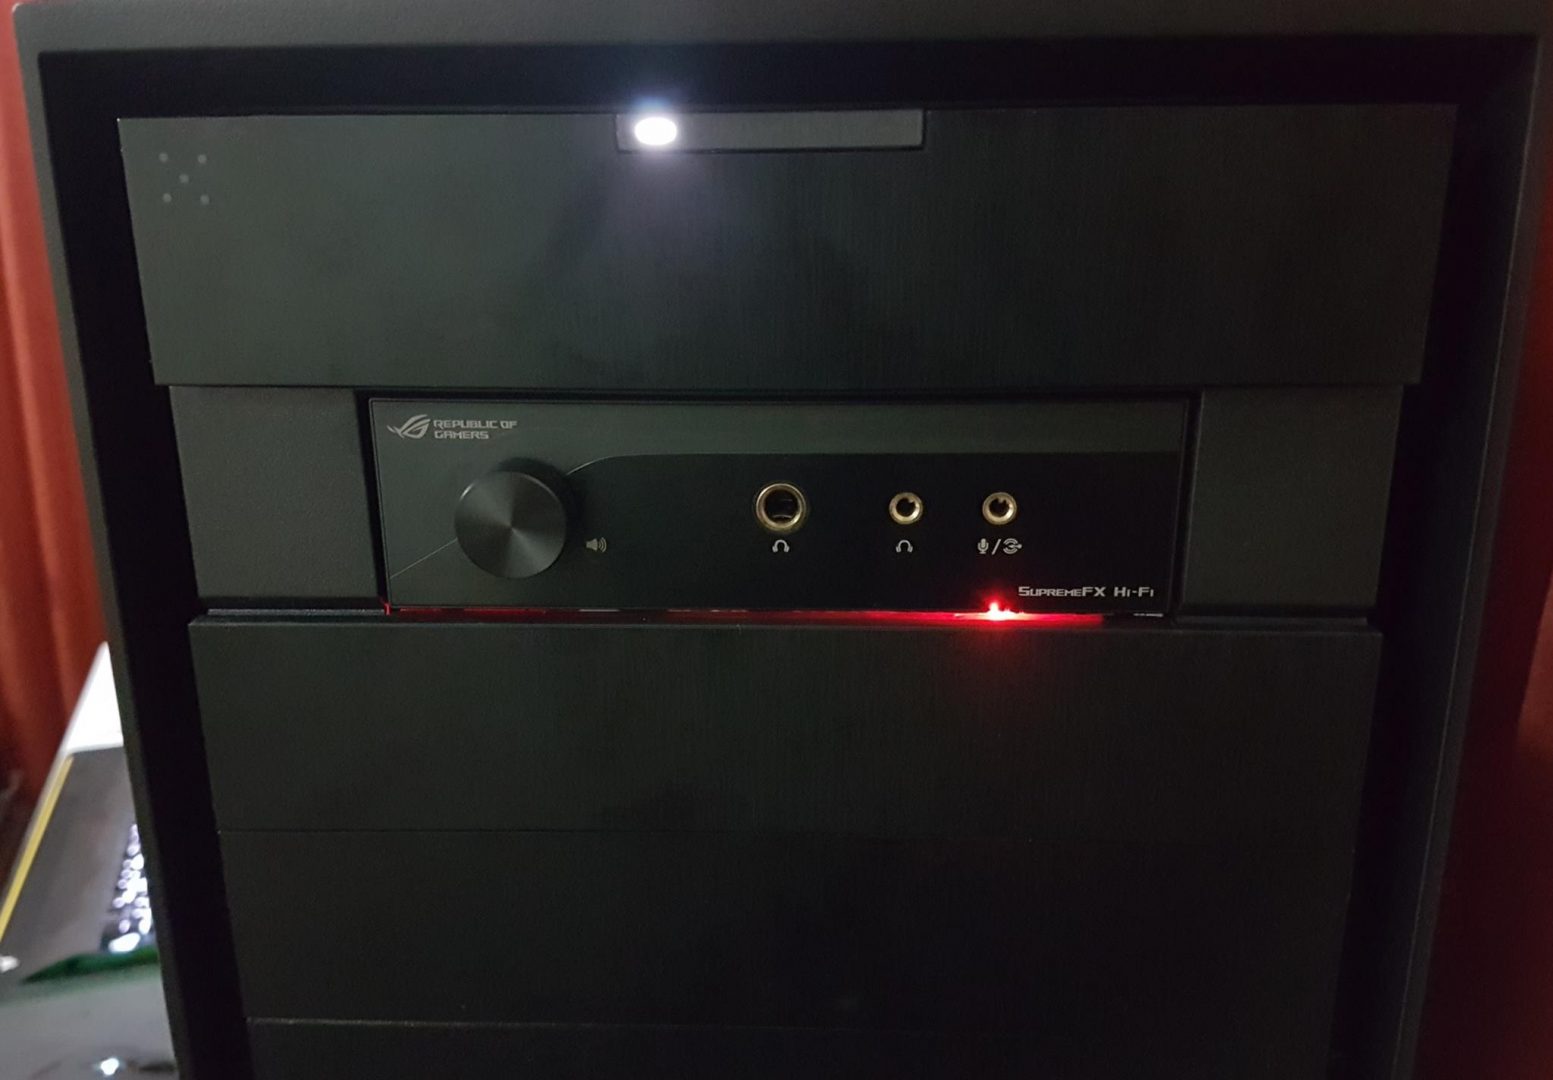
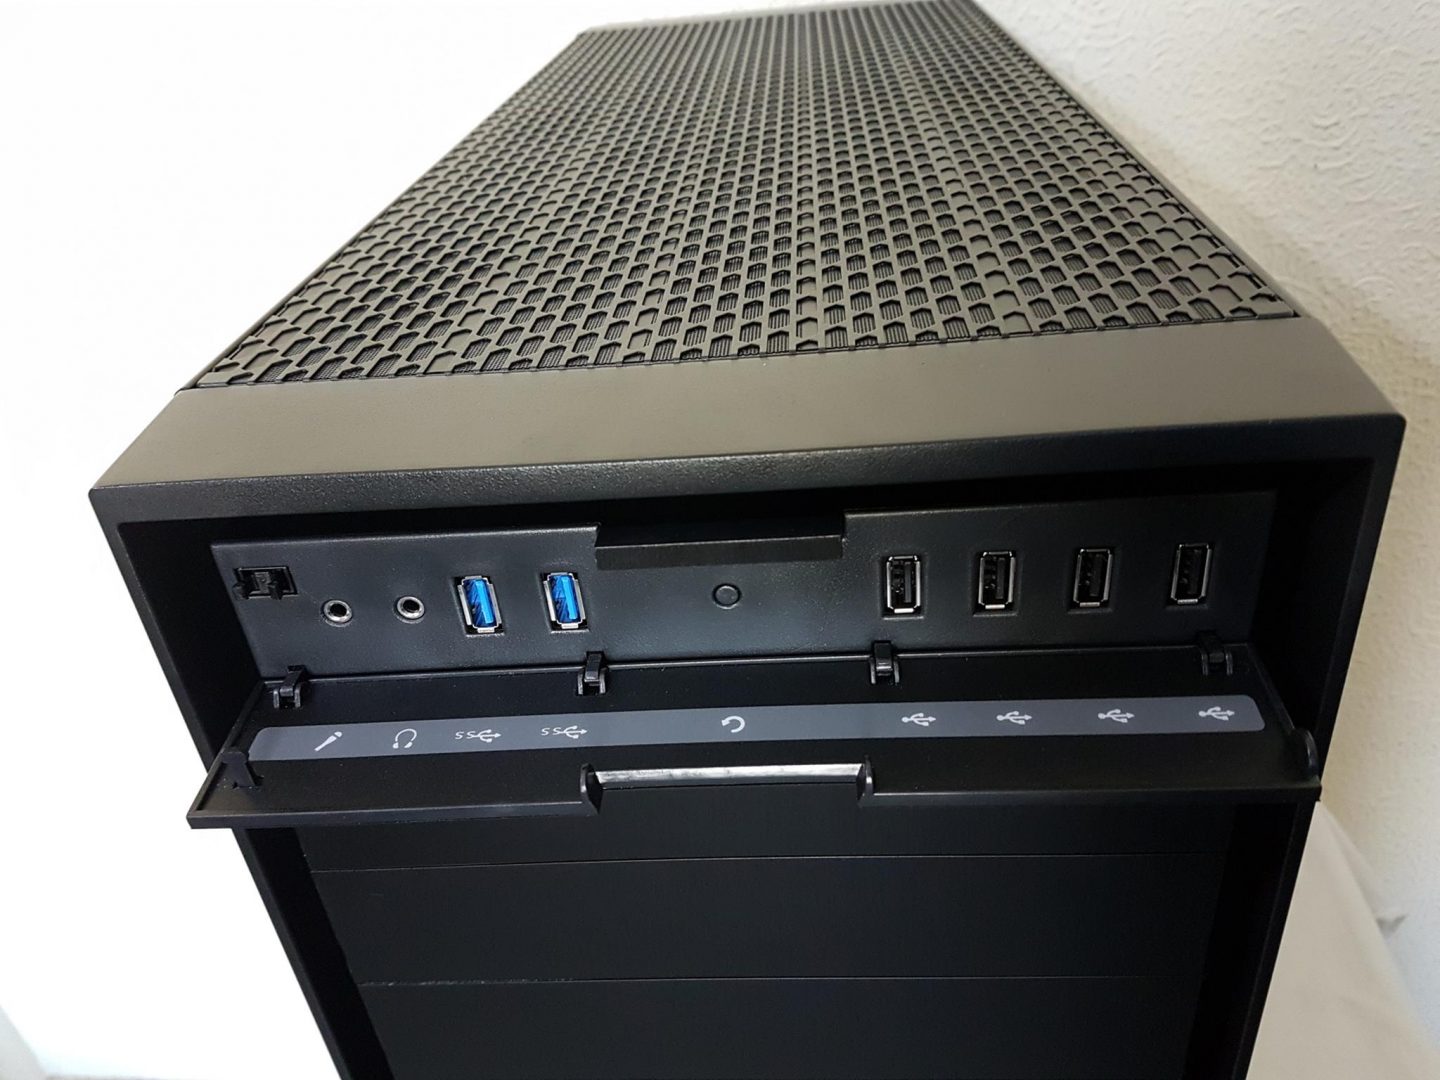
The top portion has IO Panel which is also covered. There is a section on the top left side of the cover with raised dots. It needs to be tap once to open the cover. We’ve four USB 2.0 ports, two USB 3.0 ports, a microphone jack, a headphone jack and a tiny reset button. There is a large size button on the top of this panel. This is a power button. It has two LED indicators in white color. This is a good design implementation by the Corsair except that of the reset button.
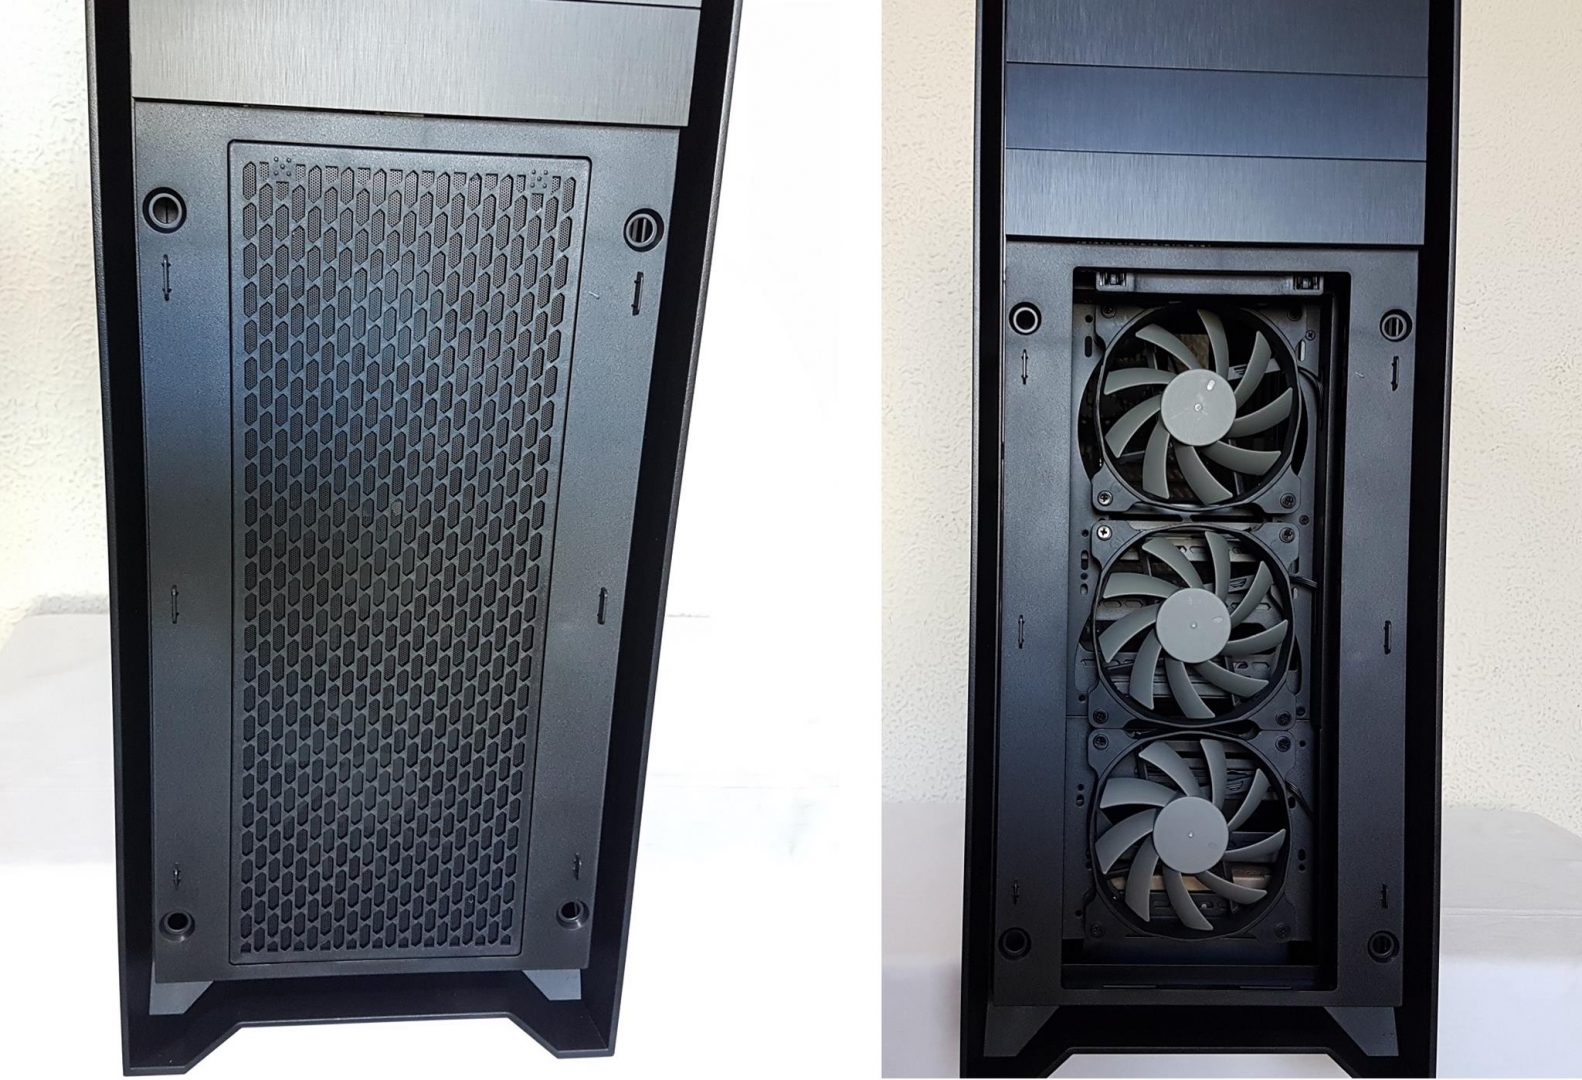
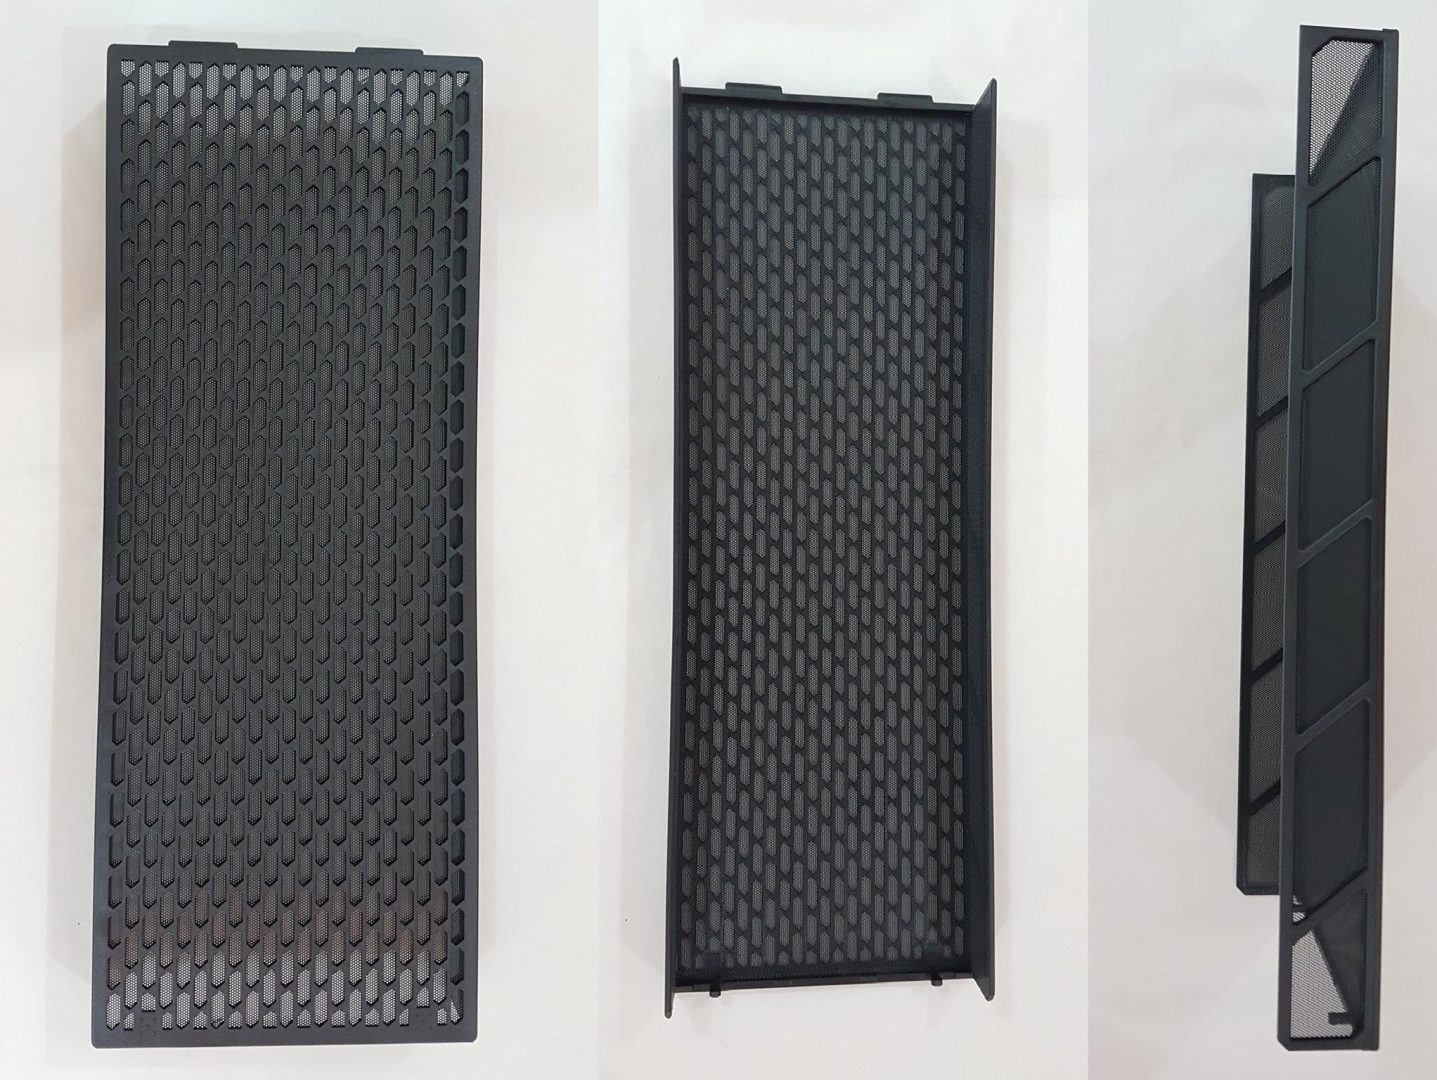
Below the 5.25″ drive bays, we have a brushed aluminum finished plate with Corsair logo on the bottom. This plate covers the front fan mounts. Brushed aluminum finish on this plate and on the front overall is top notch and is a site to gaze upon. The plate has 4 holders on the borders. In order to remove the plate, simply pull it out. This would reveal the fan dust filter pre-installed in the chassis.
There are two raised dotted areas on the top left and right most on the filter. Tap them and filter will pop out. The filter is one unit with vents on the sides. Vents are approx 25.4mm in size. Air flow is made through these vents. I really appreciate the Corsair design team for this implementation.
Removing the dust filter would reveal the pre-installed (x3) 120mm fans. These are Corsair AF-120L fans. If you would look closely, there is a gap between the top and the middle fan. This could create difficulty when installing a 240mm radiator on the front. These are all 3-pin fans. Power cables of the fans are zip tied and routed on the right side cut outs of the chassis.
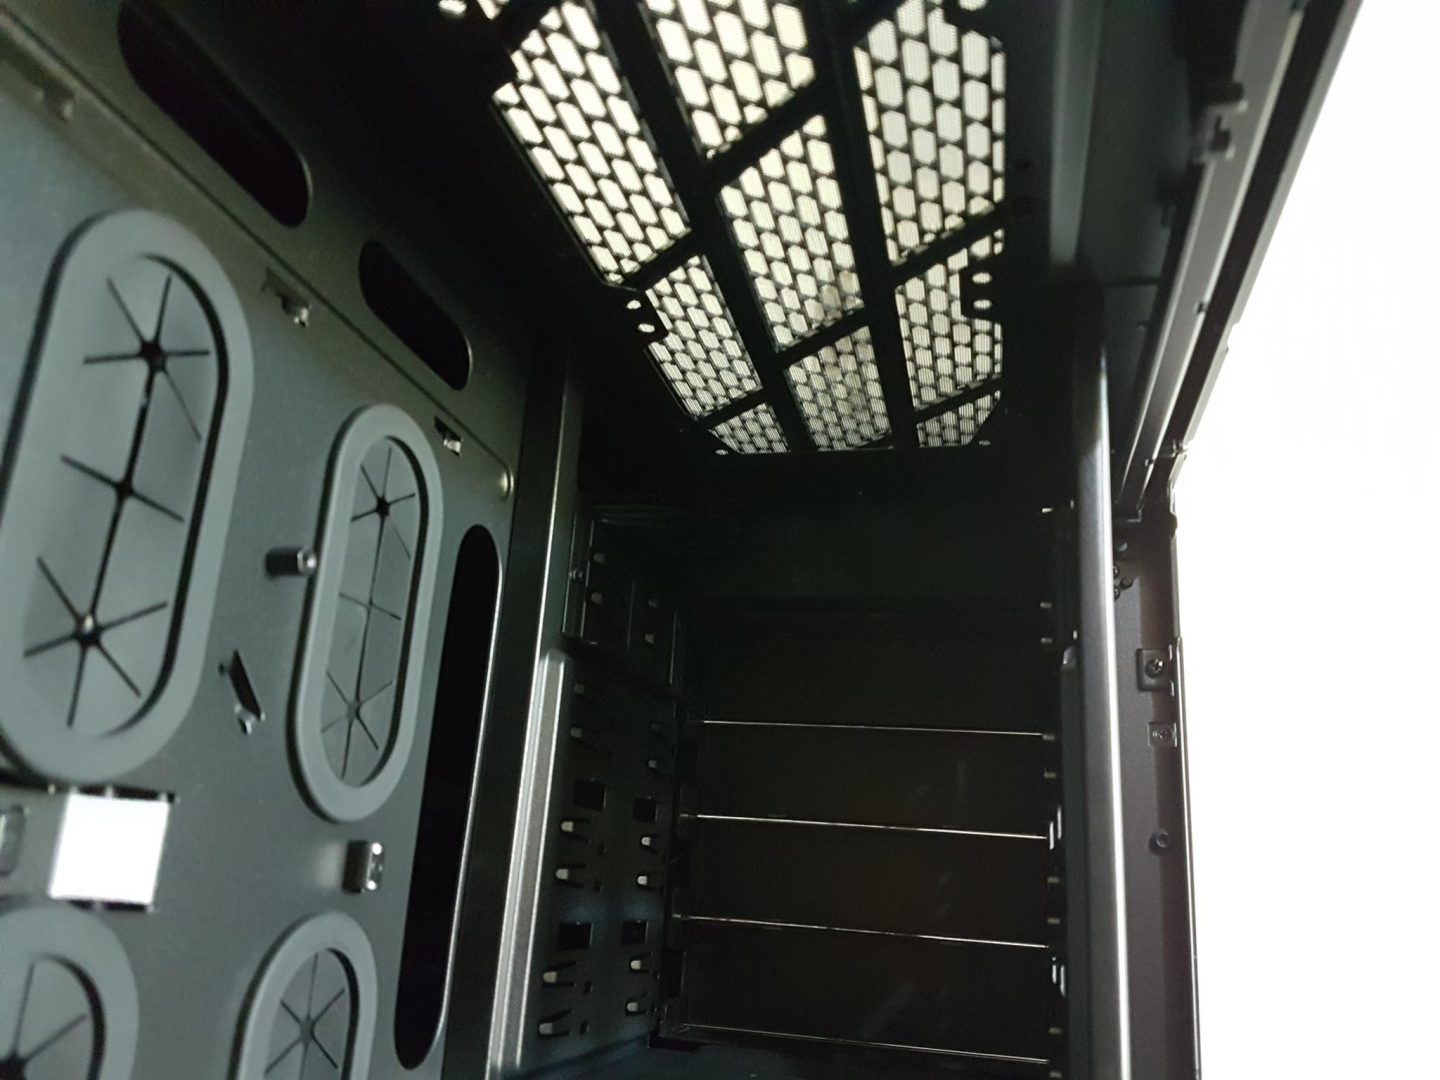
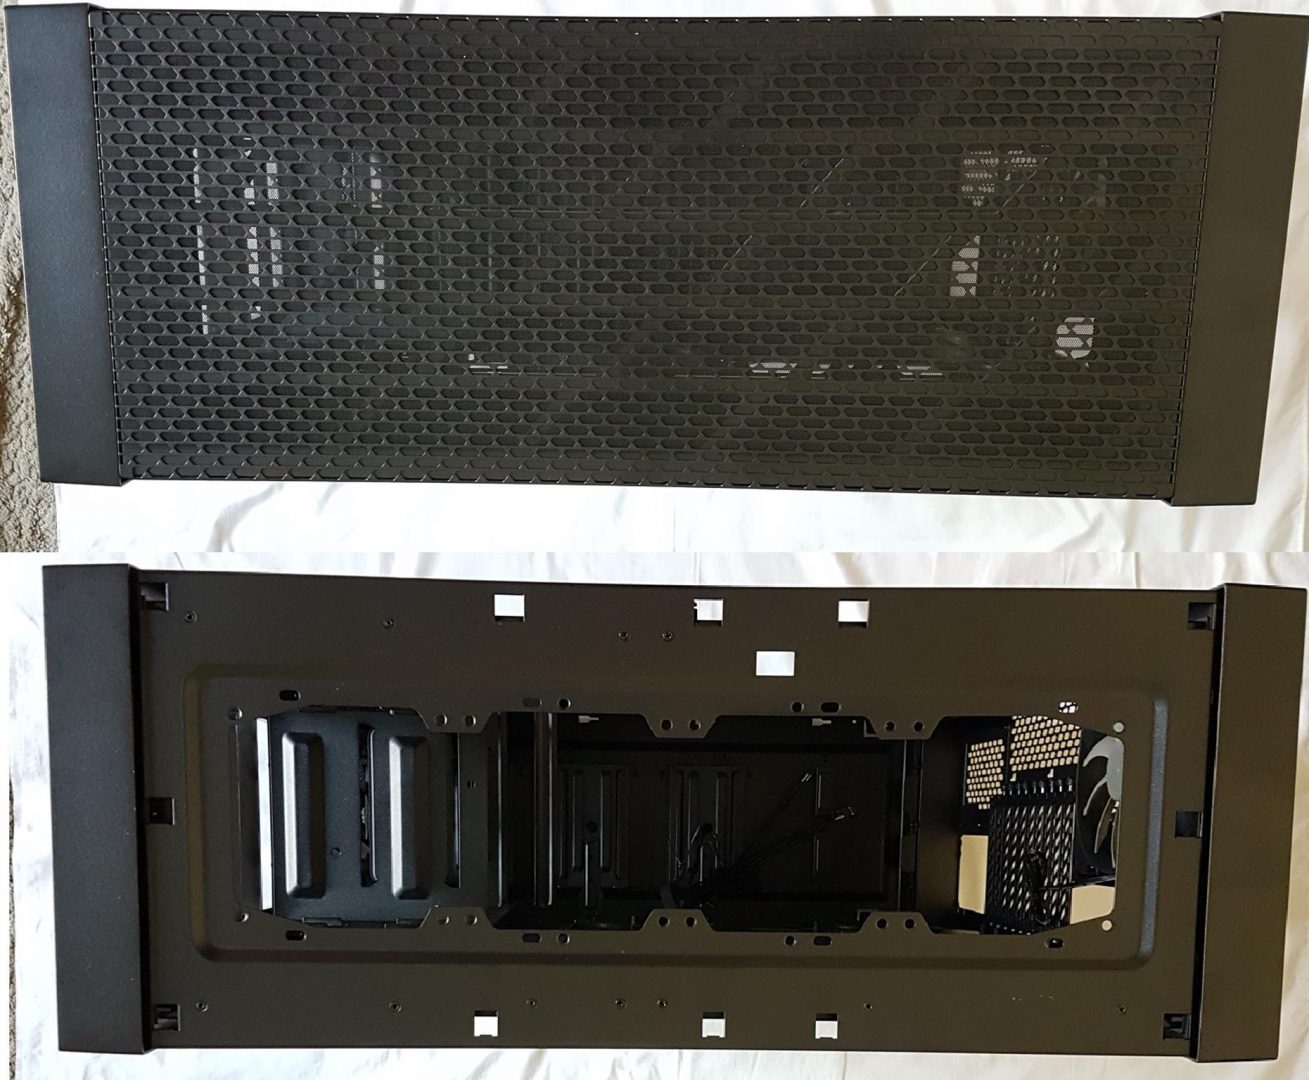
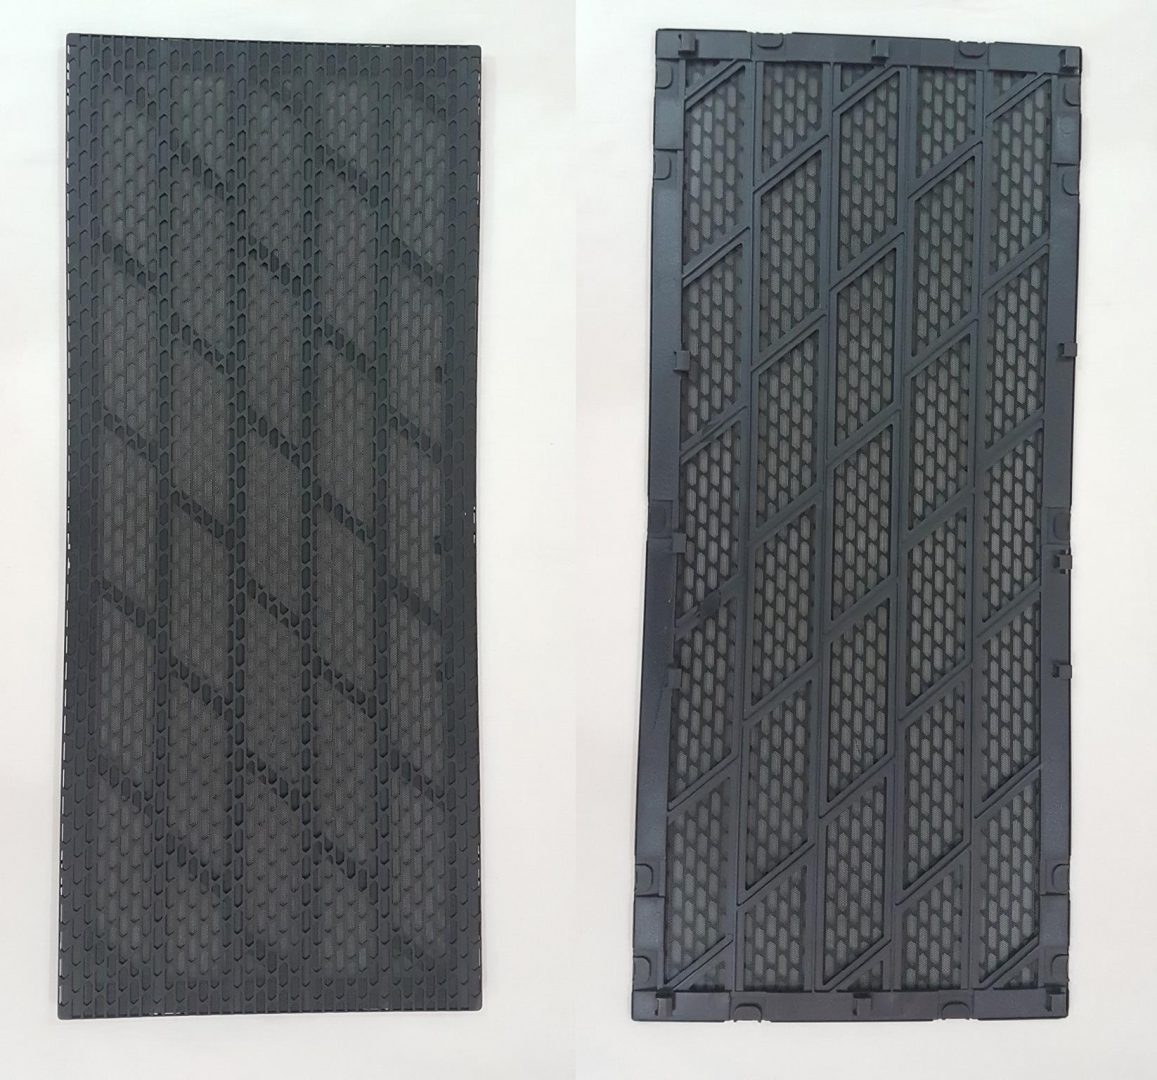
The top panel is a single piece of mesh with the underlying supporting structure for rigidity and strength. It acts like a dust filter as well as it is dense enough not to make the mounted hardware underneath it, highlighted clearly.
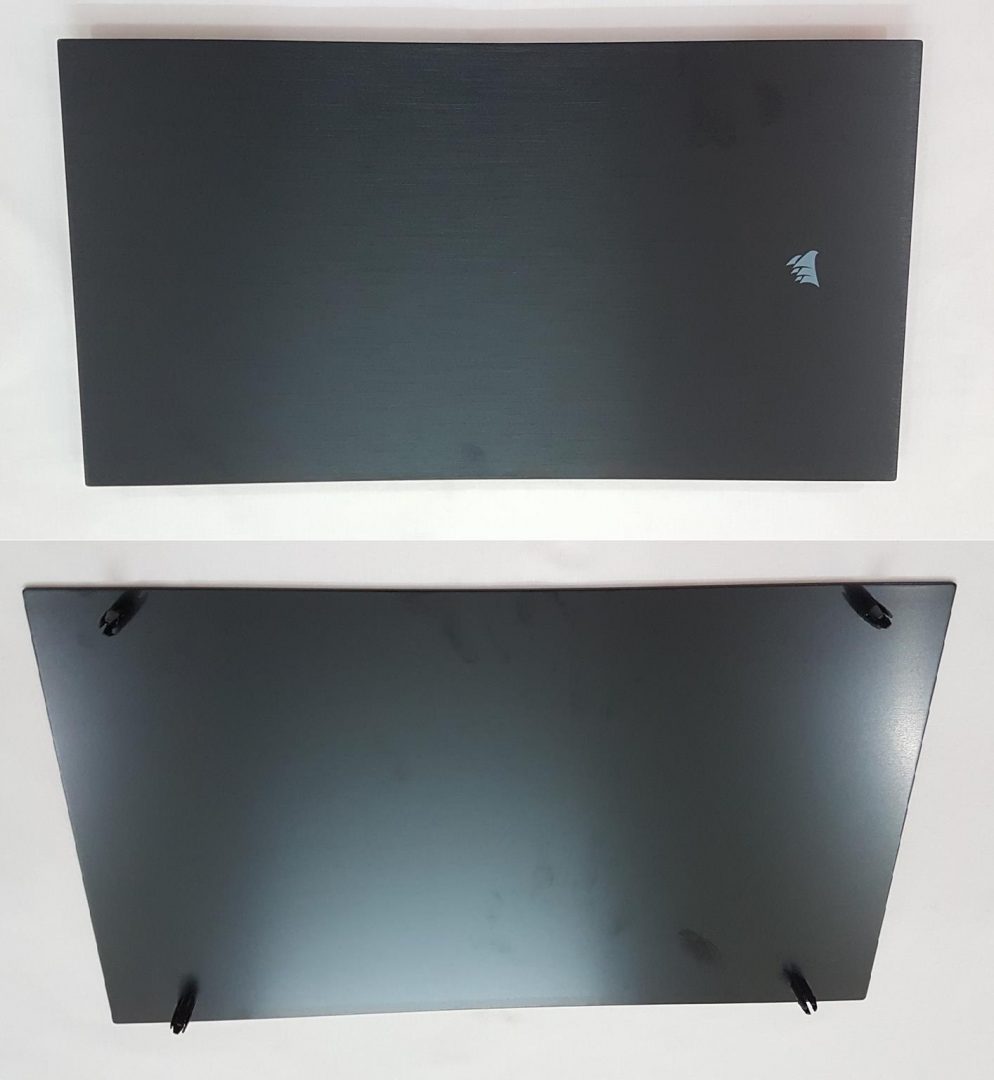
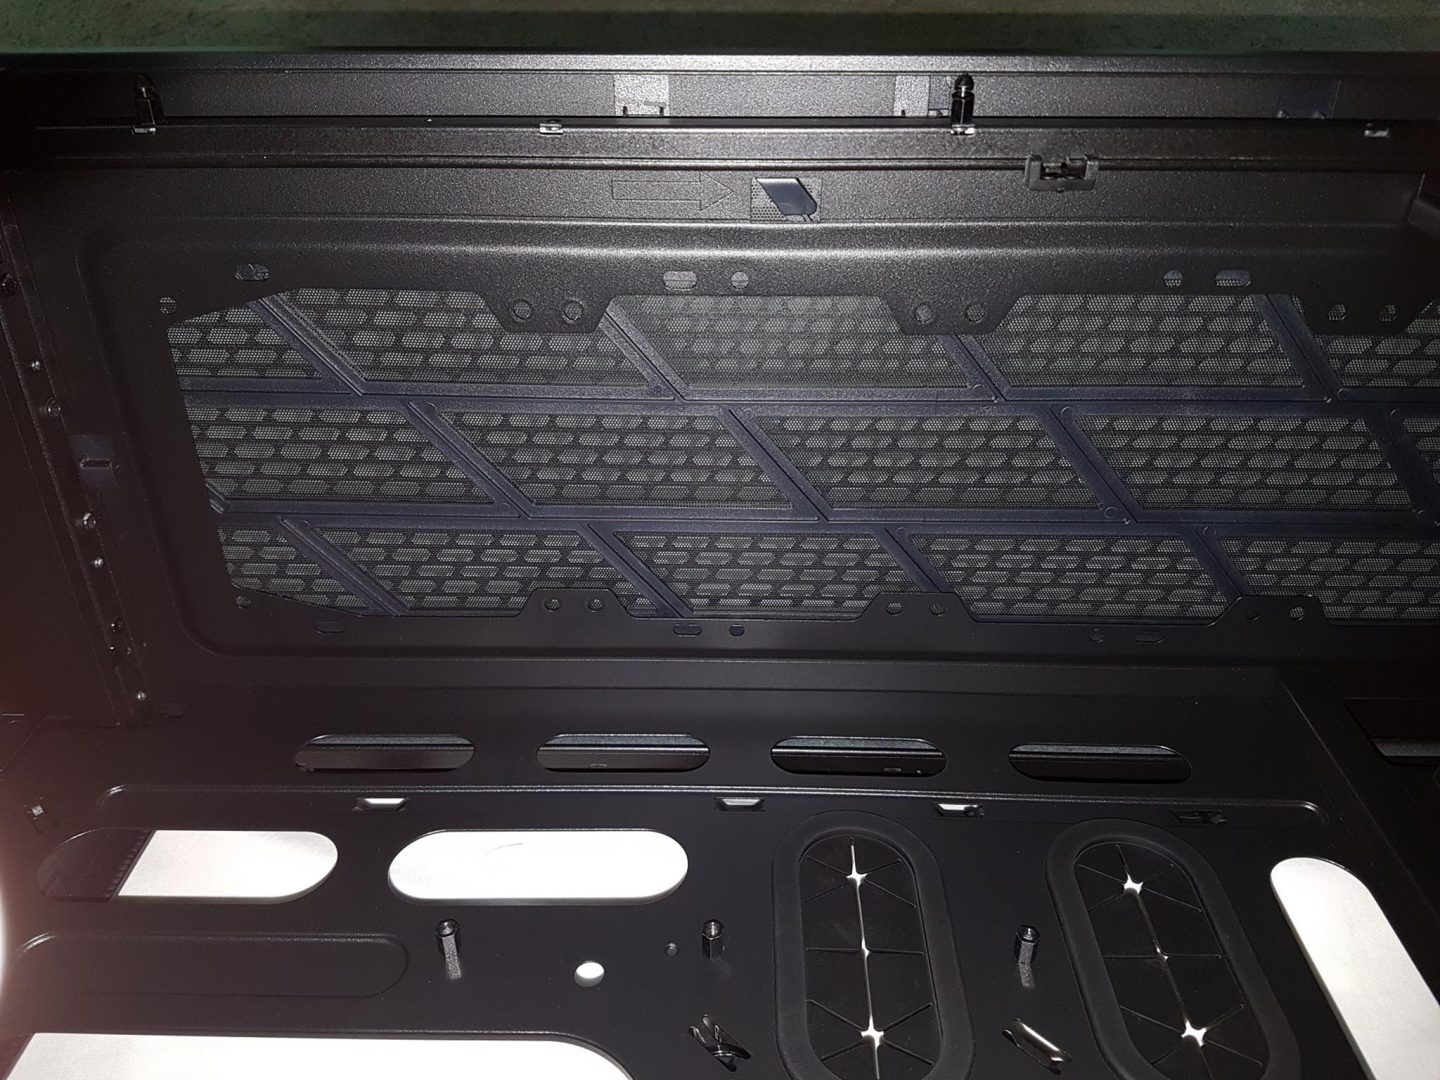
Removing the top panel is tricky and I wish Corsair had taken a different approach in its implementation. In order to remove it, one would have to look from the inside and locate a hinge right next to an arrow indicator. Please check the picture for better understanding. Press this notch upward and at the same time slide the panel towards the transparent panel side.
The top panel would come off. It is tricky but once you know the mechanism, it is not that hard but you would need to take off the side panel in order to approach that latch.
Putting the panel back on is another cumbersome task. Look at the backside of the top panel. You would see three latches on right and left sides of the panel. These would need to slide in on the steel structure of the chassis. A panel of under review chassis was bit flimsy and curvy and one would need to apply pressure on both edges to slide the complete panel inside at a time otherwise it would not fit properly. Once removed, we have a spacious room to mount up to 480mm or 420mm thick radiator. I used Corsair H100i V2 which is a 240mm radiator. There was still plenty of room after installing this AIO.
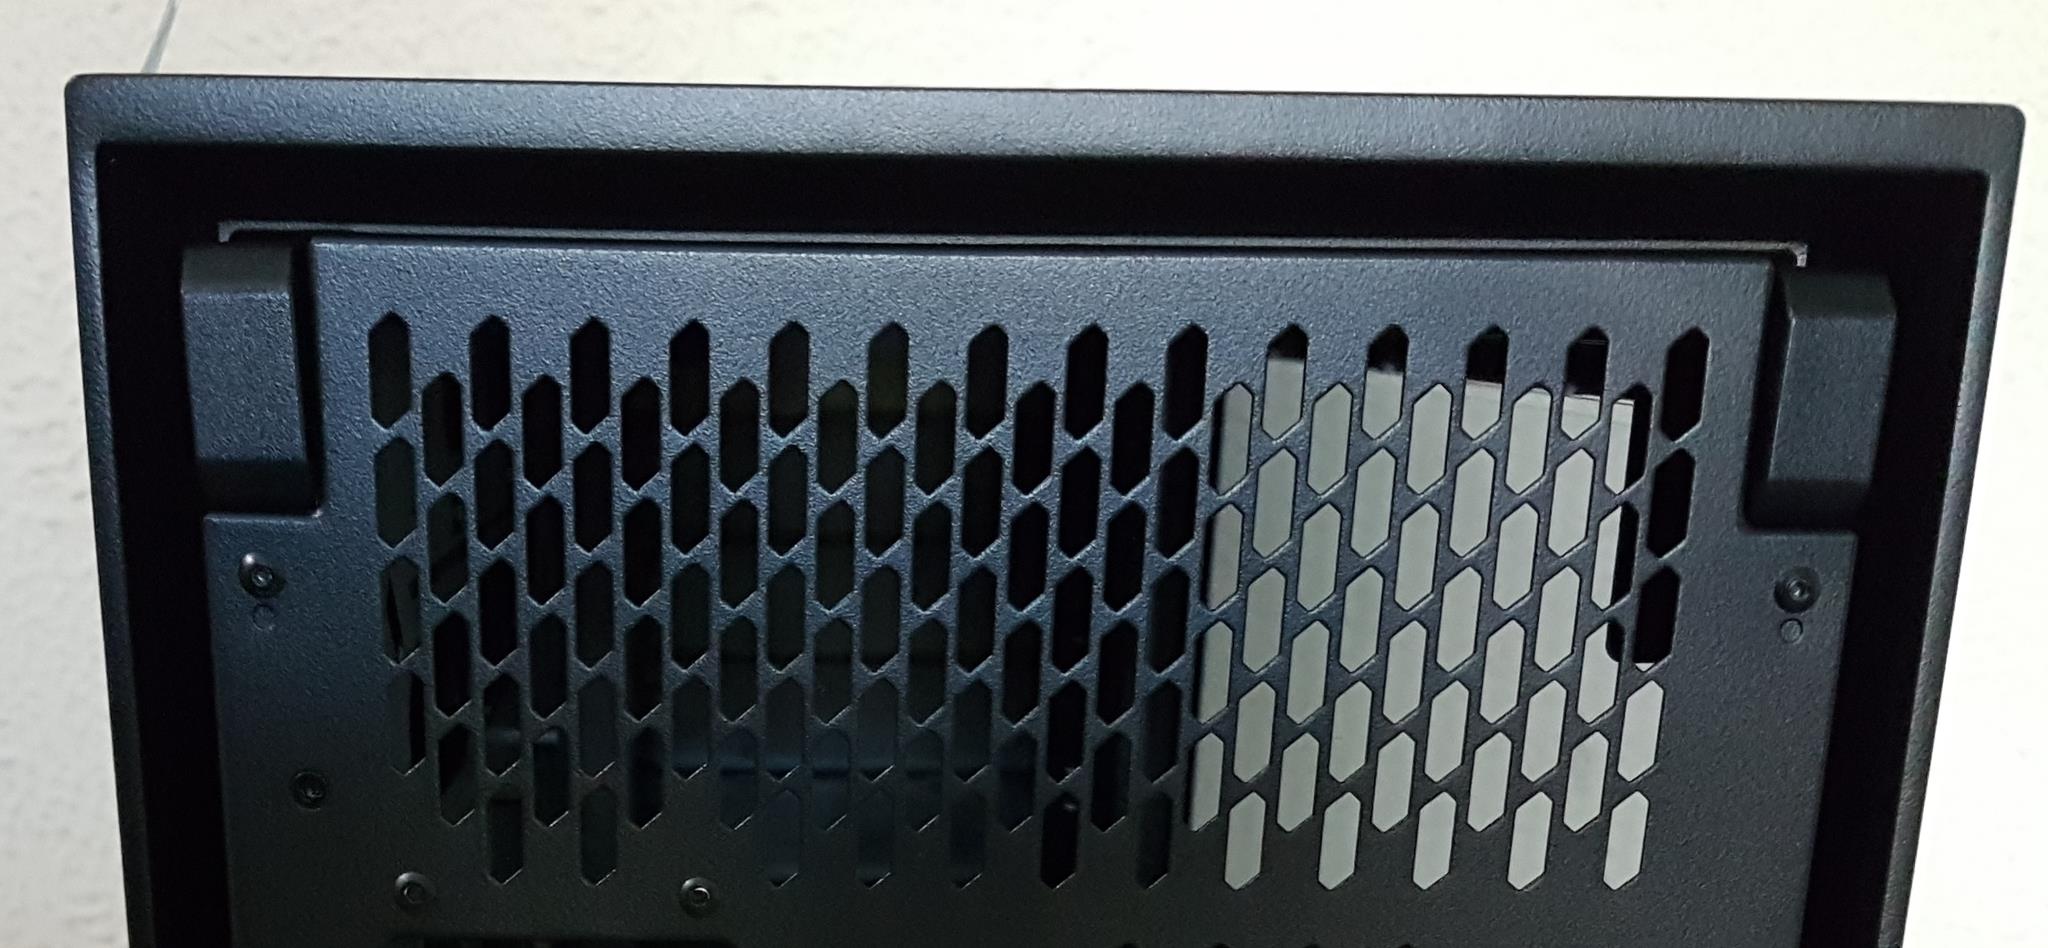
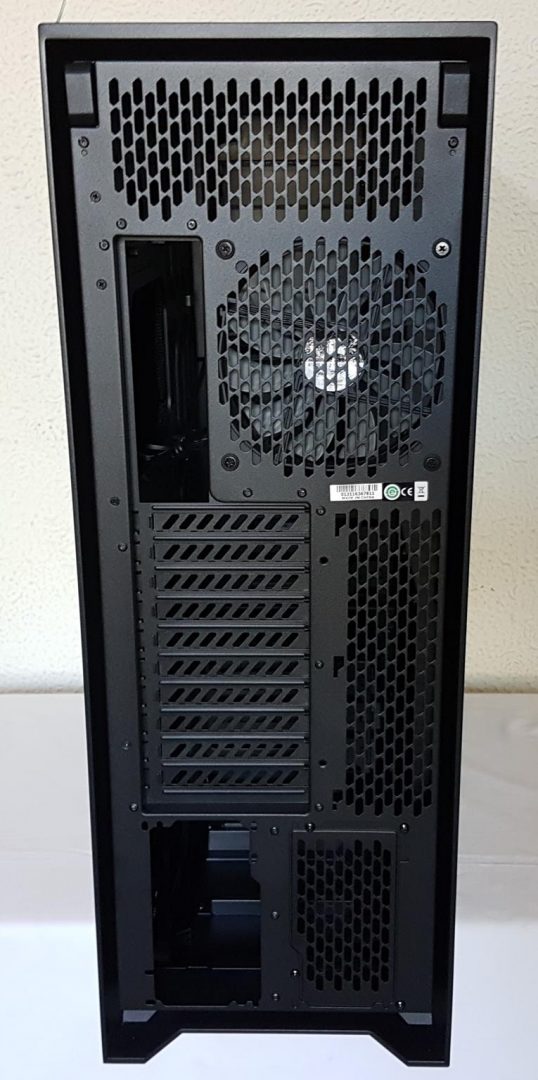
The rear of the chassis has two wedges or buttons on the top left and right sides. Pressing these buttons would release the side panels. This is quite innovative design. We don’t need thumbscrews to mount/un-mount the side panels. There is a large vented portion above the IO plate and fan mount locations. This is approx 90mm in height. Corsair was definitely thoughtful on its design. This area offsets to the radiator mount on the top. Having a vented area would help with air flow.
Fan mount for 140mm fan is fixed and height of the fan can’t be adjusted. We’ve 10 PCI expansion slot covers. Quadruple graphics cards configuration is possible in this chassis. On the bottom, we’ve one uncovered space for a vertical PSU mount and a redundant vented/covered space for another PSU. Corsair was ahead in the design lead and did not leave any corner unturned. For extreme rigs with too much power requirement, two PSU units would be handy or even if a user mods the chassis for the dual system at a time, provision of dual PSU is a plus. The whole chassis seems to be grooved inside its structure which gives pleasing looks. Note the two tone cross checked color tones of the grommets.
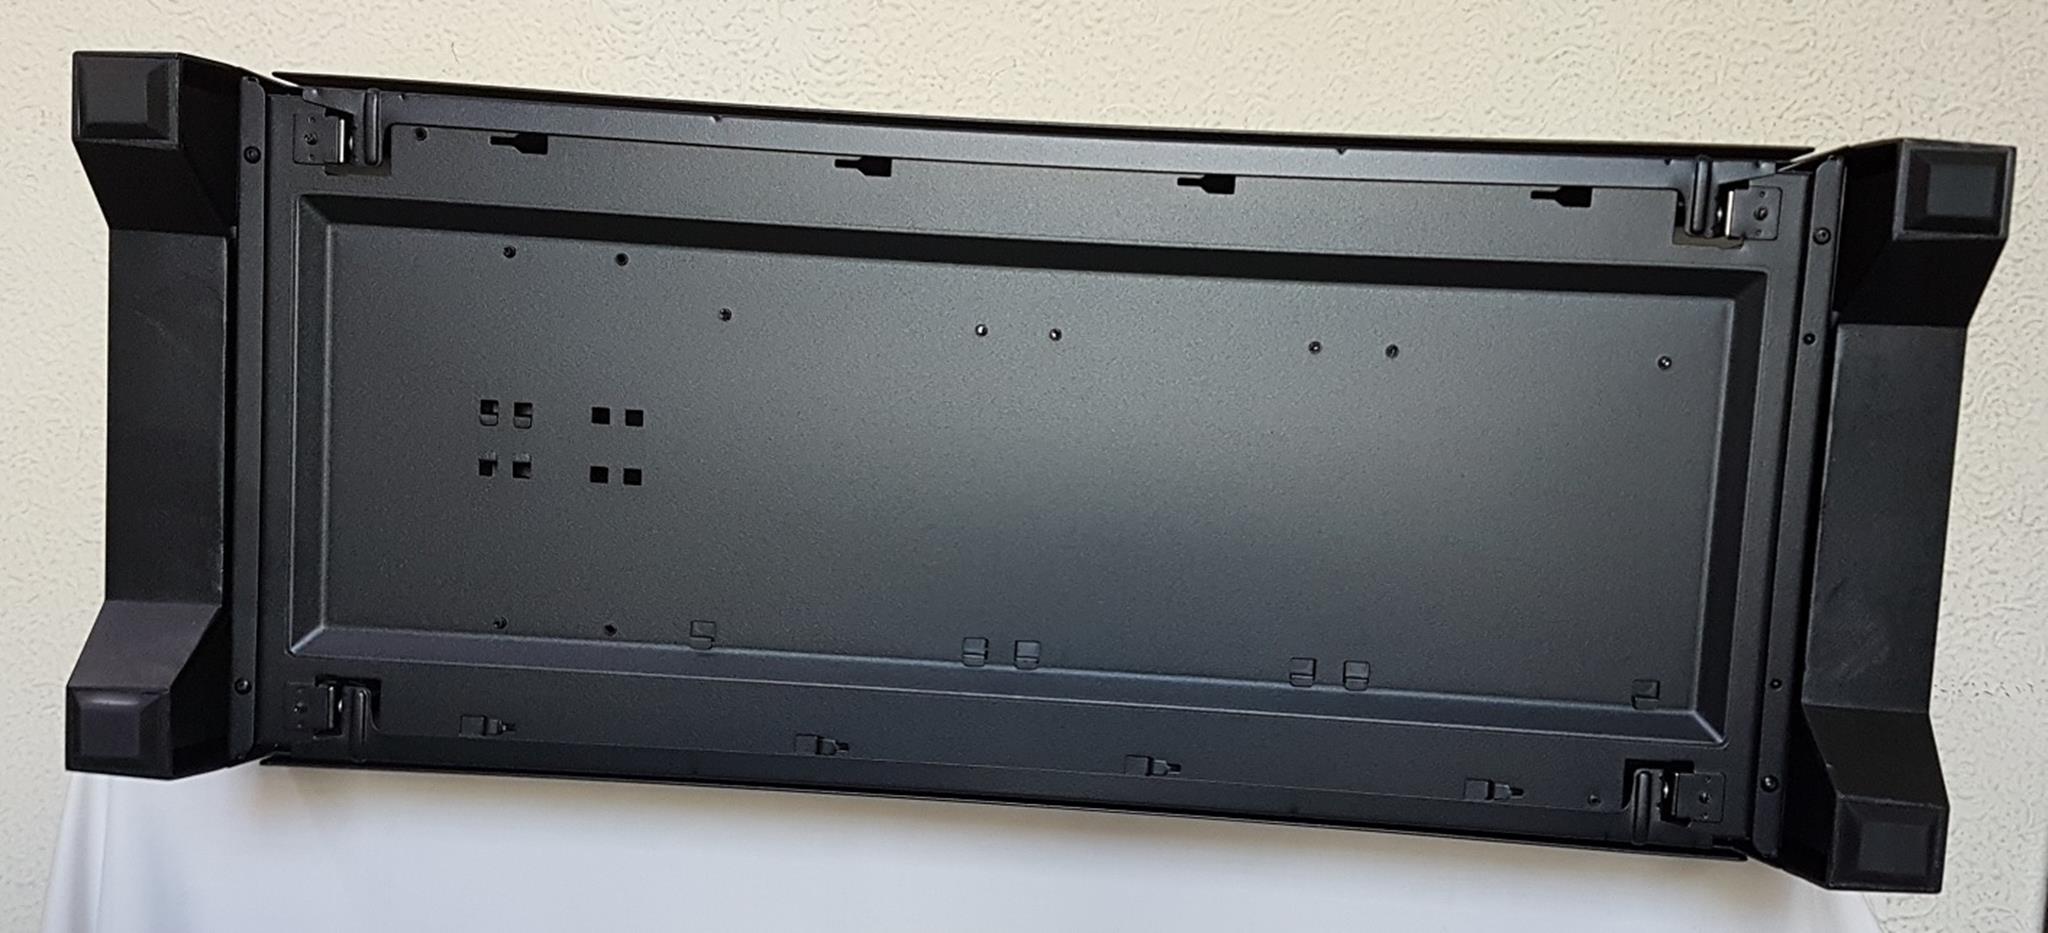
The bottom section of the chassis is plain and has no dust filter on it. This is rational as the PSUs are mounted vertically. The large feet – part of the chassis – gives enough clearance from the ground so that it can be placed on the carpeted floor.
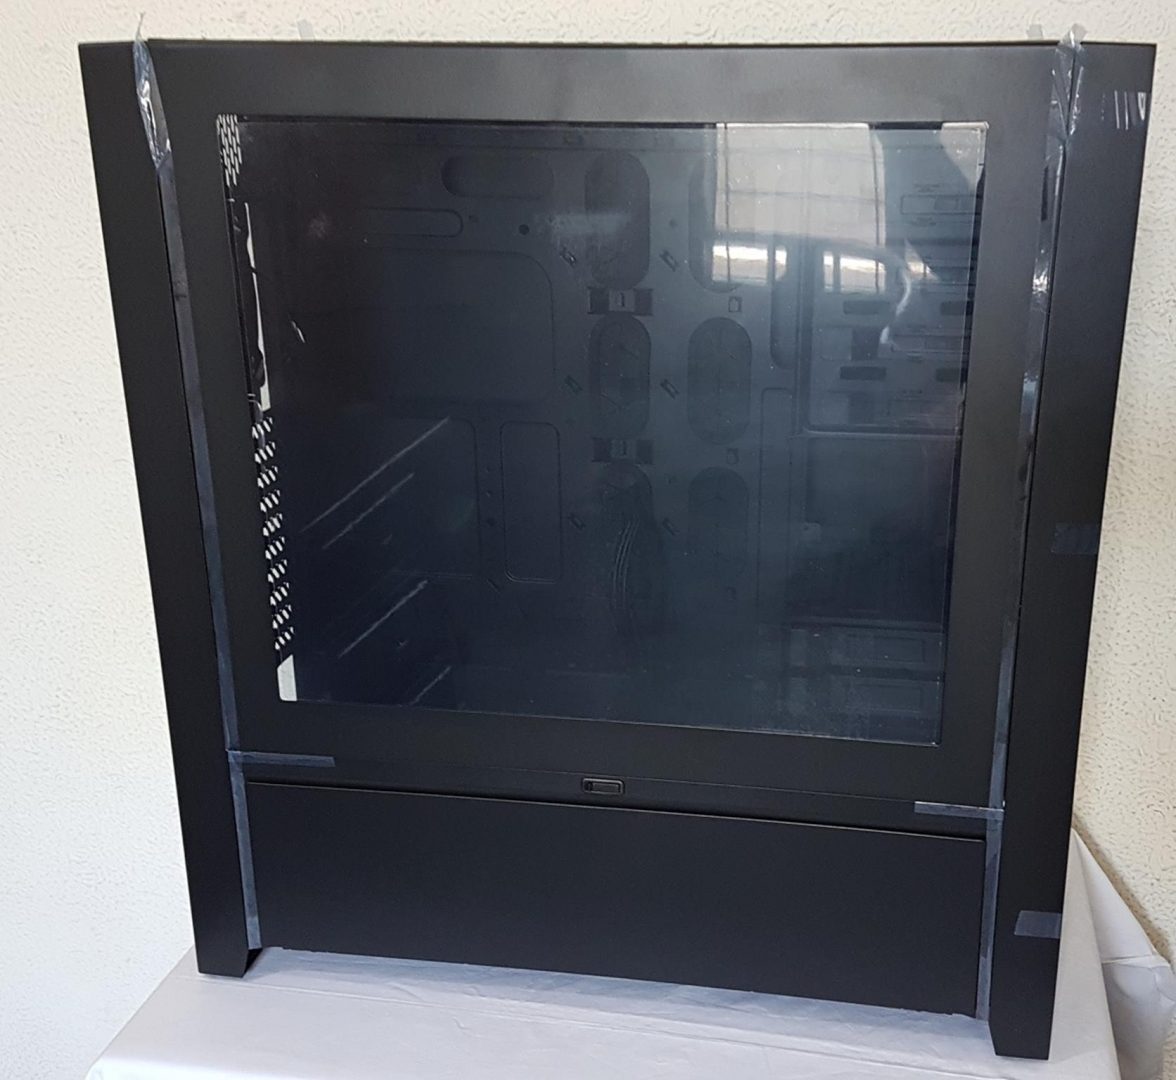
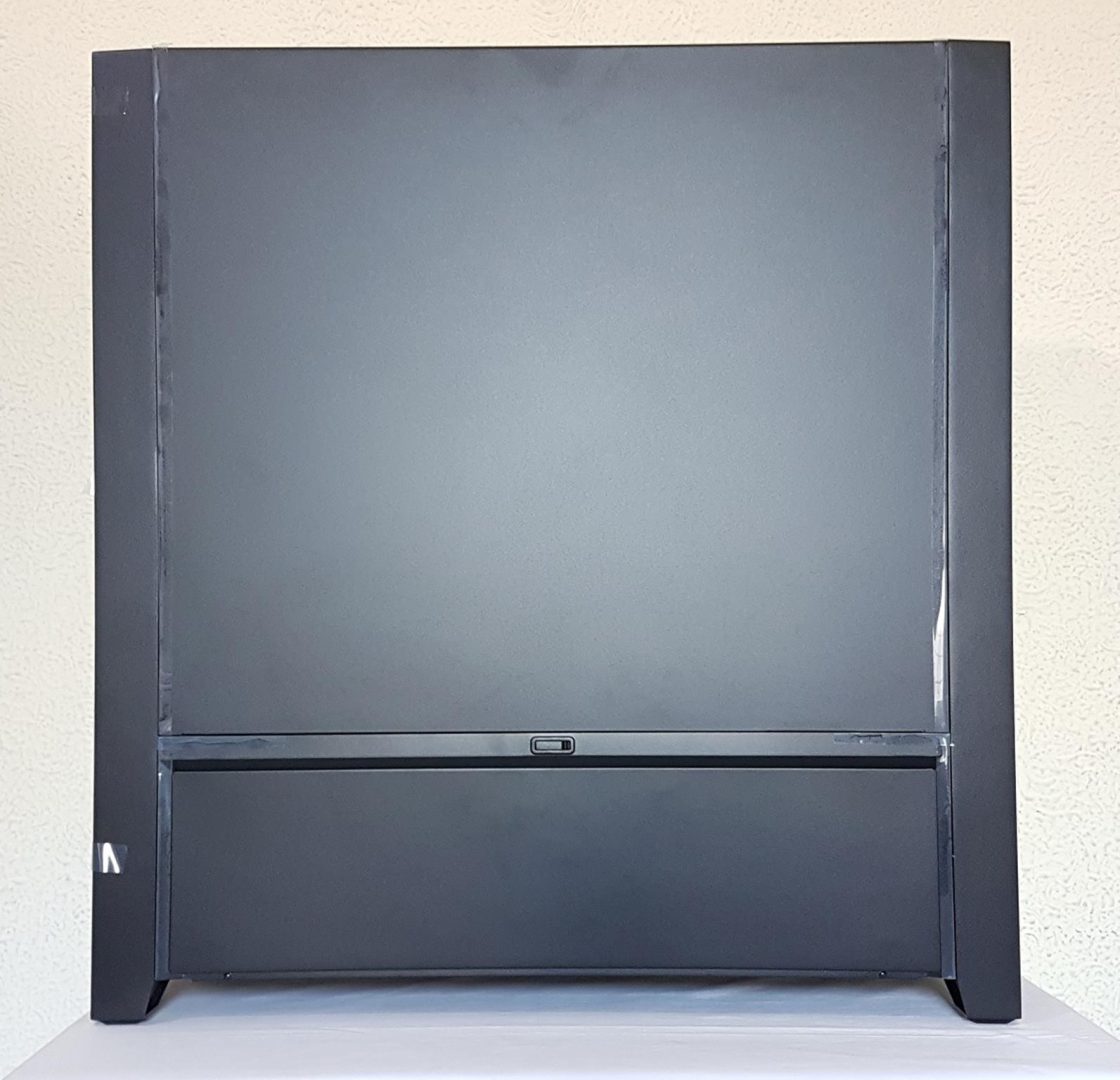
The left side of the chassis has one large transparent windowed panel measuring 558mm x 485mm (L x H). It is black tinted. Bottom chamber cover has dimensions of 558mm x 172mm (L x H). Corsair has pasted tapes on the edges to avoid panels’ displacement while shipping. Tapes can be found on the front, left and right sides of the chassis.
Top chamber panel is hinged on the bottom. In order to release it, press the button at the rear of the chassis on the same side as of the panel. Pressing the button would release the panel. The left panel of the chassis somehow has to be taken out by force even after pressing the button. Hopefully, this would not be the case with other units. I did not observe this complaint on the back panel.
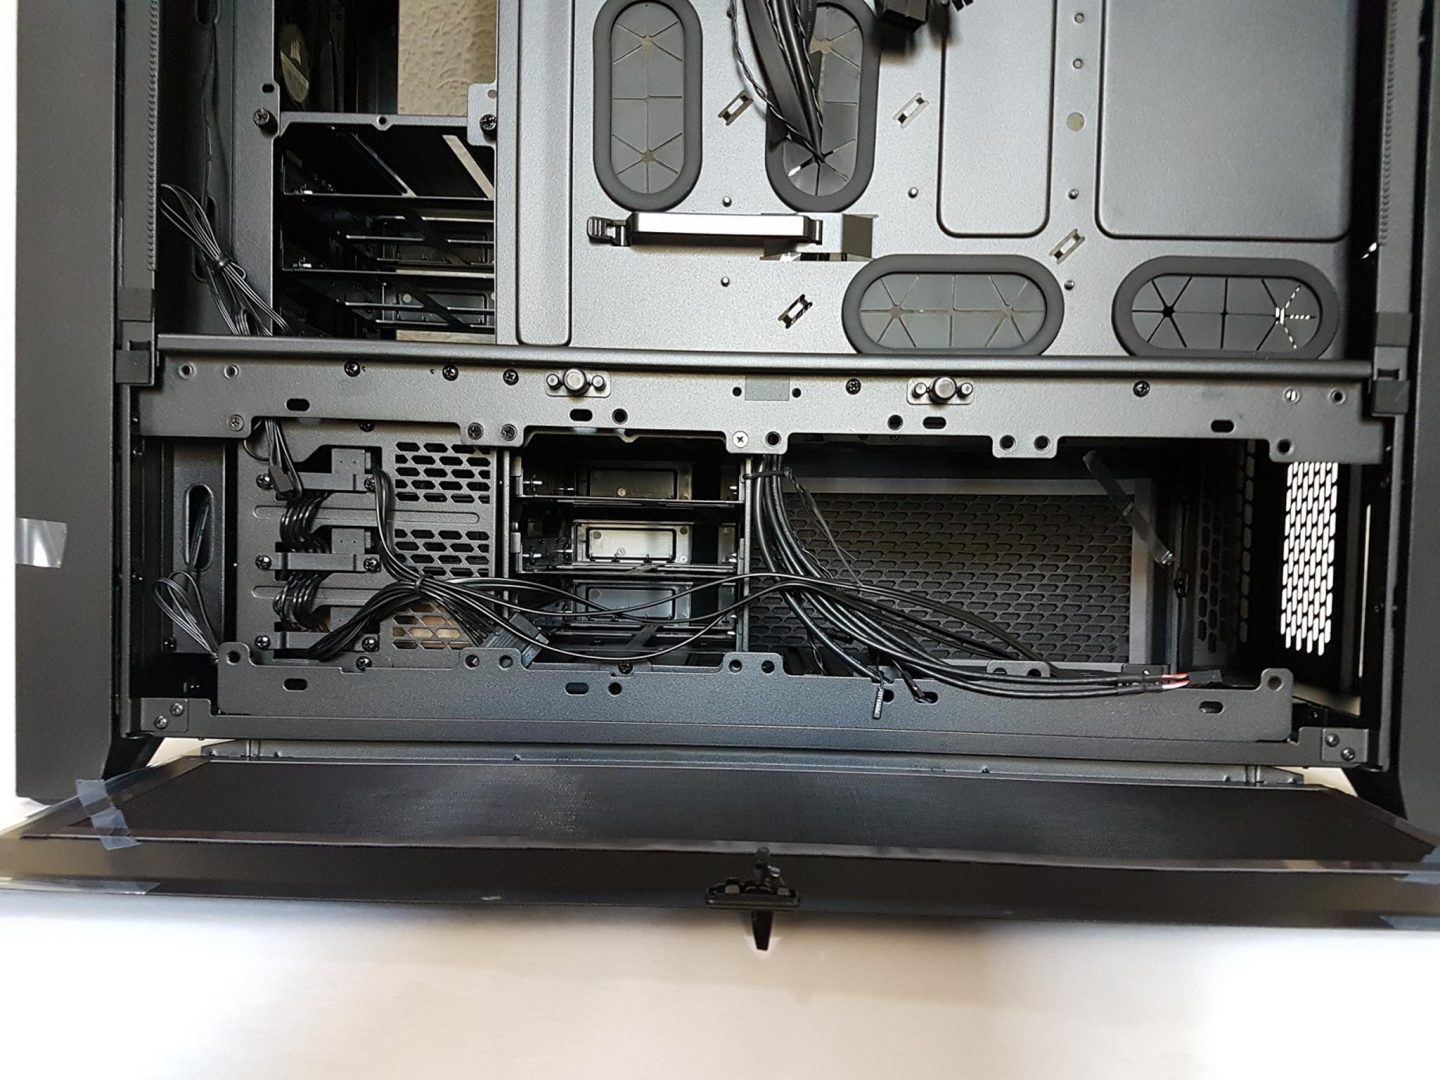
Bottom chamber panel is hinged on the bottom as well. However, it is fixed on the bottom side, unlike the top chamber’s panel. There is rocker button on the top middle of the section of this panel. Press the raised edge inside and pull the cover. This would release the panel.
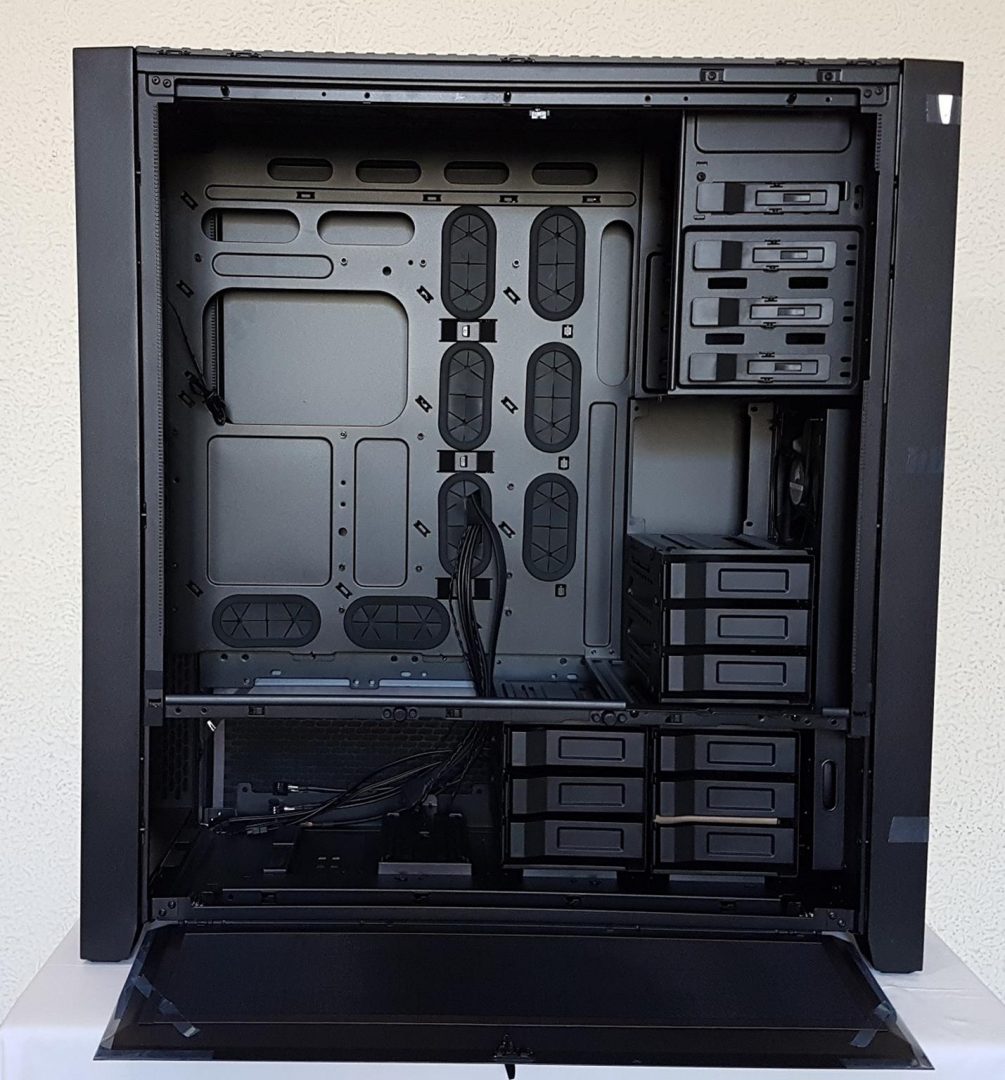
Opening both panel covers would reveal the inside of the chassis. This is quite remarkable design layout and it speaks for itself. Picture may not indicate its sheer size but believe me, this is literally a super tower of behemoth size.
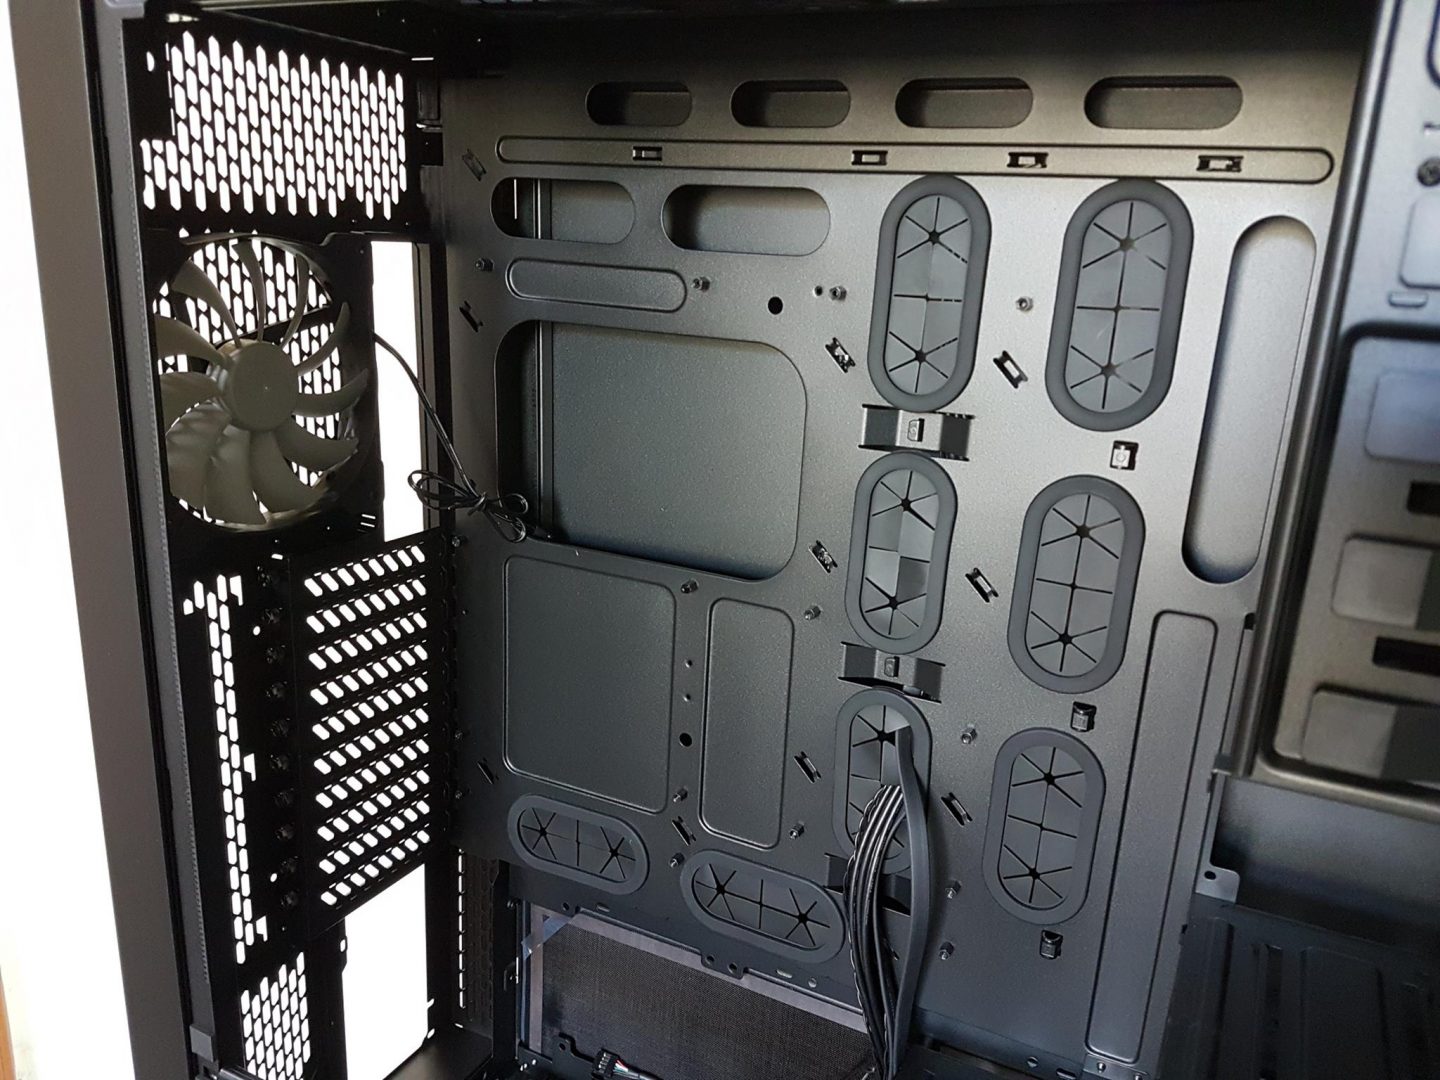
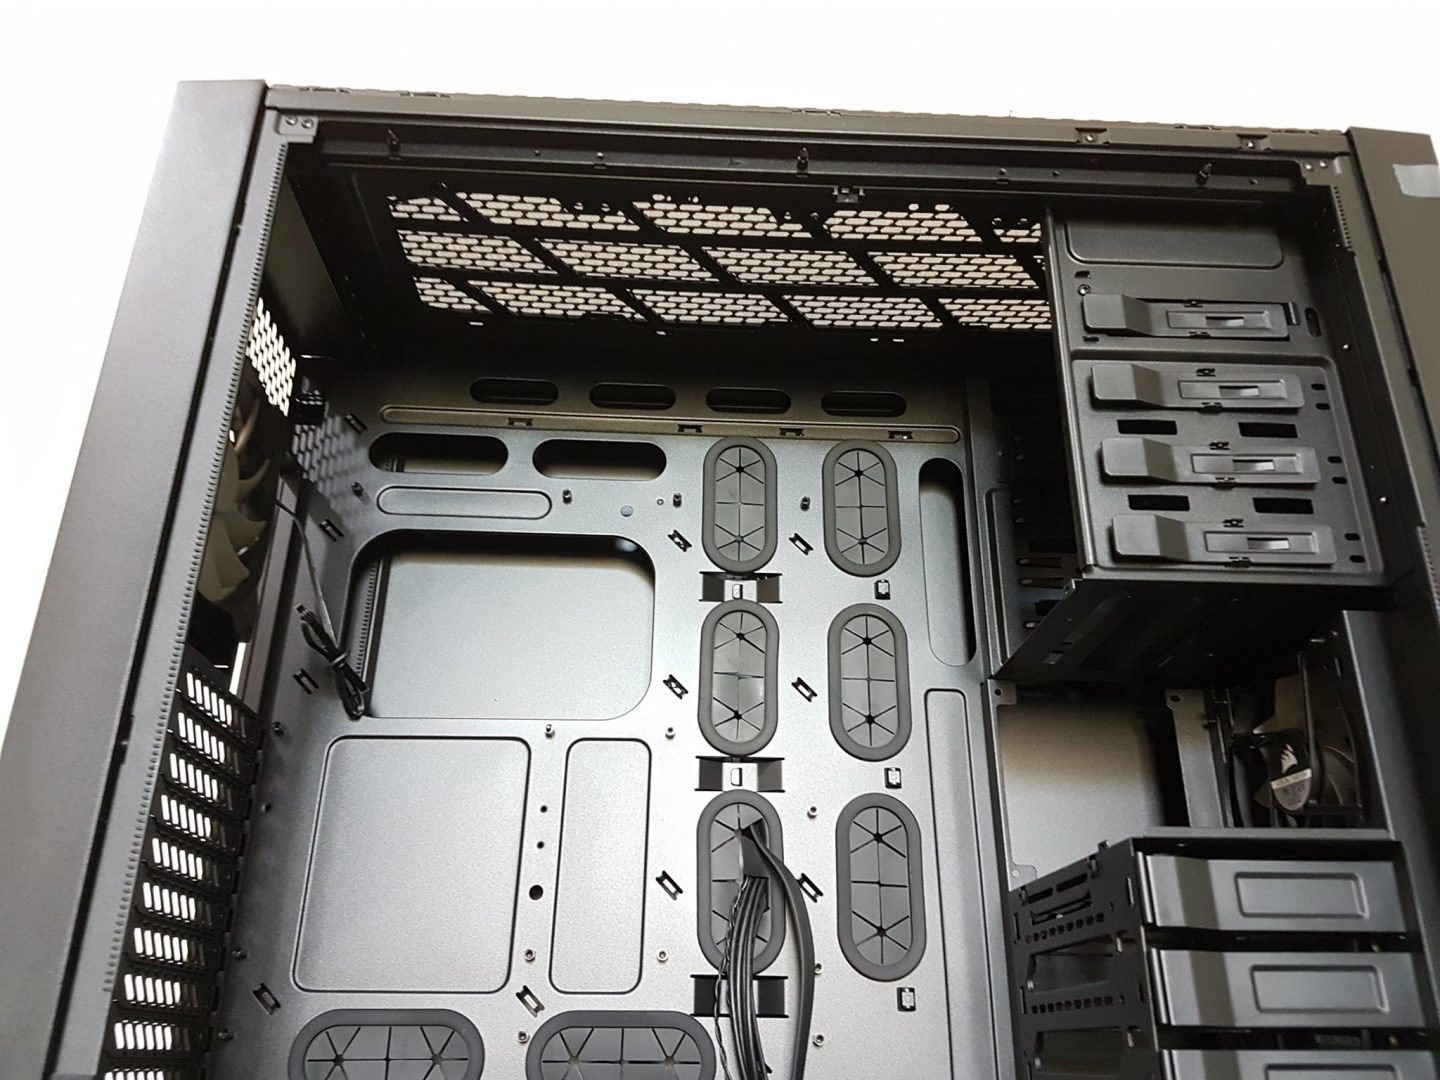
Let’s have a look on the top chamber’s layout. We’ve four cut outs on the top side beneath the top panel for cable routeing. We’ve large size CPU backplate cutout. Above this cutout, there are two more cutouts for cable routeing.
We’ve total 6 rubber grommets on the right side of the motherboard tray. Two rubber grommets are on the bottom side. There is another large length cut out further from 6 rubber grommets. This would give a hint of friendly cable management possibilities in the chassis. Standoffs are pre-mounted with one stud in the middle for guiding the motherboard placement.
Chassis supports Mini-ITX, Micro-ATX, ATX, E-ATX, XL-ATX and HPTX size motherboards. Imagine the endless possibilities of serious performing punching hardware builds in this chassis. I don’t see why someone would buy this chassis and put air cooling or even AIO based cooling configuration in the chassis of this size as it is truly built for extreme custom loop builds.
There is approx. 108mm space above the motherboard tray from the top panel. This would leave room for thicker radiators. My friend here is using 57mm thick 360mm radiator in his 900D. He is using push and pull configuration on the radiator. 57mm + 25mm + 25mm (25mm being the height of a fan) comes to 107mm and according to him his bottom fans’ frames touch the motherboard top. Just trying to put the space clearance in perspective.
On the rear, we can see single 140mm fan which is AF140L 140mm fan. This is a 3-pin fan. There is an interesting design time element with the rear side of the motherboard tray. The whole rear side area is implemented further inside the framed structure of the chassis. This creates obstruction when it comes to handling the graphics card(s) installation as screwdriver can’t be used inside that area due to restriction from the frame’s border. To address this limitation, Corsair has provided a 90 degree angled screwdriver in the accessories but I did not find it to be convenient when putting in use. Corsair could have provided pre-mounted holes on the outer frame so that screwdriver could be passed through them to screw/unscrew the graphics card(s) much like how they have done with their Crystal Series 460X RGB.
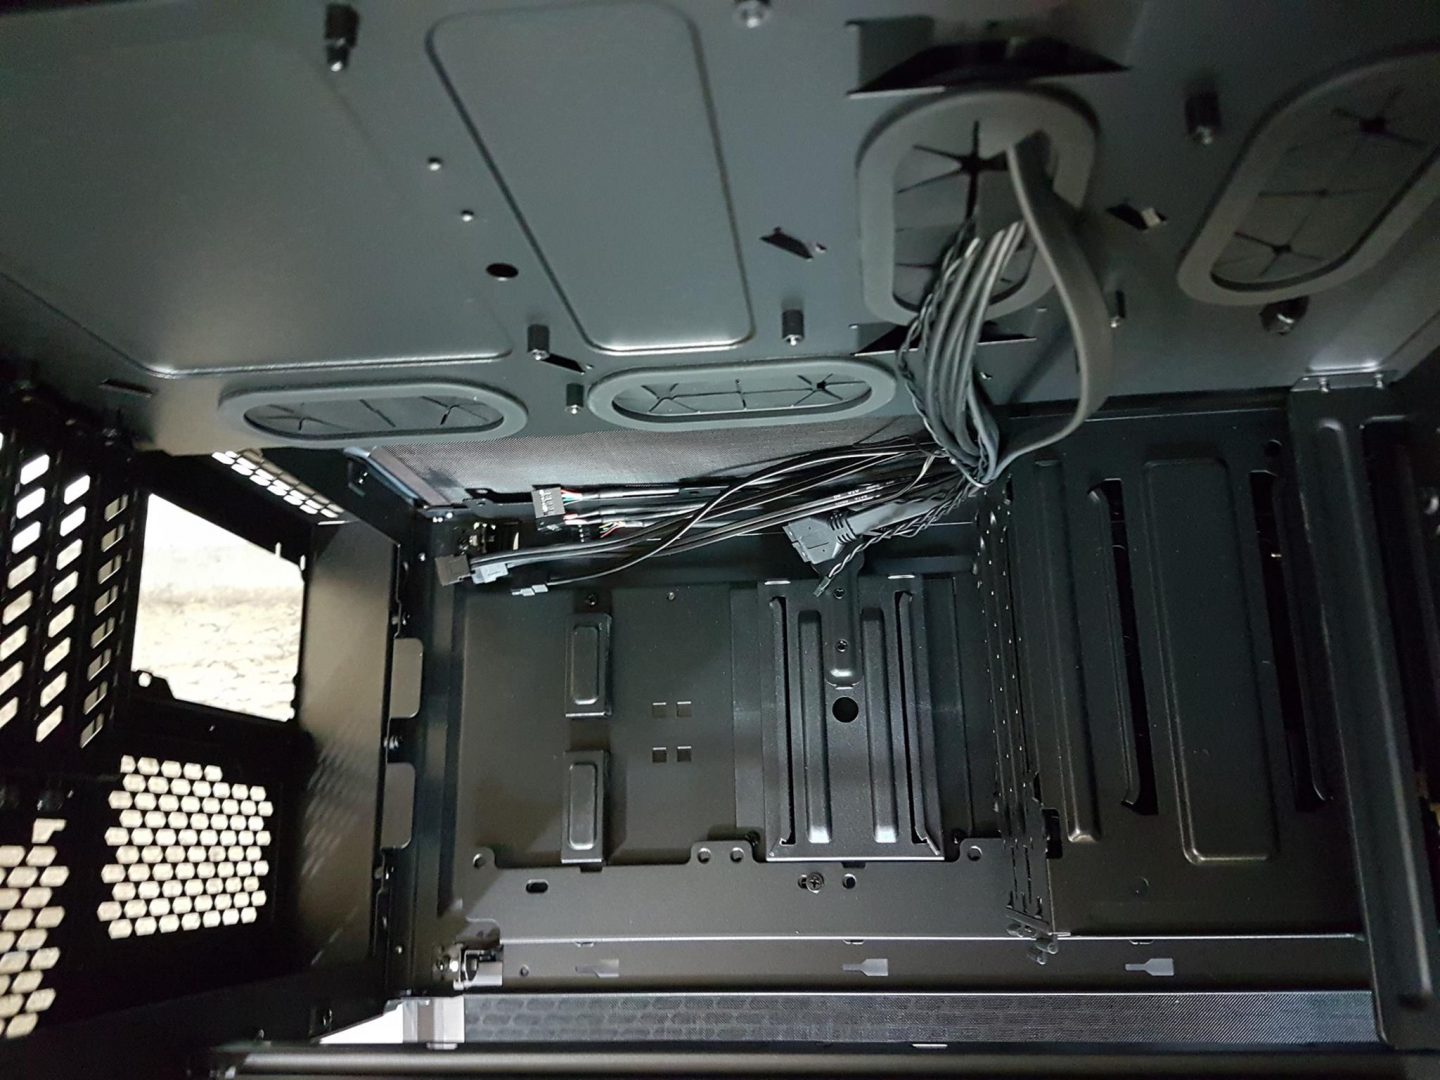
The area between the top and bottom chambers is open and there is no shroud to separate them. A shroud would have added more to the aesthetics of the chassis and completed build.
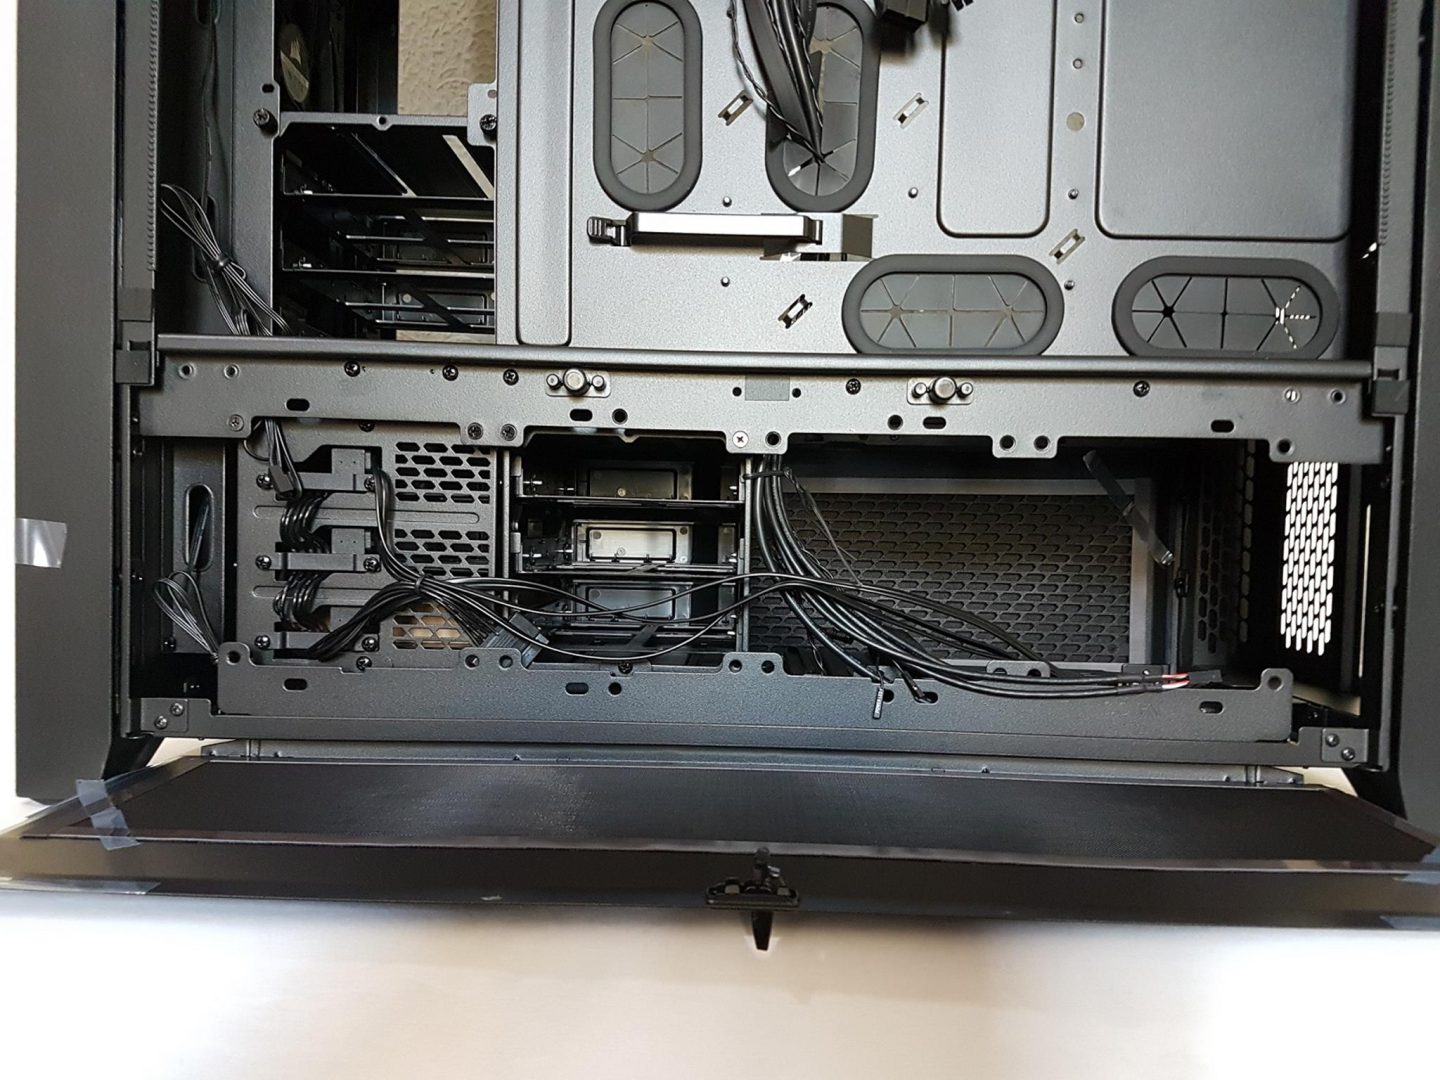
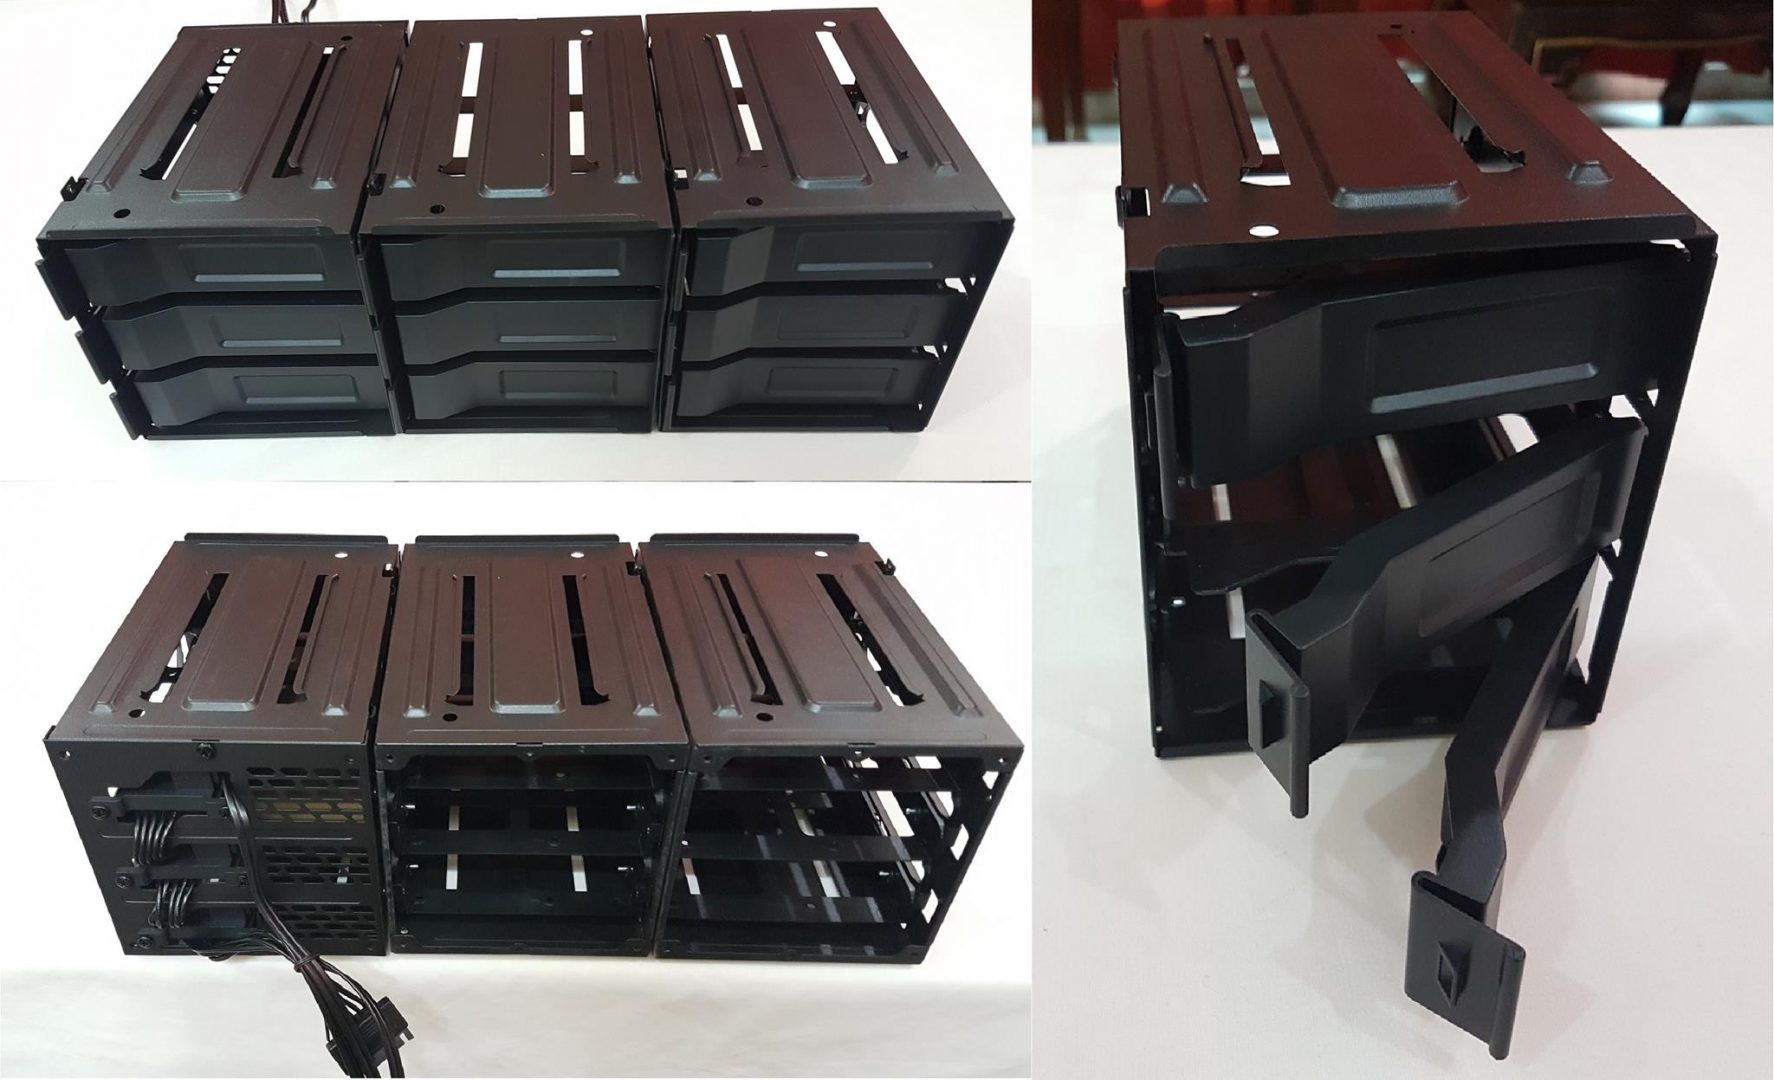
On the right side, we can see one large size 5.25″ drives bay. It can host up to 4 5.25″ drives. Above the top drive bay, we’ve room for front IO Panel cables. There is a space between drive bays and the storage drive cage. A single 120mm fan can be seen. Another drive cage can be put in that empty slot. This is purely at user’s discretion depending upon build’s requirement. A single drive cage has three caddies. Each caddy can host three HDDs/SSDs in combination.
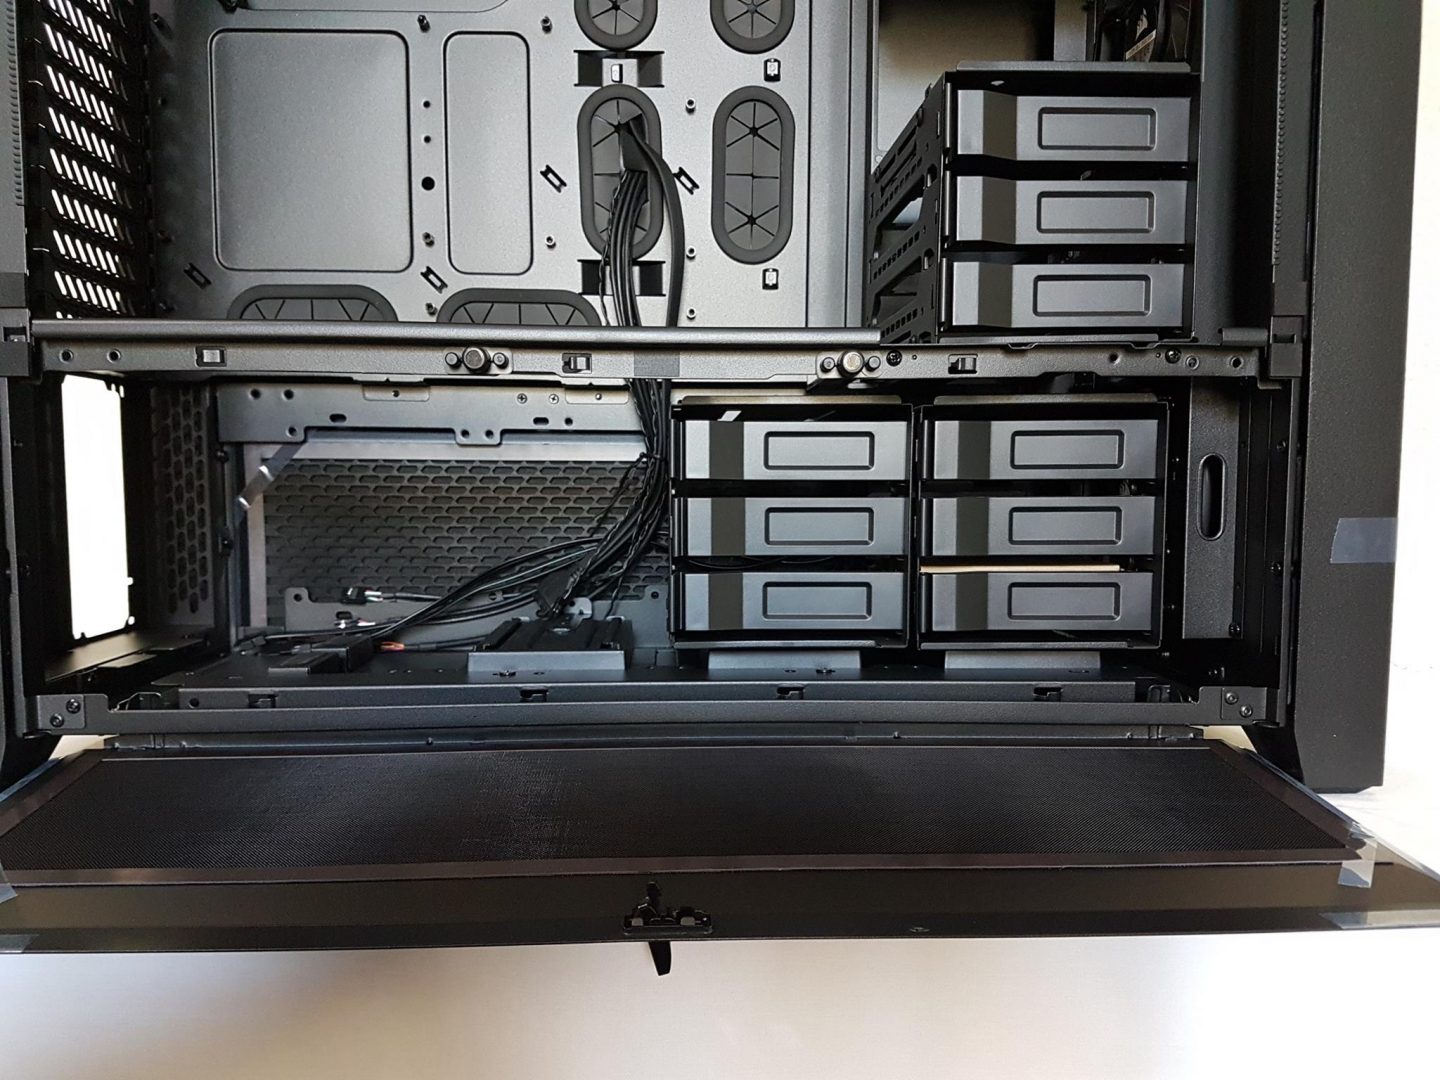
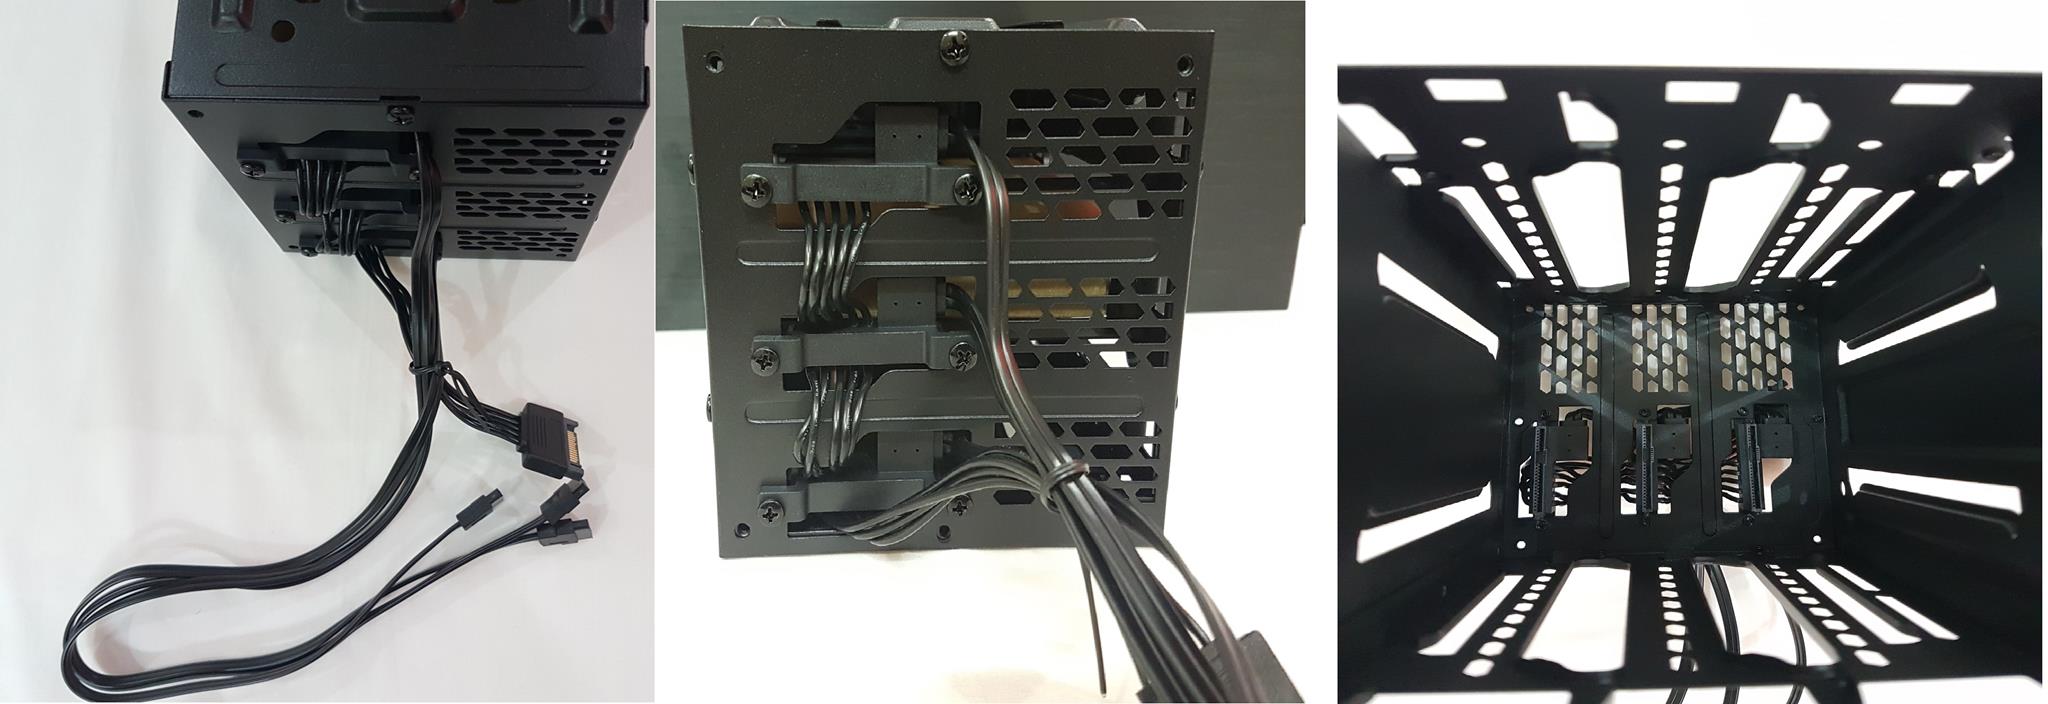
There are two more storage drive cages in the bottom chamber. The right most drive cage is implemented on hot swap mount. It has three SATA and Power connectors pre-installed in it. The user would be required to just put the storage drive on the caddy and slide it in. It will connect with the pre-installed connectors and save the hassle of connecting separate SATA and power cables to the installed drives. I wish this approach becomes the industry standard. A single SATA power connector needs to be connected with the PSU to power all three drives.
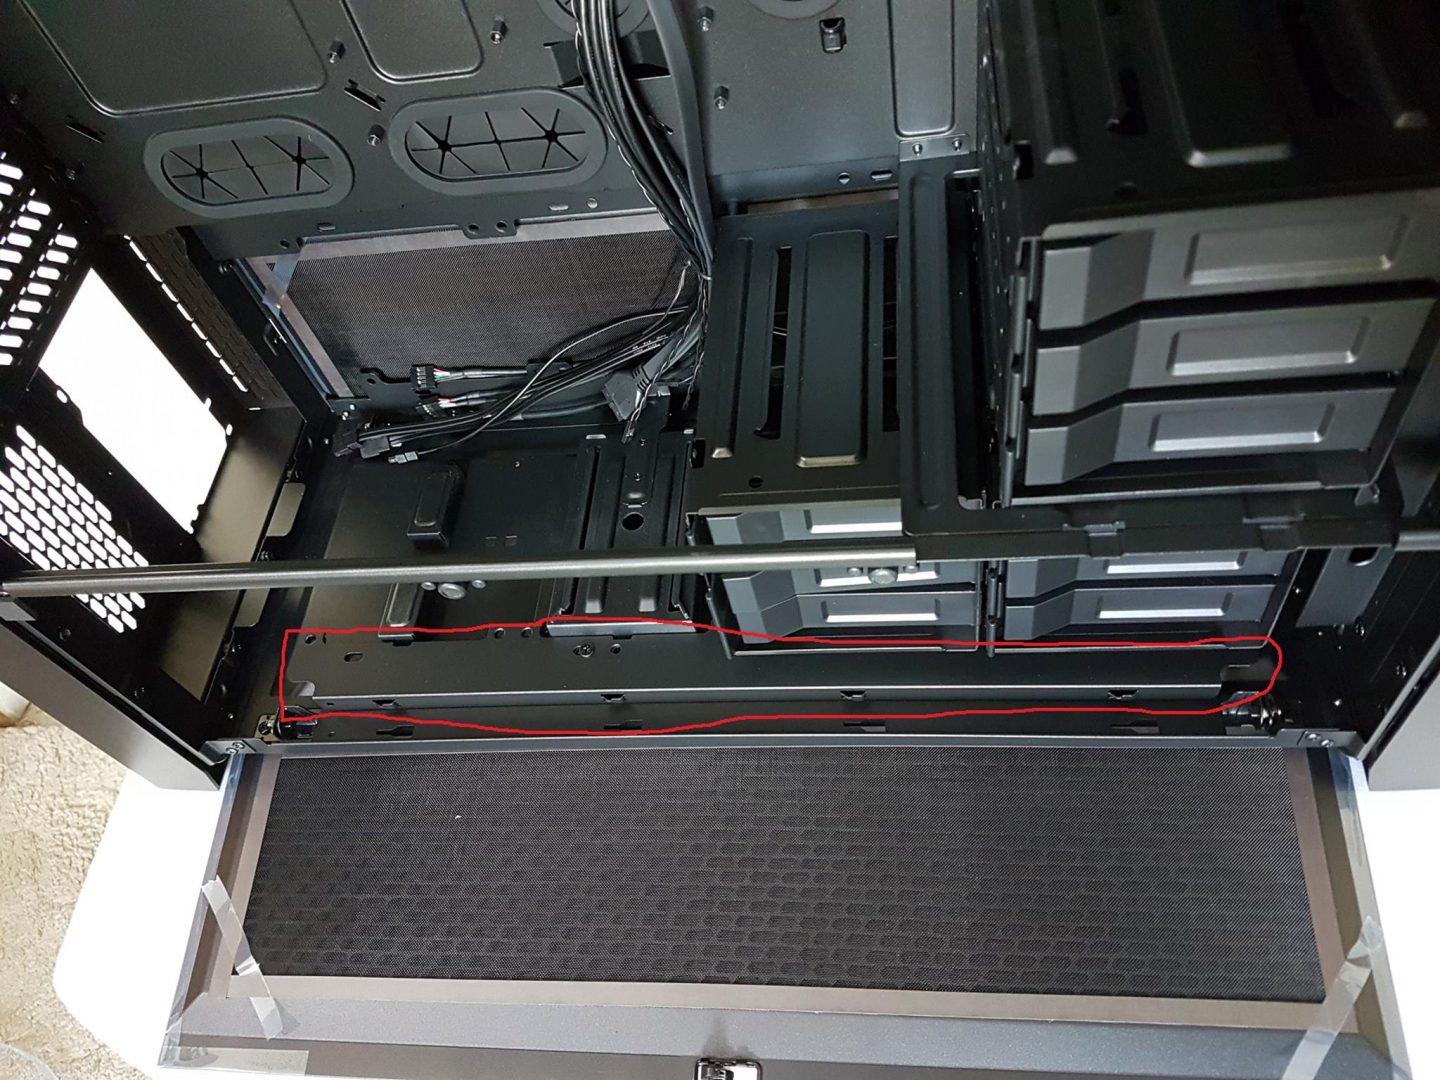
Both drive cages are mounted on top of the stands. In order to remove the cages, one would need to remove the screws as encircled in the picture.
Be careful when removing the top highlighted screws as they have spacers between them and the cage. Spacers are needed for correct installation of the cages.
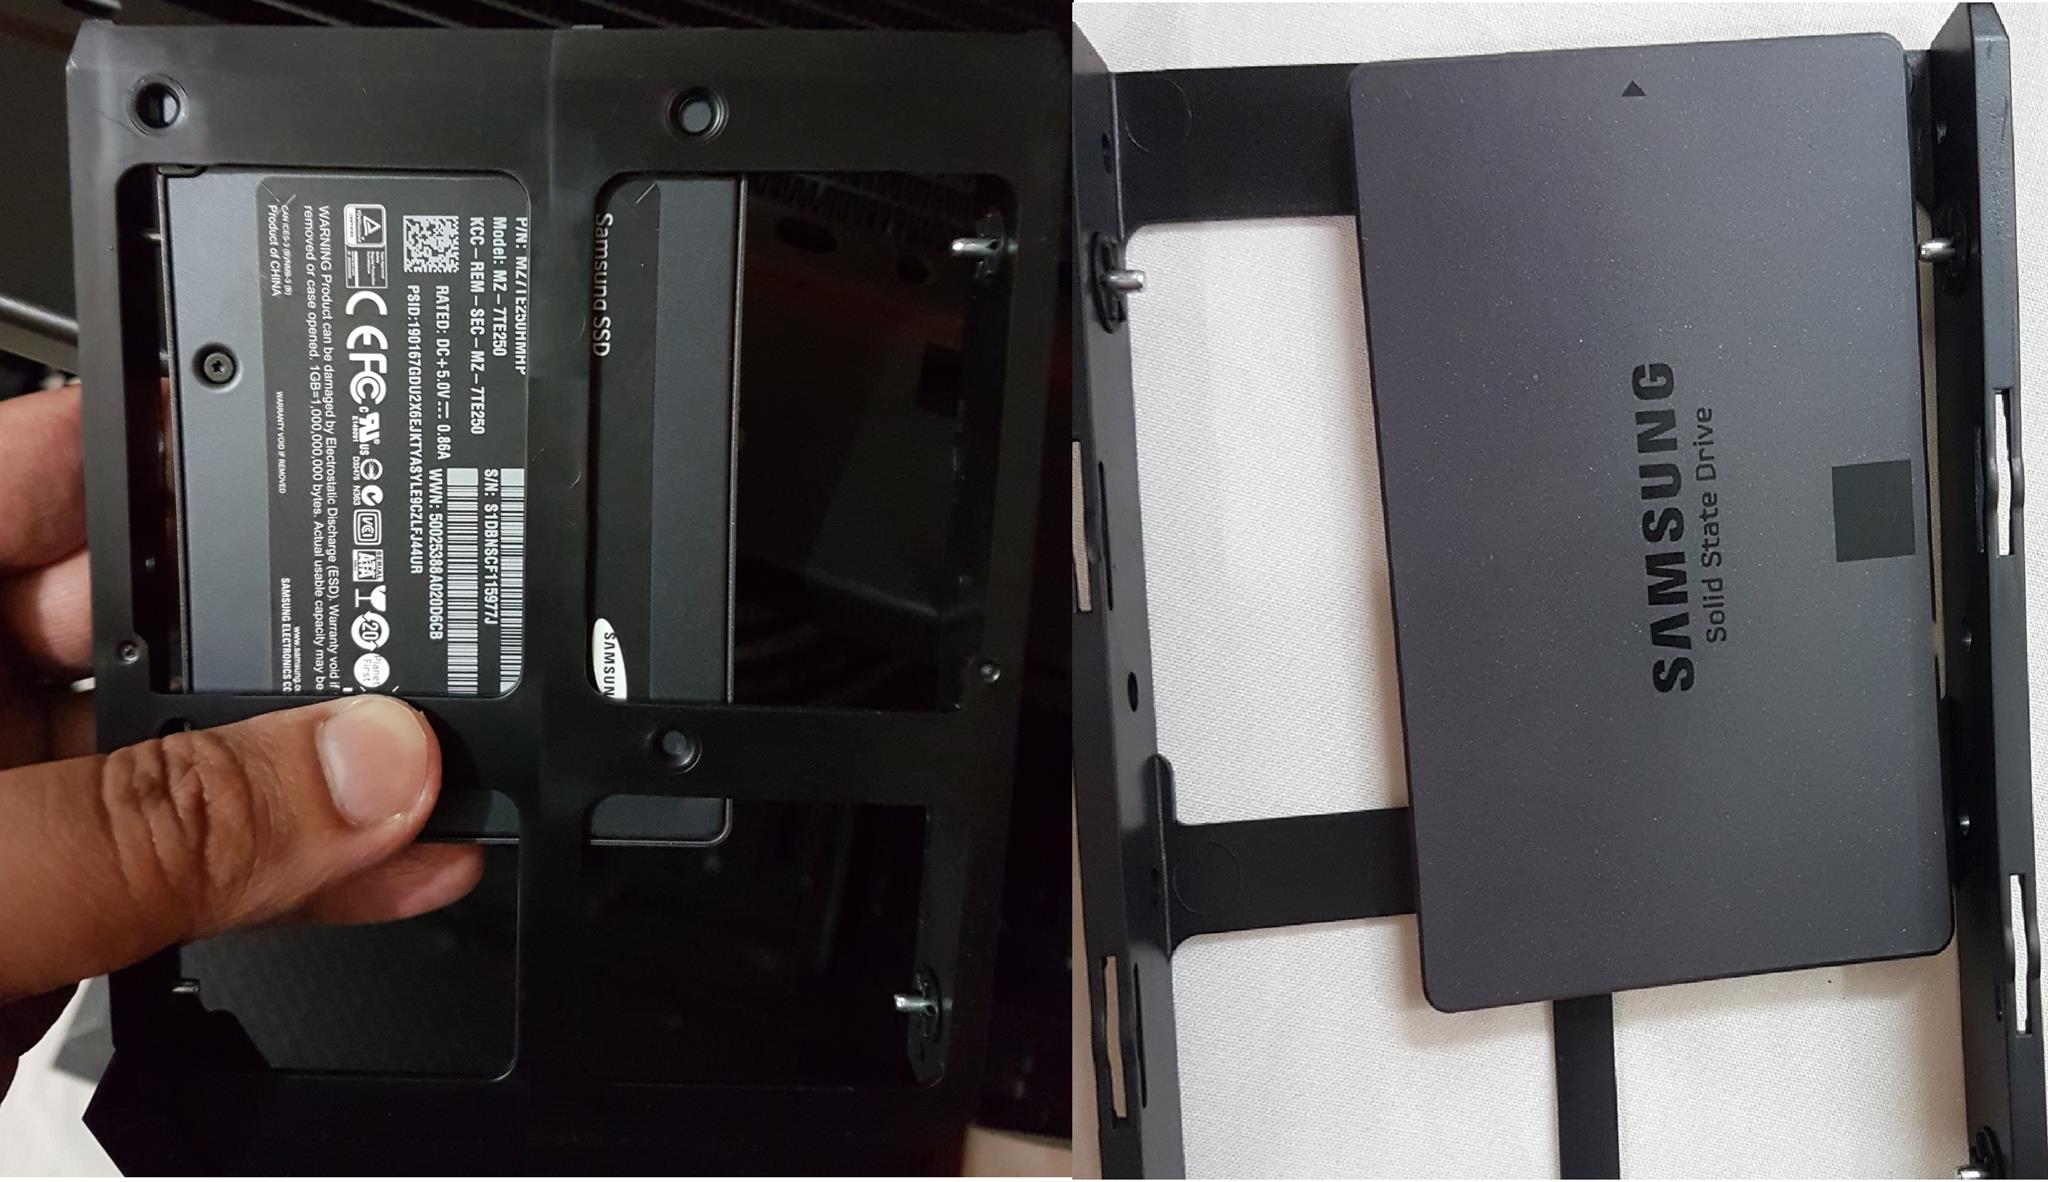
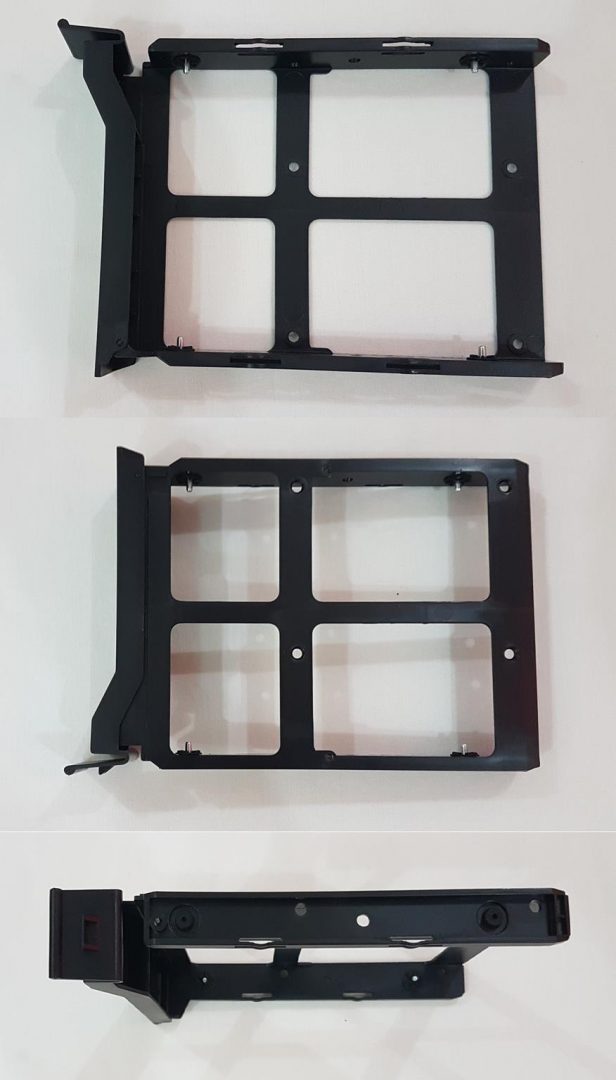
Caddy has four pre-mounted pins for tool-less installation of the storage drive. These pins have rubber washers on the frame to reduce the vibration impact on sound. During installation, it was observed that SSD(s) can’t be mounted on the drive caddy out of the box due to the design of the caddy.
There are two possible solutions for this: Either take out the pin or mount the SSD under the caddy.
The left side of the drive cages has ample space. One can order another drive cage from Corsair if so required. PSU up to 280mm can be installed in the vertical orientation. Bottom two rubber grommets on motherboard tray are used to route the cables.
The backside of the bottom chamber comes ready for radiator/fan mount. Two supporting brackets are installed opposite to each other on top and bottom. But, the user would need to setup these brackets for the front side of the bottom chamber. Take a look at the picture below with red circled area. This is one of the radiator mount brackets.
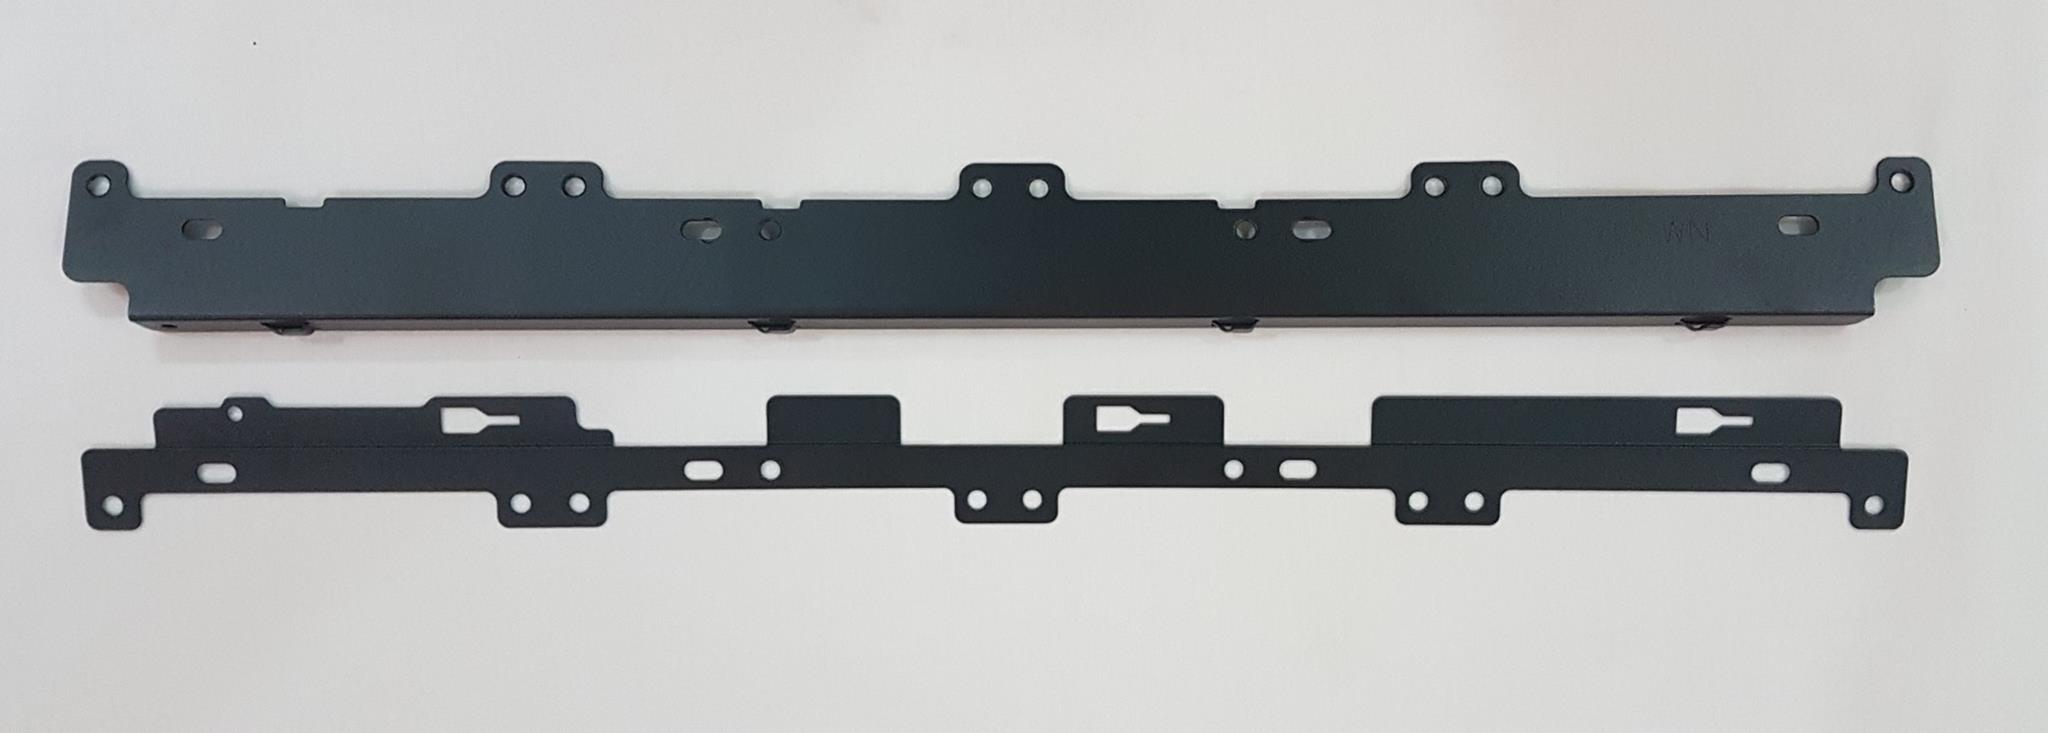
The user would need to remove the drive cages so as to access to this bracket. Remove the two screws and you will have the bracket available to you. The second bracket is underneath this one. Below picture shows both brackets.
90 degree angled bracket would fit on the bottom side of the chassis. Simply align the bracket in such a manner that area with hooks and a single hole slides on the bottom grooves. Screw in the on the single hole and bracket would be fitted. The second bracket needs to be installed on the top side of the hinge support steel bar. Align the three large size cut-outs on the hooks already on the steel bar. Slide the bracket and screw in on the single hole. Please note that in order to install radiator and fans in the bottom chamber, drive cages need to be removed.
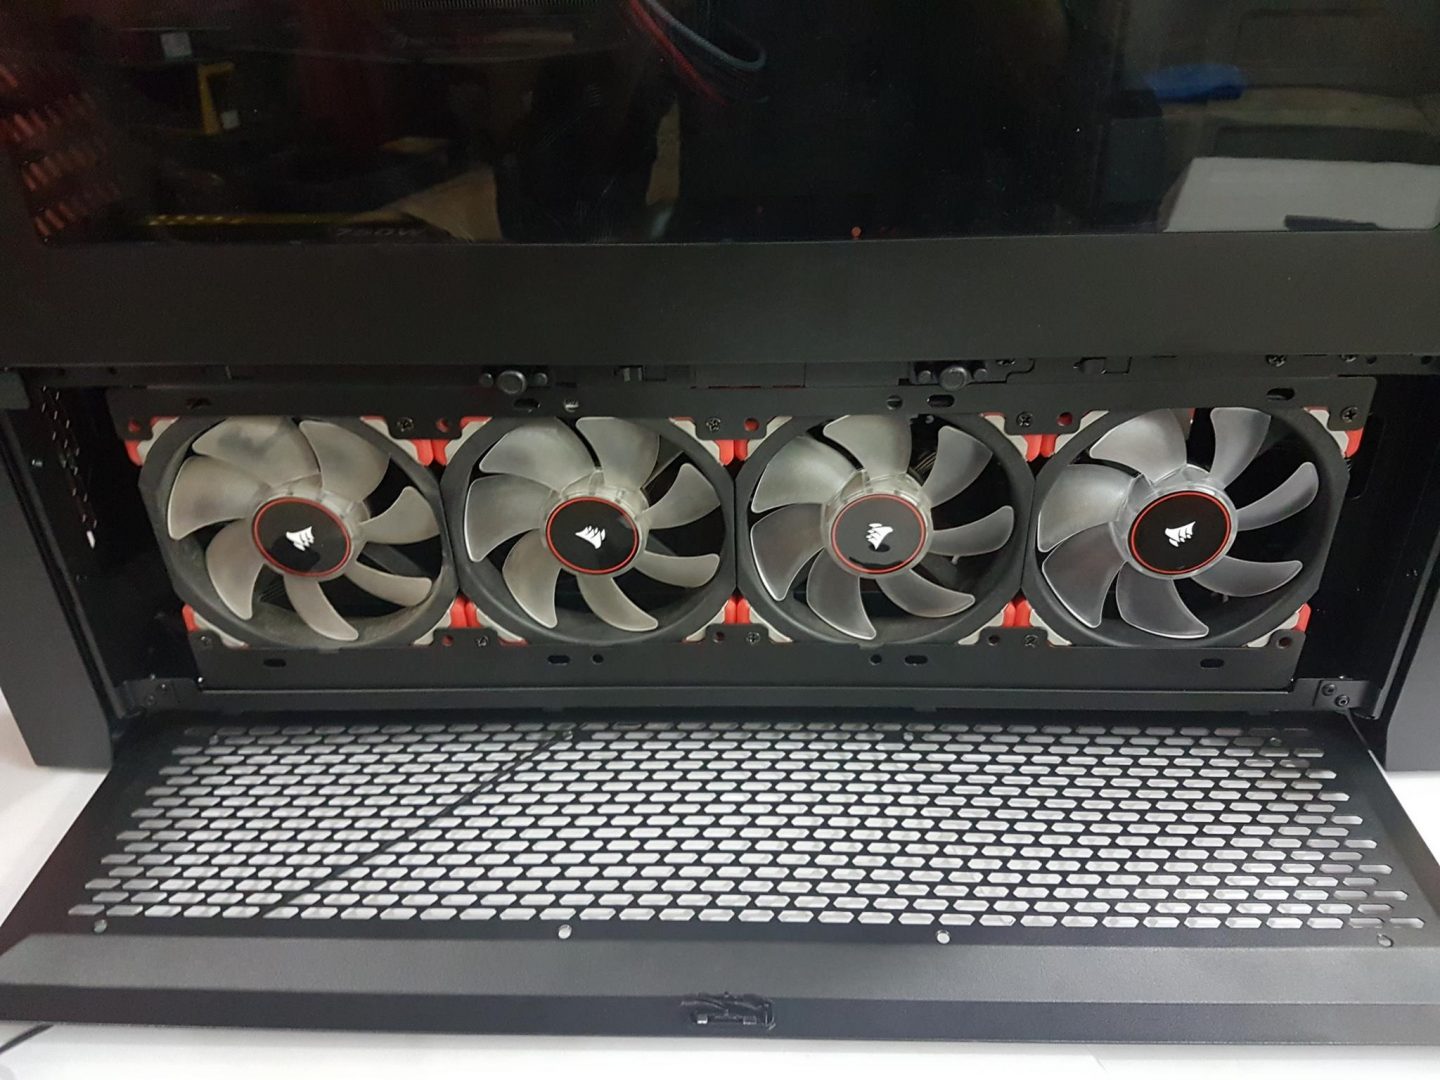
The panel of the bottom chamber consists of three parts. The middle one is the vented panel itself which is hinged on the bottom. It has a magnetic dust filter on top of it. There is a steel plate beneath it with black color on its exterior. When installing fans in the bottom chambers, remove this plate by unscrewing x8 small size screws on the panel. Don’t forget to put the dust filter back on.
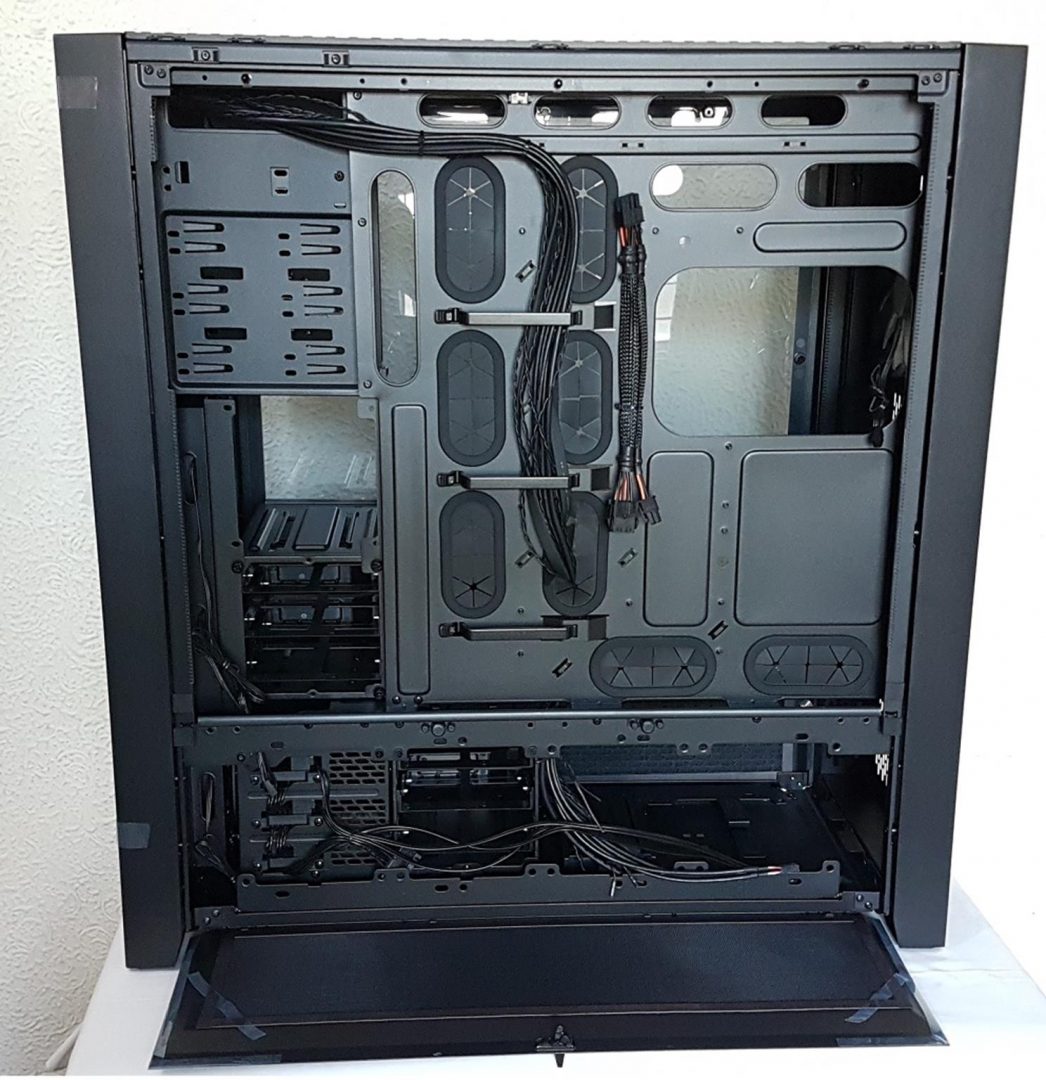
Let’s have a look at the backside of the chassis. There are two fully covered panels covering the top and the bottom chamber. Like the front top panel, use the button on the rear to release the corresponding panel. The back side panel pops off when the button is pressed.
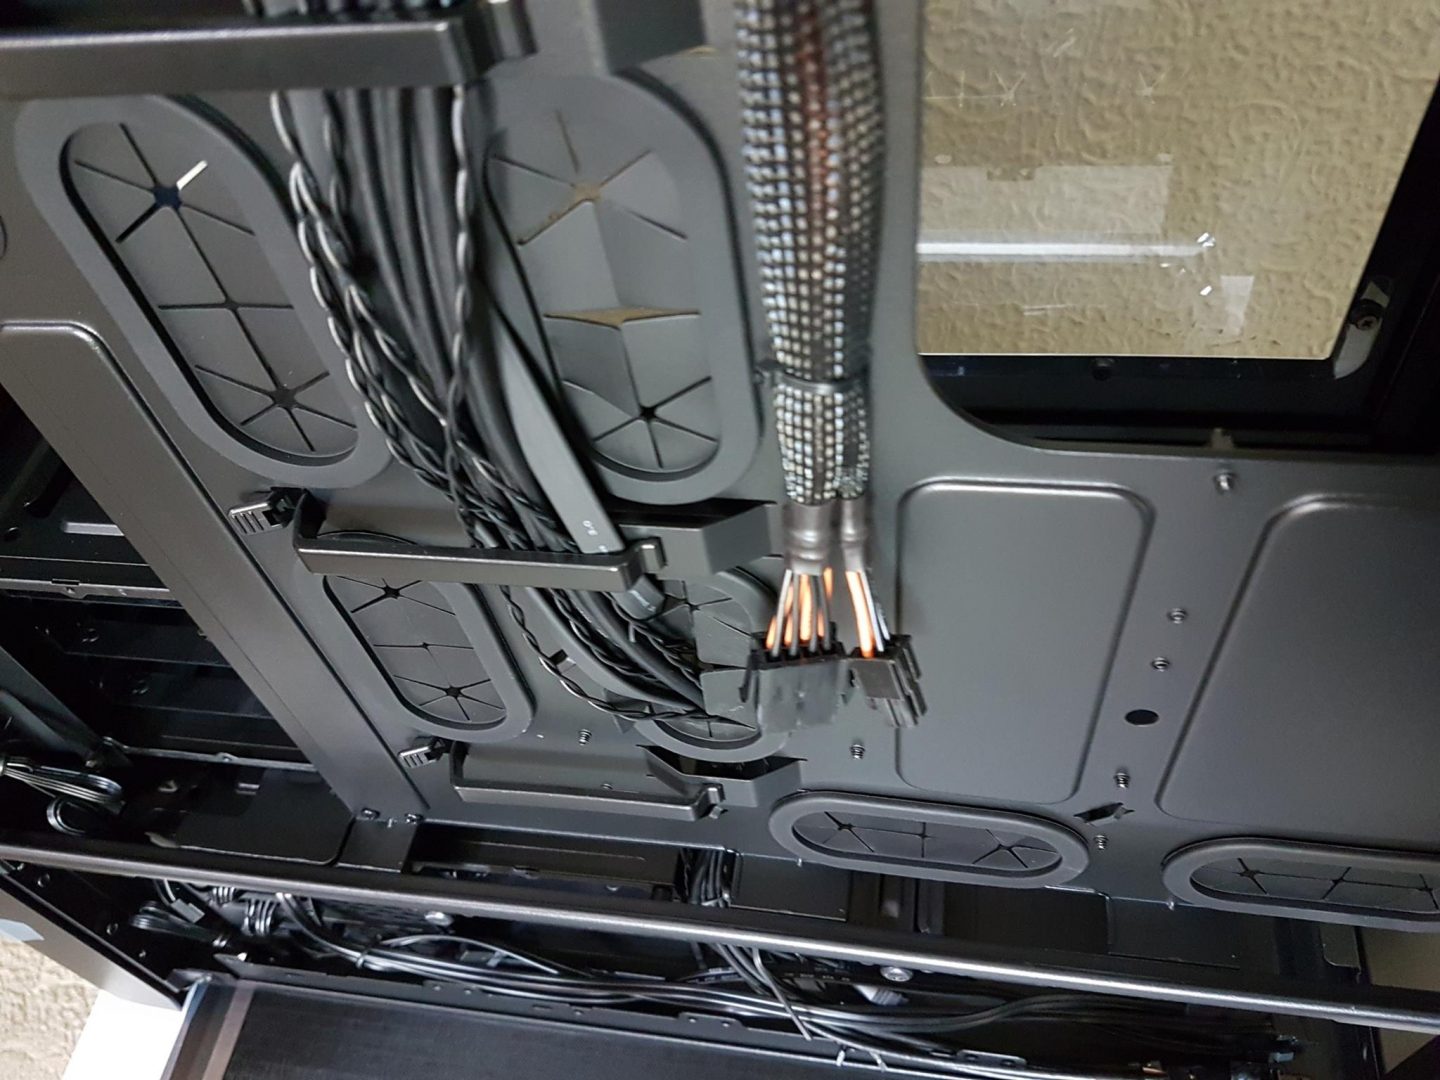
The user would immediately notice the spacious backside of the chassis. We’ve 28mm of cable management space right behind the motherboard tray which would really handy when it comes to cable management. Corsair has implemented snap-down cable latches on the backside of the motherboard tray. There are 3 such latches and they have made a cable management task quite easy. One would not need any cable tie if using these. I did not do any cable management and let the cables pass through these latches and other cables were left as it is and chassis handles all the cables with ease. This is definitely a perk when working with chassis of this magnitude. One gets to have a case with such an ease of installing hardware in it.
Corsair was thoughtful and provides CPU Power cable extension which is braided. Cables have good enough length to reach the bottom side of the motherboard and they are already routed using the latches. Cutouts for cable management are clear along with 8 rubber grommets. 16 cable tie spots are available.
There is an opening between the top and bottom chambers for cable routeing. This makes the life further easy for the builder. From cable management perspective, the user would love this chassis and I don’t see anything to complain about. The backside of the drive cage has approx. 45mm of space available for cable management.
Bottom chamber has two brackets pre-installed for radiator/fan mount. The panel of the bottom chamber has the same implementation has that on front panels. Dimensions of the both panels are same as that of front side panels. It is good to see that Corsair has provided dust filter even on the backside as well.
Final Build
Test Build
The following components were used in the test build:
Asus Rampage V Edition 10
Intel i7 6850k @ 4.0GHz
Corsair Vengeance Red LED 8x8GB @ 2666MHz
Corsair H100i V2 with stock fans
Asus Strix Rx 480 O8G
Samsung 840 EVO 250GB SSD
WD 6TB Black
Thermaltake Tough Power DPS-G RGB 750W PSU
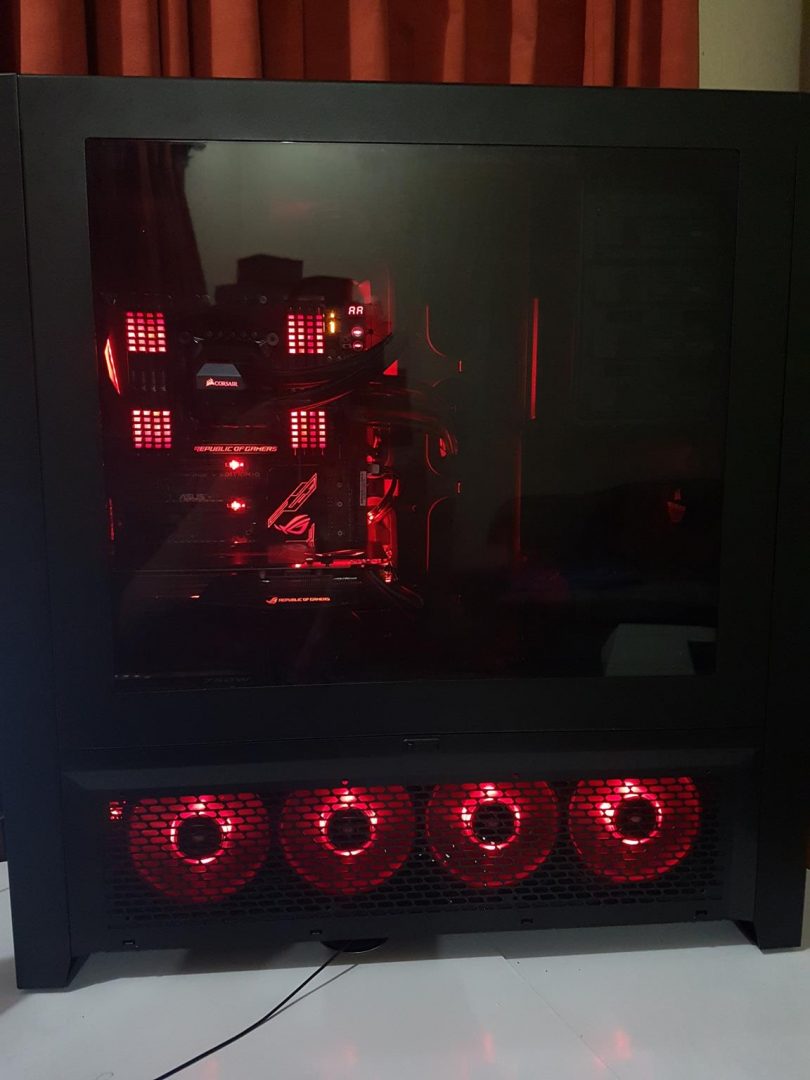
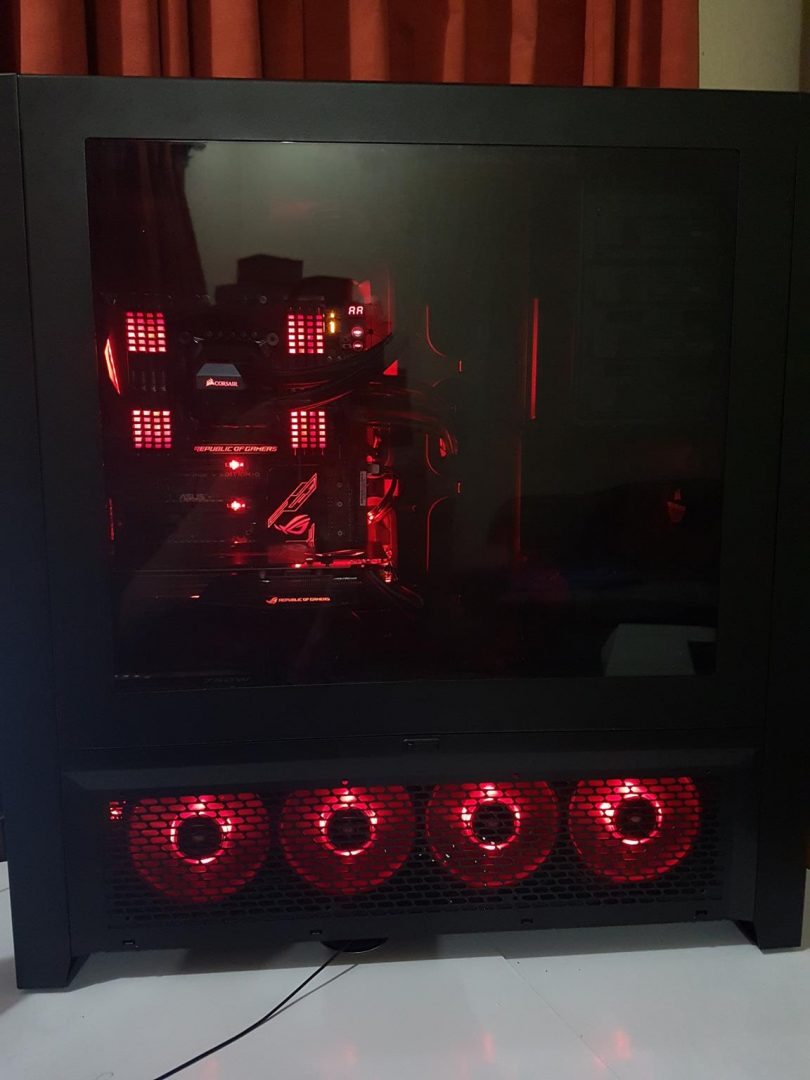
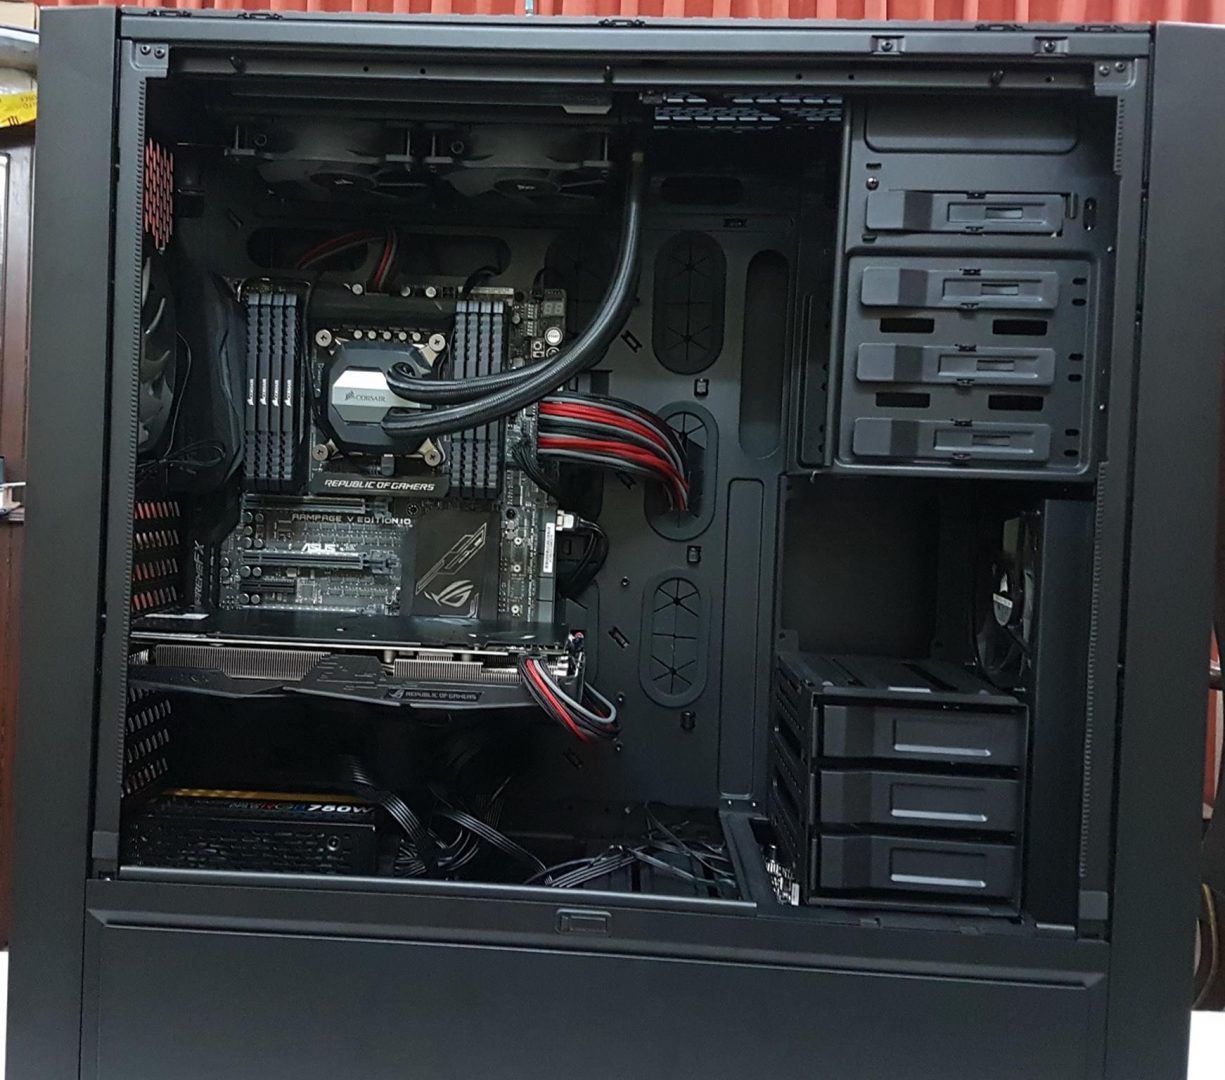
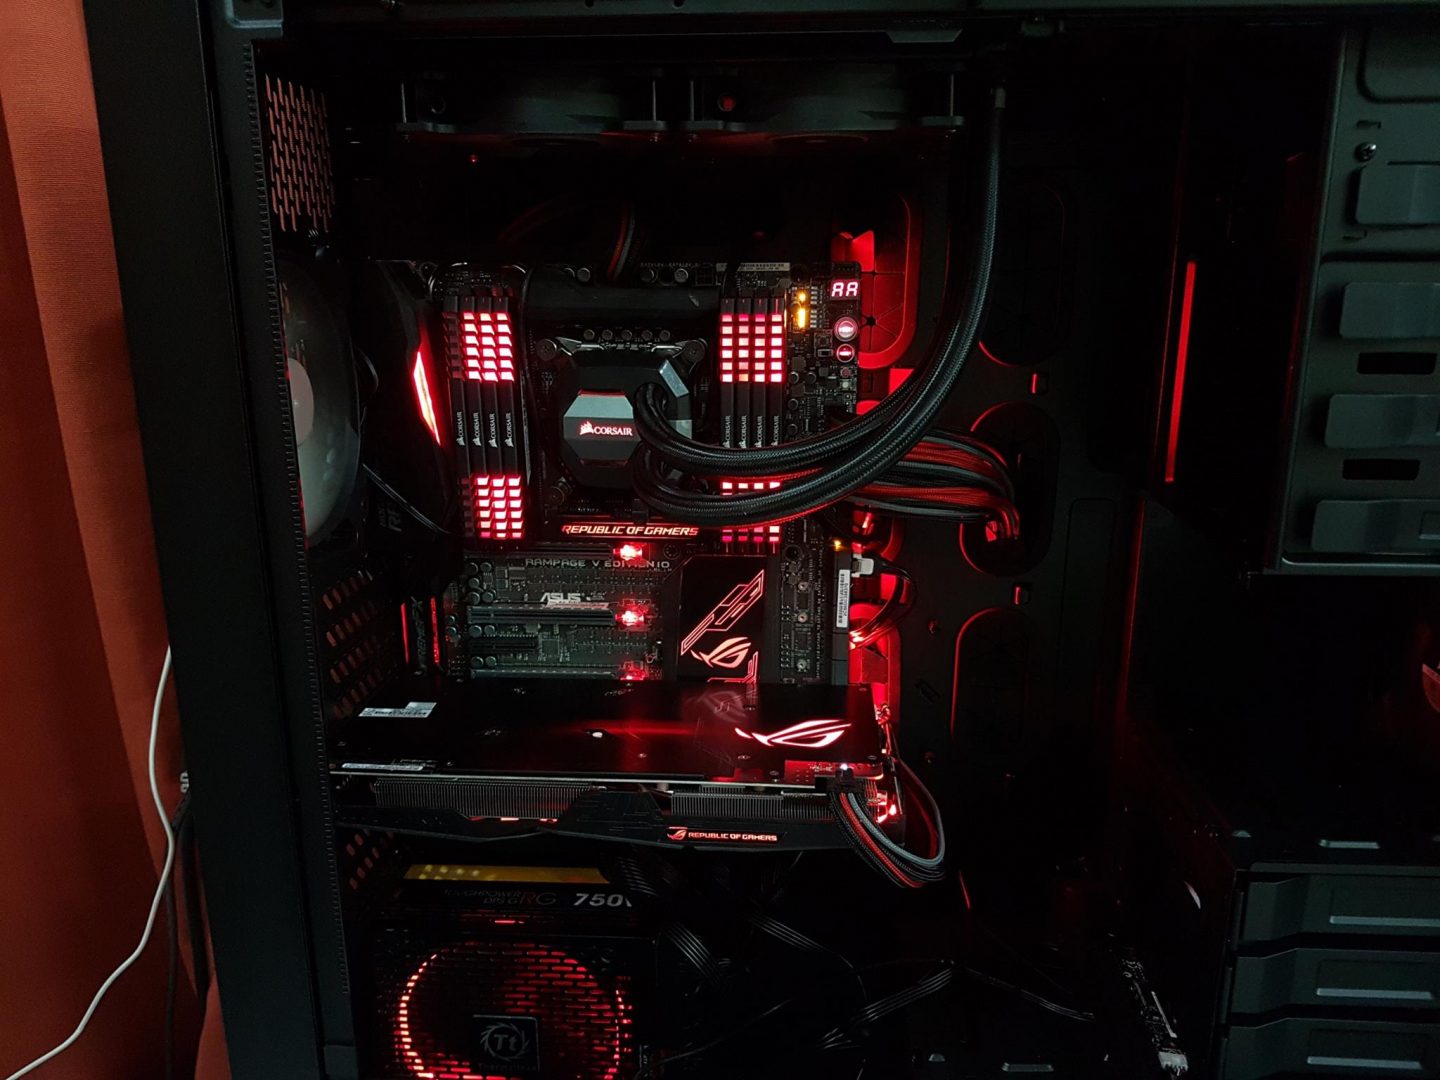
The motherboard was an easy fit. I did not encounter any incompatibility for the motherboard what so ever. Installation of every component was a breeze and I did not encounter any issue at all. I was a happy builder for sure and system build did not take much time either as I was not concerned for any incompatibility, cable routeing or space constrained what so ever. When it comes to building the PC inside this monster, I actually quite enjoyed doing that.
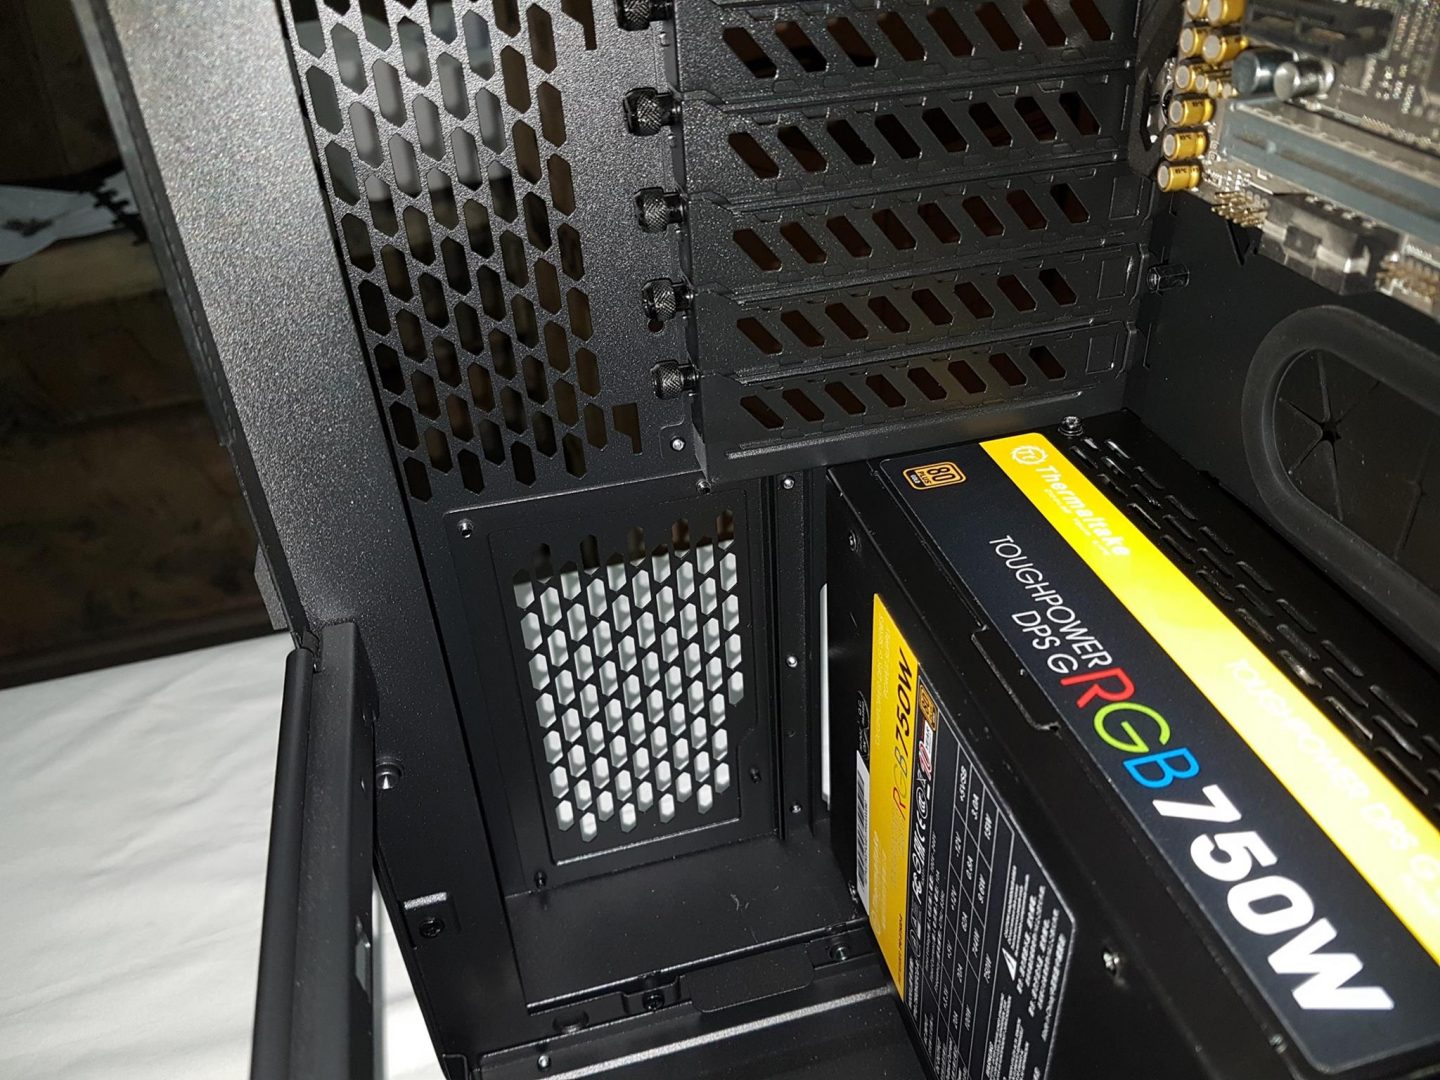
One important observation was made during the installation of the PSU. The Thermaltake’s Tough Power DPS-G RGB 750W PSU has four screws mounted on the near edges of the both sides. This would not give any incompatibility if the PSU is to be installed in horizontal orientation but as the PSU needs to be installed in the vertical orientation, PSU would not slide in the designated area. Obstruction comes from the screws on the both sides. The simple solution was to remove the both screws which I did in my case. One can replace the screws with flat head screws but even that may not give enough clearance for the installation. Bear in mind that factory supplied screws are spring loaded on the PSU.
Overall, the test build was very pleasant looking. Though I could have installed the Corsair HD120 RGB and SP120 RGB fans or even the ML Pro Red LED fans for more aesthetically pleasing looks but that would not serve the purpose of thermal and acoustic testing of the chassis. Hence stock fans were left intact for the testing purpose.
Besides, reported limitations/observations of the PSU, SSD, top panel removal and the graphics card(s) handling, I did not find any other Con to report about. From all of above four points, only SSD limitation is serious. Once you get to know the top panel, you should not have any difficulty in its handling. I did not use any screwdriver for graphics card installation and use my fingers to tighten the screws.
Thermal and Acoustic Performance
To check the thermal performance of the chassis, CPU and the graphics card were put under stress tests. Furmark was used to stress test the graphics card at 1920 x 1080 at 8x MSAA. CPU was put under stress test at the same time using AIDA64. Microsoft Windows 10 x64 was used.
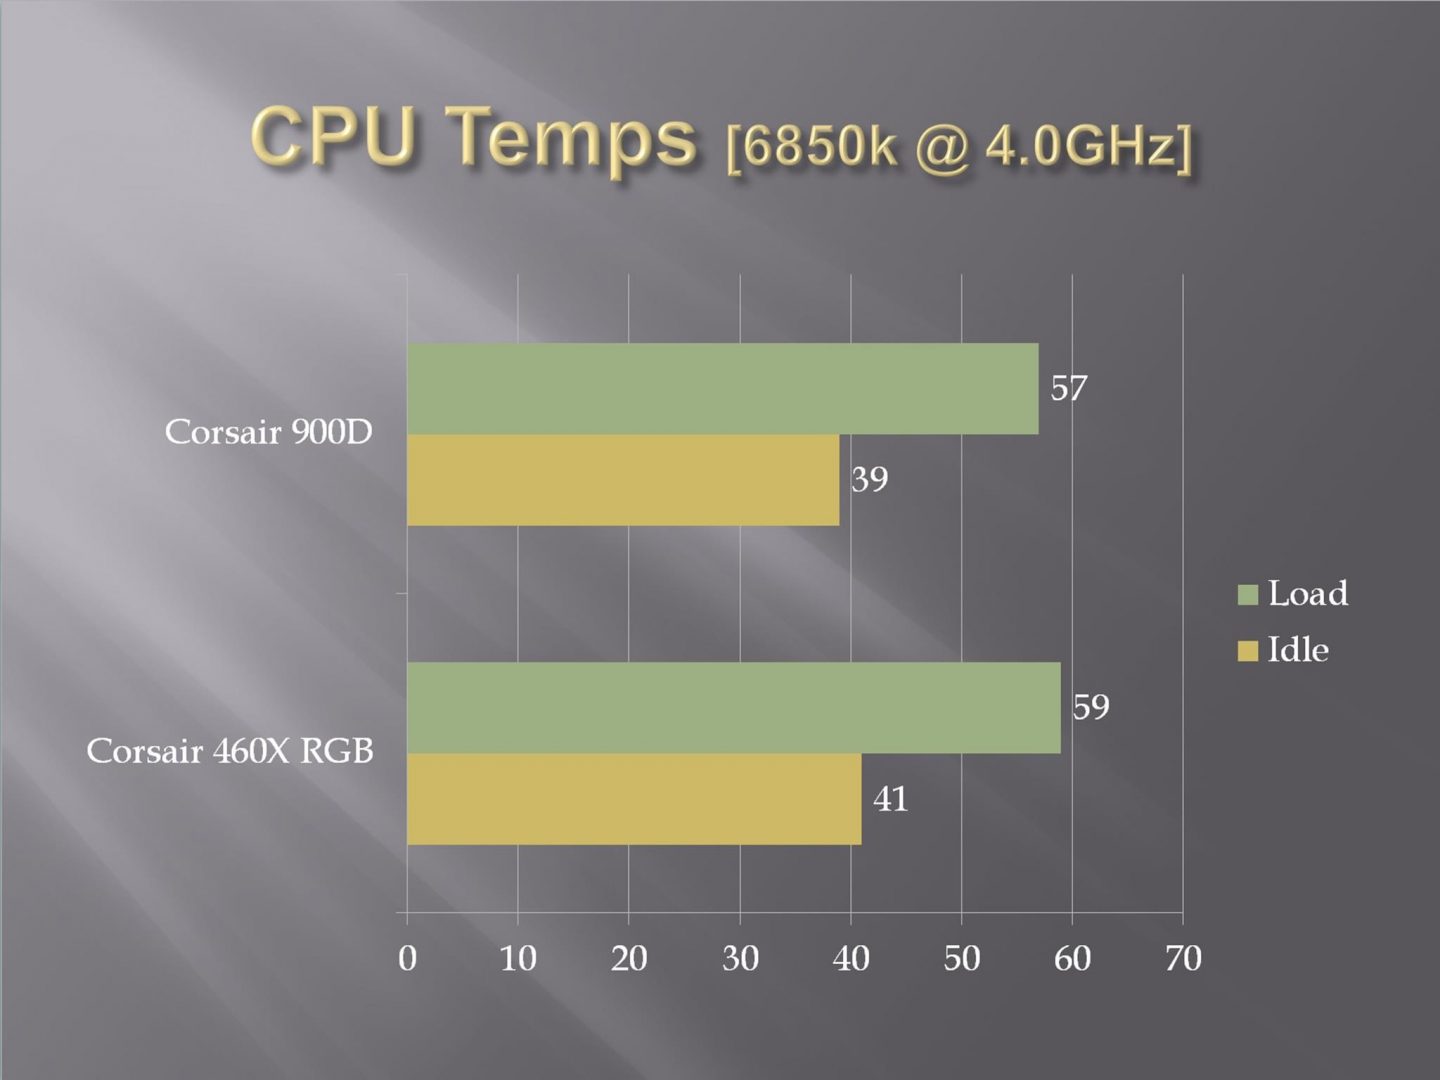
All the reported temps are in degree C. Room temp was at 35C. The summer season has started here and it is already getting heat up here. All the fans were set at custom fan curve with changes according to the temperature. The below chart shows the CPU temperatures on idle and under load:
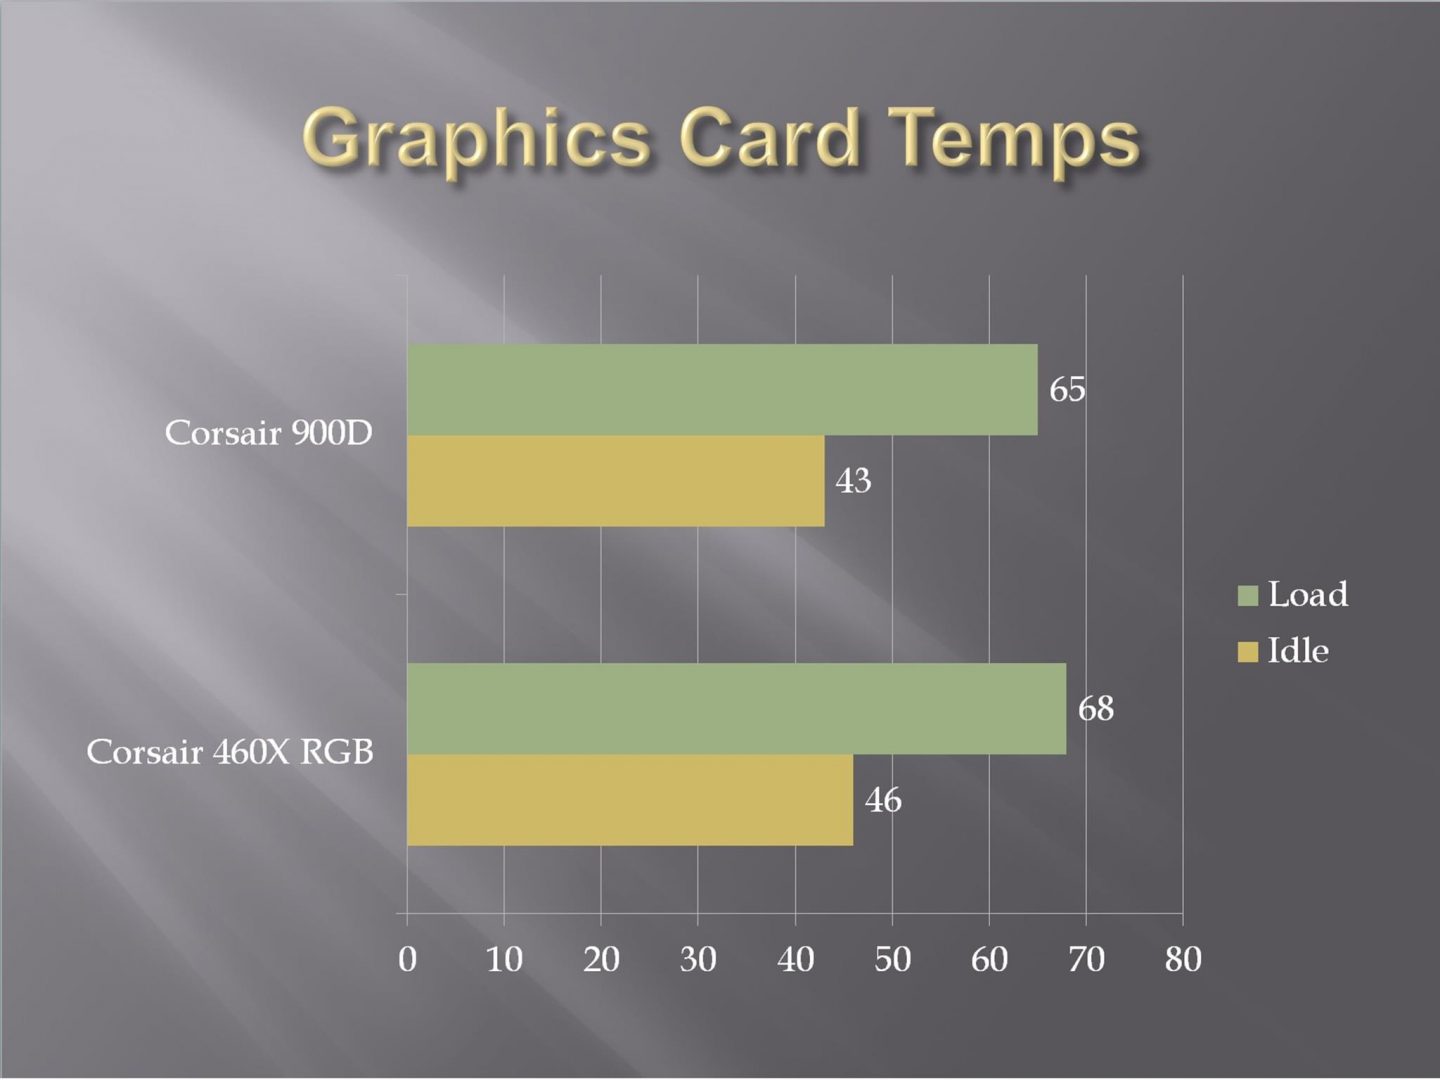
The below chart shows the Graphics Card temperatures on idle and under load:
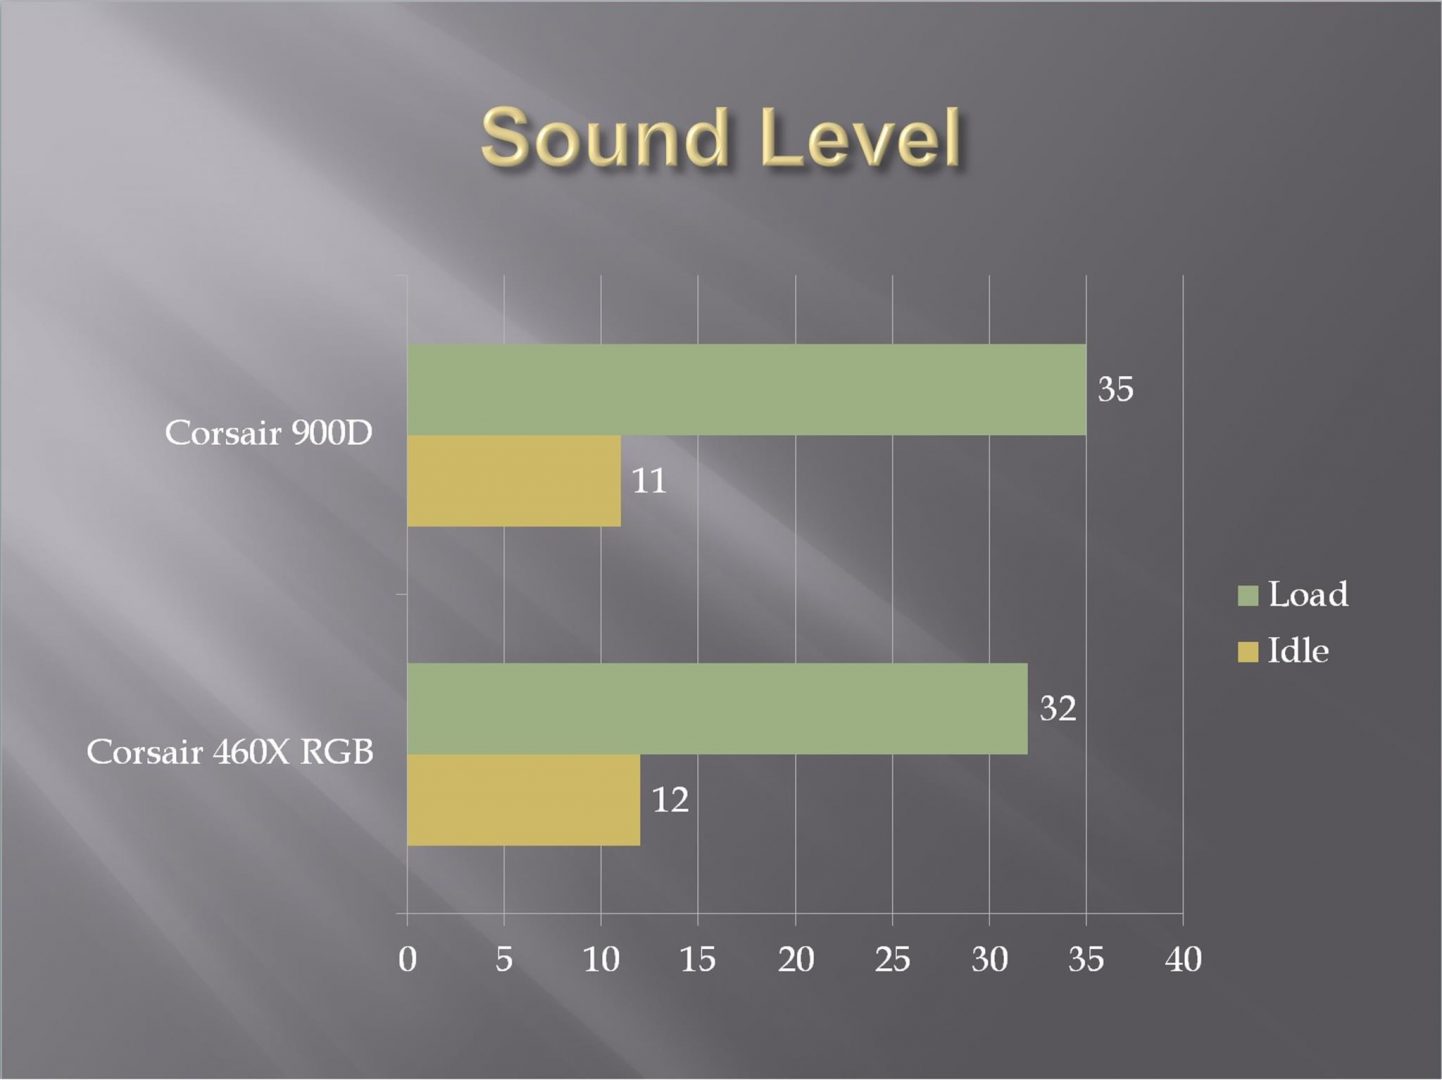
Foneso Digital Sound Level Meter version A0 was used to test the sound level of the chassis.
Thermal performance of the Corsair 900D is very good indeed. Given the fact that how Furmark juices out the graphics card and AIDA64 is known for its comprehensive stress testing for stability test, both components are expected to yield much more heat resultantly higher temperatures but 57C on the CPU and 65C on the graphics card with just 35dBA is quite remarkable. During routine desktop use system was dead silent. Corsair has my praise in this department. Sound level seems higher but this has nothing to do with the stock fans of the chassis but the fans provided with the Corsair H100i V2 takes the credit for producing high noise. That is why I don’t use them and stick with ML Pros. ML Pros have my high praise as well but this is not the topic of today’s discussion.
Final Thoughts
Conclusion
For users out there who would love to build some amazing looking machines based on the serious custom loop but can’t afford the high-priced solutions from the likes of the CaseLabs, Corsair has provided one in all solution yet at very affordable price. This chassis has no limit when it comes to setting up some serious hardware in it. The user can install up to 420mm/480mm radiator with radiator thickness of up to 57mm with push and pull configuration. Without push/pull setup, radiator up to 82mm thickness can be setup. Would you seriously do that? Chassis can support up to HPTX size motherboards without any incompatibility. The front fascia is implemented in brushed aluminum and is a marvellous design. The bottom chamber can host up to 420mm/480mm radiator. The front can host up to 360mm radiator. Rear can have 120mm/140mm radiator. You are only limited by your imagination when it comes to setting up a custom loop in this chassis. The excellent thermal performance was as expected. While the Chassis has got these perks yet there are few limitations which users need to be aware of for smooth assembling experience. SSDs are not supported out of the box on the caddies. Either user would need to take out on pin off the caddy or simply mount the SDD under the caddy. Due to design limitation, graphics card installation and removal could be challenging. With PSU installed in the default location, 420mm or 480mm radiators can’t be installed on the backside of the bottom chamber. The height of the rear fan can’t be adjusted. Top panel’s handling can be tricky.
Value
The Corsair Obsidian Series 900D is listed at $349.99 / PKR 37,000. This price definitely seems to be high but one needs to understand that this chassis is for niche market not for the masses though no one stops you from going for it. For what it offers in this price range is hard to beat particularly giving the fact that competitor offerings are priced way high than this. Cooler Master’s Cosmos II is a close competitor with the almost similar price range.
Performance
Thermal performance of the Corsair 900D was too good. Corsair AF120L and AF140L fans did the magic by providing ultimate cooling performance. I’ve absolutely no complaint when it comes to the thermal performance of the chassis and with four dust filters at crucial areas is a plus.
Overall, this chassis is one heck of a product that serves to its name and its purpose. If you are on air cooling or using AIO then this chassis is not for you. But then again, if you have money and you are sold on its design and performance then there is no stopping you.
This should not come as a surprise if this chassis has won our Performance award.
I’m thankful to M/s Ease Tec for giving me the opportunity of reviewing this unit.

