


ARCTIC Xtender VG White Case Review: One Case to Rule them All!

ARCTIC has recently released its new Xtender PC Case. This case is available in two configurations and 3 styles per configuration, which are:
- Xtender Black
- Xtender Mirrored
- Xtender White
- Xtender VG Black
- Xtender VG Mirrored
- Xtender VG White
We have got our hands on the Xtender VG White for testing. ARCTIC has gone all out in the design department, and the result is almost an impeccable PC Case that inspires. The case features a panoramic view using tempered glass on the front and side, though it does not seem like a pillar-less design.
ARCTIC has used its powerful 3x P14 Pro ARGB Reverse blade fans and 2x P12 Pro ARGB fans in this case. Mind you, these fans are not cheap and then comes a 160mm PCIe 4.0 x16 riser cable with bracket that is also included in the VG edition (Not bundled in standard configuration).
This case is massive and almost falls into the full tower design. The white edition looks spectacular in person, and if you do the build right, it will turn out amazing. Saying this based on my experience.
The Xtender VG White has an MSRP of €229.99, and ARCTIC offers a whopping 6-year warranty on the case as well.
Specifications

Packaging and Unboxing

The case is shipped inside a standard cardboard box finished in brown. The features and specifications are also listed on the box. Two thick white Styrofoam pads sandwich the case for safe shipping.


ARCTIC has provided accessories in a separate accessory box, which gives a premium feeling. The following are provided:
- 15x 6-32 UNC Cheese Head Screws
- 18x 2.5” Drive Screws
- 18x 2.5” Drive Damping Rubber
- 5x Velcro Ties
- 3x Motherboard Standoffs
- 20x M3 Washer Head Screws
- 7x PCIe Brackets/Covers
- 1x Long Standoff for PCIe bracket
Closer Look

The Xtender VG white has a 529x231x529mm (LxWxH). It is quite heavy, weighing around 15.4 Kg. It is made of ABS, SPCC, and Tempered Glass. It comes with a 6-year warranty from the manufacturer. The VG here may refer to Vertical Graphics Card mounting, which is a default layout for the VG variant.
Exterior View
Let’s start with an exterior view of the chassis, starting from the front.

The front of the case has a non-removable panel featuring a full-size clear, tempered glass providing a clean view of the chassis inside. The ARCTIC branding can be seen on the bottom right.

The top panel of the chassis has a square cutout providing sufficient area for airflow. It has a fine mesh under the panel. The panel is tool-less and can be popped by placing your hands on the rear. The smart design incorporates the IO panel button sizes that fit within the squares.

The top panel has a fine mesh dust filter on the inner side. The magnetic handling makes it a good fit.

The following fan/radiator provision is allowed on top:
- 3x 120mm / 3x 140mm Fans
- 120mm / 140mm / 240mm / 280mm / 360mm / 420mm radiator
As you can see, this case supports a 420mm radiator on the top. I have used the Liquid Freezer III 420 ARGB White liquid cooler in this case, which was a comfortable fit.

ARCTIC has provided two brackets (though our sample came with one). The purpose is to use one bracket on top and one on the side so that a 120mm mount can be ensured. Install this bracket for a 120mm fan mount as per the requirement. I removed the bracket so that the 140mm mount can be used.

The following are provided:
- 1x Power Button
- 1x Hybrid Audio Jack
- 1x USB Type-C Port 10Gbps
- 2x USB Type-A Ports 5Gbps
Come on, ARCTIC, you could have provided a 20Gbps connection port instead!

Looking at the rear, you may note the open view design using the same square design cutouts or perforations. You can see two 120mm P12 Pro ARGB fans on the rear in exhaust configuration. The motherboard IO panel’s cutout is on the left of those fans.
Then, the case has a PCIe bracket area on which the vertical bracket comes pre-installed. The bottom has a mount for a standard ATX PSU. The cover has 4x captive thumb screws. Install the PSU on this bracket and then slide it into the case and secure using these 4x captive thumb screws.
Both side panels are secured using captive thumb screws (1x each).

I am trying to show here that the side glass panel does not sit fully flush with the frame of the case. I think this is by design since those massive 3x P14 Pro Reverse blade fans generate a ton of air inside the case. This opening, plus the perforated area on the rear, is designed to prevent excessive air pressure build-up. This is my two cents.

Surprised! Yes, this case has no perforation whatsoever on the base. Not even on the PSU bay. According to ARCTIC, the air intake from the side is so enlarged that sufficient airflow for the PSU will be ensured.
ARCTIC may consider raising the gap between the surface and the chassis using large height feet so that the chassis can be lifted easily.
Interior View
It is about time to take a peek at the inside of this case.

The case has a clear tempered glass on the side. It is a see-through design that shows the complete build in its entirety. This panel is not hinged and has a Snap-On design with studs on top. You can see that it is not a pillar-less design. You can spot another tempered glass in front of the PSU bay inside the case.

I have removed the side panel and show a complete inside view of the case. Now, you can see the spacious layout that ARCTIC has provided. This is definitely a full tower configuration. The use of 3D rubber grommets on the side of the motherboard tray looks fantastic.

ARCTIC has provided 3x P14 Pro Reverse Blade ARGB White fans on the side frame. The side frame can house:
- 3x 120mm / 3x 140mm Fans
- 120mm / 140mm / 240mm / 280mm / 360mm / 420mm radiator
The P14 Pro Reversed blade fans are rated for 400 to 2650 RPM speed, generating 98 CFM with a static pressure rating of 5.1mmH₂O. These fans use fluid dynamic bearings. They are rated at 0.4A/12VDC. Each fan packs 12 Gen ARGB LEDs drawing 0.4A at 5VDC.

ARCTIC has provided a sufficient gap from the top of the case to the top of the side fan mount, ensuring that you can install up to two 420mm radiators. I would still suggest measuring the available space so that the thickness of the radiator can be taken into consideration.

The area below the fan mount on the side frame is solid. I would suggest ARCTIC to utilize this area for mounting of pump or a pump/reservoir unit for the custom loop setup, and if thermodynamics allow, this can be done usinga 120/140mm fan mount.


The PSU bay has a solid cover without any perforation. This means the PSU is getting fresh air from the side frame on the back and pushing the hot air through its rear. ARCTIC has suggested using the PSU with fan side below.
To make it more pleasing, ARCTIC has installed 24 Gen-2 ARGB LEDs on the PSU bay for vivid lighting effects. They have even put a tempered glass in front of the PSU bay. This glass is lucky to arrive in one piece as its tape was torn. Maybe ARCTIC needs to wrap the glass in a bubble sheet and then tuck it safely in the case for safe shipping.

ARCTIC has installed a PCIe vertical bracket, which is also in white for this edition. It uses a 160mm 180ᵒ PCIe 4.0 x16 riser cable. This is the default layout of the VG edition cases. This bracket is not provided in the standard configuration of non-VG Xtender cases.


I found it easy to install the graphics card on the bracket while it is outside of the PC Case. The above pictures show the graphics card installed on the bracket. I found it challenging to align the PCIe cover holes of the graphics card with the holes on the bracket. I had to use force to install the graphics card. The PCIe slot on the vertical bracket has a sliding latch or locker. Slide it out to release the lock and slide it in to lock the graphics card.

ARCTIC has provided 7x PCIe reusable perforated covers in the accessory box. In case you don’t want to install the graphics card vertically, you can install it in a standard horizontal layout.

ARCTIC has provided not one but two P12 Pro ARGB white fans on the rear. Each fan is rated for 600 to 3000 RPM speed, generating 77 CFM at 6.9mmH₂O. These fans use fluid dynamic bearings. They are rated at 0.33A using 12VDC. Each fan packs 12x Gen-2 ARGB LED,s taking 0.4A at 5VDC.

The motherboard tray itself has an inset compared to the rest of the frame of the chassis. It supports motherboards up to the E-ATX form factor. The four main cutouts have rubber grommets. There is more than 90mm of space above the motherboard’s top. Now you can imagine how spacious this layout really is!
Only 6x standoffs come pre-installed. You need to install the remaining three.

The PSU bay has two cutouts that don’t have rubber grommets.

ARCTIC refers to right-angle rubber grommets as a 3D design. They clearly serve the purpose of providing a clean and stylish view while covering two sides in different geometrical planes.

ARCTIC has provided a reference guide on radiator thicknesses. Refer to the picture for a better understanding.
It is now time to look at the backside of the case.


The backside panel is made of steel. It has a large-sized perforated area on the left facing the inner side frame for a fan mount. According to ARCTIC, this enlarged area also provides airflow for the PSU bay. This panel also uses the Snap-On design like the side panel. ARCTIC has used a magnetic dust filter here as well.

Now you can see the backside of the case. The motherboard tray is offset to the side where the fans are installed. ARCTIC has provided well-planned cable channels. This channel has inset and Velcro strips placed over the inset area. You can easily do a clean and sleek cable management in this case. In addition, ARCTIC has used Velcro strips on other cable tie points. The CPU cutout is not that enlarged as I have seen in other cases, but it serves the purpose.

You can install 3x 2.5” drives on the backside of the motherboard tray, for which the screws and damping rubbers are provided in the accessory box.

The PSU bay has two legs providing more than 20mm lift to the PSU so that the fan can suck in air from the bottom. A cable can be seen coming out from the base of the PSU bay’s wall. This cable has a standard 3-pin, 5V ARGB connector for the LEDs.


ARCTIC has also provided a drive cage with two caddies. You can install 3x 2.5” or 2x 2.5” drives here. This cage is removable in case you don’t have a need for it. This will create more space for the PSU cables.

I have removed the drive cage, and you can see the spacious area for the PSU and its cables.

I am showing a close-up of the cable channel.

Each P14 Pro Reverse fan is secured using 2x screws, whereas it should have been 4x screws. Anyhow, this is not a complaint as such since I hope that ARCTIC provides a full solution to the consumer.


ARCTIC has provided cables/connectors for the top IO panel:
- USB 3.0 Connector
- USB Type-C Connector
- HD-Audio Connector
- Front Panel Connectors
- 4-pin PWM Connector and Socket
- 3-pin ARGB Connector and socket
The fans are daisy-chained. However, you need to take into consideration the total power draw for the LEDs to determine how many 3-pin, 5V ARGB headers you would need on the motherboard.
Installation
The following configuration is used:
- Intel Core Ultra 7 265k
- ASRock B860 Steel Legend
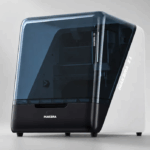
- Maxsun iCraft B580 White Graphics Card
- ARCTIC Liquid Freezer III 420 White ARGB
- V-Color Manta RGB 32GB @ 5600MHz CL26 DDR5 kit
- Biwin NV7400 2TB PCIe Gen4 NVMe SSD
- DeepCool DQ 750-M-V2L-White PSU
- Asiahorse custom extension sleeve cables
- Moddiy power adapters for the graphics card


Quite honestly speaking, you have so much space to work in that there is not much of a consideration, except for a few points. I started with the motherboard, and it was an easy fit. Since Liquid Freezer III series coolers require a contact frame so install that while the motherboard is out on a plain surface. RAM was an easy go as well.
Then I connected the 24-pin ATX and EPS cables, followed by the bottom connection cables. This is important if you are using a vertical graphics card. Since the vertical mount will obstruct access to the bottom part of the motherboard.
I installed the cooler first. This cooler’s block gives certain limitations on the height of the graphics card. Please check the ARCTIC website for compatibility and clearance data. The permissible length is 482mm with a triple slot design. Then the vertical mount and card were installed. For that, you need to install a long standoff screw on the lower middle motherboard standoff screw. I have used a moddiy adapter connectors, which hide the cable connection with the graphics card.
Before doing the cable management, I would suggest doing a test run to see if all components are getting power and that fans and blocks are lighting up. I ran into an issue where connecting fans to the block of the cooler did not get enough power. I ended up using all three 3-pin, 5V ARGB headers on the motherboard. Also, at least one of the two P12 Pro ARGB White fans must have an extended cable length. Neither length is enough to daisy-chain these fans and then connect to the motherboard’s top-mounted headers. The connectors did not reach the headers.


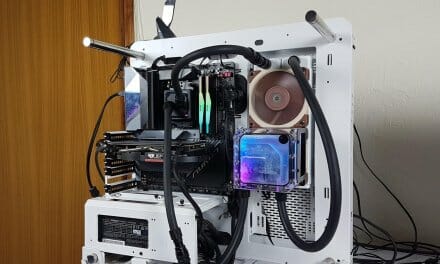
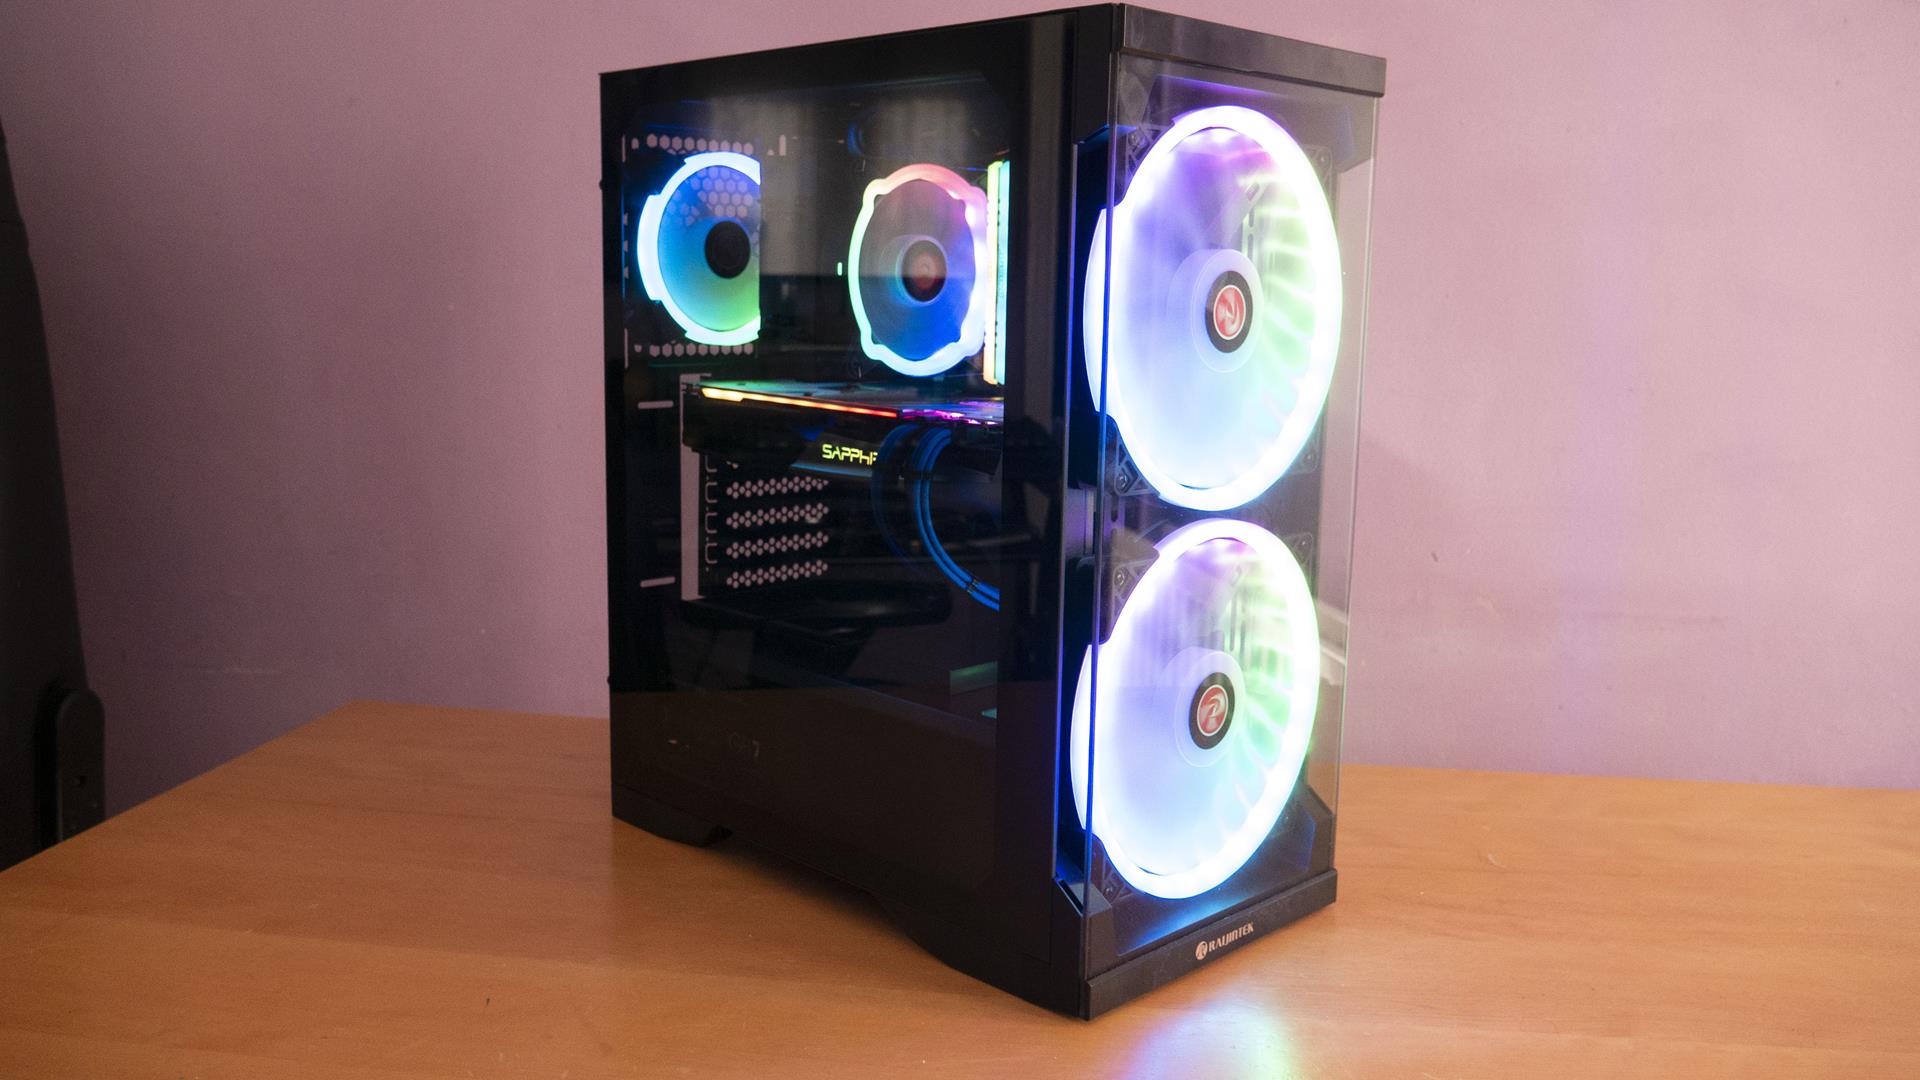
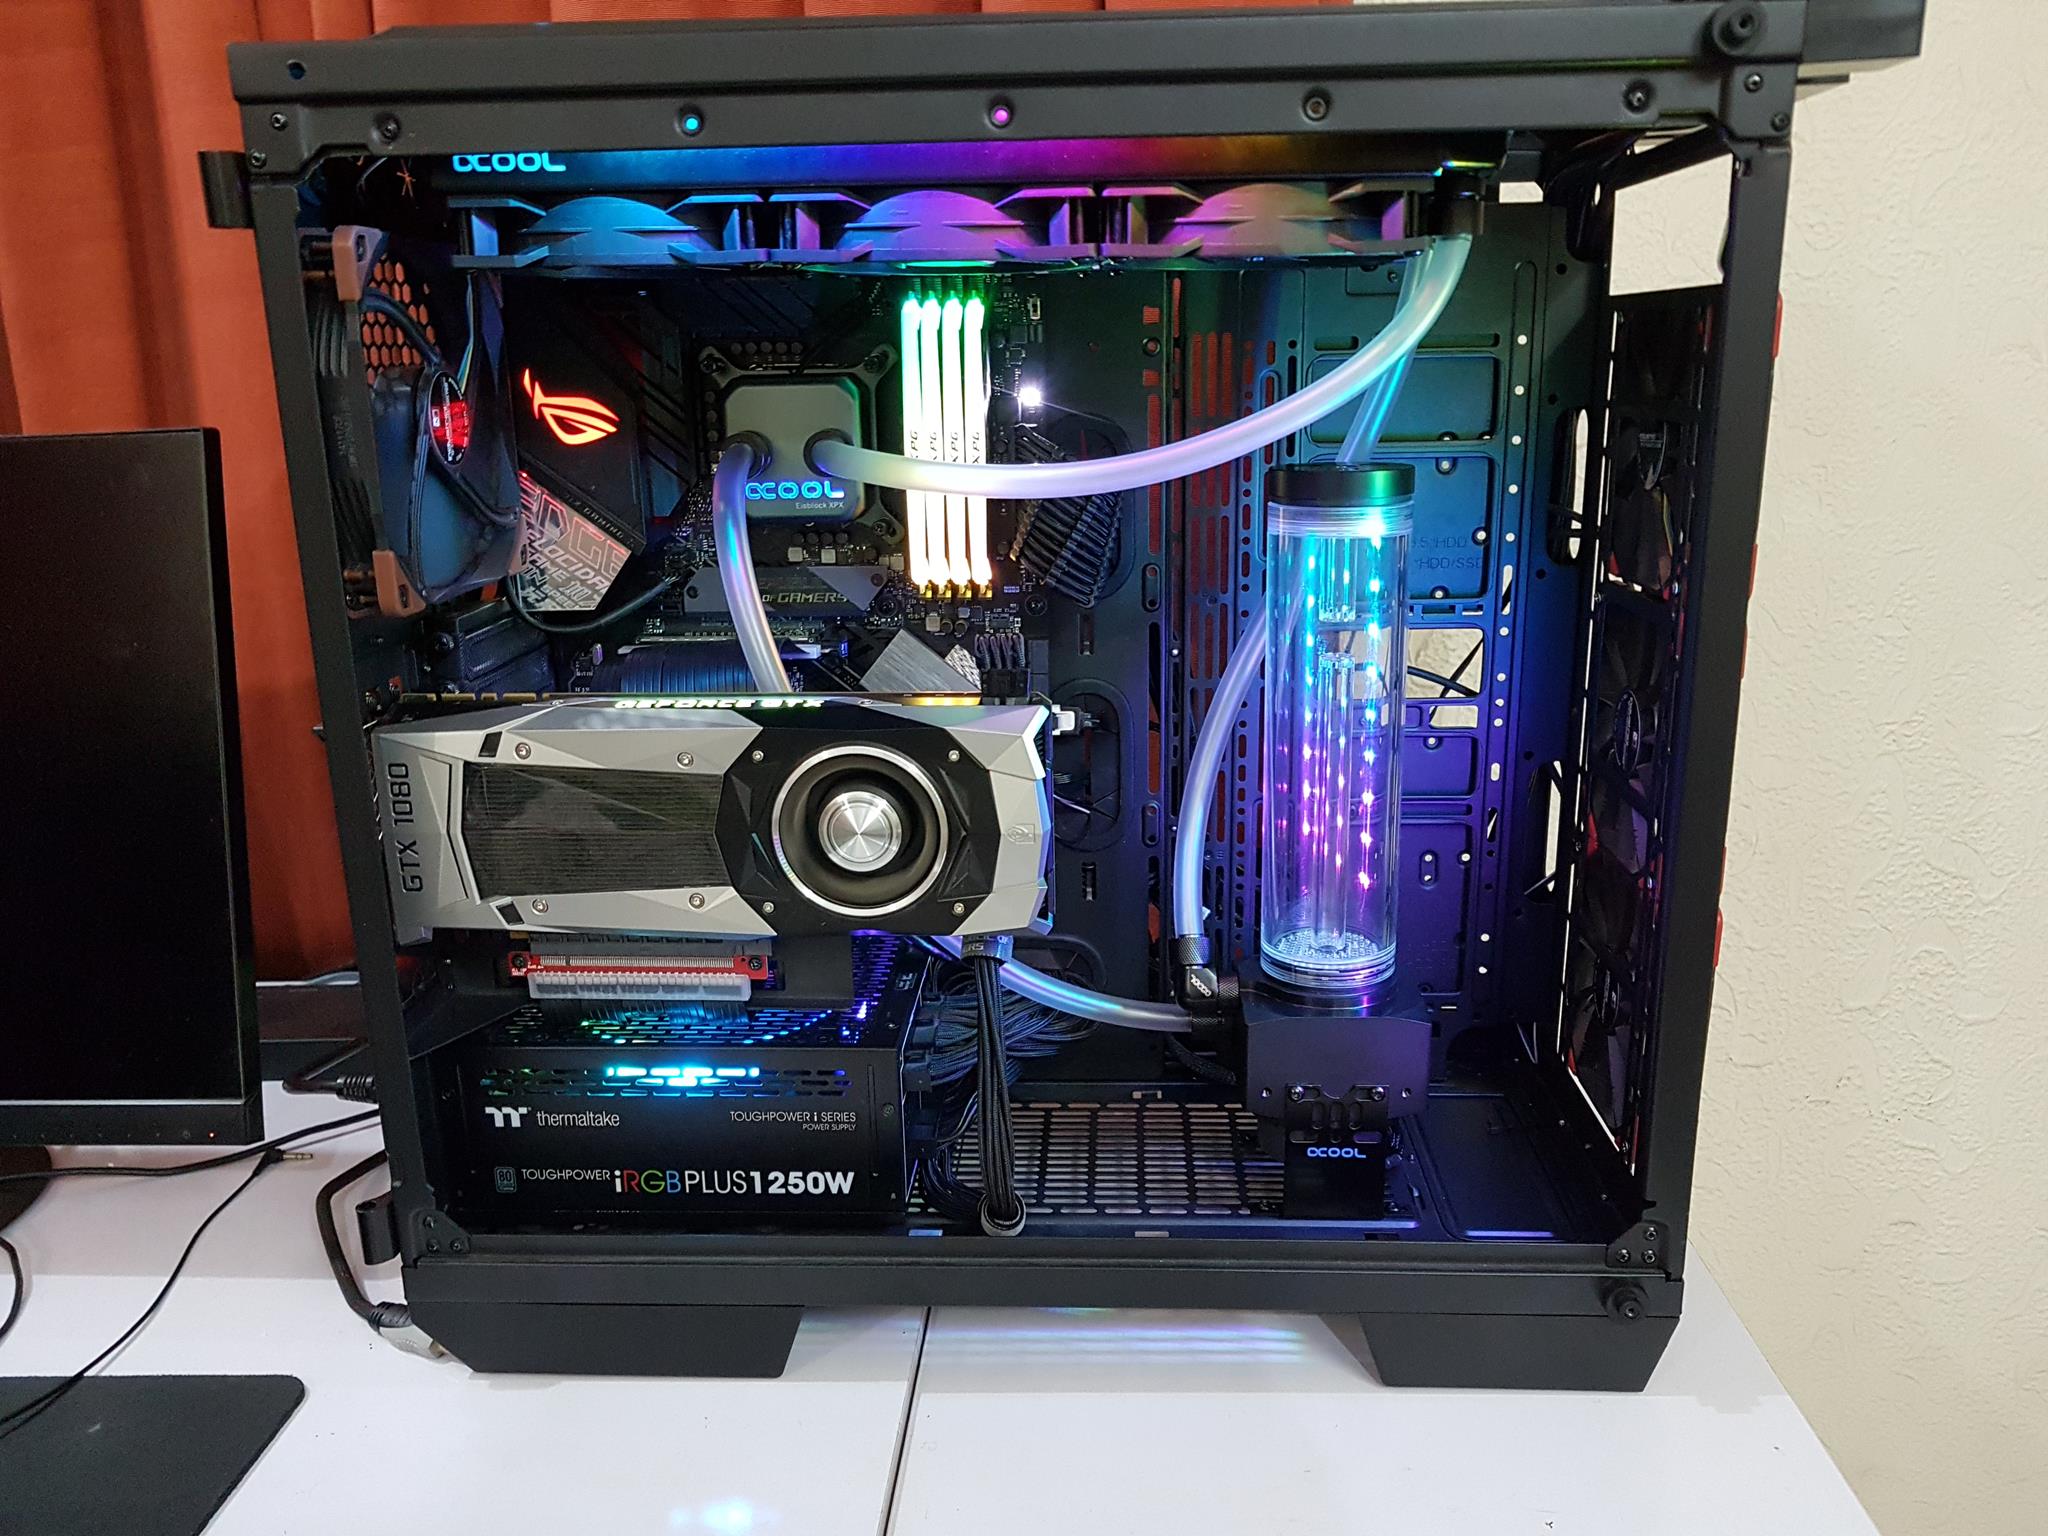
The above are a few pictures of the build.
Thermal Testing
The test build configuration is already mentioned above. I have tested the fans at full speed on their 100% PWM cycle. The fans on the AIO were also set to run at their full speed. The graphics card was running at stock settings. I have used Noctua NT-H2 thermal paste. Cinebench R23.2 is used to stress the CPU, and Furmark is used to stress the graphics card. The ambient temperature was 26°C.

We have excellent thermals on the CPU and graphics card, but the P14 Pro and P12 Pro fans at full speed are NOISY. I would suggest using the auto PWM function or a custom fan curve.
Conclusion
Xtender and Xtender VG are new cases from ARCTIC. ARCTIC is back with the cases, and this time, they have nailed it with perfection. I must say, the force is strong with these cases. These cases are available in three configurations:
- Black
- White
- Mirror
The difference between Xtender and Xtender VG is that the latter comes with a vertical PCIe bracket and riser cable which is not available in the standard configuration. My first impression is that it is a box or boxy style. No, it is not a complaint or observation. ARCTIC has managed to provide a full tower experience in these cases, but packs these with many killer features. I must say, ARCTIC has gone all out in providing what you can describe the best possible product out of the box.
Back in time, I used to buy Corsair Hydro Series liquid coolers but always used Noctua’s iPPC industrial fans with those coolers. This has been my way of doing for quite some time till the competition geared up and started providing true high-performance fans with the coolers. ARCTIC seems to have followed that has given you guys the product with which you would not want to change anything.
ARCTIC has provided powerful 3x P14 Pro reverse blade ARGB white fans capable of generating 98 CFM airflow per fan at an impressive 5.1mmH₂O. Similarly, they have used 2x P12 Pro white ARGB fans capable of generating 77 CFM airflow per fan at 6.9mmH₂O. Now imagine combining these with Liquid Freezer III Pro series coolers. I wish I had a 420mm LF-III Pro version and man, I would have never looked back or at any other option.
The housing of this case is made of SPCC for its metal frame, along with ABS material. The complete assembly is white coated. I have noted different white tones on the steel and plastic material. The chassis has a dimension of 529x231x529mm (LxWxH). The weight of this case is 15.4Kg and it comes with a 6-year warranty from the brand.
The fan support is as under:
- 3x 120mm or 3x 140mm fans on the top
- 3x 120mm fans or 3x140mm fans on the side [3x P14 Pro reverse blade ARGB white fans pre-installed]
- 2x 120mm fans on the rear [2x P12 Pro ARGB white fans pre-installed]
The radiator support is as under:
- 120mm/140mm/240mm/280mm/360mm/420mm on the top
- 120mm/140mm/240mm/280mm/360mm/420mm on the side
Clearance is:
CPU Cooler Height: Up to 171mm
Graphics Card Length: Up to 482mm without side radiator
PSU Length: Up to 318mm without HDD cage (200mm with HDD cage)
Storage provision is:
- Up to 3x 2.5” drive bays
- Up to 2x 3.5″ or 2+1 2.5” drive bays
Dust Filtration:
- Magnetic top filter
- Magnetic side filter
This case supports a motherboard up to the E-ATX form factor. It does not support a backplug motherboard. ARCTIC has provided 7x PCIe brackets or covers for a standard graphics card installation. The default layout supports a PCIe Vertical bracket with a 160mm riser cable conforming to PCIe 4.0 x16. The height of the graphics card needs to be taken into consideration with respect to the block of the cooler.
ARCTIC has used 3D rubber grommets covering the right-angle cutouts on the side frame of the motherboard tray.
The IO panel is located on the top frame and has a USB Type-C port along with USB 3.0 ports. The power button has a nice clicky sound and does not wobble. The case has strong cable management support and clearance. The channel has an inset for clean cable placement, and large Velcro strips will ensure that cables remain tucked.
The tempered glass side panel and backside panels use studs and bolts for easy latching. The PSU bay has 24 Gen-2 ARGB LEDs, and ARCTIC has deployed tempered glass on the front of this bay.
I have some suggestions for the ARCTIC:
- Use the floor or base under the side-mounted fans to provide a mount for the pump/reservoir unit installation.
- If thermodynamics allow, then having perforations on the base would be handy.
- Use large-sized feet so that there is a certain gap between the bottom of the case and the surface on which it is placed. This would make lifting the already heavier case convenient.
- Increase the length of at least one P12 Pro fan so that it can easily reach the motherboard headers.
- I would rather have an integrated SATA-powered fan/ARGB hub so that pre-installed fans are directly connected to it. This would free the user from the power calculation of ARGB LEDs.
- The above recommendation is based on my experience, where fans did not light up since the LF-III 420 fans were also connected to the same header. I had to use all three headers on the motherboard for ARGB lighting.
- Work on the safe shipping of this heavy case. Give due attention to the PSU bay’s tempered glass.
This case has an MSRP of €229.99. I am in love with this case, given its ginormous size, powerful fans, ARGB lighting, PCIe Vertical bracket with riser cable, cable management, and whatnot. ARCTIC has nailed it. Though some further refinements are possible, which are shared. In case you complain about the price tag, factor in the P14 Pro Reverse ARGB white and P12 Pro ARGB White fan,s along with the Vertical PCIe bracket with riser cable. These are not cheap by any means.
Pros:
- Panoramic View
- E-ATX size premium PC Case
- 3x P14 Pro Reverse Blade Gen-2 ARGB White Fans
- 2x P12 Pro Gen-2 ARGB White Fans
- Gen-2 ARGB LEDs on the PSU bay
- 420mm radiator on top
- 420mm radiator on side
- Bracket system for conversion from 140mm to 120mm fan mount
- Tool-Less Panels
- 3D Rubber Grommets
- USB Gen2 Type-C Port
- White PCIe Vertical Bracket with Riser Cable
- Tempered Glass front and side panels
- Tempered Glass on PSU bay
- Adequate Storage Solution
- Excellent Cooling Solution
- Excellent Thermal Performance
- Dust Filtration
- Warranty
Cons:
- Pricey Chassis
- No integrated Fan/ARGB Hub
- One fan bracket is missing


