


be quiet! Silent Base 802 Window White PC Case Review
Introduction
We have received Silent Base 802 Window White PC Case from be quiet!. We have tested the case and used it for a featured white build. This case is features rich and offers exceptional space to layout your configuration. On top of that, be quiet! has adopted the Cooler Master approach and provided sound insulated panels on the front, side, and top as well as the airflow designed front and top panel. The PSU shroud is on another level and is configured as per the user requirement including mounting one 120mm fan for further air intake. The case comes with detachable case feet. The removable motherboard tray is one main feature allowing the user to have a more traditional layout or go for an inverted layout without changing the case entirely. Extreme flexibility is there when it comes to Silent Base 802 Window White case. There are so many other features which are listed below.
- Tinted and tempered glass side window allows a superb view
- Exchangeable top cover and front panel for either maximum airflow or silent operation
- Three Pure Wings 2 140mm fans guarantee a perfect airflow
- Extra thick insulation mats for improved noise reduction
- State-of-the-art I/O port with fan controller and USB 3.2 Gen. 2 Type C connector for usage of latest hardware
- Fast and secure detachment of the side panels with push pins
- PSU shroud and smart HDD slot covers provide a neat interior
- Decoupled motherboard tray can be relocated for an inverted layout
- The power supply can be easily installed from the back of the case
- Detachable top bracket allows easy fan and radiator installation
- Generous dimensions for radiators up to 420mm
- Full metal body provides stability and a great haptic
- Side panel made of tinted and tempered glass
- Three years manufacturer´s warranty
Official Product Page: Silent Base 802 Window White
Purchase on Amazon UK £184.99
Purchase on Amazon US $202.69
Specifications

Dimensions

Silent Base 802 Closer Look

The chassis is shipped inside a brown color cardboard box. One look and we can tell this case has been handled quite well by the shipping company! Thankfully the case arrived in one piece with only a few scratches around only.

The above picture shows one white color Styrofoam. This is the only Styrofoam that has survived the shipping. There are two case feet tucked inside the foam.

There is one large size accessory box. It has airflow-oriented front and top panels. The case, by default, comes with soundproof panels all around except the glass panel. The top and front panels can be swapped with these airflow design panels.

There is a user guide provided in the case though it does not cover all corners.

be quiet! has provided various screws and Velcro strips.
Let’s start with what be quiet! is saying about their Silent Wing series, “Silent Base series offers a diversity second to none. Cases are dedicated from super silent to maximum airflow alike. With its easy handling and noise prevention methods Silent Base series underlines its claim to be the perfect symbiosis of silent operation, good cooling performance, and excellent usability. Features such as a PSU shroud and diverse cable management possibilities offer a neatly structured interior and underline the user-friendliness of Silent Base cases. With a targeted combination of sound insulation and innovative features, Silent Base is a truly superior case ideal for high-end gaming gear and for quiet systems especially.”
It is time to take a closer look at the chassis and see what it offers in this price range. The case stands at 537mm in Height without feet and 553mm with feet. The depth is 281mm and the length is 539mm. It is made of ABS Plastic, Glass, and Steel (SECC) materials. The case has a net weight of 13.15kg. By these measurements, this case sounds like a full tower but be quiet! has listed it as midi-tower.

Exterior View
Let’s start with an exterior view of the chassis.
Before we start talking about the case, the very first thing which should be done (in my opinion) is to install the case feet.

The above picture shows the two feet which remind me of the CORSAIR 780T design. Both feet have fine-quality pads on both ends. Each end has a holding column and a locking latch.

The above picture shows the feet installed on the case. There is no coverage of how to install the feet in the user guide. They are a bit tricky but nothing too challenging. You should hear proper clicks (4x) when each side of a foot bar secures with the case frame. You may have to use a bit of force but don’t put excessive force on these. We flipped the case to install the feet.

The above picture shows the case base with the feet installed. Both feet sit at an angle protruding from the base giving one elegant outlook to the case.

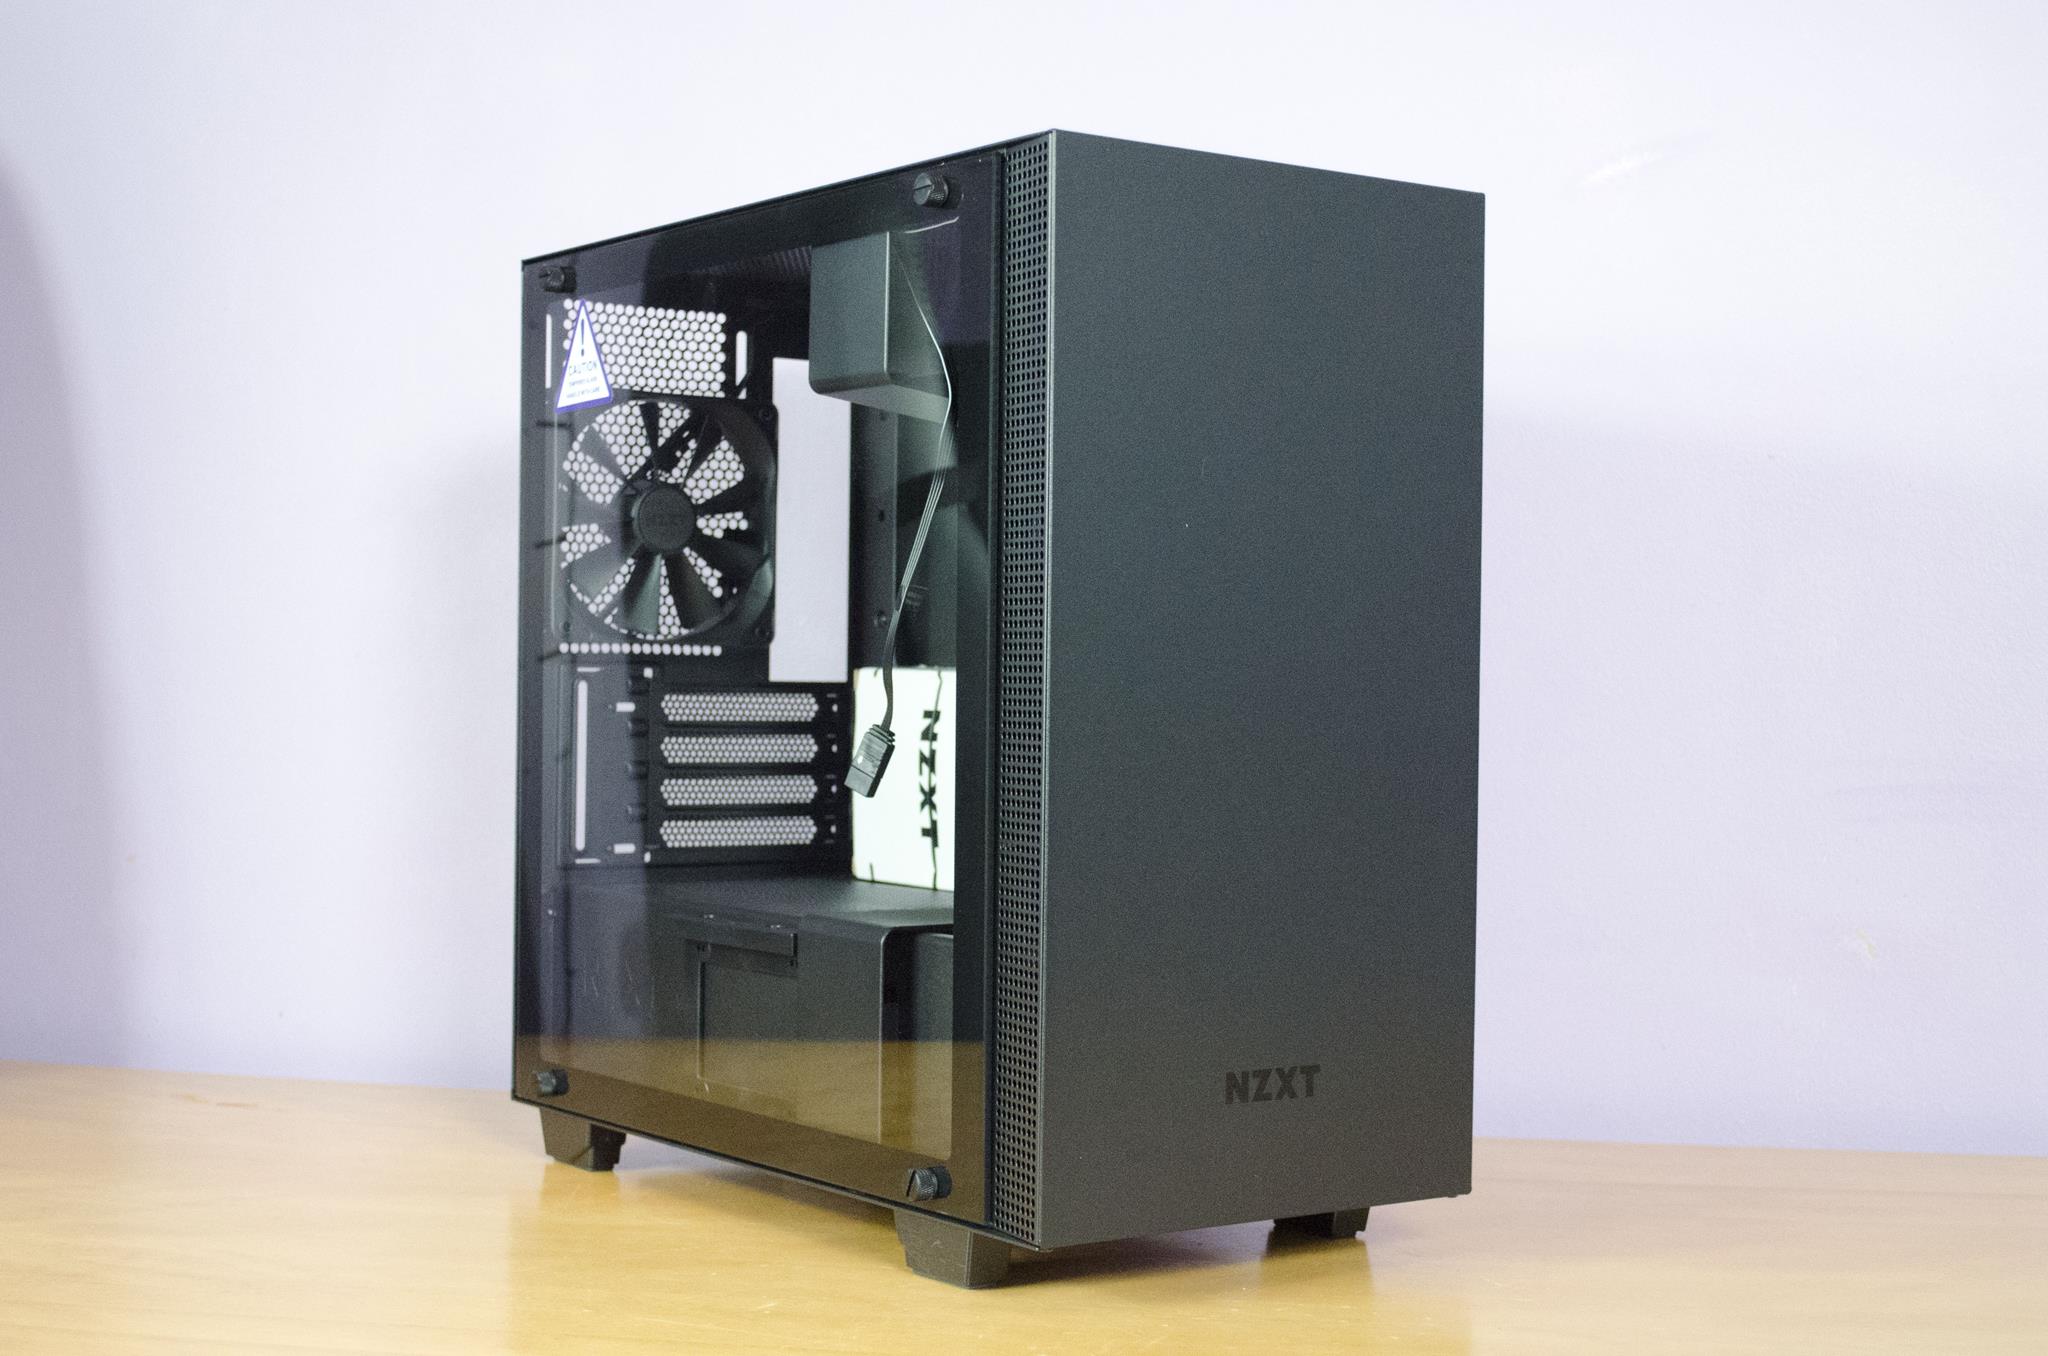
The front panel is solid without any perforation. This is because be quiet! has adopted soundproofing on the front by default. Don’t worry, they have also taken care of airflow requirements. There is a be quiet! branding on the base. Other than that, there is nothing significant besides a stylish layout.

I love how be quiet! has provided panels removing mechanisms on all sides. The front panel can be slided upward. You can see that in the above picture. The panel is lifted upward. All that is needed now is to pull it and the panel will come off.

The left and right sides of the case frame on the front have mesh intake. These intake areas compensate for the fully blocked front panel. These areas are filtered.

Take a peek at the inside of the front panel. There is a black color sound insulation pad.

This pad has roughly 1mm thickness.

As we have mentioned above that case can be prepped for soundproof or airflow orientations, for which necessary panels have been provided in the box. The above picture shows just that. The default front panel is on the left whereas the mesh panel is on the right.

The above picture shows both panels from the underside. In case you are wondering this mesh panel does not have a dust filter, take a look at the next picture.

There is a black color dust filter placed before the fan bracket.

The handling of the dust filter is convenient as well. There is a latch on the top, press it and pull the filter out. There are 2x Pure Wings 140mm black fans on the front. This black and white combination sounds strange to me as be quiet could have used their white fans.
The user can install up to 3x 120mm or 3x 140mm fans on the front.
The user can install up to 420mm radiator on the front.
We have superb cooling gear provision upfront. Since we have a highly spacious layout, the storage cage in the bottom chamber would not hinder the front fans/radiators’ placement which is a blessing.

There are cutouts at regular intervals on both sides. These are there for the air intake from the mesh side. Also, there are three cutouts facing the side of the fans. These are there to pass the fans’ cables for further routing and connectivity.

Looking at the side panel, we have a light-tinted tempered glass panel. The glass panel has a thickness of 4mm so handle it with care. The panel flushes in with the frame of the case fully. This is a different panel tooling that I have never seen before in my experience. The panel is not magnetic nor is it hinged. The panels can be released using push pins on the rear. The panel would release from the frame but would still remain fixed and the user will have to lift the panel. The glass panel has a dimension of 401x431mm.

The rear side of the case has a different approach in terms of the layout around the standard design. The top area is vented and has more height. We can spot a fan bracket through the vented area. The rest of the area excluding the PSU bay is recessed inside the frame of the case. The main reason for that is the removable motherboard tray. be quiet! needed to reinforce the complete tray and for that, they have almost used 9x screws to safely install the motherboard tray on the main frame. The provision is created on the main frame for these screws.
There is a cutout for the rear IO cover of the motherboard. On its right, there is a vented portion with one 140mm fan pre-installed. The user can install a 140mm or a 120mm fan on the rear. Height adjustment is not possible for either fan size.
In the middle section, we have 7 PCIe slot covers. There are two PCIe slot covers in a vertical layout. All covers are reusable. I wish be quiet! has made this layout bridgeless, as the bridgeless layout gives more compatibility with the majority of the vertical GPU brackets.

The vertical slots have a removable cover that can be loosened to install the card.
At the bottom, we have a provision for a standard ATX PSU. There is a bracket for the PSU bay. The user can remove the cover and install it on the PSU then slide the PSU inside the bay and complete the installation by screwing the cover on the frame. I appreciate this convenient handling of the PSU.

The above picture shows the PSU bracket. There is a sound insulation pad on the bracket for anti-vibration decoupled PSU.

The above picture shows the PSU bay in the bottom chamber. There are anti-vibration pads on which the PSU is rested.

There are two black color push pins up top. Pressing them or either will release the panels accordingly. We can see both panels in a released state.

The above picture shows the top view of the case. We have dual panels here. One panel is solid and has a sound insulation pad. The other panel is slotted for ventilation.

The above picture shows the top view with both panels removed. We have a total perforated area. There is no mounting hole or rail mount system in this area. The mounting is actually done on the bracket which is removable. We will discuss it down the road.

The above picture shows the mesh panel installed on the top. This mesh panel is provided in the accessories to convert the default sound-proof layout into an airflow layout.

The above picture shows both types of top panels.

The connectivity options on the IO panel are:
- 1x USB 3.2 Gen 2 Type-C Port
- 2x USB 3.2 Gen 1 Ports
- 2x Audio Jacks
- 1x Power Button
- 1x Reset Button
- 1x LED Indicator
- Fan Switch
The fan switch is a smart design. The integrated 4-step fan controller allows the setting of the speed of up to 6 fans manually or connects all to one PWM signal. The switch allows the user to set the speed on four dials. The user can set all fans on Auto PWM settings or increase the speed incrementally using dials 1, 2, and 3.

Looking at the bottom of the case, there is a full-length dust filter in black color. It can be removed from the front side of the case which makes its handling super convenient.

The above picture shows the underside area after removing the filter. There are rail designs on multiple spots here. The PSU bay area has quite a length. Looking closely, we can see that there is no screw anywhere here. This would mean the drive cage is secured to the frame of the case from the side.

The back side panel is solid.


We spotted strains and scratching on two points on the backside panel.
Interior View
It is about time to take a peek at the inner side of the chassis.

The above picture shows the inner side of the glass panel. The top frame is thicker and heavier. It has a locking/unlocking mechanism. There are two tabs or holders at the base which are rested on the frame of the case to secure the panel.

Let’s take an inside view of the chassis. One can easily tell how spacious this case is when it comes around to building inside. The inner space has a length of 445mm and a height of 363mm. the motherboard tray is installed such as there is a gap on the backside of the tray and its top, leaving plenty of room for the user to flex the muscle and route the cables. The motherboard tray is anti-vibration decoupled which goes to show the extent of be quiet! focus on making this case silent from almost every aspect.

The motherboard tray is made of steel and has a solid build quality. There is no flex as such in the tray. The markings are labeled for ease of identification for the installation of the motherboard. This case supports motherboards of up to E-ATX size. 9x standoffs are pre-installed. The centered standoff acts as a catcher to hold the motherboard in space. We have a large size CPU cut-out area for convenient installation of the coolers.
The top displacement is roughly 60mm which is quite good. This is coming from the 281mm depth of the case and the offset top bracket design. The three main cutouts in the center have rubber grommets. There is no cutout on the top as we have mentioned that the tray is removable hence the upper area is left open.
Take a good look at the right side of the tray. There are ABS-made covers. These are there to cover the mounting of drive cage. The idea is not new and many brands have implemented this in their own design like Phanteks Evolv have this feature. Fractal Design is using a similar feature but with a different implementation in that the drives would still remain hidden behind the cover for a clean build. If you decide to install further storage drives here then this would impact the length support of the graphics card*.
Compatibility and Clearance
The following cooling provision is supported:
- 3x 120mm or 3x 140mm fans on the front [2x 140mm pre-installed]
- 3x 120mm or 3x 140mm fans on the top
- 1x 120mm or 1x 140mm fan on the rear [1x 140mm pre-installed]
- 1x 120mm or 1x140mm fan on the PSU shroud
- Up to 420mm radiator on the front
- Up to 360mm radiator on the top
- Up to 140mm radiator on the rear
CPU Cooler Height: 185mm
Graphics Card Length: 432mm without drive cage, 287mm with the drive cage*
PSU Length: 288mm

The complete bottom chamber area including the PSU bay is covered. There are actually 4x ABS-made covers. They are cut-to-design for this specific requirement. Each one can be separately removed.

The above picture shows the PSU shroud after removing the covers. There are 6 small size cutouts on the sides to pass the cables through. Please note that there is a gap between the cover and the shroud which makes the routing of cables convenient. The far right side shows the mount where the user can install a 1x 120mm or 1x 140mm fan for intake. Given the design and regular airflow, it is recommended to install the PSU with the fan side facing down.

The above picture shows the underside of the PSU shroud covers. They are made of ABS material.

There is a be quiet! branding carved in the side of the PSU shroud.

The above picture shows the backside of the front fan bracket. Take a closer look and you will find anti-vibration decouples on the fan mounts. There are two 140mm Pure Wings 2 fans pre-installed on the front side of the bracket.
There is a gap of roughly 58mm on the front base which is covered by the ABS-made cover. It can be removed to install a 360mm or 420mm radiator up front. We installed a 360mm AIO in push-pull and it was an easy fit on the front. It was done to see if push/pull is possible or not.

There is a black color 140mm Pure Wings 2 fan on the rear which is powered by a 3-pin connector cable. Its rated speed is 1000 RPM and rated at 18.8 dB(A) at 12VDC with 61.4 FM airflow rating and 0.76mmH₂O air pressure rating.

The above picture shows the PCIe slot covers. This is not a bridgeless design. Please note that installing the card vertically in this case will sit the card closer to the side panel which would restrict the fresh air intake for the graphics card.

The above picture shows the top view of the case with the glass panel removed. There is a removable fan bracket up top which is secured by 2x Philips screws.


The above pictures show both sides of the bracket. Its offset side is vented. Clearly, be quiet! was ahead of the game when designing this bracket.

The above picture shows the inside top view of the case with the fan bracket removed. We have ample space up top for the radiator placement.

The above picture illustrates the regular and optional airflow in the case.
It is now time to look at the backside of the case.

The above picture shows the backside of the side panel. There is a roughly 1mm thick sound insulation material on the side panel. This will make contact with the cables making it difficult to put the panel on. So, make sure you are spending a good time in cable management and avoid grouping multiple cables in the center.

The above picture shows the main view of the backside of the case. The front panel cables are grouped and routed in the center. There are 10x screws which are securing the motherboard tray with the frame. Removing those and 3x more on the front side inside of the case will remove the motherboard tray for invert placement if so required. There are 18 cable tie points.

Be quiet! has implemented a fan hub with two rails. Each rail supports up to 3x fans. These are 3-pin fans but the hub is PWM and there is a PWM cable that can be connected to the motherboard header for further control. The hub is SATA powered.

There is a 2.5” drive bracket right next to the hub.

There is one more 2.5” drive bracket right behind the CPU cutout. It can house up to 2x such drives.

The above picture shows the drive cage with one caddy inside. The cage’s frame is secured with the main frame using screws on the side. This is a wise implementation as we can easily remove the cage and its frame without flipping the case. Usually, the drive cages are secured using screws from the underside of the case.

The above picture shows a caddy. It has anti-vibration decoupling mounting to absorb the vibrational noise of the 3.5” disk drives and is toolless as well. It also supports 2.5” drives.

be quiet! has also provided a dual drive caddy in the accessory box.

The above picture shows the PSU bay. The front panel cables are rested in this area. Take note of thicker anti-vibration pads in the area. The PSU is placed over these. Clearly, be quiet! is not leaving any corner unturned when it comes to ensuring the maximum soundproof case.

The above picture shows the bottom chamber after removing the drive cage. We have plenty of area to work with.

We have:
- USB 3.2 Connector
- USB Type C Connector

There is a front panel HD Audio connector.

We have front panel system connectors.

The fan hub is powered by a SATA connector and there is a 4-pin PWM connector as well.
Installation
The following configuration is used:
- Intel i9 10850k
- GIGABYTE Z490 VISION D
- GIGABYTE GeForce RTX 3070 VISION OC
- DeepCool LS720 WH
- DeepCool FC120 White ARGB Fans
- XPG Spectrix D60 16GB @ 3600MHz White
- XPG Lite 1TB NVMe SSD
- Sabrent 2TB Rocket 4 Plus NVMe SSD
- Fractal Design ION + 2P 860W PSU

We started with the installation of the motherboard. It was a convenient fitment and we did not encounter any issues.

We have used custom-sleeved extension cables in white color. The 24-pin ATX connector was installed.

The 8-pin EPS connector was installed.

The front panel connectors were routed under the motherboard and connected to the header.

The HD Audio and an A-RGB 3-way split cable were routed under the motherboard and installed for a clean look.

The USB 3.2 and Type-C connectors were installed on the headers.

3x fan PWM connectors were routed behind the motherboard and connected to three PWM headers. This would allow us to group the fans in 3 sets and control each group separately.

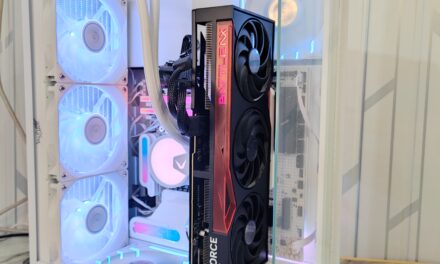
The graphics card was installed.

3x FC120 ARGB white fans were installed on the front. A single FC120 ARGB white fan was installed on the rear.

The CPU cooler was installed followed by the PSU. All the connections were established on the backside of the motherboard tray.

We did a minimum cable management to see if the back panel can be put on conveniently. This was not the case as the thick insulation foam was obstructed by the group of cables in the center. You would need to plan ahead for the cable management.
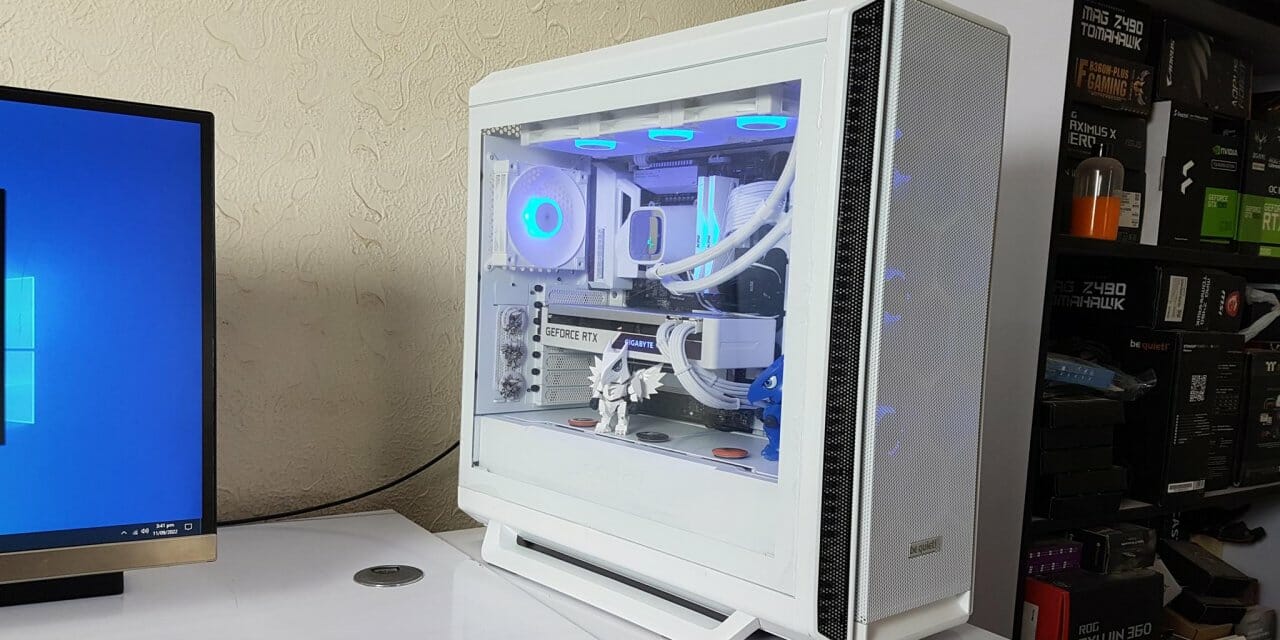
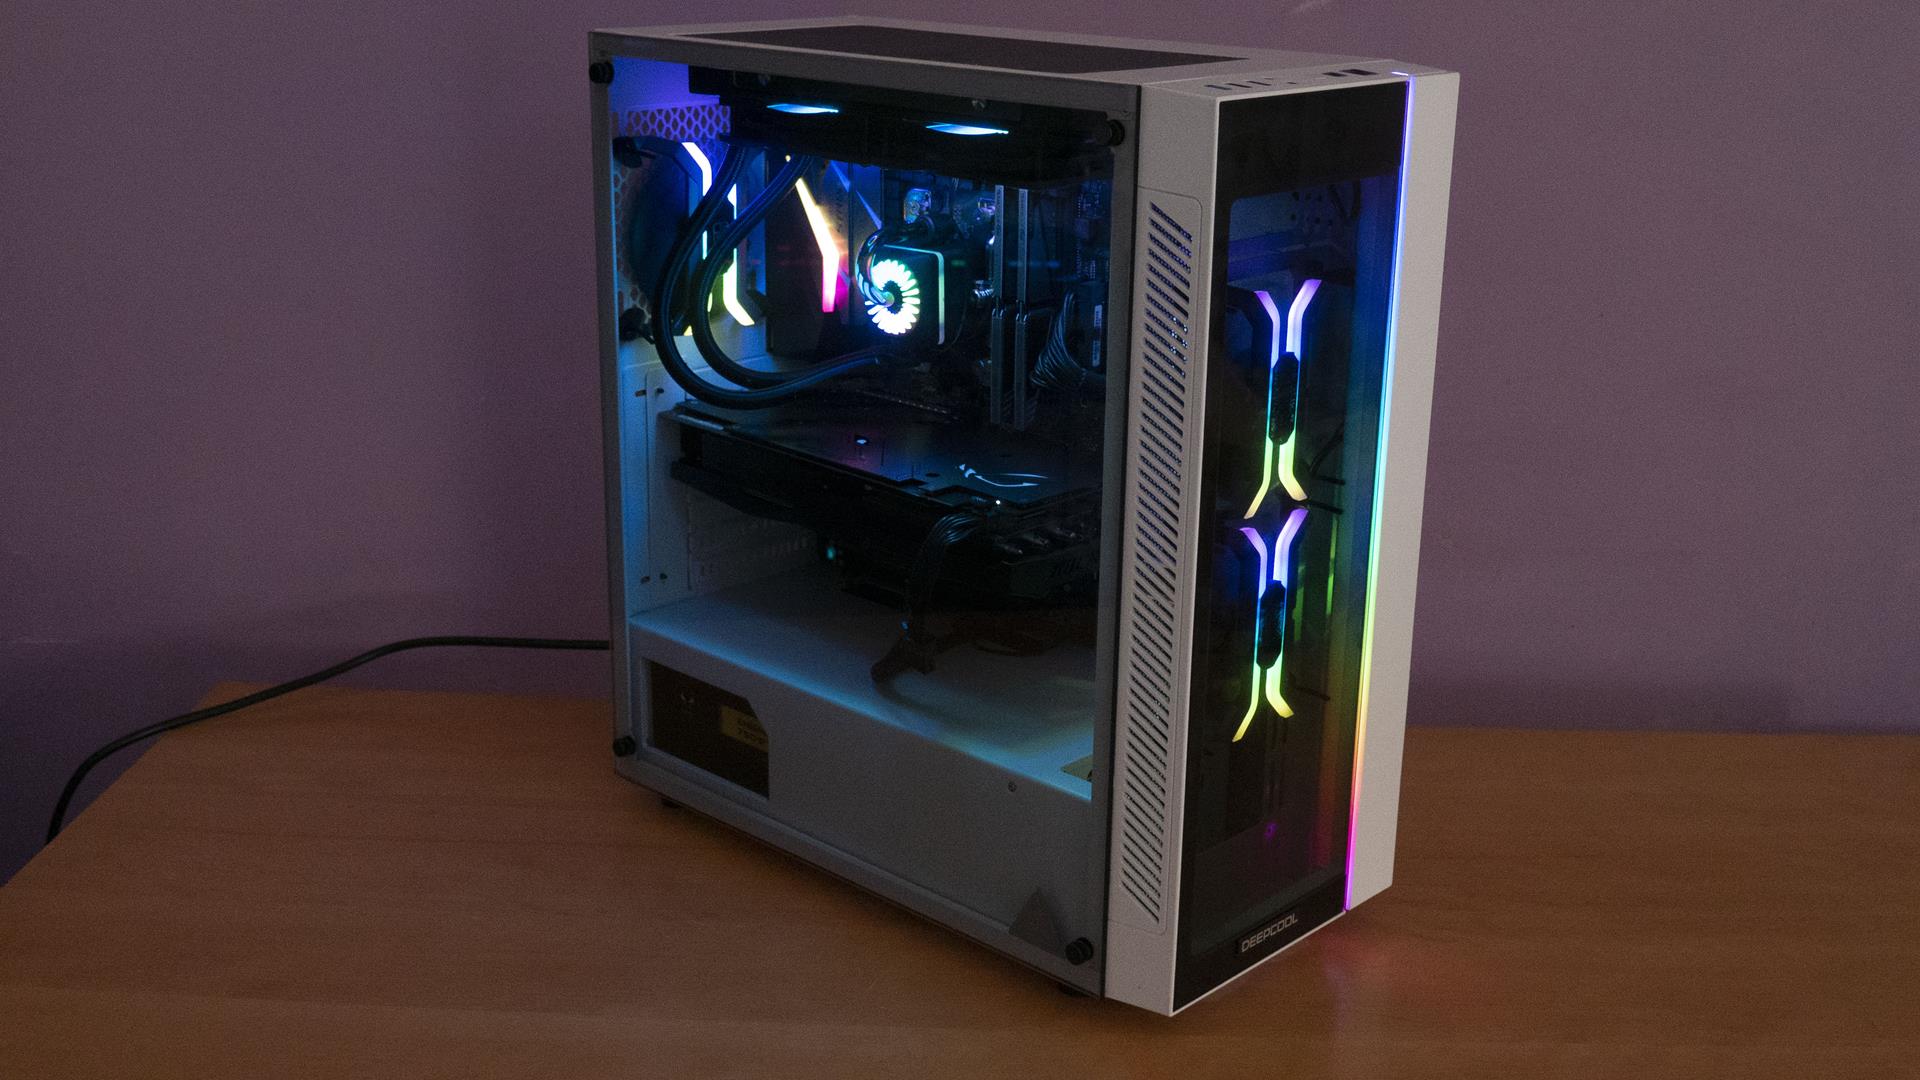
Here are a few pictures of the build.


Thermal Testing
The test configuration is already mentioned above. We have tested the case with the fans on a custom fan curve and the pump on full speed. The graphics card was on factory or Auto settings. The CPU was on [Stock, Auto] settings as well. The AIDA64 Extreme 6.35 was used to stress the CPU (using FPU) and the GPU at a time. The ambient temperature was 35°C. Here are the results:
| Sound-Proof Layout [Default] | |
| CPU Temp under load | 86°C |
| GPU Temp under load | 77°C |
| Air Flow Layout | |
| CPU Temp under load | 80°C |
| GPU Temp under load | 73°C |
This case with a sound-proofing layout provides the best silent operation but at the cost of high thermal output whereas the thermals are good with the airflow layout. This is up to the user to decide which configuration or a mix of configurations would suit best. I am using an airflow layout with a custom fan curve and the thermals are good under load with a sound level not too high to tease me.
Conclusion
The be quiet! Silent Base 802 Window White is a mid-tower PC Case that is feature rich solution catering to a multitude of market segments but at a steep price. This case is available in black and white version and we have taken a spin on the white version. The case is so spacious that I consider it in the full tower category but be quiet! has mentioned it to be midi-tower. The dimension of the case is 553x281x539mm (HxDxL) including the case feet. The height without the feet is 537mm. The case is made of ABS Plastic, Glass, and Steel (SECC) materials. The case has a net weight of 13.15kg.
The fan support is as under:
- 3x 120mm or 3x 140mm fans on the front with 2x 140mm fans pre-installed
- 3x 120mm or 3x 140mm fans on the top
- 1x 120mm or 1x 140mm fan on the rear with 1x 140mm fan pre-installed
- 1x 120mm or 1x140mm fan on the PSU shroud
The radiator support is as under:
- 120mm/140mm/240mm/280mm/360mm/420mm radiator on the front
- 120mm/140mm/240mm/280mm/360mm on the top
- 120mm/140mm radiator on the rear
Clearance is:
CPU Cooler Height: 185mm
Graphics Card Length: 432mm without drive cage, 287mm with the drive cage*
PSU Length: 288mm
Storage provision is:
- Up to 7x 3.5” drive bays [3x provided]
- Up to 15x 2.5″ drive bays [7x provided]
Dust Filtration:
- 1x fine mesh filter on the front
- 1x full-length mesh filter on the base
- 1x mesh panel on the top [Optional]
Here are the key highlights of the design:
- Light Tinted 4mm thick Glass Panel
- Push Pins to unlock the side panels
- 3x be quiet! Pure Wings 2 140mm black fans pre-installed
- Swappable Front and Top panels
- The sound-proof layout or airflow layout
- The case can be set up for Storage Server
- 6-fans hub with PWM control
- PSU Shroud with multiple use scenarios
- Tool-less drive cages
- Removable Motherboard Tray for standard or inverted layout
- PSU Bracket
- Top removable fan bracket
- USB 3.2 Type-C Gen 2 port on the front panel
- Support for up to 420mm radiator on the front
- Fan hub with the switch using 4 dials
The case can house motherboards up to the E-ATX form factor. There is a top displacement of roughly 60mm leaving enough room to easily install the radiator with the fans on the top without hindering the RAM. There are ABS brackets on the side of the motherboard tray which can be used to install drive bays. However, this would limit the length of the graphics card to 287mm so keep that in mind.
The PCIe slots are not a bridgeless design which in my opinion should have been as this provides more flexibility and compatibility with the majority of the vertical GPU brackets. The front gap is enough to support the radiator with fans up to 58mm in thickness. The PSU shroud has full-length covers that can be removed as per the requirement. There is a certain gap between the vented shroud and the covers for ventilation and cable routing. The user can optionally install a 120mm or a 140mm fan on the shroud for further intake.
The stock fans have a rated speed of up to 1000 RPM and they are using 3-pin connectors. They are connected to the fan hub on board. The speed of the fans can be set to Auto PWM or speed dials of 1, 2, and 3 for slow speed, medium speed, and full speed. A super convenient design. The case has a USB 3.2 Gen 2 Type-C port and a 2x USB 3.2 Gen 1 port as well.
The overall build quality is top-notch. The shipping company ruined the packing board. The Styrofoam pads were destroyed but luckily the case made its way safe with a few scratches on the back panel. The paint job though is neat, we can spot the differences which are mainly due to the different materials (steel and plastic). The case feet are not pre-installed and they need to be attached first for which there is no guideline in the user manual.
Our overall build experience is very good and despite using a 360mm on the top, the right side of the case is still left unused. The cable routing is super easy. The only challenge is the cable management so that the 1mm thick sound-insulation material on the back panel is not obstructed by the cables. The thermal testing shows that the CPU and graphics card run hot in the sound-proof layout. The thermals were fine in the airflow layout.
The be quiet! Silent Base 802 Window White is listed at USD 190 at the time of this review. This steep price is justified by the plethora of features, superb build quality, provision of two types of panels (for front and top), audacious design element, magnificent layout, cooling and storage provision, and whatnot. The case is a piece of marvel and yes be quiet! is right in their claim that this case is a perfect symbiosis of silent operation, good cooling performance, and excellent usability. No wonder if this case has won our Must Have award.
We are thankful to be quiet! for the provision of the test unit.


