










Thermaltake CTE E550 TG Snow Edition Review
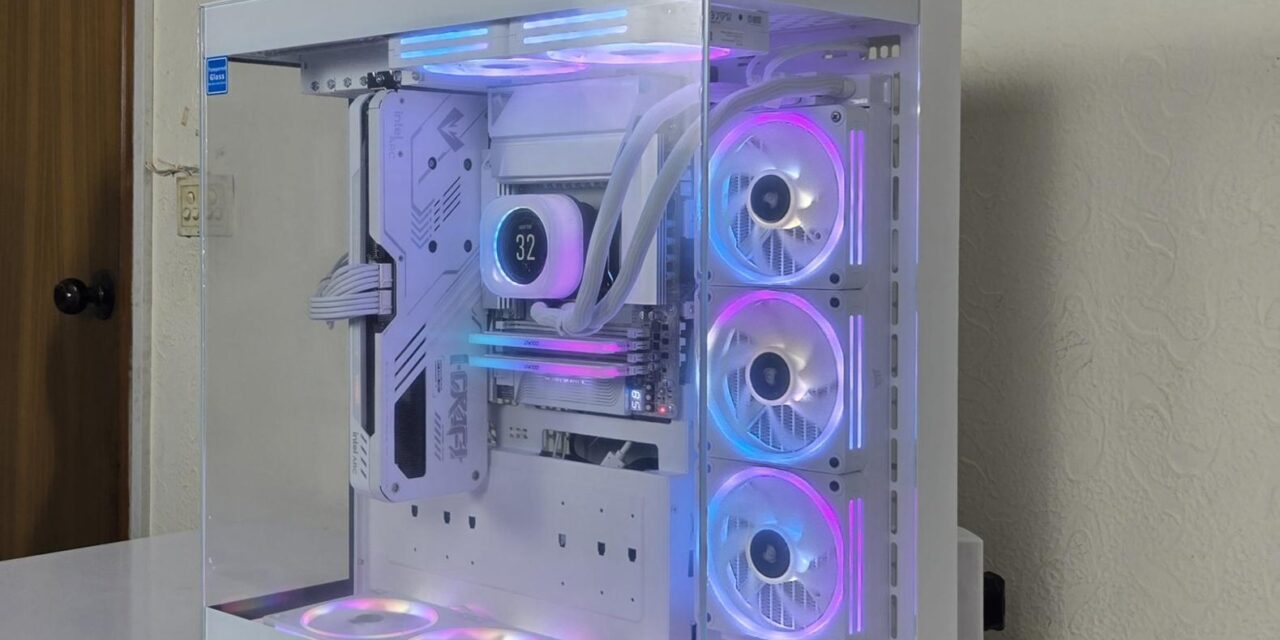
I am taking a look at the CTE series PC chassis from Thermaltake. It is CTE E550 TG Snow edition. This case is available in multiple colors. CTE stands for Centralized Thermal Efficiency. It is a concept introduced by Thermaltake some time ago, where the goal is to deliver thermal performance to core components of your build, which are obviously the CPU and graphics card, and core areas on the motherboard.
To achieve this goal, Thermaltake introduced a 90-degree mounting of the motherboard in which the RAM side/24-pin ATX power connector of the motherboard faces downward, whereas in the standard design, it is on the right side of the case. Doing so would optimize the airflow paths in the chassis. How? The CPU now sits closer to the front of the case and the graphics card towards the rear of the case. Side and bottom air intake would benefit both critical components.
Now coming back to the case itself, it is a spacious layout that comes with three tempered glass panels (front, rear, and side). The E600 is a new iteration of this series, taking over from the E550 with one key change. The rear now has a perforated panel with a fan mount, which is not in the E550. The reason I chose E550 is that it can still be converted into an open frame layout, which is my primary requirement. Thi,s in addition to the support of the backplug motherboard, is the key factor in my decision.
The all-around panoramic view gives the E550 a distinctive advantage. Motherboard rotation by 90 degrees would mean the motherboard’s rear IO panel would sit on the top of the case, and all cable connections would need to be done on top.
This is a mid-tower PC Chassis that supports a motherboard up to E-ATX form factor. It has a total of 8x fan mounts with support for up to 6x 140mm and 420mm radiators. This is something we did not get in the Core P6 TG Snow. The storage and cooling solution is excellent in this case, and so is the cable management provision.
This case hasan MSRP of USD 149.99. However, it is on sale/discount at the time of this writing and can be had at USD 134.29.
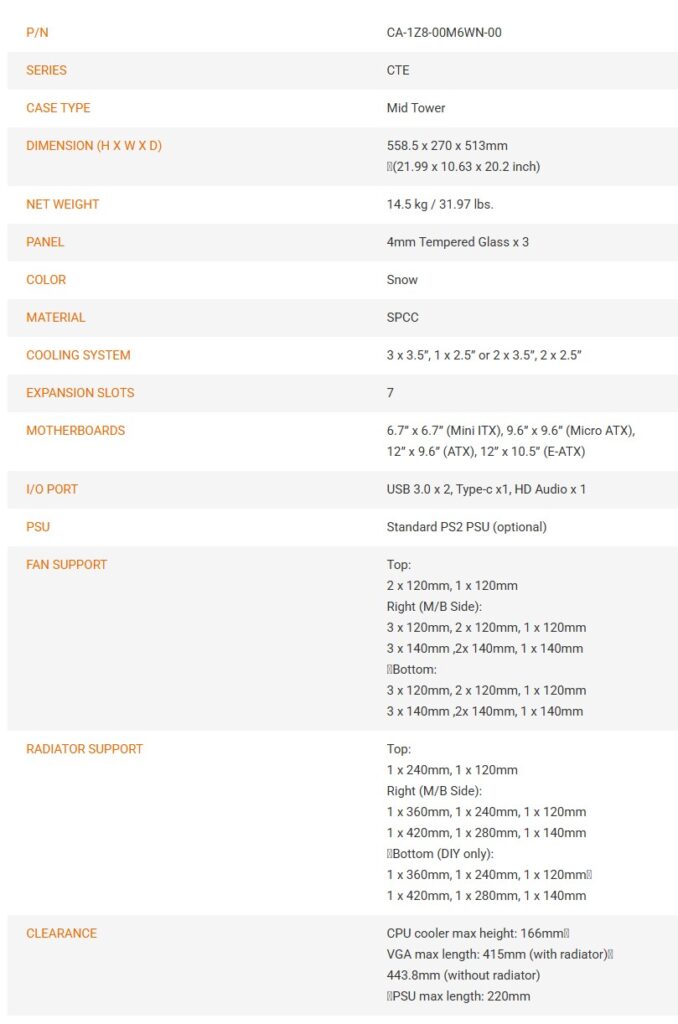
Specifications
Packaging and Unboxing
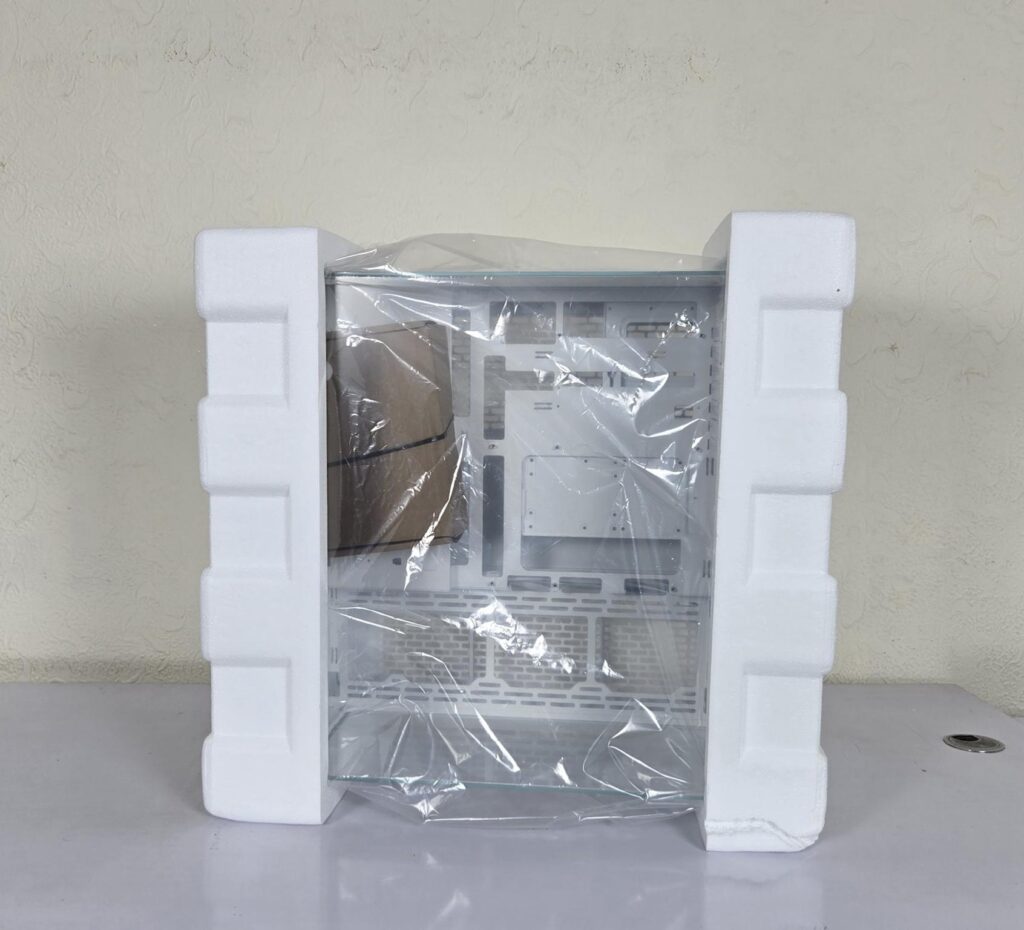
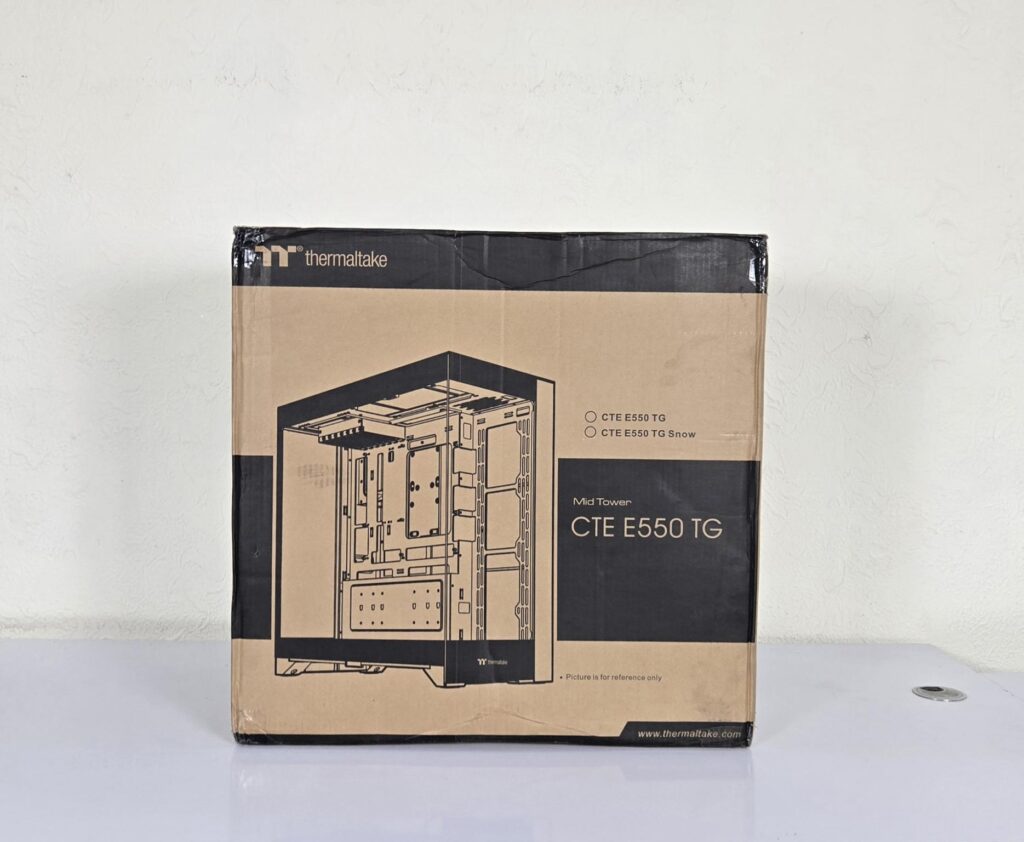
The case is shipped inside a standard cardboard box finished in brown. The features and specifications are also listed on the box. Two thick white Styrofoam pads sandwich the case for safe shipping.
Accessories
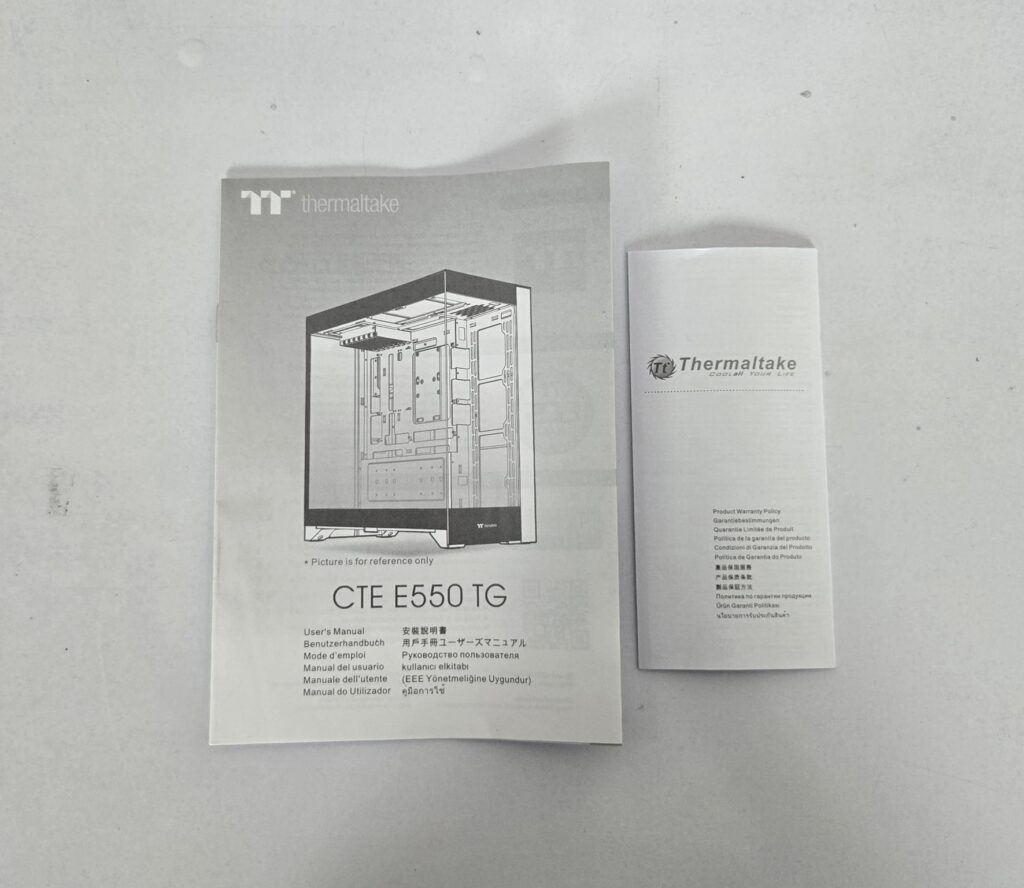
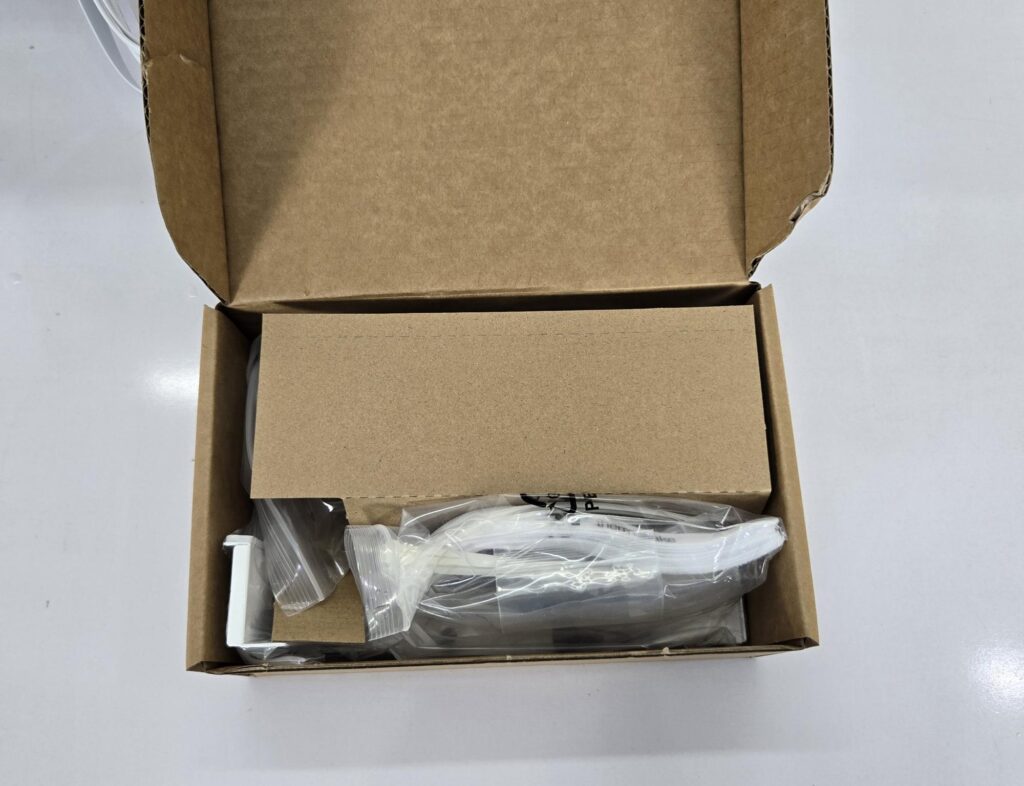
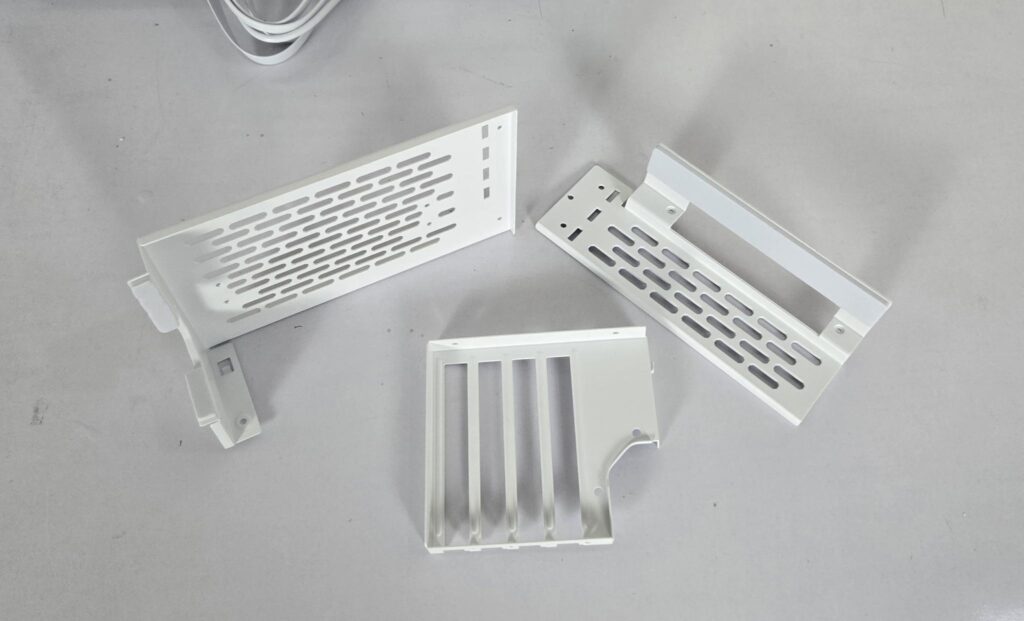
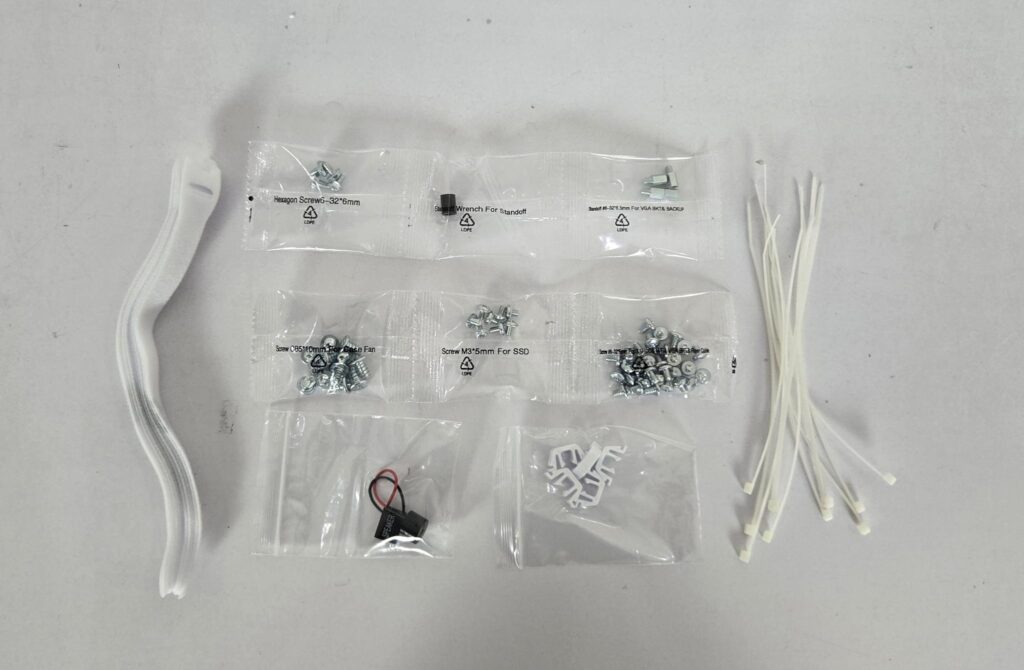
Accessories are provided in a separate box. The following are provided:
- Quick User Guide
- Warranty Page
- 3x PCIe Support Brackets
- Zip Ties
- Thermaltake-branded Velcro Strips
- 3x Standoff Screws
- 1x Wrench for standoff screws
- Clips
- Speaker
- Motherboard Screws
- PSU Screws
- HDD Cage Screws
Closer Look
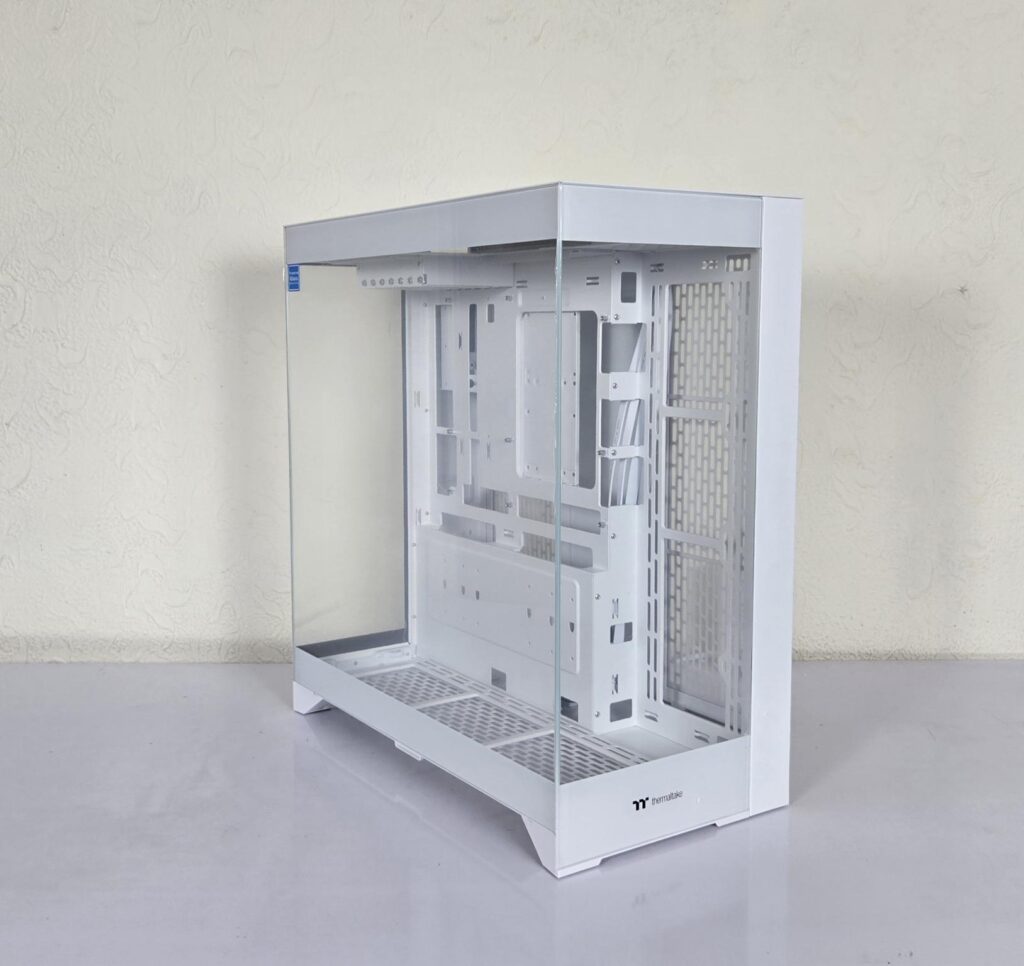
The CTE E550 TG dimension of 558.5x270x513mm (LxWxH). It is made of ABS, SPCC, and Tempered Glass. The weight of this case is 14.5Kg. I am not sure of the warranty period, but my guess it would be at least 1 year. This is a mid-tower category case that is quite spacious, and from its smart design, it may seem like a full tower case.
Exterior View
Let’s start with an exterior view of the chassis, starting from the front.
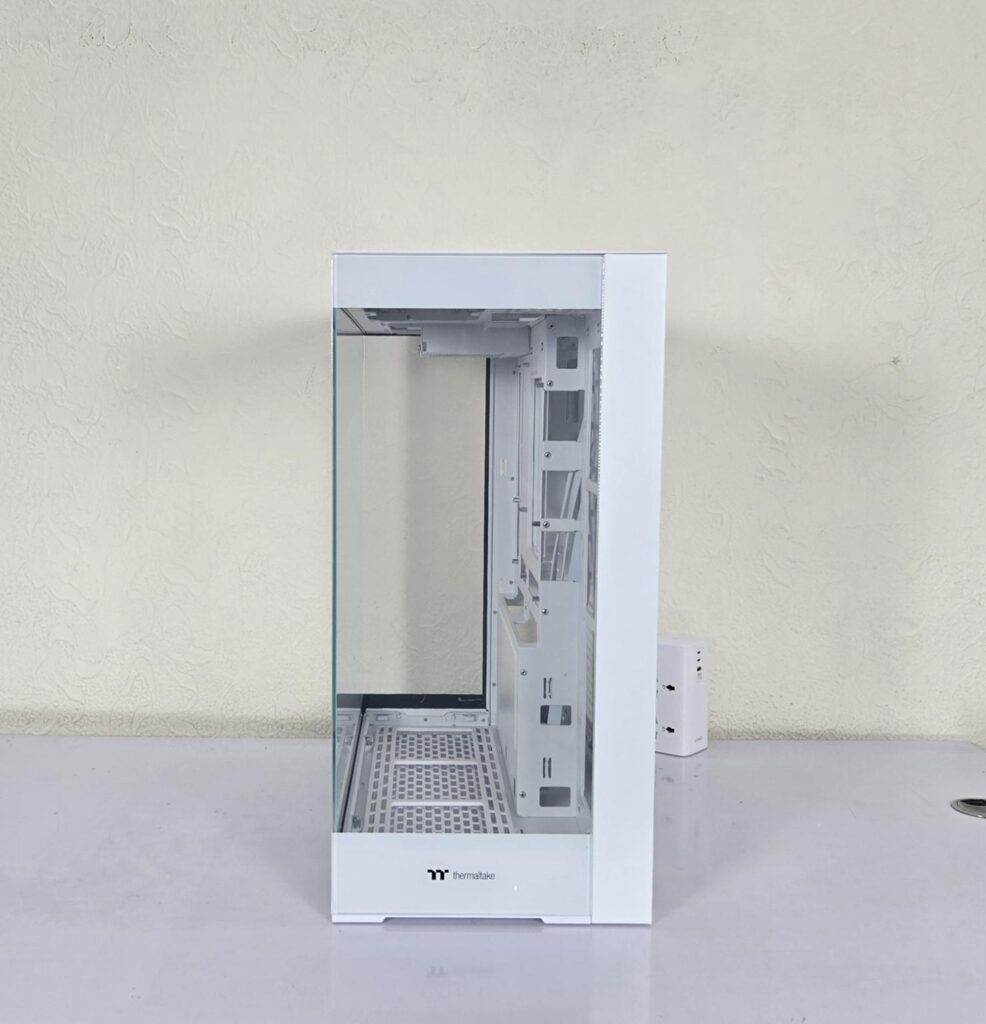
You can see a clear tempered glass over the front panel, providing a clear, see-through view of the case internals. The Thermaltake branding is visible on the base of the glass. The steel panel does not have branding. The IO panel is not on the front either. You can see an offset design for the motherboard tray. This area is parallel to the fan/radiator installed on the side.
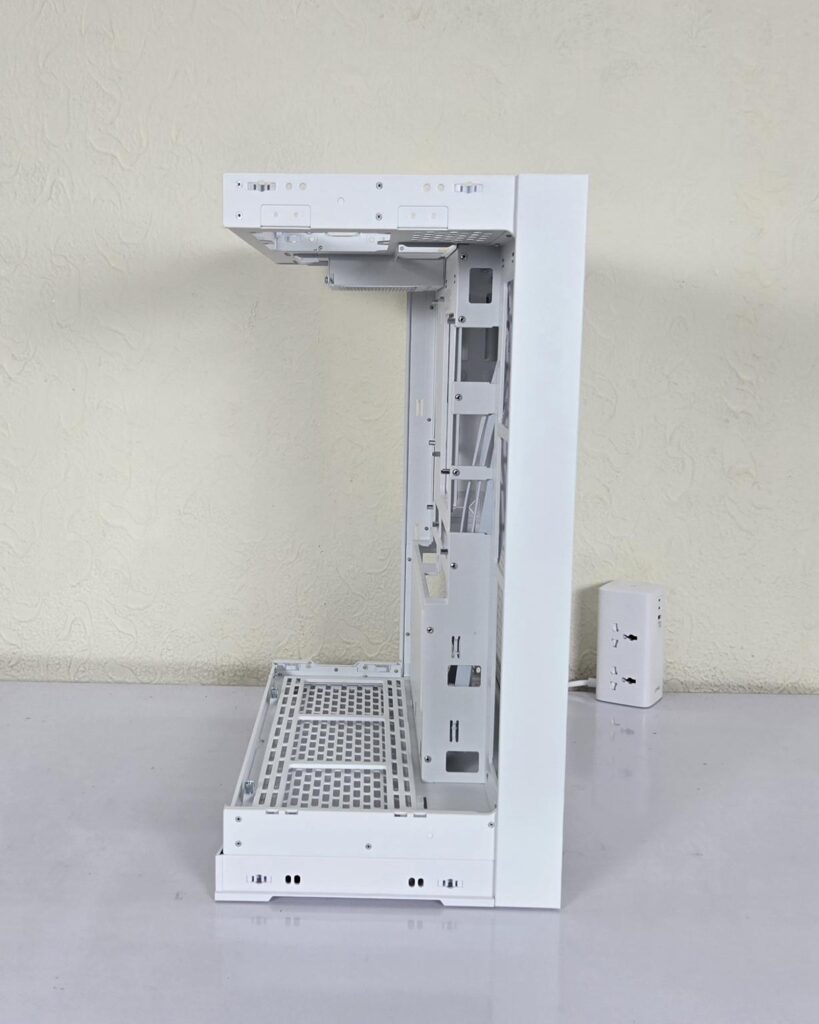
The front glass panel is removable. All panels are tool-less. You need to remove the top panel and then pull the front glass. It is mounted via studs, making our life easy.
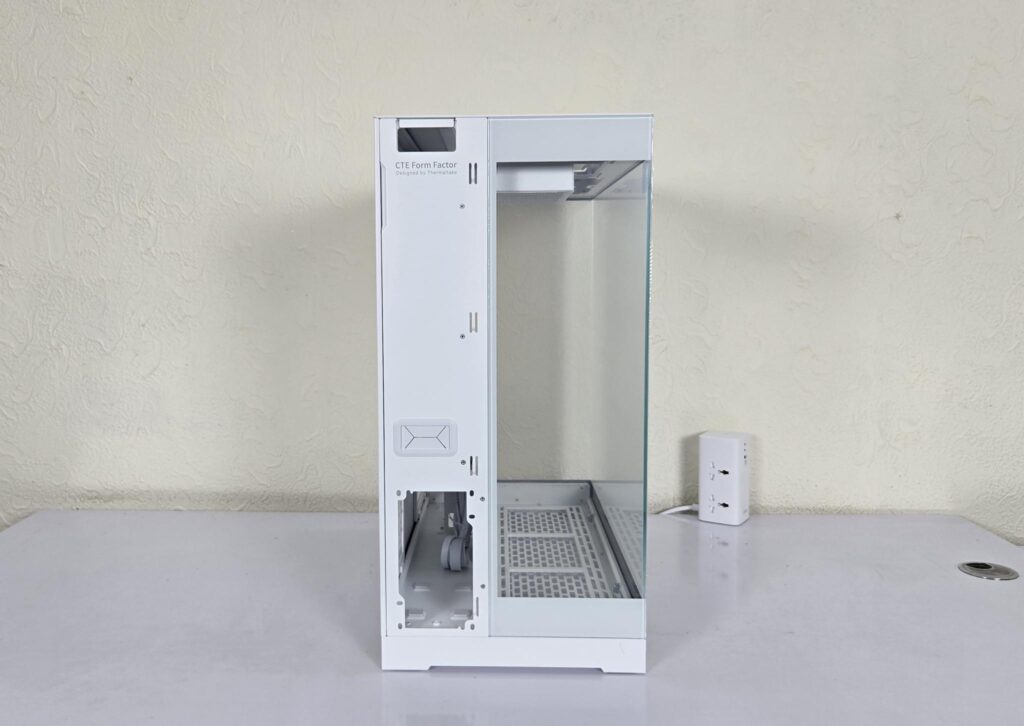
Looking at the rear, we have a different layout from what we are used to seeing on the standard or traditional design. A cutout on the top of the steel panel is where the cables connected to the graphics card and the motherboard’s rear IO panel are routed.
The base has a vertical mount for a standard ATX PSU. You can see another cutout above this mount. That cutout has a proper rubber grommet. The right side shows the interior of the case from the rear.
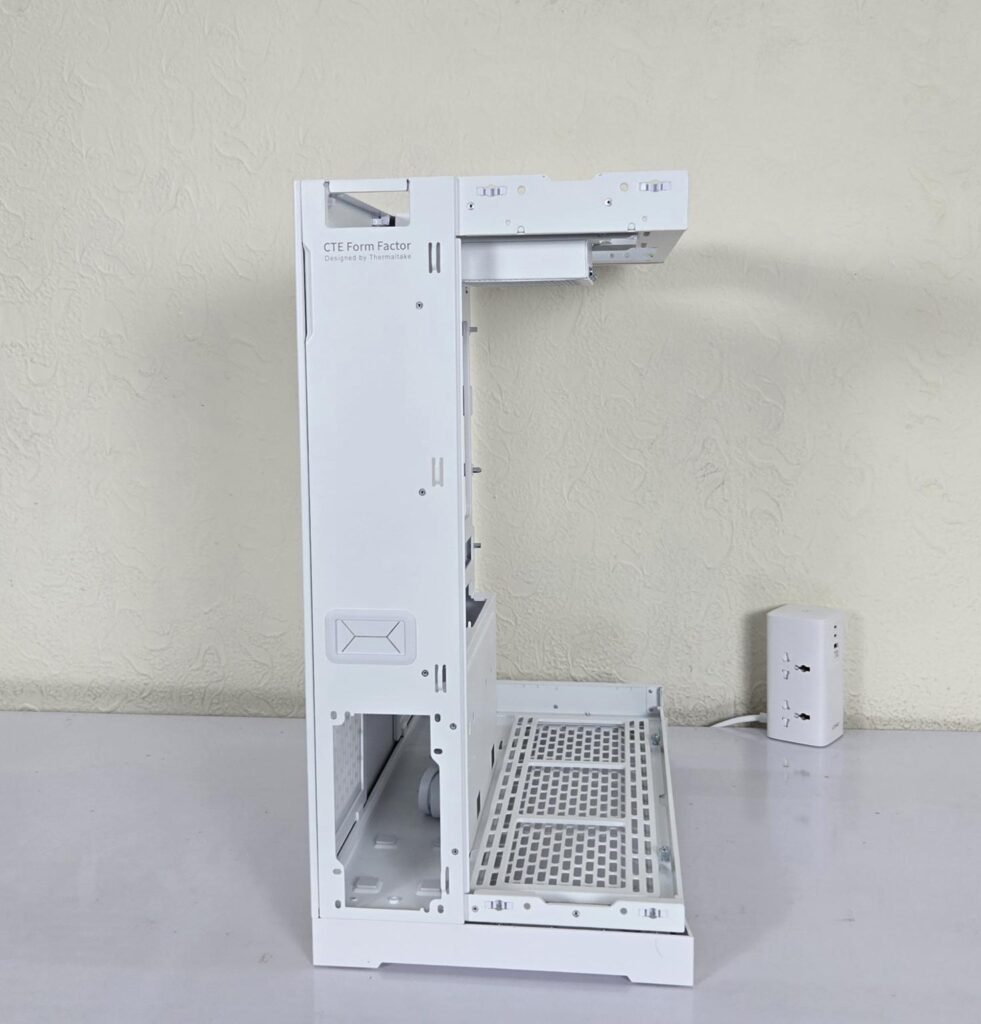
The rear glass panel is also removable. It is tool-less as well.
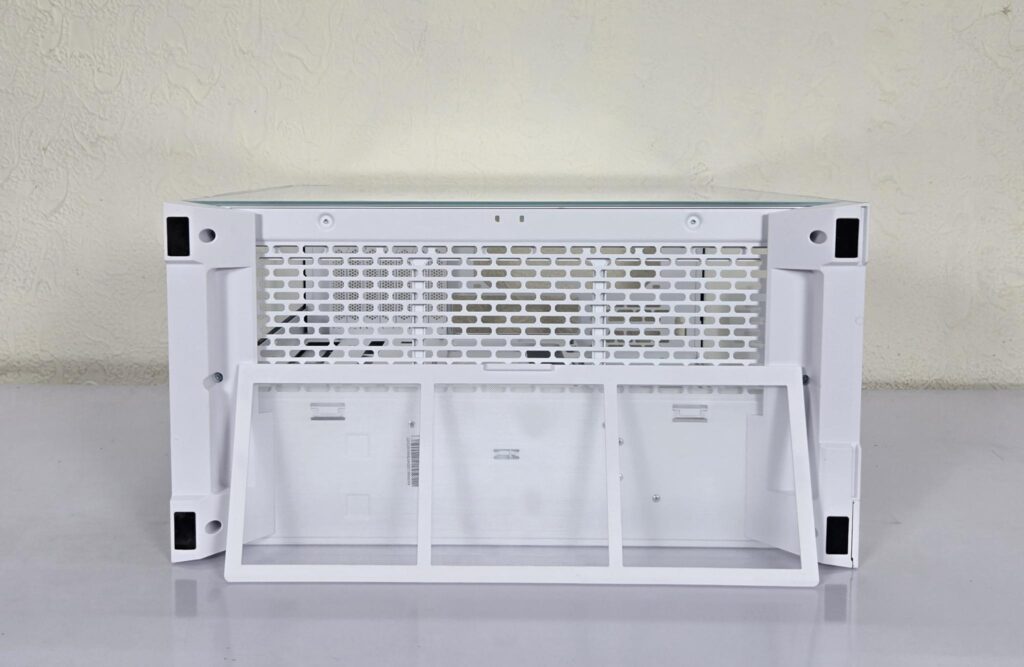
The bottom of the case from the underside has a non-magnetic dust filter that runs the entire length of the fan bracket. Thermaltake has used a fine mesh on the filter. Two stands can be seen on each end. These have feet with rubber mounts. This gives a sufficient gap between the fan bracket and the surface on which the case is placed for good air intake.
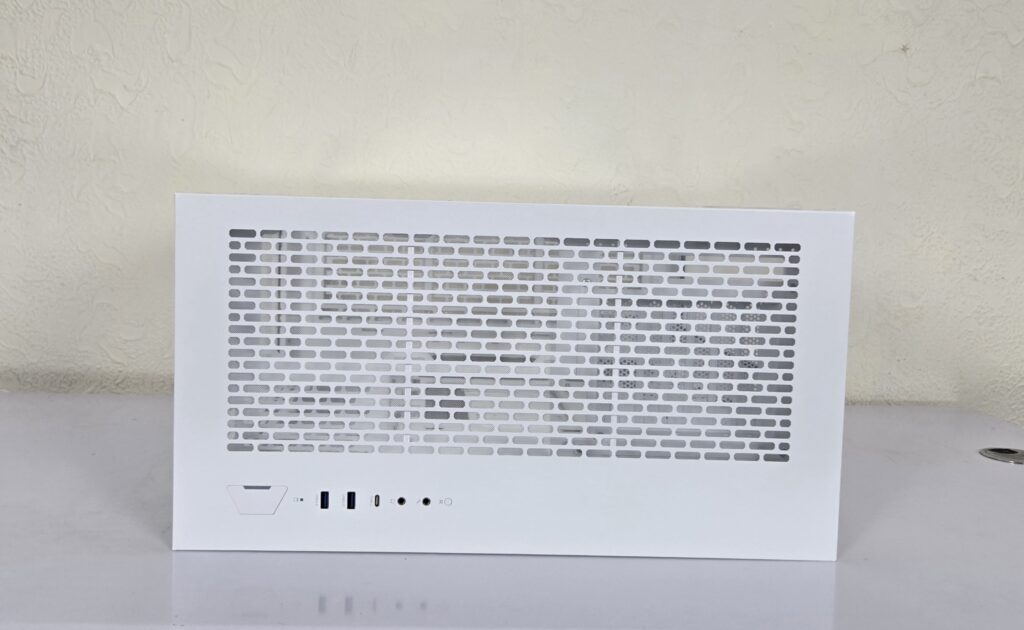
The top panel is removable and tool-less design. It has cutouts on the major surface for ventilation. The IO panel is also on the top of the case.
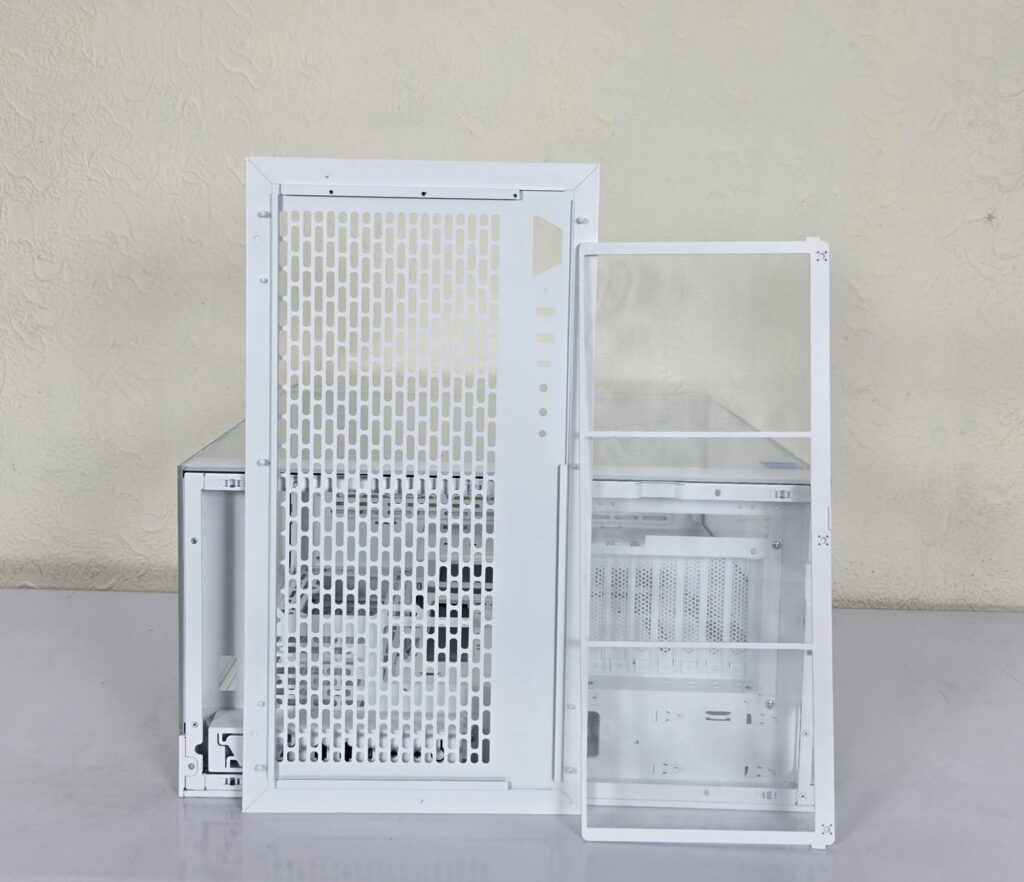
I have removed the top panel and am showing it along with its fine quality magnetic dust filter.
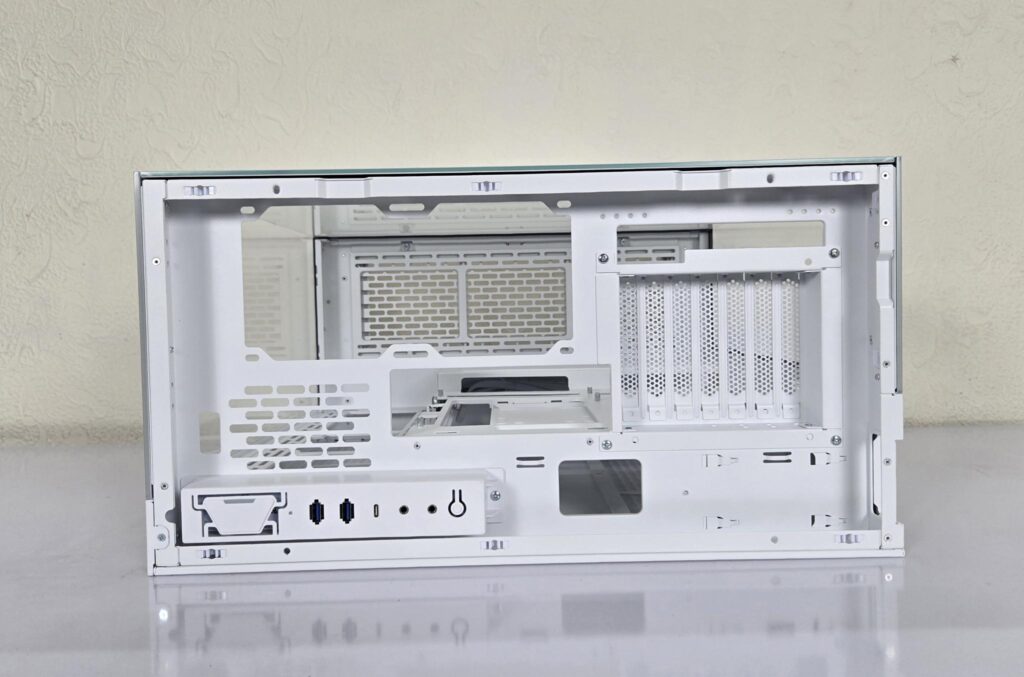
Now you can see the top view of the case housing. Some portion of it is what you usually see on the rear of the standard cases, whereas some portion of it is a fan mount. The IO panel is located on the bottom left.
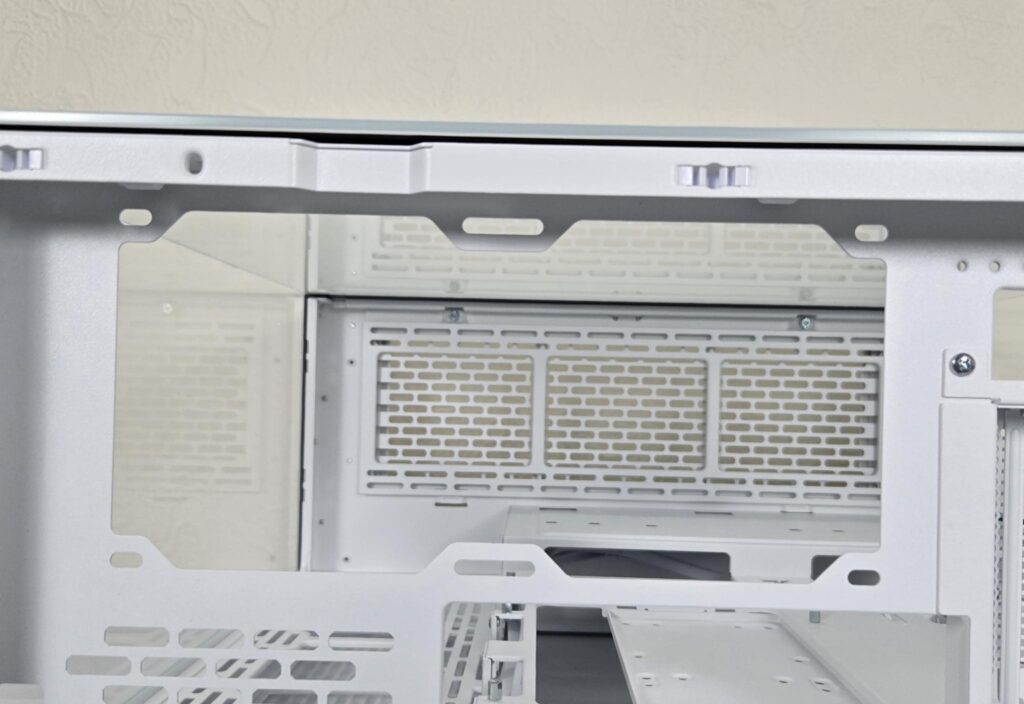
The front side of the top panel has a fan mount without a rail design. You can install:
- Up to 2x 120mm fans
- 120mm / 240mm radiator
You can install fans either under the top panel cover or inside the case (under the fan mount). Thermaltake has wisely utilized the space above the frame under the cover.
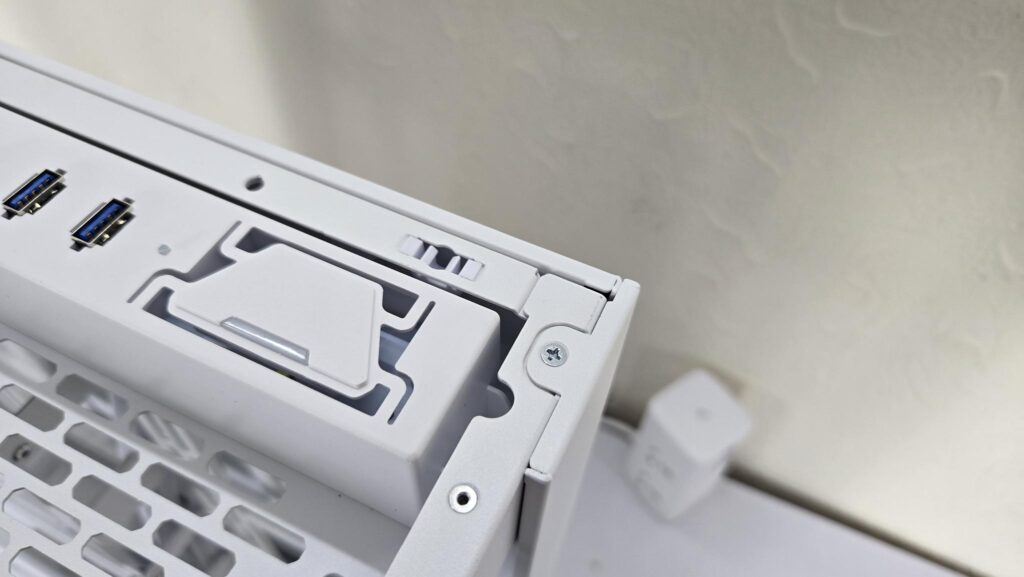
The front steel bracket is removable as it is secured using a screw. I did not open the bracket.
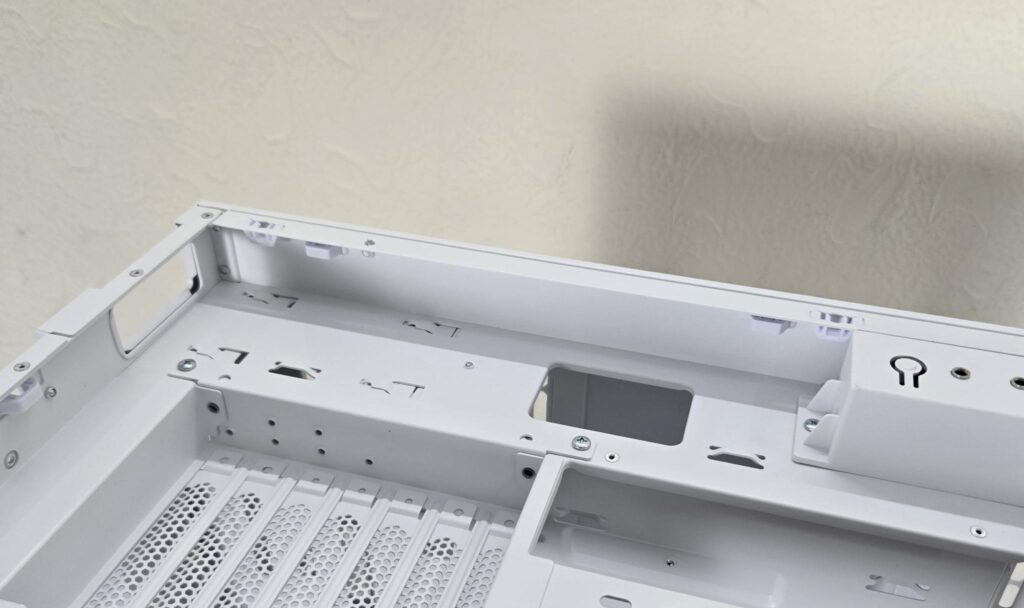
I am showing the area on which the cables are routed towards the rear cutout of the case. You can see a cutout right next to the IO panel. This will come handy if you want to route cables towards the backside of the case, like in my case, I routed the cable from CORSAIR QX120 fans towards the backside of the case for connection with the CORSAIR hub.
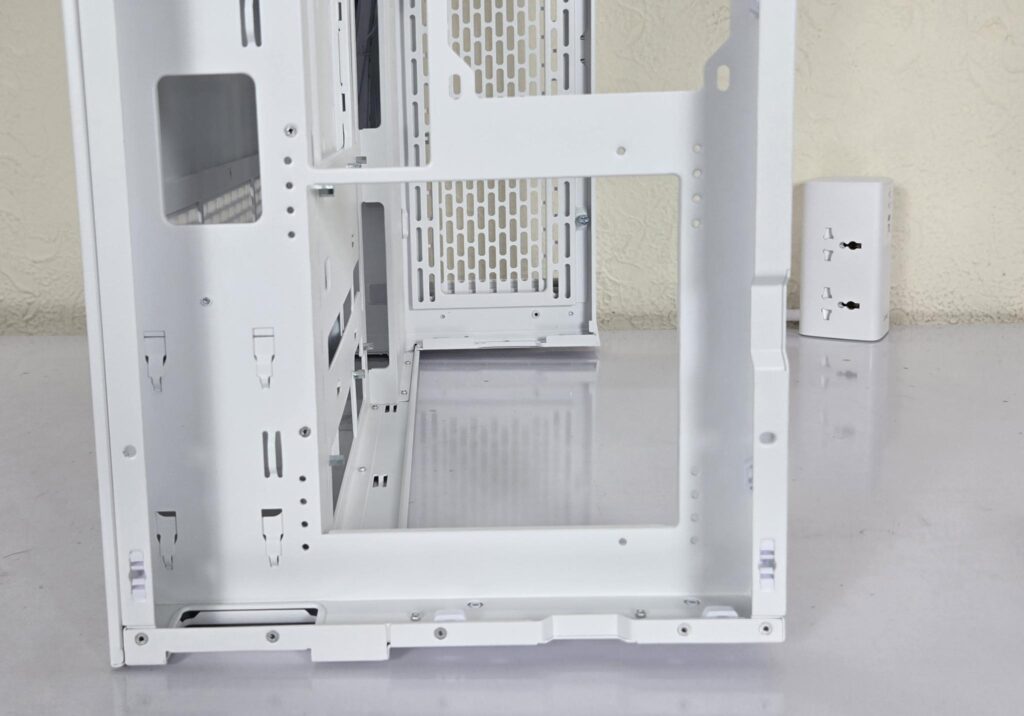
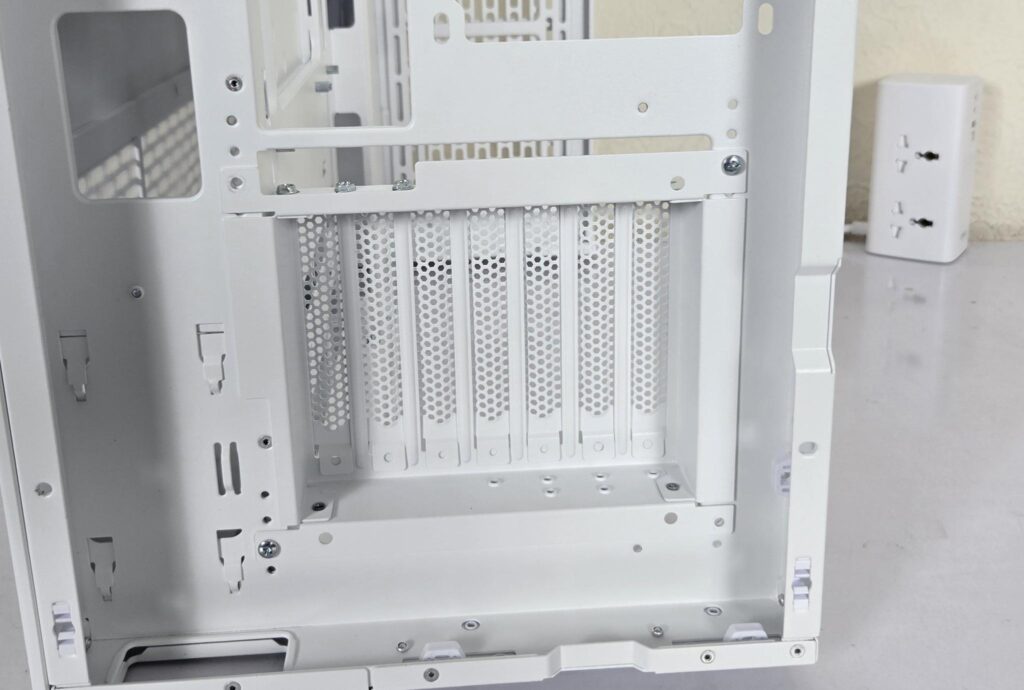
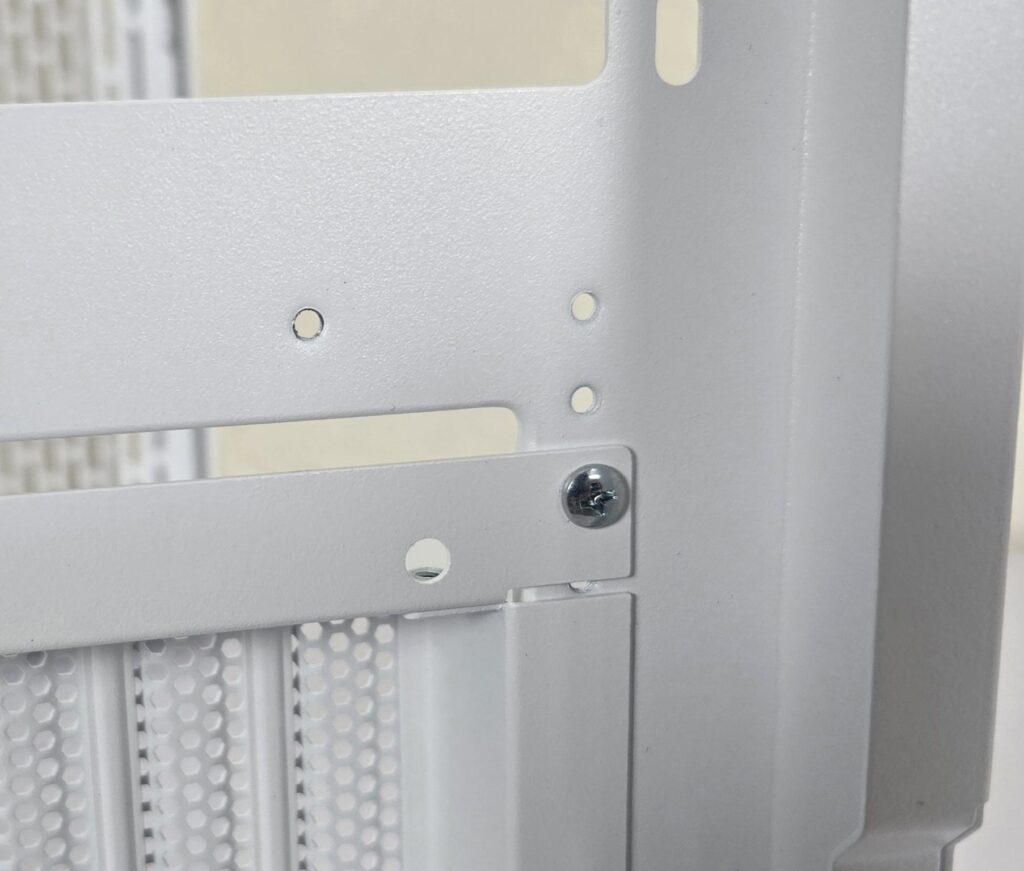
Thermaltake has provided three possible graphics card mounting:
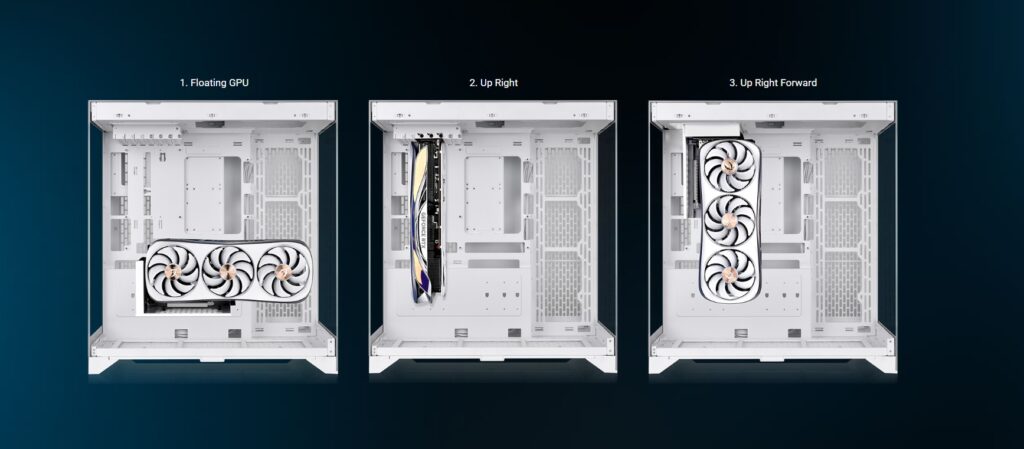
- Default: Up Right
- Up Right Forward
- Floating
I have taken the above picture from the Thermaltake website just for reference.
To make this happen, they have used the PCIe slot area wisely. This area is wider to accommodate the vertical or horizontal placement of the bracket. The default is up right placement. For the other two, you would need a PCIe riser cable, which is not included with this case.
Thermaltake recommends its PCI-E 4.0 Dual 90 Degree Riser Cabl,e available in white and black colors. It can be purchased separately.
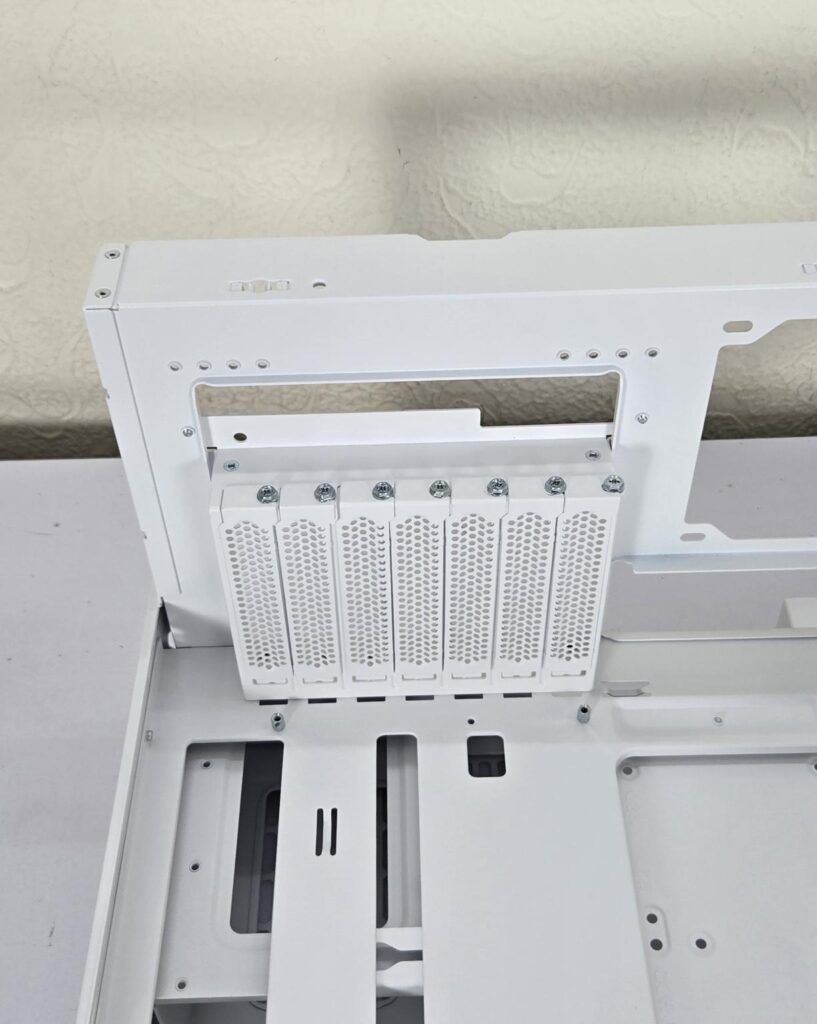
The default graphics card mounting is a standard one. Since the motherboard is rotated 90 degrees, the card will appear facing downward.
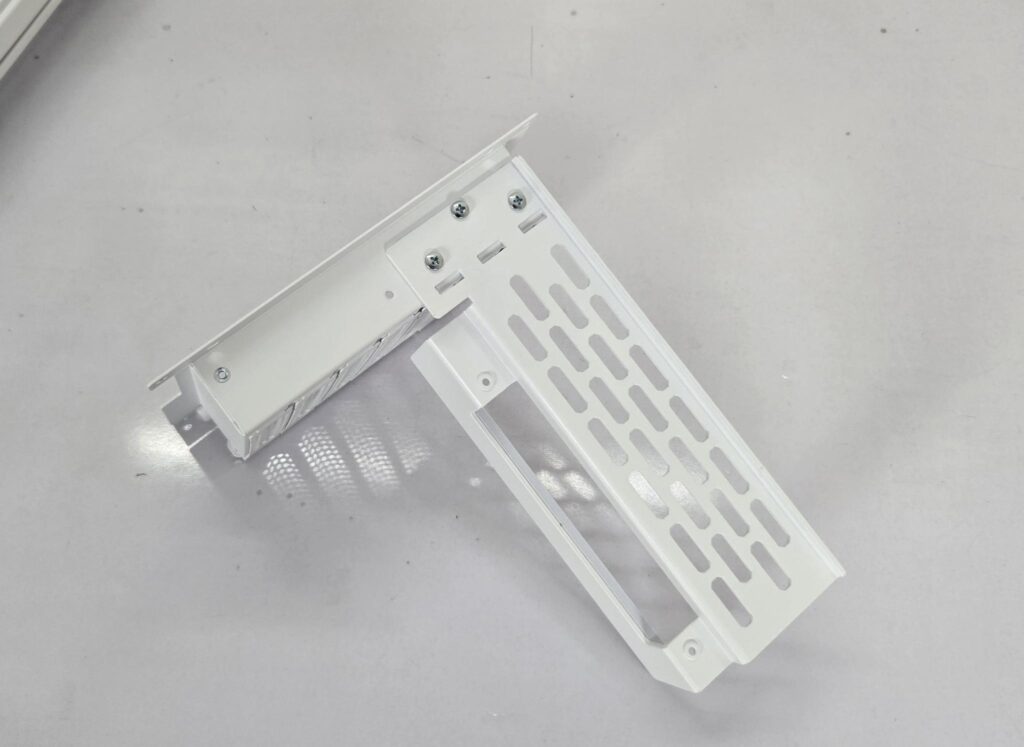
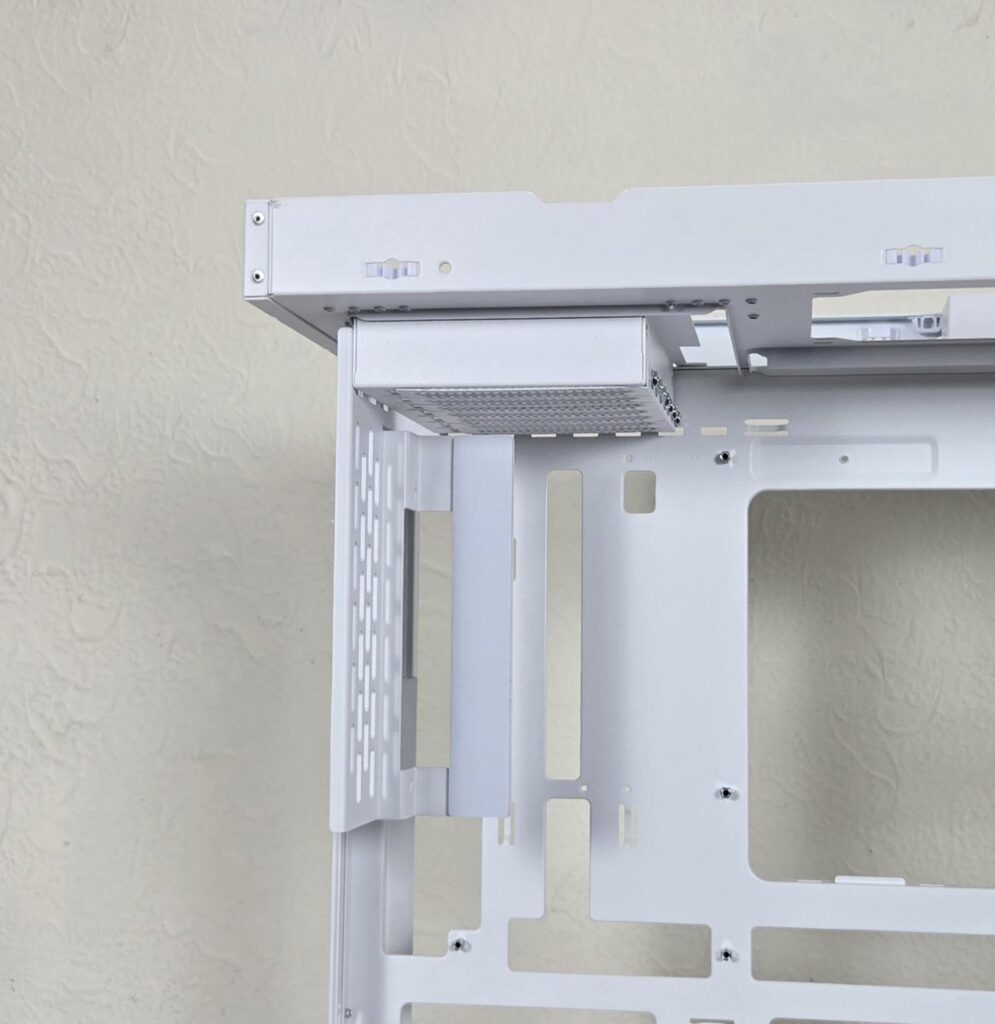
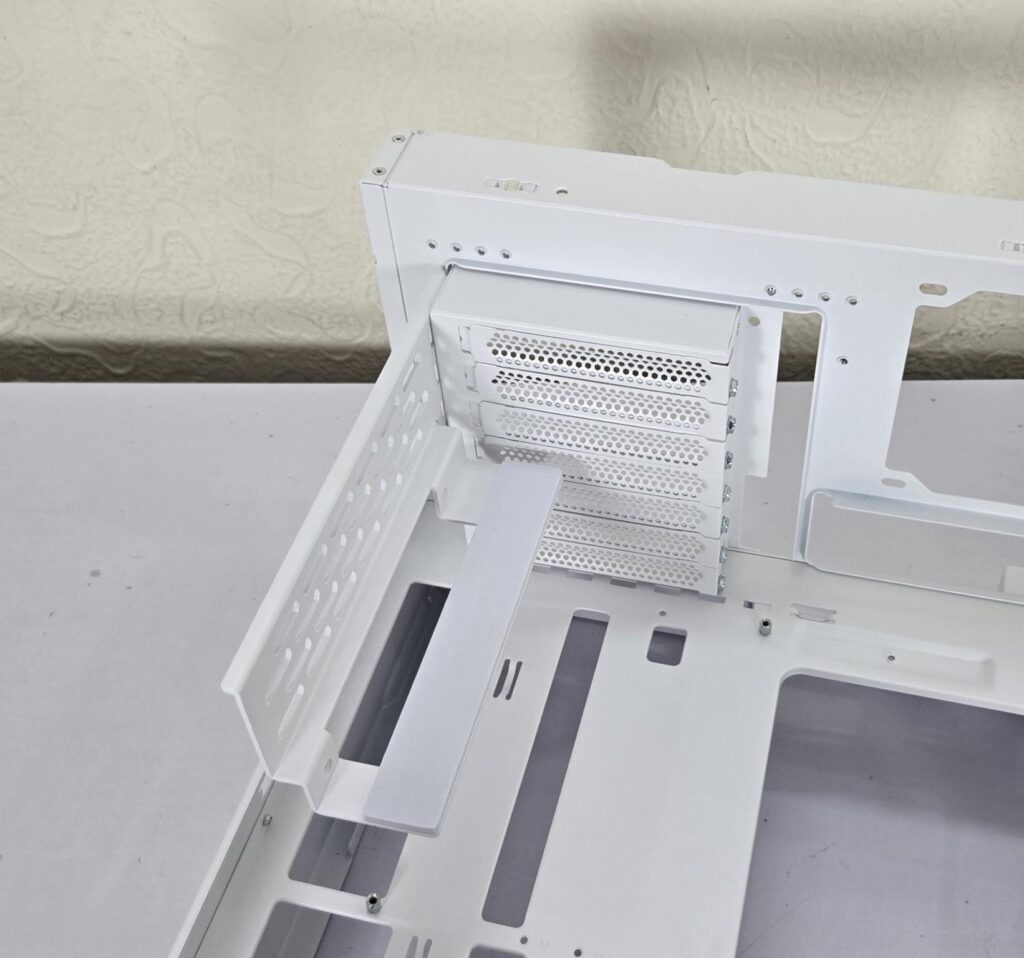
You would need a PCIe bracket (shown in the picture) provided in the accessory box so that graphics card can be mounted in up right forward orientation.
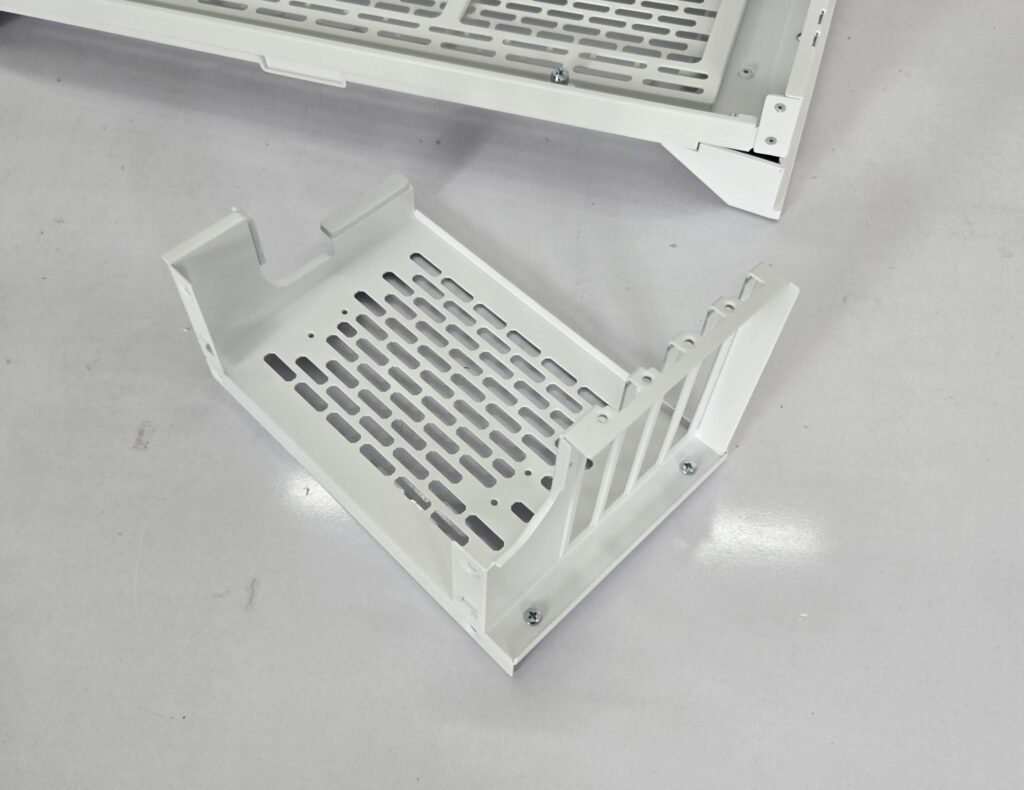
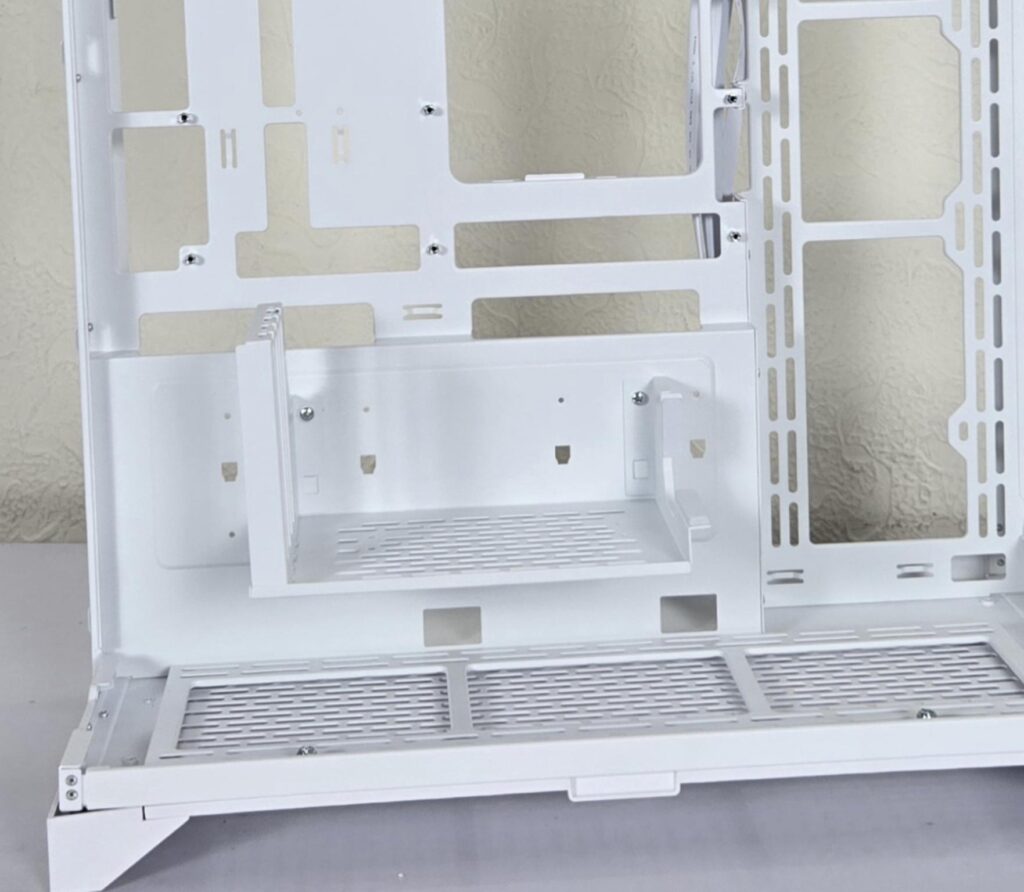
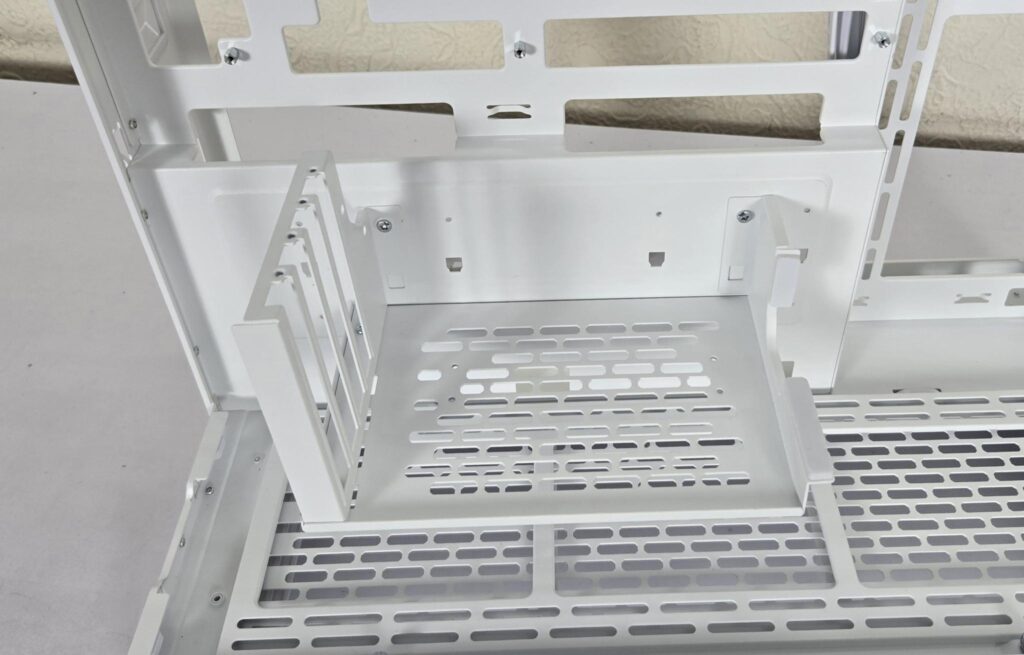
You need another bracket (provided in the box) to install the card vertically in this case. The above pictures show its installation. However, you need to install the riser cable prior to installing this bracket on the case.
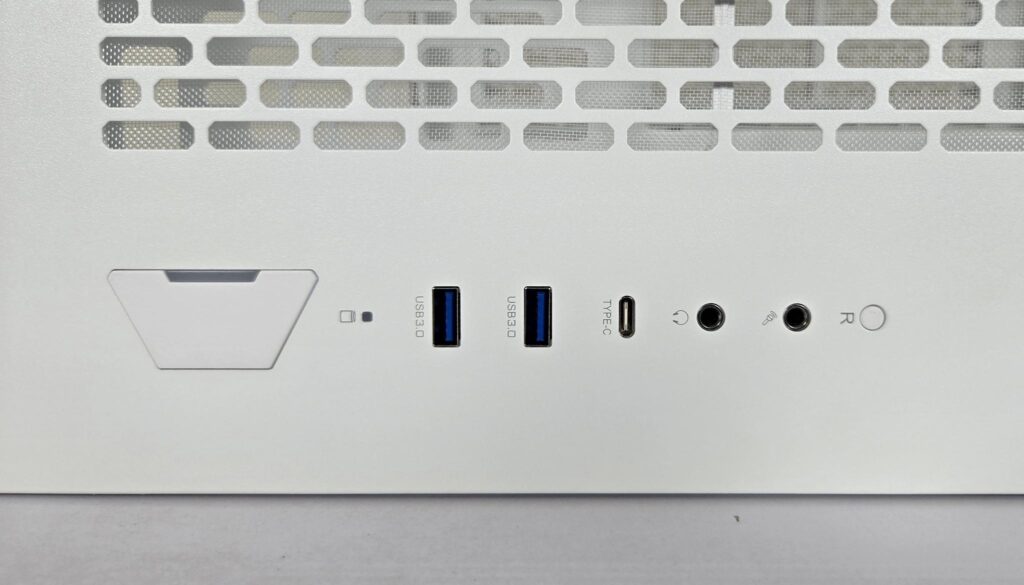
The IO panel has the following ports:
- 2x USB 3.0 Ports
- 1x USB Type-C Port
- 1x Mic Port
- 1x Headphone Port
- 1x Power Button
- 1x Reset Button
Interior View
It is about time to take a peek at the inside of this case.
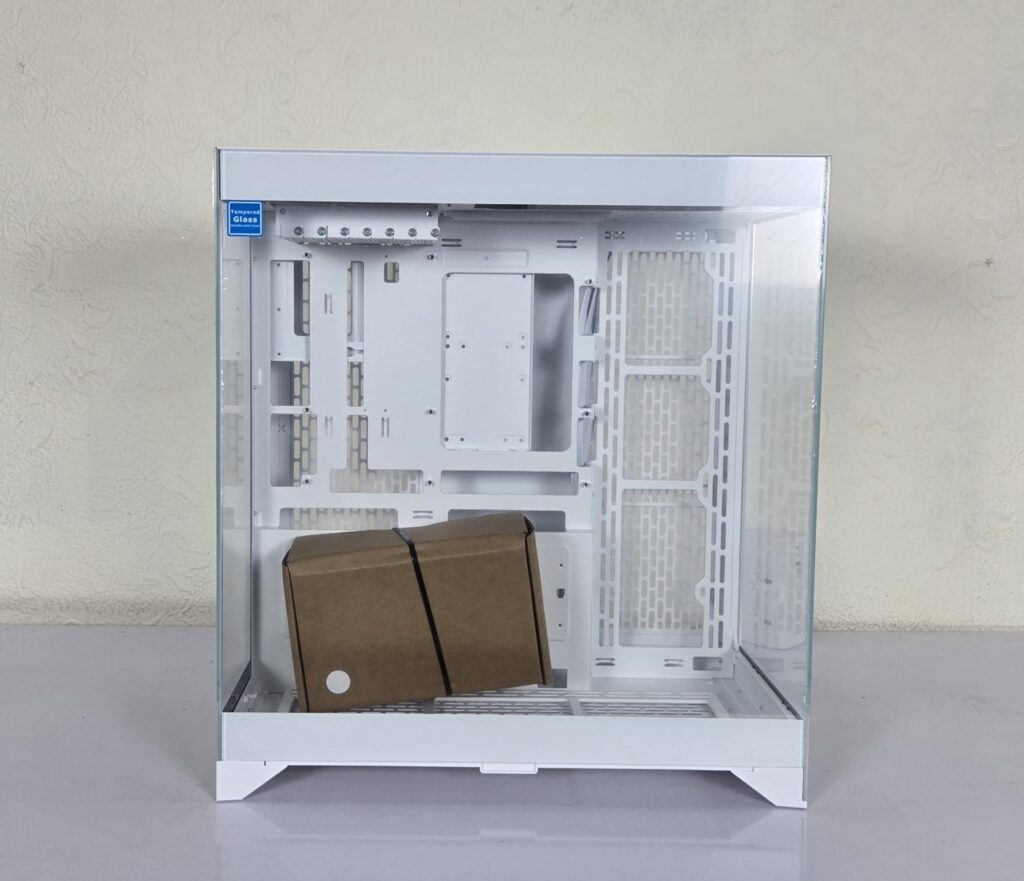
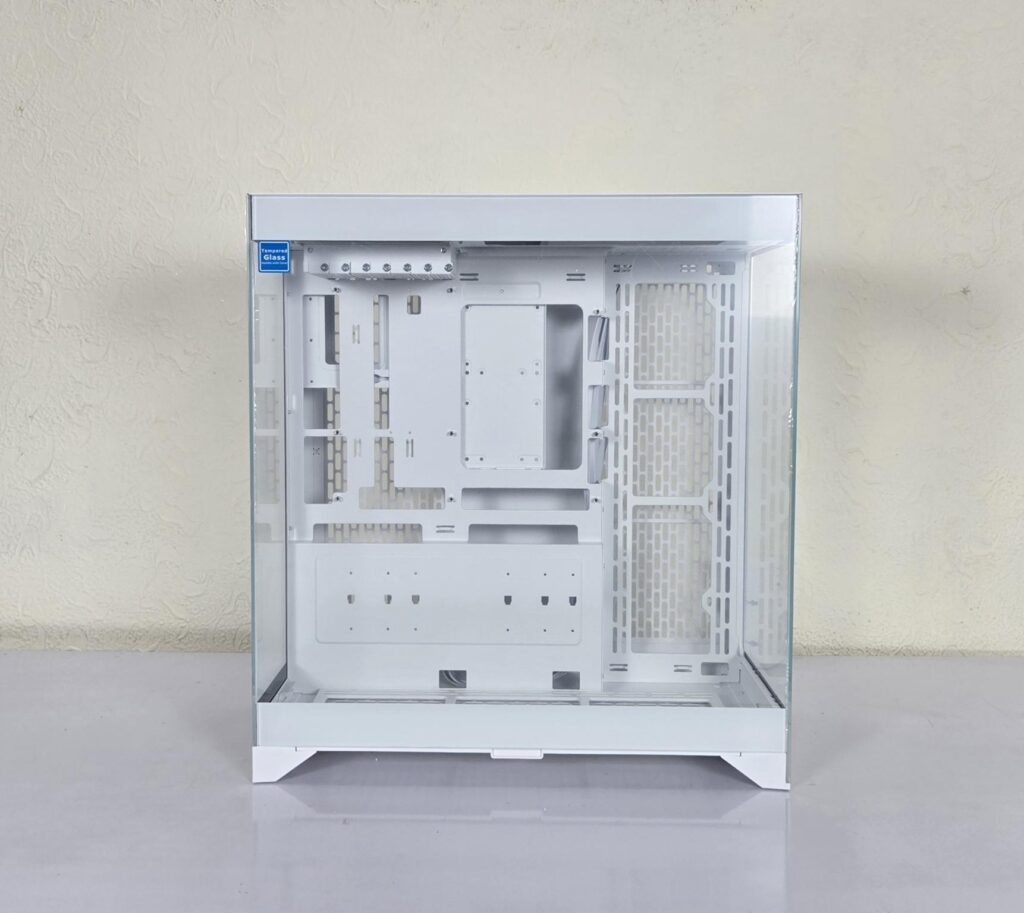
The case has a clear tempered glass on the side. It has a blue sticker cautioning to handle with care. It is a see-through design that shows the complete build in its entirety. This panel is not hinged and has a Snap-On design with studs on top. You can see that it is not a pillar-less design. The accessory box comes tucked inside.
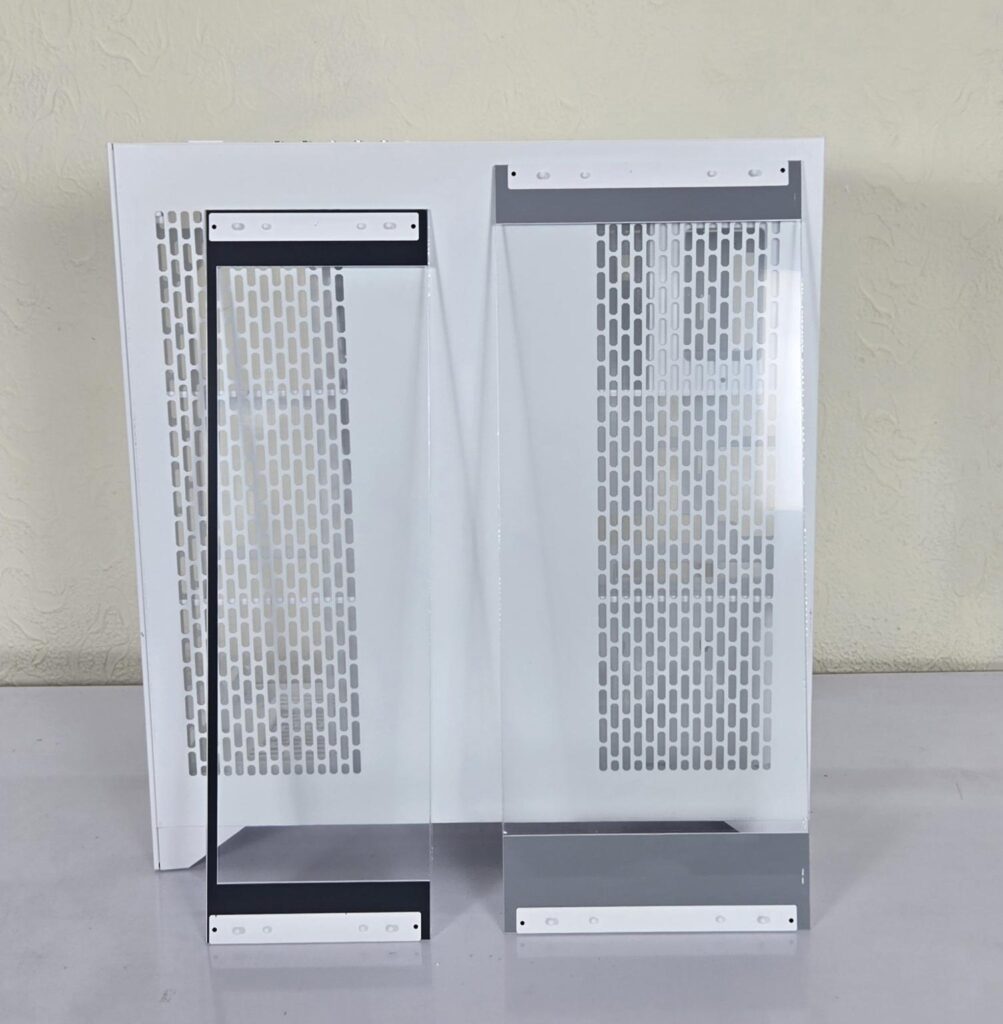
I have removed the front and rear glass panels. Both panels use the Snap-On design using studs and bolts. The front glass panel has more length compared to the rear glass panel.
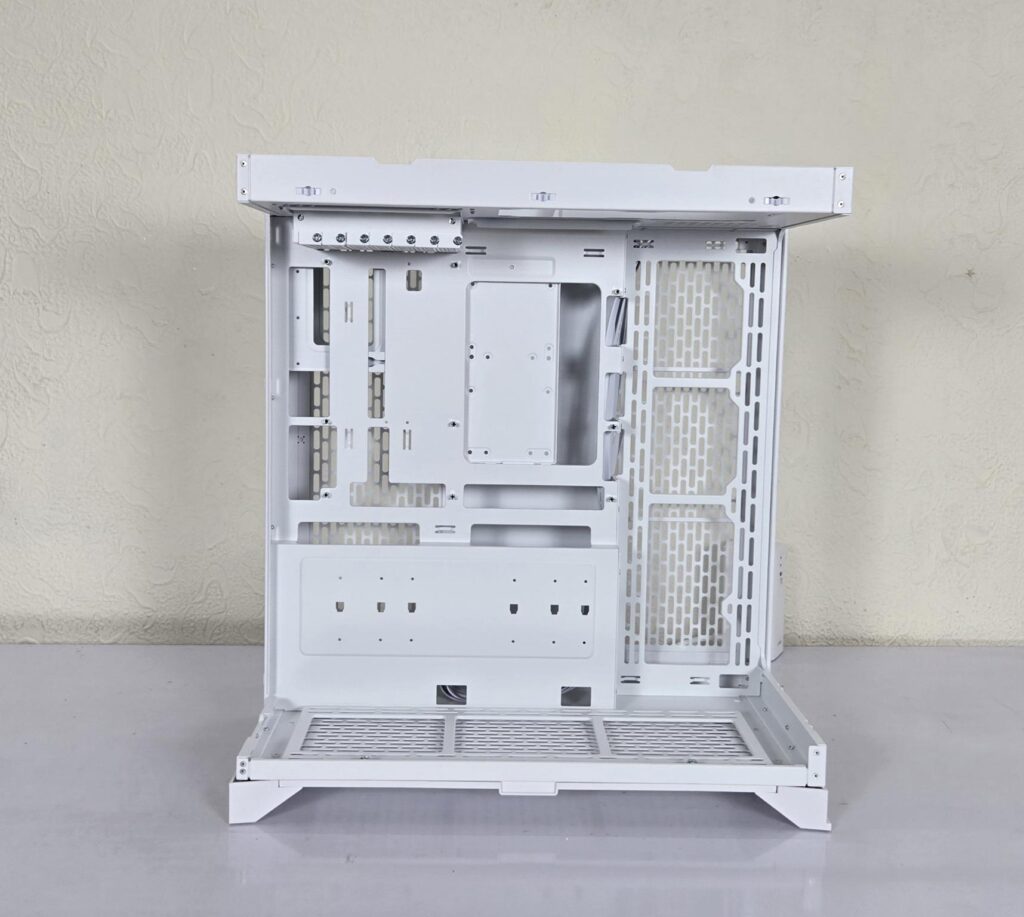
This is what I meant when I said open frame layout. You can remove all three glass panels, and you have a ready test bench case at your disposal. What makes it even more potent is the support for backplug motherboards and 420mm radiator support. You can see a spacious layout and a 90-degree motherboard tray. The CPU sits closer to the right side of the frame, whereas the graphics card is towards the rear of the case (in the default scenario).
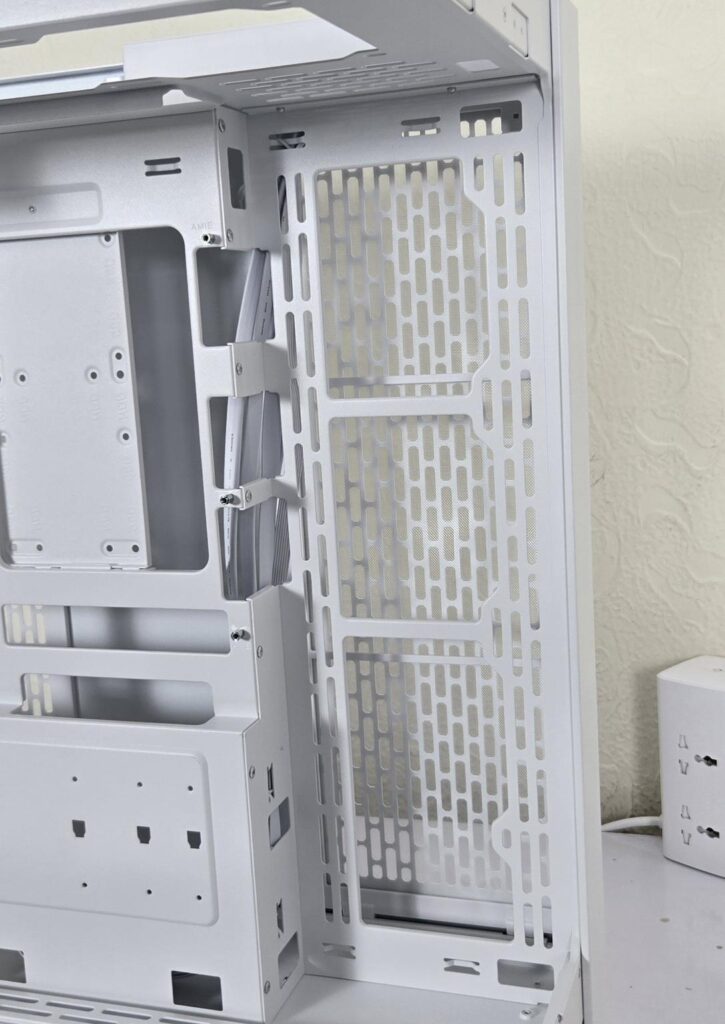
You can install the following on the side of this case:
- Up to 3x 120mm or 3x 140mm fans
- 120mm/140mm/240mm/280mm/360mm/420mm radiator
You can see an offset motherboard tray design that bodes well with the inset fan mount since this will make the fan assembly sit in parallel with the motherboard.
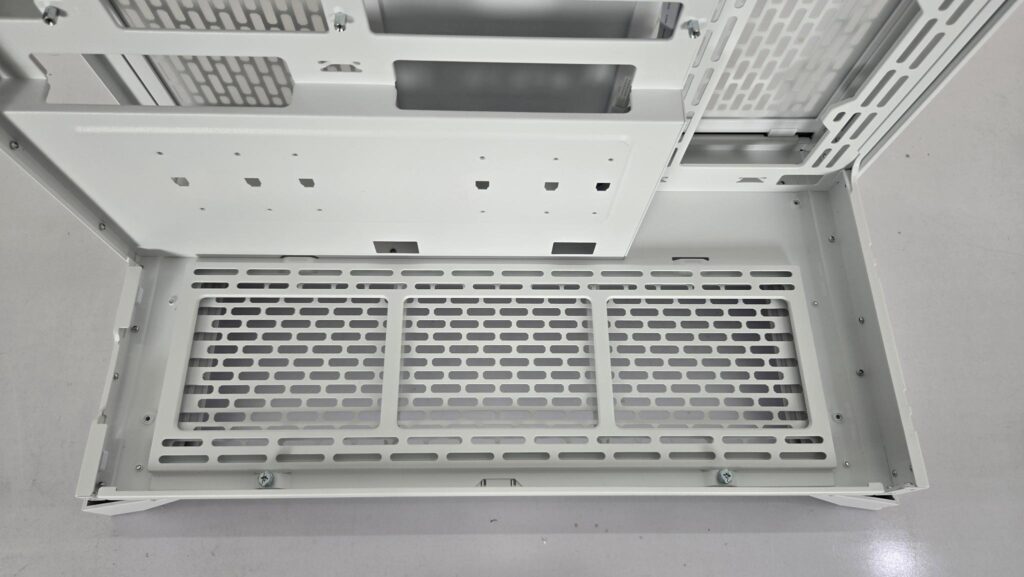
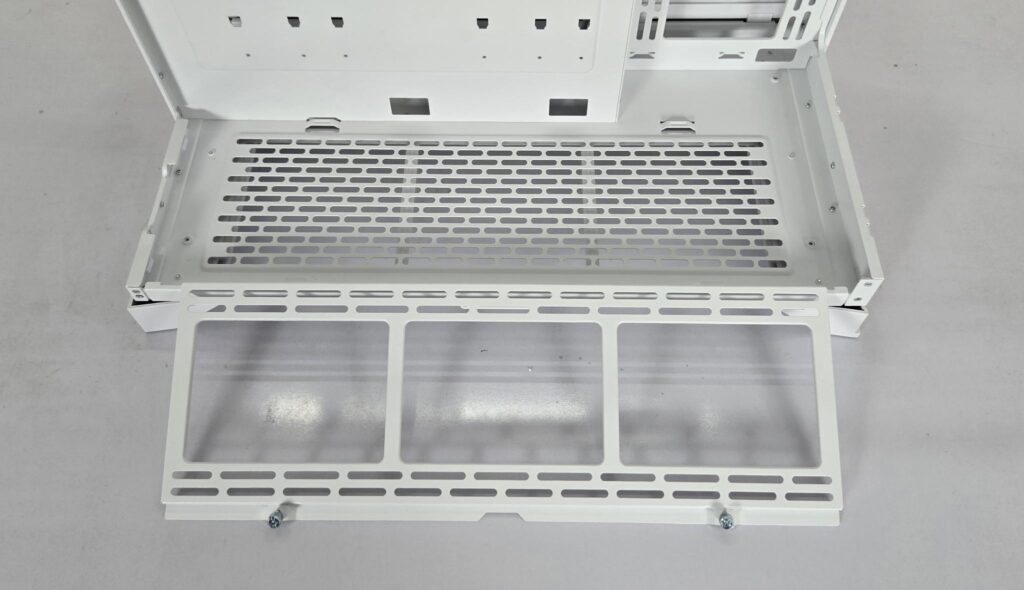
The base of the case has a removable fan bracket, which is a wise move by the manufacturer. This area has a dust filter protection as well. You can install:
- Up to 3x 120mm or 3x 140mm fans
- 120mm/140mm/240mm/280mm/360mm/420mm radiator
You can see that Thermaltake has gone all out on the cooling in this case. They have wisely utilized the space, providing one heck of a design.
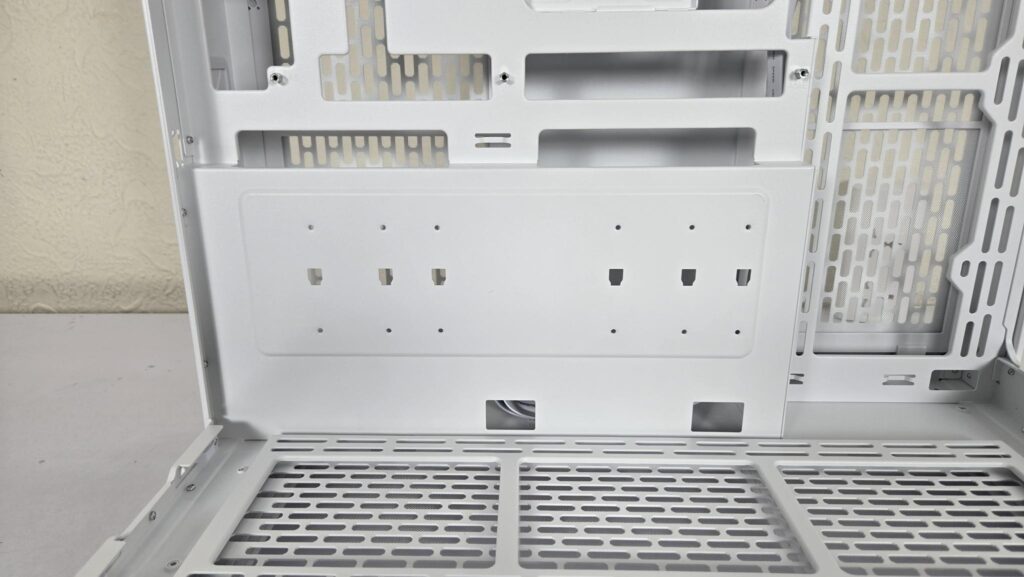
The housing below the motherboard tray has anchor points on which you can install the vertical PCIe bracket (optional). I would suggest using this area with augmentation, like a display screen or brand stickers, for example; otherwise, it is a large portion that is not utilized.
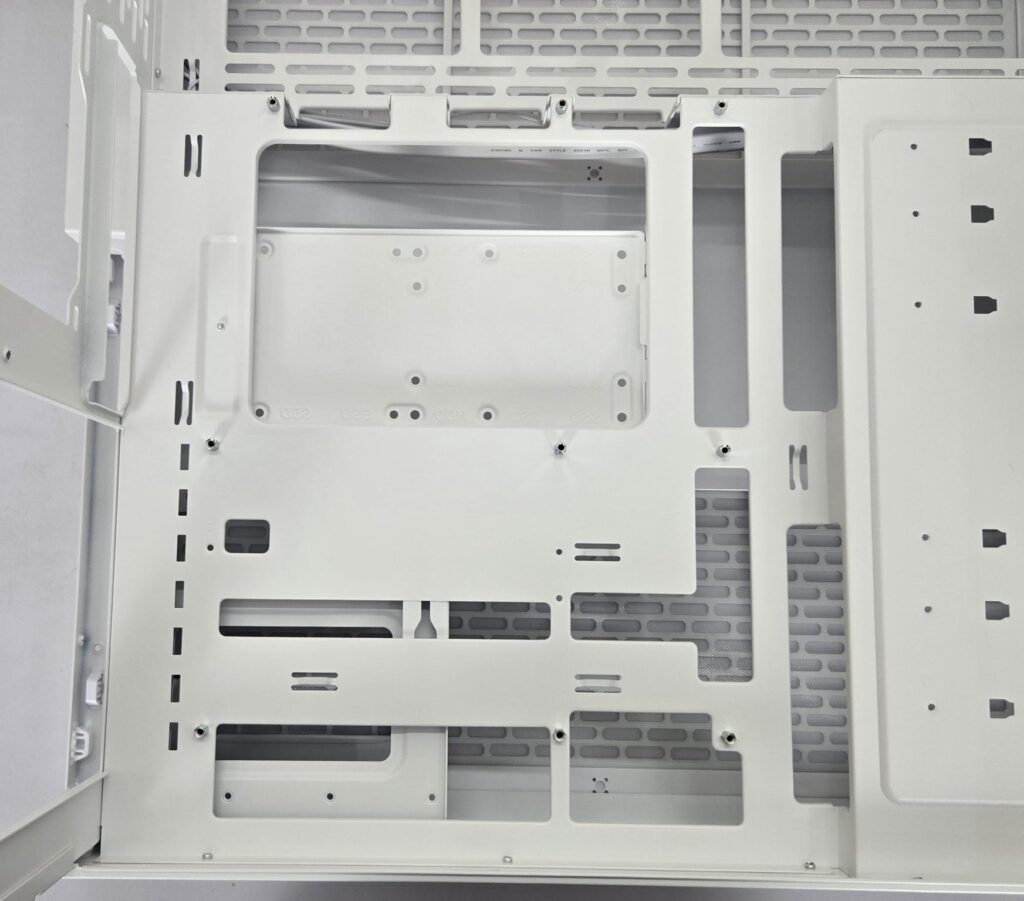
I am showing the motherboard tray in a traditional style just to make it easy to comprehend. This case supports a motherboard up to the E-ATX form factor. This motherboard also supports a backplug motherboard in mATX and ATX form factors.
I appreciate the design team at Thermaltake for extensive coverage under one roof. The 9x standoffs come pre-installed. The CPU cutout is large enough for easy installation of the cooler’s mounting hardware. The main frame has a right-angled cutout on the right side (below the motherboard tray). I wish Thermaltake had put some white rubber grommets on main cutouts and on right-angled cutouts, like what I saw on the ARCTIC Xtender VG White case.
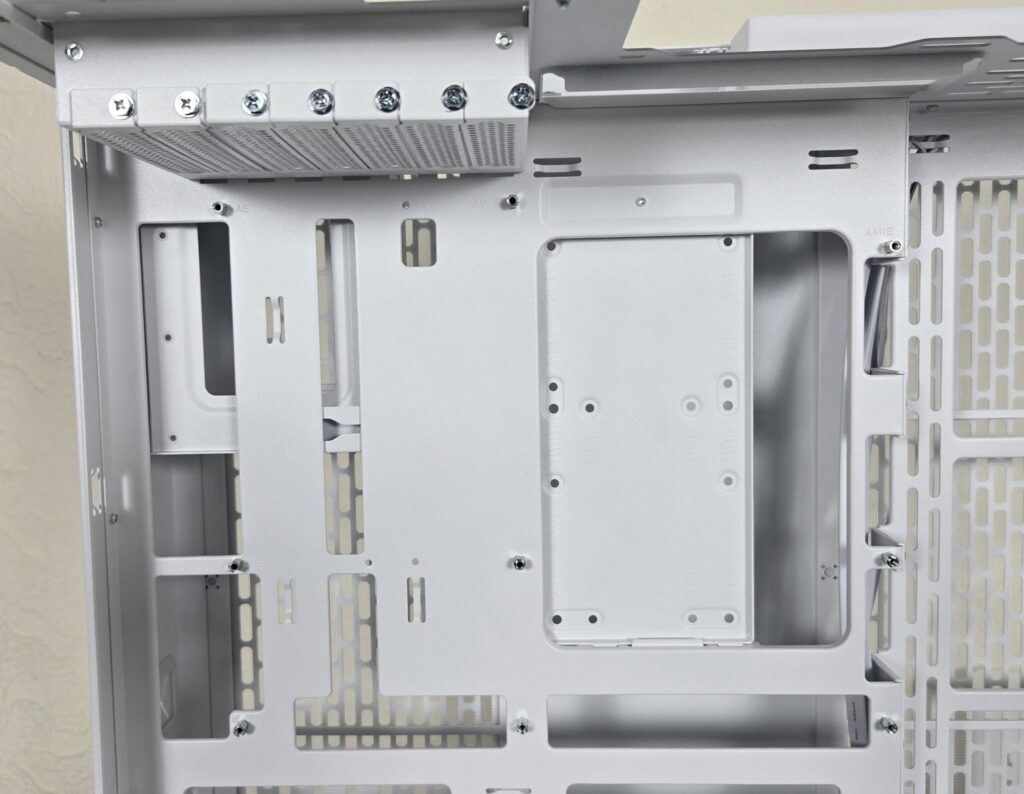
Here is the motherboard tray in its original layout in this chassis.
Clearance
Since we are at it, let’s see the clearance restrictions of components in this chassis:
- 166mm CPU Air Cooler
- PSU maximum length is 220mm
- The Graphics Card’s maximum length is 443.8mm without the radiator
- The Graphics Card’s maximum length is 415mm with a radiator
Please note that if you are installing fans only at the base, then you will still get the full permissible length of the graphics card. The graphics card length is subject to the cooling provision on the base, not on the side, given the motherboard’s 90-degree layout.
It is now time to look at the backside of the case.
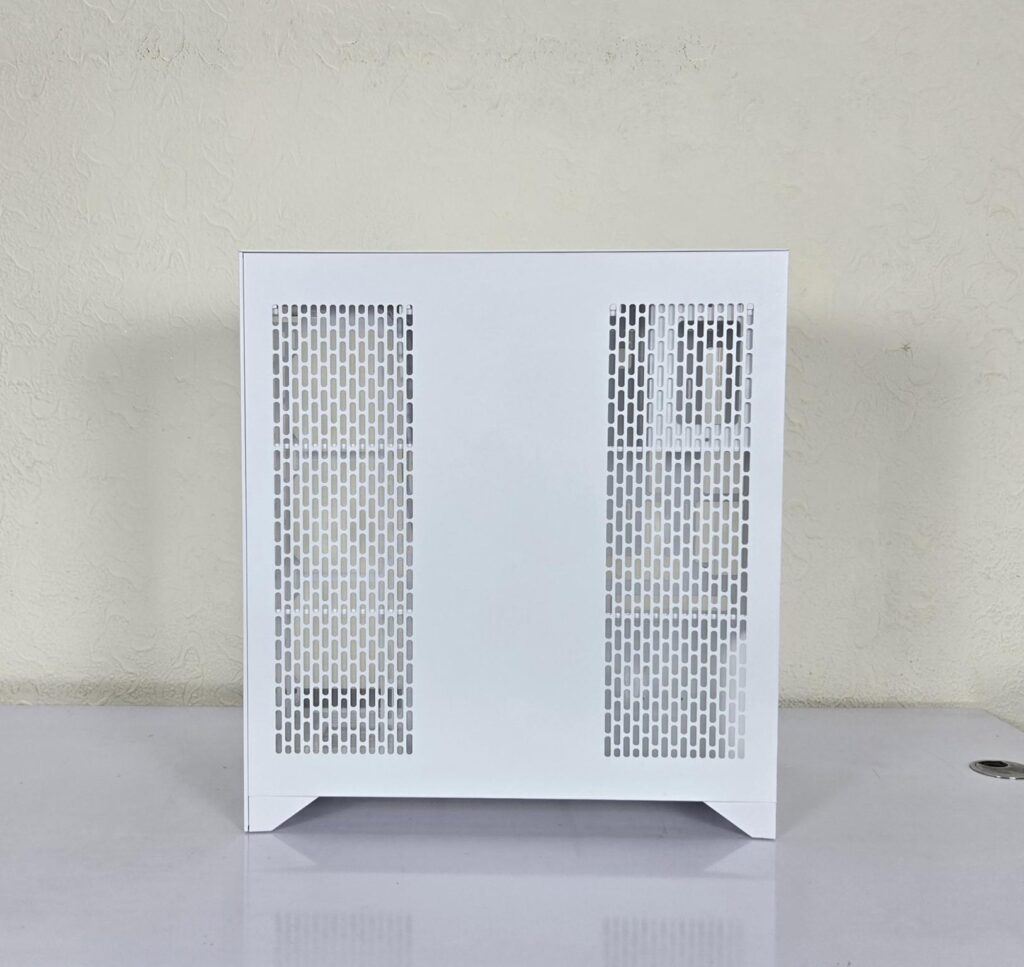
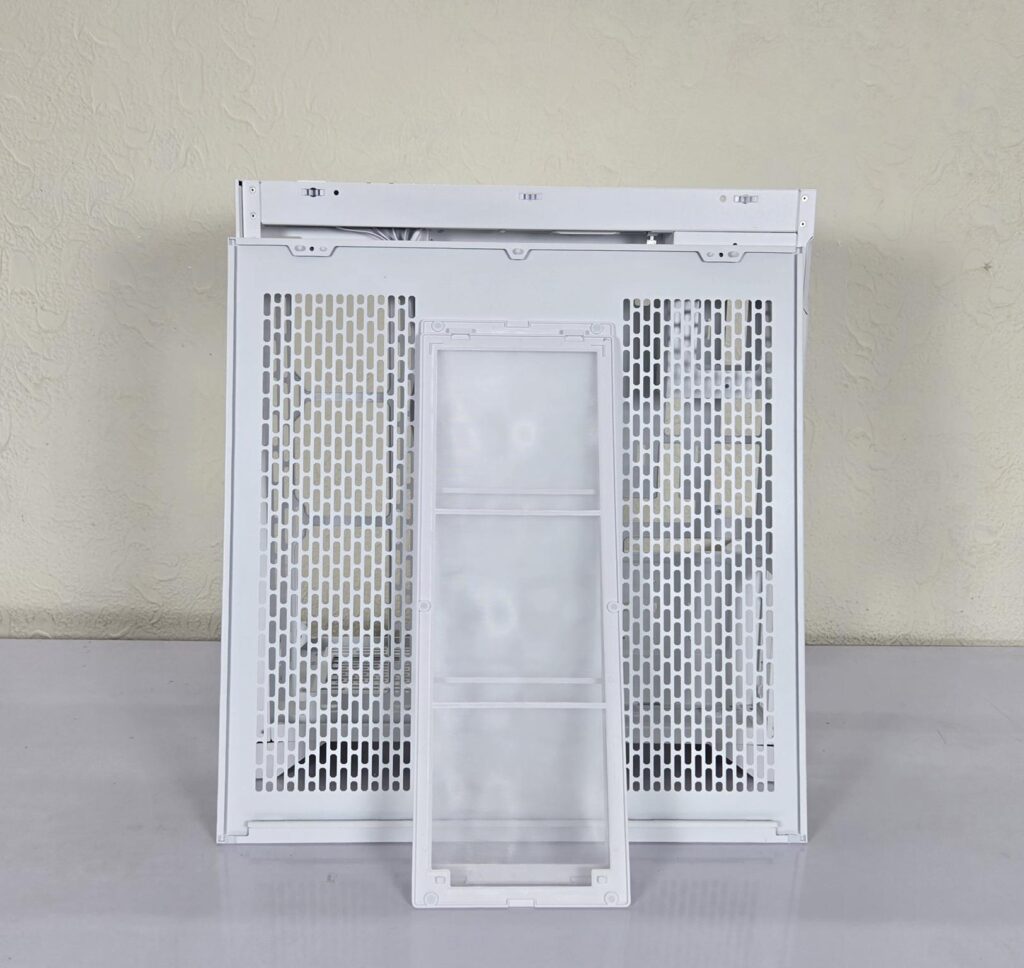
The side steel panel is made of steel. You can see two perforated areas. These face the fan mount on the side of the case and the PSU mount on the opposite end for effective ventilation. This panel also uses the Snap-On design like the side panel. Two magnetic dust filters are also provided.
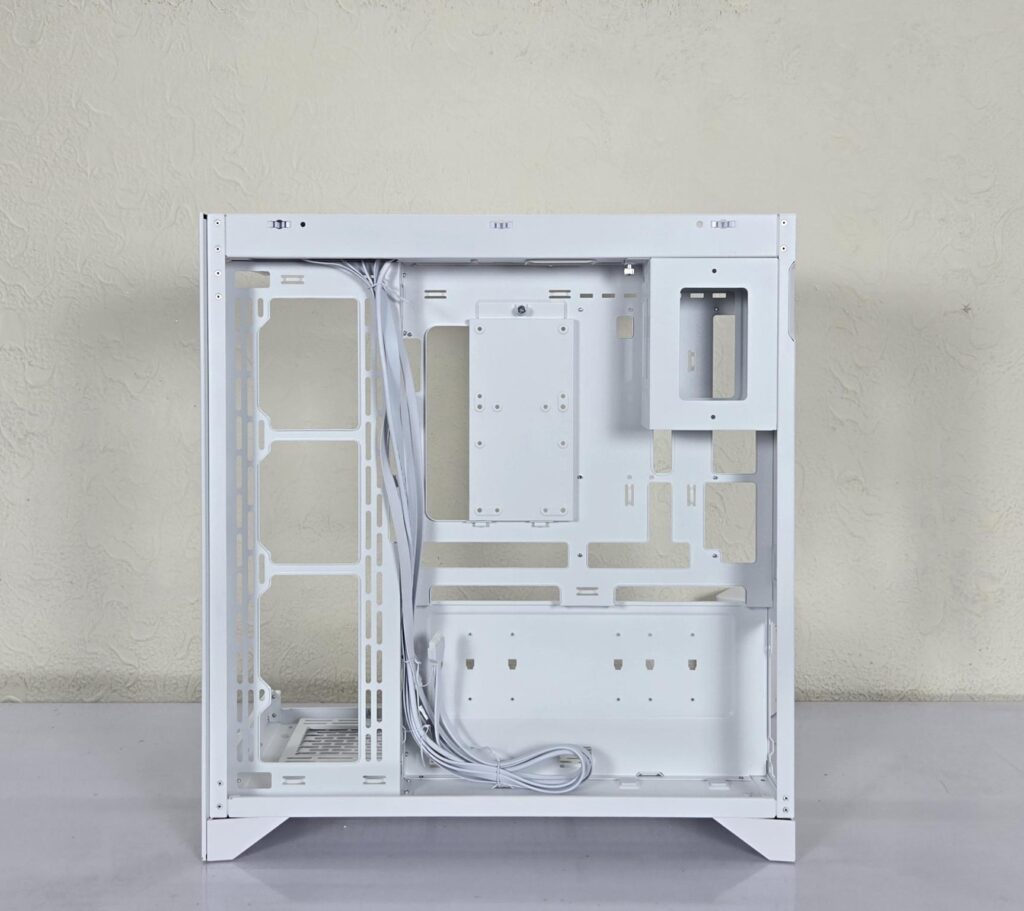
Now you can see the backside of the case. The motherboard tray is offset to the right side and the bottom of the case at a time. This provides good room for the PSU and cables. This is also needed to ensure maximum clearance and compatibility for the back-plug motherboard. The cables come tucked behind.
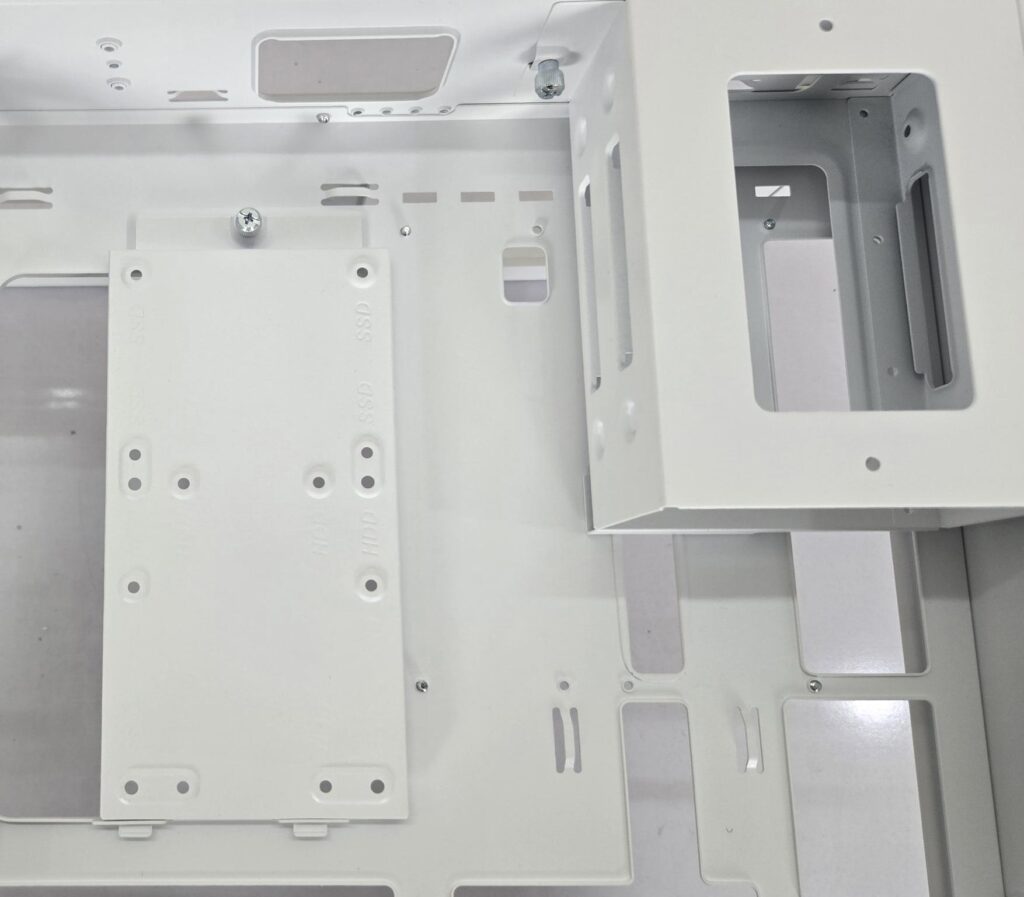
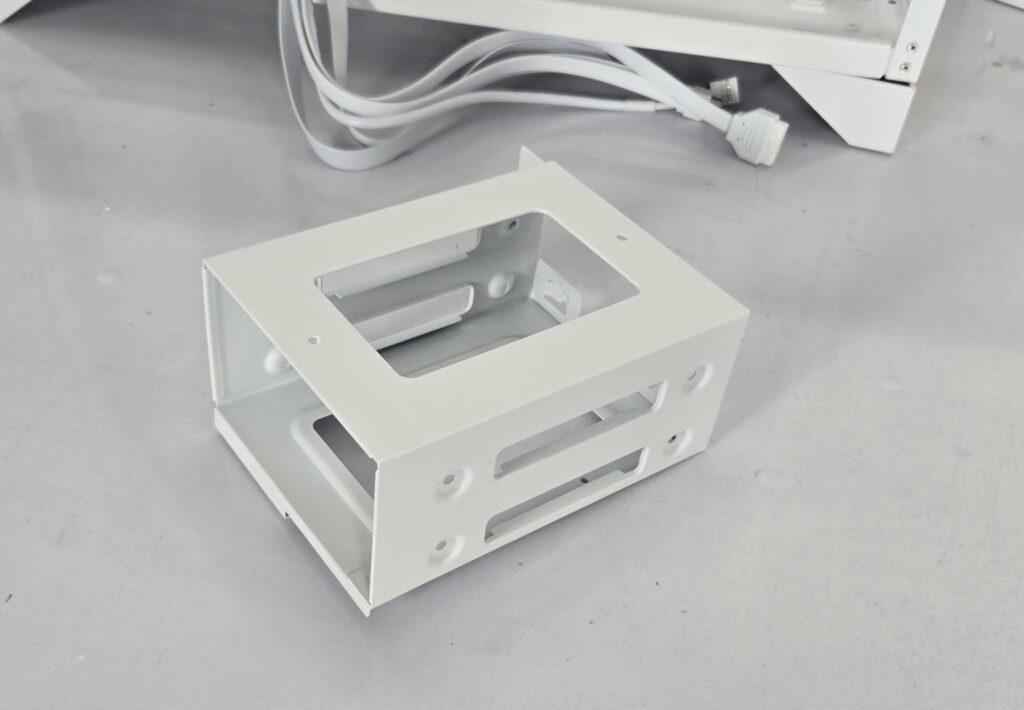
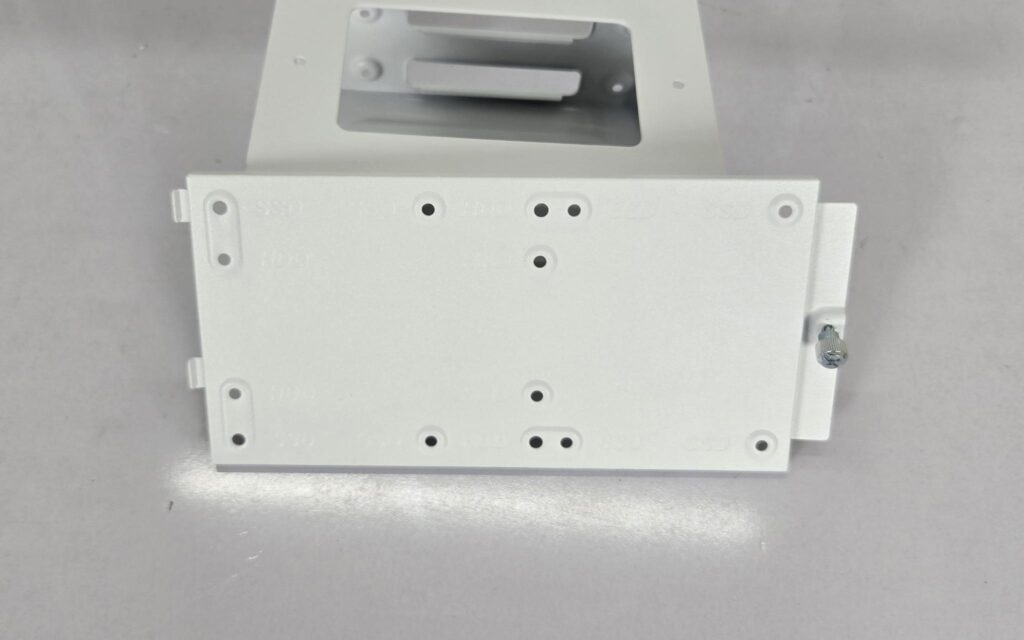
Thermaltake has installed a drive cage on the top right side. They have also provided a bracket for 2.5” drives. Both are tool-less and come equipped with captive thumb screws. The hard drive cage does not have tool-less caddies.
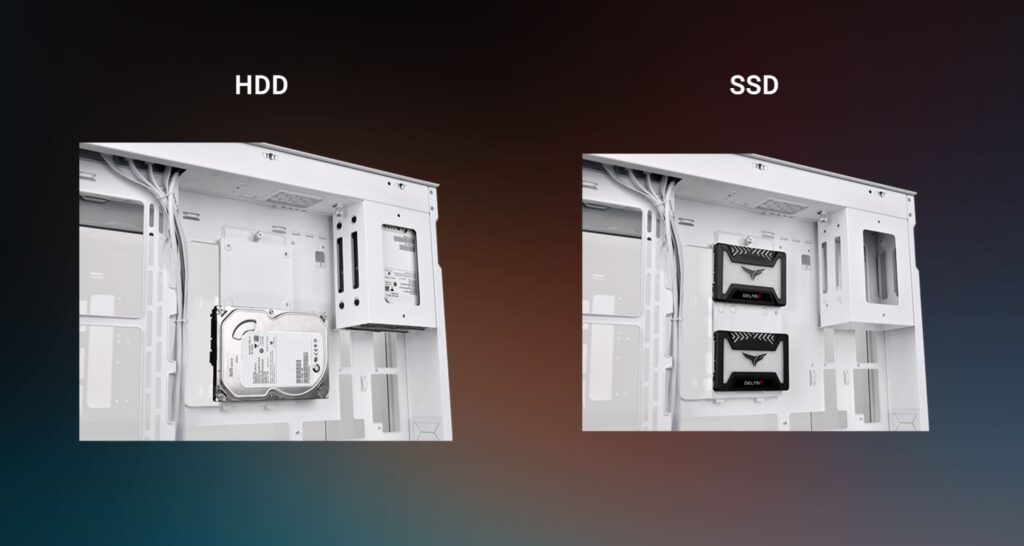
The storage provision is:
- 3x 3.5” Drives
- 1x 2.5” or 2x 3.5” Drives
- 2x 2.5” Drives
The above picture is taken from the Thermaltake website for reference only.
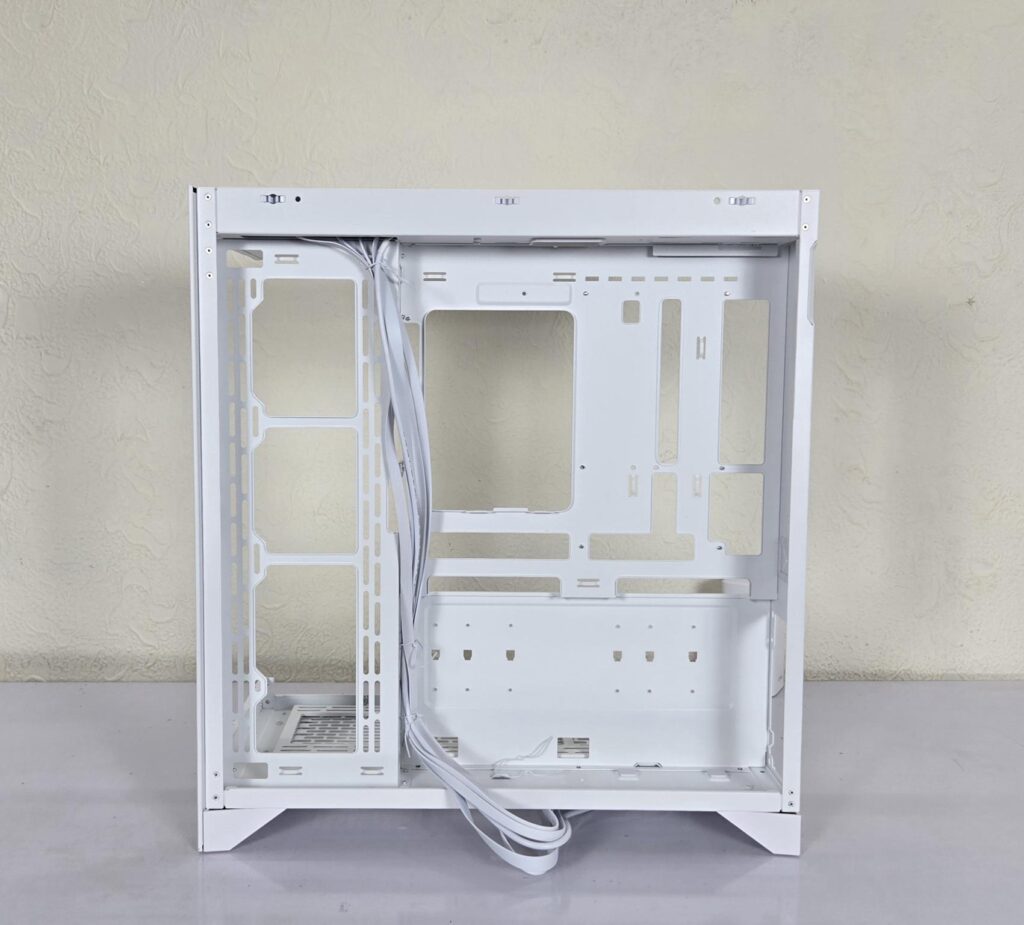
I have removed the drive cage and bracket. You can see that this case comes equipped with multiple anchor points, and Thermaltake has provided Velcro strips in addition to the zip ties for neat cable management. The PSU bay has 4x feet with rubber mounts on which the PSU is vertically rested.
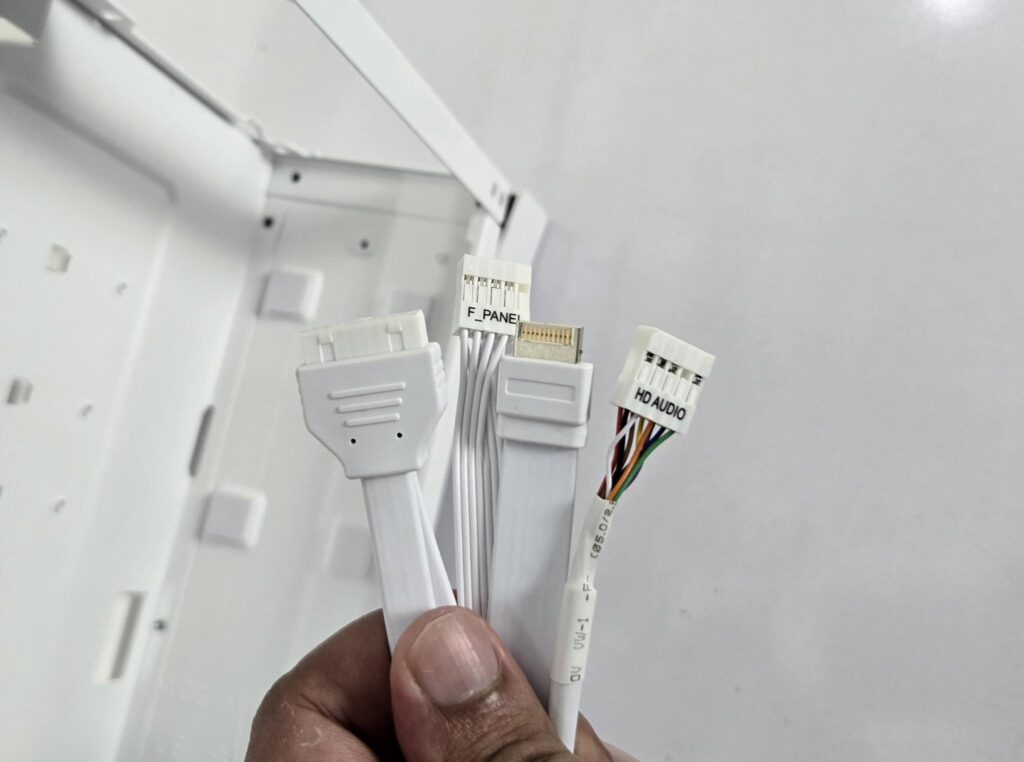
Thermaltake has provided cables/connectors for the top IO panel:
- USB 3.0 Connector
- USB Type-C Connector
- HD-Audio Connector
- Front Panel Single Connector
Installation
The following configuration is used:
- AMD Ryzen 9 7950X
- GIGABYTE X870 AORUS Stealth Ice
- Maxsun iCraft B580 White Graphics Card
- CORSAIR iCUE Link H150i LCD
- CORSAIR iCUE Link QX120
- DeepCool FL12R White
- Biwin DW100 RGB 32GB @ 8000MHz DDR5 kit
- Sabrent Rocket 4 Plus 1TB NVMe SSD
- Sabrent Rocket 4 Plus 2TB NVMe SSD
- Be quiet! Straight Power 11 1000W Platinum PSU
- Thermal Grizzly Kryonaut Extreme Thermal Paste
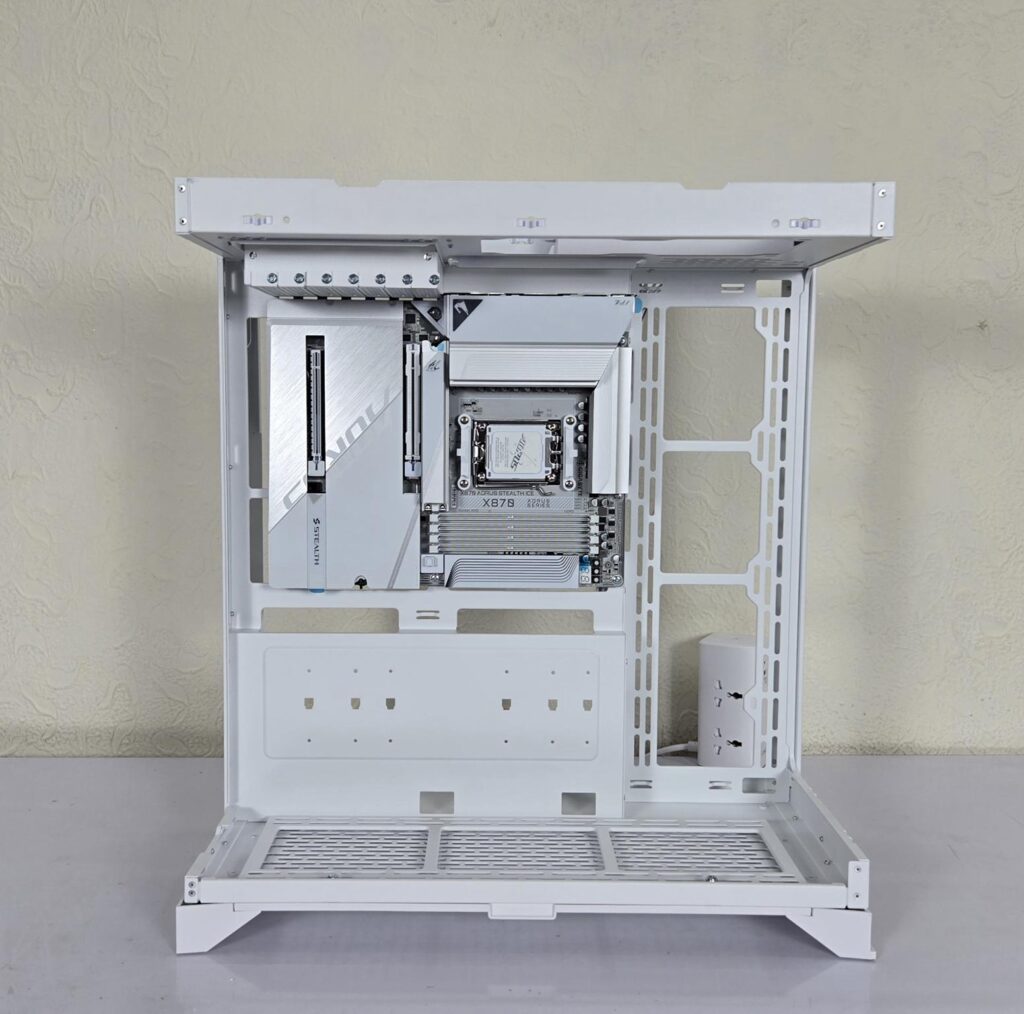
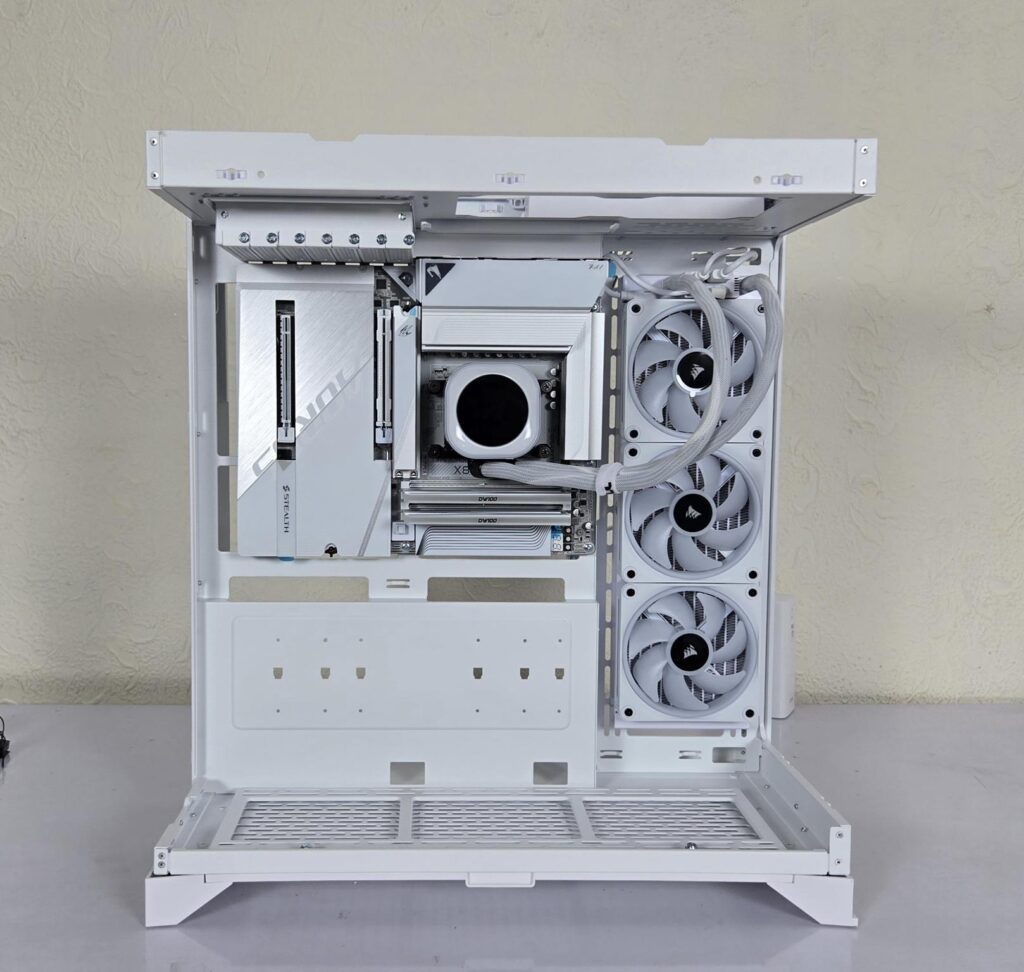
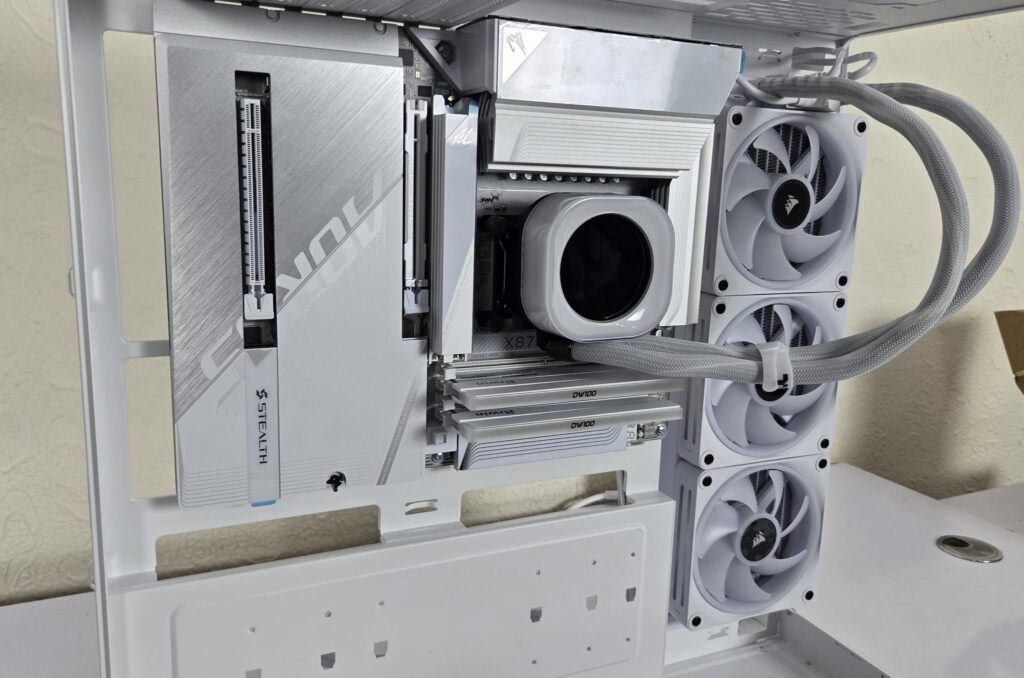
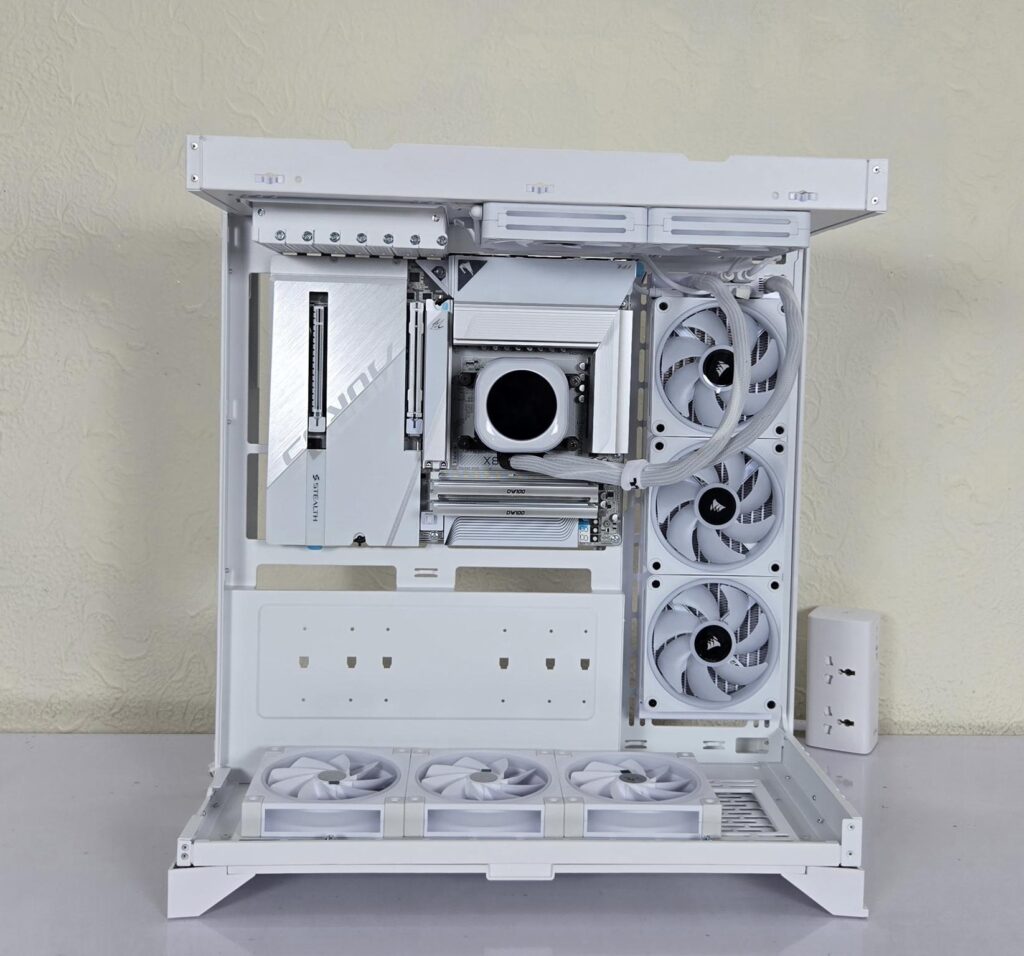
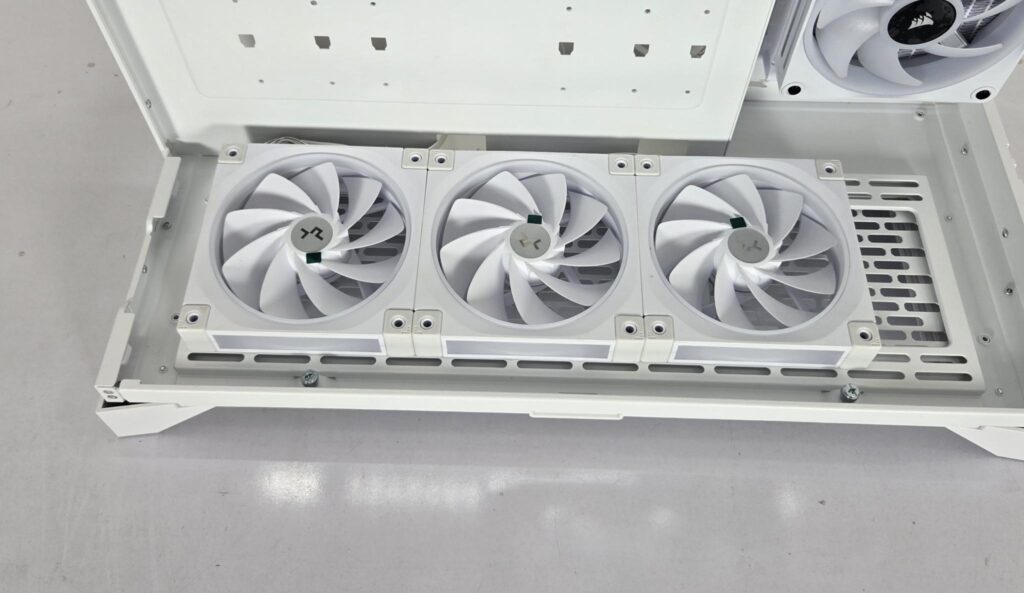
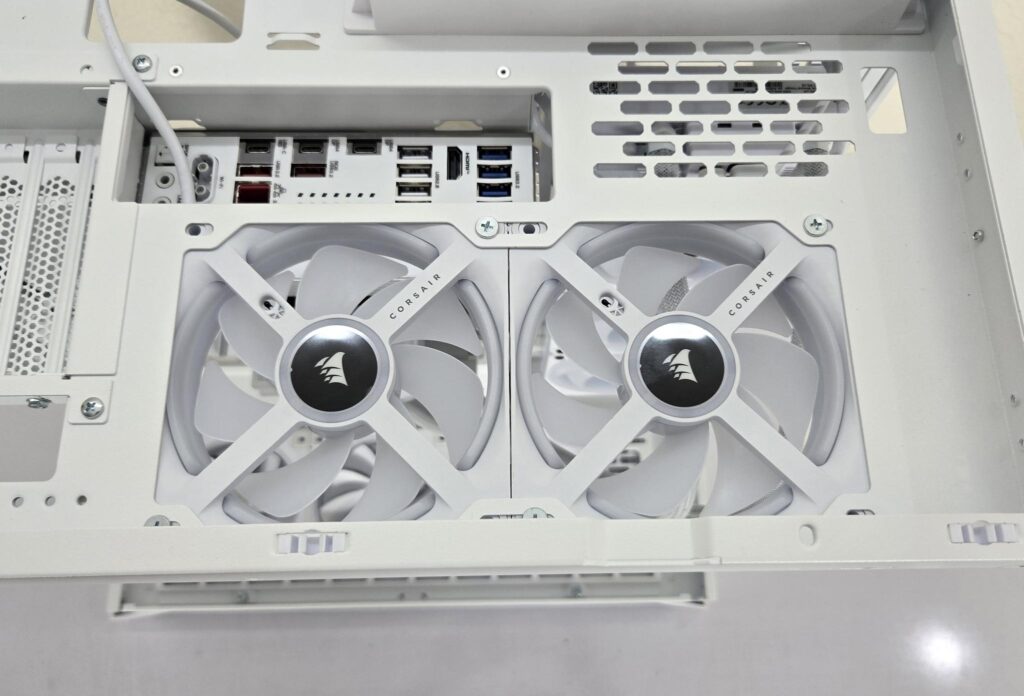

Since the motherboard is placed at a 90-degree angle in this chassis, plan well your build. I started with the beautiful backplug motherboard from GIGABYTE. My choice for the cooler was CORSAIR iCUE Link H150i LCD because this cooler does not have any cables on the block. This would provide a clean and neat look on the back plug motherboard that has all cable connections on the backside.
Instead of using another set of CORSAIR iCUE Link QX120 fans on the base of the case with the backside facing up, I used DeepCool FL12R White reverse-blade fans. I have also used CORSAIR QX120 fans on the top as exhaust. Ideally, I would want to install fans on the right as intake, but I decided to use them as exhaust and favor the overall look and feel of the build.
Then the graphics card was installed, followed by the PSU. I did not face any issues during the installation process in this case, and I enjoyed doing a build. If you are not gonna install two 120mm fans on the top then, your build will show the cables connected on the rear IO panel of the motherboard and the large size cutout on top as well. This, in my opinion, is a letdown for the user, but remember this design forces you to install fans on the top in the exhaust for effective ventilation.
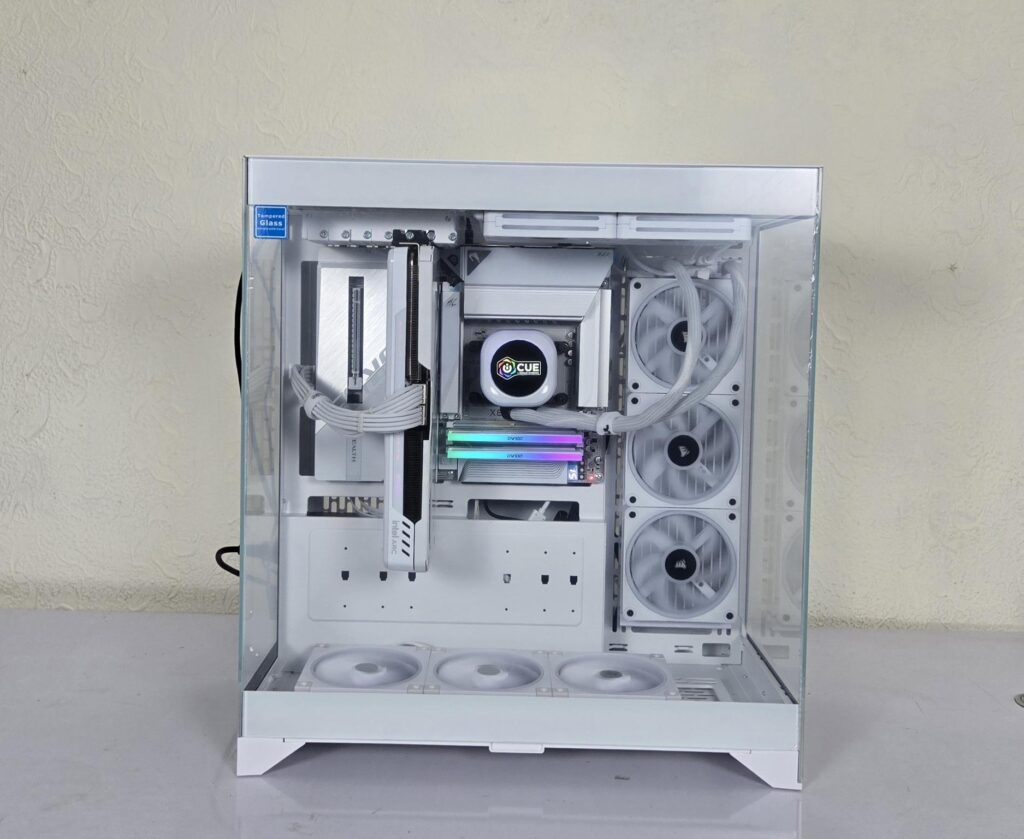
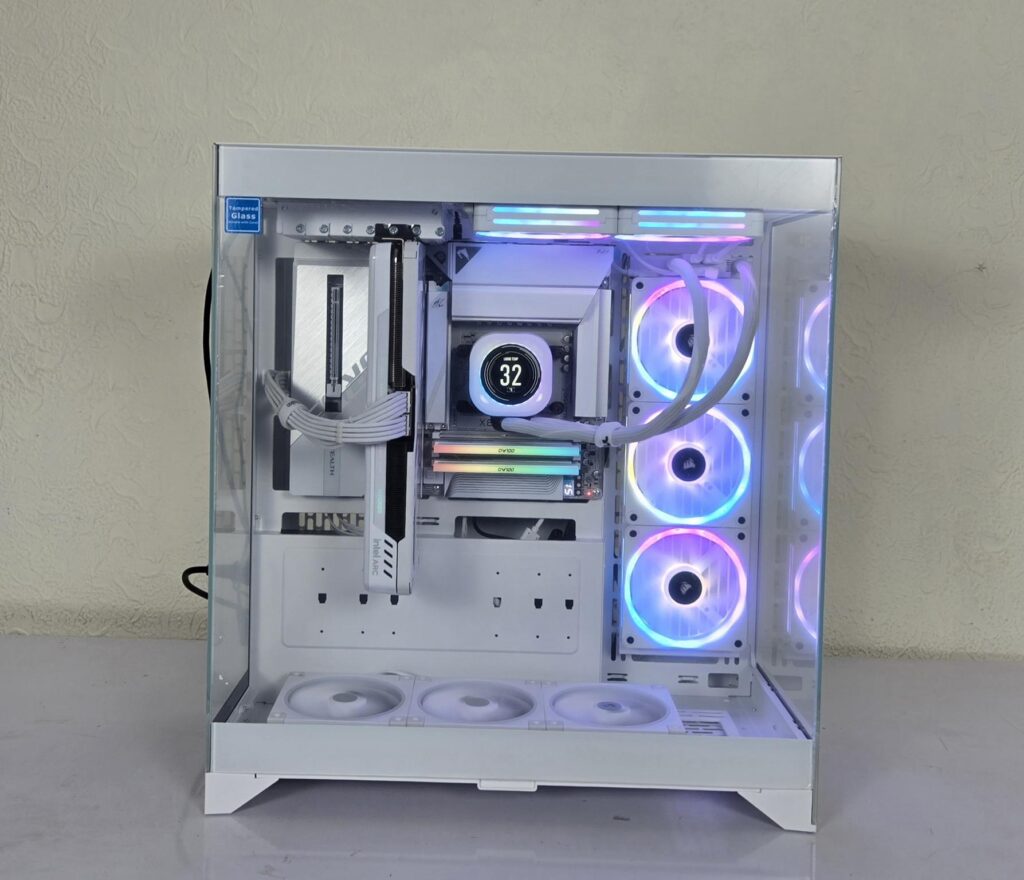
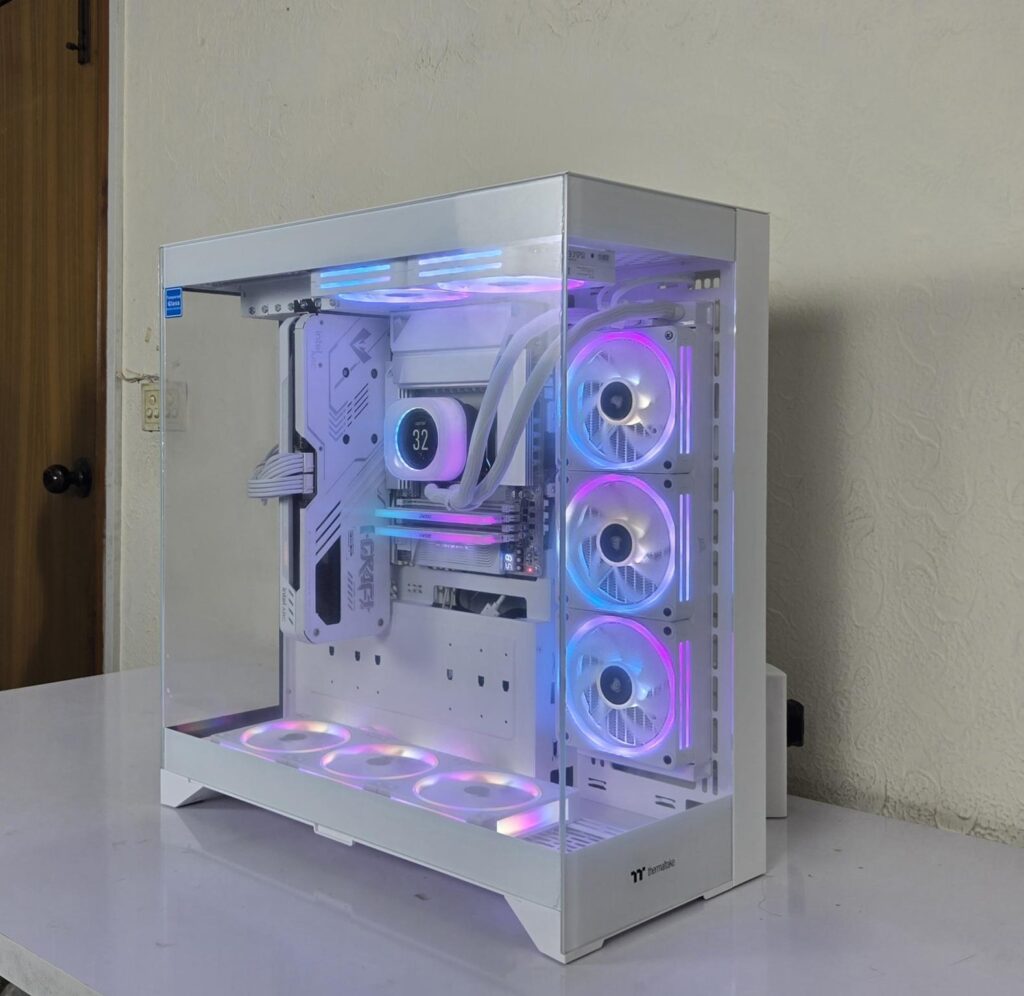
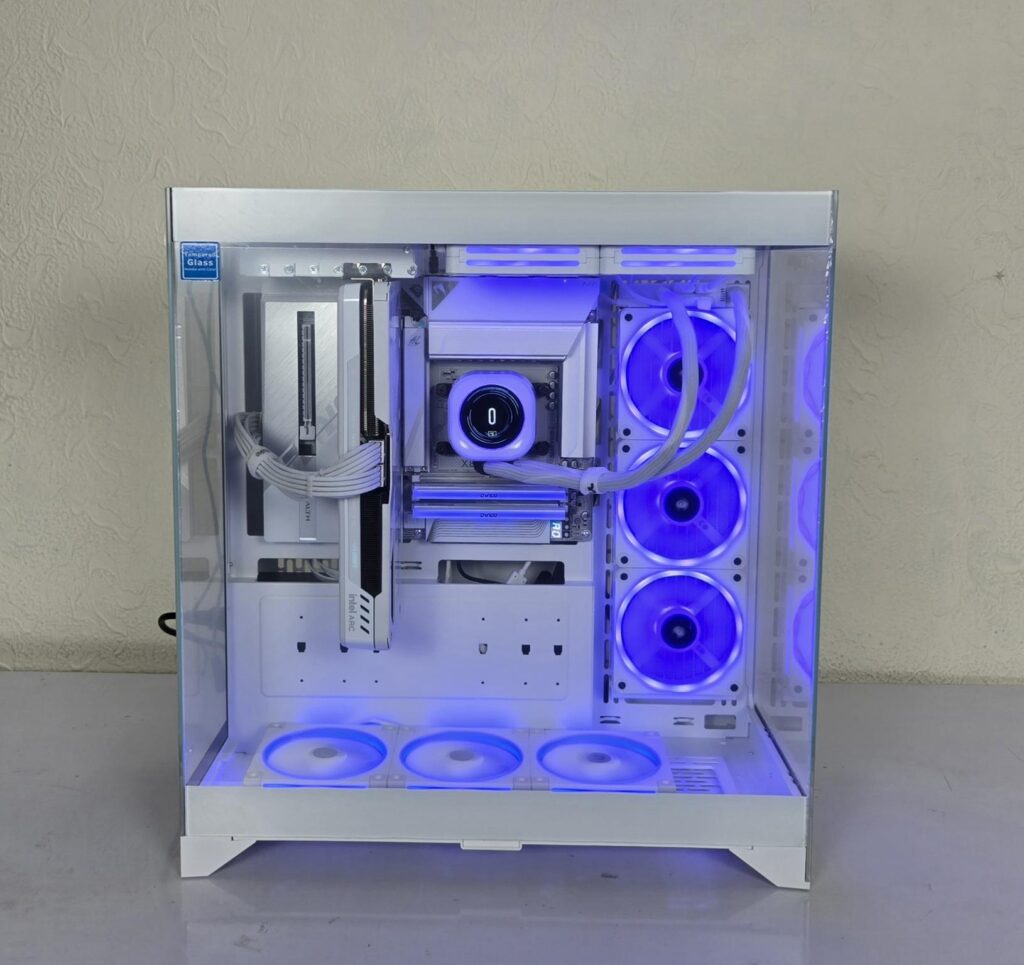
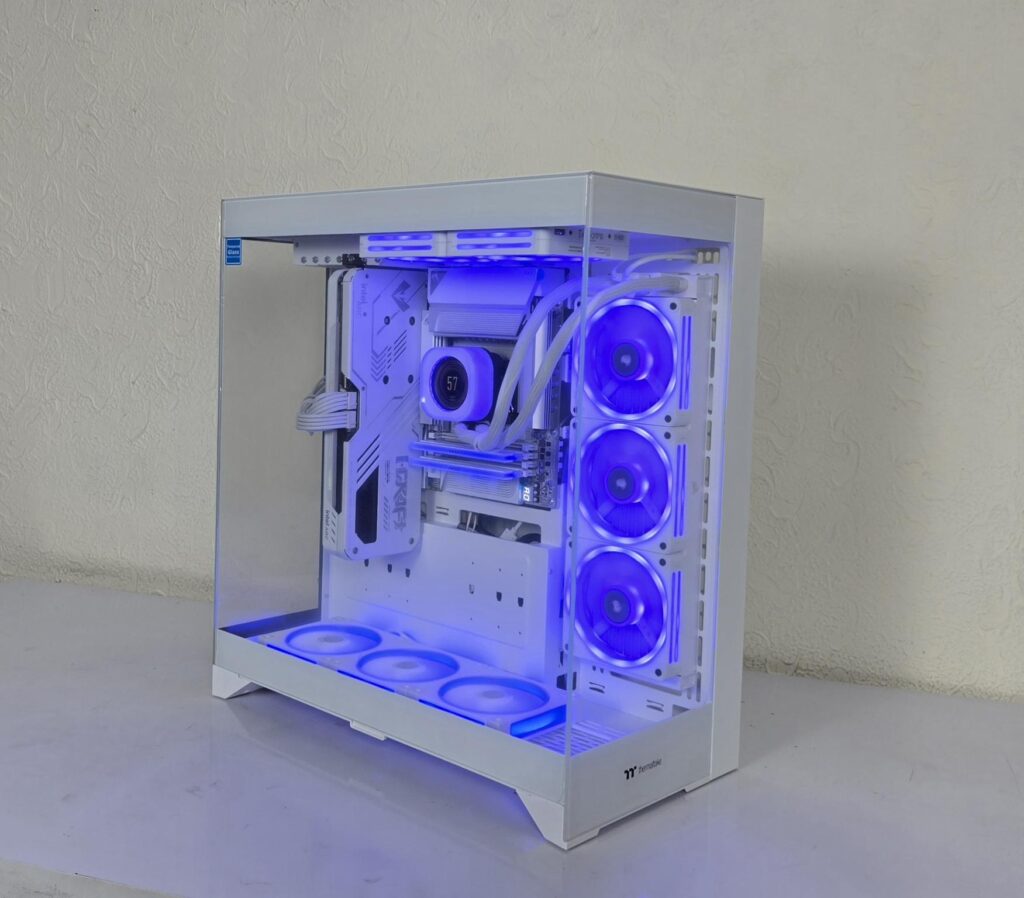
The above are a few pictures of the build.
Thermal Testing
The test build configuration is already mentioned above. The following configurations are tested:
- Stock configuration without fans on the base and all glass panels removed.
- Stock configuration without fans on the base and all glass panels installed.
- Configuration with fans on the base and all glass panels installed.
The fans and pump were set to run at full speed. The graphics card was running at stock settings. I have used Thermal Grizzly Kryonaut Extreme thermal paste. The ambient temperature was 25°C.
Editor’s Note: I normally use stress tests for the CPU and graphics card. Since the AMD Ryzen 9 7000 series SKUs run at full thermal junction under load, there was no point in using a stress test for the CPU as the CPU will operate at 95⁰C. This is why I have used the gaming load to test the CPU and graphics card together. This is obviously a realistic scenario since the majority of the users are gamers.
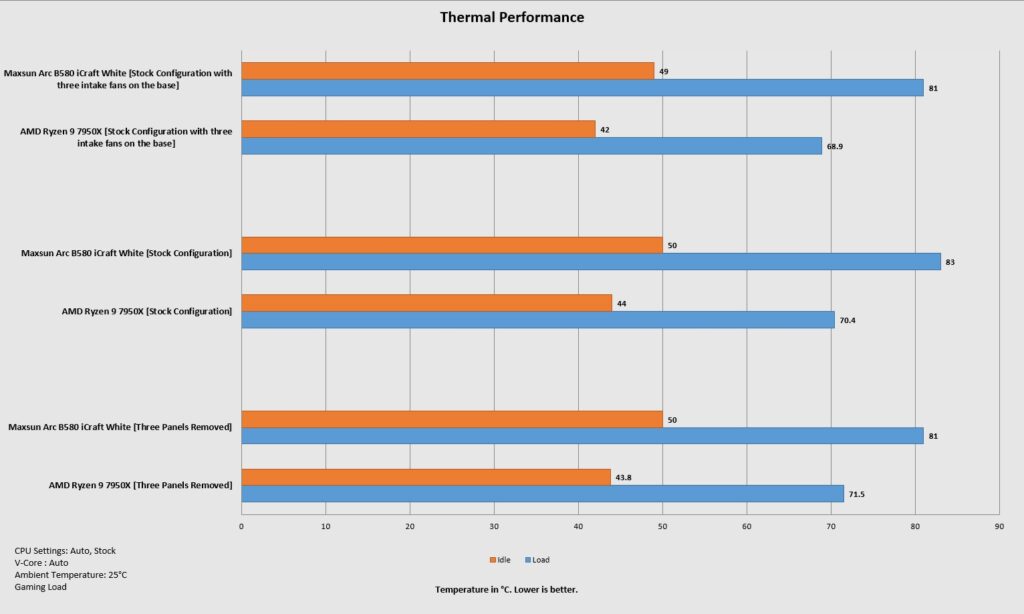
You can see that the configuration that yielded the best results is with glass panels installed and using 3x 120mm fans as intake. I did not test the case with AIO fans as intake, but given the overall design theme, side intake fans might give even better results.
Conclusion
In this article, I have tested the CTE E550 TG Snow PC Case from Thermaltake. I have been using the Core P6 TG Snow edition case as my primary test bench case, given its open frame layout. I wanted to add the functionality of testing the backplug motherboards while getting the maximum open frame layout. The two potential candidates came out to be (based on what is available in the sourcing region) CTE E600 and CTE E550. I chose E550 because all of its glass panels are removable, whereas E600 has a fixed rear back panel, but I lost more fan mounts than is on E600. It is always a give and take.
I digress, coming back to the topic, this case is available in four colors, including white and black. It has a panoramic view with three clear glass panels. The housing of this case is made of SPCC for its metal frame, along with ABS material. The complete assembly is white coated. It has a dimension of 558.5x270x513mm (LxWxH). The weight of this case is 14.5Kg.
The fan support is as under:
- 2x 120mm fans on the top
- 3x 120mm fans or 3x140mm fans on the side
- 3x 120mm fans or 3x140mm fans on the base
The radiator support is as under:
- 120mm/240mm on the top
- 120mm/140mm/240mm/280mm/360mm/420mm on the side
- 120mm/140mm/240mm/280mm/360mm/420mm on the base
Clearance is:
CPU Cooler Height: Up to 166mm
Graphics Card Length: Up to 443.8mm without radiator and 415mm with the radiator
PSU Length: Up to 220mm
Storage provision is:
- 3x 3.5” Drives
- 1x 2.5” or 2x 3.5” Drives
- 2x 2.5” Drives
Dust Filtration:
- Magnetic top filter
- Non-Magnetic bottom filter
- Magnetic Backside Filters
Coming from the CTE category, this case has a motherboard tray in a 90-degree layout. This case supports mini-ITX, micro-ATX, ATX, and E-ATX motherboards. This case also supports micro-ATX and ATX backplate motherboards.
This case has a strong cooling provision and adequate storage provision. The PSU is mounted vertically in the second chamber. Since the motherboard rear IO panel faces the top side of the case, Thermaltake has designed the top area with enough space to route the cables either to the rear of the case or the backside of the case. You can even install 2x 120mm fans on the top area. The case IO panel is on the top as well.
The offset motherboard tray design is provided for better clearance on the backside of the tray. The side cutouts are angular, which is a wise move. But no cutout has a rubber grommet, which should have been provided. This case has 7 PCIe slots with reusable covers.
Speaking of the graphics card installation, this case supports three possible mounts for which the supported brackets are provided as well, but the PCIe riser cable is not included. I have demonstrated all three configurations above.
The bottom area has a removable fan bracket for a convenient installation of fans/radiator. The backside has ample space for cable management. Thermaltake has also provided branded Velcro strips and zip ties in the accessory box. The drive cage and drive bracket are removable as well. They use captive thumb screws.
This case has an MSRP of USD 149.99. However, it is on discount at this time on Amazon at a price tag of USD 134.29. In terms of the features, this case is feature feature-rich option. It provides a spacious layout, ample cooling and storage provision. The thermal performance is satisfactory. However, I have seen that the graphics card in the upright position runs warm compared to some other cases that I have tested recently.
Pros:
- Three Tempered Glass Panels
- Tool-Less Panels
- Removable TG Panels
- Open Frame Layout is possible
- Panoramic View on three sides
- CTE Design
- 90-degree motherboard tray
- Backplug motherboard support
- Excellent Cooling Provision
- Cable Management on the top
- Dual-Chamber Design
- 420mm radiator supported
- Removable Fan Bracket on the base
- Three possible graphics card mounting
- PCIe brackets for three configurations
- USB Type-C Port
- Graphics Card Clearance
- Dust Filtration
- Price
Cons:
- The Graphics Card runs warm in the default configuration
- Visible motherboard IO panel cables and a large-sized cutout on top, 2x 120mm fans are not installed.